How to Grow and Care for Garden Phlox
Grow tall garden phlox successfully: choose the right site, plant at the right depth, water wisely, prevent powdery mildew, and extend summer bloom.
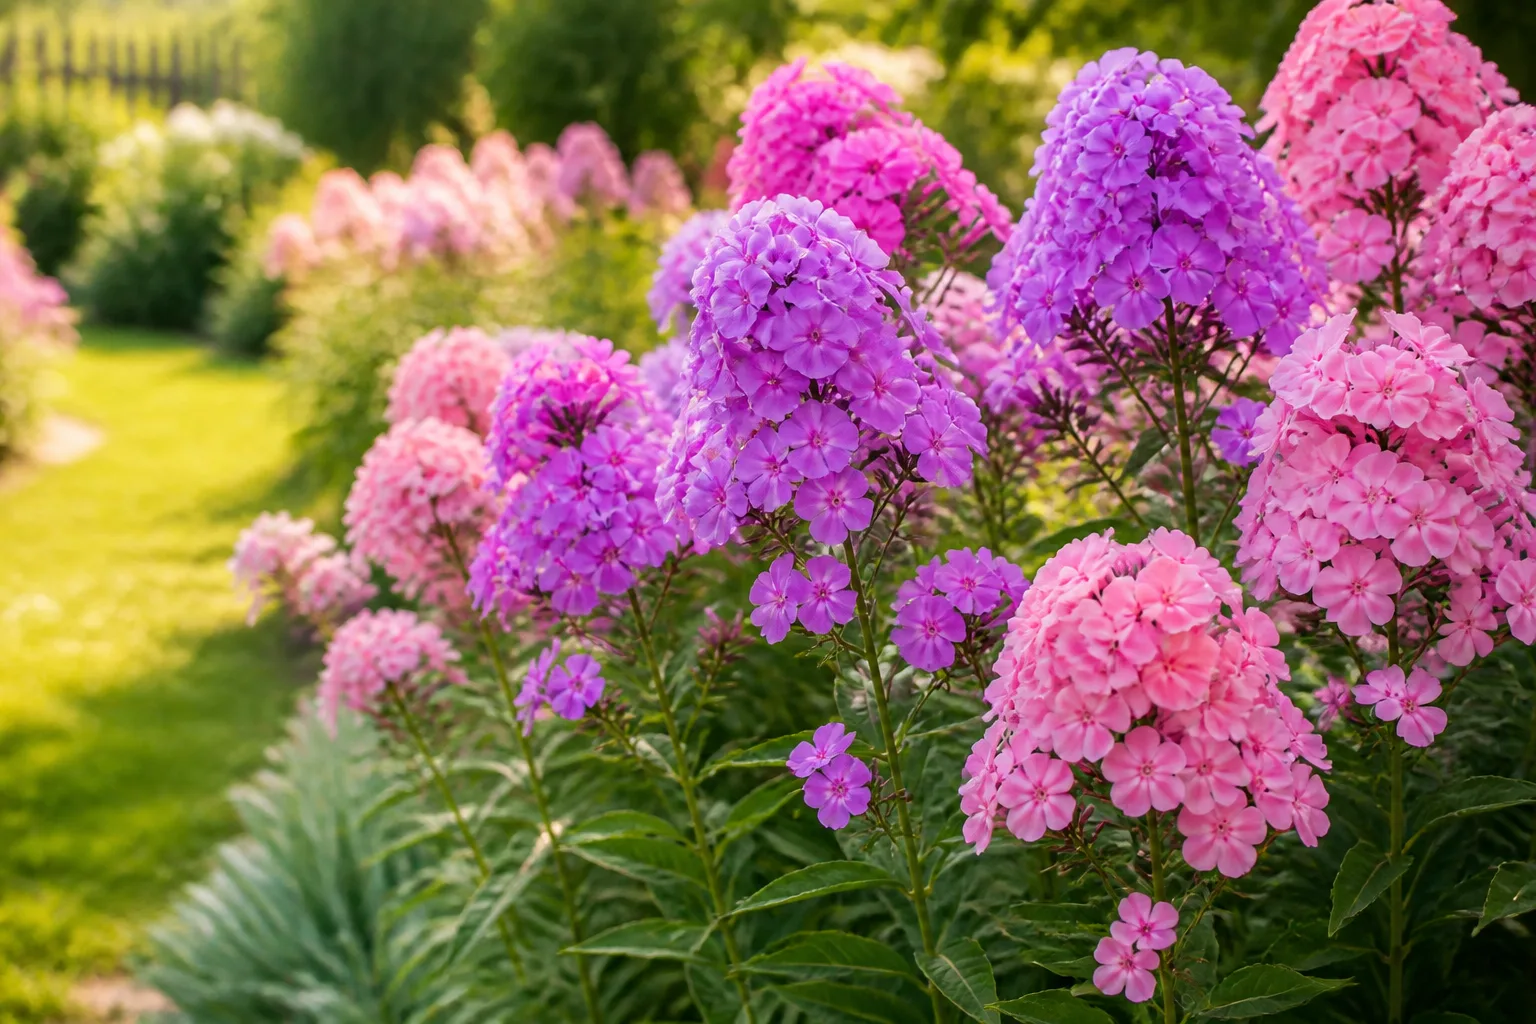
Garden phlox (Phlox paniculata) is a tall, clump-forming perennial that earns its space when summer gardens begin to look tired. Upright stems carry rounded panicles of fragrant flowers in pink, lavender, purple, red, white, and bicolors, often from midsummer into early fall. It also supplies nectar for butterflies and hummingbirds and gives a cutting garden the kind of sturdy, scented stems that are hard to replace.
The plant is more particular than the phrase “easy perennial” suggests. Garden phlox wants moisture, but not stagnant soil; sun, but relief from punishing heat in some climates; and enough room for leaves to dry quickly. The most reliable care plan is simple: choose an airy site, plant the crown at soil level, water the root zone deeply, and treat mildew prevention as a design problem before it becomes a spray problem.
What Garden Phlox Is—and What It Is Not
Tall garden phlox is the species Phlox paniculata, an herbaceous perennial native to parts of the eastern and central United States. It is not the same plant as creeping phlox (P. subulata), which forms a low spring carpet, or woodland phlox (P. divaricata), which is better suited to lighter shade. Confusing those plants leads to bad expectations about height, bloom season, and light.
The NC State Extension Plant Toolbox describes garden phlox as an erect, clump-forming plant generally 2 to 4 feet tall, with flowers from midsummer into fall. The Missouri Botanical Garden gives a similar mature size of 2 to 4 feet tall and 2 to 3 feet wide, with a typical July-to-September bloom period. Cultivars can be shorter, earlier, more compact, or more resistant to powdery mildew, so read the plant label instead of planting every phlox at the same distance.
Garden phlox usually returns every year in its hardiness range, but winter survival is not the same as year-round beauty. In cold regions the foliage and stems die back, while the crown remains dormant underground. In warm regions, plants may hold foliage longer but can struggle more with heat, humidity, and fungal pressure.
Choose a Cultivar That Fits Your Garden
Start with the site, then choose the color and height. A four-foot cultivar in a narrow border beside a path may need a support ring, while a compact selection can stand without help in the same wind. If your summers are humid or you have repeatedly lost foliage to white mildew, prioritize a cultivar described by a reputable nursery or extension source as mildew resistant. That means better odds, not immunity.
‘David’ is a classic white-flowered selection often chosen for fragrance and comparatively good mildew resistance. ‘David’s Lavender’ adds a cool lavender tone, ‘Delta Snow’ has white flowers with soft pink centers, ‘Lord Clayton’ brings strong magenta-red color, and ‘Jeana’ is a lavender-pink selection recognized for abundant flowers and pollinator value. NC State lists these cultivars in its plant record and identifies ‘Jeana’ as the 2024 Perennial Plant of the Year.
Also consider bloom timing. If one clump is your only phlox, choose a variety whose mature size and flowering window suit the rest of the border. If you want a longer display, combine early, midseason, and later selections rather than expecting deadheading to make one cultivar bloom continuously for months.
Find the Right Planting Site
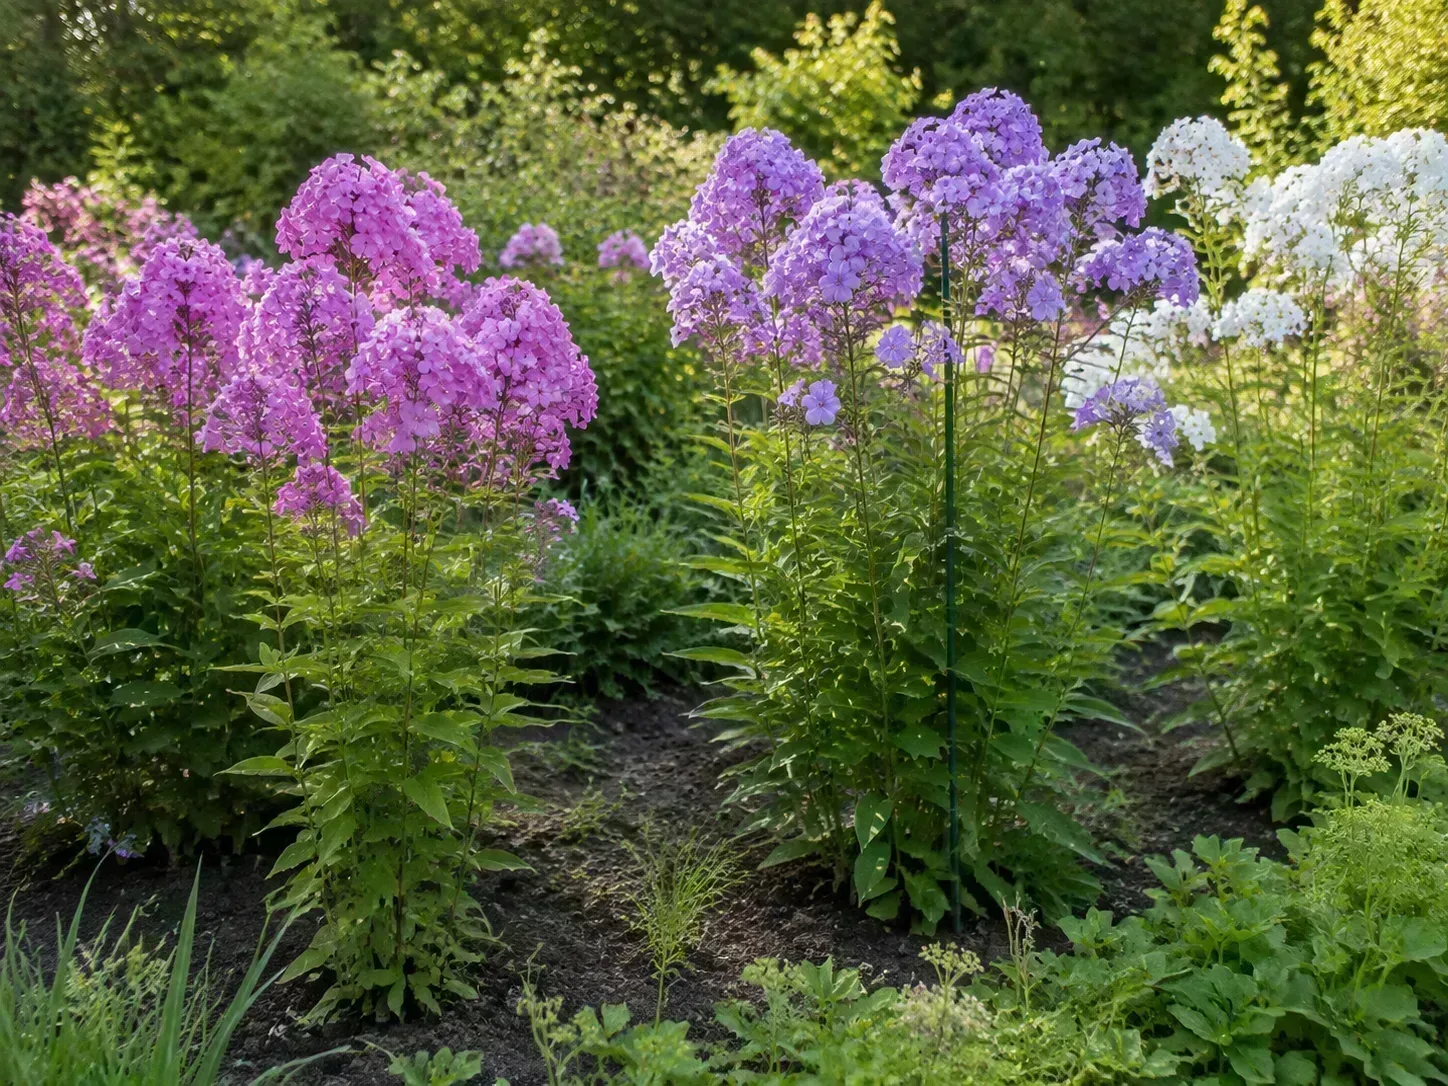
The best location receives at least six hours of direct sun in a typical day, has rich soil that drains freely, and is open enough for air to move between stems. Morning sun is especially helpful because it dries dew early. A site that is bright but trapped between a fence and a dense hedge can still be a mildew pocket.
In a hot climate, light afternoon shade can protect flowers and foliage from heat stress, but deep shade usually means fewer blooms, weaker stems, and a more open habit. In a cooler summer climate, give the plant as much sun as your soil moisture allows. If the only available site is dry shade beneath a tree, garden phlox is probably the wrong perennial; changing the plant is easier than forcing this one to perform.
Avoid low spots where irrigation or rain stands around the crown. Garden phlox appreciates consistent moisture, not a permanently wet root zone. If water drains slowly, use a raised or gently mounded bed, improve the soil structure over a broad area, or choose a different plant for that location rather than placing a small pocket of amended soil in a bathtub of clay.
Plant Garden Phlox in Spring or Fall
Spring planting after the ground is workable and severe frost has passed is forgiving because cool soil and spring moisture help roots establish before the first hot spell. Early fall is also excellent where the plant has several weeks to root before the ground freezes. The BHG phlox guide recommends spring planting after frost or fall planting at least a month before the first fall frost; your local climate and nursery timing should refine that rule.
Prepare the Bed and Set the Crown Correctly
Prepare a planting area wider than the root ball, not just a narrow hole. Loosen the soil roughly 12 inches deep, remove perennial weeds, and mix in finished compost if the bed is low in organic matter. Do not fill a heavy clay hole with fluffy potting mix alone: roots may grow into the amended pocket, then stop at the compacted wall where water collects.
Set a potted plant so the top of the root ball is level with the surrounding soil. For bare-root plants, spread the roots naturally and place the crown—the point where roots meet stems—at the soil line. Planting too deep is a common cause of slow growth and crown problems. Backfill with the native soil, firm it gently, water thoroughly, and add a thin layer of mulch without touching the stems.
Space Plants for Mature Width and Airflow
Use the label’s mature width as the final authority, but about 18 to 24 inches between many tall garden phlox plants is a practical starting range. The Flower Patch Farmhouse planting notes use 18 inches to give plants room for circulation, while BHG also lists 18 inches for tall garden phlox. Give especially vigorous cultivars or damp, humid sites more room rather than squeezing them into a solid wall.
Spacing is not wasted ground. It gives leaves a chance to dry, lets you water the soil without blasting foliage, and leaves enough access to thin stems or inspect the crown. A young bed may look sparse for one season; filling the gaps with short annuals or low perennials is safer than crowding the phlox and creating a disease problem by July.
Balance Sun, Heat, and Humidity
Garden phlox likes sun but does not enjoy stagnant, humid air. High night temperatures, wet foliage, crowding, and drought stress can all make the plant more vulnerable to unattractive fungal problems. In hot regions, give it morning sun and some afternoon protection if full-day exposure turns the leaves limp or bleaches flowers, but keep the canopy open.
Do not respond to heat by keeping the foliage constantly wet. Watering the leaves may temporarily cool them, yet it extends the period of surface moisture and can move soil or spores onto the plant. A deep drink at the soil line, followed by a drying interval, is a better rhythm. Mulch the root zone with compost, shredded leaves, or fine bark, keeping the mulch a few inches away from the crown.
Manage Soil and Water Through the Season
Aim for soil that feels evenly moist below the surface but never stays saturated. Garden phlox tolerates a range of soil pH, so drainage and moisture are usually more urgent than chasing a precise number. Organic matter helps sandy soil hold water and helps some clay soils form a better crumb structure, but it cannot make a waterlogged site well drained by itself.
For established plants, roughly 1 inch of water per week during active growth is a useful starting point, adjusted for rainfall, soil, temperature, and plant size. Check the soil 2 to 3 inches down before watering. If it is dry at that depth, water slowly at the base until the root zone is wet; if it is still cool and damp, wait. The Longfield Gardens guide also recommends about 1 inch weekly and root-zone watering.
New plants need more frequent checks because their roots occupy a small volume. Water deeply at planting, then monitor every few days during the first couple of weeks. Established phlox may survive a short dry spell, but drought during stem growth or flowering often produces fewer flowers and more stress. Container plants dry much faster and should be checked daily during hot weather.
Fertilize Lightly, Not Habitually
If the bed is fertile and amended with compost, garden phlox rarely needs a heavy feeding program. A top-dressing of compost in spring is a low-risk way to add organic matter and a modest nutrient supply. If a soil test or weak growth indicates the plant needs more, apply a balanced granular fertilizer according to the product label when new growth begins.
Avoid repeated high-nitrogen applications. They can produce lush, soft foliage at the expense of sturdy flowering stems and may make a dense canopy that dries slowly. Fertilizer cannot correct deep shade, poor drainage, root damage, or a cultivar that is simply too tall for its position. Fix the site problem first.
Pinch Young Stems and Stake Before They Flop
Pinching is optional, but it can make tall phlox shorter, bushier, and less likely to need a support ring. When new stems are about 6 to 8 inches tall, pinch or snip the growing tips on some—not necessarily all—stems. The plant branches below the cut, which can produce more flower clusters later but may delay bloom slightly. Leave some stems unpinched if you want the earliest flowers or a taller back layer.
Staking works best before the plant leans. Place a hoop, grid, or discreet stake while stems are still growing, then guide the plant through it rather than tying a flowering bundle tightly to one post. A support that is installed after a storm often leaves stems bent permanently. Shorter cultivars, plants growing among sturdy neighbors, and phlox in a sheltered bed may need no support.
Deadhead to Extend the Flower Display
Deadhead when most florets in a flower panicle have faded but before the head has fully dried and scattered seed. Follow the flower stalk down to a pair of healthy leaves or a side branch and cut just above it. Removing the finished panicle keeps the plant looking cleaner and can encourage a later flush, especially when the plant has adequate water and light.
Deadheading is not magic. It cannot turn a shaded, drought-stressed, or diseased plant into a continuous bloomer. It also prevents self-sown seedlings, which may not resemble the named cultivar. If you want seed for experimentation, leave one or two heads to mature and collect them separately; if you want the parent plant’s color and form, divide it or use cuttings instead.
Cut Back and Clean Up in Fall
After a hard frost has finished the top growth, cut garden phlox stems back close to the ground and remove the debris from the bed. This is primarily a sanitation step when mildew has been present, not a way to force better flowering the following spring. NC State Extension and the Missouri Botanical Garden both recommend fall cutback and removal of plant material to reduce the chance of disease carrying over.
Do not cut healthy plants to the ground in midsummer just because a few leaves look tired. First check for drought, root problems, pests, or mildew. If the plant has finished blooming and the foliage is declining naturally, wait until the end of the season. Sterilize pruners between obviously diseased plants and avoid composting heavily infected material unless your compost system reliably reaches temperatures that destroy pathogens.
Propagate by Division
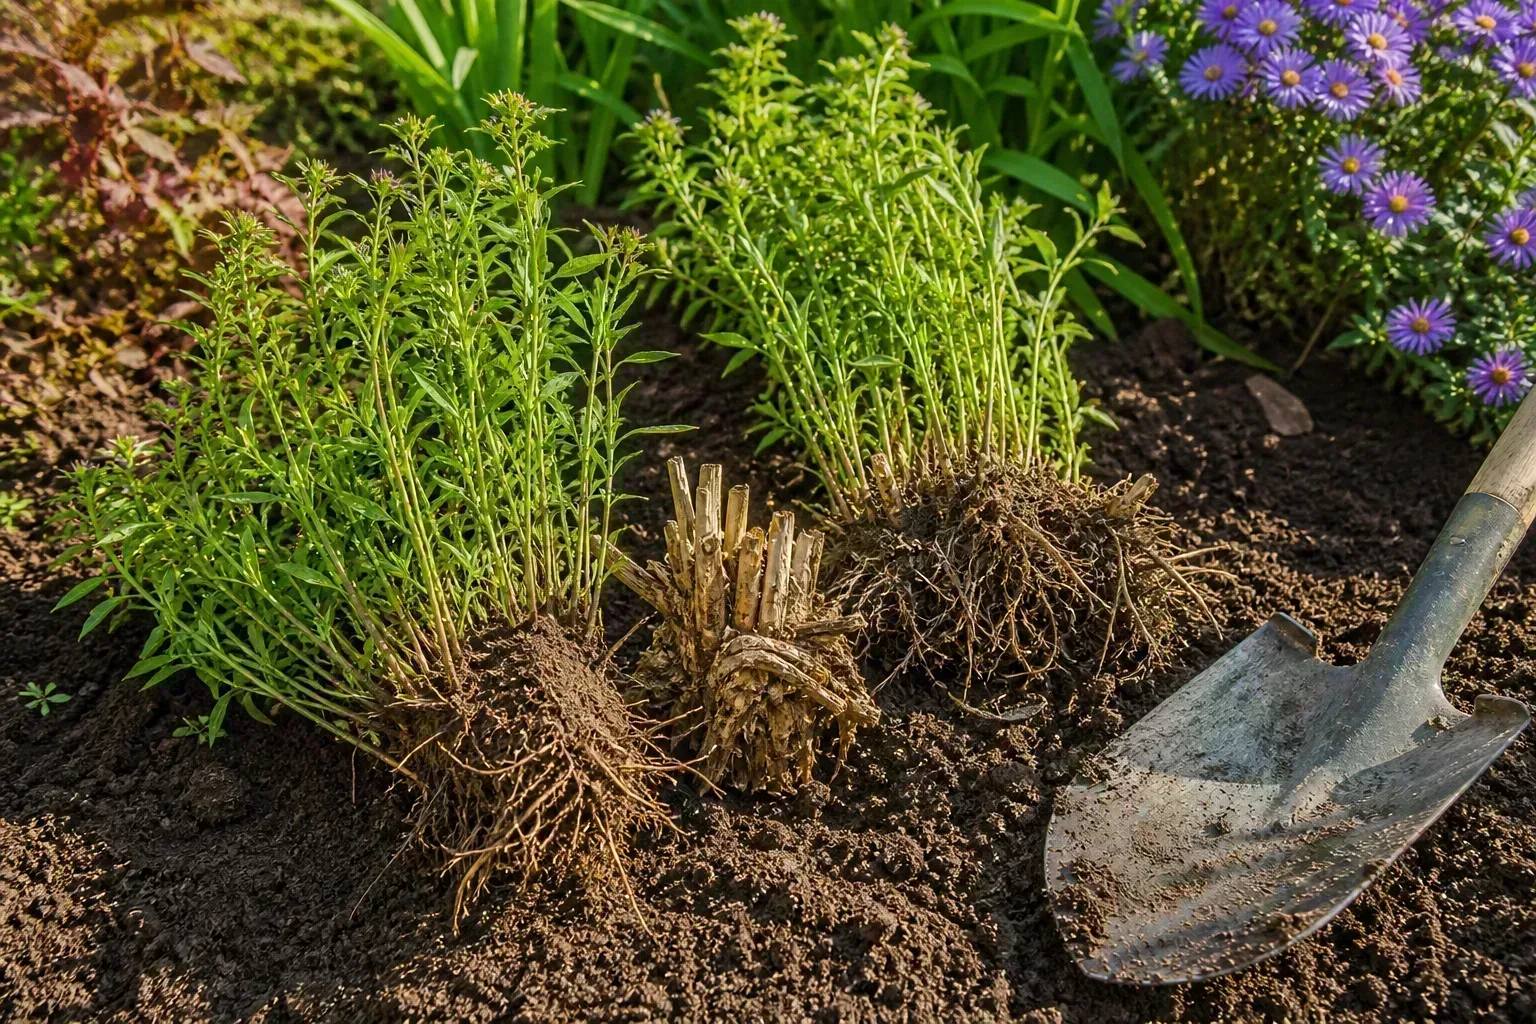
Division is the most predictable way to make a clone of a named garden phlox. Divide in early spring as new shoots emerge, when cool weather reduces transplant stress and the divisions have a full season to establish. You can also divide in early fall in climates with a long, mild rooting window.
Water the parent plant the day before if the soil is dry. Dig around the clump, lifting as much of the root mass as practical. Separate it into sections with several healthy shoots and a good portion of roots, using a sharp, clean knife if the crown is tough. Replant the divisions immediately at the original depth, firm the soil, and keep them consistently moist while they recover.
Do not divide merely because a calendar says three years have passed. Division makes sense when the center is thin, flowering has declined, stems are overcrowded, or the clump is too large for its space. A vigorous plant that is flowering well can remain undisturbed. Repeated unnecessary division creates more recovery work without improving the border.
Grow New Plants From Cuttings or Seed
Stem cuttings are useful when you want several plants from one healthy parent and division is not convenient. In late spring, take a 4-inch cutting from a nonflowering stem, remove the lower leaves, and insert the bare lower section into damp, well-drained propagation mix. Keep the pot in bright light out of direct hot sun and maintain even moisture without saturating it. BHG’s propagation guidance notes that roots can take at least a month to develop; wait for new leaves and a firm root system before transplanting.
Rooting hormone is optional rather than a guarantee. The cutting’s health, timing, humidity, and cleanliness matter more than coating the base heavily. Discard cuttings that blacken or collapse instead of repeatedly watering a failing stem.
Seed is easy to try but less reliable for preserving a cultivar. Garden phlox may self-sow, yet seedlings can vary in color, height, and bloom quality. Sow fresh seed where the young plants can be thinned, or start it in a protected container and transplant seedlings while small. If your goal is a particular ‘David’ or ‘Jeana’ plant, use division or cuttings.
Grow Garden Phlox in Containers
Tall garden phlox can grow in a large container, but it is not the lowest-maintenance choice for a pot. Select a compact cultivar when possible, use a container with several drainage holes, and fill it with a quality potting mix rather than garden soil, which compacts easily. A pot at least 12 inches wide may support a young plant, but a wider, heavier container is more stable for a mature, top-heavy clump.
Container phlox needs closer watering because wind and sun dry the limited root volume quickly. Check the mix with your finger or a moisture meter and water thoroughly when the upper layer has dried, allowing excess to drain. Do not leave the pot sitting in a saucer of water. Nutrients also wash out faster, so use a light, label-directed feeding plan during active growth rather than applying garden-bed rates.
Repot when roots circle densely or emerge from drainage holes, moving up only one container size. A pot that is dramatically oversized holds wet mix longer and may increase root problems. If the plant repeatedly flops, combine an appropriately heavy pot with an early support ring or move the phlox into a border where its roots and stems have more room.
Prevent and Respond to Powdery Mildew
Powdery mildew appears as a white, dusty coating on leaves and stems. It is usually more disfiguring than lethal, but a severe infection can reduce the plant’s vigor and shorten the season. Garden phlox is particularly vulnerable when warm, humid weather meets crowded growth, poor air movement, or drought-stressed roots.
Prevention starts before symptoms appear:
- Give the clump sun and enough spacing for air to move through it.
- Thin a few crowded interior stems in late spring rather than letting a dense thicket form.
- Water at soil level and avoid routine overhead irrigation.
- Mulch to reduce drought swings, but keep mulch off the crown.
- Choose cultivars with a record of better mildew resistance for your conditions.
- Remove infected debris during fall cleanup.
If you see a few affected leaves, remove the worst ones and improve the conditions above. Do not strip every leaf from a stressed plant or spray a random household product. For a serious recurring outbreak, identify the disease through a local extension service and use only a product labeled for the crop and disease in your location, following its directions. A fungicide may protect new growth but will not undo a crowded, shaded planting site.
Diagnose Pests, Root Rot, and Weak Flowering
Inspect the plant before choosing a treatment. Phlox plant bugs can distort or stipple growth; aphids cluster on tender stems; spider mites are more likely during hot, dry weather and may leave stippling or fine webbing. Knock a small population from the plant with a firm water stream directed at the undersides of leaves, encourage beneficial insects, and avoid broad-spectrum insecticides unless a confirmed infestation warrants further action.
Root or crown rot is a different problem. Wilting despite wet soil, yellowing that starts low, a collapsing crown, or dark, soft roots points to excess moisture or a pathogen rather than thirst. Remove the plant from a saturated spot, inspect the roots, improve drainage, and do not replant a failing crown into the same wet hole. The NC State plant record flags root rot among garden phlox problems, which is why “water more” is unsafe blanket advice.
When a healthy-looking plant has few flowers, check the basics in this order: hours of direct sun, moisture during stem formation, excessive nitrogen, crowding, and cultivar timing. Too much shade is the most common design mismatch. If stems are tall and floppy, consider pinching next spring, earlier support, a more compact cultivar, or a neighboring plant that can provide light—not a last-minute tie-up after the stems bend.
Use Garden Phlox in Borders and Pollinator Plantings
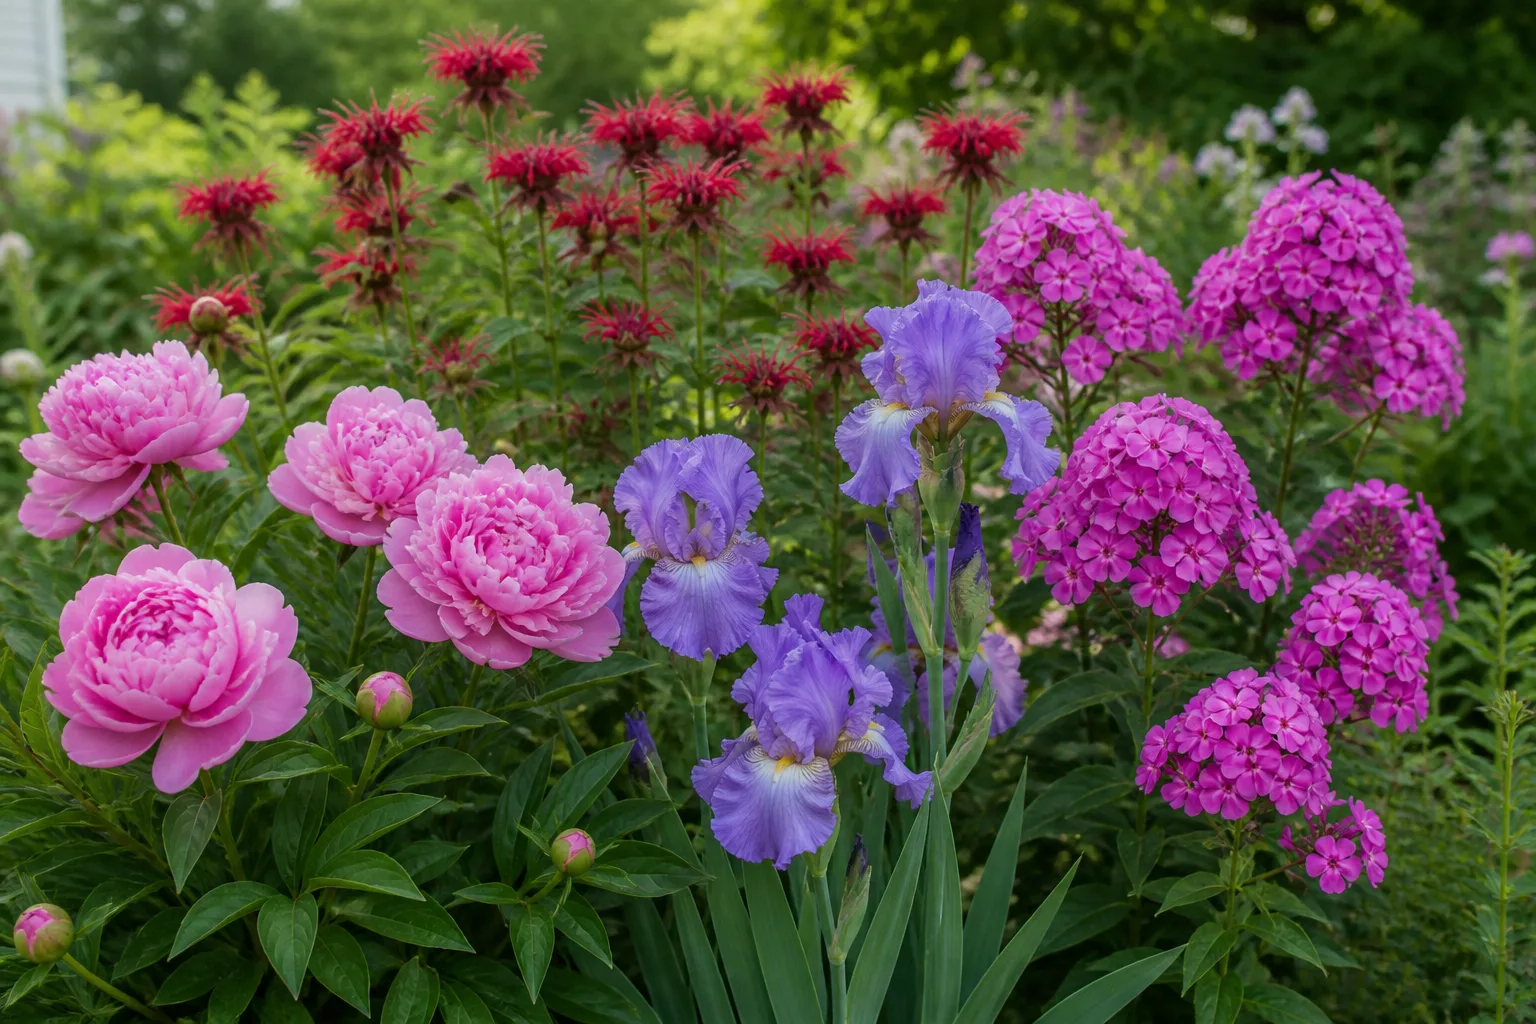
Place tall cultivars toward the middle or back of a border, where their stems rise above shorter perennials without hiding everything behind them. Grouping three or more plants of one cultivar makes the flower color read as intentional and gives pollinators a larger target than scattered single plants. Leave a path or stepping area nearby so you can deadhead and inspect the foliage without walking through the crown.
Pair the rounded flower heads with contrasting forms: coneflowers and black-eyed Susans for a sunny pollinator border, ornamental grasses for movement, or Shasta daisies for a classic cutting-garden combination. Choose companions with similar moisture needs. A drought-loving plant beside phlox can make you under-water the phlox or over-water the companion.
Garden phlox is valuable during the midsummer gap between spring bloomers and the strongest late-season display. Its fragrant panicles work near a patio or walkway, while its height gives a new perennial bed structure. For the best pollinator support, combine it with plants that bloom before and after it rather than treating one phlox clump as a complete habitat.
Conclusion: Give Phlox Air, Moisture, and the Right Timing
Successful garden phlox care is less about a complicated fertilizer schedule than about getting four decisions right. Give Phlox paniculata enough sun for strong flowering, soil that stays moist but drains, open space for air circulation, and support or pinching before tall stems lean. Water the root zone during dry weather, deadhead for a possible later flush, and remove diseased top growth after the season.
If mildew returns, first widen the spacing, thin the canopy, and correct watering before reaching for a product. If flowering declines, inspect light, roots, nutrition, and crowding before dividing. Match the cultivar to the climate and the border, and garden phlox can repay that bit of planning with fragrant, pollinator-friendly color every summer.



