How to Prevent Blossom End Rot on Tomatoes
Learn how to prevent blossom end rot on tomatoes with steady moisture, soil testing, smart fertilizer choices, mulch, and fixes for fruit already affected.
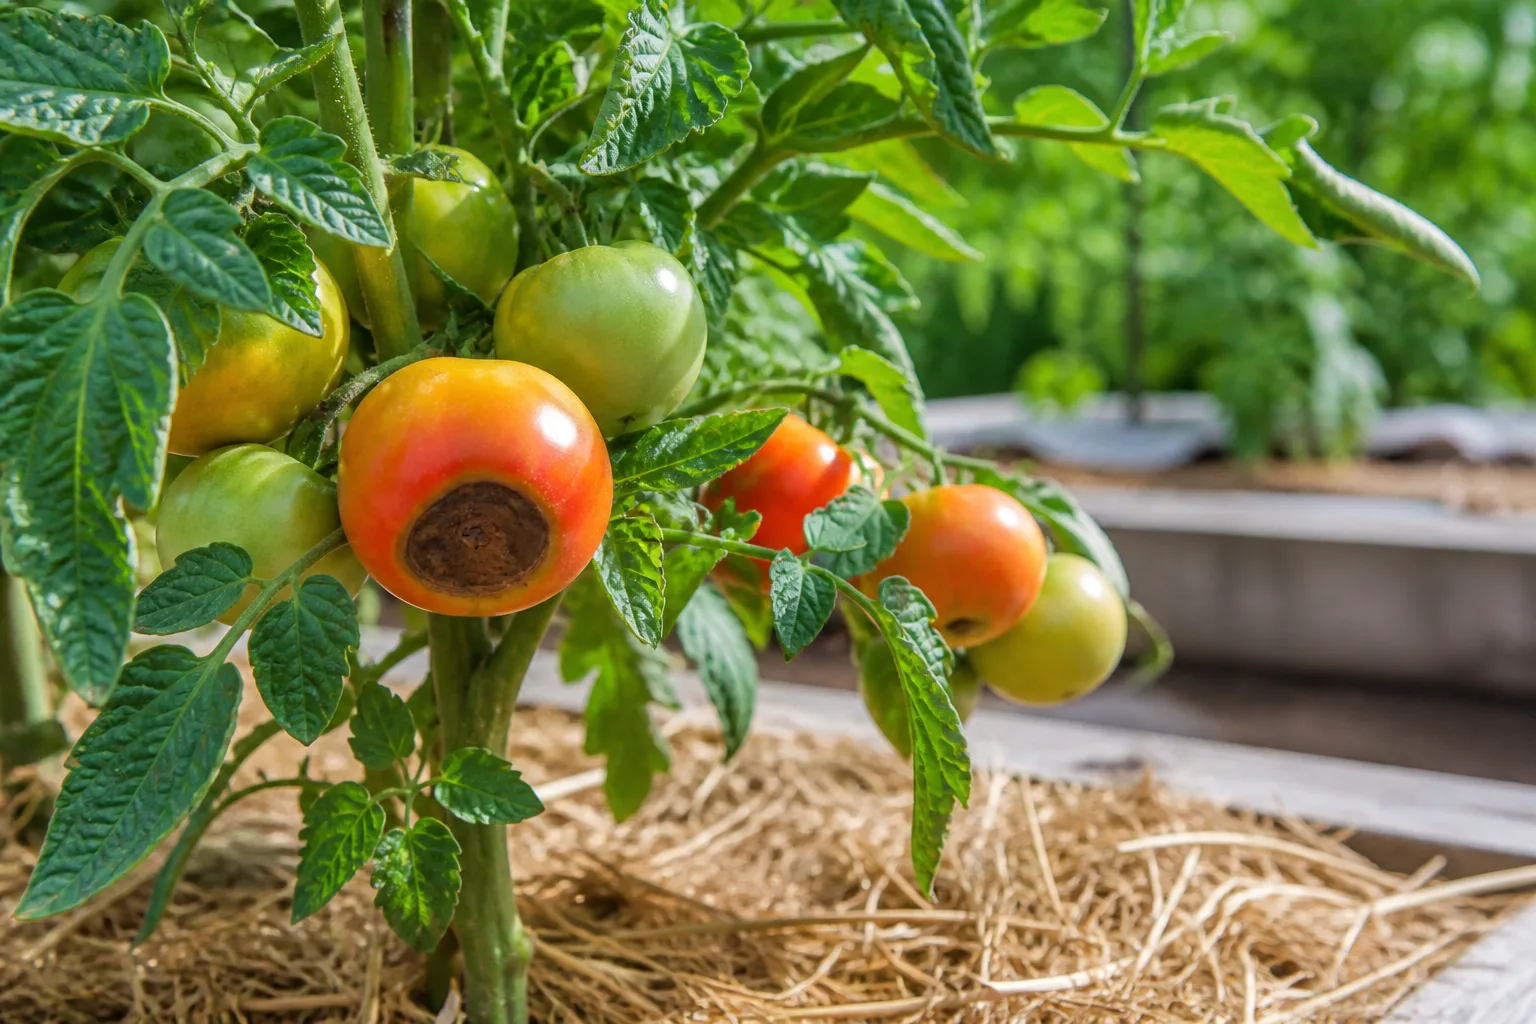
The most reliable way to prevent blossom end rot on tomatoes is to keep the root zone steadily moist and well drained while fruit is setting and sizing. The black, sunken patch is a localized calcium-uptake failure in the developing fruit; it is often triggered by drought, saturated soil, damaged roots, or a sudden swing between dry and wet conditions—not by an empty bag of calcium sitting in the shed.
Start with the fruit and the soil. Confirm that the lesion is on the end opposite the stem, check moisture several inches down, pause any automatic watering if the soil is saturated, and test before adding lime or another amendment. That sequence prevents the two most common mistakes: watering a waterlogged plant and adding calcium when the plant already has enough but cannot move it to the fruit.
The Short Answer: Stabilize the Root Zone First
Remove badly affected fruit, then make the next week boring for the plant: no drought followed by a flood, no deep hoeing through the feeder roots, and no heavy nitrogen or calcium dose chosen by guesswork. Aim for an evenly moist root zone, use mulch to slow evaporation, water at soil level, and let a soil test decide whether pH or calcium actually needs correction.
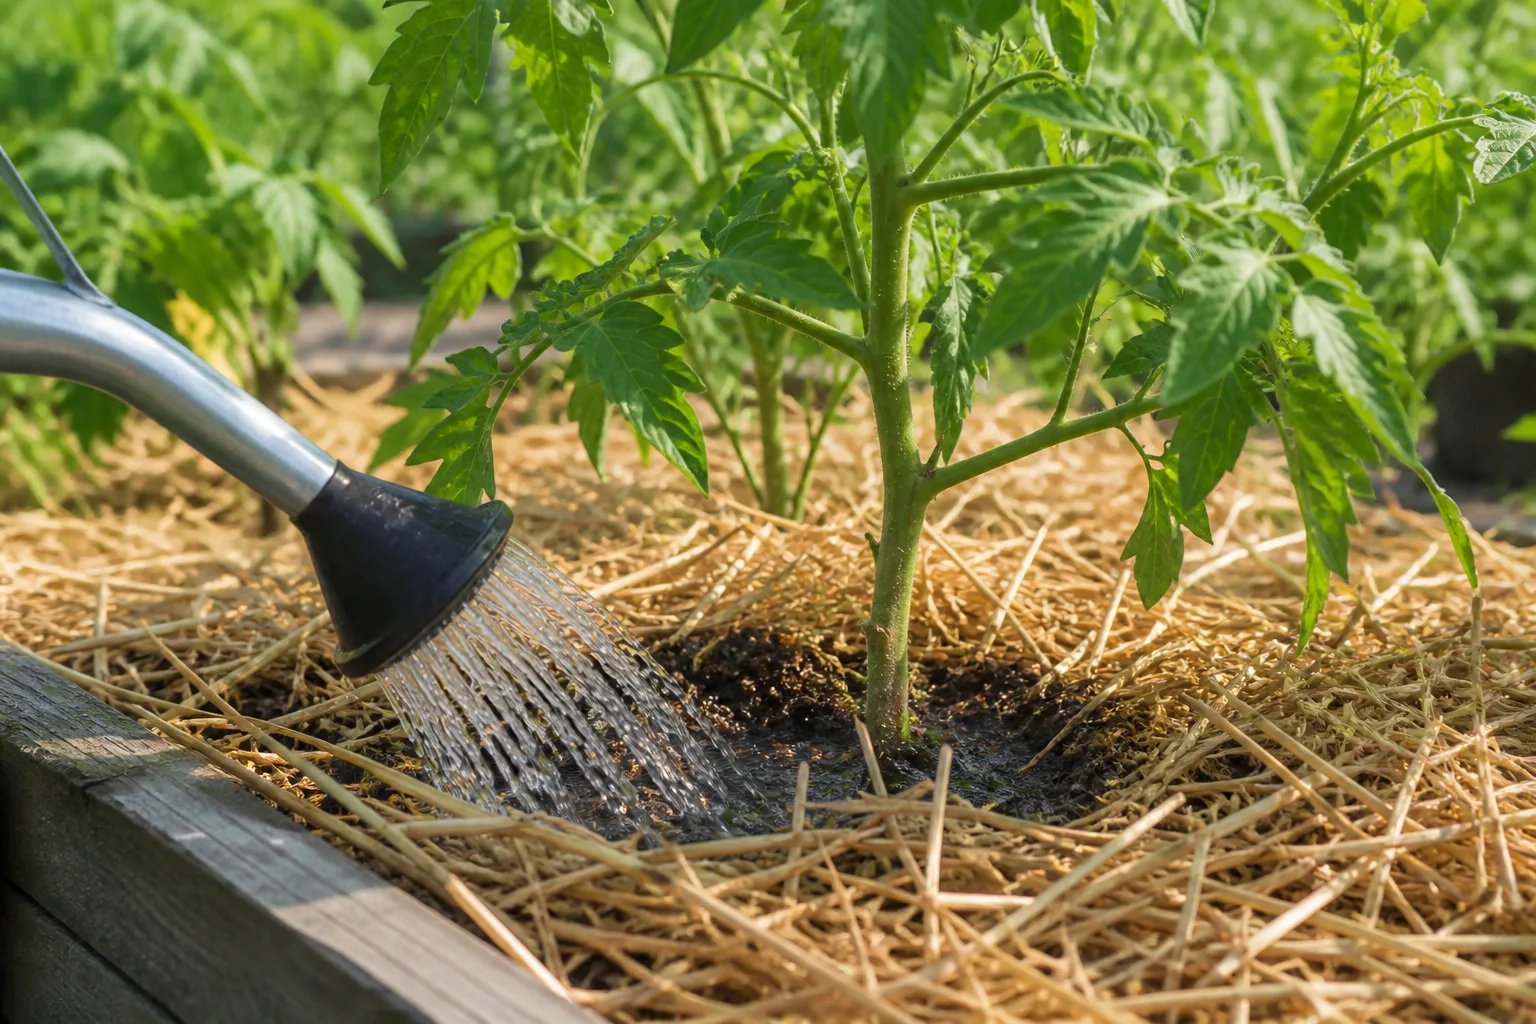
Established tomatoes commonly use about 1 to 2 inches of water per week, including rainfall, but that is a planning range rather than a universal schedule. Sandy soil, a shallow raised bed, hot wind, a large fruit load, or a small container may require more frequent checks; clay soil, cool weather, and a soaking rain may require less. UConn Extension and UGA Extension both emphasize steady moisture and deep watering rather than a rigid calendar (UConn Extension) (UGA Extension).
How to Recognize Blossom End Rot
Blossom end rot begins on the blossom end, the bottom of the tomato opposite the stem scar. The first mark may be a small, pale brown, water-soaked patch on a green fruit. It then expands, darkens, sinks, and becomes dry or leathery as the tomato continues to grow and color (NC State Extension).
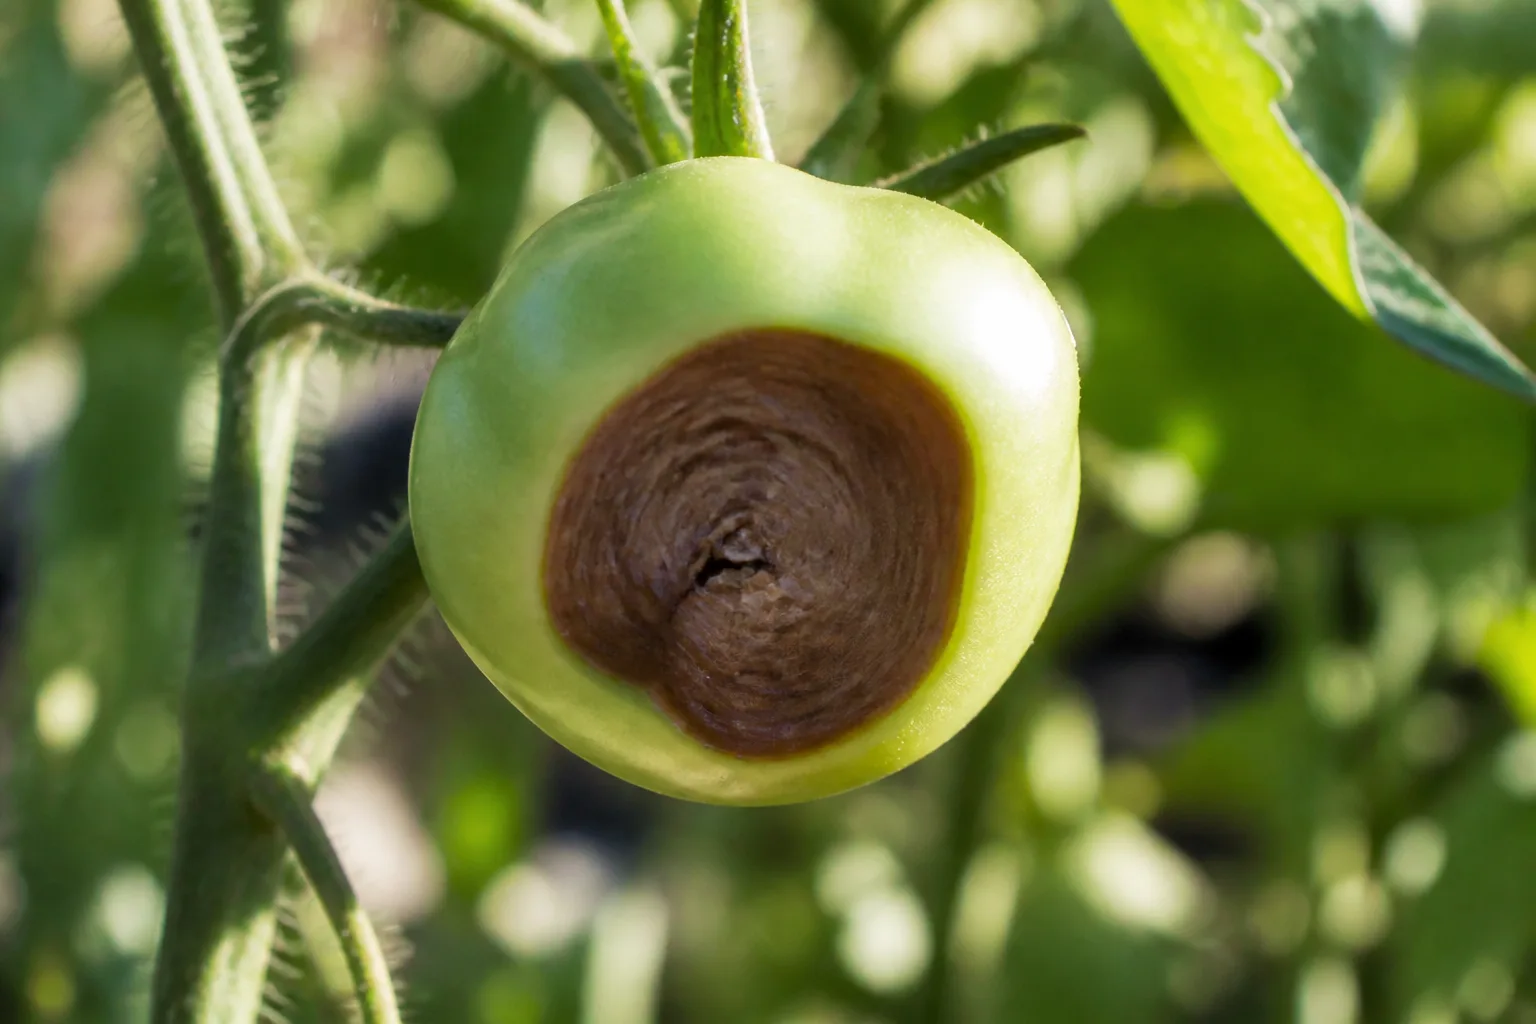
What the First Spot Looks Like
Look for a lesion that is localized to the bottom rather than scattered across the shoulders or leaves. Affected tissue may cover a large portion of the fruit in severe cases, and bacteria or fungi can colonize the damaged area later, making it softer, wetter, or blacker than the original disorder.
The plant itself may look completely healthy. That is why blossom end rot is so frustrating: the leaves can be green, the flowers can be abundant, and only the first few developing tomatoes show the warning. It is especially common on the first fruit truss and on large or elongated fruit, which can demand calcium quickly as the fruit expands (UConn IPM) (UConn Home & Garden Education Center).
What Black Spots on Other Parts of the Fruit May Mean
Location is your first diagnostic clue, not your only one. A pale, papery patch on the sun-exposed shoulder suggests sunscald; a split that opens the skin points to fruit cracking; fuzzy mold, leaking tissue, or a spreading lesion can indicate secondary decay or another disease. Spots on leaves and stems are not blossom end rot.
| What you see | More likely explanation | First response |
|---|---|---|
| Dry, sunken patch on the bottom | Blossom end rot | Check moisture, roots, and recent fertilizer; remove the fruit if needed |
| Rough rings or cracks near the stem | Rain check or concentric cracking | Stabilize moisture and harvest vulnerable fruit before heavy rain |
| Pale, leathery patch on the sun-facing side | Sunscald | Improve leaf cover and avoid stripping foliage in hot sun |
| Soft, wet, fuzzy, or foul-smelling decay | Secondary infection or rot | Discard the fruit and diagnose the original wound or disease |
Blossom end rot is a physiological disorder, not something that spreads from plant to plant like a contagious infection. The damaged tissue will not become healthy again, but the plant can produce sound later fruit once the moisture and root-uptake problem is corrected. If several unrelated symptoms appear at once, use a local extension diagnostic service instead of treating every mark as calcium deficiency; Wisconsin Extension cautions that visual diagnosis alone has limits (Wisconsin Horticulture).
Why Calcium and Water Are Linked
Calcium helps build and stabilize cell walls in young tomato fruit. The roots take up dissolved calcium, and water moving upward through the xylem carries it toward growing tissues. When the root zone dries too far, stays saturated, or loses functioning roots, the developing fruit may not receive calcium steadily enough to build sound tissue (Clemson Extension).
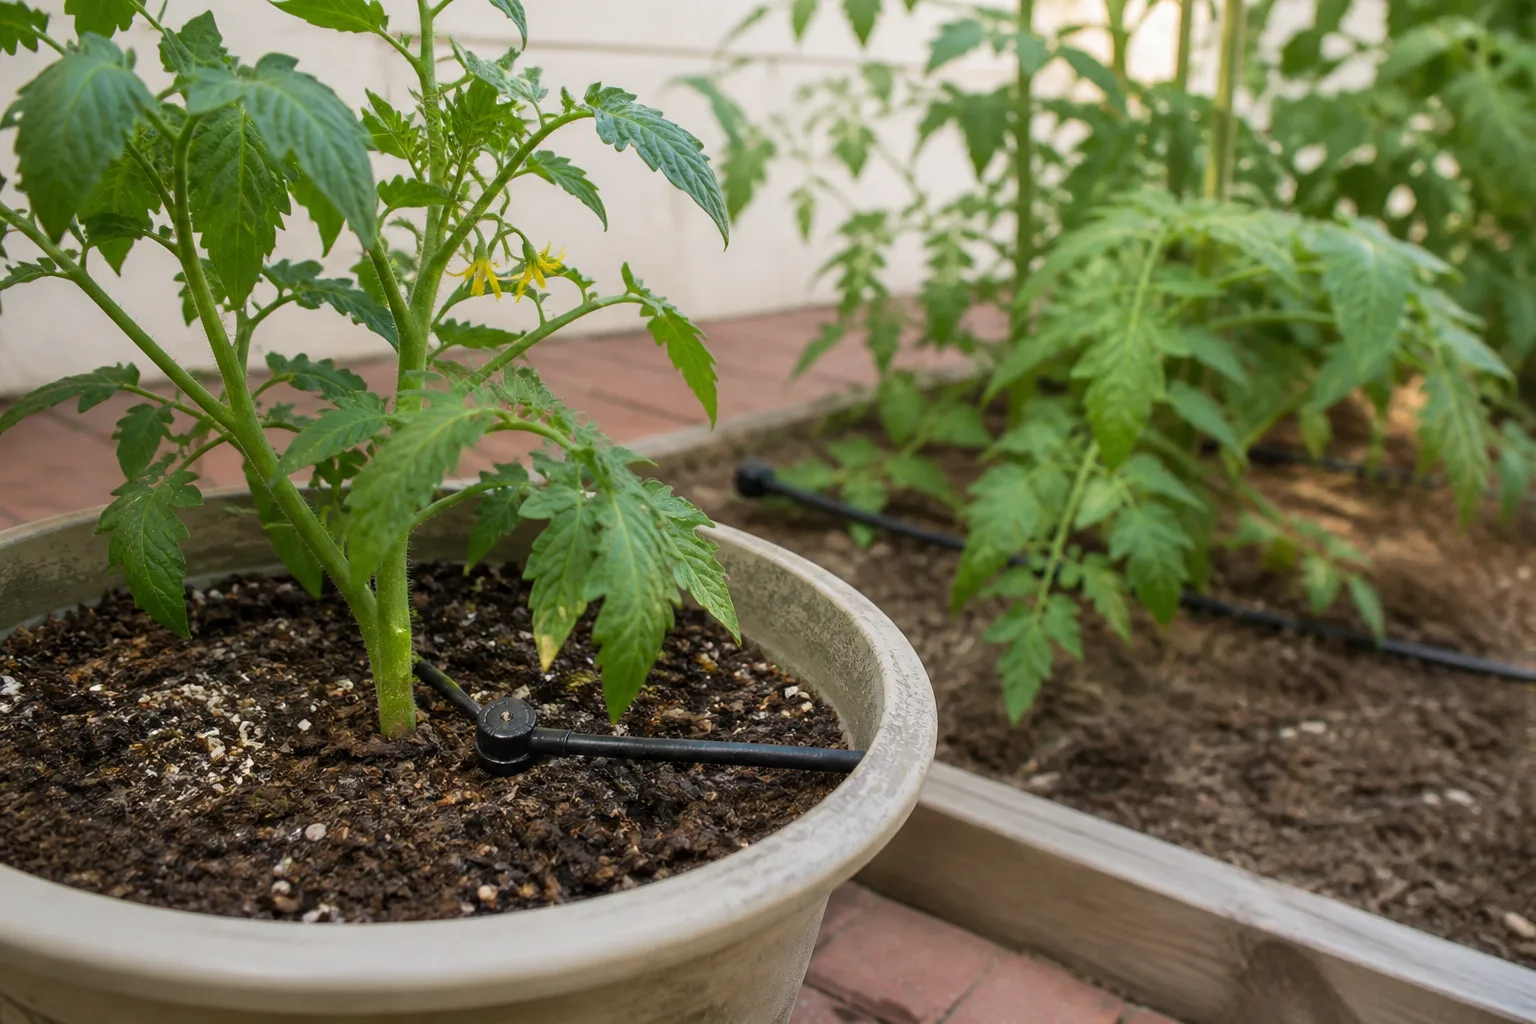
That is why a tomato can have blossom end rot after a week of hot weather, even when the garden soil is not deficient. The plant may have been growing quickly while transpiration and fruit demand were high, then encountered dry soil, high heat, salt stress, or a clogged emitter. The fruit shows the shortage at its far end, where the tissue is developing fastest and the calcium supply is least reliable.
Why Soil Can Contain Calcium and Fruit Can Still Lack It
A soil test measures the root environment; it does not guarantee that roots were healthy, that water reached them, or that calcium traveled into every developing fruit. Calcium is not readily redistributed from mature leaves into fruit, so correcting a problem after the fact cannot simply empty the leaves’ calcium reserve into a damaged tomato (Wisconsin Horticulture).
Several stresses can interrupt the supply line:
- Dry soil: roots cannot take up enough water or dissolved nutrients.
- Waterlogged soil: air is displaced, fine roots lose function, and root diseases become more likely.
- Root damage: hoeing, transplant shock, fertilizer burn, or a compacted root zone reduces uptake.
- Excess fertilizer salts: high concentrations of ammonium, potassium, magnesium, or salts can interfere with calcium uptake.
- Fast, leafy growth: excess nitrogen can direct calcium and water toward foliage rather than fruit.
- Heat, wind, and humidity extremes: these can make water demand or transpiration out of balance with root supply.
Penn State’s cultivar trials are a useful reminder that weather and irrigation failures can overlap. Their plants experienced heat, a dry period, and clogged drip emitters before blossom end rot appeared; the practical lesson is to inspect the delivery system and recent weather, not to assume the soil suddenly lost all its calcium (Penn State Extension).
The Prevention Sequence for a Healthier Tomato Crop
Treat prevention as an order of operations. Correct the factor most likely to be limiting uptake before adding a product, because changing soil chemistry in an already stressed root zone can create a second problem.
Test Soil Before Adding Lime or Calcium
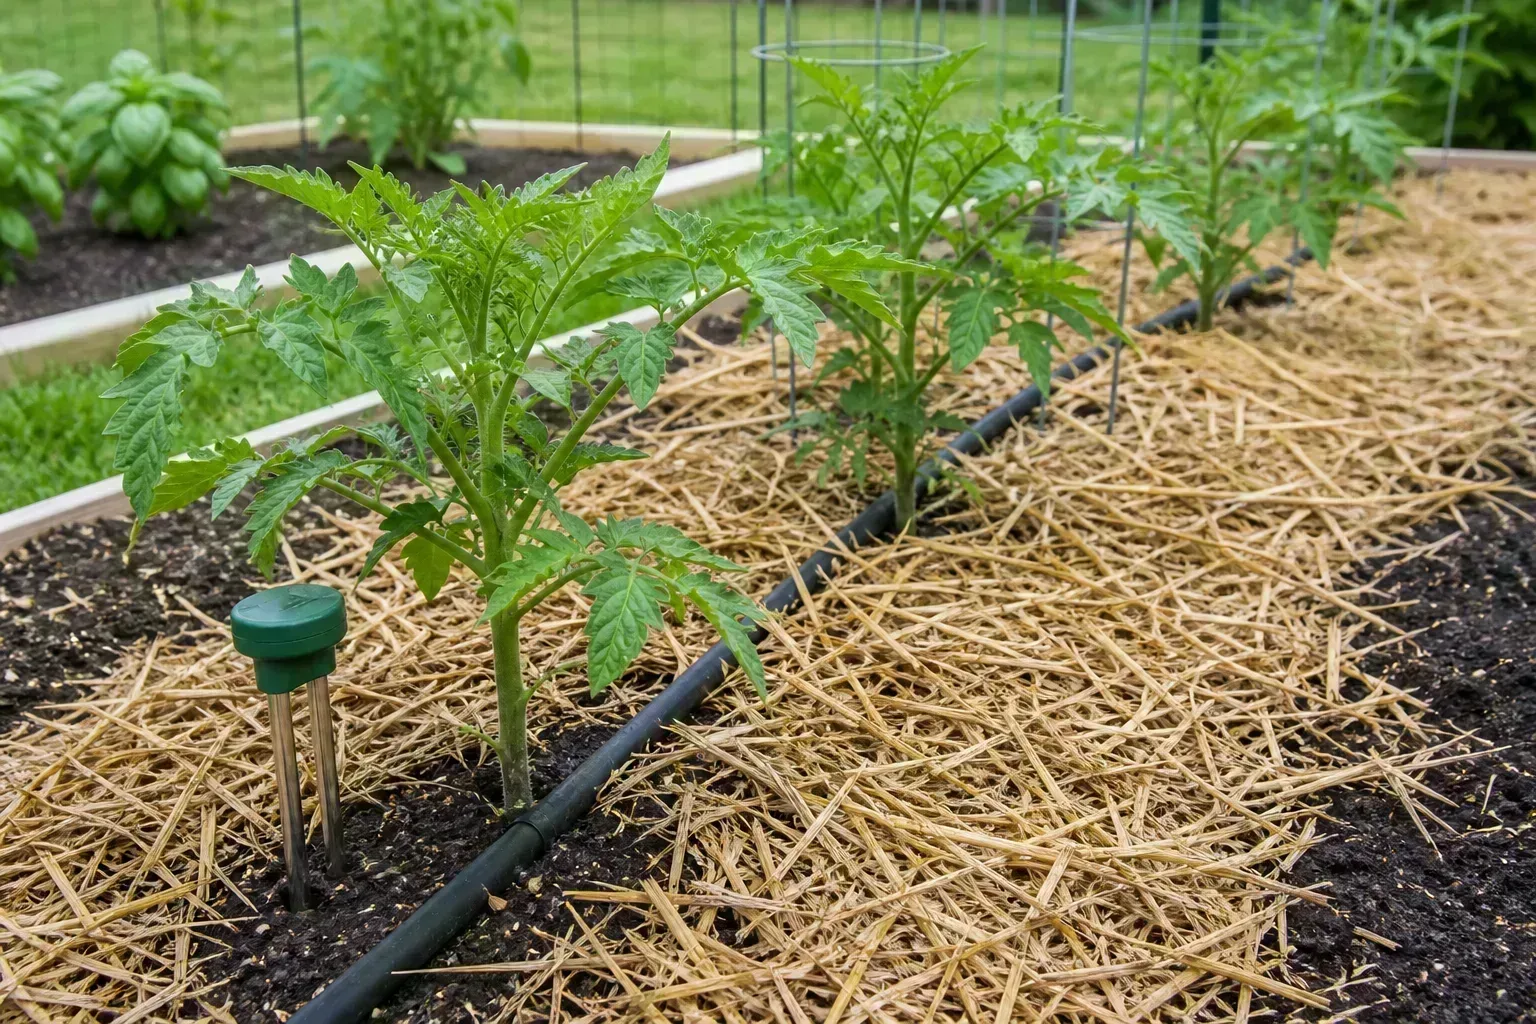
Test the bed or container mix where the tomato is actually growing. A lawn test may not represent a compost-amended raised bed, and a bag of unused potting mix will not describe the root zone after months of fertilizer and irrigation. Follow the lab’s sampling instructions and read the calcium, pH, and nutrient recommendations together.
Tomatoes generally grow well in a mildly acidic soil, with a useful target around pH 6.2 to 6.8 depending on the testing program and local recommendations. Do not push the pH toward an alkaline range simply because the fruit has a black bottom. NC State recommends liming according to the soil analysis, while UConn and Wisconsin both warn that lime changes pH and should be used for a demonstrated pH or calcium need—not as a blind emergency cure (NC State Extension) (UConn IPM) (Wisconsin Horticulture).
If the test shows adequate calcium and a suitable pH, skip the amendment and focus on water, drainage, roots, and fertilizer concentration. If calcium is low, follow the report’s material and rate. If calcium is adequate but pH is too low, lime may be appropriate; if calcium is low but pH is already suitable, a calcium source that does not raise pH as much may fit better. Those are soil-test decisions, not interchangeable tomato tricks.
Use Mulch and Drainage to Buffer Moisture
Apply about 2 to 3 inches of clean organic mulch such as straw, shredded leaves, or compost after the soil has warmed. Keep the mulch slightly away from the stem so the crown is not kept constantly damp. Mulch reduces evaporation, moderates soil temperature, and slows the dry-to-wet swings that make blossom end rot more likely (UGA Extension) (Savvy Gardening).
Mulch is a buffer, not a cure for a poor site. If rain collects in a low spot, a downspout empties beside the plant, or the bed is compacted clay, redirect water or improve the bed’s structure before relying on a thicker layer of straw. Compost can improve moisture retention and aggregation, but it cannot make a permanently flooded root zone well drained.
Keep irrigation lines under the mulch only after you have tested them. Run drip emitters or a soaker hose and check moisture at the beginning, middle, and end of the line. Penn State’s experience with clogged emitters shows how a system can appear to be running while plants still spend weeks in drought stress (Penn State Extension).
Water Deeply Without Keeping Roots Soggy
Water slowly at the soil line until moisture reaches roughly 6 to 8 inches deep in an established bed. A deep soak is more useful than a daily sprinkle that wets only the surface, but “deep” does not mean leaving the bed muddy. Wait for the root zone to begin drying before watering again, and account for rain before turning on a timer (UGA Extension).
Avoid overhead sprinklers when practical. Water on leaves does not cause blossom end rot directly, but keeping foliage and fruit wet can raise disease pressure and soil splash can move pathogens onto lower leaves. A wand aimed at the soil, a soaker hose, or a correctly placed drip line delivers water more precisely; BBC Gardeners’ World also flags irregular watering as a contributor to both blossom end rot and fruit splitting (BBC Gardeners’ World Magazine).
Adjust the Check for Beds, Raised Beds, and Containers
In-ground tomatoes usually have the largest moisture reservoir once their roots spread. Start with one or two deep waterings per week when rain is absent, then adjust for soil texture and weather. Heavy clay may still be damp several inches down after a week; sandy soil may be dry much sooner.
Raised beds often drain and warm faster than surrounding ground. A deep, compost-rich bed may hold moisture well, while a shallow bed over fast-draining soil can dry quickly. Check beneath the mulch rather than judging by the color of the surface.
Containers and grow bags need the closest attention because their root volume is limited and exposed sides heat up. A mature tomato in a small pot may need a daily check or, in extreme heat, more than one check; the same plant can stay wet for days in cool, cloudy weather. Use a pot with open drainage holes and a free-draining container mix, and never leave it standing in a saucer of runoff.
Use a Root-Zone Moisture Check
Push a finger, narrow trowel, wooden plant label, or moisture probe several inches into the soil a few inches from the stem. If the soil is cool and slightly damp below the surface, wait. If it is dry and crumbly through the active root zone, water slowly and recheck after the water has had time to move down.
Use more than one clue. A dry-looking mulch can cover damp soil; a damp surface can hide a dry center in a container. If a plant is wilting while soil is wet, do not add water automatically—inspect roots, check drainage, and consider heat stress or disease. Consistency comes from observation, not from keeping the hose on a timer that ignores weather.
Fertilize Without Creating a Calcium-Uptake Problem
Tomatoes need nutrition, but more fertilizer is not a substitute for functioning roots. Follow a soil test and the fertilizer label, and be cautious with high-nitrogen products that produce a very leafy plant with delayed or uneven fruit development. Excess nitrogen can also increase salt concentration and change how the plant allocates water and nutrients.
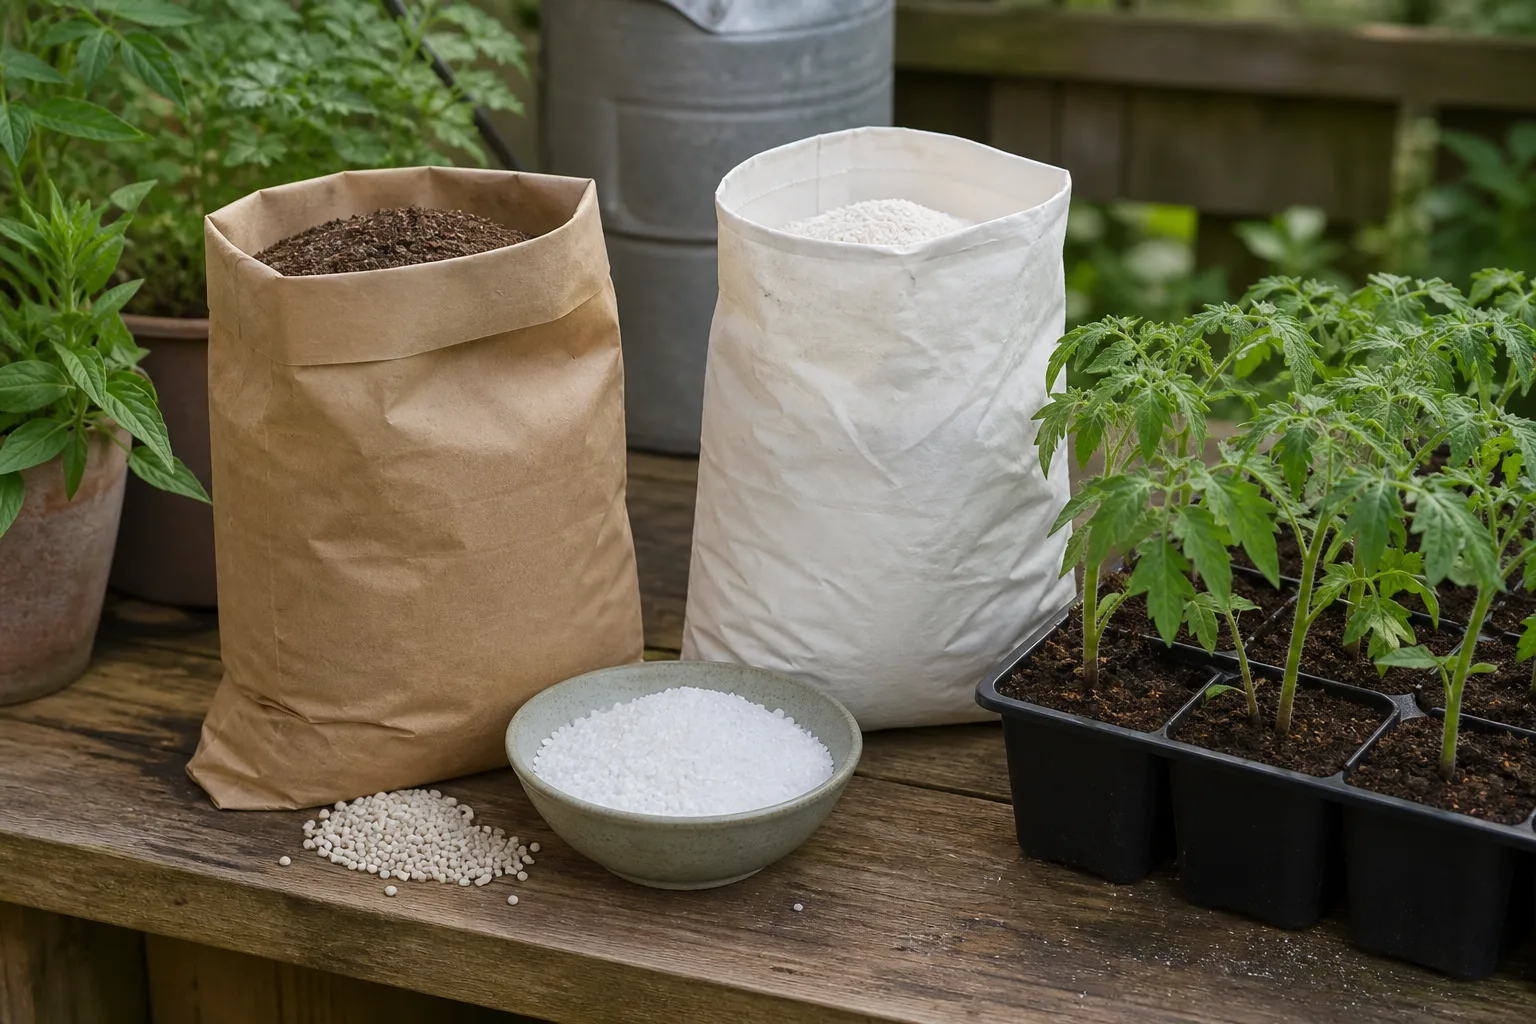
Use a complete fertilizer appropriate for vegetables rather than chasing one nutrient based on a single damaged fruit. If the foliage is dark green and vigorous but fruit is scarce, stop adding feed until you review the program. If growth is pale or stunted across the plant, diagnose the whole root zone and soil fertility instead of assuming blossom end rot explains every symptom.
When Lime, Gypsum, or a Calcium Spray Makes Sense
Lime makes sense when the soil is too acidic and the test or local recommendation supports it. It is not a quick rescue for fruit that already has a leathery lesion, and repeated applications can push pH too high. Gypsum can supply calcium without acting like lime as a pH-raising amendment, but it is still not a universal cure; use it only when the soil report and local guidance support it.
Calcium sprays deserve a cautious answer because extension sources are not perfectly aligned on their usefulness in every situation. Clemson explains that calcium in leaves is not readily moved into fruit and that fruit skin does not directly absorb foliar calcium, while older NC State guidance describes labeled calcium chloride sprays as a possible supplemental control when used at the recommended rate (Clemson Extension) (NC State Extension).
The practical conclusion is to stabilize moisture and protect roots first. If a soil test or diagnostic recommendation identifies a genuine deficiency and a currently registered product is appropriate for your crop and location, follow the product label exactly; do not copy a concentration from a different crop, country, or year. Never mix a calcium product with a pesticide unless both labels permit the combination, and do not spray in hot conditions without checking for phytotoxicity risk.
Reduce Stress From Planting Through Fruit Set
Prevention begins before the first flower. Plant after cold soil and frost risk have passed for your area, harden transplants gradually, and avoid burying or disturbing the root ball in a way that leaves roots unable to supply the new growth. A steady establishment period gives the plant a better chance of supporting fruit as it begins to size.
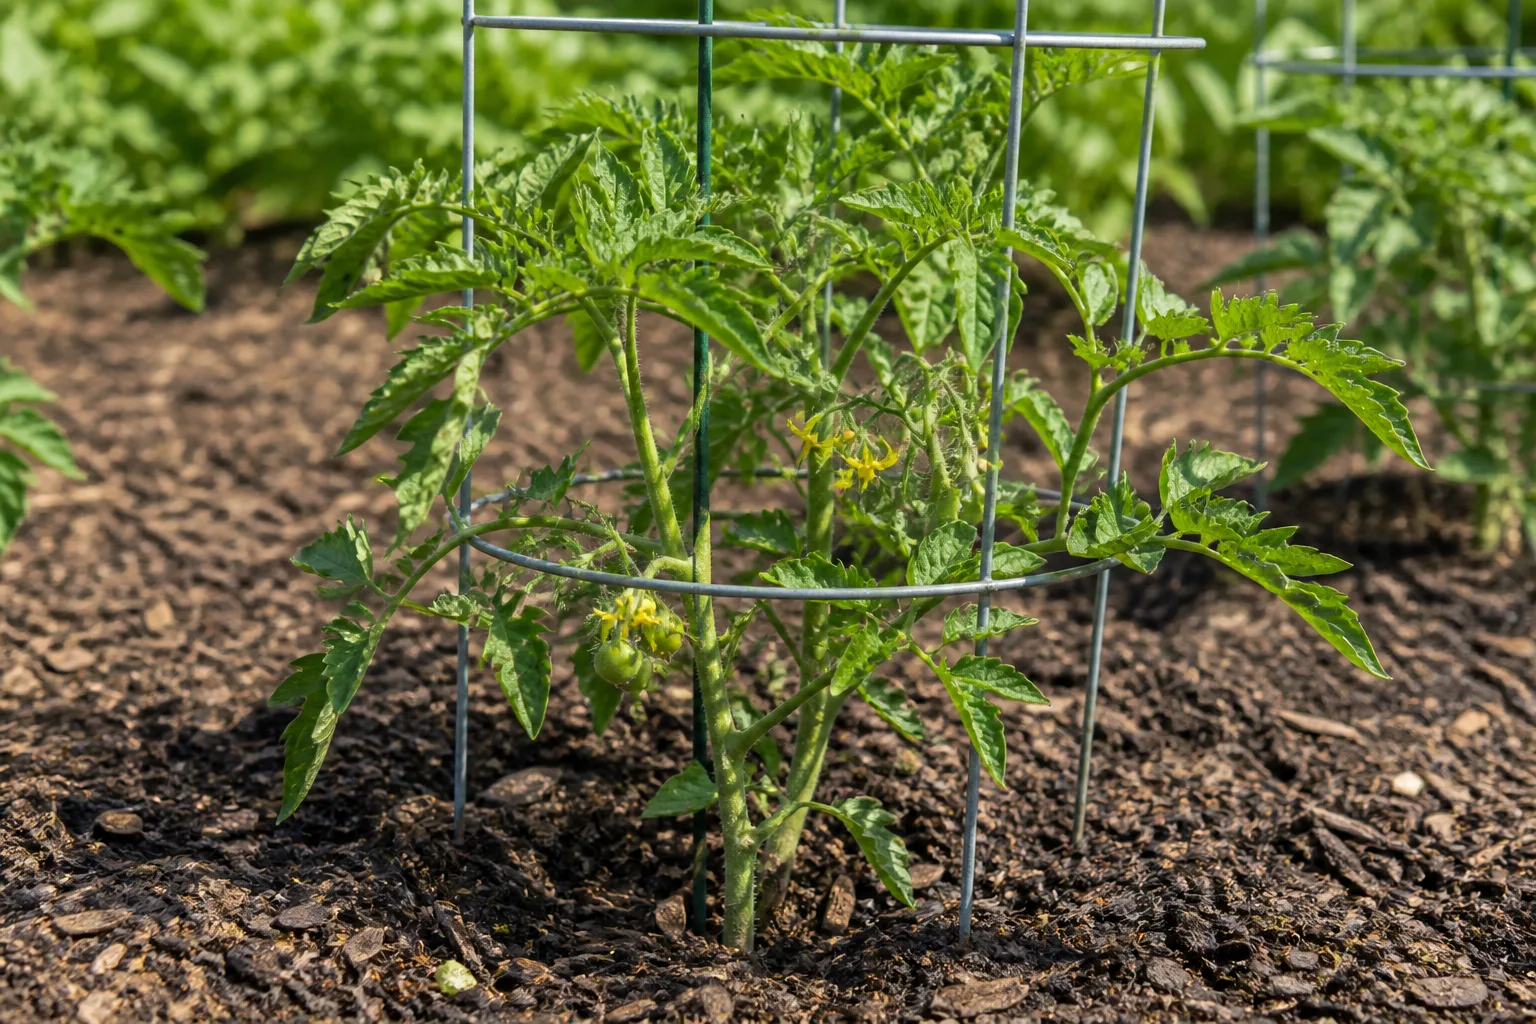
Place tomatoes where they receive strong light and where rain or irrigation can drain away. Support tall plants early so roots are not torn later by a leaning stem, and keep cultivation shallow and away from the main root zone. The goal is not to eliminate every stress—summer heat and storms are unavoidable—but to keep one stress from stacking on top of another.
During fruit set, watch the weather and the irrigation system more closely than the calendar. Hot, windy days can dry a container or shallow bed quickly; a heavy storm after a dry spell can saturate the same soil. A rain gauge, a working emitter, mulch, and a two-minute soil check are more useful together than a promise that one product will protect every truss.
Choose Cultivars With Lower Risk
Variety choice is a risk-management tool, especially when your site has a history of blossom end rot. Cherry types are generally less susceptible, while large, elongated plum and paste tomatoes are often more vulnerable because their fruit can expand rapidly and place greater demand on calcium supply. That is a tendency, not a guarantee (UConn IPM).
| If you want to grow… | What to expect | Practical choice |
|---|---|---|
| Cherry tomatoes | Often lower BER risk and smaller fruit demand | Useful for a difficult, hot, or container site |
| Large slicers | More fruit volume and sometimes more sensitivity to stress | Give them generous root volume and steadier moisture |
| Plum or paste types | Elongated fruit can be more prone to BER | Pair with soil testing and careful irrigation |
| A favorite heirloom | Flavor and shape may come with higher risk | Grow it alongside a less susceptible cultivar |
Penn State notes that cultivars such as Celebrity, Fresh Pak, Jet Star, Mountain Pride, and Early Girl have shown lower susceptibility in cited trials, but “less prone” does not mean immune. Treat those names as a starting point for local trialing, not a guarantee that genetics can overcome a dry root zone or damaged roots (Penn State Extension).
What to Do When Fruit Already Has Blossom End Rot
You cannot reverse the black patch. Remove a badly affected tomato when you notice it, especially if it is using space and moisture while secondary organisms are moving into the damaged tissue. Removing early fruit may help the plant direct resources to later fruit, but it does not replace correcting the underlying moisture or root problem.
If the spot is small, dry, and free of mold, the sound portion may be usable after you cut away the affected tissue. Treat that as a food-quality decision: discard the entire tomato if it is soft, leaking, foul-smelling, fermented, or moldy. Do not compost heavily diseased or rotten fruit if your compost pile does not reliably heat; remove it according to local waste guidance.
Next, inspect the plant’s recent history. Was the soil dusty, muddy, or alternately both? Did a timer run after rain, did a drip emitter clog, did you cultivate near the roots, or did you apply a strong feed? Correct the most likely trigger, then monitor new fruit. A healthy-looking plant with one damaged early tomato may recover quickly; a whole crop showing lesions after repeated drought and saturation needs site-level changes.
Conclusion
To prevent blossom end rot on tomatoes, protect the water-and-calcium supply line rather than reaching first for a calcium product. Keep soil evenly moist but not waterlogged, water deeply enough to wet the active root zone, mulch after the soil warms, protect roots, avoid excess nitrogen, and use a soil test before changing pH or adding calcium.
The first affected tomato is a warning about conditions during fruit development—not a verdict on the whole plant. Check the bottom of the fruit, correct the root zone, and judge success by the next truss: firm new fruit, stable moisture, and no expanding leathery lesions are better evidence than a fixed watering schedule or a shelf full of amendments.



