How to Grow and Care for Wallflower Plants
Grow wallflowers successfully with clear advice on species, life cycle, planting, watering, propagation, pruning, containers, winter care, and pests.
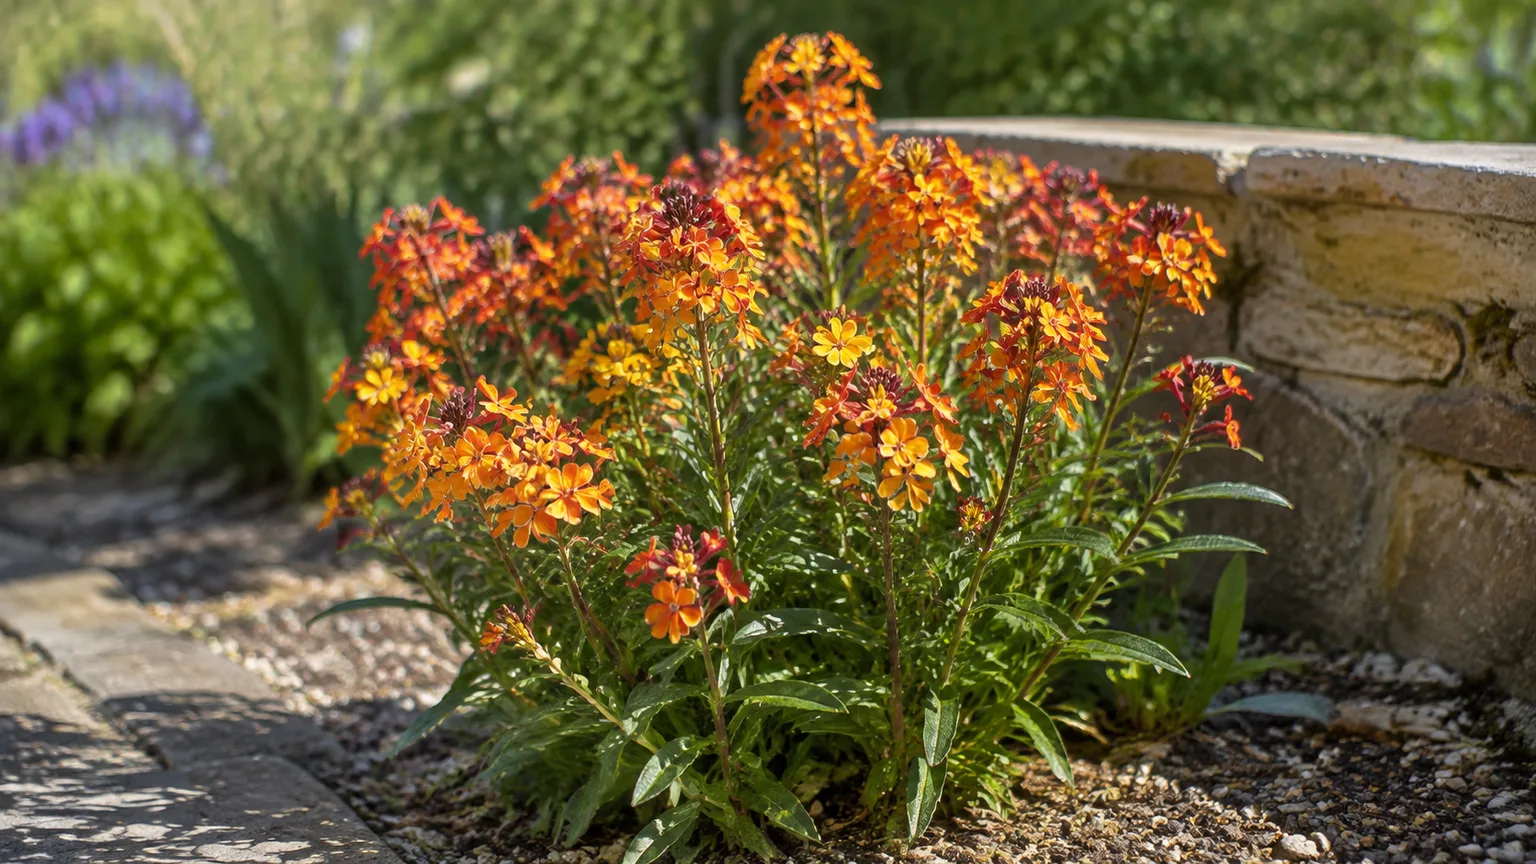
Wallflowers are easiest to grow when you treat them as cool-season, sharply drained garden plants, not as one universal perennial. The common garden wallflower, Erysimum cheiri, may live as a short-lived woody-based perennial, but gardeners often grow it as a biennial or annual because its performance changes with heat, winter moisture, cultivar, and sowing date. Other species called wallflowers have different native ranges and habits.
Give a wallflower full sun or light shade, soil that drains quickly, and only moderate fertility. Then decide what you want after flowering: let a seed-raised plant naturalize, take cuttings from a favorite perennial cultivar, or replace a tired plant rather than trying to force it through another season. That small decision prevents most of the common mistakes with Erysimum.
Know Which Wallflower You Are Growing
The name wallflower covers a genus in the mustard family, Brassicaceae. The common or English wallflower, Erysimum cheiri (also sold under the older name Cheiranthus cheiri), is the familiar bedding and border plant with narrow green leaves and fragrant four-petaled flowers in yellow, orange, copper, red, brown, or burgundy. The RHS describes Erysimum as a genus of annuals, biennials, and woody-based perennials, which is why a single “wallflower care” rule can be misleading.
Read the label for the full botanical name and cultivar before you plant. A compact seed-raised E. cheiri and a long-flowering perennial hybrid may share flower colors, but they differ in whether they set seed, how long they last, and how hard you can cut them back.
Common garden wallflower and Western wallflower are not interchangeable
Common wallflower is a cultivated plant native to southern Europe. Missouri Botanical Garden lists E. cheiri as a low-maintenance plant for dry to medium, well-drained soil, with a typical height of 6 to 24 inches and spring bloom; its profile also notes that it has naturalized in parts of western North America (Missouri Botanical Garden). That does not mean every cultivar is invasive, but it is a good reason to check local guidance before allowing seed to spread beyond the bed.
Western wallflower, Erysimum capitatum, is a separate North American wildflower. The National Park Service describes the Western wallflower as a Rocky Mountain and western U.S. species found from desert canyons to high-elevation meadows, with yellow or orange flower clusters and a much broader native habitat than the garden wallflower. Choose it for a native-plant project only when it suits your local ecology and is available from a responsible native-plant source; do not assume a nursery hybrid is the same plant.
Match the Plant’s Life Cycle to Your Climate
The word perennial tells you what the plant can do biologically, not what it will do in your yard. Frost, summer heat, drainage, and the genetic makeup of the cultivar determine whether a wallflower returns strongly, limps through one more season, or finishes after setting seed.
| What you bought | What to expect | Best after-bloom plan |
|---|---|---|
| Seed-raised common wallflower | Usually grown as a biennial; it often makes foliage first and flowers the following spring | Leave selected seed pods to mature, then remove the spent plant once seedlings are established |
| Spring-blooming wallflower sold as an annual | A one-season display, especially where summers become hot or winters are severe | Deadhead for a tidier display, then replace or let a few plants seed |
| Short-lived perennial or woody-based cultivar | Can flower for several seasons in a suitable climate but may become woody or collapse after a few winters | Deadhead, trim leafy growth after the main flush, and keep backup cuttings of favorites |
| Western wallflower or another species | Care and longevity depend on the species and local habitat | Follow the plant’s regional requirements rather than the label “wallflower” alone |
The Missouri Botanical Garden profile for E. cheiri gives zones 7 through 9 as a starting point, but a zone number cannot account for wet clay, exposed wind, a hot urban courtyard, or a protected stone wall. In a hot-summer climate, a spring wallflower may be best treated as a cool-season annual even if a nearby garden keeps a perennial hybrid for years.
Choose a Sunny, Sharply Drained Site
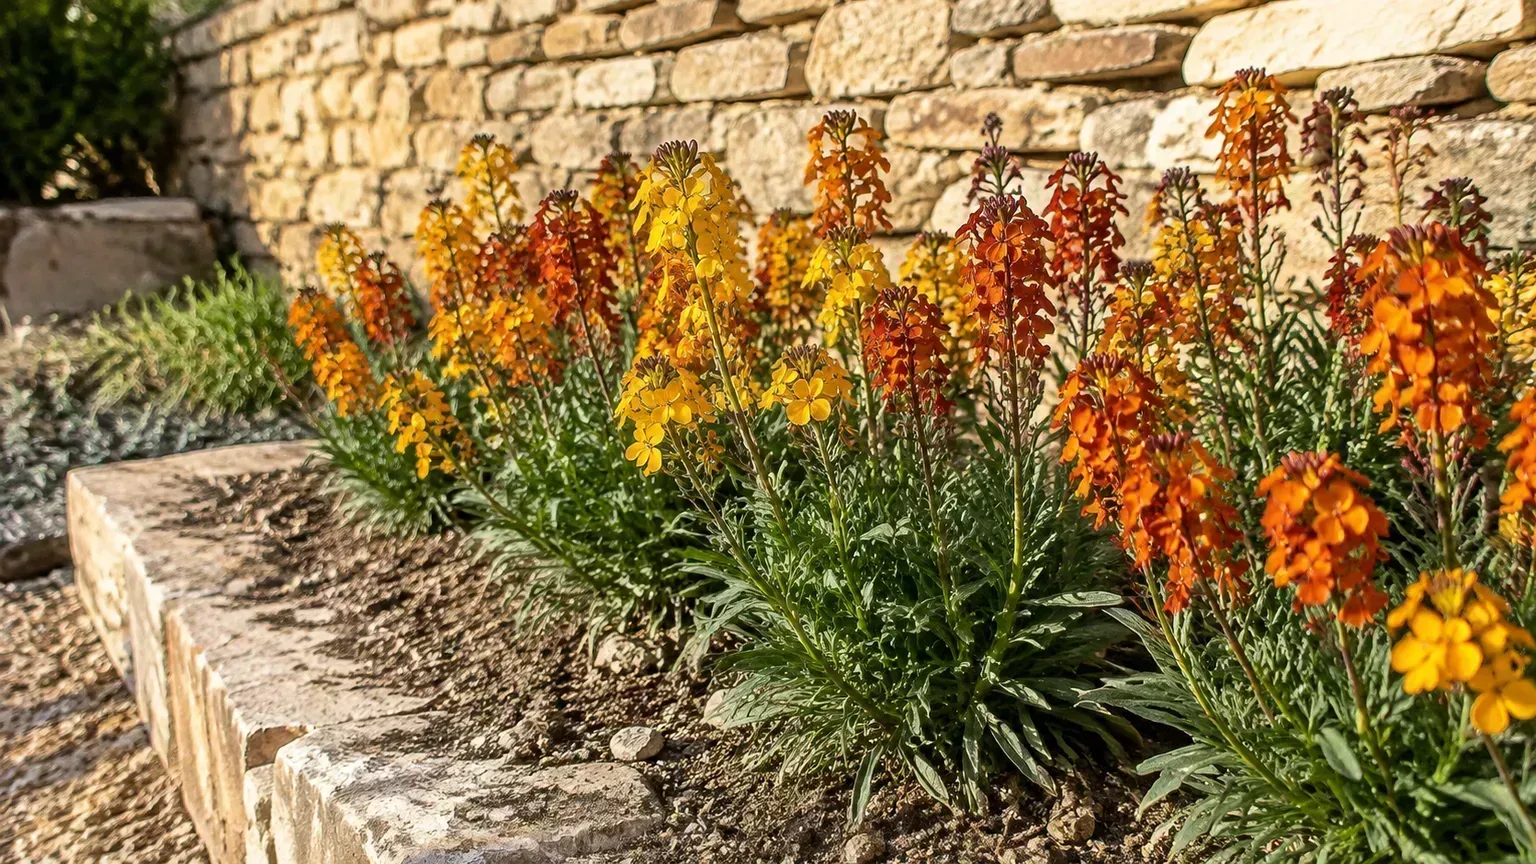
Start with the site, because no amount of pruning will rescue a wallflower planted where water sits around its crown. Aim for at least six hours of direct sun, good airflow, and a position that does not collect runoff from a roof, downspout, or frequently watered lawn. In very hot regions, light afternoon shade can reduce heat stress, but dense shade usually produces stretched stems and fewer flowers.
The RHS recommends full sun and well-drained neutral or alkaline soil for common wallflower, while NC State Extension notes that E. x cheiri tolerates partial shade but appreciates afternoon shade in hot southern summers (NC State Extension). Put fragrance-led cultivars near a path, patio, or entrance where you can notice them, and reserve the hottest open exposure for plants with enough moisture during establishment.
Wallflowers are natural fits for rock gardens, raised beds, border fronts, slopes, wall crevices, and containers. Their roots need oxygen as much as they need water, so a shallow gritty pocket between stones can be a better home than a rich but compacted bed. If your soil is heavy clay, create a raised or sloped planting area and blend in durable mineral material through the bed; do not fill a small planting hole with a pocket of loose sand that drains into a surrounding clay bowl.
Plant Wallflowers in Beds, Crevices, or Containers
Plant nursery starts in early spring as soon as the soil can be worked, or in early autumn where young plants can establish before hard winter. A fall planting often gives biennial wallflowers the cool rooting period they need for spring flowers, but the local climate and the nursery label should decide the timing.
Set the plant at the same depth it occupied in its pot, with the crown level with the surrounding soil. Water the root ball in thoroughly, then allow the surface to dry slightly before watering again. Keep mulch or gravel a little away from the stem base so the crown does not stay damp.
For spacing, begin with the cultivar’s mature width rather than forcing every wallflower into one measurement. Compact plants may sit about 10 to 12 inches apart, while larger, billowing forms need more room for airflow; a practical range is roughly 12 to 24 inches. Crowding encourages weak, floppy growth and keeps leaves wet after rain.
Containers work especially well when you want to control drainage, move a prized plant out of summer rain, or grow wallflowers in a courtyard. Choose a pot with an open drainage hole and a gritty, free-draining container mix; the pot should be large enough for the root ball plus room for a season or two of growth, not an oversized tub that stays wet for days. Empty any saucer after watering, and remember that a pot in full sun can dry much faster than the same plant in a raised bed.
Water and Fertilize Without Encouraging Floppy Growth
Water newly planted wallflowers whenever the upper layer of soil begins to dry, applying enough to wet the root zone rather than sprinkling the leaves every day. Check the soil with a finger or trowel: if it is cool and damp below the surface, wait; if it is dry several inches down and the plant is actively growing, water deeply. Container plants need more frequent checks, especially during a windy spring.
Once established, wallflowers tolerate dry soil better than saturated soil. NC State Extension specifically advises gardeners not to overwater or fertilize Erysimum x cheiri. You generally do not need routine feeding in average soil, and repeated high-nitrogen fertilizer can produce lush stems that outgrow their root system. If a soil test shows a genuine deficiency, correct that deficiency modestly rather than feeding by habit.
Grow Wallflowers From Seed
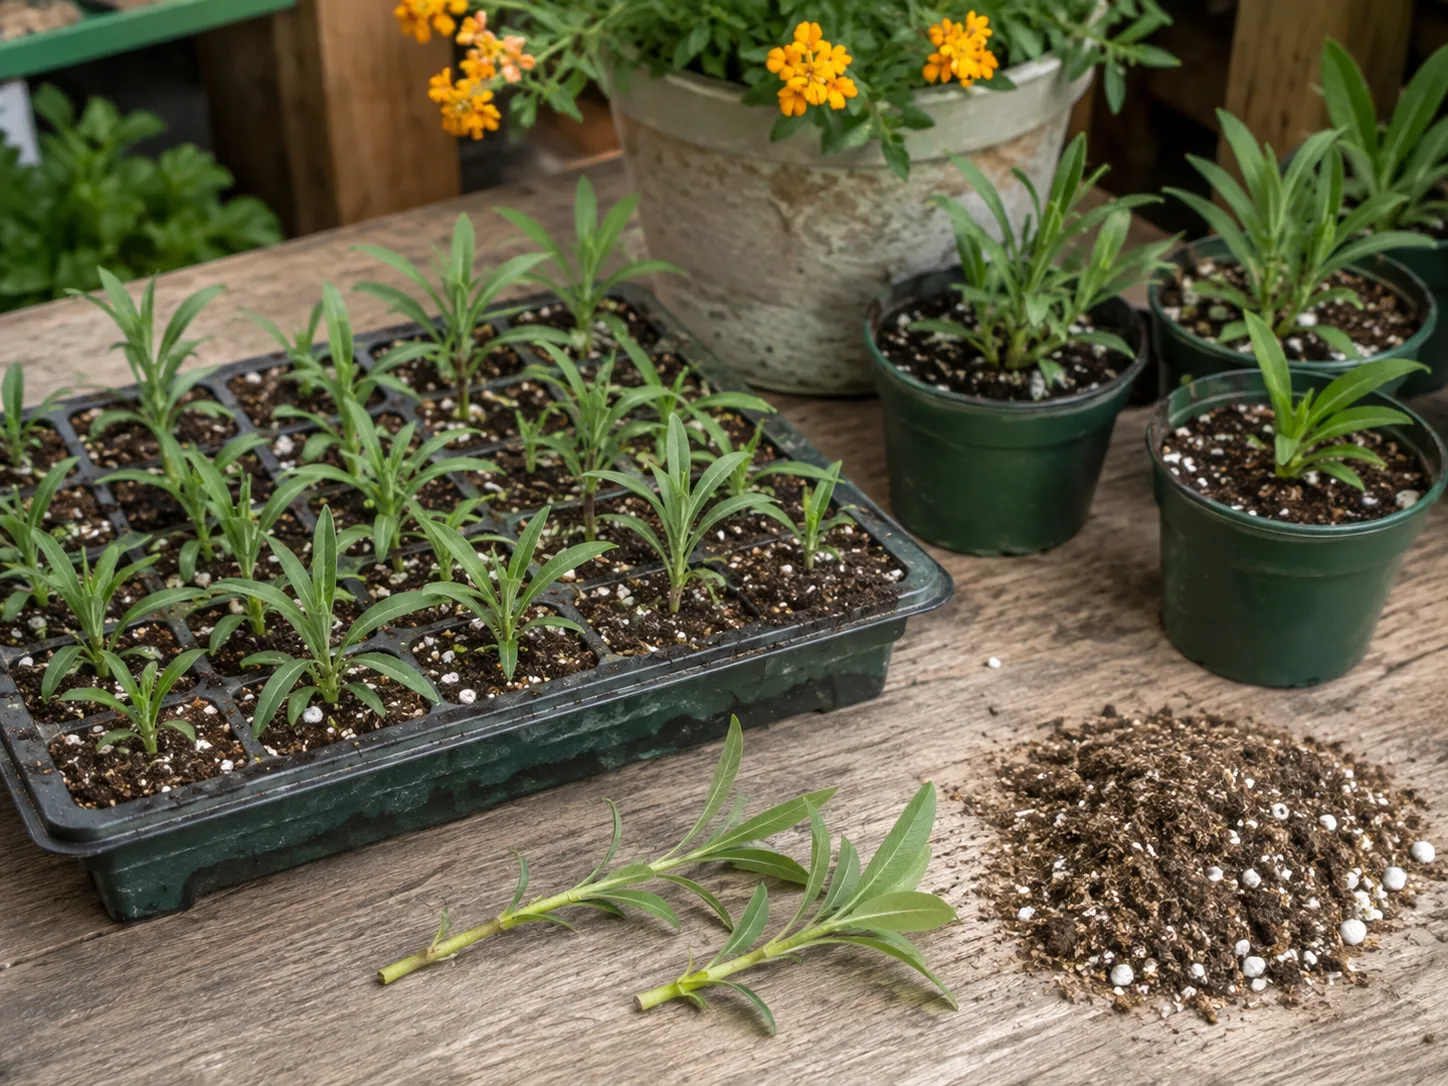
Seed is the most useful way to raise common wallflowers because many biennial forms are meant to flower, set seed, and renew themselves. You will not get an exact copy of a named hybrid from saved seed, and sterile perennial cultivars may produce little or no viable seed, so buy fresh seed when color and habit must be predictable.
Sow in a clean seed-starting mix in a tray or small pots, cover the seed only lightly, and keep the medium evenly moist but never waterlogged. Give seedlings strong light as soon as they emerge. Wallflowers are cool-season plants; seedlings that linger in warmth and low light become thin before they ever reach the garden.
Time sowing, germination, and transplanting
Use the seed packet’s bloom and climate guidance as the final calendar, but these rules make the timing easier to understand:
- For spring bloom from biennial common wallflowers, sow in late spring or summer so plants can form sturdy rosettes before winter.
- In mild-winter climates, late-summer or early-autumn sowing can produce plants that establish outside and flower in spring.
- For a same-year display, start early indoors or buy young plants; success depends on how quickly the seedlings mature before heat arrives.
- Grow seedlings bright and cool, thin them before roots tangle, and harden them off gradually before planting outdoors.
Harvest to Table’s wallflower growing guide gives cool germination conditions and recommends spring sowing for colder areas, with late-summer sowing possible where winter temperatures remain mild. That regional difference is more useful than a single universal date. When weather is uncertain, sow a small batch at two dates rather than putting every seed into one risky window.
Transplant when seedlings have several true leaves and a compact root system. Harden them off over about a week by increasing outdoor exposure while protecting them from harsh midday sun and drying wind. Plant in the final bed before roots become tightly circling, then water the planting hole and monitor moisture until new growth shows.
Propagate Perennial Wallflowers From Cuttings
Cuttings are the best insurance for a favorite perennial wallflower that is aging, becoming woody, or sold under a cultivar name you want to preserve. The RHS lists semi-hardwood cuttings in spring or summer, and Gardens Illustrated gives a practical summer method using short, partly firm shoots in gritty medium (Gardens Illustrated).
Take a healthy, non-flowering shoot about 3 to 4 inches long, cutting just below a leaf node with a clean blade. Remove the lower leaves and every flower or bud so the cutting spends its limited energy on roots instead of seed. Insert it into a small pot of damp, airy propagation mix, firm the medium around the stem, and keep it bright but out of harsh afternoon sun.
The mix should be damp enough to keep the cutting from collapsing but never saturated. Good airflow matters because a leafless stem in wet compost rots quickly. Once you see new growth and the cutting resists a gentle tug, move it into a small pot of free-draining mix and grow it on before planting.
Check the plant label before propagating a named hybrid. Some cultivars are protected by plant-rights or patent rules, and taking cuttings for personal backup is not automatically the same as selling or distributing them. When in doubt, use seed from an unprotected plant or buy additional stock from a licensed nursery.
Prune, Deadhead, and Save Seed With a Purpose
Deadheading and pruning are different jobs. Remove individual faded flowers or spent spikes when you want a tidier plant and more energy directed toward new flowering, but do not remove every spent stem if your biennial wallflower needs to set seed for next year.
To save seed, leave a few flower spikes in place after petals fall. The slender pods, called siliques, swell and dry on the stems; collect them as they turn tan but before they split and scatter. Place a paper bag beneath the stem while cutting, label the seed with the species and year, and store it dry. Expect seedlings from open-pollinated plants to vary in color and habit.
Perennial forms often benefit from a trim after their main flush, especially when stems are stretching or the plant is starting to look woody. Gardens Illustrated recommends a yearly midsummer cut into leafy growth to keep perennial Erysimum compact and vigorous, while NC State advises waiting to cut common wallflower stems until seed has matured if you want it to naturalize. Those instructions are not contradictory: one protects a perennial cultivar’s shape, and the other protects a seed-raised plant’s life cycle.
Do not shear a tired wallflower automatically. If stems are already brown and woody down to the base, a hard cut may not produce new shoots; take insurance cuttings first, or accept that the plant has reached the end of its useful life. Use sharp, clean pruners and make cuts just above healthy leafy growth.
Plan Winter Care and Realistic Longevity
Winter care depends more on drainage than on wrapping. In a suitable zone, common wallflowers may overwinter as short-lived perennials or biennials, but a crown sitting in cold saturated soil is at greater risk than one in a gritty raised bed. Keep winter mulch thin and porous, and never pile wet leaves against the crown.
In colder climates, the dependable strategy is to grow wallflowers as annuals or start replacements from seed. A potted perennial cultivar can be moved to a sheltered, bright location before repeated freezing weather, but it still needs light and airflow; a dark, warm room encourages weak growth and a damp root ball can rot. Reduce watering during cold weather without allowing a container to become dust-dry.
In hot climates, the opposite problem appears. Spring flowers may fade when temperatures rise, even though the plant is technically capable of living longer. Give it afternoon shade, stop expecting a cool-season plant to perform like a summer annual, and save seed or cuttings before replacing it.
Diagnose Common Wallflower Pests and Diseases
Start with the root zone when a wallflower looks wrong. A limp plant in dry soil needs water, but a limp plant in wet soil may have damaged roots, heat stress, or disease. Check the underside of leaves, inspect the crown, and slide a troubled container plant out of its pot before reaching for a spray.
Shot holes, aphids, slugs, and snails
Wallflowers belong to the mustard family, so they can attract some of the same pests as brassica vegetables. The RHS lists slugs, snails, and flea beetles among possible pests, while Missouri Botanical Garden reports no serious insect or disease problems for its common wallflower profile; the practical takeaway is to monitor early without assuming every blemish requires treatment.
Use the pattern to narrow the cause:
- Tiny round shot holes on young leaves suggest flea beetle feeding. Protect small transplants with an appropriate physical barrier where practical, remove nearby weed hosts, and inspect plants often while they establish.
- Clusters of small soft-bodied insects on tender tips suggest aphids. Knock light infestations off with a firm water spray, encourage beneficial insects, and use only a product labeled for the crop and pest if further control is necessary.
- Ragged leaf edges or overnight chewing point more toward slugs or snails. Improve hiding-place cleanup, water early rather than late, and use a locally legal control according to its label.
- Twisted new growth without visible insects can also come from cold, heat, root stress, or herbicide drift, so inspect before treating.
Avoid broad insecticide use on open flowers when pollinators are active. A dry, airy site will not prevent every pest, but it reduces the dense, soft growth that makes damage harder for a wallflower to outgrow.
Wilting, mildew, and clubroot
Overwatering is the first fix to test when the soil stays wet and the plant wilts. If the root ball smells sour, roots are brown and soft, or the stem base is collapsing, improve drainage and remove badly rotted material rather than watering again. A plant that wilts only during the hottest part of the day but recovers in the evening may be heat-stressed; shade the root zone and check moisture before diagnosing disease.
The RHS lists downy mildews, clubroot, and bacterial leaf blight as possible diseases of common wallflower. Clubroot deserves extra caution because it can cause stunting, wilting, and swollen or distorted roots; do not move soil from a suspect plant into another bed, and avoid replanting related Brassicaceae in the same spot until you have checked local extension guidance.
Remove heavily diseased foliage and improve spacing and airflow. Do not apply a fungicide simply because leaves look dull: identify the pattern, read the product label for the exact plant and disease, and remember that a treatment cannot repair roots already damaged by standing water.
Use Wallflowers Where Their Strengths Show
Wallflowers earn their space in places where many bedding plants struggle: the front of a sunny border, a raised bed that drains quickly, a gravel garden, a stone wall pocket, or a pot near a path. Their narrow foliage and upright flower spikes also make them useful between spring bulbs, where they can soften the gap after bulbs bloom.
Pair fragrant forms with tulips, low spring perennials, or silver-leaved plants that enjoy the same lean conditions. Choose a compact hybrid for a container, a long-flowering perennial for a carefully drained border, and a seed-raised biennial when you want changing colors and a self-renewing display. The right wallflower is less about finding the “best” variety than matching lifespan, mature size, and moisture tolerance to the exact spot.
Conclusion
Grow wallflowers in sun, lean-to-average soil, and fast drainage, then let the plant’s life cycle guide the rest of the care. A common Erysimum cheiri may be a biennial in your garden, a short-lived perennial in a mild site, or a one-season plant where summer heat or winter wet overwhelms it.
Plant the crown at the correct depth, water only while roots establish, skip routine fertilizer, and give each pruning cut a purpose. Save seed when renewal matters, take cuttings when a perennial cultivar is worth preserving, and inspect the roots whenever wilting does not match the soil moisture. Those choices will give you healthier wallflowers and a much clearer answer about whether a particular plant is worth carrying into another season.



