What Is a Pebble Tray? Setup, Benefits & Limits
Learn what a pebble tray is, how the stones-and-water setup works, which plants benefit, and when a tray cannot replace a humidifier.
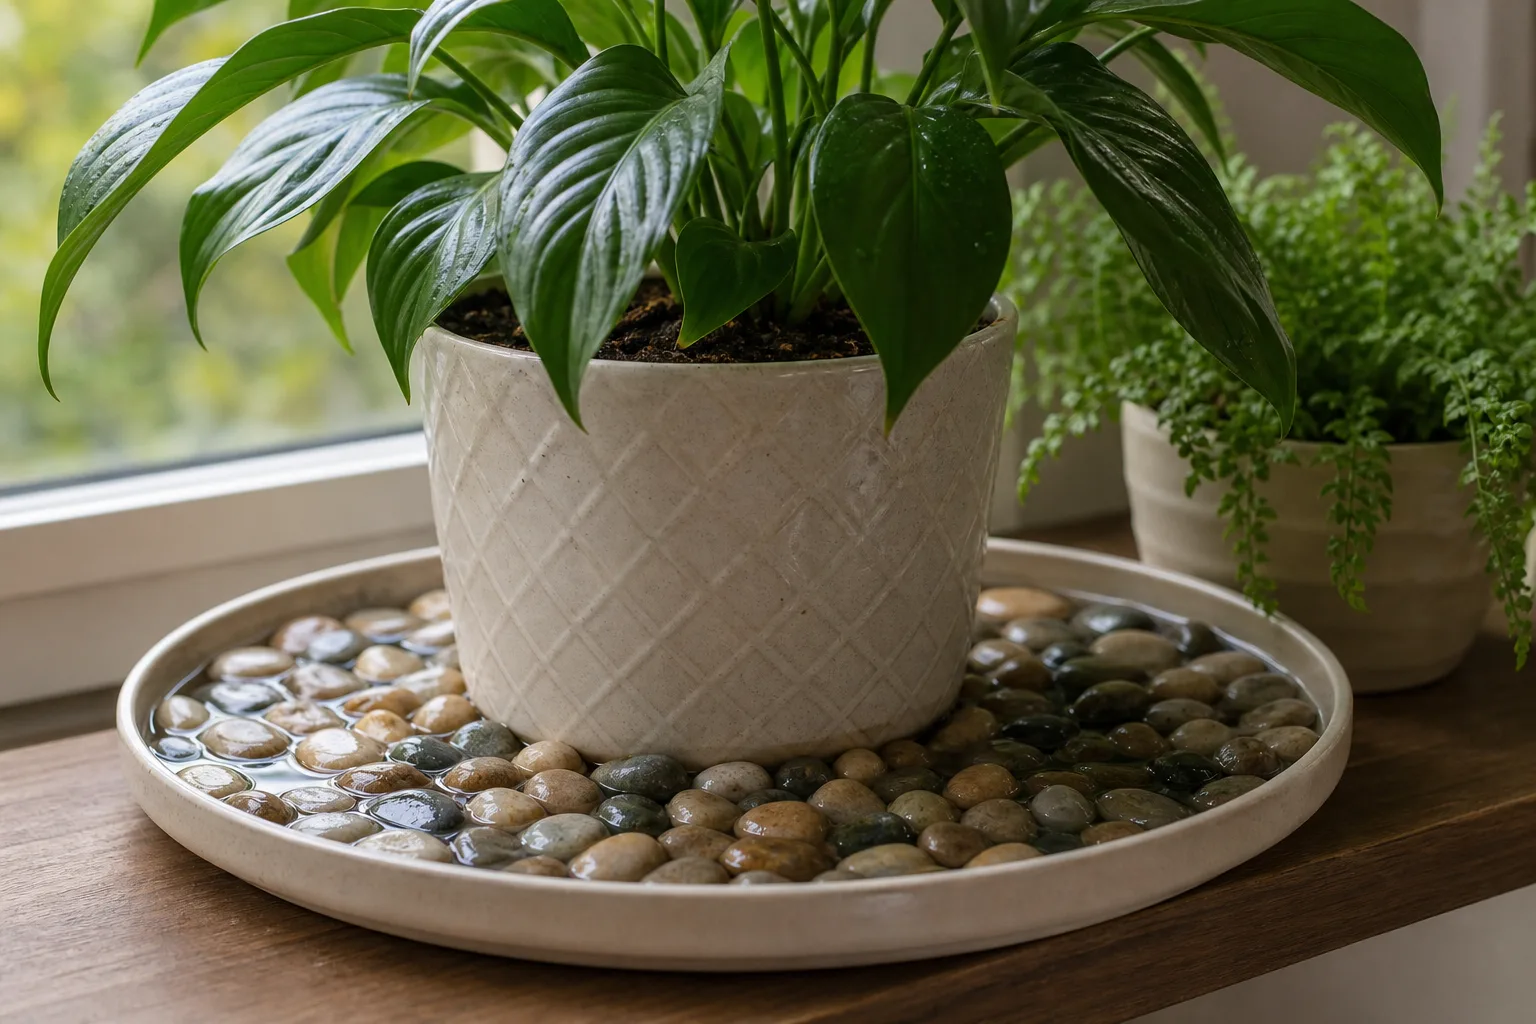
If you have scrolled plant-care reels or nursery shelves lately, you have probably seen a pebble tray—a shallow dish of stones and water sitting under a pot. The idea sounds simple: water evaporates, air near the plant gets less dry, tropical leaves stay happier. The confusion starts when that saucer becomes standing water around roots, or when a tall floor plant gets a token tray and nothing changes.
This page is the definition guide in the LeafyPixels pebble-tray cluster. It explains what the device is, how the geometry works, what it can realistically do, and where it fails. For measured humidity numbers, see do pebble trays really increase humidity for houseplants. For photo-by-photo build steps, see how to set up a pebble tray.
The Short Answer
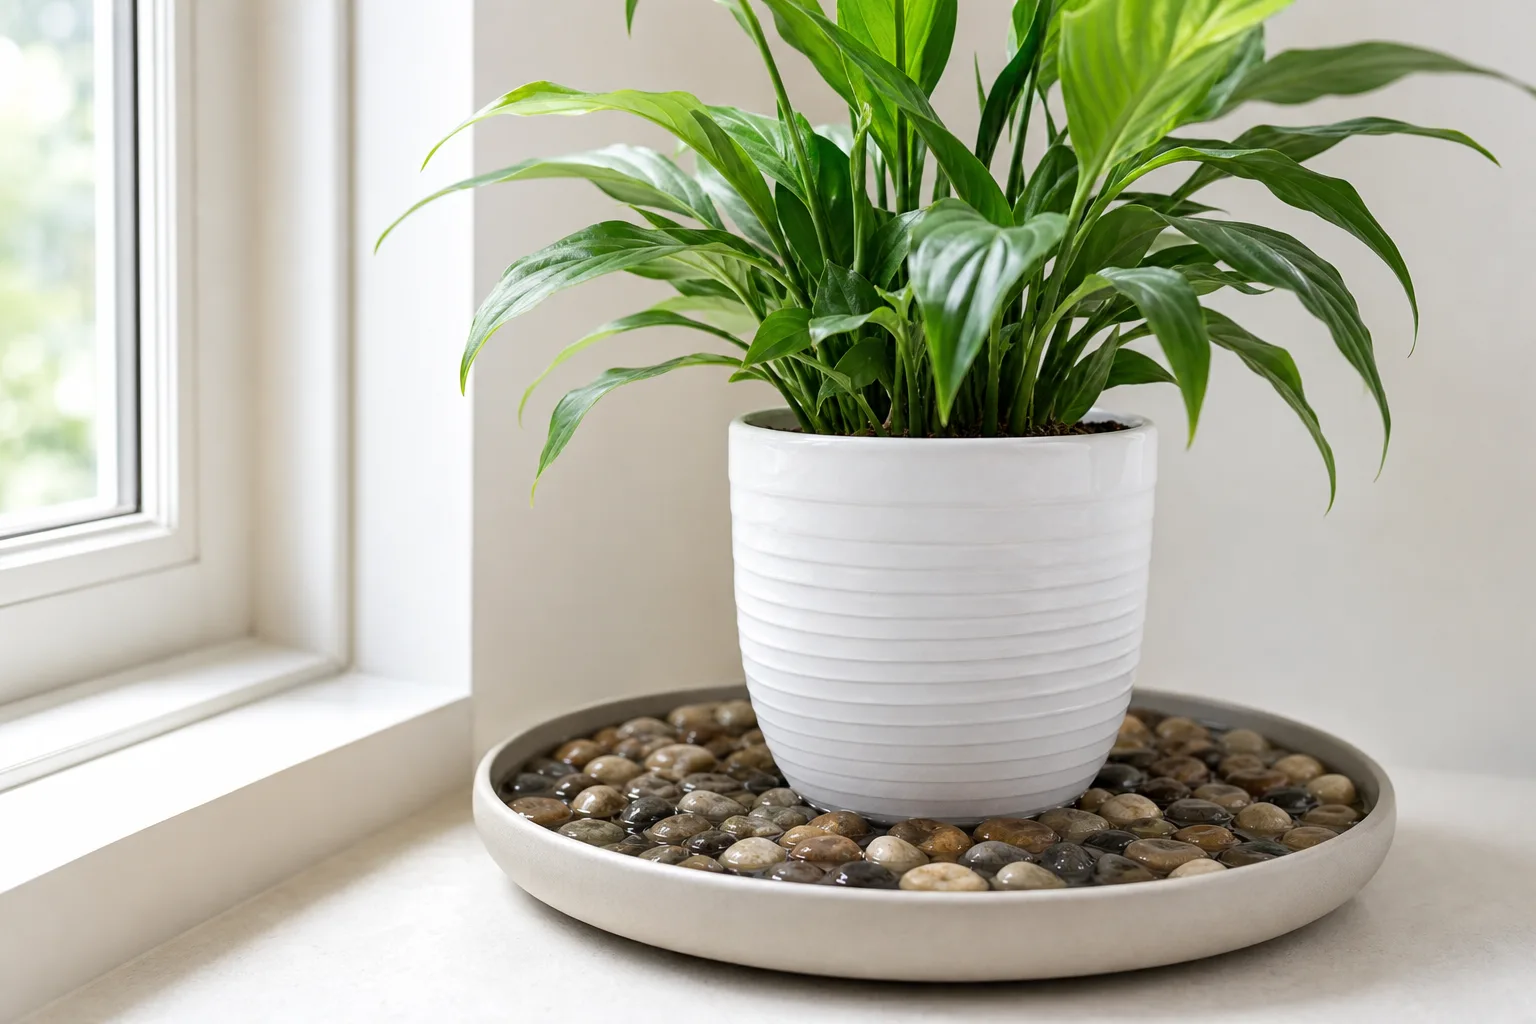
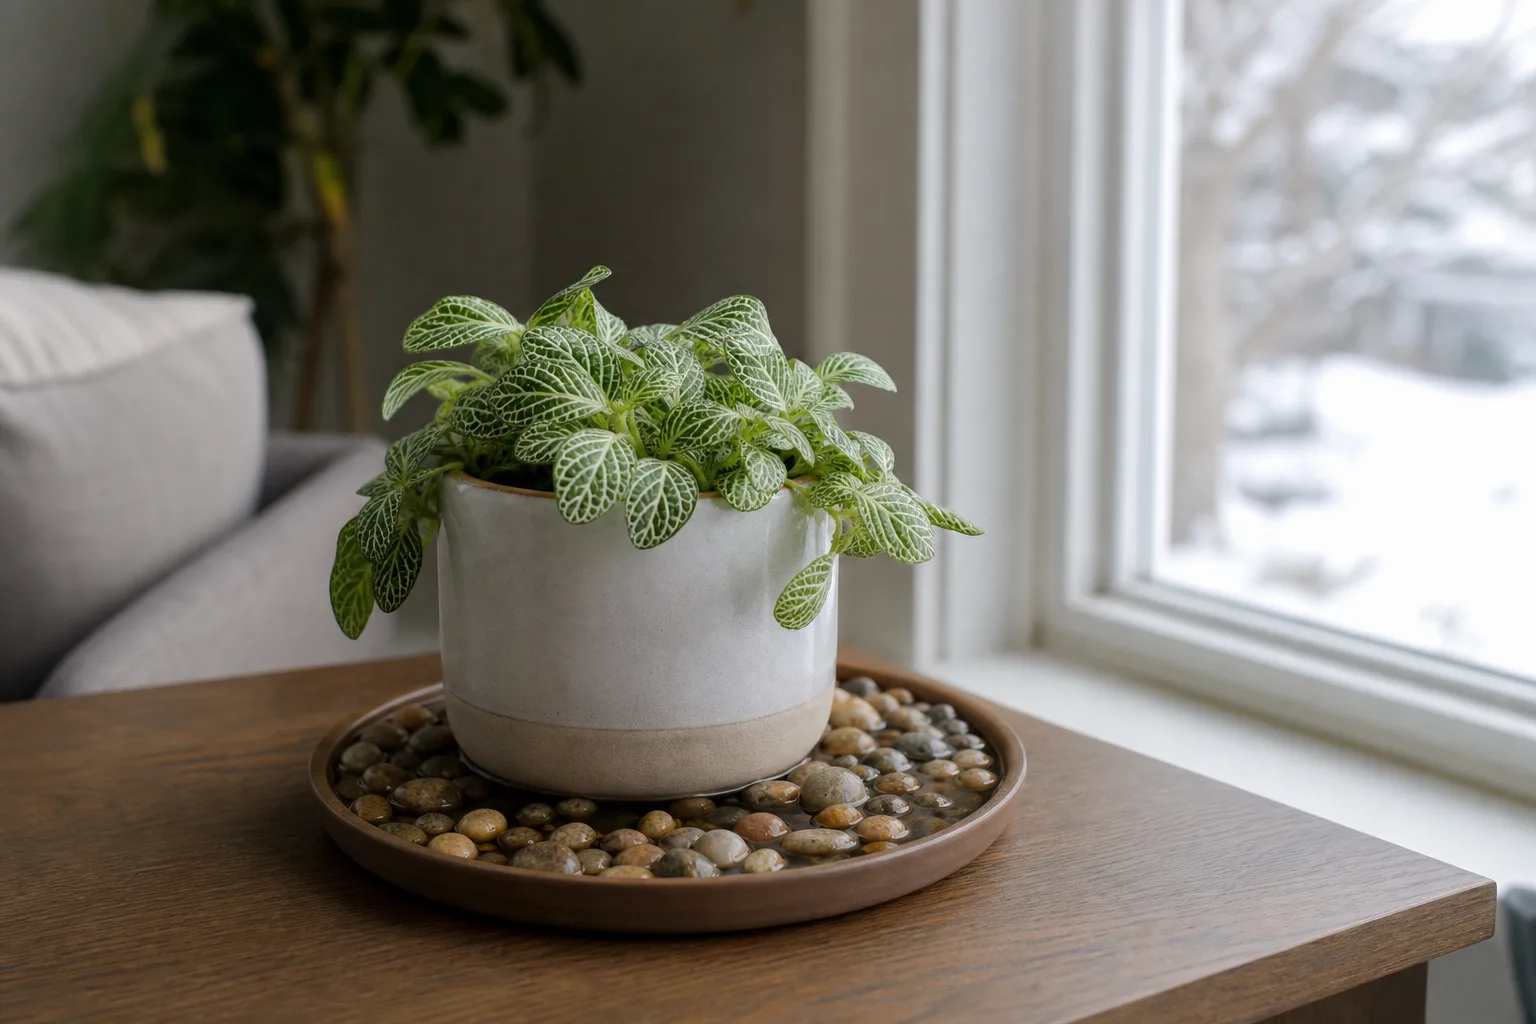
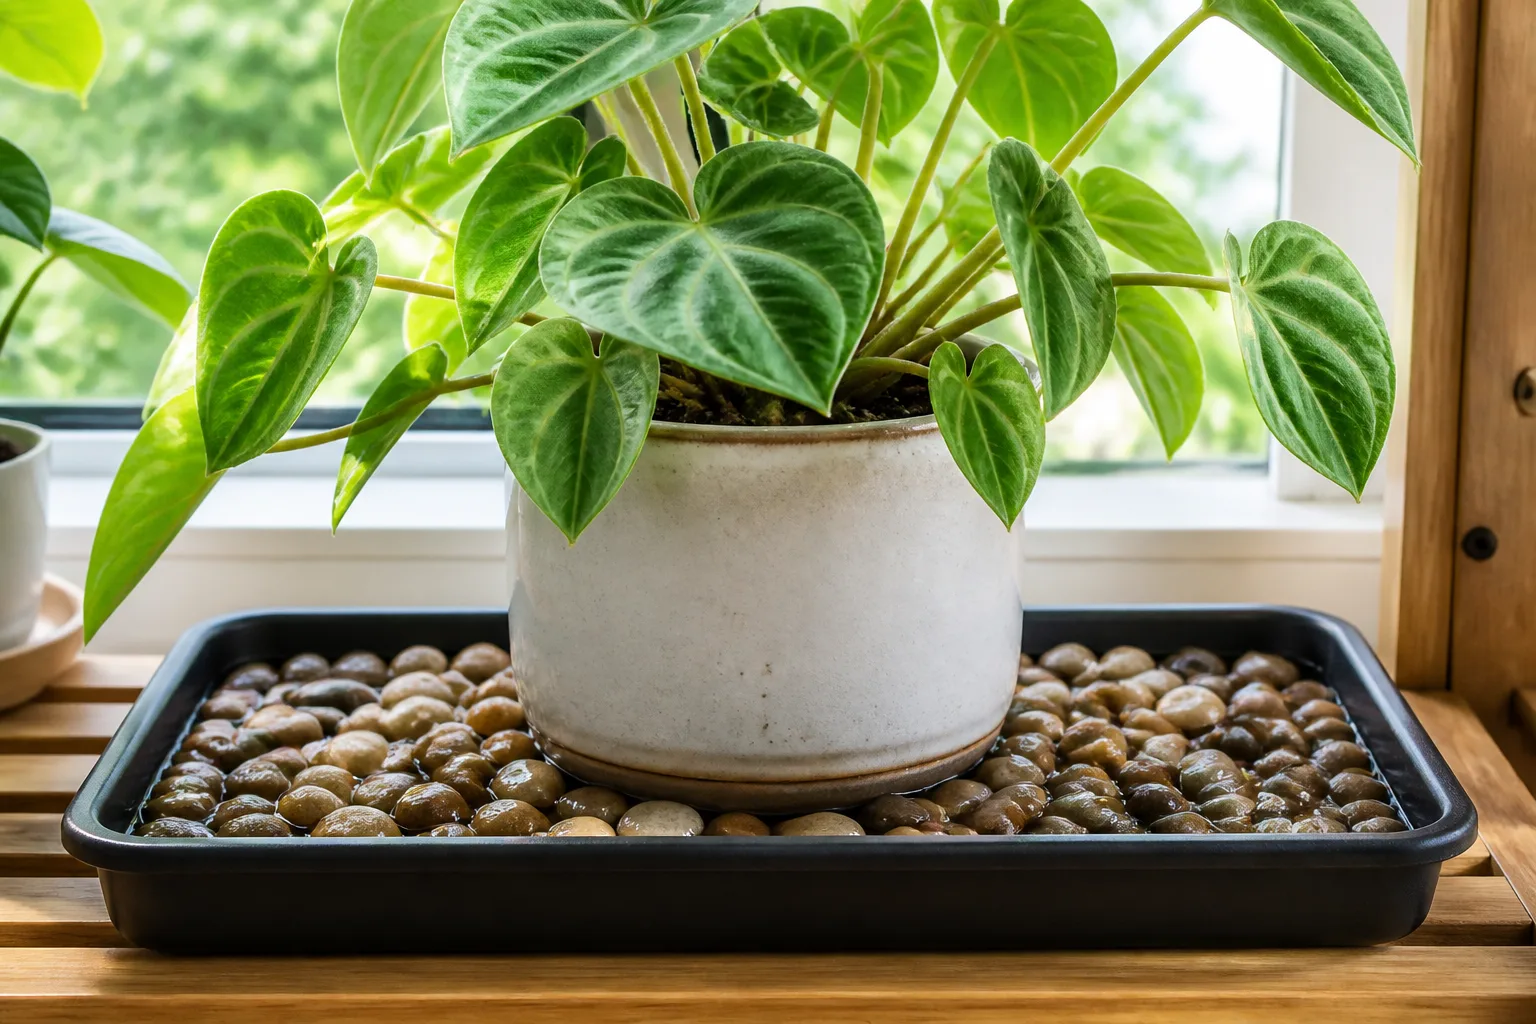
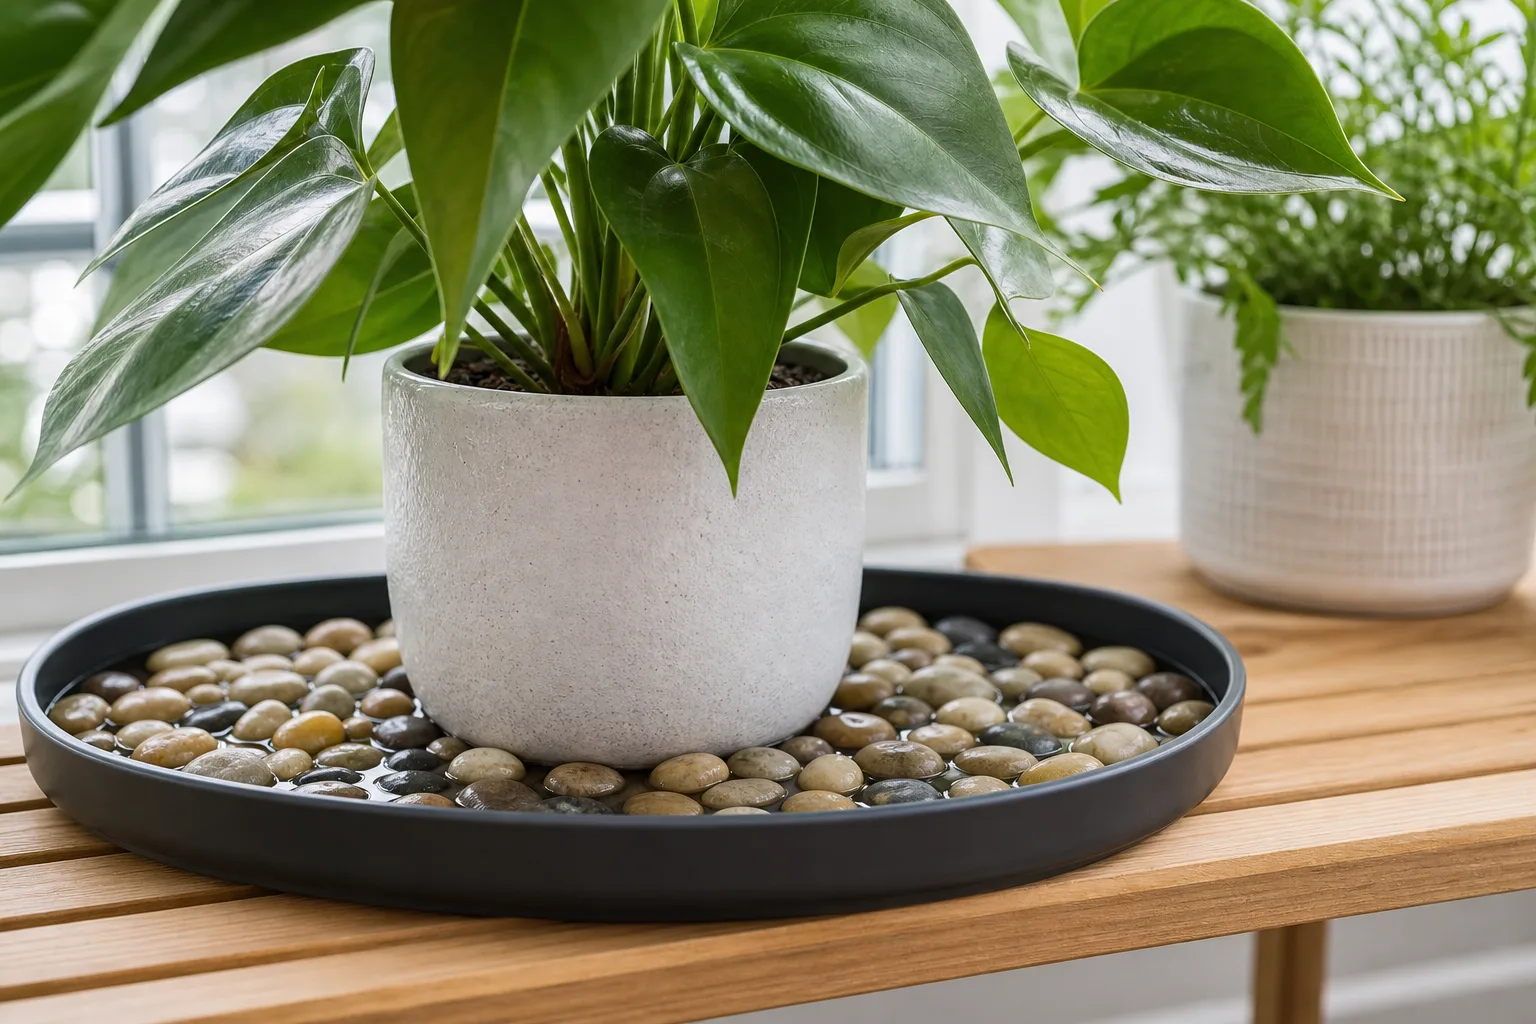
A pebble tray (also called a humidity tray or evaporation tray) is a shallow waterproof dish filled with clean stones and a thin layer of water. The plant pot rests on top of the stones, with the pot base and drainage holes above the waterline. Evaporation from the exposed water surface can raise relative humidity in a small pocket of air near the tray—not across the whole room.
It is a local, passive humidity tool. It is not bottom watering, not a drainage substitute, and not a replacement for a humidifier when winter heat keeps an entire room in the teens or low twenties percent RH. Built correctly, it is low-cost and low-risk for compact humidity-sensitive plants. Built wrong—pot sitting in water, tray too narrow, water left stagnant for weeks—it can cause root problems and pest pressure without helping foliage.
What a Pebble Tray Actually Is
At its core, a pebble tray is three things working together: a reservoir, a lift, and a plant platform.
The reservoir is any watertight tray or saucer wide enough to hold water without tipping when you set a pot on it. The lift is a layer of inert pebbles, gravel, or similar stones that elevates the pot above the water. The plant platform is simply the pot itself, resting on the stones so evaporation happens around the base of the plant while roots stay out of standing water.
Missouri Botanical Garden describes placing gravel in a tray, adding water below the gravel, and setting the container on the gravel to increase humidity around plants. University of Illinois Extension gives the same picture: pebbles in a tray, water below the pebble tops, pot on the stones.
That arrangement matters because many people already own a saucer under every pot. A drainage saucer catches runoff after watering. A humidity pebble tray is a deliberate evaporation setup with stones between pot and water. The names overlap in conversation, but the jobs are different.
The Three Parts Every Tray Needs
Every working pebble tray needs:
- A waterproof tray — rigid plastic saucer, glazed ceramic dish, or shallow tray from a garden center. Depth is usually 1 to 2 inches; width matters more than depth.
- Inert fill material — washed pea gravel, river pebbles, aquarium gravel, or coarse horticultural gravel. The stones must be stable enough that the pot does not sink or tilt.
- Water below the stone tops — enough liquid to keep an exposed surface evaporating, never enough to touch the pot base or submerge drainage holes.
Skip any one of those and you are not running a pebble tray—you are running a wet saucer, a dry decorative dish, or a wicking bath for roots.
What a Pebble Tray Is Not
Clarity here saves plants. A pebble tray is not:
- Bottom watering. Bottom watering soaks the mix from below through drainage holes until the top moistens. A pebble tray should never keep holes in continuous contact with water.
- A fix for pots without drainage. Stones do not make a sealed pot safe. If there are no holes, skip the tray and fix the pot problem first.
- A room humidifier. University of New Hampshire Extension lists pebble trays among modest local options and points to humidifiers and grouping for larger humidity shifts. Trays change a microclimate, not thermostat-zone air.
- A cure for every brown leaf tip. Crispy edges can come from underwatering, salt buildup, heat vents, or low humidity. A tray only addresses the humidity slice of that puzzle. See can pebble trays prevent crispy leaves before you assume humidity is the culprit.
- An organizer tray. Entryway catch-alls with keys and mail are not plant humidity trays. If there is no potted houseplant on stones above water, it is a different object entirely.
Wet leaves and wet roots are not the same as humid air. Houseplant pros repeatedly stress that making a plant wet does not equal raising humidity in a useful, sustained way. A tray succeeds when it evaporates cleanly near foliage without soaking the root zone.
How Evaporation Creates a Local Humidity Pocket
Relative humidity is the amount of water vapor in air compared with how much that air could hold at the current temperature. When winter heat runs, indoor air often reads 10% to 25% RH in cold-climate homes—far below what many tropical houseplants prefer. Heated air can hold more moisture, so the same absolute water content reads as lower relative humidity. That is why furnaces feel drying even when you are comfortable.
A pebble tray adds a small, steady evaporation surface at pot level. Water molecules leave the tray, enter the air immediately above the stones, and bump local RH up slightly in still conditions. The effect is strongest within a few inches of the water and weakens as distance and airflow increase. That distance pattern is why a tray under a windowsill fittonia can matter and a tray under a six-foot foliage plant often disappoints.
Bloomscape describes pebble trays as a way to increase moisture around the plant as tray water evaporates, with pebbles holding the plant above water so roots are not constantly wet. The mechanism is sound. The scale is the debate.
Why Pebbles Matter More Than Deep Water
Pebbles are not decorative filler. They do two mechanical jobs:
- Elevation — They keep drainage holes above the reservoir so capillary wicking does not turn the tray into silent bottom watering.
- Exposed surface area — Water between stones evaporates from many small gaps. A deep saucer of water with the pot dunked in it wets roots instead of humidifying air.
Nebraska Extension instructs growers to keep water below the base of the container when using gravel trays. Iowa State Extension warns against letting the pot sit in the water. The pebble layer is how you follow both rules at once.
Wider trays with more exposed water between stones evaporate more than narrow pot-width saucers. Deeper trays do not automatically help if the water surface area stays small. When choosing materials, think width and exposed surface, not aquarium depth.
Tray and Pebble Options for Indoor Setups
You do not need a branded “humidity tray kit,” though pre-made kits with stones included are fine if the geometry is correct. Common indoor options:
| Tray type | Pros | Watch-outs |
|---|---|---|
| Plastic plant saucer | Cheap, watertight, easy to clean | Flexes if too thin; size up for stability |
| Glazed ceramic dish | Stable, looks intentional on shelves | Confirm glaze is waterproof; heavy when filled |
| Shallow storage tray | Extra width for grouping plants | Keep depth shallow so lifting pebbles is easy |
| Baking sheet (short-term) | Wide surface for experiments | Not always watertight; rust risk on metal |
For pebbles, washed pea gravel, river pebbles, and aquarium gravel are the usual choices. Avoid limestone that may alter water chemistry for sensitive orchids, and avoid dusty unwashed quarry stone that clouds the tray. A full pebble comparison—including clay pebbles and sizes—lives in best pebbles to use in a DIY pebble tray.
Tray width should extend beyond the pot rim on all sides when possible. Nebraska Extension recommends a tray a few inches wider than the pot. More exposed water at the edges evaporates more than a saucer that matches pot diameter exactly.
The Waterline Rule
If you remember one setup rule, remember this:
The pot base and every drainage hole stay above the waterline.
Water fills the tray only until it sits below the top of the pebbles. When you set the pot down, a side-view check should show clear air gap between pot bottom and water—not contact, not wicking, not bubbles climbing into the mix.
Violating the waterline rule is the fastest way to turn a humidity tray into a root-rot trap. Mix that stays wet at the bottom breeds anaerobic conditions, slows oxygen exchange, and invites fungus gnat larvae in many indoor setups. The tray was supposed to humidify air, not saturate soil.
If the pot sinks until holes touch water, add more stones or pour off excess. If the tray wobbles, spread stones evenly or size up the dish before you risk a spill on a shelf.
How to Set Up a Pebble Tray (Overview)
Full build photos and refill math are in how to set up a pebble tray. The overview sequence is:
- Wash the tray and stones — Rinse dust, algae, and old mineral crust before the first fill.
- Spread an even pebble layer — Typically 1 to 2 inches deep, stable enough that the pot does not tilt.
- Add water below pebble tops — Fill until water is visible in gaps, not covering stone surfaces.
- Set the pot on stones — Confirm drainage holes are dry when you peek underneath.
- Place the tray — Shelves and windowsills away from blasting heat vents work better than spots in constant draft.
Optional but smart: place a digital hygrometer near lower foliage for a week and log readings against a room control spot. You cannot tell from brown tips alone whether a tray is working. Sibling guide do pebble trays really increase humidity owns the editorial measurement tables; this page owns the definition and geometry that make those tests meaningful.
DIY builders who want cost breakdowns and small-space hacks should read DIY pebble tray for indoor plants.
Benefits When Built Correctly
A correctly built pebble tray offers real, if modest, advantages:
- Passive local humidity — No electricity, no nightly misting ritual, no fogging mirrors if you dislike mist.
- Low cost — Saucer plus bag of gravel often costs less than a single specialty pot.
- Root safety when geometry is right — Elevation prevents the tray from becoming accidental bottom watering.
- Good fit for compact plants — Low-growing foliage sits inside the evaporation zone where a few percentage points of RH may matter.
- Grouping anchor — Several small humidity lovers on one wide tray share a microclimate and combined transpiration, a tactic University of New Hampshire Extension mentions alongside trays.
Benefits show up in new growth, not old damage. A tray that is working may produce softer new leaves on a fittonia or fewer fresh crisp edges on a small fern. Existing brown tips do not uncurl when humidity improves—they are already desiccated tissue.
Limits You Should Plan For
Honest limits keep expectations proportional:
- Room scale — A tray does not humidify a bedroom. Opposite-wall hygrometer readings typically stay unchanged even when leaf-level readings nudge upward.
- Distance — Humidity falls off with height. Leaves a foot or more above a narrow tray share little air with the evaporation surface.
- Airflow — HVAC cycles, fans, and open windows strip the moisture pocket quickly. A tray beside a heat vent is mostly decorative.
- Dry winters — When whole-room RH sits in the low teens for months, a tray may add a few points locally—not enough to bridge a twenty-point gap to tropical comfort zones.
- Large plants — A floor Monstera deliciosa with a six-inch saucer is a geometry mismatch. See Monstera humidity needs for species-scale thinking.
Empress of Dirt argues that pebble trays and misting do not meaningfully fix dry indoor growing conditions at room scale—a fair skepticism for whole-room goals. The nuanced read: trays are microclimate tools, not failures, when your plant and room match that scale. They are the wrong tool when you need a room-wide shift.
For humidity targets, symptom differentials, and EPA-aligned indoor moisture ranges, start at indoor humidity and pebble trays.
Best and Worst Plant Candidates
Better candidates — small, humidity-aware tropicals whose foliage stays near the tray:
- Fittonia and nerve plants
- Compact ferns and indoor fern care subjects
- Prayer-plant relatives (maranta, calathea)
- Creeping tropicals and selaginella on shelves
- Some compact orchids on humidity-conscious benches
- Peace lilies and small anthuriums on still windowsills
Poor candidates — plants that tolerate or prefer drier air, or whose leaves sit far above any reasonable tray:
- Cacti and most succulents (can you use a pebble tray for succulents and cacti explains why)
- Snake plants and ZZ plants in already acceptable humidity
- Tall floor trees and large upright tropicals
- Plants already in a humid bathroom or well-run greenhouse cabinet
Missouri Botanical Garden notes that ferns and orchids struggle in low humidity while many cacti tolerate dry indoor air. Match the tray to the plant’s native moisture preferences, not to the word “tropical” on a tag.
Broader plant lists and routine placement advice live in pebble trays for plants.
Common Setup Mistakes
Most tray failures are build errors, not magic failures of evaporation:
- Pot sitting in water — Holes submerged; mix wicks upward; roots stay wet. Fix: add stones or drain excess until the waterline rule is satisfied.
- Tray too narrow — Pot-width saucer minimizes exposed surface. Fix: wider dish with 1.5× pot diameter or more.
- Pebbles too small or too few — Pot sinks; holes dip into water. Fix: larger stable stones or deeper pebble bed.
- Stagnant, dirty water — Weeks without rinse; algae slime; gnats. Fix: refresh water and scrub tray on a regular cadence.
- Wrong problem — Tray installed for brown tips caused by fluoride, over-fertilizing, or underwatering. Fix: triage before hardware.
- Expecting room humidity — Tray “failed” because the hygrometer across the room never moved. Fix: measure at foliage height or accept room-scale tools.
Expert humidity mistake lists often flag pebble trays with stones so small the planter sits in water as a harm path—wet plant, not humid plant. Size your stones and water level so the pot never bathes.
Maintenance, Cleaning, and Indoor Moisture Safety
Open water indoors needs hygiene. EPA moisture guidance reminds homeowners that indoor moisture should be managed deliberately—not ignored until mold, slime, or musty smells appear.
Practical tray maintenance:
- Refill when the exposed surface is mostly dry and evaporation has slowed.
- Rinse weekly or biweekly in many heated-home setups—more often if dust or algae appears.
- Deep-clean with scrubbing when mineral crust or biofilm builds up.
- Skip additives — Perfume, essential oils, and random “plant boost” drops in tray water add residue without helping humidity.
Stale trays can contribute to fungus gnat pressure when organic film collects at the water line, especially if potting mix is also kept too wet. Keep tray water clean and let mix dry appropriately between waterings.
Pebble Tray vs Misting vs Humidifier (At a Glance)
| Method | What it does | Duration | Best when |
|---|---|---|---|
| Pebble tray | Evaporates from tray surface near pot | Hours while water remains | Compact plant, moderate dryness, calm air |
| Misting | Wets leaf surfaces briefly | Minutes | Not a primary humidity strategy |
| Humidifier | Adds vapor to room air | Continuous while running | Dry winter room, many sensitive plants, large specimens |
Iowa State Extension does not treat misting as meaningful long-term humidity care. Trays beat misting on duration for local evaporation. Humidifiers beat trays on reach when the whole room is the problem.
Full sizing, EPA indoor RH guardrails, and purchase decision trees are in pebble tray vs humidifier—not duplicated here.
When to Try One — and When to Skip It
Try a pebble tray when:
- The plant is compact and foliage sits near pot level.
- Room humidity is moderately low, not catastrophically dry all winter.
- Drainage and watering are already sound.
- You want a cheap experiment before buying a humidifier.
- You will measure near leaves instead of guessing from old leaf damage.
Skip it when:
- The pot would be unstable or the shelf cannot hold a wider tray.
- The room already reads 50%+ RH without help.
- The plant is drought-adapted.
- Roots, salts, pests, or vent blast explain the symptoms better than humidity.
- The whole room needs a large RH shift—tray scale will not match the gap.
Escalate to a humidifier or placement change when repeated hygrometer logs show no useful lift at foliage height and new growth still struggles. Persistent decline needs a broader care review—not another saucer.
Overstated social-media claims are common; pebble tray myths separates durable facts from hype if you want a skeptic’s checklist.
Conclusion
A pebble tray is a shallow waterproof dish of stones and water that holds a houseplant above the reservoir while evaporation humidifies a small pocket of air near the pot. It is one of the simplest humidity tools in indoor plant care—and one of the most misunderstood because people confuse it with bottom watering, room humidifiers, and misting sprays.
Get the waterline rule right, size the tray wider than the pot, keep water clean, and match the tool to compact humidity-sensitive plants in relatively still air. Expect a modest local effect, not a greenhouse transformation. When the gap between your room and your plant’s needs is larger than that, measure first, then move to cluster guides for measured tray performance, step-by-step setup, or humidifier comparison.
Understand the definition and limits, and you can decide in minutes whether a pebble tray belongs under your plant—or whether your effort should go somewhere else.