Alocasia Cuprea Watering: Schedule, Soil Checks & Mistakes
Alocasia Cuprea Watering: Schedule, Soil Checks & Mistakes
Alocasia Cuprea Watering: Schedule, Soil Checks & Mistakes
Alocasia Cuprea watering is not a calendar problem — it is a corm problem. The jewel alocasia sold as Alocasia cuprea ‘Red Secret’ stores water and starch in a compact underground corm while its bullate, copper-bronze mirror leaves transpire at a moderate pace. That combination is why the plant can drop every leaf in winter and push a new red-flushed spear from bare soil weeks later, and why it dies so fast when the root zone stays wet. NC State Extension describes the genus as preferring slightly acidic, moist, well-drained, humus-rich soil — moist, not saturated, in mix that drains fast enough for oxygen to reach fine roots.
This guide covers how often to water, how much each time, mirror-leaf placement rules, how to tell overwatering on Alocasia Cuprea from underwatering on Alocasia Cuprea, winter dormancy adjustments, post-repot caution, and step-by-step recovery when the rhythm slips. For mix structure and drainage, pair this page with the Alocasia Cuprea soil guide; for dry-down speed by window, see the light guide.
Why the Corm Controls Everything
Most houseplant watering advice treats leaves as the control point. Alocasia Cuprea is a leaf-and-corm system. The corm anchors the plant, stores energy for the next leaf, and produces offsets. Fine roots move water upward; the corm holds reserves when those roots fail. Your job is to keep the root zone wet enough for uptake and dry enough for oxygen — a narrow band that shifts with light, pot size, and season.
What Alocasia Cuprea Is Biologically
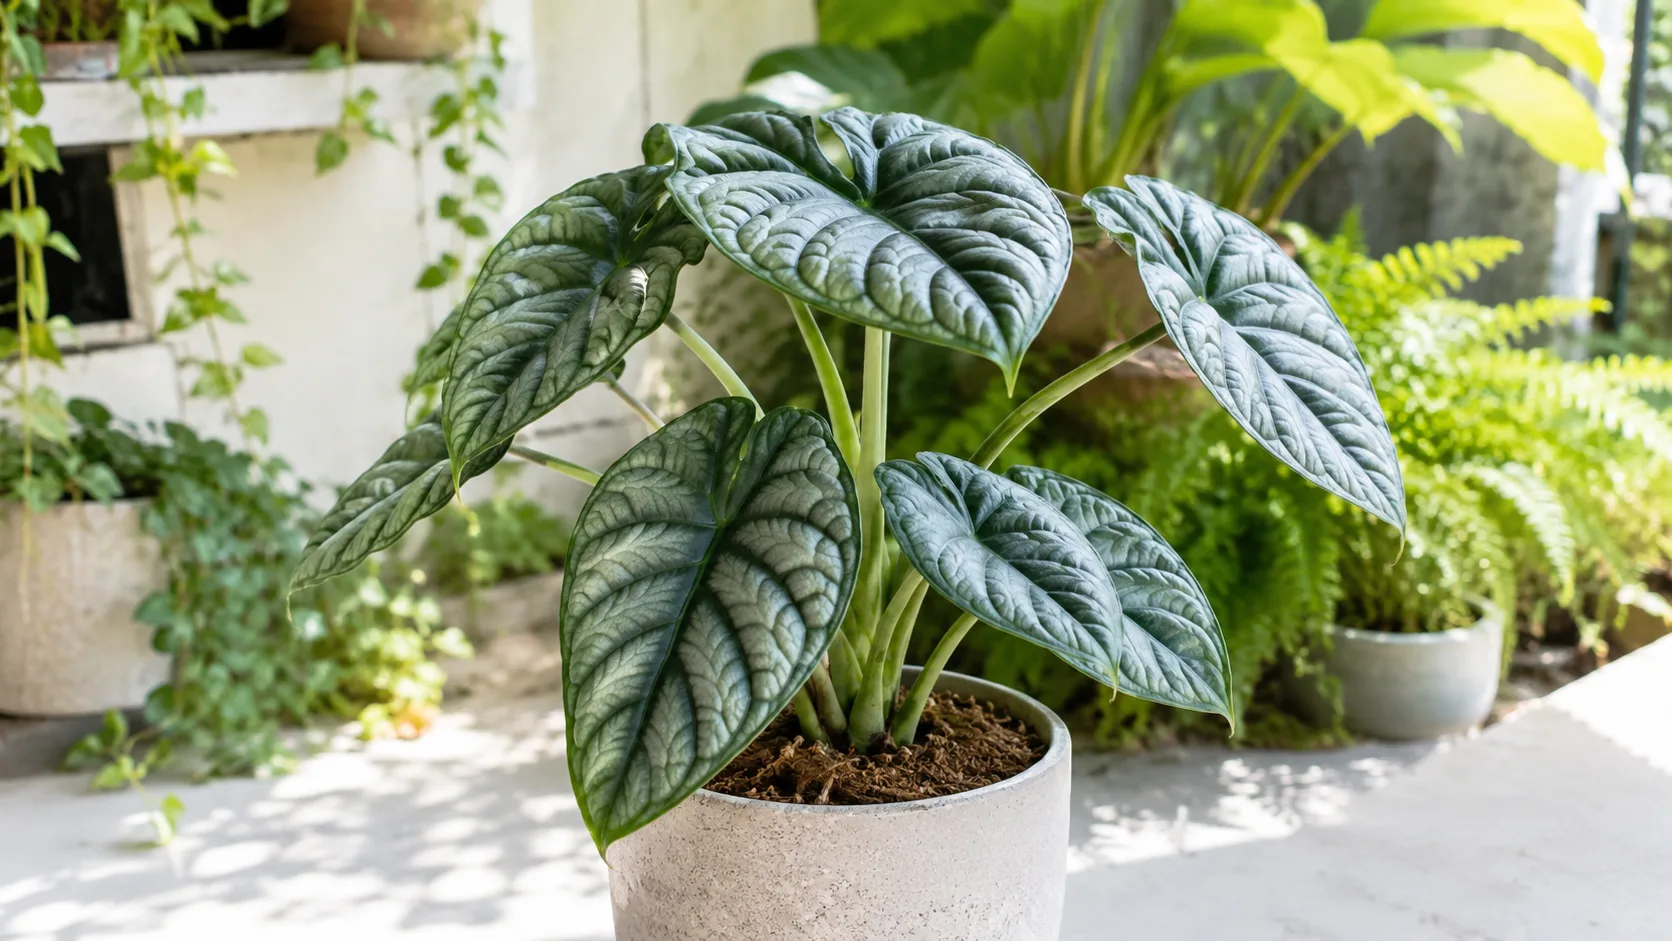
Cuprea is a jewel alocasia with bullate, rippled leaves that emerge flushed red and mature to metallic copper-bronze above with a dark purple underside — the mirror effect that gives the species its nickname. Kew Plants of the World Online places the species’ native range in Borneo (Sabah), where it grows as a subshrub in the wet tropical biome. NC State Extension lists Alocasia cuprea ‘Red Secret’ among cultivars with deeply ridged, metallic red foliage. The Royal Horticultural Society’s A. cuprea profile recommends moist but well-drained compost and watering freely from spring to autumn while reducing to a minimum in winter. The RHS Alocasia growing guide notes that alocasias need a period of dormancy in cooler, drier winter conditions and should be kept above 16 °C (60 °F) during active growth.
The corm sits at or just below the soil surface — a starchy modified stem, not a tulip bulb. Burying a Cuprea corm deep in wet peat is one of the fastest routes to rot. Cuprea’s slow growth rate means it tolerates dry intervals slightly better than fast hybrids like Alocasia Polly, but its smaller root mass recovers more slowly once rot starts.
Mirror Leaves and Where Water Goes
Cuprea’s bullate, reflective leaf surface traps water droplets and slows evaporation from the blade — useful in Bornean forest humidity, problematic when growers mist foliage or overhead-water in dry homes. Keep water in the soil, not on the leaves. Top-water at the soil line only; use a humidifier for atmospheric moisture instead of misting mirror foliage. Wet leaves in stagnant air invite fungal spotting and do nothing to replace root-zone moisture. This is one of the clearest differences between Cuprea and smooth-leaved Alocasia hybrids.
Why Overwatering Kills Faster Than Underwatering
Underwatering is recoverable because the corm holds reserves. Overwatering is dangerous because waterlogged soil displaces oxygen, damaging fine roots and creating anaerobic conditions where Pythium and Phytophthora colonize weakened tissue. The University of Wisconsin–Madison Extension on houseplant root rots explains that these pathogens prefer wet soil and that reducing moisture is the first rescue step when rot is suspected.
A plant that wilts in wet soil is rarely thirsty — it is suffocating. Roots can no longer move water upward even though the mix is damp. Iowa State Extension warns that wilting on wet soil is commonly mistaken for drought, leading growers to add more water and accelerate collapse. The asymmetry matters on Cuprea: a firm corm with slightly crispy leaves can bounce back in days; a soft corm in sour soil may not recover at all. If the corm is mushy, focus on propagation from firm offsets rather than repeated soaking.
When to Water: The Real Variables
Four variables set your real interval: light, temperature, pot, and soil. Adjust the rhythm in proportion to how strongly each pulls moisture out of the container. The RHS Alocasia guide recommends watering from April to October once the top 5 cm / 2 in of compost is dry, and reducing to a minimum in winter when the plant is dormant — a useful band for Cuprea, not a schedule.
Light and Temperature
Brighter indirect light drives faster photosynthesis and transpiration. An east window in summer can shorten the interval by a full day or two compared with a north room. Temperature works the same way: a plant at 24 °C / 75 °F dries faster than one at 18 °C / 65 °F with identical light. Cool rooms below 16 °C / 60 °F hold moisture longer — exactly when dormancy reduces water uptake.
Worked scenario: A 10 cm terracotta pot in an east window in July may need water every 5–7 days after the top 2–3 cm dry. The same plant in a 12 cm glazed ceramic pot in a north room in November may sit damp for two to three weeks before the chopstick reads dry at depth. Same species, opposite intervals — always confirm with a soil test, not a reminder app.
Pot Size and Material
Oversized pots hold more soil than Cuprea’s root system can drink, leaving unoccupied mix wet and oxygen-poor. University of Maryland Extension notes that if your finger cannot penetrate two inches, the mix may be too dense or the plant root-bound — both change how water behaves. Terracotta breathes and pulls moisture through walls, drying faster; glazed ceramic and plastic trap it. Chunky aroid mix drains faster than peat-heavy retail soil; if the bottom stays wet while the surface dries, the problem is structure, not frequency.
How to Test Before You Water
UMD Extension advises against calendar watering and recommends testing soil to about two inches before adding water. Three methods cover nearly every home setup.
Finger, Chopstick, and Meter Methods
The finger test is the default: push your finger 2–3 cm / about 1 inch into the mix. Dry at that depth means water; damp means wait. The chopstick test upgrades reliability in deeper pots: insert a clean wooden skewer to the bottom, wait 30 seconds, and pull it out. Clinging soil means moisture remains at depth; a nearly clean stick means the root zone is dry enough to water. A moisture meter can help while you are learning — calibrate it right after a thorough soak (should read wet) and again before your next watering (should read in the dry-to-moist range). Meters misread in very chunky mixes, so treat them as one signal among several.
Lift the pot when you can. A freshly watered container is heavy; a dry one is noticeably light. Weight reflects moisture through the whole column, not just the surface.
How Much Water Each Time
Water deeply, then let the soil dry to the right depth before the next round. Pour slowly at the soil line until water runs freely from the drainage hole — even saturation, salt flush, and no channeling down dry cracks at the pot edge. A light sprinkle that only wets the top centimeter trains roots shallow and leaves minerals concentrated where they burn fine roots.
After watering, empty the saucer within 10–15 minutes. A pot sitting in pooled drainage water is a root-rot setup. If you use a decorative cache pot, lift the inner nursery pot out, let it drain freely, then return it — never let standing water linger between the pots.
Post-repot note: Fresh repotting disturbs roots and often packs new mix more loosely, so the first dry-down cycle can be unpredictable. Wait until the top 2–3 cm is dry before the first soak — often 7–10 days after repot — then resume normal depth checks. Do not water on day one unless the root ball was bone dry going in.
Top vs Bottom Watering
Top watering is the default for Alocasia Cuprea. It wets the entire root ball, keeps mirror leaves dry when you pour at the soil line, and moves excess salts downward and out of the pot. UMD Extension on mineral salt deposits warns that salt buildup causes brown leaf tips, dropped lower leaves, and weakened roots — top flushing is the primary prevention.
Bottom watering keeps the surface drier, which discourages fungus gnats, and can rehydrate compacted mix. Set the pot in a basin of room-temperature water to about one-third pot height for 20–30 minutes until the surface feels cool and slightly damp. The catch: bottom watering does not flush salts. Every 3–4 bottom sessions, do a full top-water flush until water runs freely for 30–60 seconds.
Water Type for Cuprea
Rainwater is the gold standard because it is soft, slightly acidic, and free of treatment chemicals. Filtered water from a basic carbon pitcher is the easiest everyday upgrade. Distilled or reverse-osmosis water works for very hard tap water but carries no nutrients. If you must use tap water, let it sit in an open container for 24 hours to off-gas chlorine (note: this does not remove chloramine, fluoride, or hardness), and always use room-temperature water. UMD Extension notes that sensitive plants can develop brown leaf tips from fluoride in tap water — persistent brown margins despite good humidity and watering rhythm often improve after switching to rainwater or filtered water.
Overwatering: Yellow Leaves and Wet Wilt
Overwatering is the single most common cause of decline in Alocasia Cuprea. The classic pattern starts with the oldest leaves yellowing from the outside in, often more than one at a time. Petioles may feel soft or rubbery at the base. The substrate smells sour or stagnant. The plant may wilt even though the soil is wet — the most diagnostic sign. NC State Extension lists root rot and yellowing leaves among problems from overwatering.
Fungus gnats are a related warning sign. The larvae live in the top centimeter of substrate and only sustain a population when that layer stays wet for days at a time. Brooklyn Botanic Garden ties fungus gnats to overwatered, persistently moist surface soil. A few gnats flying around the pot means the substrate is staying wet too long — extend the dry-down interval before reaching for pesticides.
If you see wilting paired with wet substrate, stop watering immediately and inspect roots. Healthy roots are firm and white to light tan. Rotted roots are dark, mushy, and may smell bad. See root rot on Alocasia Cuprea for the full rescue path.
Underwatering Signs on Cuprea
Underwatering is less common but more forgiving. Curling leaves, especially inward into a taco or canoe shape, is the most common early sign. Brown, crispy edges may follow, but they look different from fluoride damage: the browning from underwatering is usually more uniform and accompanied by a slightly papery texture across the whole leaf. Drooping that resolves within hours of a thorough watering is another strong signal. The substrate will feel dry, sometimes pulling slightly away from the sides of the pot. If you see these signs, water thoroughly at the soil line until it drains — and the plant should perk up within a day. If it does not, the roots have likely been damaged by a previous overwatering cycle.
Dormancy and Winter Watering
Alocasia Cuprea can stay evergreen year-round if it is kept consistently warm (above 21 °C / 70 °F), in bright indirect light, and with humidity above 60%. In most homes, the plant responds to shorter days and cooler rooms by slowing growth or going fully dormant — losing all of its leaves and surviving on the corm alone. This is not death. PDA Exotic Plants explains that the underground corm stays alive while foliage drops, and that resuming summer watering during dormancy is a common rot trigger.
Cutting Volume in Dormancy
The biggest mistake in dormancy care is keeping the summer watering schedule. The plant is pulling almost no water, the substrate dries slowly because of cooler temperatures and lower light, and the roots sit in moisture for weeks. Cut total irrigation volume by 60–70% and extend the interval to every 3–4 weeks. The goal is not to grow the plant; it is to keep the corm from desiccating. If the top 3–4 cm of substrate dries and the corm still feels firm when you press the side of the pot gently, you are doing it right.
When you see a new growth tip emerge in late winter or early spring, do not jump straight back to the summer schedule. Water lightly, about half the normal volume, and wait until the top 2–3 cm of substrate is dry before the next session. Do not resume a full watering schedule until the first full leaf has unfurled.
Recovery from a Soggy Alocasia Cuprea
If you have caught the problem early — yellowing leaves, soft petioles, sour substrate, but the plant is still standing — work through these steps in order:
- Unpot the plant. Tip the pot on its side, support the corm with your hand, and slide the root ball out. Do not yank by the stem.
- Rinse the roots. Wash away all the old substrate under lukewarm room-temperature water.
- Inspect and trim. Cut every soft, dark, or smelly root back to firm white tissue with sterilized shears. If the corm itself is mushy, trim back to firm white tissue inside.
- Treat with dilute hydrogen peroxide. Mix 1 part 3% hydrogen peroxide with 3–4 parts water. Soak the trimmed root system and corm for 5–10 minutes.
- Repot in a fresh, dry, chunky mix. Use the ratios from the soil guide. Choose a clean pot with drainage holes — terracotta wicks moisture away from the root zone.
- Hold off on watering for 5–7 days. Let trimmed roots callus. Then water lightly and resume the normal “top 2–3 cm dry” schedule. Do not fertilize for at least 4–6 weeks.
- Increase humidity and keep warm. Push humidity to 70% and keep temperatures around 22–25 °C (72–77 °F) while the plant rebuilds roots.
If more than 50% of the root system is gone, recovery is possible but slow. Expect a month or more before new growth appears, and accept that the plant may drop its remaining leaves and resprout from the corm.
Conclusion
Watering an Alocasia Cuprea is less about a fixed schedule and more about a connected system: substrate, pot, water quality, humidity, temperature, and season all feed into the same decision. The default rule — top 2–3 cm of substrate dry, then water thoroughly at the soil line — covers most of the year, but the rhythm changes with the seasons, dormancy demands sharp cuts, and the difference between “moist” and “soggy” is the difference between a thriving jewel alocasia and a dying one. Build the habit of checking the substrate with a chopstick, lifting the pot to feel the weight, and watching the leaves for early signals. Protect the corm, and the plant will come back.
When to use this page vs other Alocasia Cuprea guides
- Alocasia Cuprea overview — Start here for whole-plant context, naming, and toxicity before deep-diving this topic.
- Alocasia Cuprea light — Use when placement and dry-down speed need adjustment, not watering technique alone.
- Overwatering on Alocasia Cuprea — Escalate here when chronic wet soil persists despite rhythm changes.
- Underwatering on Alocasia Cuprea — Escalate when leaves curl and dry but the substrate is genuinely bone dry.
- Root rot on Alocasia Cuprea — Use when inspection reveals mushy roots or sour substrate.
Related Alocasia Cuprea guides
- Alocasia Cuprea overview
- Alocasia Cuprea light
- Alocasia Cuprea soil
- Alocasia Cuprea propagation
- Alocasia Cuprea fertilizer
- Alocasia Cuprea repotting
- Overwatering on Alocasia Cuprea
- Underwatering on Alocasia Cuprea
- Root rot on Alocasia Cuprea
- Wilting on Alocasia Cuprea
- Drooping leaves on Alocasia Cuprea
- Mold on soil on Alocasia Cuprea