Root Rot on Alocasia Cuprea: Corm Checks & Fixes
Quick answer
Root rot on Alocasia Cuprea means the corm and shallow roots are decaying in saturated mix—limp copper mirror leaves on wet soil and mushy petioles are the giveaway. First step: stop watering, press the corm at the soil line, and lift the pot before you add another drink.
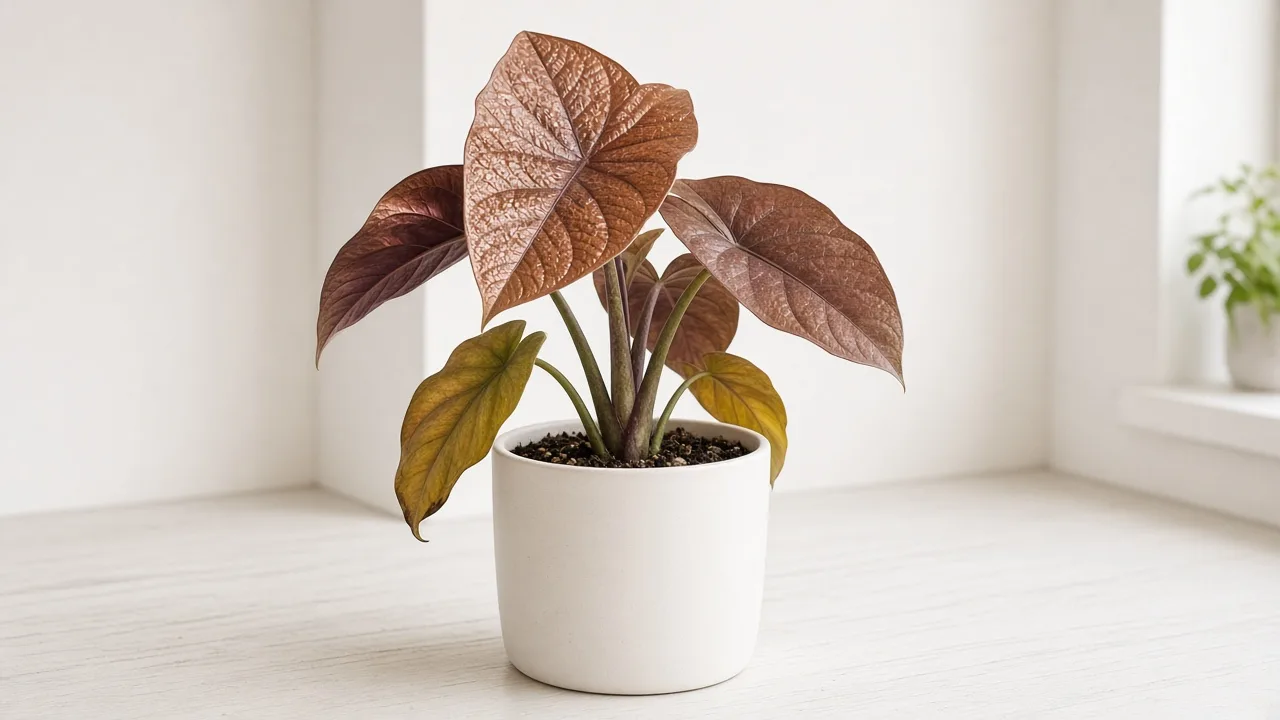
Root Rot on Alocasia Cuprea: Causes, Checks & Fixes
This guide covers root rot on Alocasia Cuprea. See also the general Root Rot guide, watering, and light pages for this plant.
Root Rot on Alocasia Cuprea: Causes, Checks & Fixes
Quick answer
Root rot on Alocasia Cuprea (Alocasia cuprea — Red Secret, Mirror Plant) is decay of the corm and shallow root system in soil that has stayed too wet too long—not a mysterious airborne disease. On this slow jewel alocasia, rot usually starts underground while the copper mirror crown still looks acceptable for a few days. The signature trap: limp, yellowing mirror leaves on wet, heavy soil—wet-wilt—while the metallic foliage makes the plant look merely thirsty.
First step: stop watering and press the corm at the soil line before you add another drop. If the corm is still firm and only a few roots look brown, you may stabilize by letting the top 2–3 cm of mix dry. If soil smells sour, multiple leaves yellow on wet mix, or any root is mushy on a spot check—unpot today.
For how chronic wet mix damages roots in general, see our root rot guide. On Cuprea, the pattern usually shows up faster than on larger elephant ears because the corm is compact, the root system is shallow, and an oversized pot holds days of excess moisture around tissue that cannot tolerate it.
Caught wet soil before roots turned mushy? Start with overwatering on Alocasia Cuprea—early saturation rescue is simpler than full rot surgery.
When to use this page vs other Cuprea guides
This page is the root-zone and corm rescue entry when wet soil has already damaged underground tissue.
| Pattern | Read next |
|---|---|
| Mix stays wet but corm still firm, no mushy roots yet | Overwatering |
| Limp mirror leaves without confirmed root damage | Drooping leaves or wilting |
| Light pot, dry upper mix, crisp margins | Underwatering |
| Flies at rim on damp mix, corm still firm | Fungus gnats |
| Long-term watering rhythm after recovery | Watering guide |
| Repotting after root pruning | Repotting guide |
What root rot looks like on Alocasia Cuprea
Root rot is a progression from oxygen-starved roots to pathogen colonization to corm failure. On a healthy Cuprea—typically 30–60 cm tall with stiff copper-bronze mirror blades on upright petioles—symptoms often climb from the bottom up while the crown still looks intact briefly.
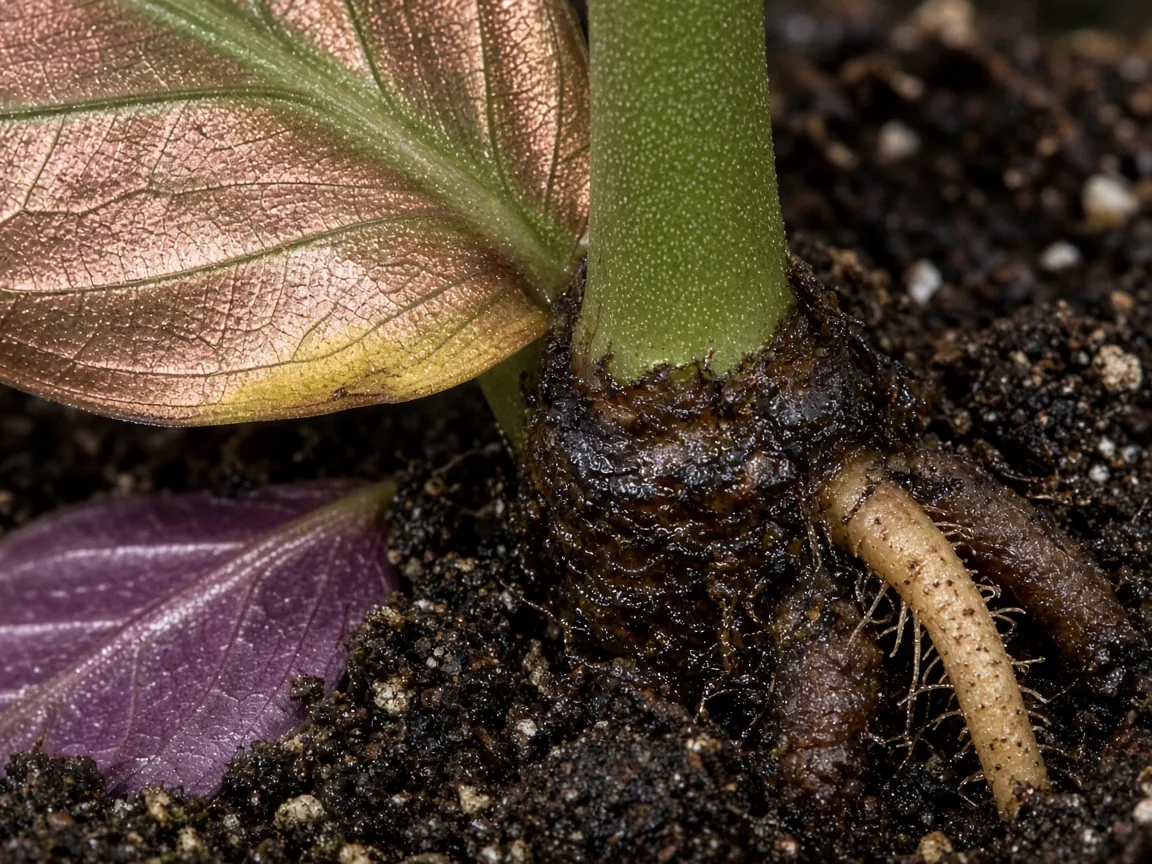
Root rot symptoms on Alocasia Cuprea — compare mushy tissue at the soil line with firm healthy corm flesh and pale tan roots.
Early signs (still time to act)
- Soil stays wet 5+ days after a normal watering in a pot that should dry faster
- Yellow lower mirror leaves while mix remains damp—not the single aging leaf Cuprea naturally sheds
- Faint sour or swampy smell when you lift the pot or disturb the surface
- Limp copper blades despite wet soil—wet-wilt; functional roots are failing
- Fungus gnats hovering over the pot—wet substrate attracts them
- Metallic sheen dulls to flat olive-bronze on stressed blades
- New red-flushed spears emerge smaller or thinner than the previous mirror leaf
Advanced signs (confirmed rot)
- Brown, slimy, or translucent roots when you unpot—healthy roots are pale tan to white and firm
- Mushy tissue at petiole bases or the soil line where stiff petioles meet mix
- Corm softening, discoloration, or foul odor at the soil line
- Multiple mirror leaves yellowing and collapsing within days with no firm new growth
- Petioles turning black and collapsing despite moist soil
Compare with underwatering: a light dry pot, crispy brown leaf edges, and leaves that perk after one thorough soak point away from rot. Compare with wilting for the wet-soil versus dry-soil fork before you unpot.
Red-flush new spear vs rot collapse — reading mirror colour
Cuprea’s most distinctive feature is the copper mirror leaf—but that colour sequence confuses diagnosis. Young leaves emerge flushed red before the cuticle darkens to bronze. That normal colour shift on an upright, firm petiole is not rot.
Stress rot shows on mature mirror blades that were firm yesterday: the petiole bends, the blade hangs below horizontal, the purple underside dulls, and the soil line smells sour. If only the newest unfurling spear looks soft while older copper leaves stay upright, you are watching normal development—not a watering crisis. If mature mirror blades collapse together on wet mix, start corm inspection immediately.
Why Alocasia Cuprea gets root rot
The compact corm makes rot fast—and salvage possible
Cuprea is a leaf-and-corm system, not a deep-rooted foliage plant. The underground corm—a starchy storage organ smaller than on larger elephant ears—holds water and energy for the next mirror spear. When soil stays saturated, water displaces oxygen from pore spaces, fine roots die, and pathogens colonize weakened tissue. The corm suffocates after roots fail.
That biology creates an asymmetry rescue teams rely on: underwatering is recoverable because the corm holds reserves; overwatering and rot attack the corm directly. A firm corm with rotten roots is salvageable. A mushy corm is not. Judge survival by squeezing the corm, not by whether the last copper leaf still looks metallic.
Snug pots, slow roots, and the overpotting trap
Cuprea prefers a snug container—often 10–15 cm diameter for a mature plant—with chunky aroid mix that drains fast. An oversized pot surrounds a small root ball with wet, oxygen-poor soil that never dries at the bottom even when the top 2–3 cm feels acceptable. NC State Extension notes that root rot can occur from overwatering on alocasias that need moist, well-drained soil—dense or waterlogged mix at the bottom of an oversized pot fails that requirement even when you water carefully.
Mirror leaves hide wet-wilt longer than glossy alocasias
The rippled metallic cuticle can make a stressed plant look merely dull rather than obviously collapsed. Do not interpret slight petiole droop as thirst when the pot is heavy. Lift the pot and check the corm before adding water—calendar watering on jewel alocasias is how rot reaches the corm before surface symptoms spread.
Dormancy, cool rooms, and the empty-pot trap
In fall and winter, Cuprea often slows or drops every leaf while the corm rests below the surface. A dormant plant pulls very little water while cool rooms slow evaporation—soil stays wet for weeks on a summer schedule. The RHS Alocasia growing guide warns that overwatering especially while dormant can rot roots. Combined with temperatures below 16 °C, prolonged moisture creates ideal conditions for rot to reach the corm before you notice anything above soil. See the Alocasia Cuprea watering guide for winter dormancy protocol—and do not confuse a bare dormant pot with rot until you check corm firmness.
Heavy mix, blocked drainage, and cachepots
Dense peat-heavy mix holds water at the bottom while the top inch dries—finger tests lie. Blocked drainage holes and cachepots without drainage turn every watering into a standing-water event. Bottom-watering is fine when you empty saucers within 30 minutes; a pot sitting in runoff is a rot setup on a plant whose roots cannot outgrow wet zones quickly.
Root rot vs. overwatering on Alocasia Cuprea
These pages overlap because overwatering is the usual cause and root rot is the result—but the action differs.
| Stage | Soil | Roots on inspection | Corm | What to do |
|---|---|---|---|---|
| Early overwatering | Wet 4+ days; sour smell possible | Mostly firm pale roots; maybe a few brown tips | Firm | Stop water; let top 2–3 cm dry—see overwatering guide |
| Intermediate rot | Wet; multiple yellow leaves | Mix of firm and mushy roots | Firm | Unpot, trim mushy roots, repot dry—this page |
| Advanced rot | Wet; petioles mushy at base | Mostly brown, slimy roots | Soft spots or softening | Aggressive trim or offset salvage |
| Corm lost | Wet or dry; collapsed plant | No firm roots remain | Mushy throughout | Propagate firm offsets or discard—see propagation |
Escalate from overwatering to rot surgery when you smell sour soil, see wet-wilt spreading to multiple mirror leaves, or find any brown slimy roots on a spot check. Waiting for “more proof” is how compact corms are lost.
How to confirm root rot
Unpot and inspect roots
Tip the pot on its side and work the root ball loose gently—Cuprea’s shallow roots tear easily. Rinse or shake off old mix so you can see roots and the corm clearly. Healthy Alocasia roots are pale tan to white and firm—they snap cleanly when trimmed. Rotted roots are brown, black, translucent, or jelly-like; they may smell sour or like rotting vegetation. Wilting with moist soil often means roots cannot absorb water because they are decaying—do not interpret that as thirst.
Trim a suspicious root: cut until you reach firm white tissue. If every cut stays brown and mushy, rot is advanced.
The corm firmness test
Brush soil from the base of the petioles. A healthy Cuprea corm feels firm, slightly waxy, and potato-like—uniform tan-brown color. Press gently with a thumb:
- Firm corm + mushy roots → salvageable; proceed with trim-and-repot below
- Small soft spots on otherwise firm corm → carve back to firm flesh, dust cuts, air-dry
- Soft, sunken, or foul-smelling corm → main plant unlikely to recover; search for firm daughter corms in the mix
- Papery, collapsed corm → dead; dispose of mix and sterilize the pot
This test matters more on jewel alocasias than on most houseplants because the corm—not just roots—determines whether new mirror spears can ever push again.
The first fix to try
Stop watering immediately. Move the pot to bright indirect light—not deep shade, which slows drying. Empty any saucer water. If the corm is still firm and only a few roots look brown, you may stabilize by letting the top 2–3 cm of mix dry and monitoring for 3–5 days.
If soil smells sour, multiple mirror leaves are yellowing on wet mix, or any root is mushy on a spot check—unpot today. Do not wait for more leaves to collapse. Do not fertilize. Do not mist heavily onto mirror foliage—water droplets on the glossy copper blade leave permanent marks while roots are failing. The first correct action is inspection, not another treatment stack.
Step-by-step recovery (firm corm required)
This sequence assumes the corm is mostly firm after inspection. If the corm is mushy throughout, skip to when to propagate instead.
Step 1: Unpot and rinse. Remove all old mix from roots and corm. Work under lukewarm running water or in a basin so you can see every root and any small daughter corms.
Step 2: Trim all rotted tissue. With sterile scissors or a blade, cut away every brown, mushy, or foul-smelling root back to firm white tissue. If the corm has soft spots, carve them out until you reach solid flesh. Sterilize blades between cuts with rubbing alcohol if rot is extensive. Wear gloves—alocasia sap can irritate skin.
Step 3: Dust cuts and air-dry. Dust trimmed roots and corm cuts with ground cinnamon (a mild natural antifungal) or a powdered fungicide labeled for ornamentals. Lay the plant on a paper towel in bright indirect light for 12–24 hours so cut surfaces callus.
Step 4: Repot into fresh airy mix in a snug pot. Use a chunky aroid blend—see the Alocasia Cuprea soil guide for proportions. RHS recommends moist but well-drained peat-free compost with perlite added Scrub reused pots with dilute bleach solution and rinse thoroughly, or use a clean pot sized to the trimmed root mass—not two sizes up. Plant the corm shallowly—top of corm at or just below the soil surface, never buried deep in wet mix. See repotting for depth and pot sizing.
Step 5: Hold water 7–10 days. Cut roots need oxygen to heal. Resist soaking “to help recovery.” After the hold, give a light watering—about half your normal amount—only when the top 2–3 cm is dry.
Step 6: Warmth and humidity. Target 21–24 °C with ambient humidity around 65–80%—a clear bag with air holes or a humidity dome works short term. Use a humidifier rather than misting mirror leaves directly. Bright indirect light; avoid direct sun on a stressed plant.
Step 7: Hold fertilizer until new growth. Wait until at least one new mirror leaf has fully unfurled with its red flush before resuming half-strength balanced feed. Salt stress on healing roots delays recovery.
Recovery timeline and what to expect
| Severity | What you did | Stabilization | New roots / shoot | Full new leaf |
|---|---|---|---|---|
| Mild — few mushy roots, firm corm | Trim + repot + hold water | 3–7 days without spread | 2–4 weeks | 2–4 months |
| Moderate — 30–70% roots removed, firm corm | Full surgery above | 1–2 weeks | 2–6 weeks | 2–4 months |
| Severe — most roots gone, firm corm | Aggressive trim + warmth | 2+ weeks; may drop all leaves | 4–8 weeks | 4+ months |
Damaged mirror leaves rarely re-green. Yellow or collapsed copper blades will not regain turgor or restore the metallic cuticle. Judge success by corm firmness and a new spear from the center with a fresh red flush—not by saving old blades. Trim fully collapsed leaves only after the plant pushes one healthy new leaf.
Signs of improvement: corm stays firm; no new sour smell; first new petiole or red-flushed spear emerging from the center.
Signs of failure: corm softens further; black tissue climbs petioles; sour smell returns after repot despite dry hold period.
Lookalike symptoms
| Symptom pattern | Pot / soil | Roots if checked | Likely cause |
|---|---|---|---|
| Wet-wilt, sour smell, mushy roots | Heavy, wet | Brown, slimy | Root rot (this page) |
| Wet soil, limp leaves, firm roots | Heavy, wet | Mostly pale and firm | Early overwatering—act before rot |
| Dry wilt, crispy edges, light pot | Light, dry | Shriveled but firm | Underwatering |
| Limp after repot, moist fresh mix | Medium | Firm; disturbed | Transplant shock—hold normal rhythm 1–2 weeks |
| All leaves dropped, bare mix, winter | Lightly moist | Firm corm below surface | Dormancy—reduce water, do not repot |
| Gradual petiole sag over weeks | Varies | Often firm until late | Drooping leaves—slower posture change |
| Lower yellow leaves, firm corm, drying mix | Medium | Firm | Brown leaves—may be light or age, not rot |
What not to do
- Do not keep watering because mirror leaves look wilted when soil is already wet. Watering a wilted plant with rotting roots makes the problem worse.
- Do not repot into dense garden soil or a pot without drainage.
- Do not bury the corm deeper during emergency repot—shallow planting is critical on Alocasia.
- Do not overpot into a large container “to give roots room”—excess wet soil kills slow Cuprea roots.
- Do not mist mirror foliage as a humidity fix during rot recovery—use a humidifier instead.
- Do not reuse rotted mix or skip pot sterilization—pathogens persist in old substrate.
- Do not fertilize a recovering plant until new growth proves roots are working again.
- Do not assume metallic leaves mean a healthy corm—inspect underground tissue directly.
How to prevent root rot next time
- Water when the top 2–3 cm of mix feel dry—not on a calendar. The RHS recommends checking the top 5 cm before watering in the growing season.
- Use airy aroid mix and refresh it every 1–2 years before compaction traps moisture at the bottom—see soil guide.
- Size pots to the root ball—snug containers dry predictably; oversized pots hold excess wet soil.
- Empty saucers within 30 minutes after every watering.
- Reduce winter watering sharply when growth pauses; let the top half of mix dry between sparse drinks.
- Keep temperatures above 16 °C during the growing season and avoid drenching cool dormant plants. Overwatering in winter is the most common alocasia killer.
- Log pot weight weekly—a sudden heavy feel after your normal interval is an early warning before roots turn mushy.
When to propagate instead
Propagation is the salvage path when the main corm is lost but firm daughter corms or offsets remain.
Propagate when:
- The main corm is mushy but you find firm smaller corms attached or loose in the mix
- You trimmed rot aggressively and only a small firm corm section remains with no leaves
- The plant has multiple offsets and one section rotted while neighbors stay firm
How: Separate firm offsets with a sterile blade, air-dry cuts 12–24 hours, pot each in small containers with airy mix, and hold water until new roots form. See the Alocasia Cuprea propagation guide for division timing and aftercare. Do not propagate through active rot without trimming all mushy tissue first—sick corm tissue spreads with every cut.
Related Alocasia Cuprea guides
- Overview — cultivar profile, dormancy rhythm, and care checkpoint
- Overwatering — use when mix stays wet but corm and roots are still firm
- Watering — long-term top 2–3 cm dry-down rhythm
- Soil — mix and pot-size decisions that prevent repeat saturation
- Repotting — step-by-step workflow after root pruning
- Problems hub — full symptom index for this species
Related tool
Use the Root Rot Risk Checker to narrow causes for root rot on this plant before changing multiple variables at once.