Root Rot on Monstera Siltepecana: Emergency Fix & Soil
Quick answer
Root rot on Monstera siltepecana strikes when dense, oversaturated soil suffocates root tissue, causing roots to turn black, mushy, and foul-smelling while silver leaves wilt. Emergency intervention requires immediately unpotting the vine, excising necrotic root tissue with sterilized shears, and repotting into an airy, chunky aroid mix. If decay has invaded the basal stem, salvage the vine by taking clean node cuttings above the rot line to propagate in water or perlite.
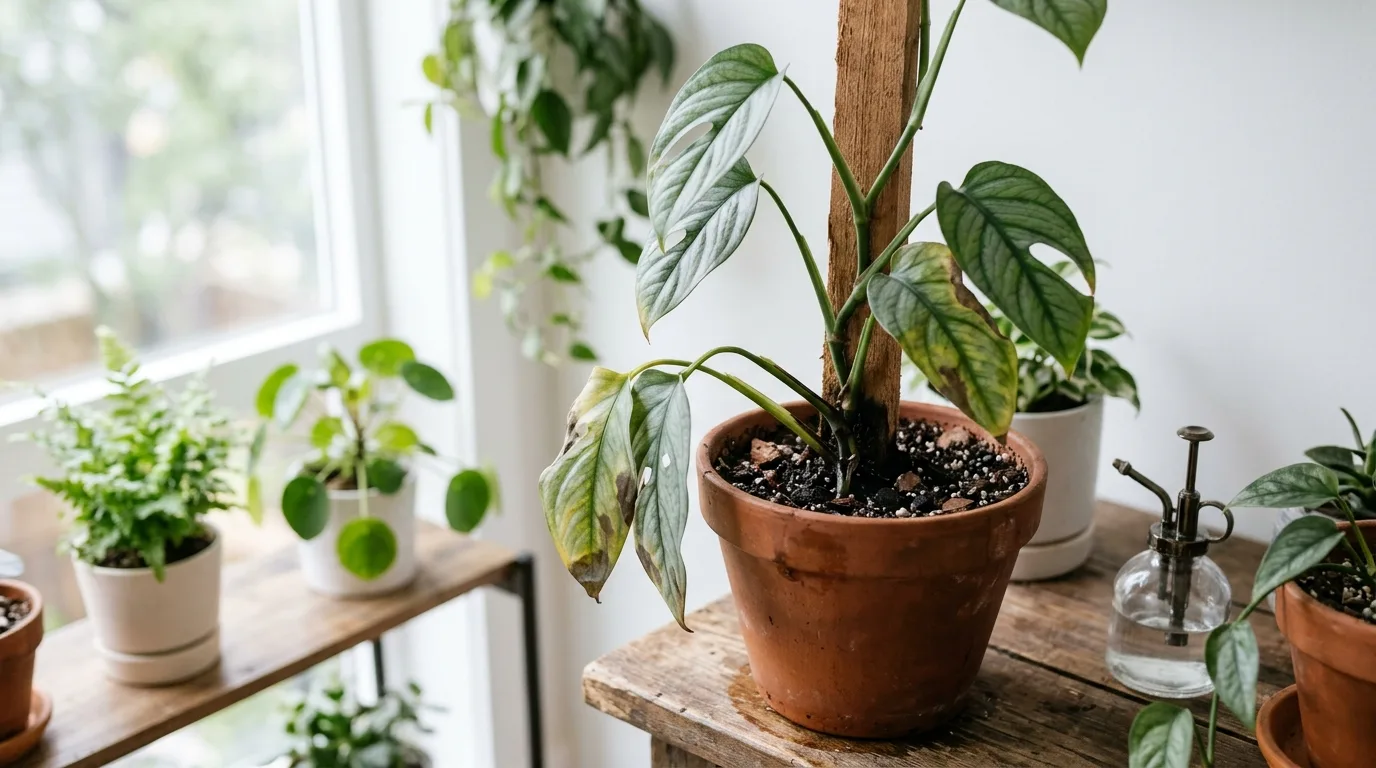
Root Rot on Monstera Siltepecana: Emergency Fix & Soil Recovery
This guide covers root rot on Monstera Siltepecana. See also the general Root Rot guide, watering, and light pages for this plant.
Root Rot on Monstera Siltepecana: Emergency Fix & Soil Recovery
Quick answer
Root rot on Monstera siltepecana is a catastrophic subterranean collapse caused by prolonged saturation and oxygen deprivation in the root zone, which invites destructive water molds like Pythium and Phytophthora to consume root tissues. In nature, Monstera siltepecana climbs tree trunks as a hemiepiphyte where its root system breathes freely; when confined to dense, waterlogged peat mixes indoors, its roots drown and rot within days. For a general overview of subterranean decay mechanisms, consult our root rot symptom hub.
On Monstera siltepecana, the cardinal diagnostic warning is foliage that wilts or droops even though the potting mix is thoroughly soaked, accompanied by dull, yellowing juvenile silver leaves with soft brown patches, mushy black root tissue that sloughs off under gentle pressure, and a swampy, sour smell escaping the drainage holes.
First step: stop watering immediately, slide the root ball out of its container, and inspect the roots. If the roots are firm, pale tan, and resilient, your vine may simply be suffering from early overwatering. If the roots are black, water-soaked, and disintegrate into stringy threads in your fingers, you must immediately perform emergency root debridement, sterilize the remaining system, and repot into a coarse, well-aerated aroid soil mix.
When to use this guide vs other Monstera siltepecana guides
Root rot requires urgent physical surgery. Use this matrix to confirm whether your plant requires immediate root excision or a less invasive cultural correction:
| Observed Symptom Pattern | Substrate Condition | Root System Status | Immediate Guide to Follow |
|---|---|---|---|
| Limp silver leaves, dark brown mushy roots, sour odor | Soggy, cold, heavy pot | Sloughing, hollow, black or dark brown | This guide (Root Rot) |
| Yellowing lower leaves, firm pale roots, mix damp | Saturated for over 7 days | Intact, creamy-white to light tan, firm | Overwatering guide |
| Crisp curling leaf margins, dry pot, drooping tips | Bone-dry, shrunken mix | Firm, dry, light tan, fibrous | Underwatering guide |
| Uniform yellowing on oldest leaves only, roots healthy | Moderately moist | Fully colonized, healthy white root tips | Yellow leaves guide |
| Soft, blackened stem base creeping upward from soil | Constantly saturated | Rotted completely away at crown collar | This guide (Stem Salvage section) |
| Limp foliage without root loss after repotting | Damp or fresh mix | Intact but transplant-shocked | Repotting guide |
What root rot looks like on Monstera siltepecana
A healthy Monstera siltepecana produces lanceolate juvenile leaves boasting an iridescent silvery sheen intersected by deep emerald veins. Healthy roots are fleshy, flexible, and ivory to light cinnamon in color. When root rot sets in, this vibrant vascular structure fails from the root tips upward.
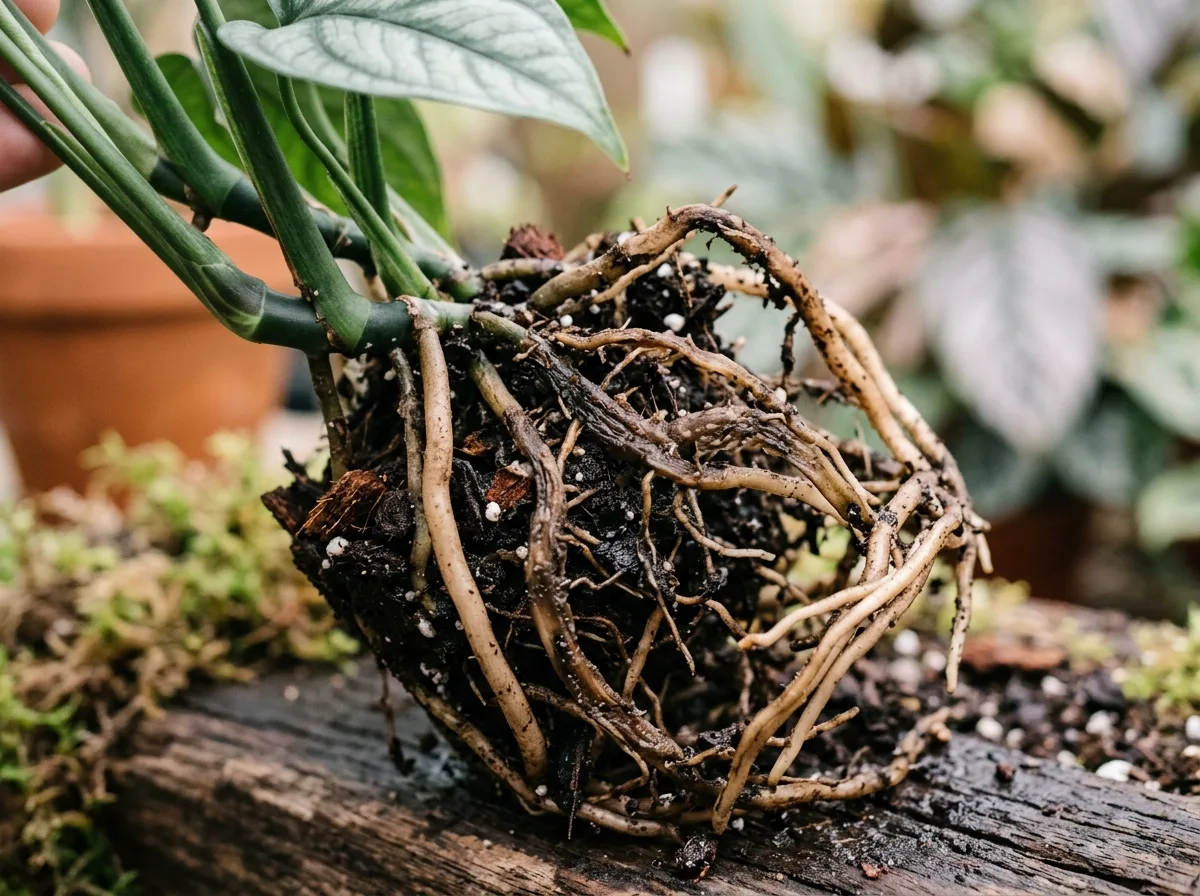
Severe root rot on Monstera siltepecana—black, mushy root tissue and sloughing outer cortex from waterlogged soil; healthy roots remain pale tan, firm, and springy.
Early diagnostic indicators
- Paradoxical wilting: The silver leaves lose turgor pressure and flag downward despite the potting substrate being visibly wet.
- Chlorosis with water-soaked margins: Lower leaves turn dull yellow-green, developing limp, translucent brown spots that look water-soaked rather than papery.
- Loss of metallic silver luster: The distinctive silvery foliage takes on a flat, lifeless gray cast as chlorophyll synthesis and water transport break down.
- Substrate stagnation: The potting container stays heavy for more than ten to fourteen days after watering, with condensation clinging to inner plastic walls.
- Faint anaerobic odor: A stale, earthy, or slightly sour scent emanates from the bottom drainage holes.
Advanced necrotic indicators
- Widespread cortex sloughing: Upon handling, the outer spongy layer of the root (the cortex) slides right off like a wet sleeve, leaving behind a frail, thread-like vascular stele.
- Jet-black or dark chocolate root pulp: Entire feeder root networks dissolve into a foul, muddy slurry with zero tensile strength.
- Basal stem liquefaction: The lower stem nodes touching the soil line turn dark brown or black, feeling soft and slippery between your fingertips.
- Rapid leaf drop and vine collapse: Entire trailing or climbing vines detach at the soil level as the collar rots through completely.
Why Monstera siltepecana roots rot: Pathogens vs anaerobic suffocation
True root rot is rarely caused by water alone; it is an ecological disaster where physical suffocation creates the ideal breeding ground for pathogenic microorganisms.
As explained by Wisconsin Horticulture Extension, waterlogged container soil displaces oxygen from macropores, depriving plant roots of the oxygen needed for cellular respiration. Without aerobic energy, root cells die, leak cellular sugars into the surrounding rhizosphere, and attract opportunistic oomycetes and fungi.
Primary pathogens responsible for houseplant root rot include:
- Pythium spp.: Ubiquitous soilborne water molds that produce motile zoospores capable of swimming through free water in saturated media. UF/IFAS Extension pathology studies note that Pythium selectively attacks juvenile root tips and soft cortex tissue on tropical foliage aroids, dissolving roots into a water-soaked mush.
- Phytophthora spp.: Highly aggressive cousins of Pythium that not only ravage root systems but also climb into the crown and lower stem vascular channels, triggering systemic crown and stem rots.
- Fusarium and Rhizoctonia species: Secondary true fungi that exploit roots previously stressed or wounded by oxygen starvation, accelerating the collapse of vascular bundles.
- Anaerobic bacterial decay: Under continuous oxygen starvation, obligate anaerobic bacteria multiply, producing sulfurous volatile compounds that generate the unmistakable “rotten egg” or sour smell of rotting pots.
The epiphytic paradox: Why dense peat kills silver monstera
In its native habitats across southern Mexico and Central America, Monstera siltepecana thrives as a nomadic vine and hemiepiphyte, according to botanical records from NC State Extension Plant Toolbox. In tropical rainforests, its root system anchors into mossy bark fissures, leaf litter, and tree forks where monsoon deluges wash over roots and instantly drain away, maintaining perpetual high oxygen levels.
Commercial growers, however, frequently propagate Monstera siltepecana in finely milled Canadian sphagnum peat moss or dense coconut coir dust. While efficient in industrial greenhouses equipped with high ventilation and automated bottom heat, this dense sponge becomes lethal inside a typical home:
- Compaction and perched water tables: Fine peat particles pack tightly together after several watering cycles, creating an impenetrable perched water table at the bottom third of the container.
- Dim indoor light and low transpiration: In home environments with low or moderate ambient light, photosynthesis slows drastically. The foliage stops pulling moisture from the soil, leaving the dense peat saturated for weeks on end.
- Cold roots in winter: Cooler indoor temperatures drop soil biological activity and root metabolism, meaning water that was safely utilized in July causes fatal root decay by November.
Lookalike symptoms on Monstera siltepecana
Before cutting away root tissue, verify that you are not mistaking another common problem for subterranean rot:
| Symptom Pattern | Soil Moisture | Root System Condition | Primary Cause |
|---|---|---|---|
| Limp leaves, mushy black roots, sour odor | Soaked / Saturated | Disintegrated, sloughing, black | Root Rot |
| Wilting, pale leaves, firm root mass | Bone dry throughout | Intact, firm, pale tan | Underwatering |
| Soft brown patches with yellow halo on leaves | Wet potting mix | Rotten, decaying roots | Root Rot moving systemically |
| Crisp brown leaf tips, no wilting | Normal moisture cycles | Intact, healthy | Low indoor humidity or tap water salts |
| Sudden yellowing and leaf drop after cold draft | Moist or dry | Healthy pale roots | Cold shock (<55°F / 13°C) |
| Single lowest leaf turning yellow and shedding | Predictable dry-down | Vigorous, white tips | Natural leaf senescence |
Step-by-step diagnostic confirmation
Follow this sequential diagnostic process to verify root rot without causing unnecessary shock to a healthy vine:
Step 1: Pot heft and olfactory check
Lift the container. If the pot feels exceptionally heavy for its size and hasn’t dried out in over ten days, saturation is present. Lean in and smell the drainage holes at the base of the container. A healthy root zone smells fresh, earthy, and clean like damp forest humus. If you detect a sour, sulfurous, or swamp-like odor, anaerobic bacterial fermentation and fungal rot are active.
Step 2: Stem collar inspection
Inspect the base of each vine where it enters the potting mix. Gently compress the stem collar between your thumb and forefinger. Healthy Monstera siltepecana stems are firm, tough, and pale green with distinct internodes. If the stem feels soft, squishy, or sloughs off its green skin to reveal dark brown slime, decay has already progressed from the root zone into the plant’s vascular crown.
Step 3: Foliar lesion analysis
Check the foliage. Nutrient deficiencies or dry air typically cause brittle, pale yellow or crisp brown edges. Root rot produces irregular, soft, water-soaked brown lesions bordered by a bright chlorotic yellow halo. This halo indicates that toxic waste products and rotting cell debris are backing up into the leaf lamina.
Step 4: The root inspection & slip test
Place your hand across the surface of the soil with the vine stems secured between your fingers, invert the pot, and gently tease the root ball free. Gently shake loose the outer substrate. Take a discolored root between your fingers and pull lightly:
- If the root feels springy and resists tension, it is alive.
- If the outer sheath slides away effortlessly, leaving a wiry central core (the “slip test”), that root’s cortex is necrotic and dead from water-mold infection, as documented by the Royal Horticultural Society.
Emergency rescue protocol: Saving an infected plant
If your inspection confirms root rot, do not wait for the soil to dry naturally. Fungal oomycetes will consume healthy tissue every hour the mix remains wet. Perform this emergency surgical rescue immediately:
Step 1: Complete substrate evacuation
Take the plant to a sink, utility tub, or outdoor hose. Gently tease away every speck of old potting soil from the root ball. Run lukewarm water (68–72°F / 20–22°C) over the roots to wash away the contaminated, spore-laden soil until only bare roots remain. Never reuse this infected soil—discard it in the trash, not the garden compost.
Step 2: Radical surgical debridement
Sterilize a sharp pair of pruning shears or a razor blade using 70% isopropyl alcohol or a 10% bleach solution, a step strongly emphasized by Penn State Extension to prevent pathogen transmission.
- Methodically snip away every root that is black, dark brown, limp, mushy, or hollow.
- Cut 3 to 5 mm into healthy tissue on fine lateral feeder roots, and 10 to 15 mm into healthy tissue on thick primary anchor roots to ensure no fungal or oomycete hyphae remain inside the vascular cylinder.
- Re-sterilize your cutting tool between cuts to prevent inoculating clean tissue.
Step 3: Antiseptic root dip and blotting
After mechanical excision, immerse the remaining healthy root system in a sanitizing bath:
- Hydrogen peroxide dip: Mix 1 part 3% household hydrogen peroxide with 4 parts room-temperature water. Submerge the roots for 30 to 60 seconds. The solution will fizz as it cleanses surface pathogens and delivers oxygen. Do not soak for prolonged periods, which can damage fine root caps.
- Alternative biological/copper soak: Alternatively, dip roots in a dilute liquid copper fungicide or a broad-spectrum bio-fungicide containing Bacillus amyloliquefaciens per label directions.
- Blot damp-dry: Gently blot the treated roots with clean paper towels and pot immediately; never leave bare fine roots exposed to dry indoor air for extended periods, which desiccates fragile surviving root hairs.
Step 4: Downsizing, potting, and suberization
Never place a pruned root system back into its original pot unless that pot has been thoroughly scrubbed and soaked in a 10% bleach solution for fifteen minutes.
- Because you have removed a significant portion of the root volume, you must downsize the pot.
- Choose a container that leaves only 2 to 3 cm of clearance around the remaining trimmed root ball. An oversized pot holds excess potting mix that will stay wet and trigger a secondary rot cycle. Ensure the container has multiple unobstructed drainage holes.
- 48-Hour Suberization Window: Repot into a fresh, barely damp chunky mix, and withhold heavy watering for 48 hours. This allows root wounds to suberize and form protective wound periderm before encountering standing soil moisture.
Rebuilding the root zone: The chunky aroid mix recipe
The ultimate long-term defense against root rot is an open-structured potting mix that physically cannot hold excess water or exclude oxygen. Standard bagged potting soil is far too dense for Monstera siltepecana.
Prepare this custom chunky aroid substrate:
- 40% Medium Horticultural Orchid Bark (Fir or Pine): Creates large, stable macropores that allow ambient air to circulate continuously around root surfaces.
- 25% Coarse Perlite or Pumice (#3 or #4 grade): Resists compaction and provides permanent aeration channels throughout the root column.
- 20% High-Grade Coco Coir Chunks or Peat Strips: Holds sufficient moisture within its fiber structure without collapsing into an anaerobic sludge.
- 10% Horticultural Charcoal: Absorbs residual metabolic impurities and helps keep the substrate sweet and open.
- 5% Earthworm Castings: Delivers gentle, non-burning micronutrients and beneficial microbes to stimulate root regeneration.
Before mixing, verify your quantities and container volumes using our Soil Mix Calculator.
Pot the trimmed plant into this airy mix, pressing lightly to secure the vine without crushing the chunky bark. Do not compact the mix with your thumbs.
Stem rot escalation: Node salvage and propagation
If your inspection reveals that root rot has traveled upward past the root crown and turned the basal stem black, soft, and watery, the root ball cannot be saved. The vascular transport channels (xylem and phloem) are plugged with bacterial slime and fungal mycelium.
Your only course of action is emergency stem salvage via node cuttings:
- Locate the rot boundary: Examine the climbing or trailing vine from the soil line upward. Find the point where the stem transitions from discolored, soft, or brown tissue to firm, bright green stem tissue.
- Make the salvage cut: Using a razor blade sterilized with 70% isopropyl alcohol, sever the vine at least 3 to 5 cm above the highest visible discoloration. Inspect the cut cross-section of the stem: it must be uniformly pale green or creamy-white without any brown or black internal vascular rings. If you see dark vascular specks, sterilize your blade and cut another node higher.
- Divide into individual node cuttings: Divide the healthy vine into cuttings containing one to two leaves and at least one healthy, firm nodal eye or aerial root nub.
- Callus and root: Allow the cut stem ends to dry on a clean paper towel for one hour to form a protective protective callous.
- Rooting medium:
- Water propagation: Place the node in a clear glass of clean, filtered room-temperature water. Change the water every two to three days to keep oxygen levels elevated.
- Damp perlite or moss: Place the cutting into a cup filled with moistened coarse perlite or well-aerated sphagnum moss inside a warm propagation dome.
- Once new water-roots develop to 5 cm in length, transfer the rooted cuttings into the chunky aroid substrate detailed above.
Aerial Root Bypass Salvage (Pole Climbers)
If your Monstera siltepecana is trained up a moss pole and possesses active adventitious aerial roots above the rot zone, you can perform an aerial root bypass without severing the vine immediately:
- Position a small pot filled with moist chunky aroid mix directly next to or attached to the climbing pole.
- Guide 2 to 3 vigorous aerial roots into the new mix.
- Keep the new container lightly moist. Over 14 to 21 days, these aerial roots will transition into subterranean feeder roots, supplying water and nutrients directly to the upper canopy.
- Once the bypass root system is established, cleanly sever the decaying lower vine section 3 cm above the rot line, discarding the infected base while preserving an intact, actively growing climbing vine.
Recovery timeline and post-surgery care
Rescuing a plant from root rot requires disciplined post-operative patience. The plant will look visually stressed before it begins new vegetative growth:
| Post-Rescue Phase | Expected Plant Behavior | Recommended Care Routine |
|---|---|---|
| Weeks 1–2: Stabilization | Minimal visible top growth; leaves may continue slight flagging as roots acclimate. | Keep in bright, indirect light (warmth: 72–78°F / 22–25°C). Water very lightly only when top 50% of chunky mix dries. Never allow standing saucer water. |
| Weeks 3–5: Root Regeneration | Foliage regains turgor pressure; leaves stand upright; old damaged leaves stop spreading brown spots. | Maintain high ambient humidity (50–65%) without misting wet foliage. Continue cautious watering based on pot weight. |
| Weeks 6–10: New Foliar Flush | The terminal apex or dormant lateral nodes swell and produce the first new, clean silver leaf. | The root system has re-established. Resume normal watering when the top 3–5 cm of mix is dry. |
| Week 12+: Full Recovery | Vigorous trailing or climbing growth resumes; healthy aerial roots emerge along stems. | Re-introduce dilute, balanced liquid fertilizer at one-quarter strength. Attach climbing vines to a sturdy cedar board or moss pole. |
Common mistakes that trigger relapse
Growers attempting to nurse a recovering Monstera siltepecana frequently make several critical mistakes that undo their surgical efforts:
- Drenching the soil immediately after surgery: Newly pruned, sanitized roots cannot absorb large volumes of moisture. Giving a heavy soak right after repotting creates instant saturation around freshly wounded tissue. Give only a modest drink of water, or moisten the chunky mix slightly before planting.
- Applying fertilizer to “boost” recovery: Never feed a plant suffering from root rot. Chemical fertilizer salts burn fragile regenerating root hairs and feed soil pathogens. Wait until the plant has produced at least one completely new, healthy leaf before feeding.
- Putting the plant into deep shade: While hot direct sun scorches stressed leaves, moving a recovering plant into dim light stops transpiration completely, preventing the soil from drying out. Provide generous, bright indirect light.
- Foliar misting: Spraying water onto the leaves of a plant fighting root rot spreads fungal spores to aerial foliage and increases bacterial leaf spot risks without improving root hydration. Run an ultrasonic room humidifier instead.
- Reusing contaminated potting media or tools: Fungal resting spores (oospores) can survive for years in dry potting soil and on dirty tools. Always discard infected mix and thoroughly disinfect all shears, stakes, and pots.
How to prevent root rot permanently
Once your Monstera siltepecana has recovered, establish these permanent care habits:
- Water by moisture depth, not by the calendar: Never water on a fixed weekly schedule. Insert a wooden skewer or your finger into the pot and water only when the top 3 to 5 cm (1 to 2 inches) of potting mix is completely dry. Use our Plant Watering Schedule Calculator to calibrate your watering intervals against local temperature and humidity.
- Always empty the saucer: Clemson University Extension’s indoor watering guide advises watering until liquid flows freely from the drainage holes, but you must discard all runoff sitting in drip trays or cachepots within fifteen minutes. Never let the pot sit in standing water.
- Maximize bright indirect lighting: Provide your Monstera siltepecana with ample bright indirect illumination near an east-facing window or a few feet back from an unshaded south- or west-facing window. Vigorous photosynthesis drives rapid water transpiration, keeping soil cycles short and healthy.
- Adjust for winter dormancy: When daylengths shorten and ambient indoor temperatures drop in late autumn and winter, plant metabolism slows. Stretch watering intervals significantly, allowing the chunky mix to dry down further between sparse drinks.
- Rely on intrinsic substrate porosity: Maintain an open aroid mix with 12–18 mm bark chunks and pumice rather than packing down soil or probing chopsticks into the root zone, which can sever tender feeder roots.
Related Monstera siltepecana guides
- Monstera Siltepecana Care Overview — Complete botanical guide, lighting benchmarks, and vertical climbing training.
- Monstera Siltepecana Soil Guide — In-depth breakdown of drainage materials, bark grades, and aeration porosity.
- Monstera Siltepecana Watering Guide — Master the seasonal dry-down method and avoid chronic overwatering.
- Monstera Siltepecana Repotting Guide — Safe root-handling techniques, container sizing, and pole installation.
- Monstera Siltepecana Overwatering Guide — Identify early physiological moisture stress before root pathogens take hold.
- Monstera Siltepecana Problems Hub — Triage pests, chlorosis, slow growth, and foliage issues across the species.
Related tool
Calculate your exact bark, perlite, and substrate proportions for any pot dimension using the Soil Mix Calculator before repotting your recovering vine.