Dieffenbachia Seguine Care: Light, Water & More
Set up Dieffenbachia seguine for steady growth with clear advice on light, watering, soil, repotting, propagation, seasonal care, and toxic sap precautions.
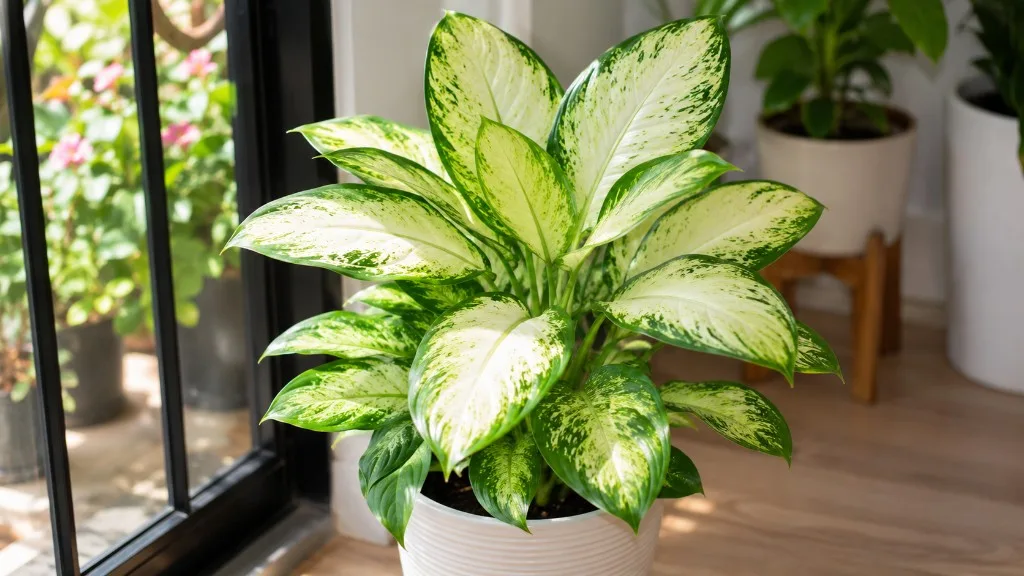
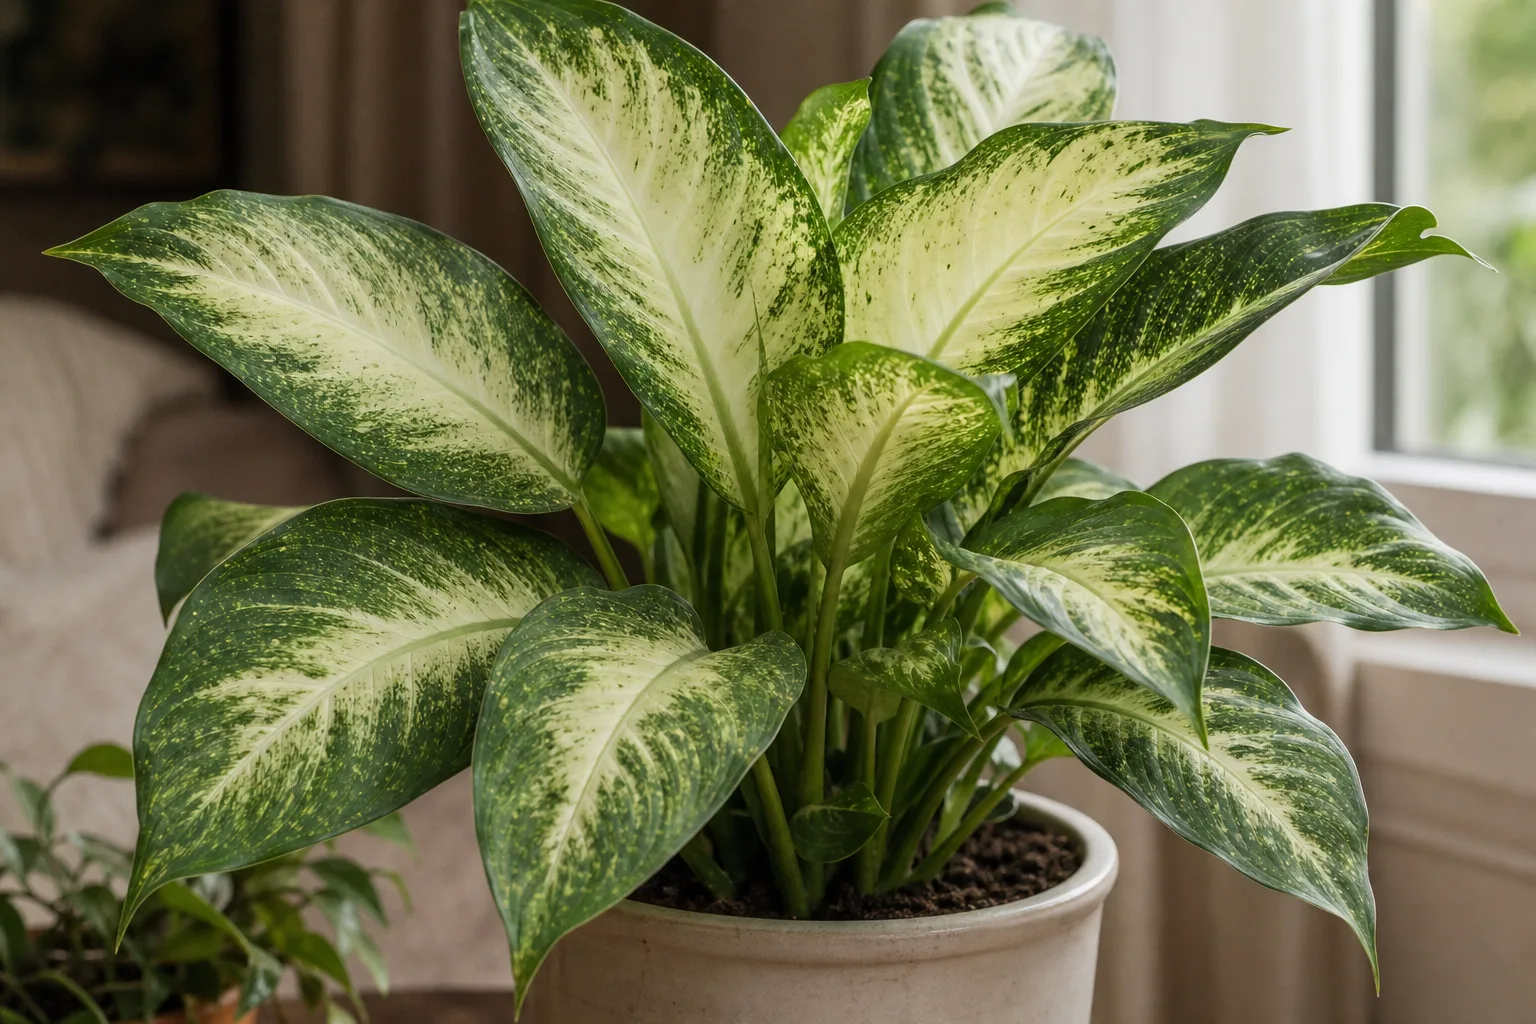
Dieffenbachia seguine grows as an upright cane with broad, glossy leaves patterned in cream, white, yellow, and green. It can handle the ordinary rhythm of a home, but its large leaves and thick stems look best when you get two things right: enough filtered light for compact growth, and a potting mix that drains before the roots stay wet for days.
A simple starting routine is to place it near a bright window out of harsh midday sun, feel the potting mix before you water, and empty the saucer afterward. Keep pruning and propagation tools away from children and pets: the plant’s sap can irritate skin and eyes, and chewing any part can cause painful mouth swelling.
What makes Dieffenbachia seguine distinctive (and why names vary)
This tropical evergreen belongs to the arum family, Araceae. It is native to tropical parts of the Americas and is grown indoors for its leaf pattern, not its flowers; a mature plant can develop a stout, visible cane as its lower leaves age and fall. Oxford Botanic Garden describes leaves that can reach about 40 centimeters and wild stems several meters tall, while North Carolina State Extension notes that plants cultivated indoors are commonly sold under several older botanical names. Oxford University Plants 400 and North Carolina State Extension are useful references if a plant label says D. amoena, D. maculata, or D. picta rather than D. seguine.
Cultivar names describe different looks, not separate care rules. ‘Camille’ is often bushier and paler, while ‘Tropic Snow’ grows taller with a different pattern; retailers sometimes group these and other forms under the broad name Dieffenbachia. Identify the plant by its upright cane and broad, patterned leaves, then adjust placement to the amount of white or cream on its foliage: heavily variegated leaves have less green tissue to capture light and may need a brighter position than a mostly green plant.
Give it filtered light, not a dark corner
Choose a bright room where the plant receives plenty of daylight without prolonged, strong sun striking the leaves. An east-facing window is often an easy fit; at a sunnier south- or west-facing window, set the pot back from the glass or filter midday rays with a sheer curtain. Bright indirect light supports shorter, sturdier growth and helps keep variegation distinct, while direct sun through glass can bleach or scorch leaf patches. UConn Extension and the Royal Horticultural Society’s growing guidance both describe filtered or indirect light as a good growing condition.
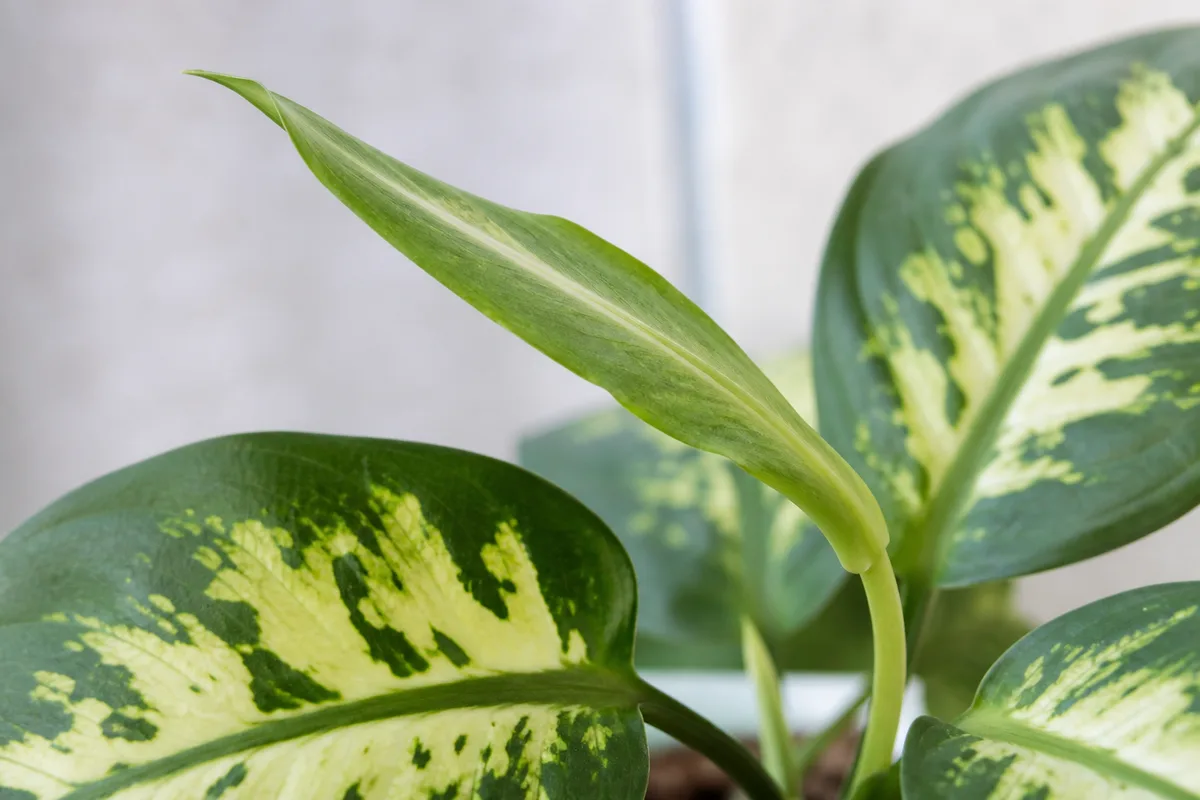
A shaded room is not an automatic death sentence, but it changes the result. Growth slows, the cane may lean toward the nearest window, and new leaves may appear smaller or less strongly patterned; move the plant closer to natural light or add a grow light if it must stay in a dim room. Turn the pot a quarter-turn every week or two so one side does not do all the reaching. If pale patches look dry and crispy rather than simply less colorful, check for sun exposure before increasing light again.
Water when the pot is ready
Do not water by weekday. Check the mix with a finger or wooden stick: when the upper inch or two is dry and the deeper root zone is no longer wet, water slowly until the whole root ball is moistened and excess drains through the holes. Empty the saucer or decorative cachepot after it finishes dripping. UConn Extension recommends watering thoroughly, then waiting until the surface is dry to the touch; NC State Extension gives a similar top-inch check. The point is not to let the plant wilt, but to prevent an unseen wet core from sitting against its roots.
A small plant in a warm bright room may use water much faster than a large cane in a cool, dim corner. Pot size, mix, air movement, season, and root health all change the interval, so a weekly calendar is only a reminder to check. In winter, growth and water use often slow; let the mix dry a little farther between drinks, but do not leave the root ball bone-dry for long stretches. A pot that stays wet well past a week, smells sour, or produces repeated yellow leaves deserves a drainage and root check, not another scheduled watering.
Build an airy mix and choose a draining pot
Use a loose indoor potting mix that holds some moisture but leaves air around the roots. A practical blend is two parts general-purpose potting mix with one part perlite or fine orchid bark; adjust if your home is unusually dry or the mix dries too fast. Avoid dense garden soil or a pot with no drainage hole. A layer of stones in the bottom does not fix poor drainage because the water still has to pass through the same compact mix above it.
The pot should fit the root ball rather than the height of the foliage. A tall, top-heavy Dieffenbachia may need a heavier outer cachepot for stability, but the inner nursery pot should still drain freely. When repotting, move up only one modest size—roughly 1 to 2 inches wider—and keep the cane at its original soil line. Too much extra mix stays wet longer than the roots can use, which can create the very root stress the larger pot was meant to solve. The National Gardening Association’s Dieffenbachia guide also recommends drainage amendments and avoiding an oversized container.
Keep warmth steady and humidity practical
Aim for normal warm indoor conditions, roughly 65 to 80°F (18 to 27°C), and avoid cold drafts, air-conditioner blasts, and contact with cold window glass. UConn Extension reports best growth around 65 to 75°F and warns against low temperatures; NC State Extension also advises protection from cold drafts. A brief cooler night may not ruin a mature plant, but repeated chill or sudden temperature swings can trigger drooping and lower-leaf loss. Move it away from exterior doors and heating or cooling vents before assuming a fertilizer or watering problem.
Dieffenbachia appreciates humidity, especially when a heated room dries quickly, but it does not require a tropical greenhouse to survive. If leaf edges stay crisp despite correct watering and a stable location, group plants or run a room humidifier and check the humidity with a meter. Misting is temporary and may leave water on foliage without raising room humidity for long; avoid leaving leaves wet in cool, still air. A humidifier is more predictable than a tray for changing the room’s conditions, while no added humidity is needed if new growth looks healthy.
Feed only while it is actively growing
During spring and summer, feed a plant that is producing new leaves with a balanced liquid houseplant fertilizer at the label’s conservative rate, or about half strength if the label allows dilution. Apply it to already-moist soil rather than dry roots. UConn Extension suggests feeding complete fertilizer every four to six weeks during active growth, while the Gardener’s Supply Company plant-care guide likewise recommends reducing feeding in winter.
Skip or sharply reduce fertilizer when the plant has stopped growing, is recovering from root trouble, or sits in low light. Extra feeding will not correct pale leaves caused by darkness or roots damaged by saturated soil. If white crust builds up on the mix or leaf tips brown after repeated feeding, pause fertilizer and flush the mix thoroughly with water, letting it drain completely. Resume at a lower rate only after new growth appears.
Prune tall canes without losing useful cuttings
Remove yellow or damaged leaves with clean pruners, cutting near the leaf stalk without nicking the main cane. It is normal for the oldest leaves to disappear from the bottom as the plant grows upward, so do not strip healthy leaves just to force a fuller silhouette. Wipe dust from the remaining leaves with a damp cloth; clean leaf surfaces catch more light and make it easier to spot pests early.
If the plant is leaning or has become too tall for its spot, shorten the cane in spring or early summer when growth is active. Choose the height you want and cut above a visible cane node; buds below the cut may produce new shoots, though the timing and fullness vary. Keep the rooted base rather than discarding it, and consider using the removed top as a cutting. Wear gloves and protect your eyes while pruning, then wipe sap from the work surface and clean the tool before using it on another plant.
Repot when the roots or mix tell you to
There is no need to repot every year just because the calendar says so. Check the root ball when roots circle densely around the outside, emerge from drainage holes, or fill so much of the pot that water races through without wetting the mix. A plant that dries unusually fast despite moderate light may also have outgrown its container; compare that pattern over several waterings before moving it. Many plants need a new pot every couple of years, but growth rate and pot size are better guides than a fixed schedule.
Spring is a convenient time because fresh growth can help the plant settle, but root rot or a broken pot requires action whenever it occurs. Slide the plant out carefully, loosen only the soil that releases easily, trim away black or mushy roots with clean pruners, and repot healthy roots in fresh, airy mix. Keep the new pot only slightly larger and water enough to settle the soil without leaving the container standing in a tray of water. If the cane is top-heavy, use a stable cachepot or a stake rather than burying the stem deeper.
Propagate from a healthy plant
Spring and early summer offer warmth and active growth, but a healthy cane can root at other times if you can provide steady warmth and bright indirect light. Choose between a leafy tip cutting, a bare cane section, and division of an already multi-stemmed plant. Use a clean sharp blade and label the top end of bare sections before cutting; keeping their original orientation reduces guesswork when you plant them. Because the cut surfaces release irritating sap, prepare the work area first and keep tools, water jars, and prunings out of reach of children and animals.
Root a tip cutting
Put on gloves, then cut a healthy leafy top just below a cane node. Keep at least one or two nodes on the portion that will be rooted, remove leaves that would sit under the soil or water, and let the cut surface dry briefly while you prepare a small pot of damp, airy mix. Set the lower node into the mix; firm it just enough to hold the cutting upright. A stake can steady a top-heavy piece while new roots form.
Keep the mix lightly moist, not saturated, and place the cutting in warm filtered light. If rooting in water, submerge the node but keep the leaves above the waterline, refresh the water when it becomes cloudy, and transfer the cutting once it has several roots rather than waiting for a tangled mass. Rooting takes weeks, and a cutting may pause after planting as it adjusts. New leaf growth is a better sign of establishment than a calendar estimate.
Start cane sections with a node
A bare cane can produce more than one plant if each piece has a growth node. Cut the stem into sections several inches long, making sure every piece includes at least one visible node; a smooth internode without a bud cannot make a new shoot. UConn Extension describes using short sections with a lateral bud and rooting them in a suitable medium, while the RHS propagation notes recommend stem sections with a growth bud laid on compost in warm conditions.
Set sections horizontally on damp perlite-rich mix with the node facing upward, then cover only part of the cane so it stays in contact with the medium without being buried in a soggy pot. Keep the container warm and evenly but lightly moist. Check occasionally for firm tissue and roots; discard sections that turn soft or smell rotten. Do not keep adding water to compensate for slow rooting, since too much moisture can rot an unrooted cane before it has a chance to grow.
Divide only a plant with separate rooted shoots
Division is appropriate when the pot contains distinct shoots with their own roots, not when a single cane is simply tall. Remove the plant from its pot during repotting and gently separate the rooted sections by hand; use a sterile blade only where roots or rhizomes are joined and cannot be eased apart. Each division needs both a healthy shoot and enough roots to support it. Pot each piece in a snug container of fresh mix, water once to settle it, then keep it in the same warm, indirect light as the parent.
Diagnose changes by their pattern
One symptom rarely identifies one cause. First note which leaves are affected, whether the soil is wet or dry, where the plant sits, and whether the cane feels firm. Change one condition at a time so you can tell whether the plant responds; a sudden series of moves, waterings, and fertilizer doses can make diagnosis harder.
Yellow leaves and drooping: check moisture before watering
One old bottom leaf yellowing while the crown continues to push out healthy leaves is usually normal turnover. Several leaves yellowing together, especially with a drooping crown, call for a closer look at the mix. If the pot is heavy and soil is still wet below the surface, suspect overwatering, a blocked drainage hole, or a pot that is too large. Let the mix dry toward the normal watering point and make sure water can leave the pot; if the stem base is soft or the roots are black and mushy, remove the damaged tissue and repot healthy portions in fresh mix.
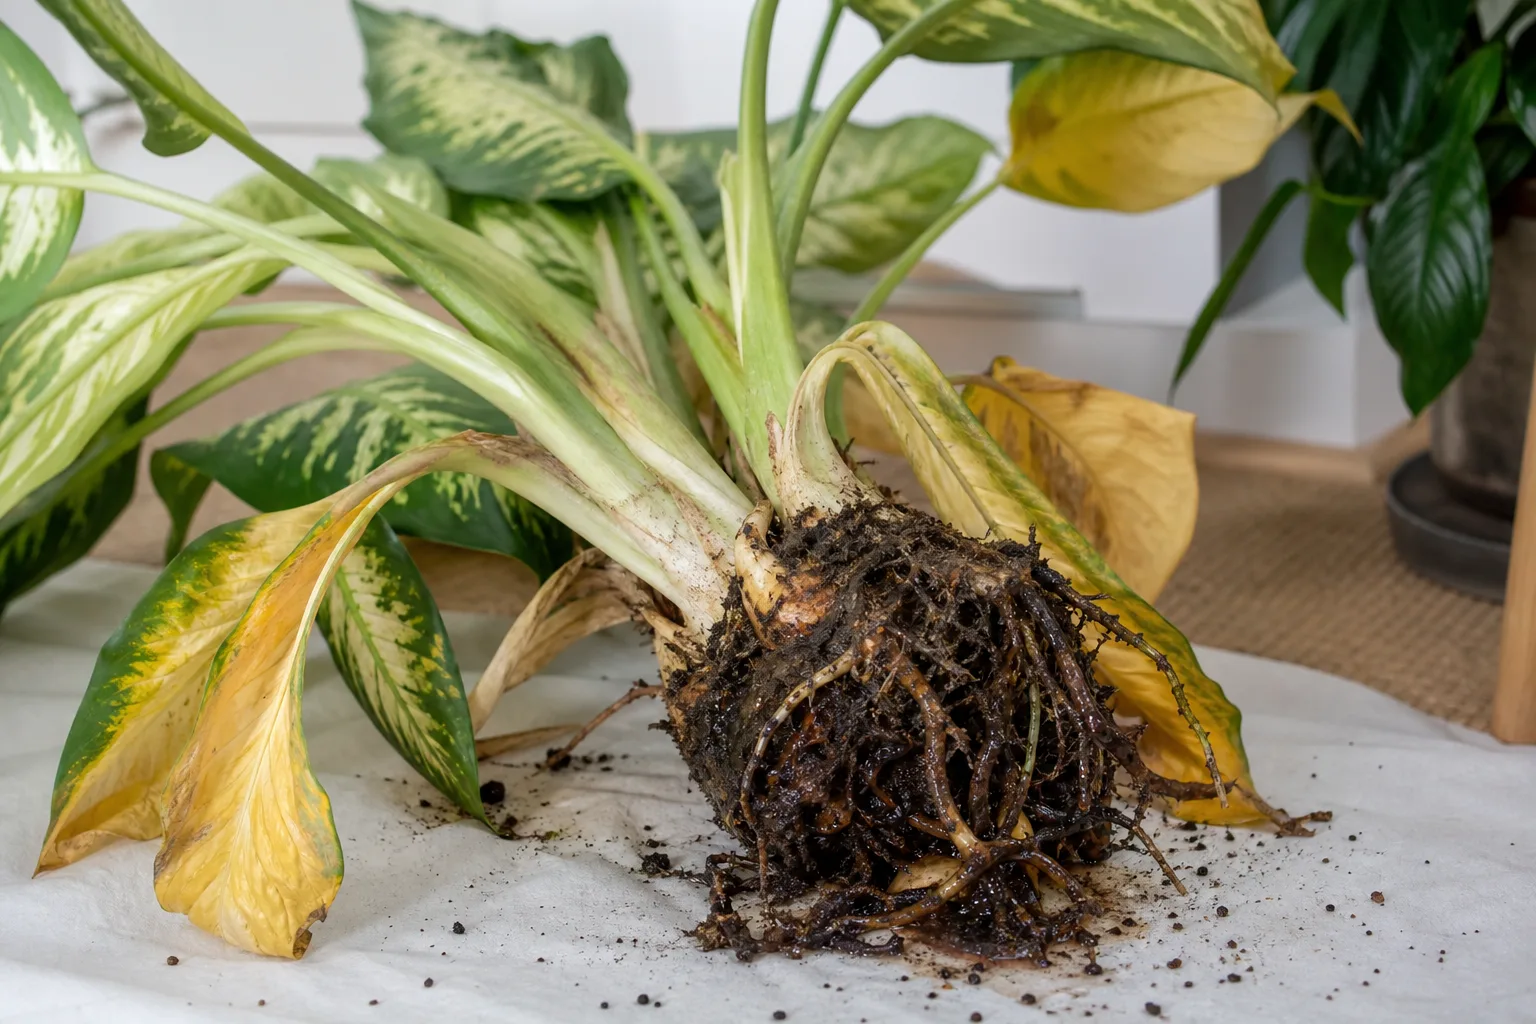
If the root ball is dry, very light, or pulling away from the pot, water it slowly and thoroughly, then drain it. Drooping in wet soil is not a signal to add more water: damaged roots cannot take up moisture normally, so the plant can wilt while the mix remains soaked. Cold drafts can also cause a sudden slump or leaf drop, so check recent changes in temperature and placement before treating every wilt as a watering error.
Brown tips, faded color, and leggy stems
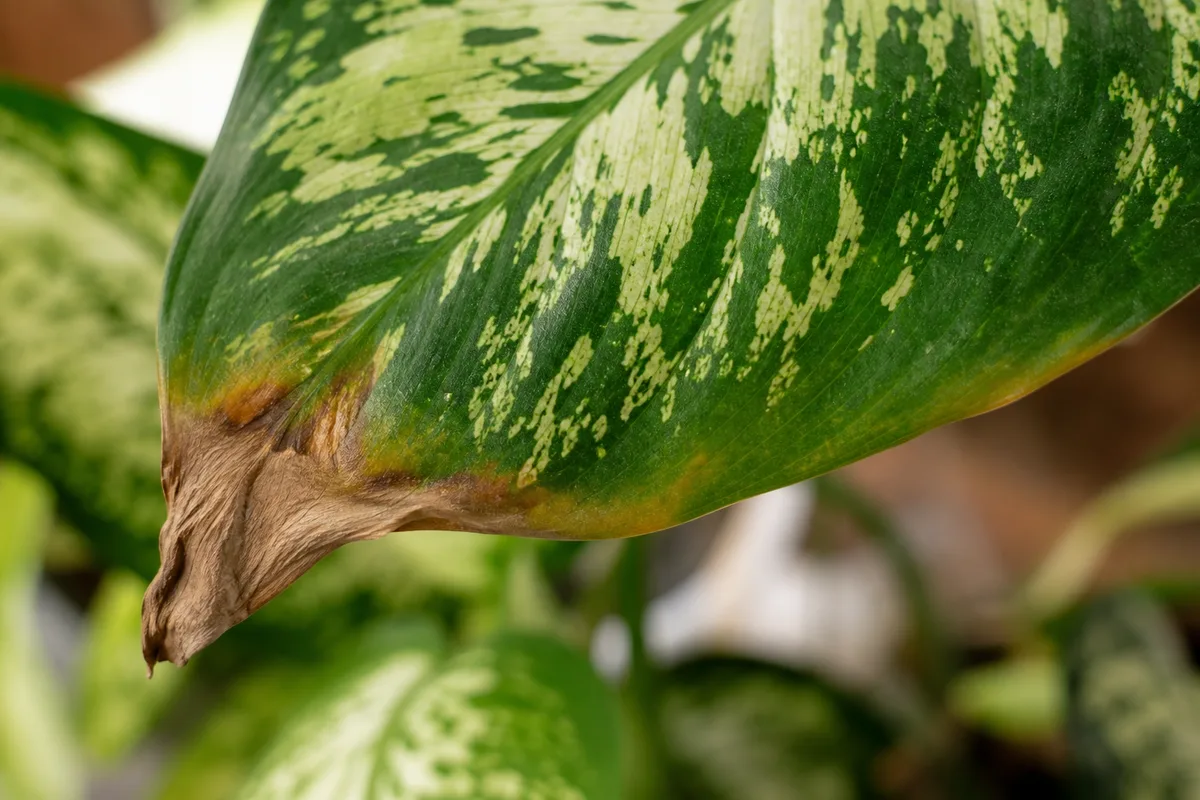
Crispy brown edges can follow a dry spell, low humidity, direct sun, or fertilizer salts. Look at where the damage starts: bleached, dry patches on the window side suggest sun scorch; brittle margins after the pot became very dry point to moisture stress; crust on the soil plus tip burn makes excess fertilizer more plausible. Trim only the dead portion of a leaf if its outline bothers you; the brown tissue will not turn green again. Then correct the underlying condition instead of repeatedly removing leaves.
Leggy growth and reduced variegation usually mean the plant needs more usable light, particularly if the cane leans toward a window. Increase light gradually rather than moving it from a dark room straight into midday sun. A plant that is both leggy and wet may have two problems: improve drainage and watering first, then reassess the new growth over the next several weeks. Older leaves do not regain their pattern, so judge changes by the leaves the plant produces next.
Pests, leaf spots, and soft stems
Inspect leaf undersides and the cane joints when growth looks mottled, sticky, or unusually dull. Fine webbing and pale stippling point toward spider mites; cottony clusters suggest mealybugs; small fixed bumps can be scale. Isolate the plant, rinse foliage where practical, and wipe visible pests away. For a persistent infestation, use an insecticidal soap labeled for indoor ornamental plants and follow its directions exactly, including repeat timing and any precautions for people and pets. A test spray on one leaf can reveal whether the cultivar reacts badly.
Spreading water-soaked spots, a foul smell, or a cane that softens at soil level suggests a disease problem rather than ordinary leaf aging. Remove affected leaves with a clean tool, keep foliage dry overnight, provide airflow, and avoid splashing water from one plant to another. Root rot is usually encouraged by persistently wet media, while bacterial soft rot can progress quickly; isolate a plant with a soft stem and save firm, healthy cuttings only if handling can be done safely. For an uncertain or fast-moving infection, a local extension service can help identify it before you apply a treatment.
Handle sap and plant parts safely
Treat every Dieffenbachia as toxic if chewed and irritating if sap reaches skin or eyes. The plant contains needle-like calcium oxalate crystals, and the National Capital Poison Center explains that plant tissue can cause immediate burning and swelling in the mouth; severe exposure may affect swallowing or breathing. The ASPCA’s plant database lists Dieffenbachia as toxic to cats and dogs, with oral irritation, drooling, vomiting, and difficulty swallowing among the signs.
Place the pot where a curious child or chewing pet cannot reach it, and do not leave cuttings rooting in an accessible glass. For pruning or repotting, wear gloves, avoid touching your face, use eye protection if sap could splash, and wash tools and hands when finished. If sap gets on skin, wash it thoroughly with soap and water; if it reaches the eyes, rinse with clean water and seek poison-center or medical guidance. If anyone chews the plant or develops mouth swelling, call a poison center promptly; for a pet, contact a veterinarian or animal poison service. Trouble breathing or swallowing needs emergency care. In the United States, Poison Control is available at 1-800-222-1222; the ASPCA lists 888-426-4435 for animal poison guidance.
Grow it outdoors only in reliably warm weather
In frost-free tropical or subtropical climates, Dieffenbachia can grow outdoors in warm filtered shade, sheltered from harsh afternoon sun and strong wind. For most gardeners in temperate climates, treat it as a houseplant and use a shaded patio only during reliably warm weather. Wait until nights are consistently warm before moving it out, acclimate it over several days, and bring it back inside well before cold nights; a sudden move into direct summer sun can scorch leaves as readily as a cold snap can damage them. The RHS rates it H1A for UK conditions, meaning it should be kept under glass year-round at temperatures above 15°C rather than planted outdoors through a cool season.
A seasonal check is more useful than an arbitrary monthly care routine. As days shorten, expect slower growth, check soil before watering, and pause routine feeding until active growth returns. In spring, inspect for crowded roots, prune a leggy cane if needed, and restart fertilizer only when new leaves appear. These small seasonal adjustments prevent a winter plant from being treated as if it were still growing at midsummer speed.
Conclusion
Dieffenbachia seguine is easiest to keep attractive when its light, water, and pot size work together: give it bright filtered light, let the upper mix dry before watering thoroughly, and keep the roots in a draining container. Use the plant’s new growth and the condition of its cane and roots to decide when to prune, repot, or propagate; do not let a weekly schedule overrule what the pot is telling you.
The one rule to keep constant is safe handling. Keep the plant and its cuttings out of reach, wear gloves when you work with its sap, and contact poison control or a veterinarian if it is chewed. With those precautions and a stable warm spot, the plant can keep producing its patterned leaves for years without a fussy routine.



