How to Grow and Care for Dieffenbachia
Learn dieffenbachia care from light and watering to pruning, propagation, pet safety, and fixes for yellow leaves, drooping, pests, and root rot.
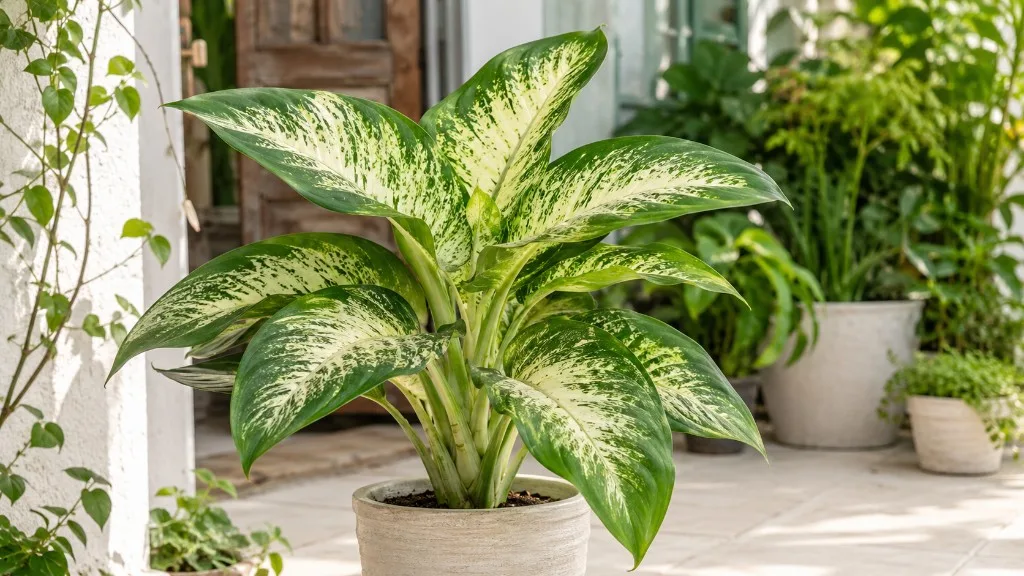
Dieffenbachia, also called dumb cane, earns its place as a houseplant through sheer visual impact: broad leaves, upright canes, and variegation in green, cream, yellow, or white. It is forgiving about light compared with many tropical plants, but it is not forgiving of a pot that stays cold and wet. The most reliable routine is simple: give it filtered light, use an airy mix, water when the upper root zone has dried, and let excess water drain completely.
There is one decision to make before you bring it home. Dieffenbachia sap and plant tissue contain irritating calcium oxalates, and the ASPCA lists dieffenbachia as toxic to cats and dogs. If a child or pet can reach and chew a large floor plant, choose a different plant or put this one behind a genuinely inaccessible barrier. Care is easy; safe placement is non-negotiable.
Dieffenbachia Care at a Glance
Use this table as a starting point, then adjust to the pot, season, window, and cultivar. A plant in a small plastic nursery pot near a bright window may need water much sooner than a large plant in a dim room, so a calendar is a poor substitute for checking the soil.
| Care factor | Practical target | What to watch |
|---|---|---|
| Light | Bright, indirect or filtered light; partial shade outdoors | Harsh direct sun scorches; low light stretches growth |
| Water | Water thoroughly when the top 1–2 inches of mix are dry | Wet soil plus droop can mean damaged roots |
| Soil | Fertile, airy, well-drained houseplant mix | Compaction keeps roots short of oxygen |
| Temperature | About 60–75°F; avoid cold drafts | Chilling is more damaging when the mix is wet |
| Humidity | Average home humidity is workable; moderate humidity is helpful | Humidity cannot compensate for dim light or poor drainage |
| Fertilizer | Diluted foliage fertilizer during active growth | Skip feeding a dry, recently repotted, or sick plant |
| Repotting | One pot size larger when roots or mix require it | Oversized pots stay wet longer |
| Safety | Keep away from children and pets; wear gloves for cuts | Wash hands after handling sap |
What Dieffenbachia Is—and Whether It Fits Your Home
Dieffenbachia is a broadleaf evergreen perennial in the arum family, Araceae, native to tropical parts of Central and South America. The NC State Extension Plant Toolbox describes Dieffenbachia seguine as an erect, sparsely branched plant that can reach roughly 3–8 feet outdoors or in ideal interiorscape conditions, although compact cultivars sold for homes may remain closer to 12–36 inches. Plants previously sold under names such as D. amoena, D. maculata, and D. picta are now often treated within D. seguine, so an older nursery label does not necessarily mean you have a different-care plant.
The houseplant is grown for foliage, not flowers. It may produce a small spadix and spathe when mature and well lit, but indoor blooms are uncommon and not the reason to change a good foliage-care routine. Lower leaves also disappear naturally as a cane elongates; a bare lower stem is not automatically a disease.
Dieffenbachia is a good fit if you want a large, architectural plant and can provide a stable warm spot with bright filtered light. It is a poor fit for a reachable windowsill in a home with a leaf-chewing cat, dog, bird, rabbit, or toddler. Put safety first, then optimize the plant’s growing conditions.
Light: Bright, Filtered, and Even
Give dieffenbachia bright indirect light rather than a dark corner or hours of hard midday sun. An unobstructed east-facing window is often an easy starting point. Near a south- or west-facing window, use a sheer curtain or place the plant far enough back that direct rays do not heat and bleach the leaves.
Variegated cultivars need more light than mostly green ones to maintain strong contrast and compact growth. That does not mean full sun. Pale sections contain less green tissue and can scorch first, leaving tan, papery patches on the window-facing side. Green-leafed forms may tolerate lower light, but they will grow more slowly and can lean toward the nearest window.
Rotate the pot a quarter turn every week or two. This is not cosmetic busywork: large leaves intercept light unevenly, and a one-sided light source encourages a leaning cane and a lopsided crown. If growth is still stretched, move the plant closer to diffuse light or add a grow light; do not solve slow growth by adding fertilizer to a plant that lacks enough energy to use it.
A healthy variegated dieffenbachia shows why filtered light matters: enough brightness to support patterned leaves, without harsh sun on the foliage.
Watering: Use the Soil-Check Rule
Water dieffenbachia when the upper 1–2 inches of potting mix feel dry, not because it is Tuesday or because another plant nearby needs a drink. Press a finger into the mix, use a wooden skewer in a deep pot, or lift the container after watering and again as it dries. The goal is a root ball that is moist after watering but has enough air between waterings.
When the plant is ready, water slowly over the soil surface until water exits the drainage holes. Let the pot drain fully, then empty the saucer or cachepot. Small sips can leave dry pockets in the root ball, while a full saucer keeps the lowest roots submerged and raises the risk of root rot. If the mix has pulled away from the pot and repels water, water in two passes a few minutes apart so the root ball rehydrates evenly.
Expect the interval to change. Bright summer light, warmth, a small pot, and active growth increase water use; winter light, a large pot, cool glass, and slow growth reduce it. In a dim room, watering more often because leaves droop is especially risky: the plant may be drooping because its roots are oxygen-starved, not because the pot needs another drink.
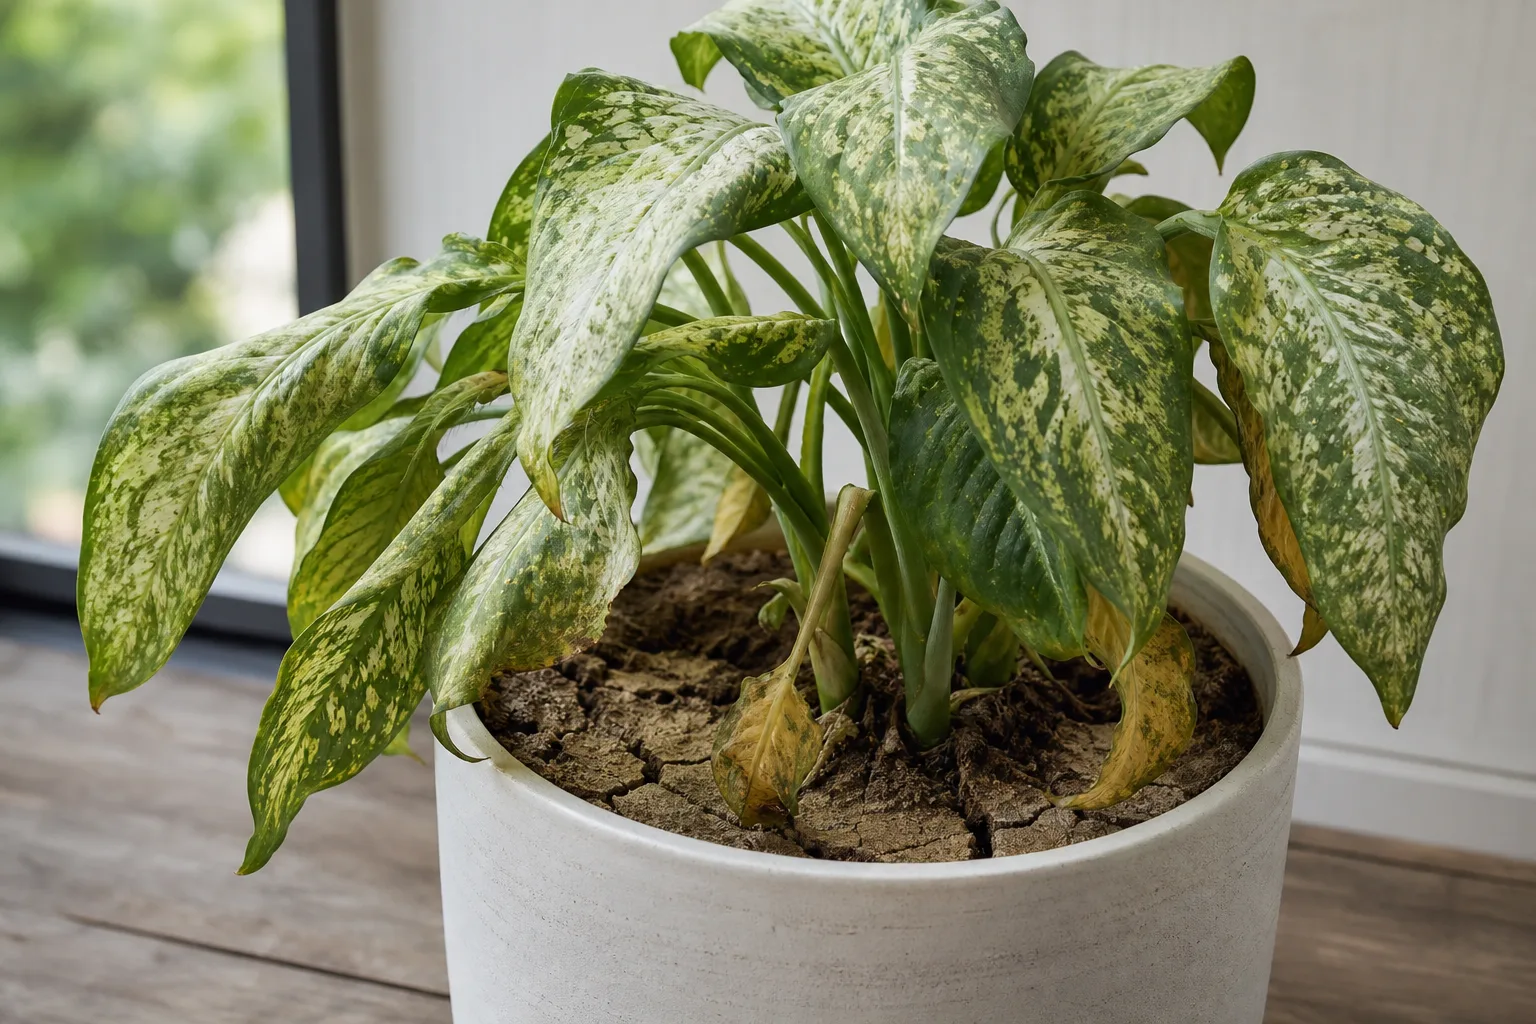
A dry pot and light container point toward thirst; always confirm the soil before watering a drooping dieffenbachia.
Soil, Pots, and Drainage
Use a fertile, well-drained, airy houseplant mix. A quality indoor potting mix amended with perlite, pumice, or fine orchid bark is a practical starting point; the amendment should create air spaces without turning the pot into a dry, unstable pile of chunks. If water sits on the surface or the mix remains wet for many days, refresh it rather than compensating with smaller and smaller drinks.
Choose a container with at least one open drainage hole. A decorative cachepot is fine around a draining nursery pot, but lift the inner pot to water and return it only after runoff has stopped. Pot material changes the drying speed—terracotta dries faster, plastic retains moisture longer—but neither material fixes a mix that is compacted or a pot that is much too large.
When repotting, move up only one size, usually about 1–2 inches wider than the current root ball. Extra soil around a small root system stays wet and can make an apparently careful waterer look like an overwaterer. A drainage hole, appropriate pot size, and porous mix do more for the roots than a layer of gravel trapped at the bottom of a non-draining container.
Temperature, Humidity, and Placement
Keep dieffenbachia warm and steady, roughly 60–75°F according to UF/IFAS Gardening Solutions. Avoid cold drafts, air-conditioning blasts, and a leaf canopy pressed against cold window glass. A short cool spell can show up as sudden droop or leaf drop, especially when the soil is already saturated.
Average household humidity is usually sufficient, although moderate humidity helps broad leaves look cleaner and reduces the speed at which a pot dries. A bright bathroom or kitchen can work well; a humid but dim bathroom cannot. Misting gives a brief film of water on the leaf and does not raise room humidity for long, so use a clean humidifier or improve plant placement if the air is genuinely dry.
Do not crowd the plant against a wall or pack it tightly among other plants. Air movement helps leaves dry after watering and makes pests easier to spot. Clean dust from large leaves with a soft, damp cloth or a gentle rinse when the weather is warm, then allow the foliage to dry with good airflow.
Fertilizer During Active Growth
Feed dieffenbachia when it is actively making new leaves, usually in spring and summer under indoor conditions. A balanced or foliage-oriented liquid fertilizer diluted below full label strength every four to six weeks is a conservative starting point. Established plants in brighter light may use more; a slow-growing plant in a dim office needs less, not more.
Water the plant first if the mix is dry, and do not feed a plant with root rot, fresh repotting damage, or sudden cold stress. Fertilizer salts can burn already compromised roots. UF/IFAS notes that curled leaves with brown edges can follow excess fertilizer and recommends flushing accumulated salts with clean water while following the product label.
If you see a white crust on the mix or pot rim, pause fertilizer and flush the container with plain water that can drain freely. New leaves that stay small despite good light and healthy roots may need feeding, but a yellowing plant in wet soil needs an oxygen and root-zone fix first. Fertilizer supports growth; it does not start growth in a plant that is too dark, too cold, or losing roots.
Common Dieffenbachia Varieties and Their Differences
Cultivar choice changes size, pattern, and light tolerance more than it changes the basic care system. ‘Camille’ is compact with a pale center and green margins; ‘Tropic Snow’ has large green leaves with cream or white patterning; ‘Compacta’ stays smaller; and selections such as ‘Tiki’, ‘Exotica’, and ‘Snow Queen’ vary in leaf size and the amount of pale tissue. The NC State profile lists several cultivated forms and confirms that patterns range from cream and white blotches to yellow variegation.
Use the plant’s pattern as a placement clue. A highly variegated dieffenbachia usually needs a brighter position to hold contrast, while a mostly green form can tolerate a little less light. If a patterned plant becomes greener and stretches, improve diffuse light gradually; if pale tissue turns crispy on the window side, reduce direct exposure instead.
Pruning a Tall or Leggy Dieffenbachia
Prune when the plant has lost lower leaves, grown too tall for its space, or leaned into one-sided light. Put on gloves, use clean sharp pruners, and decide whether you want to shorten the main cane, remove a weak side shoot, or simply take off a damaged leaf. Cut the cane just above a healthy node so dormant buds below the cut have a place to produce new growth.
A tall plant does not need to be discarded. Shorten it in stages if several canes are involved, leaving enough healthy stem and foliage for the plant to keep using light while new shoots develop. The leafy top can become a cutting, while the rooted base may push new growth from nodes lower on the cane. Correct the light at the same time or the replacement growth will stretch again.
Always wipe sap from the work area and wash your hands after removing gloves. The NC State Extension profile advises gloves because the plant can cause skin irritation and contact dermatitis. Never prune where a pet can investigate fallen leaves or wet cut surfaces.
Propagating Dieffenbachia Safely
Dieffenbachia is most often propagated from stem cuttings, cane sections, or division. Start with a hydrated, pest-free parent plant during warm active growth. Wear gloves, disinfect the blade between plants, label the top of each cane piece, and keep all cuttings away from children and pets while they root.
For a stem-tip cutting, take a healthy 4–6-inch section with at least one visible node and a few leaves. Remove leaves that would sit in water or under the rooting mix, then root the node in clean water or an airy, lightly moist mix of perlite and potting medium. Bright indirect light and warmth matter more than rooting hormone. If rooted in water, pot it when roots are established rather than leaving it indefinitely; the plant may pause briefly while water-grown roots adjust to soil.
For cane propagation, cut a bare stem into short sections, each with one or more nodes. Lay the pieces horizontally on lightly moist, well-drained medium or plant them upright with the original lower end down. Keep the medium damp enough to support rooting but never saturated, and provide gentle air exchange if you use a clear cover. Rotting cane pieces usually indicate too much water, too little warmth, or a section without a viable node.
Division works when a mature plant has separate rooted shoots that can be eased apart. Unpot it, look for natural divisions with their own roots, and separate them with as little tearing as possible. Pot each division at its previous depth and keep it evenly but lightly moist while it re-establishes. A rootless piece is a cutting, not a division, so give it a node and a propagation medium instead of expecting it to behave like a finished plant.
Repotting Without Creating Root Rot
Repot when roots circle densely, emerge from drainage holes, the mix has collapsed, the plant repeatedly dries unevenly, or the container is unstable under the canopy. Spring or early active growth is easiest, but a plant with confirmed root rot should not wait for a perfect calendar date. Move it into fresh mix as soon as you can safely inspect the root zone.
Slide the plant out while wearing gloves and check the roots before choosing the new pot. Healthy roots are firm and pale to tan; damaged roots are dark, soft, hollow, or easy to pull apart. Trim only dead tissue with a clean tool, keep the crown at the same depth, and use a pot only slightly larger than the remaining root mass. Water once to settle fresh mix, let it drain, and return to moisture checks rather than keeping the new pot constantly wet.
If the plant has very little healthy root left, take a healthy top or cane cutting before the rot travels farther. A backup cutting is not a failure of care; it is a sensible insurance policy for a plant that can regrow from viable nodes.
Growing Dieffenbachia Outdoors and Overwintering
Dieffenbachia can spend warm weather outdoors in bright shade, but it should be acclimated slowly. Move a houseplant first to a sheltered, shaded position, then increase outdoor brightness only if the foliage remains firm and unscorched. Protect the pot from repeated heavy rain, wind, and standing water, and inspect closely for pests before bringing it back inside.
Year-round outdoor culture is limited to frost-free climates and suitable cultivars. In most homes outside those climates, treat dieffenbachia as a container plant that returns indoors before cold nights. A practical rule is to bring it in well before temperatures approach the plant’s lower comfort range, then place it in bright filtered light rather than immediately beside a hot heater.
Local rules matter as well as weather. UF/IFAS says dieffenbachia is no longer recommended by its extension program in Florida because its assessment predicts D. seguine could become invasive in natural areas. Do not plant it into landscapes where local extension guidance flags that risk; keep it contained, and follow local recommendations for disposal and outdoor use.
Common Problems: Diagnose the Root Zone Before the Leaf
Leaf color is a clue, not a diagnosis. Before changing care, check three things: how wet the mix is below the surface, how much light reaches the leaves, and whether the plant has recently moved, been repotted, or been exposed to cold. Make one major change at a time unless the plant is collapsing and needs immediate root-rot intervention.
Yellow or Brown Leaves
One old lower leaf turning yellow and dropping can be normal as a cane grows. Several leaves yellowing together, especially while the mix is wet and the pot feels heavy, points more strongly toward overwatering, poor drainage, cool roots, or root damage. Pause watering and inspect the roots if the plant is loose in the pot, smells sour, or continues to decline after the soil begins to dry.
Yellow leaves with a very dry, light pot suggest the opposite problem: the root ball has been allowed to dry too far or has become hydrophobic. Water thoroughly, let it drain, and monitor new growth rather than expecting damaged leaves to turn green again. Brown, crispy patches on the glass-facing side are more consistent with sun scorch; brown tips after irregular watering or feeding suggest moisture swings or salt stress.
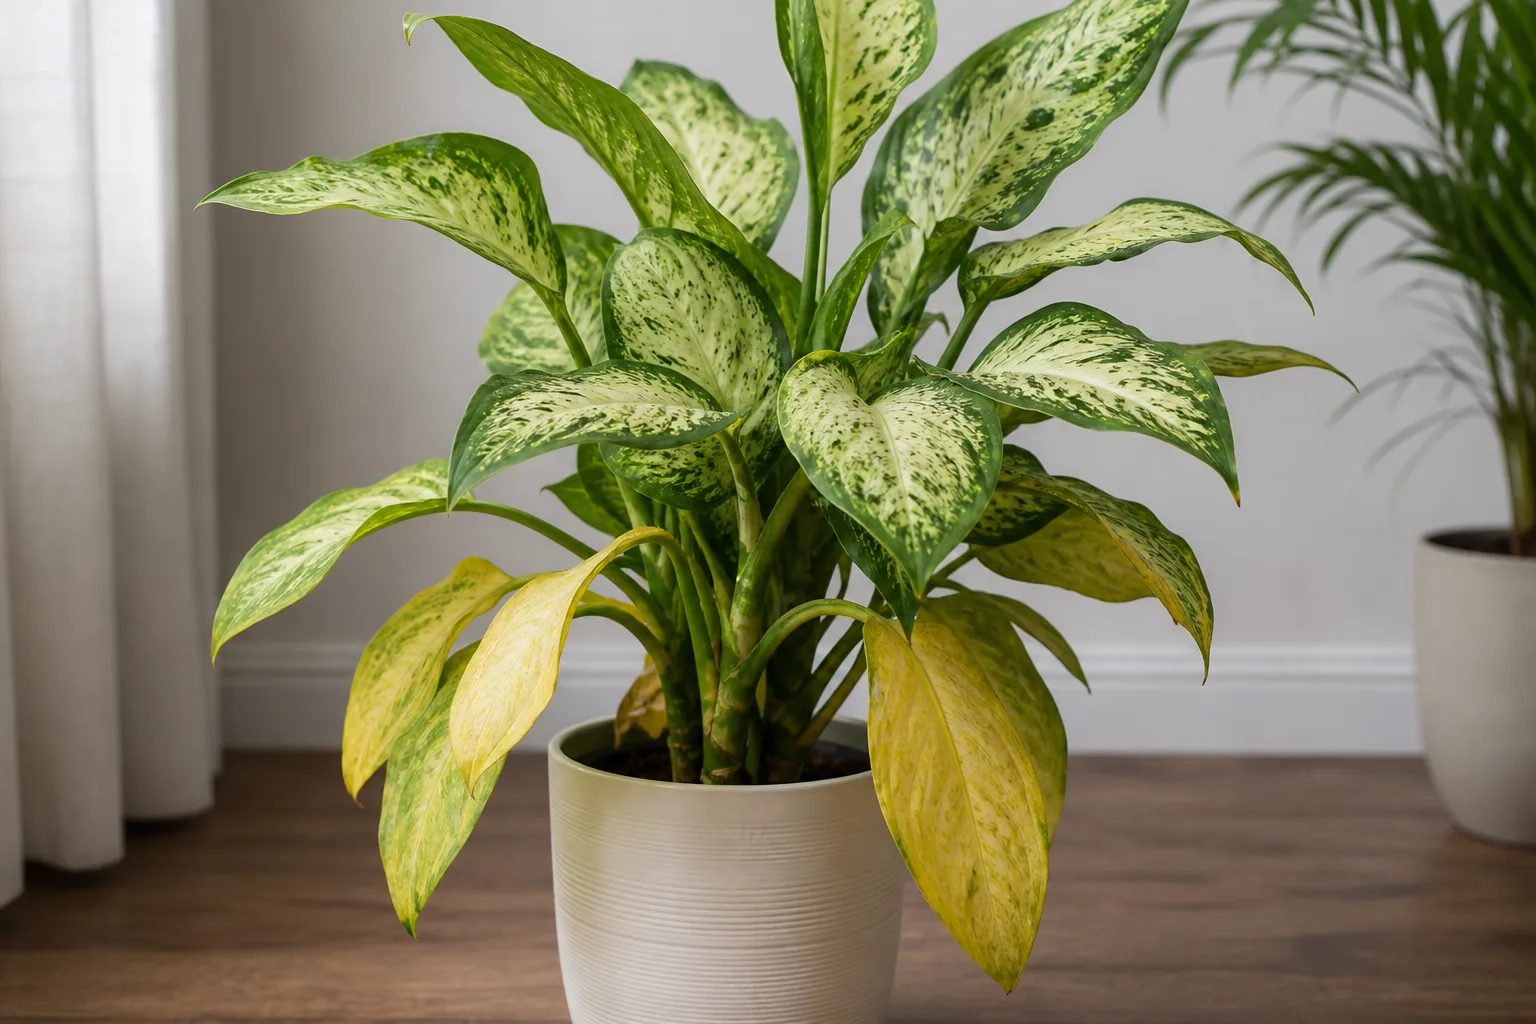
Yellowing leaves need a soil and placement check before you add fertilizer or water again.
Drooping Leaves or Little New Growth
Droop with dry mix and a light pot is a watering problem until proven otherwise. Water deeply, allow drainage, and reassess the plant over the next day. Droop with wet mix is different: it can mean the roots are damaged and cannot move water to the foliage even though the pot is saturated.
Cold drafts can cause sudden droop or lower-leaf loss without the yellowing pattern of normal aging. Low light can also slow growth, reduce variegation, and leave the plant leaning. Move it toward brighter filtered light, correct the temperature, and wait for healthy new growth before increasing fertilizer.
Pests, Fungus Gnats, and Root Rot
Inspect leaf undersides, petiole joints, and the newest growth every time you water. Fine stippling or delicate webbing suggests spider mites; cottony clusters suggest mealybugs; sticky residue and clusters on soft new growth can point to aphids or scale. Isolate an infested plant, rinse or wipe away what you can, and use only a product labeled for the pest and indoor ornamentals. Test any spray on a small section first because broad, textured leaves can mark.
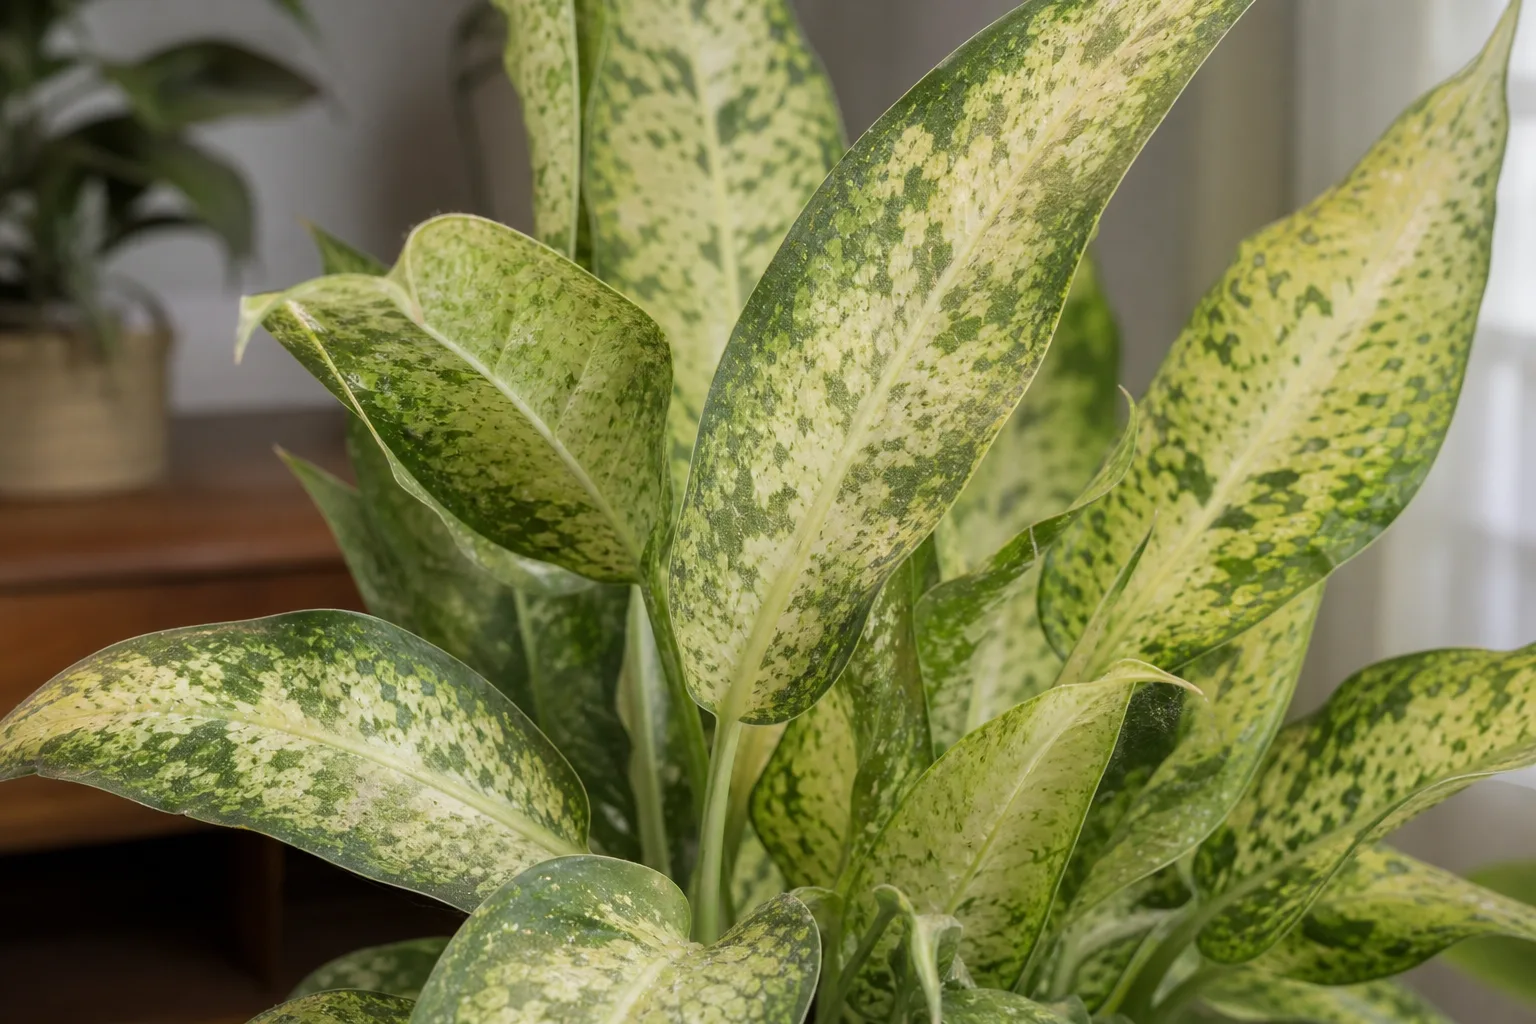
Stippling and fine webbing are reasons to inspect leaf undersides and isolate the plant before mites spread.
Fungus gnats are often a signal that the growing mix stays wet for too long. Adult flies are annoying, but the durable fix is to let the upper mix dry appropriately, improve drainage, and avoid keeping a saucer full of water. Sticky traps can monitor adults; they do not replace a better root-zone routine.
Root rot is confirmed in the roots, not by a yellow leaf alone. Unpot the plant if decline continues in wet soil, then remove soft, dark tissue, clean the container, and repot the surviving roots or cane into fresh airy mix. Keep the reduced root mass in a pot that fits it. If almost no healthy root remains, take cuttings from sound tissue and discard contaminated mix rather than repeatedly watering a failing stump.
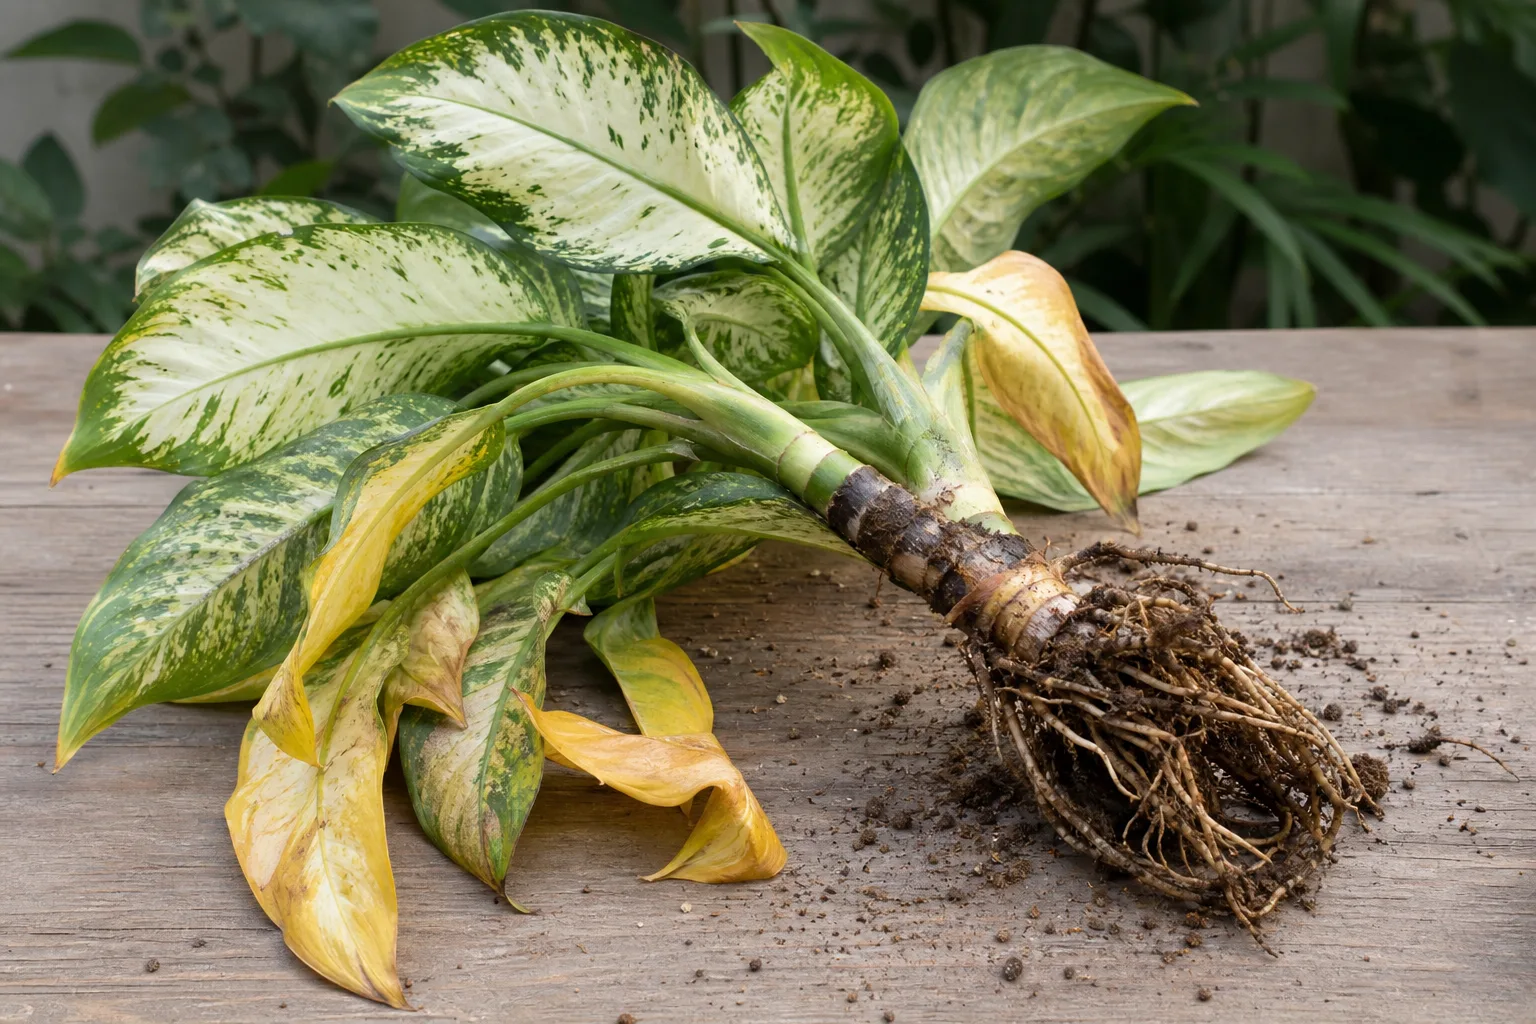
When a dieffenbachia declines in wet soil, inspect the roots instead of treating the leaf color in isolation.
Toxicity and Safe Handling
Treat dieffenbachia as a toxic ornamental around pets and children. The ASPCA’s dieffenbachia listing identifies insoluble calcium oxalates and a proteolytic enzyme as toxic principles for dogs and cats, with clinical signs including oral irritation, intense burning of the mouth, tongue and lips, drooling, vomiting, and difficulty swallowing. Keep the plant, fallen leaves, pruning waste, and propagation cuttings out of reach.
Wear gloves for pruning, repotting, and any work that may release sap. Avoid touching your eyes or mouth while working, wash hands and tools afterward, and clean any sap from a surface before a child or pet can contact it. If a pet chews the plant, contact a veterinarian or ASPCA Animal Poison Control at (888) 426-4435 promptly; if a child ingests plant material or sap reaches the eyes or causes trouble breathing or swallowing, contact local poison-control or emergency medical services.
“Toxic” is a placement decision, not a reason to panic over routine care. If you cannot reliably prevent access, choose a pet-safer plant instead. If you can keep it inaccessible, gloves and hand washing make pruning and repotting manageable.
Conclusion
Good dieffenbachia care comes down to balancing light above the leaves with air around the roots. Give a variegated plant a bright filtered window, use a draining pot with a loose mix, soak only when the upper soil has dried, and reduce watering when winter light or cool temperatures slow the plant.
When something goes wrong, do not guess from the leaf alone. Pair yellowing, droop, brown tips, or slow growth with the soil’s moisture, the plant’s light, the temperature, and the condition of the roots. Prune and propagate with gloves, repot only as needed, and treat toxicity and outdoor containment as part of dieffenbachia care—not as footnotes.



