How to Grow Heliconia Indoors: Care Guide
Heliconia can grow indoors, but species size and light matter. Find the best variety, potting mix, watering rhythm, and steps for dividing and moving it outdoors.
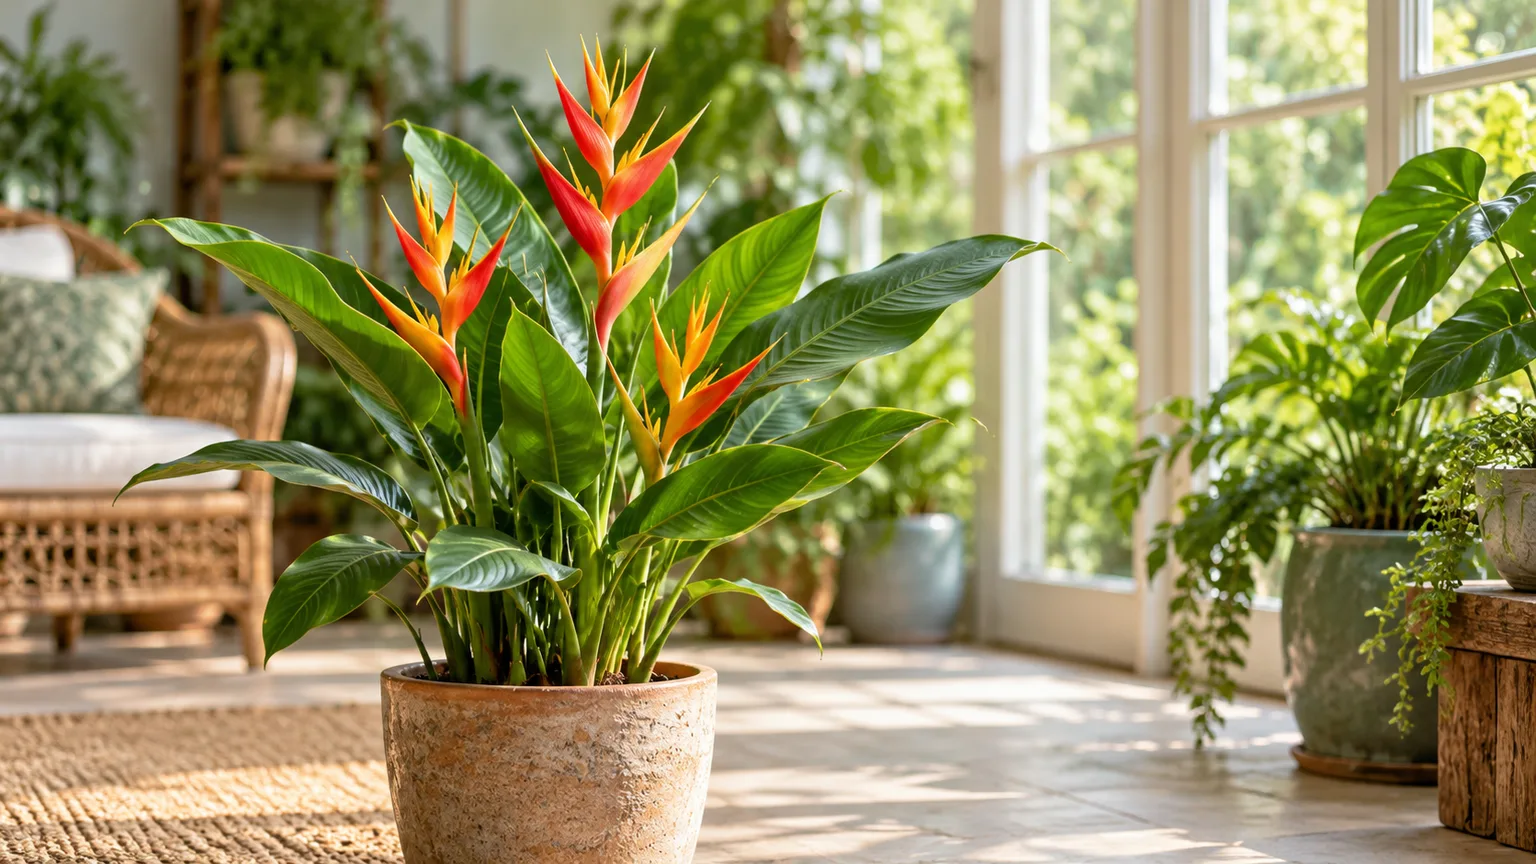
Heliconia can grow indoors, but the plant you buy matters as much as the care you give it. A compact parrot heliconia may suit a bright, warm room; a large lobster-claw species can outgrow an ordinary home and is better treated as a conservatory plant. Before buying, check the mature height and spread of the named cultivar, then make sure you can provide warmth, strong light, and a pot that will not become unstable.
Heliconia is a tropical, rhizomatous perennial. Its upright “stems” are pseudostems made from overlapping leaf bases, and its vivid display comes from colorful bracts surrounding small flowers. Each mature shoot can produce one terminal inflorescence; once that flowering shoot is spent, it eventually dies back while new shoots emerge from the underground rhizome. That cycle is normal, not a sign that the whole plant is failing. University of Wisconsin–Madison Extension describes the plant’s growth and flowering structure.
Is Heliconia a Good Indoor Plant?
It can be, if you treat it as a demanding tropical container plant rather than a carefree foliage plant. Indoor success depends on four things working together: a variety with a manageable mature size, a very bright position, warm conditions through winter, and a root zone that stays evenly moist while draining freely. A plant can survive in less-than-ideal conditions for a while, but it may stretch, shed leaves, or fail to flower.
The trade-off is space and light. Heliconias often form clumps from spreading rhizomes, and some species reach several feet or much more outdoors. If your only bright window is small, the room runs cool, or you need a compact plant for a shelf, choose another tropical species. If you have a warm sunroom, large bright window, or room for a grow light and a stable floor pot, a compact Heliconia can be a striking long-term project. UF/IFAS Extension notes that some Heliconia species suit containers, while others spread quickly and need room.
Choose a Heliconia That Fits Your Space
Look for a compact selection of Heliconia psittacorum, often sold as parrot’s flower or parrot heliconia. H. psittacorum is one of the more realistic choices for a home because selected cultivars can stay relatively small and tolerate bright indirect light. A compact cultivar such as ‘Hawaii’ is listed at about 50 cm tall and wide by BBC Gardeners’ World. Still, do not assume every plant sold under the species name will remain that small: UF/IFAS lists H. psittacorum at up to about 5 feet and notes that hybrids vary.
Ask the nursery or seller for the cultivar name and expected mature size, not just the current pot size. A young rhizome can look tidy in a small container while the mature clump becomes broad and tall. If the tag says H. rostrata (hanging lobster claw), expect a much larger plant; it is commonly grown under glass, and its heavy leaves and pendant flower clusters need more headroom and space than most living rooms provide. UF/IFAS lists many H. stricta cultivars under 3 feet, but the name alone is not a guarantee of a compact indoor habit (UF/IFAS fact sheet).
Choose a plant with firm pseudostems, evenly colored leaves, and no fine webbing, cottony clusters, or sticky residue. Look at the undersides of leaves and at the soil line. A clean specimen is especially important if it will share a room with other houseplants, because spider mites and mealybugs are easier to manage before an infestation spreads.
Give It Bright, Reliable Light
Place Heliconia close to the brightest window you have, usually a large east-, south-, or west-facing window depending on hemisphere, glazing, and outdoor shade. “Bright indirect light” should mean a position where the plant receives strong daylight for much of the day, not a dim corner several feet back from glass. Rotate the pot a quarter turn every week or two so the leaves do not all lean toward one side.
Watch the plant as well as the clock. Long gaps between leaves, thin growth, and leaning are signs that the plant is reaching for more light. Faded or scorched patches on the window-facing leaves suggest that sudden direct sun is too intense; move it slightly back or filter the hottest midday rays, then reintroduce brighter light gradually. Heliconia varies by species and cultivar, so a plant that has been grown in shade at a nursery should not be placed in full, hot sun on its first day home.
In winter, shorter days and cloudier weather can reduce light enough to stop active growth and flowering. A full-spectrum LED grow light can help if the window is weak. Suspend it overhead and follow the maker’s distance guidance; start with a consistent daily schedule, then adjust based on how the plant responds rather than moving the lamp close enough to heat the leaves. University of Minnesota Extension notes that supplemental lighting and rotating plants can help houseplants through winter. More light cannot compensate for a cold room or saturated soil, so address those conditions too.
Keep the Room Warm and Humid
Heliconia is tropical and does not appreciate cold drafts, chilled window glass, air-conditioning blasts, or abrupt temperature swings. Keep it in a warm room through winter and away from exterior doors that open frequently. If the room is cool enough that you reach for a sweater, it may also be too cool for active Heliconia growth. Warmth matters most when the plant is producing new leaves or flower spikes.
The minimum temperature depends on the species. Gardeners’ World recommends keeping H. rostrata above about 15°C (59°F) in winter and notes that H. psittacorum can tolerate temperatures down to about 13°C (55°F). Treat those as lower limits, not ideal growing targets, and use the more conservative threshold if the species is unknown. A stable warm room gives the plant a better chance to keep its leaves and grow than repeated exposure to chilly nights followed by heating.
Heliconia also prefers humid air. In a dry home, a room humidifier is the most controllable way to raise humidity around a large plant. A pebble tray may slightly humidify the air immediately around the foliage, but it cannot correct a very dry room; keep the pot above the waterline and do not let drainage holes sit in water. Leave a little space around the leaves for air movement. Brown margins can point to dry air, but they can also follow inconsistent watering, root damage, or fertilizer salts, so check more than humidity before changing the setup.
Water for Steady Moisture, Not Soggy Roots
Heliconia wants consistent moisture during active growth, not a rigid watering schedule. Check the pot every few days in warm, bright weather by feeling the upper inch of mix and lifting the container to judge its weight. When the surface is just beginning to dry but the mix below still feels slightly cool, water slowly and thoroughly until excess runs from the drainage holes. Let the pot finish draining, then empty the saucer or cachepot.
In a bright, warm room, a leafy Heliconia may use water quickly. In winter, after growth slows or light drops, the same pot can remain damp much longer. If you water by calendar alone, you can keep the roots wet during the very season when the plant is using less. Conversely, letting the entire root ball dry out can cause crisp edges and stress. The goal is a moist, aerated root zone; both UF/IFAS and Gardeners’ World describe Heliconia as needing fertile, moist soil that still drains freely.
Use room-temperature water if possible, and make sure the pot drains freely from more than one hole. Never leave the container standing in runoff. If water beads on the surface or shoots down the sides without wetting the center, the mix may have become hydrophobic or tightly packed. Re-wet it slowly in several passes or refresh the mix at the next suitable repotting. If it stays heavy and wet for days, move on to checking drainage and roots instead of watering again.
Use a Rich, Airy Potting Mix
Use a fertile houseplant mix that retains some moisture but lets excess water escape quickly. Heliconia is not a cactus, so a very gritty, fast-drying blend can force constant watering; dense garden soil or a compacted peat-heavy mix can starve roots of air and keep the rhizome too wet. The useful middle ground is a moisture-holding base with larger particles that create air spaces.
A practical starting blend is two parts quality potting mix to one part fine orchid bark and one part perlite or pumice. If your home is hot and dry, use a little more base mix; if the pot stays wet for too long, add more bark or perlite. This is a starting recipe, not a universal formula: pot material, room temperature, plant size, and watering habits change how quickly a mix dries. The finished mix should clump lightly when squeezed, then fall apart when touched rather than forming a sticky ball.
Do not add a layer of gravel to the bottom of the pot as a substitute for drainage. It reduces the depth of usable mix and does not fix clogged holes or an oversized container. Choose a mix with a stable texture, keep it loose when filling, and set the rhizome at the same depth it was growing before. Gardeners’ World advises moist but free-draining compost for Heliconia, and UF/IFAS likewise emphasizes fertile soil and regular moisture.
Pick a Stable Pot With Drainage
The pot needs at least one clear drainage hole and should be only modestly larger than the root mass. A container that is much wider than the roots holds extra damp mix where the plant cannot use it, raising the risk of poor root health. When the plant is root-bound or top-heavy, move it into a container only about 2–3 inches (5–7.5 cm) wider than the current pot, a conservative houseplant rule also recommended by University of Minnesota Extension.
Stability matters because broad leaves catch air and a mature clump can become top-heavy. A heavier ceramic or terracotta pot may anchor the plant, but terracotta dries more quickly than plastic or glazed ceramic. If you choose a lightweight nursery pot, set it inside a heavier cover pot for stability and lift it out to drain after watering. Never let the inner pot sit in accumulated water inside the cover pot.
There is no universal “12-inch pot” size for Heliconia. Start with the roots you actually have, then upsize as the rhizome fills the container. A pot that is slightly snug is easier to water accurately and move. If roots circle densely, emerge from drainage holes, or the plant loses stability, repot rather than upsizing in anticipation of future growth.
Feed During Active Growth
Feed while the plant is actively making leaves or flower shoots, usually during the brighter, warmer part of the year. Use a complete liquid fertilizer suitable for foliage and flowering plants, following the label rate and interval. Gardeners’ World recommends feeding Heliconia every two to three weeks through the growing season; a dilute application can be easier to manage in containers than a large dose of concentrated fertilizer.
Do not feed a dry root ball, a plant with damaged roots, or one that is sitting in cold, wet mix. Water first if the soil is dry, and pause feeding while growth is stalled or light is low. Fertilizer cannot make an undersized or poorly lit plant bloom, and excess salts can burn roots and leaf edges. If a white crust forms on the mix or pot rim, flush the substrate thoroughly with clean water when drainage is good, and review both fertilizer strength and water quality.
Resume feeding when fresh growth shows that the plant is active again. If your Heliconia remains warm and well lit through winter and keeps growing, it may still use nutrients; if growth has paused, reduce or stop feeding until it resumes. This observation-based approach is more reliable than applying the same dose every month regardless of season.
What It Takes to Get Heliconia to Flower
A Heliconia can grow attractive foliage indoors without flowering. Blooming depends on the plant being mature enough, receiving strong light, staying warm, and having enough root and leaf growth to support an inflorescence. Choose a compact, flowering-size plant if blooms are a priority; a young rhizome or recently divided piece may need time to establish before it has the strength to flower.
Start with light and temperature if your plant has not bloomed. A plant in a dim corner may keep making leaves but fail to initiate flowers. Move it to brighter light gradually and keep it warm through active growth. Then confirm that the rhizome is healthy and the potting mix is not staying cold and saturated. Regular feeding during active growth supports the plant, but extra phosphorus or bone meal is not a shortcut to flowers; the plant still needs suitable light, warmth, and maturity.
Expect flowers according to the variety, not a promised indoor timetable. Some heliconias flower seasonally, and indoor conditions may shift or prevent that cycle. Outdoors, each mature shoot may produce a single terminal inflorescence; indoors, one flower spike is a meaningful success, not a cue that every stem will bloom at once. If foliage is healthy and new shoots keep appearing, continue improving light and warmth before dividing or discarding the plant. Oxford Botanic Garden notes that good light, regular feeding, and a moist environment support flowering in its glasshouse Heliconia.
Prune Finished Stems Without Removing New Growth
Heliconia does not need routine shaping. Remove yellow or badly damaged leaves only when they are no longer useful, cutting close to the base of the leaf stalk without nicking nearby shoots. Wipe dust from broad leaves with a damp cloth so you can inspect them, and avoid polishing products that leave a coating.
The flowering stalk is different from a leaf. Once its bracts and flowers are finished, that particular shoot eventually declines and dies back; the rhizome then sends up new shoots. Wait until the stalk is clearly fading or brown, then cut it near the soil line with clean pruners. Do not cut every green stem simply because its flowers have faded—leaves still feed the rhizome while the plant is recovering. The natural dieback of a spent shoot is described by Wisconsin Horticulture and the University of Oxford Botanic Garden.
Keep spent leaves and stems from piling up in the pot; removing dead material improves airflow and makes pest checks easier. Leave green, firm flowering stems in place until they begin to decline because their leaves still support the rhizome.
Repot and Divide a Crowded Rhizome
Repot when roots crowd the container, the mix collapses or dries unevenly, or the clump becomes too unstable to water well. Spring or the start of active growth is a convenient time because the plant can recover as light and warmth increase. Do not repot only because a calendar says two years have passed; inspect the roots and substrate first. A clump that is healthy and stable can remain slightly snug.
To divide a mature plant, water it the day before so the root ball holds together, then slide it from the pot. Loosen enough mix to see where the rhizomes connect. Separate a section that includes a healthy rhizome, roots, and at least one attached shoot or visible growing point. Pull apart small natural divisions by hand; use a clean sharp knife for thicker rhizomes. Do not cut the whole clump into tiny pieces: each division needs stored energy and a viable growth point. UF/IFAS recommends propagating Heliconia by dividing the rhizome mass, while Gardeners’ World advises replanting rhizomes with a stem attached.
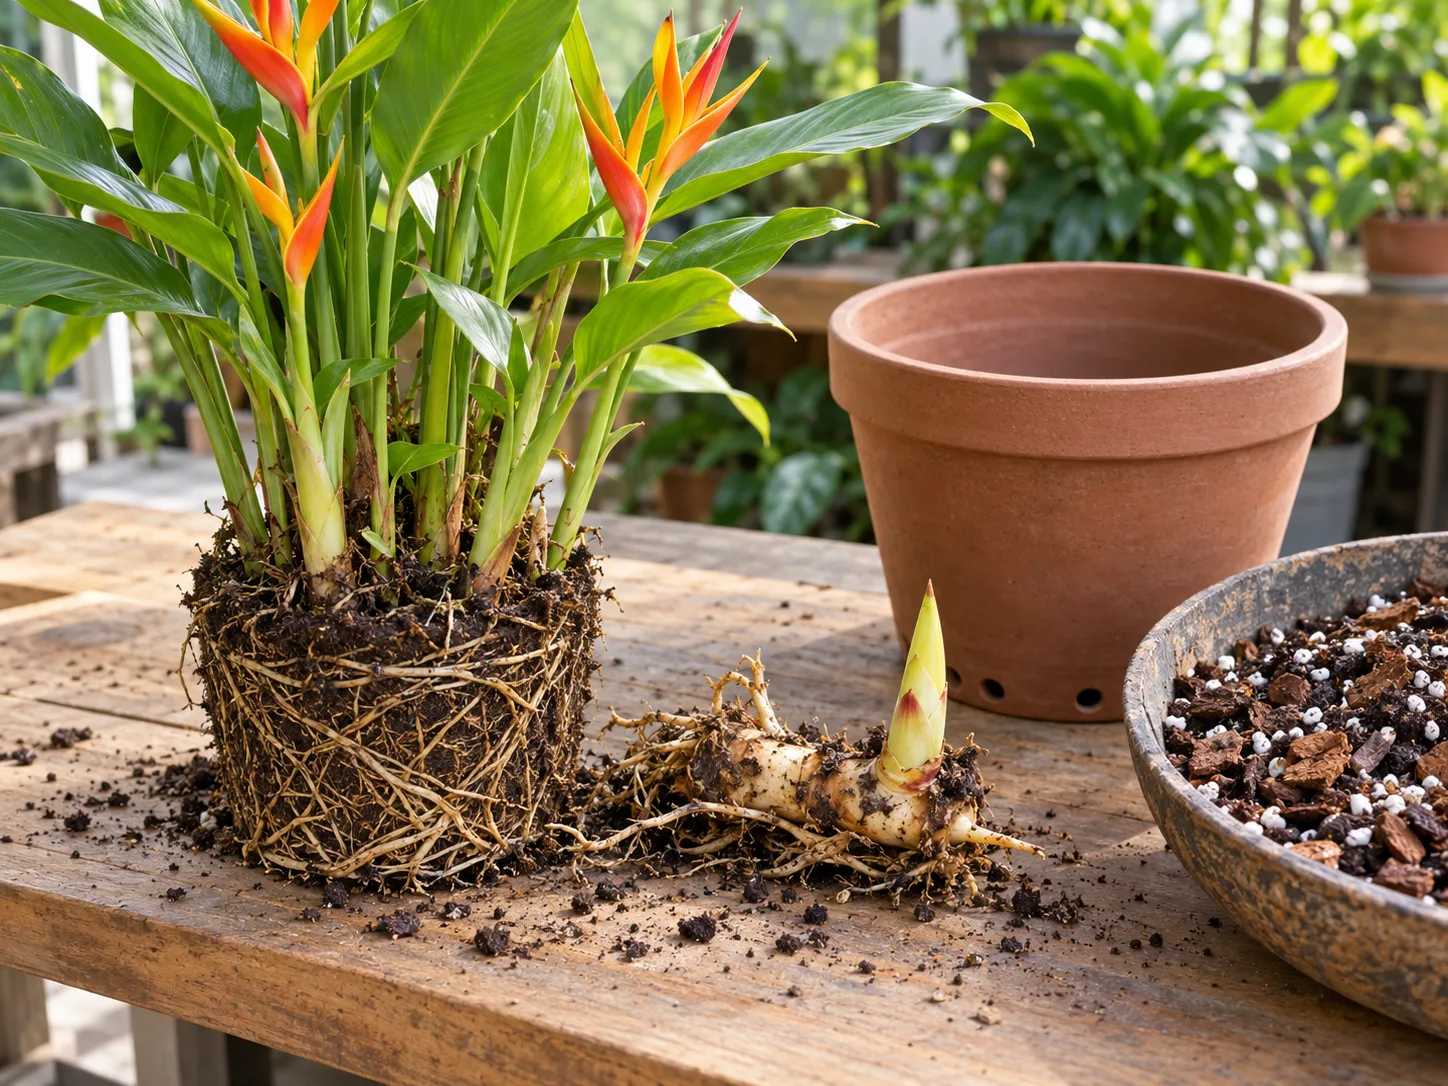
Set each division at its previous soil depth in a pot just large enough to hold the roots. Firm the mix gently so the shoot is supported, water to settle the substrate, and let it drain fully. Keep the new division warm in bright indirect light while it re-establishes; avoid strong direct sun and do not fertilize a plant with damaged roots. A division may pause before producing new leaves, so keep it lightly moist and wait for visible growth instead of digging it up repeatedly to check.
Move the Pot Outdoors in Warm Weather
A summer stay outdoors can provide more light and air movement, but only if nights are warm enough for the variety. Use the more conservative 15°C (59°F) threshold when you do not know the cultivar; the Gardeners’ World guide lists that minimum for H. rostrata, while it lists 13°C (55°F) for H. psittacorum. Put the pot in a sheltered place where it will not be battered by wind or sudden exposure to full afternoon sun.
Acclimate the plant over about one to two weeks. For the first few days, place it outside in bright shade for a short period, then gradually lengthen the stay and give it more light. Bring it back inside if the forecast turns cool. Once adapted, a spot with bright filtered light or gentle morning sun can work, depending on the plant’s previous exposure. Watch for leaf scorch, wind splits, and faster drying; outdoor pots often need more frequent moisture checks than they did indoors.
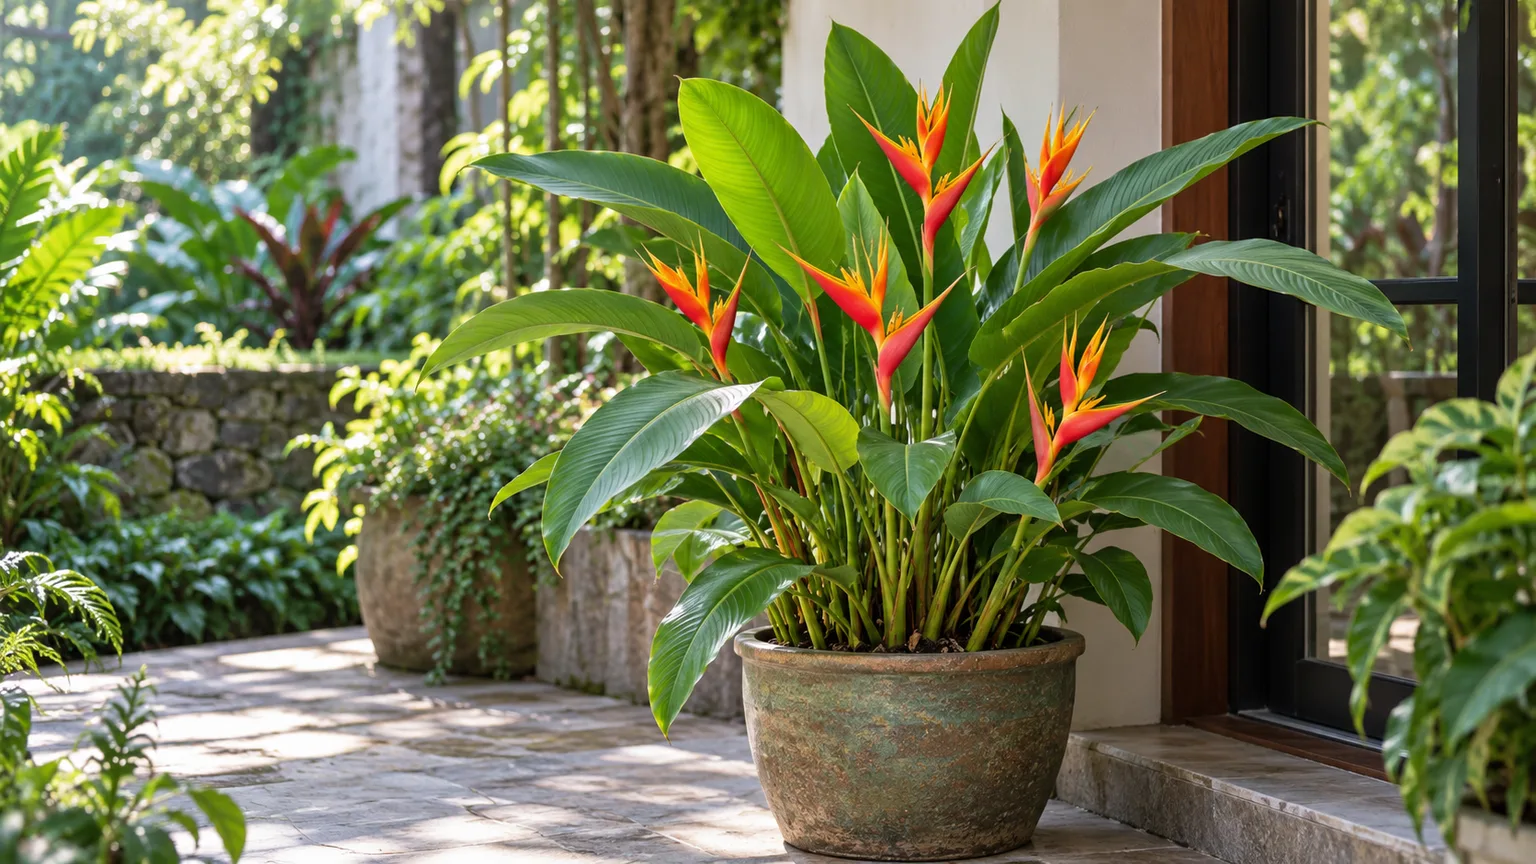
Before moving it outside, check the pot for drainage and make sure it can be lifted safely. A wheeled plant caddy helps with a large container, but do not leave a pot in a tray of rainwater. If you cannot lift the pot back indoors, choose its summer spot with the return trip in mind. A gradual transition protects leaves and reduces stress from the change in light, wind, and humidity.
Bring It Back Inside Before Nights Turn Cool
Move the pot indoors before nighttime temperatures approach the variety’s lower limit. For an unknown Heliconia, use 15°C (59°F) as a cautious threshold rather than waiting for a cold snap; a brief dip may not kill the plant, but cold stress can slow growth and damage leaves. Reduce the outdoor stay over several days if possible, but bring it in immediately when the forecast threatens a cold night.
Inspect both sides of every leaf, the pseudostems, and the soil surface before it joins indoor plants. Look for fine webbing, stippled leaves, scale-like bumps, cottony mealybugs, and tiny insects around new growth. Rinse foliage with a gentle stream of water if the plant can tolerate it, let the pot drain, and isolate it from other houseplants while you monitor it. Avoid dunking a large pot by default: it can waterlog the mix, and it is not a reliable substitute for identifying and treating a pest.
After the move, expect some adjustment. Keep the plant bright and warm, check soil moisture more often, and avoid repotting unless there is a clear problem. If stems remain firm and new growth is healthy, give it time to settle before changing several other conditions.
Troubleshoot Browning, Yellowing, and Weak Growth
A damaged leaf is a clue, not a diagnosis. Before changing several care conditions at once, note which leaves are affected, whether the soil is wet or dry, how long it takes to dry after watering, and whether the plant recently moved or was repotted. Check the undersides of leaves and the rhizome area as well. Indoor leaf symptoms can come from water stress, poor roots, low light, temperature swings, fertilizer salts, or pests, so use the pattern to narrow the cause.
Brown tips and edges
Crisp tips can follow dry air, a root ball that dries too far between waterings, or soluble salts from hard water and fertilizer. Feel the mix before watering and compare the pot’s weight with how it feels just after a thorough watering. If the mix is bone-dry, rehydrate it slowly; if it is damp but tips keep browning, check humidity, drainage, and the fertilizer routine. Trim only the dead tissue if you want a neater edge, leaving a narrow brown margin rather than cutting into green leaf.
If browning follows a move to a sunny window, check for bleached or papery patches on the exposed side; that points more toward sun scorch than dry air. If the tips darken while the pot stays wet, inspect drainage and roots instead of adding more humidity. UC IPM’s houseplant problem guide lists multiple possible causes for leaf yellowing, wilting, and poor root health, which is why the soil and recent changes matter.
Yellow leaves or sudden wilting
One aging lower leaf can yellow as the plant replaces old foliage. Several leaves yellowing together, a soft pseudostem, or a wilted plant in wet soil deserves a root check. Remove the pot from its cover pot and confirm that water is not trapped inside; if the mix smells sour or roots are brown and soft, cut away clearly rotted material with a clean tool and repot into fresh, airy mix. Keep the plant warm while it recovers and water only when the upper mix begins to dry.
A plant that wilts in dry soil may simply need a thorough drink. If the soil is moist and the plant wilts anyway, do not keep watering—the roots may be damaged or the container may be too compacted. Sudden leaf drop after a seasonal move can instead reflect temperature or humidity change. Correct the underlying condition, isolate the plant if pests are present, and allow time for healthy new growth; already-browned tissue will not turn green again.
Check for Spider Mites and Mealybugs
Spider mites are easy to miss on broad leaves until stippling, bronzing, or fine webbing appears. Examine leaf undersides and the growing points with a hand lens. Mealybugs look like small white cottony patches, especially where leaf stalks meet stems; scale insects appear as small fixed bumps and may leave sticky honeydew. These pests are reported on cultivated Heliconia, including glasshouse plants at Oxford Botanic Garden and in the Gardeners’ World guide.
Isolate an infested plant first. Wipe or rinse accessible pests from the foliage, then repeat inspections every few days because eggs or hidden insects may remain. If you use an insecticidal soap, horticultural oil, or other product, choose one labeled for the plant and pest, follow its directions, and test a small leaf area before treating the whole plant. Do not apply products in direct sun or when the plant is heat-stressed. UC IPM recommends inspection and sanitation as part of houseplant pest management; correct identification matters before treatment.
Inspect again before bringing Heliconia in for winter, especially if it spent the summer near other plants. Quarantine it for a short period if you are unsure. Catching a small population before it spreads is simpler than treating a large clump after pests have settled in the leaf folds and new shoots.
Conclusion
To grow Heliconia indoors, start with a compact cultivar and a realistic plan for its mature size. Give it strong light, steady warmth, and a loose mix that remains moist without holding standing water. Water according to what the pot and soil tell you, feed only during active growth, and expect the plant to shed a flowering shoot after it finishes.
The most reliable routine is simple: inspect the leaves and soil weekly, adjust light and watering as seasons change, and move the pot outside or back inside gradually when temperatures allow. If the plant is healthy but not flowering, improve light and warmth before reaching for extra fertilizer. Heliconia is a space-hungry tropical with specific needs, but matching the variety to your room makes those needs manageable.



