How to Grow and Care for Water Lilies Indoors
How to grow water lilies indoors: choose a dwarf hardy cultivar, build a stable water garden, add enough light, and solve algae, leaf, and bloom problems.
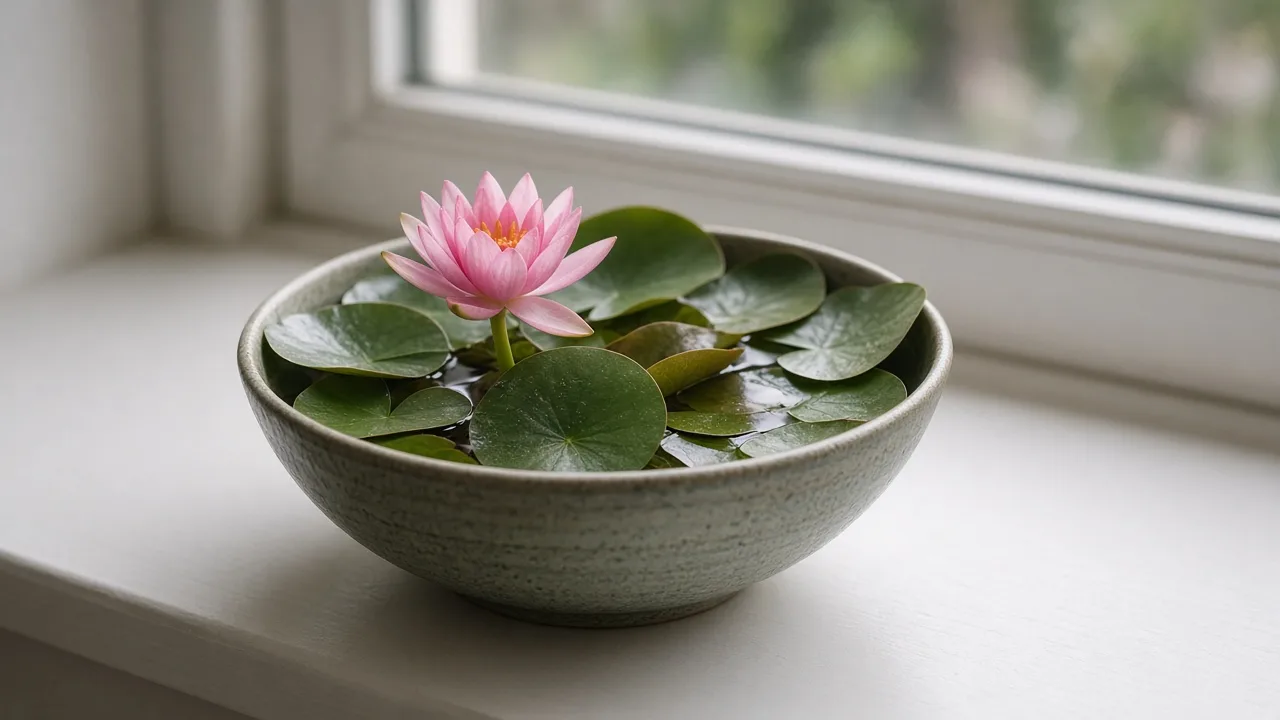
Growing a water lily indoors is possible, but it is closer to keeping a small controlled water garden than to caring for a typical houseplant. The plant needs a watertight container, heavy growing media, a correctly positioned rhizome, enough light to drive floating leaves and flowers, and a water depth that matches the cultivar. If any one of those pieces is wrong, adding more fertilizer usually makes the container dirtier rather than making the lily healthier.
The most reliable starting point is a dwarf hardy water lily (Nymphaea), bought from an aquatic-plant nursery with a named cultivar and published mature spread. The Royal Horticultural Society’s waterlily guide notes that dwarf forms can suit large containers, while the RHS profile for Nymphaea ‘Pygmaea Alba’ gives a useful example of a small plant grown in covered water. Treat indoor bloom as a rewarding possibility, not a guarantee: a sunny greenhouse or outdoor pond offers more usable light and room than most homes.
The Reality of Growing Water Lilies Indoors
A water lily is an aquatic perennial rooted in sediment below the water surface. Its rounded leaves rise on long petioles and float, while flowers sit on or just above the surface. The leaves have a notch toward the center where the stalk attaches, which helps distinguish a true water lily in Nymphaea from a lotus, whose leaves and flowers have a different habit. UF/IFAS describes the floating, notched leaves and rhizomes of fragrant water lily.
Indoors, the challenge is not keeping the roots wet. It is reproducing the combination of bright sun, stable water, open surface area, and seasonal rhythm that an outdoor water garden supplies naturally. A small decorative bowl may look attractive for a week, but it often leaves too little room for a basket, gives the leaves nowhere to spread, and warms or cools quickly. Plan the container, floor location, light, and maintenance access before you buy the plant.
Use this quick fit test:
- You can provide at least five hours of unobstructed sun, or a dedicated grow-light area that can stay on a timer.
- You have a leak-proof location on a load-rated floor or stand, not a delicate shelf.
- You can accommodate a wide container and leave open water around the basket.
- You are willing to remove dying leaves and flowers before they decay in the water.
- You can accept a slow start or winter dormancy instead of expecting flowers on demand.
If two or more answers are no, choose a smaller aquatic plant or an easy flowering houseplant instead. Water lilies are beautiful because their biology is specialized; that is also why they are unforgiving indoors.
Choose a Water Lily That Can Fit Your Setup
Start with the plant label, not a flower photograph. Water lilies differ dramatically in mature spread, leaf size, preferred water depth, temperature tolerance, and bloom timing. A lily that is “small” at the nursery can still outgrow a tabletop container once its pads begin covering the surface.
Hardy water lilies are the better indoor experiment for most homes. NC State Extension describes hardy types as rhizomatous perennials that need sun and heavy soil in containers, and lists them for tubs and water gardens according to their size. They tolerate cooler water than tropical types and can enter dormancy, which gives a home grower a realistic winter plan. Look for a dwarf or miniature hardy cultivar with a stated spread and depth range.
Tropical water lilies can offer larger, more vivid flowers and may include day- or night-blooming forms, but their demands rise quickly. NC State Extension says tropical day-blooming types prefer temperatures above 70°F; the RHS likewise describes tropical lilies as tender plants needing warm water and frost-free winter conditions. Choose one only if you have a warm sunroom or greenhouse-style setup, strong light, and a plan for winter heat.
The label should answer four questions: How wide will the plant become? How deep should the crown sit below the surface? Is it hardy or tropical? Does it need dormancy? If the seller cannot answer those questions, do not guess from the common name. A cultivar such as Nymphaea ‘Pygmaea Alba’ is useful as a model because the RHS profile identifies it as a small, hardy waterlily suited to container ponds, but even a dwarf needs more room than a vase.
Build the Container Before You Buy the Plant
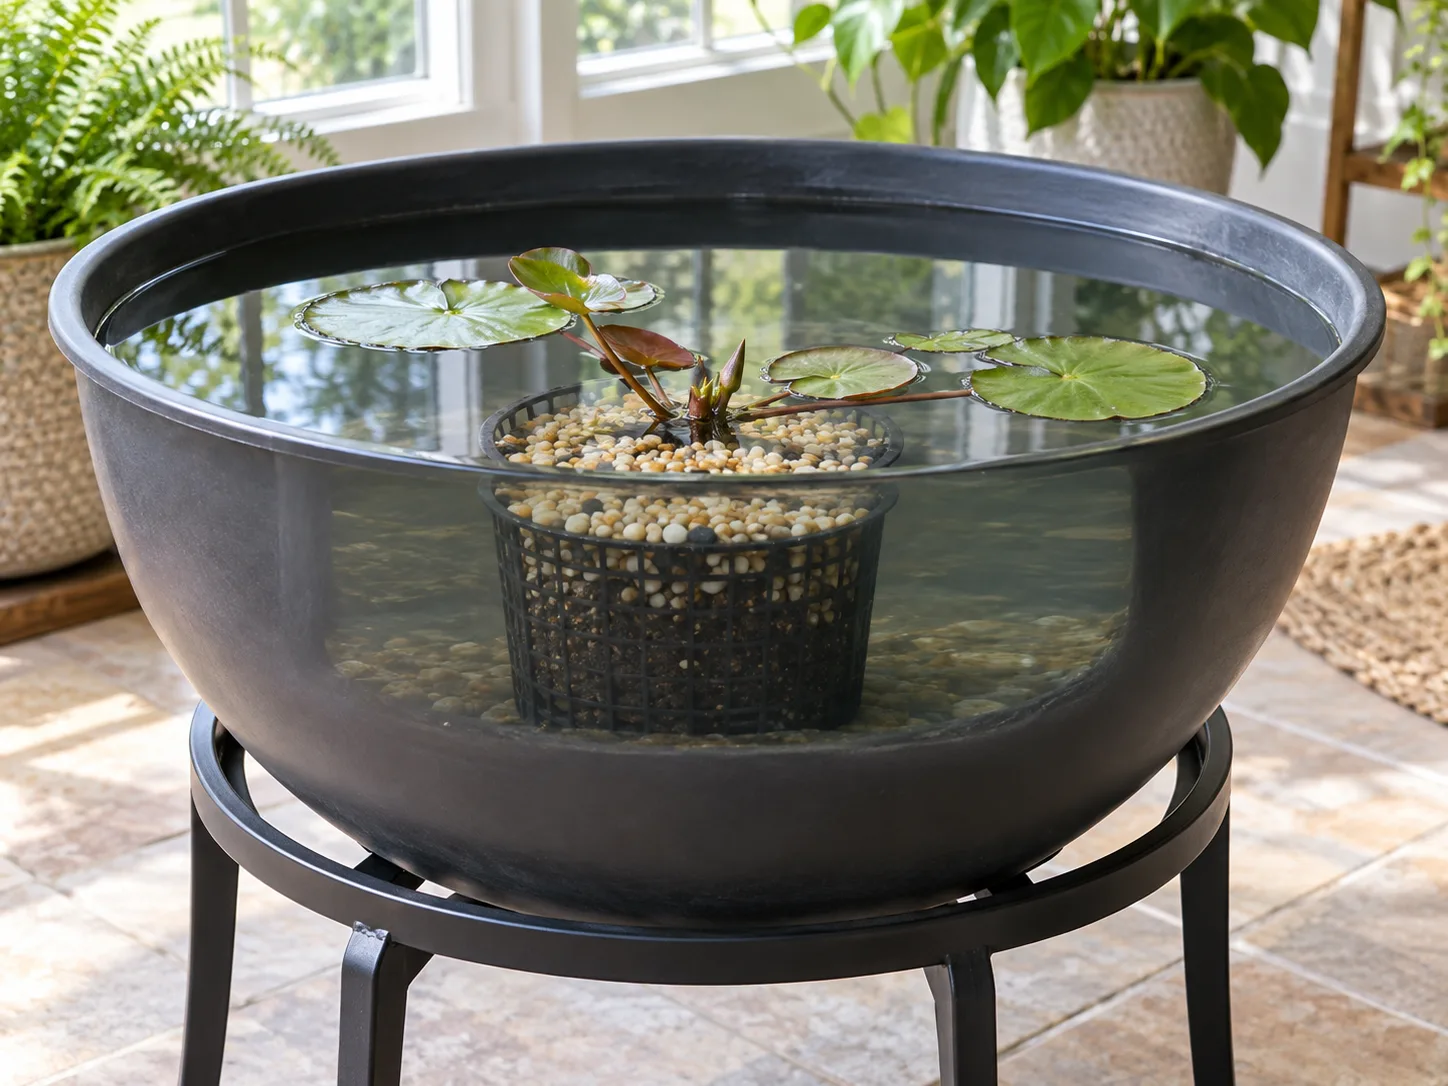
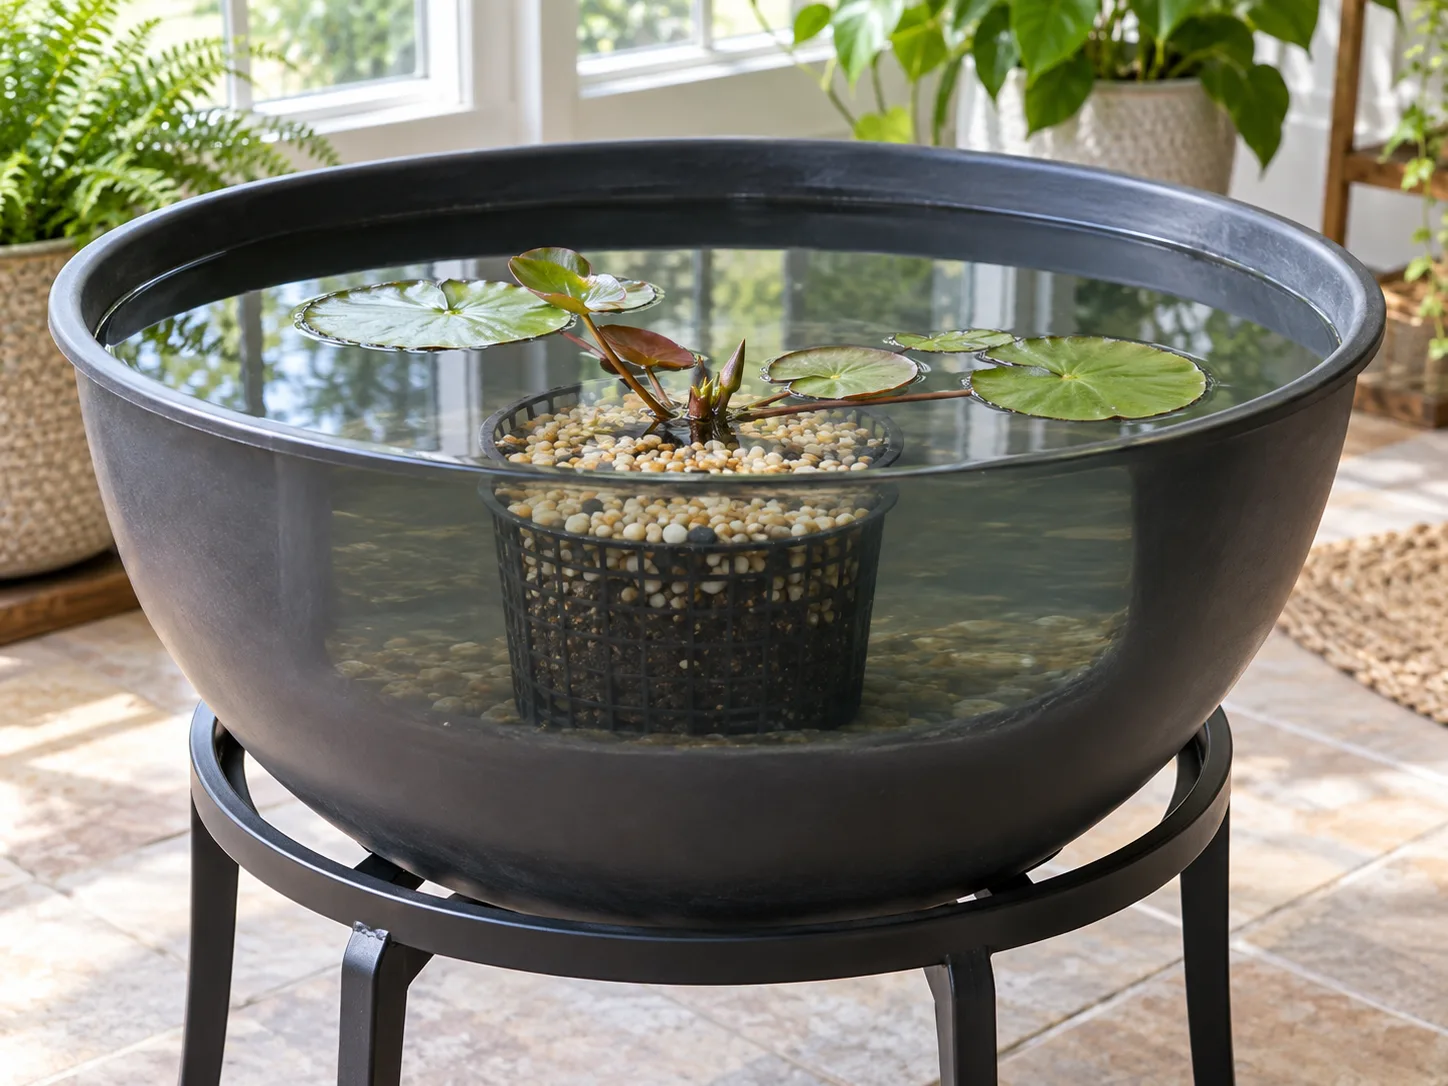
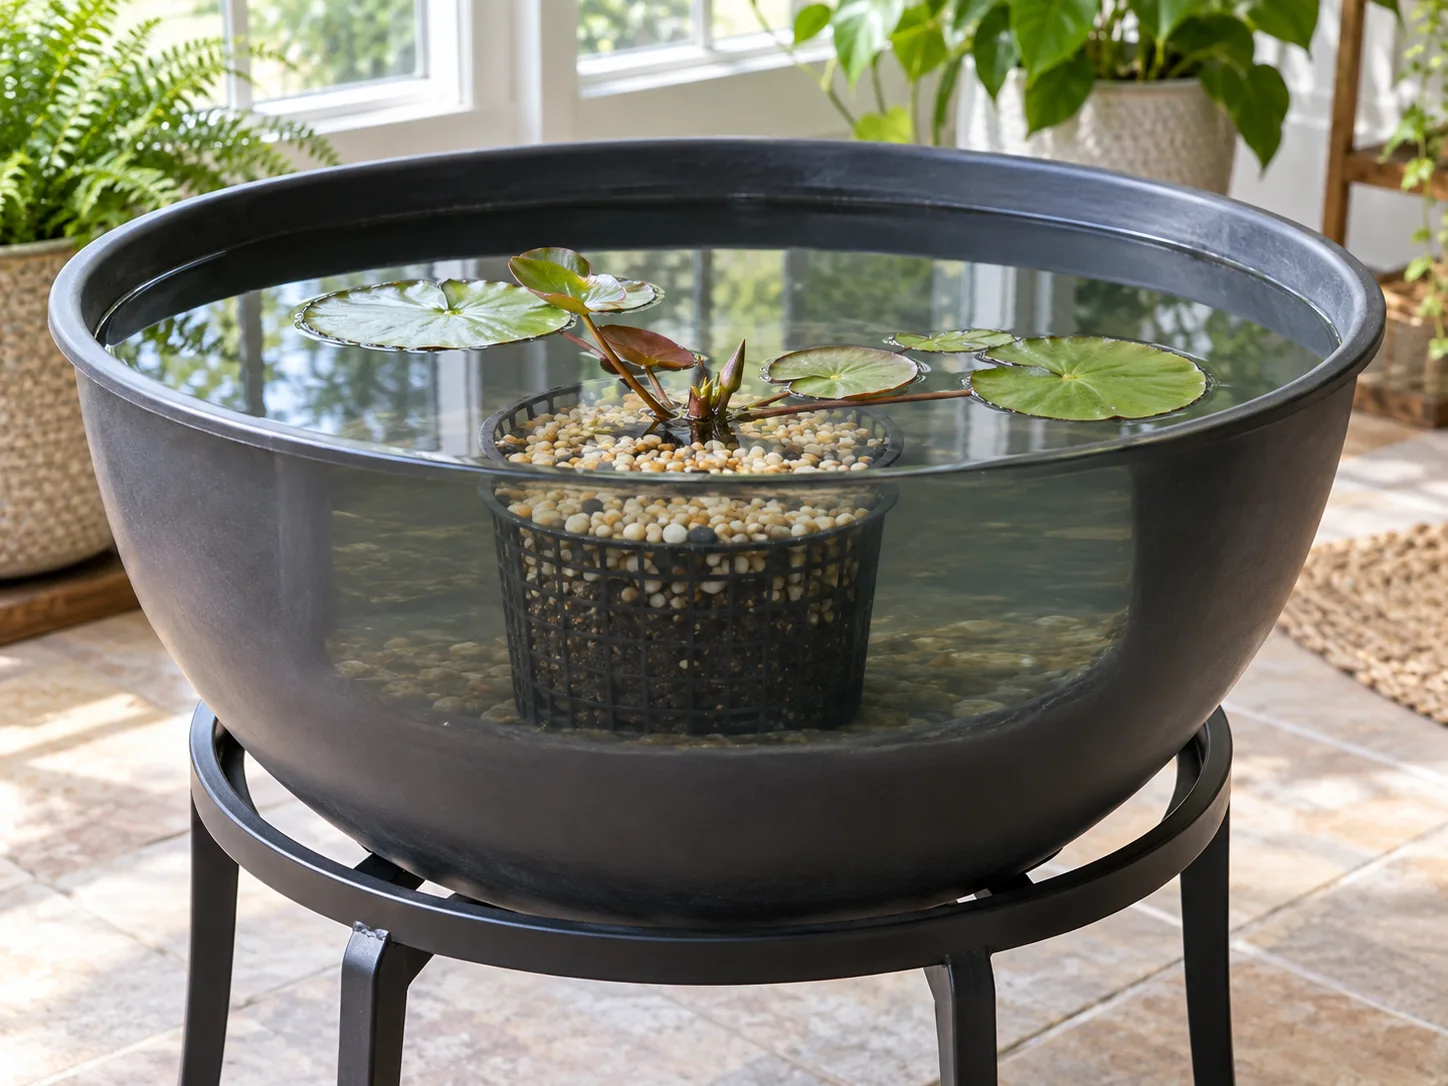
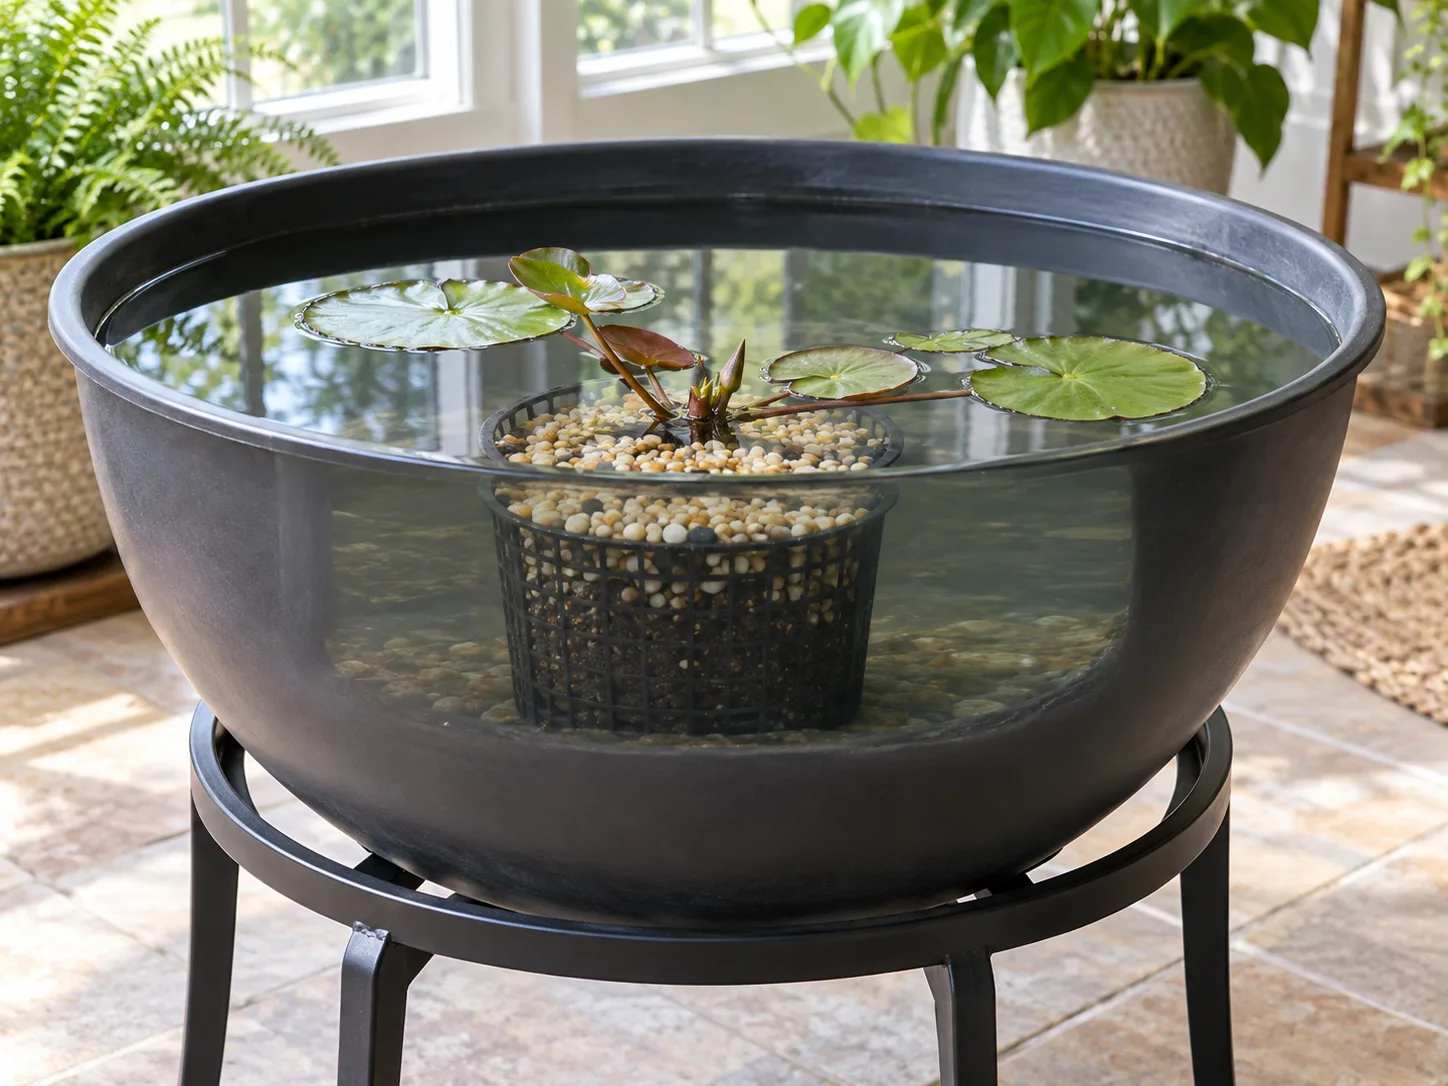
Choose a wide, watertight tub with a stable base and enough depth for the water above the crown. Opaque plastic, a stock tank, or a glazed ceramic vessel is usually easier to manage than a clear glass bowl: opaque sides reduce light reaching the water column and make algae less aggressive. Avoid a narrow container that leaves the leaves pressed against the rim.
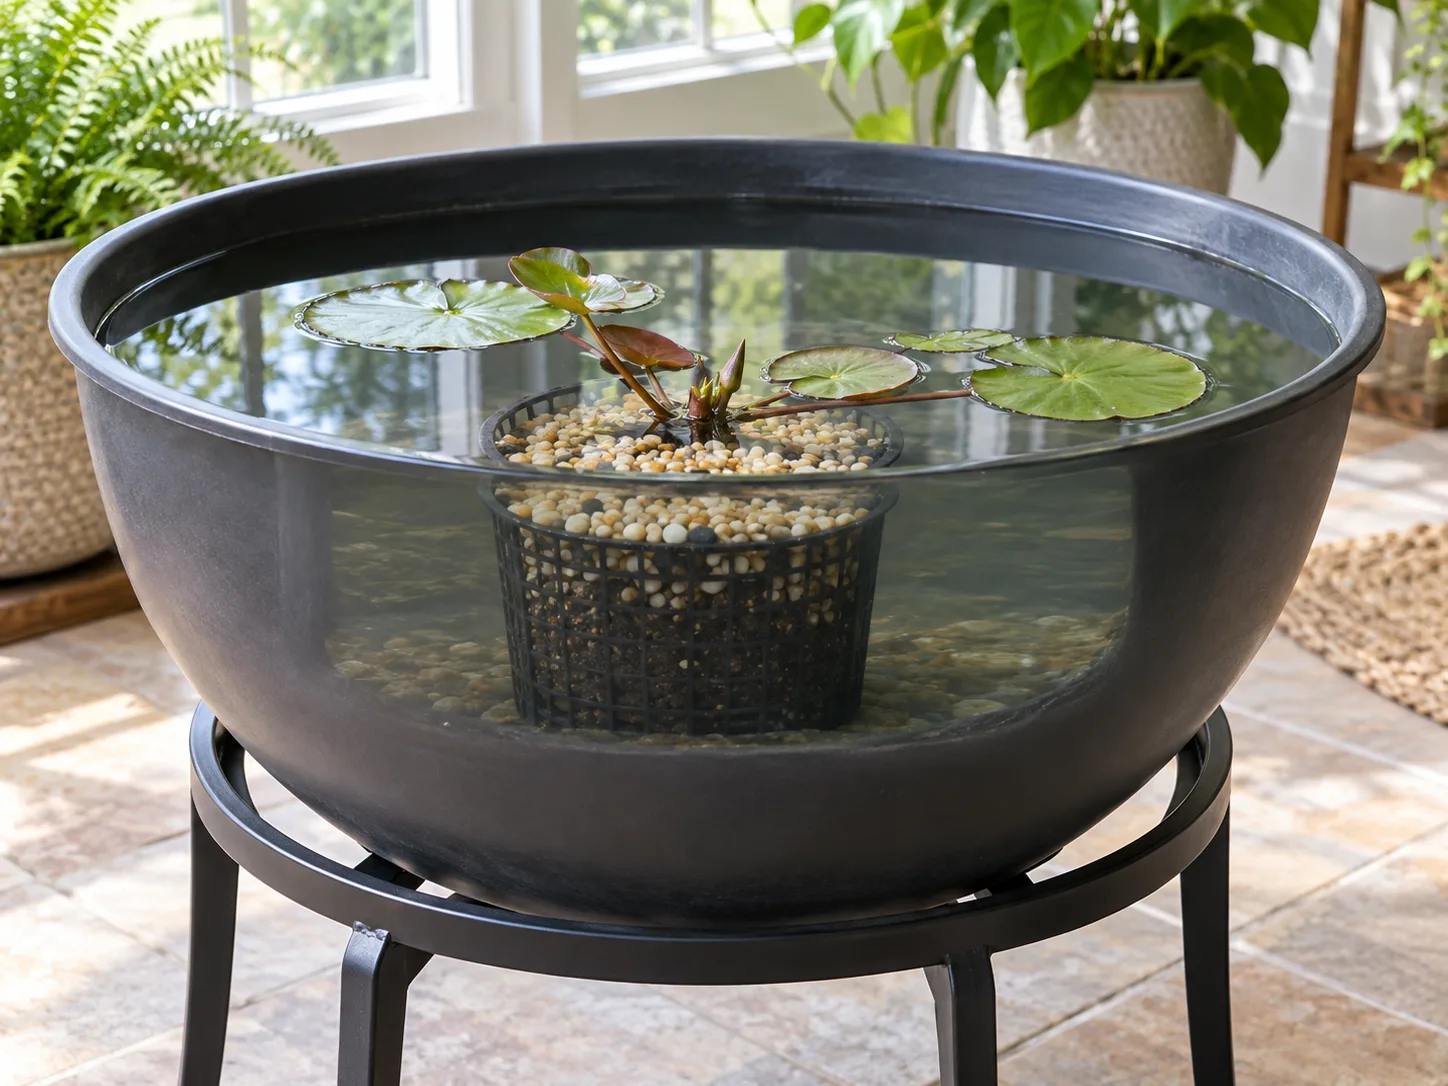
A wide indoor tub gives a dwarf water lily room for its basket, gravel cap, and floating leaves.
Capacity matters because water is heavy. Fifteen U.S. gallons weighs about 125 pounds before you add the tub, basket, soil, gravel, and plant. Put the container on a load-rated floor, protect the surface with a waterproof tray, and leave enough headspace for displacement when the planting basket goes in. A container that is technically large enough but impossible to lift or safely drain is not a workable indoor garden.
The plant itself belongs in a mesh aquatic basket, not loose soil in the bottom of the decorative tub. A basket keeps the rhizome contained and lets water move around the root zone. Use aquatic planting media or heavy clay-based loam that will stay submerged. USU Extension recommends a silt-loam or clay-type soil and specifically warns against light potting mixes that float out of the pot. UF/IFAS similarly recommends a pot with holes in the bottom and sides for circulation and pebbles on top to hold the soil in place.
Do not fill the basket with ordinary peat-heavy houseplant mix, bark, vermiculite, or a fluffy perlite blend. Those ingredients can float, cloud the water, expose the roots, and feed algae. Fill the basket nearly to the top while leaving enough room for the rhizome, then cap the surface with washed pea gravel or aquatic shingle. Rinse the gravel first so dust does not become the first water-quality problem.
Plant the Rhizome Without Burying the Growing Tip
Plant when the rhizome is firm and the growing tip is visible. A soft, sour-smelling, or extensively blackened rhizome is a poor candidate for an indoor setup because stagnant water and low light magnify existing rot.
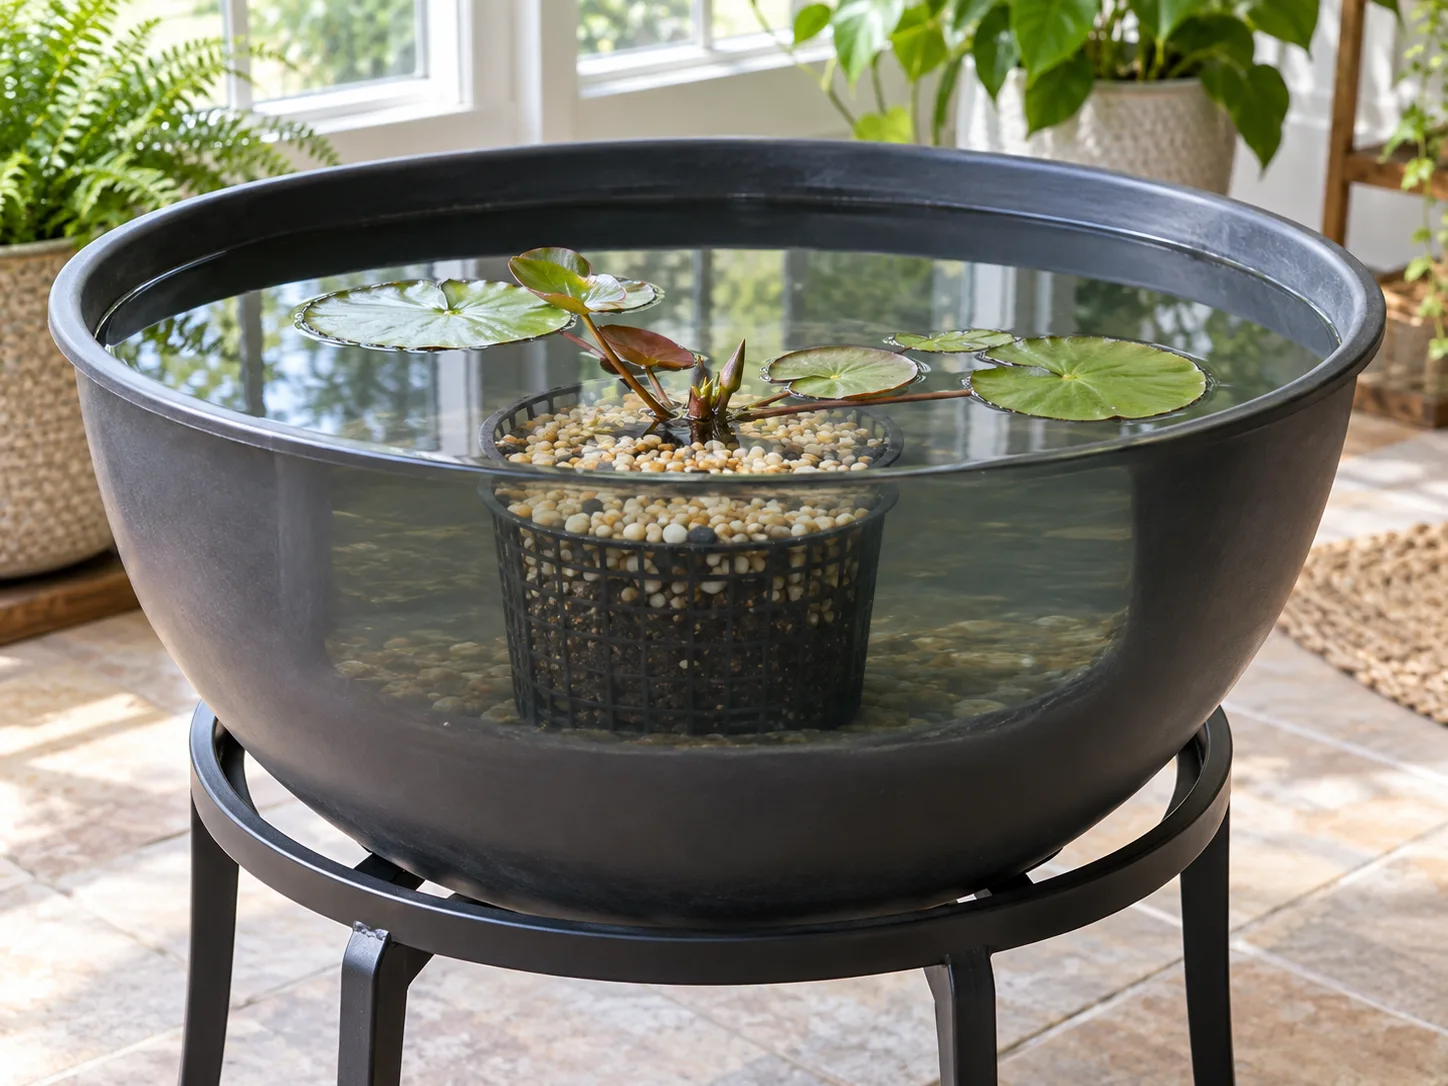
Put a layer of heavy media in the basket and place the rhizome at roughly a 45-degree angle, close to one side rather than centered. The growing tip, sometimes called the eye or crown, should sit at the surface of the media and remain uncovered. The older end can be buried, but covering the active tip can stop new leaves before they have a chance to reach the surface. This side placement also leaves the rhizome room to extend across the basket.
Firm the media around the buried portion, add the gravel cap without covering the growing tip, and pre-wet the basket with room-temperature water. Lower it into the container slowly. Pouring water directly onto the media can create a cloud; trickle water down the side of the tub or onto a saucer held above the gravel until the container is full enough for the first stage.
The UF/IFAS water-lily guidance follows the same basic logic: a planted pot with circulation holes, new soil, and pebbles on top is placed at the proper depth, then the grower waits for leaves to reach the surface. The indoor adaptation is to keep the first placement shallow and easy to adjust rather than committing the new plant to its final depth on day one.
Set the Starting Water Depth
Water depth is measured from the top of the growing media or crown to the water surface, not from the floor of the tub. The right number depends on the cultivar. Large and medium pond lilies may eventually need much deeper water than a home container can provide, while dwarf forms can be comfortable in a smaller column.
| Plant situation | Practical starting point | What to do next |
|---|---|---|
| Newly planted dwarf hardy lily | About 4–6 inches above the crown | Keep the young leaves close to the surface while they establish |
| Dwarf cultivar with a published shallow range | Follow the label, often within roughly 4–10 inches | Lower the basket gradually only if the new leaves are reaching the surface easily |
| Medium or large cultivar | Usually a poor indoor choice | Do not force it into a shallow tub; choose a smaller plant |
| Tropical lily | Use the seller’s depth and temperature instructions | Keep the water warm and make changes in small stages |
The RHS growing guide recommends placing new plants with the crown covered by about 6–10 inches of water and lowering the basket in stages as growth develops. Its size table also separates dwarf, medium, and large cultivars by both spread and water depth. That is more useful than a single universal “12-inch” rule.
Raise the basket on clean, stable supports if the leaves cannot reach the surface. Lower it only after several new leaves are floating and the plant is growing steadily. If you lower it too soon, the petioles may stretch, the leaves can remain submerged, and the plant spends its limited energy trying to reach light instead of producing a flower.
Give It Sunlight or a Purpose-Built Grow-Light Setup
Light is the indoor bottleneck. NC State’s hardy water-lily profile recommends at least five hours of sun, while the RHS describes full sun as the position that promotes flowering. A bright room is not automatically a bright growing site: a north-facing window, filtered winter light, or sun blocked by nearby buildings may keep a leaf alive without providing enough energy for a bloom.
Place the tub where the water surface receives the longest stretch of direct sun without overheating the container or bleaching the leaves. Check the position across a full day before you commit. Rotate nothing if the tub is heavy; instead, choose a placement that gives the plant consistent exposure and leaves space for maintenance.
A dedicated overhead grow light can supplement short winter sun when it stays safely above the water.
If natural light is short, use a full-spectrum grow light mounted above the water surface and controlled by a timer. A practical starting schedule is about 12 hours daily, with the fixture close enough to deliver strong light without creating excessive heat. Follow the manufacturer’s hanging distance, then watch the plant: long weak petioles, small pale leaves, and no new floating pads indicate insufficient light, while curled or scorched leaves and a hot water surface indicate excess heat. The goal is a stable high-light environment, not the brightest lamp you can buy.
Keep the light and its cord away from splash zones. A water lily’s container should never be positioned where a leaking fitting, overfilled tub, or condensation can reach an outlet or power strip. If you cannot provide safe separation between water and electricity, use a brighter window and skip the powered setup.
Keep Temperature Stable
Hardy lilies are the sensible choice for a normal home because they do not require tropical heat to remain viable. A stable room-temperature container is usually easier for a hardy plant than a tub that becomes cold beside a window at night and hot in direct afternoon sun. Avoid drafts, heat vents, and repeated moves.
Tropical lilies need a warmer plan. The RHS specifies at least 70°F water during the growing season for tropical waterlilies, and NC State gives the same threshold for tropical day-blooming types. If you use an aquarium heater, choose equipment rated for the container volume, install a thermometer, and follow its safety instructions. Never rely on a heater without measuring the water, and do not let the heater touch the tub wall or rest in a shallow section where it can run exposed.
Temperature should support the cultivar, not override a seasonal signal. A hardy lily that slows down in winter is not necessarily failing. Forcing it to grow with extra heat while light is weak can produce soft, stretched growth and still no flowers.
Manage Water Quality, Level, and Movement
Top off the container when evaporation lowers the water surface, but add water slowly and at roughly the same temperature as the tub. Keep headspace below the rim so the basket cannot displace water onto the floor. A marked water-level line on the outside of an opaque tub is more reliable than judging by the rim.
For tap water, find out whether your utility uses chlorine, chloramine, or neither. The CDC explains that chlorine can dissipate when water stands for a few days, but chloramine cannot be removed that way. If chloramine is used, use a treatment specifically labeled for chlorine and chloramine, or another water source appropriate for aquatic plants. Do not assume that leaving a bucket overnight solves every tap-water problem.
Water clarity matters, but crystal-clear water is not the only success signal. Remove loose leaves, flower debris, insects, and visible sediment before they break down. If the water smells sour, develops a surface film, or stays cloudy after debris is removed, siphon or drain part of it and replace that portion with conditioned, temperature-matched water. A partial change is less disruptive than repeatedly emptying the entire container.
Water lilies prefer still or gently moving water. The RHS recommends calm water away from fountains, pumps, cascades, and turbulence. A small air stone can help prevent a sealed container from becoming stale, but it should create mild circulation rather than churn the surface, lift the gravel, or push the leaves against the rim. If aeration creates bubbles under the pads or keeps the surface in constant motion, reduce it or remove it.
Fertilize the Root Zone, Not the Whole Water Column
Water lilies are hungry plants, but the safest indoor feeding method is controlled and localized. Use a slow-release aquatic fertilizer tablet pressed deep into the media near the roots, following the product label for the basket size and cultivar. RHS recommends spring aquatic feed tablets pushed into the compost so they feed the plant rather than the water.
Do not pour a general houseplant liquid fertilizer into the open tub on a guess. Nutrients released into the water column can stimulate algae, especially when the plant is not receiving enough light to use them. If you use a liquid product, it must be labeled for aquatic plants and dosed exactly as directed; a stronger dose is not a shortcut to more flowers.
Wait until the plant is actively growing before feeding a new or recently divided lily. If the water turns green soon after feeding, pause fertilizer and correct light, debris, and circulation first. The plant may need more usable light, not more nutrients.
Prune, Deadhead, and Keep the Surface Open
Remove yellowing or collapsing leaves at the base of their stalks before they sink and decay. Cut spent flowers as low on the stem as you can safely reach. This keeps decomposing material out of the water and makes it easier to see whether new leaves are emerging from the crown.
Do not trim healthy floating pads just because they overlap. A few leaves are how the plant harvests light. Thin only when the surface becomes so crowded that new leaves cannot open, airflow is poor, or the pads shade the crown and water excessively. Use clean snips and remove each cut piece from the tub.
Pruning is also inspection. Look beneath leaves and around buds for clusters of aphids, chewing holes, cast skins, or leaf spots. NC State and RHS both list water-lily aphids, beetles, midges, crown rot, and leaf spot among possible problems. In a small indoor tub, physical removal of affected material and correction of the growing conditions are safer first responses than adding an untested spray to an open water system.
Help an Indoor Lily Through Its First Month
The first month is an establishment period, not a bloom contest. Keep the basket shallow, the growing tip exposed, the water level steady, and the light consistent. Measure the temperature for a few days rather than relying on room-air readings; water beside a cold window can be much cooler than the room.
Check the plant twice a week using the same sequence: water level, water odor and clarity, floating leaves, crown condition, and light schedule. Record new leaves and the date of each fertilizer application. This small log prevents the common indoor mistake of changing depth, adding fertilizer, moving the tub, and replacing all the water in the same week, leaving you unable to tell what helped.
Expect a pause after planting or moving. A firm rhizome with a clean growing tip may spend time making roots before it sends a leaf. Act quickly only if the crown becomes soft, the water smells foul, the media is floating out, or leaves collapse in succession. Those signs point to a setup problem rather than normal patience.
Troubleshoot Leaves, Algae, and Missing Flowers
Leaves stay underwater. First check whether the basket is too deep for the plant’s current size. Raise it so the crown is in the cultivar’s shallow starting range, then wait for new leaves. If new leaves repeatedly stretch and fail to float, check light before adding fertilizer. A congested plant can also push leaves upward; if the container is full of roots and the pads are crowded, it may need division or a larger basket.
Leaves rise above the surface instead of floating. This usually means the water is too shallow for the mature plant or the plant is congested. Check the cultivar’s stated depth and lower the basket in stages if the leaves are otherwise healthy. Do not bury the crown deeper just to make the plant look settled; the growing point still needs the correct relationship to the media.
Leaves turn yellow. One old leaf yellowing while new leaves appear can be ordinary turnover. Several yellowing leaves at once call for a sequence: confirm the crown is firm, inspect the water for odor, check for sudden temperature change, and review light and fertilizer. Remove dying leaves so they do not become more organic matter for algae. If the crown is soft or dark, isolate the plant from other aquatic specimens and inspect it rather than feeding it.
The water is green, cloudy, or smelly. Remove debris first, then reduce nutrient input and confirm the container is not receiving weak light that the plant cannot use. Replace part of the water if it smells or carries suspended sediment. Improve gentle aeration only if it does not create turbulence. Do not solve a small indoor tub by adding fish; fish create their own waste and require a properly managed aquarium or pond system.
The plant has leaves but no flowers. Check light before anything else. A water lily can produce foliage in conditions that are still too dim for bloom. Next check temperature, cultivar, water depth, and season. A hardy lily may be building reserves or following dormancy, while a tropical lily may be stalled by cool water. If leaves are small and stretched, improve light; if leaves are healthy but crowded, address space and division; if the plant was recently moved, give it time to re-establish.
Spots, holes, or insects appear. Remove a small number of affected leaves and inspect the undersides and buds. Water-lily beetles chew holes, while aphids may cluster around tender growth. If spotting spreads, remove affected material and improve air movement around the surface without creating turbulence. For any treatment, use only a product whose label allows the intended aquatic use and follow the label; never improvise soap, oil, or pesticide in a living water container.
Repotting, Dividing, and Moving Outdoors
Do not repot on a calendar just because the plant has been indoors for a few months. Lift the basket when roots have filled it, the rhizome is pressing against the container, leaves are consistently rising above the surface despite correct depth, or flowering has declined in a mature crowded plant. The RHS recommends dividing many waterlilies every four to five years when they become congested, but an indoor plant may reach its space limit sooner.
Divide only an established, actively growing plant with a firm crown and visible young shoot. Use a clean sharp knife, keep a growing point with each section, and replant divisions into fresh heavy media topped with washed gravel. Start the divisions in shallow water until new leaves develop, then lower them gradually. Do not divide a plant that is already collapsing from suspected crown rot; first identify and remove the damaged tissue, and accept that recovery may not be possible.
Moving an indoor lily directly into an outdoor pond can fail because the light, temperature, water chemistry, pests, and depth change at once. If you want an outdoor season, acclimate gradually and confirm the cultivar’s hardiness and legal suitability for your area. Never release a purchased water lily into a natural waterway; keep it in a managed container or pond and dispose of unwanted material responsibly.
Hardy lilies may naturally lose leaves and rest during winter. The RHS notes that hardy types die back and return as water warms, while tropical types need warmer winter water or storage above about 50°F. Indoors, a dark, cool rest can be appropriate for a hardy cultivar only if the seller’s instructions support it; do not force a winter bloom by placing a dormant plant under weak light and heavy fertilizer.
Protect the Floor, Equipment, and Household
Treat the water container as a small piece of equipment. Test it for leaks outdoors before bringing it inside, use a catch tray with room for a small overflow, and keep the rim below nearby furniture. Check seams, tubing, heater mounts, and the waterline whenever you top off. Keep a siphon or drain plan nearby so maintenance does not become a wrestling match with a tub full of water.
Keep electrical devices above splash level, use only equipment rated for the setup, and follow the heater and light instructions. Do not place a heavy tub where children or pets can pull it over, and do not add aquatic animals simply to make the container look more like a pond. If the only available location cannot handle the weight, water, light, and maintenance access, the correct care decision is not to grow a water lily there.
Conclusion
The indoor water lily setup that works is deliberate: a dwarf hardy Nymphaea, a wide watertight container, heavy aquatic media in a mesh basket, an exposed growing tip, shallow starting water, strong sun or a safe grow light, stable temperature, and root-zone fertilizer. The routine is simple once the system is right—top off carefully, remove decaying material, watch the leaves, and change conditions one at a time.
The main measure of success is not whether the first flower appears quickly. It is whether the plant produces clean new leaves, keeps a firm crown, and settles into a water garden you can safely maintain. Give it the room, light, and seasonal rhythm it evolved to use, and indoor flowering becomes possible without pretending that a water lily is an ordinary houseplant.