How to Grow and Care for Juniper Bonsai
Learn juniper bonsai care from setup to winter: choose the right outdoor spot, water by soil moisture, prune without killing branches, and repot safely.
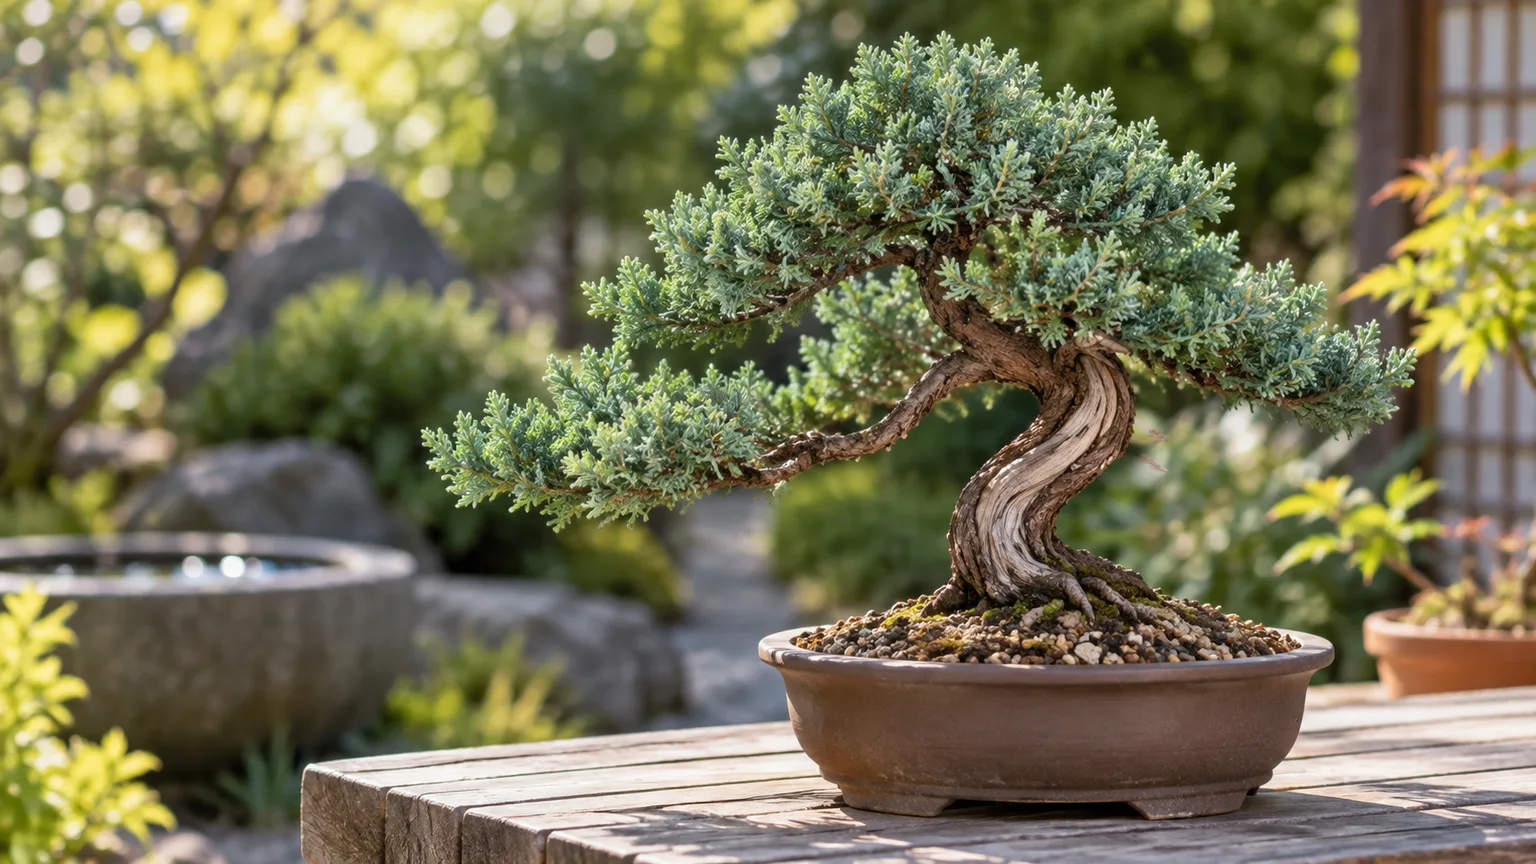
A juniper bonsai is easy to keep alive only when you give it the life of a juniper: strong outdoor light, moving air, a real winter, and a root system that is watered thoroughly but never left stagnant. The shallow pot makes those basics less forgiving than they are in the ground, so the best care routine is built around observation rather than a weekly schedule.
This guide covers the decisions that matter most after you bring one home: how to tell what kind of foliage you have, where to place the tree, how to water and feed it, when to prune or wire, how to repot without overworking the roots, and how to read browning before the damage spreads. If what you really want is a bonsai for a desk or windowsill, choose an indoor species such as ginseng ficus instead; a ginseng ficus bonsai has a different temperature and light brief.
Understand the Juniper You Bought
“Juniper bonsai” is a care category, not one single species. Nurseries sell several Juniperus species and cultivars, including Chinese juniper, Shimpaku, Japanese garden juniper, needle juniper, common juniper, and California or Rocky Mountain juniper. Their basic needs overlap, but growth habit, foliage texture, heat tolerance, and winter hardiness do not.
That uncertainty matters most when you are choosing a winter plan. The Missouri Botanical Garden, for example, lists Juniperus communis ‘Compressa’ as a full-sun, needled evergreen with strong cold tolerance but poor tolerance for heat and humidity. Do not apply that cultivar’s zone information to an unidentified juniper; keep the nursery label, ask the seller for the cultivar, and treat the pot—not only the top growth—as the vulnerable part in severe cold. (Missouri Botanical Garden)
Needle and scale foliage behave differently
Look closely at a soft shoot. Scale foliage appears as short, overlapping sprays and is common on Chinese juniper and Shimpaku forms. Needle foliage is sharper and more obviously pointed; Japanese needle juniper and common juniper are familiar examples. A scale juniper may also push juvenile, needle-like growth after stress or strong training, so one branch is not always enough for identification.
The distinction changes how you prune. On a scale-foliage tree, avoid snipping into quiet, mature green sprays that are not extending; trim the shoots that are actually running and thin crowded pads so light reaches the interior. On a needle-foliage tree, repeated soft-shoot trimming can be useful, but the same rule still applies: every branch you intend to keep needs living green foliage attached to it.
Set Up the Right Outdoor Home
The single most important juniper bonsai care decision is placement. The Royal Horticultural Society’s bonsai guidance treats junipers under outdoor-grown bonsai, while indoor bonsai are generally tropical or subtropical trees chosen for their ability to live in steady indoor warmth. A juniper may look fine indoors for weeks because old foliage does not immediately reveal root or energy loss; that delay is not proof that the location works.
Put the tree outside where it receives several hours of direct sun, ideally with bright light for most of the day. A patio, balcony, roof terrace, or garden bench can work if the pot is stable and the tree is not trapped against a hot reflective wall. The RHS notes that most conifers prefer an open sunny position, and container-grown conifers need regular watering even when an established landscape plant would manage on rainfall. (RHS conifer growing guide)
Balance light, wind, and heat
Sun tightens growth and helps foliage pads stay dense without becoming a shaded outer shell. If your climate combines fierce afternoon heat with dry wind, give the tree gentle morning sun and filtered protection during the most punishing hours while keeping it outdoors. That is a stress adjustment, not an invitation to move the bonsai into a dim room.
Wind is a hidden watering variable. A small pot can dry much faster on an exposed balcony than on a sheltered bench, while a wall that radiates heat can cook the root ball on a summer afternoon. Check the tree in its actual location for a week before deciding how often to water, and use a pot stand or low shelf that keeps drainage holes open and prevents the tree from blowing over.
Water by the Root Zone, Not the Calendar
Water a juniper bonsai when the surface has begun to dry and the root zone is no longer uniformly wet—not merely because it is “watering day.” Insert a wooden chopstick or your finger into the upper layer, look at the color and texture of the mix, and lift the pot occasionally so you learn the difference between freshly watered and nearly dry. The goal is a repeating cycle of thorough wetting, drainage, and slight drying.
When it is time, water slowly over the entire surface until it runs freely from the drainage holes. Pause for a minute and water again if the dry mix initially repels water. Empty a tray beneath the pot; a drainage hole is not helpful if the container sits in collected water.
In a hot, windy summer, a small bonsai may need checking every day and sometimes watering twice in one day. In cool, cloudy weather, the same tree may need several days between waterings. The RHS explains that shallow bonsai compost dries quickly in warm, windy weather and still needs checking during a dry winter week; pot size, substrate, sun, wind, and rainfall all change the interval.
Do not “fix” brown foliage by automatically watering more. Brown tips with a dry pot point toward drought or wind exposure, but brown inner foliage with persistently wet mix points toward poor aeration or root trouble. If soil stays wet for many days, first check the drainage holes, saucer, particle size, and rainfall before adding another drink.
Use a Fast-Draining Soil and Pot
Junipers need a coarse, open bonsai substrate that holds some moisture while leaving air-filled spaces around the roots. A commercial conifer bonsai mix is the simplest choice. If you mix your own, use durable mineral particles such as pumice, lava rock, or fired clay with a smaller moisture-retaining component; avoid building the entire root ball from fine garden soil or fluffy peat-based potting mix.
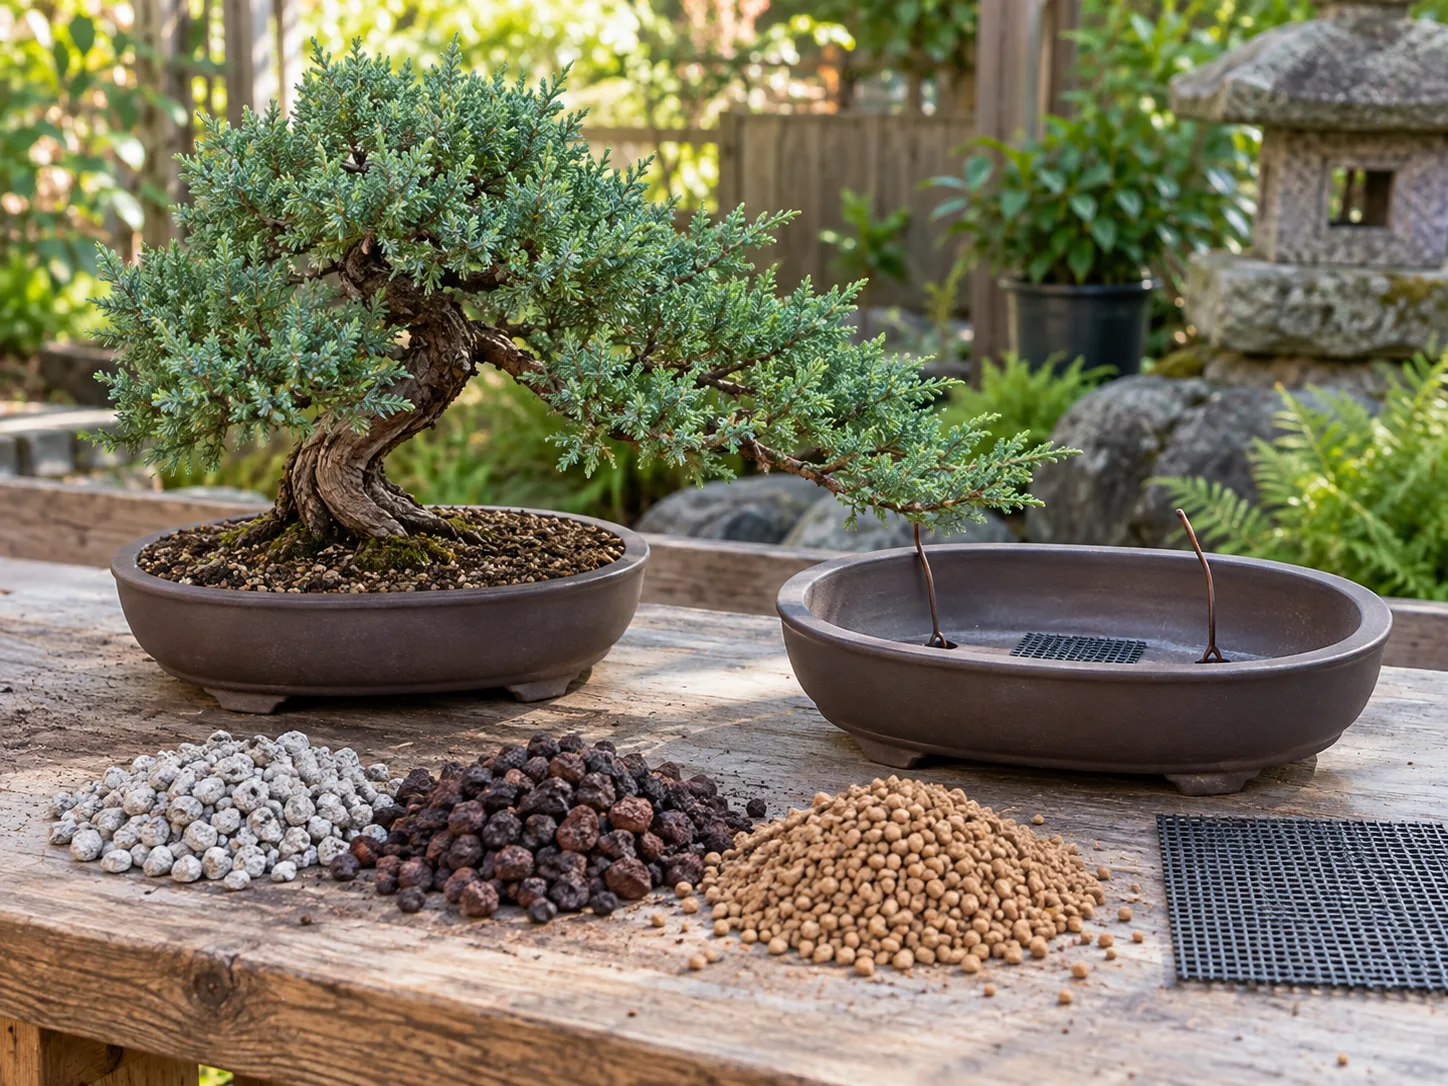
Particle size should match the tree and pot. Very fine particles stay wet in a shallow container, while an oversized mix can dry before a newly repotted root ball is re-established. Sift out dust, use a pot with generous drainage holes, and secure the tree so wind cannot rock it and tear new roots.
Choose a container for root health before color or shape. A bonsai pot should drain quickly, have room for the current root pad without a large unused wet pocket, and allow you to attach drainage screens and tie-down wire. A slightly larger training pot is often the better choice while a young tree is gaining trunk and branch strength; forcing a developing juniper into a show pot can make watering and recovery harder.
Fertilize for Steady Growth
Feed only when the tree is actively growing and the root system is functioning. A balanced slow-release fertilizer applied according to its label is forgiving for beginners, while a dilute liquid feed can be used at the label interval when you are already checking the tree frequently. Do not increase nitrogen simply because the foliage looks sparse; weak light, root damage, or an over-pruned branch will not be repaired by extra fertilizer.
Stop or reduce feeding during winter dormancy and during a heatwave when the tree is barely using water. Also wait after repotting until the tree has begun to re-establish; fresh soil and damaged roots do not need a concentrated salt load. Overfeeding can drive soft, elongated growth and add stress to a tree that needs better light or drainage, not more nutrients.
For hard or alkaline tap water, mineral buildup may show as a crust on the soil surface or an increasingly poor wetting pattern. Occasional rainwater can reduce that buildup where it is clean and legally safe to collect, but do not let a water-quality theory distract you from obvious overwatering, a blocked drain hole, or a pot that dries in a few hours.
Prune with the No-Bare-Wood Rule
Junipers do not reliably make new green shoots from every section of old, bare wood. Before cutting, trace the branch back to its green foliage and ask where the remaining foliage will get its energy. If a branch would be left as a long brown stick, do not remove its last green spray unless you have deliberately decided to sacrifice that branch.
The safest maintenance cut is selective. Remove dead, crossing, downward, or badly placed shoots; shorten vigorous extensions back to a suitable green side shoot; and thin the outside of a dense pad so sun and air can reach the interior. Avoid shearing the whole canopy into a solid meatball. Hedge-style clipping removes growing tips across the tree, hides dead interior foliage, and encourages the exact dense, weak pad that later becomes difficult to recover.
Separate maintenance from structural pruning
Maintenance pruning keeps an established design tidy during active growth. Structural pruning changes the design by removing a primary branch, shortening a trunk line, or selecting a new leader. Do those jobs separately when possible: a tree can recover from one major operation more predictably than from heavy root pruning, severe structural cuts, and aggressive wiring in the same week.
The RHS advises that major work on conifers is generally suited to autumn or winter, with light pruning during the growing season. Specialist juniper guidance also emphasizes that a tree needs green foliage left on every branch you wish to preserve. When sources offer different timing windows, the practical beginner rule is to do small maintenance cuts when the tree is growing well, reserve major design work for a healthy, seasonally appropriate window, and never prune a stressed tree just because the calendar says it is time.
Wire Branches Gradually and Check Them
Wiring lets you position a branch while it is flexible, making the tree’s structure visible instead of leaving a crowded green ball. Use bonsai wire that matches the branch, anchor it securely, and wrap at a consistent angle without crushing the bark. Aluminum is easier for many beginners to handle; thicker or older branches may need guy wires, raffia protection, or an experienced hand rather than one forceful bend.
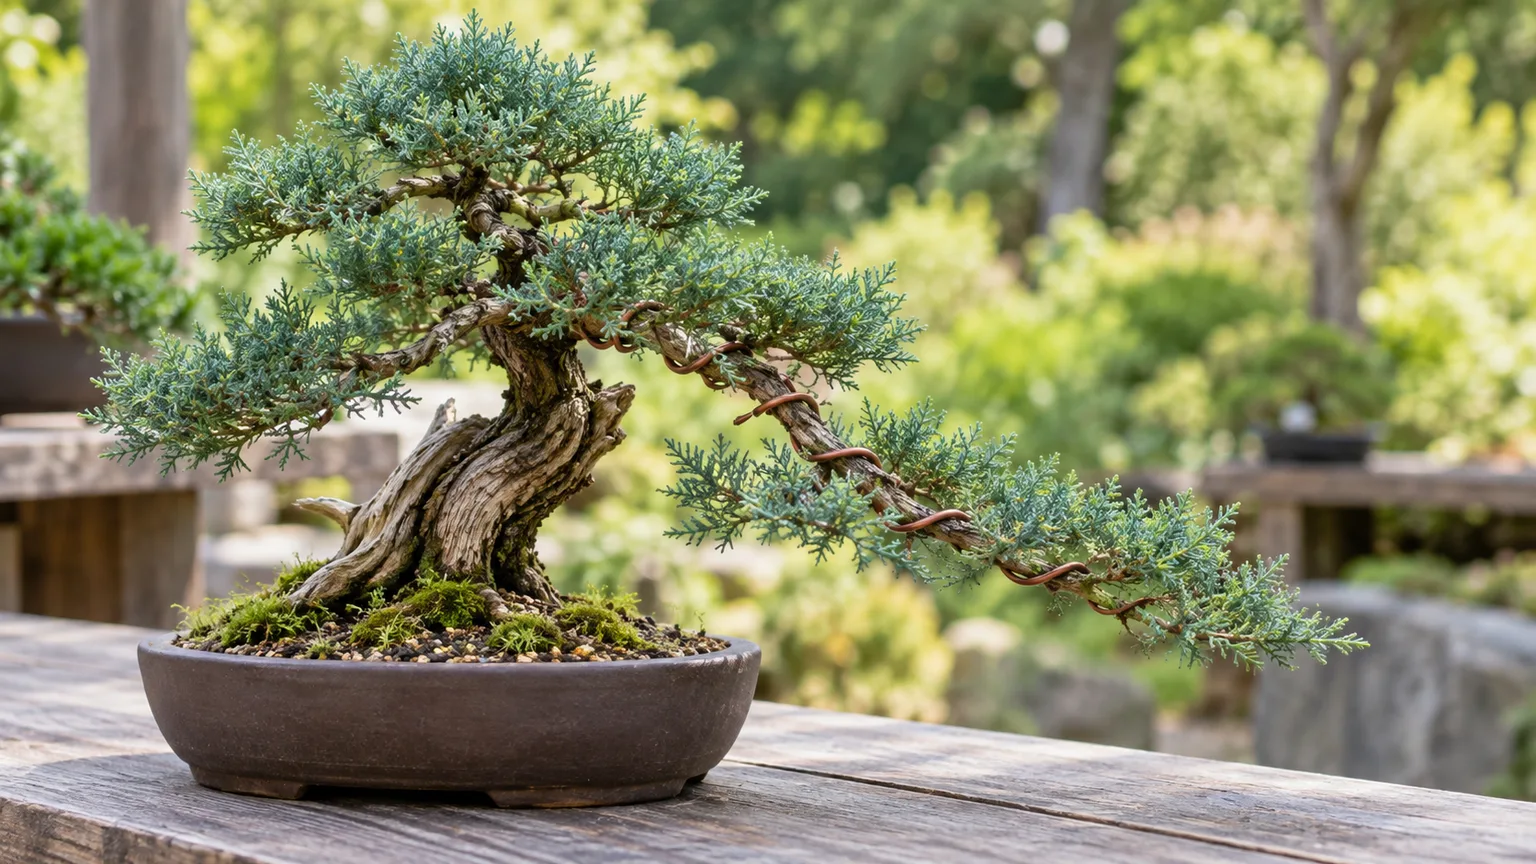
Juniper wood can be flexible, but old deadwood can snap and cold wood is less forgiving. Bend in small stages, support the trunk, and stop when the bark begins to crease. After wiring, check every few weeks during active growth; junipers can thicken quickly enough for wire to bite in and leave scars. Remove wire by cutting each coil rather than unwinding it through the foliage.
Do not wire a branch simply because it is long. First decide where the live vein, foliage, and trunk movement create a believable line. Fan pads enough for light and air to reach their centers, then allow the tree months—not a weekend—to set. Bonsai Empire and Bonsai4Me both emphasize the combination of wiring and thinning for healthy, readable foliage pads, not just dramatic curves. (Bonsai Empire juniper guide; Bonsai4Me juniper species guide)
Repot Only When the Root System Needs It
Repotting is not an annual wellness ritual for a juniper. Check the bottom and sides of the root ball in the appropriate season: roots circling densely, water running straight through a dry channel, soil that has collapsed into fine sludge, or a tree that dries unusually fast can justify the work. A healthy tree in open soil may not need attention merely because two years have passed.
For most beginners, early spring just before strong growth is the safest default. The RHS recommends spring root pruning and repotting for outdoor bonsai, while Bonsai4Me describes late summer to early autumn as a useful alternative in suitable climates because root production can be strong then. The trade-off is local weather: spring gives a long recovery season in many places, whereas autumn repotting needs a mild, sheltered aftercare period.
Prepare the new pot, screens, tie-downs, and soil before lifting the tree. Remove it carefully, loosen only enough old soil to inspect the roots, untangle circling roots, and make a modest reduction rather than stripping the root ball bare. Junipers dislike abrupt changes to the root environment; retain a substantial core of the existing soil, especially if you cannot identify the species or the tree is already weak.
After repotting, water thoroughly, place the tree in bright but sheltered outdoor conditions, and pause strong fertilizer until new growth or firm recovery is evident. Keep the tree protected from drying wind, but do not seal it in a stagnant plastic tent. If the roots are black, soft, foul-smelling, or collapsing, treat that as an urgent drainage and root-health problem rather than as a normal repot.
Protect the Pot Through Winter
Junipers need a cold season, so winter protection should preserve dormancy rather than replace it with heated indoor air. A tree can remain outside in many climates, but roots in a shallow pot experience colder and faster temperature swings than roots in the ground. Shelter the pot from drying wind, keep drainage open, and group or insulate containers when a severe freeze is forecast.
The exact threshold depends on species, pot size, wind, moisture, and the duration of the freeze. Some junipers tolerate very low temperatures, while a recently repotted or heat-sensitive cultivar may need more protection. When the forecast calls for prolonged extreme cold, use an unheated cold frame, unheated greenhouse, or sheltered garage that stays cold enough for dormancy but avoids the freeze-thaw blast against the pot.
Check moisture during winter. Dormant trees use less water, but a frozen or bone-dry root ball can still be damaged, especially when evergreen foliage loses water on bright, windy days. Water on a mild day when the mix is dry enough to need it, then let excess drain completely. Do not bring the tree into a heated living room for the season; if you need it on display, limit the indoor visit to a brief event and return it outdoors.
Propagate from Cuttings
Cuttings are the practical way to make genetically similar young junipers, but “easy to root” does not mean “ready for bonsai next month.” Use healthy, vigorous material from a known plant, take several cuttings because success varies, and label the cultivar. Semi-ripe cuttings taken in late summer to early autumn are a general conifer option described by the RHS; exact timing and rooting speed depend on the species and local conditions. (RHS conifer propagation guidance)
Fill a clean, draining propagation container with a moist, airy medium. Take a several-inch cutting from current-season growth, remove the lower foliage, make a clean cut, and insert the base into the medium. Keep the container bright but out of harsh drying sun, maintain even—not waterlogged—moisture, and provide gentle humidity and airflow.
Do not tug on the cutting every few days to test for roots. Wait for resistance and new growth, then pot up carefully once a usable root system has formed. Let the young plant build roots, trunk, and branching for a year or more before asking it to carry a bonsai design; early wiring and repeated pinching on a weak cutting only prolong the juvenile stage.
Troubleshoot Browning and Dieback
Browning is a symptom, not a diagnosis. Start with three observations: where the browning begins, whether the soil is wet or dry, and what changed in the last month. A juniper can bronze slightly in cold weather and still be healthy, but widespread persistent browning, brittle tips, a sour pot, or dieback that moves along branches deserves prompt investigation.
| What you see | First checks | Best first action |
|---|---|---|
| Tips brown on the sunny, windy side | Dry mix, hot wall, recent heatwave | Water deeply if dry; shelter from desiccating wind and reflected heat |
| Inner foliage browns inside a dense pad | Light blocked, old interior growth, poor airflow | Thin the pad gradually and improve light; do not shear the outer shell |
| Foliage browns while the soil stays wet | Blocked holes, fine mix, root damage | Stop routine watering, inspect drainage, and assess roots before repotting |
| Whole tree declines after moving indoors | Insufficient direct light, no dormancy, low airflow | Move it back outdoors gradually and keep care steady; recovery is not guaranteed |
| Bronze color appears after frost but tips stay firm | Seasonal cold response | Monitor through spring rather than pruning healthy colored foliage |
| Browning follows a new wire or hard bend | Bark injury, constricted wire, snapped branch | Remove or correct the wire and inspect the branch connection |
If only old inner needles drop in autumn while the growing tips remain green and firm, seasonal shedding may be normal. If brown tissue begins at the tips and progresses toward the trunk, or if a whole branch becomes brittle, test moisture and roots before assuming the tree is dead. Juniper foliage can stay green for a surprisingly long time after serious root damage, so “it is still green” is not a reliable all-clear.
Rule out mites, scale, and rust
Spider mites are favored by hot, dry conditions and can be difficult to see. Colorado State University Extension describes stippling or flecking, bronzing, premature foliage loss, and webbing in heavier infestations; the spruce spider mite is one of the mites associated with spruce and juniper. Hold white paper beneath a branch and tap it gently, inspect the undersides and pad interiors, and look for moving specks rather than treating every web as a pest. (Colorado State University Extension spider-mite guidance)
For a light infestation, a firm water spray can dislodge mites and webbing without saturating the soil repeatedly. Isolate an affected container from a collection, remove badly damaged material, and repeat monitoring. If a pesticide is needed, use only a product labeled for the plant and pest in your location, follow its reapplication and temperature instructions, and remember that broad insecticides can kill predatory insects and worsen some mite outbreaks.
Scale insects look more like fixed bumps on twigs than moving dust. Confirm the diagnosis before spraying, since juniper buds and bark features can be mistaken for insects. Rust diseases can produce swellings, galls, or orange spore structures and may involve nearby apple, pear, or hawthorn relatives; the RHS lists rust and other diseases among conifer problems, while the Missouri Botanical Garden notes juniper blight, cedar apple rust, and wilt as possible issues for common juniper cultivars. Prune only with a clear diagnosis and local guidance, and never add diseased material to home compost if the pathogen’s host range is uncertain.
Build a Month-by-Month Care Routine
Use the seasons as prompts, not rigid deadlines. Your local temperature and the tree’s growth stage should override a generic calendar.
- Late winter: Inspect the pot, drainage holes, wire, and winter wind damage. If the tree is healthy and growth is about to resume, this is the usual beginner window for repotting and modest root work.
- Spring: Increase watering as growth begins, start feeding according to the fertilizer label, and select the branches that need structural work before doing repeated maintenance cuts. Acclimate a sheltered tree back to stronger sun over several days if it spent winter under protection.
- Summer: Check the root zone daily during hot, windy spells. Pinch or selectively trim extending shoots, thin dense pads, inspect for mites, and do not wire a branch so tightly that rapid growth hides the wire.
- Autumn: Reduce fertilizer as growth slows, remove wire before it bites, and complete any appropriate major design work only on a vigorous tree. Prepare a wind-sheltered, cold-but-not-stagnant winter position before the first hard freeze.
- Winter: Keep the tree outdoors and dormant, protect the pot during severe cold, and water on mild days when the root zone is genuinely dry. Avoid heavy pruning, repotting, feeding, or indoor display marathons.
At every season, make one change at a time when the tree is stressed. Moving it, repotting it, pruning half the canopy, and changing fertilizer together destroys the evidence you need to identify the real cause of decline.
Know When a Juniper Is Not the Right Bonsai
A juniper is a poor fit for a home with no outdoor space, a dark apartment, or a routine that requires every plant to live on a heated windowsill. That is not a failure of skill; it is a species-and-setting mismatch. Choose an indoor bonsai suited to your light and temperature, or keep a juniper as an outdoor tree in a training container until your conditions change.
It is also reasonable to delay styling. A newly purchased tree may have been transported, root-pruned, wired, or exposed to a sudden change in sun before you got it. Give it a stable outdoor position, learn its watering rate, and wait for healthy new growth before combining design work with recovery. A year of observation is often faster than a month of ambitious cuts followed by years of trying to rebuild lost foliage.
Conclusion
Successful juniper bonsai care is less about a secret fertilizer or a perfect pruning trick than about matching the tree to outdoor conditions and responding to what the root zone and foliage show you. Give it direct light, fast drainage, thorough watering followed by slight drying, restrained feeding, and a real winter. Keep green foliage on the branches you want to preserve, inspect wire before it scars, and repot only when the roots or soil give you a reason.
When the tree browns, slow down before reaching for more water or a spray. Check the location, moisture, roots, wire, season, and pests in that order, then make the smallest effective correction. With that rhythm, a young nursery juniper can become a long-term bonsai project rather than a short-lived decoration.



