How to Grow an Apple Tree That Produces Fruit
Learn how to grow an apple tree that produces fruit with practical rules for site, pollination, rootstock, pruning, feeding, thinning, and pests.
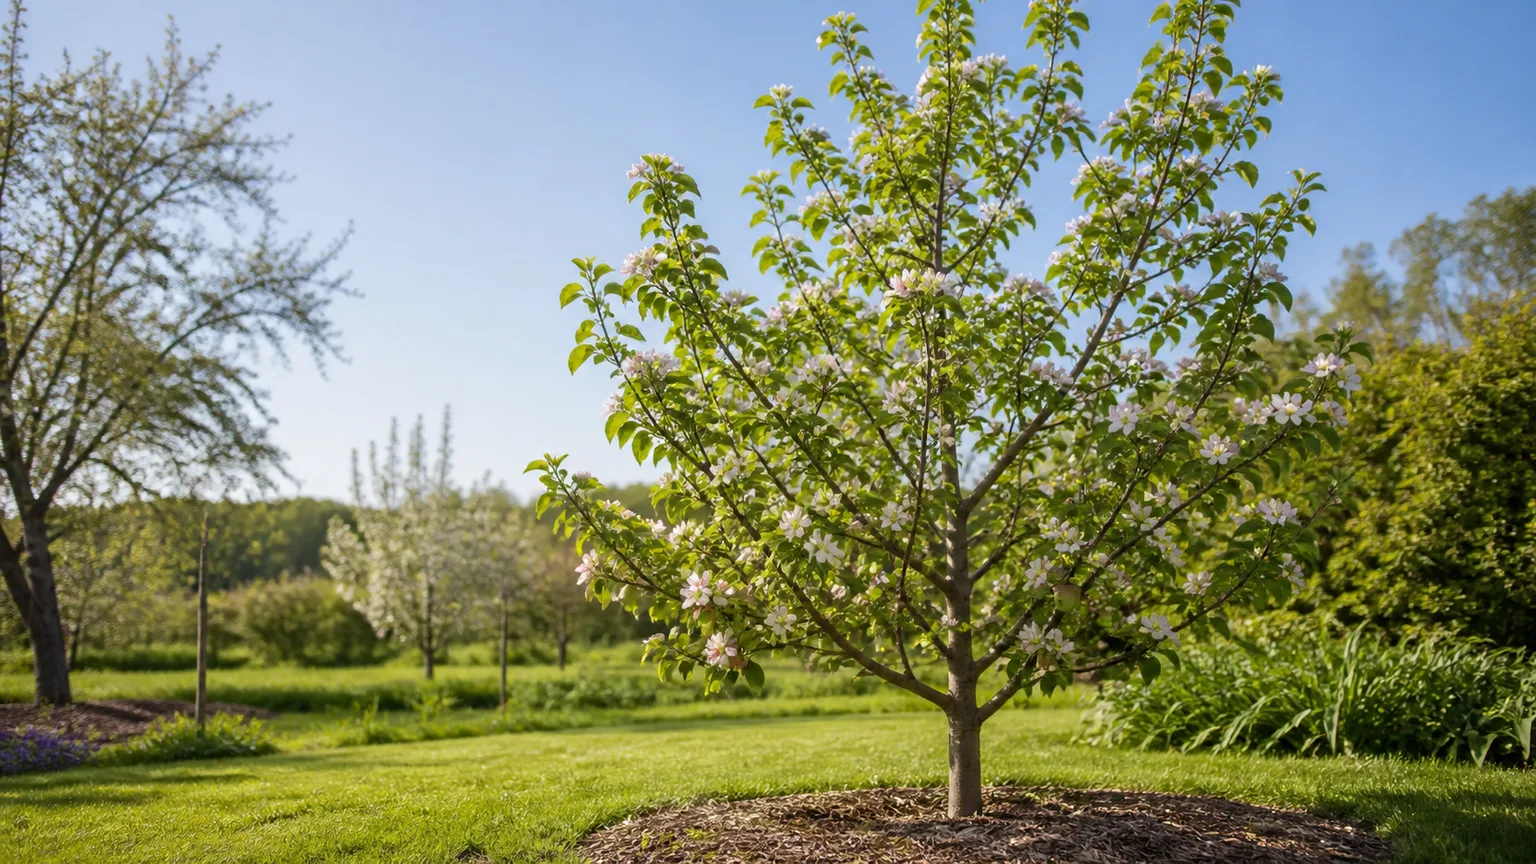
An apple tree can be healthy, leafy, and covered in spring flowers yet still give you no apples. The missing step is usually not a secret fertilizer. It is a broken link in the fruiting chain: the tree did not form enough flower buds, the flowers were not pollinated, a frost killed the blossoms, or young fruit dropped before it could grow.
The most reliable way to grow an apple tree that produces fruit is to make seven decisions in the right order: choose a suitable site, buy a cultivar and rootstock that fit it, plan for compatible pollination, train the framework early, prune for light without overreacting, feed and water based on actual growth, and protect both this crop and next year’s buds. The sequence matters because you cannot fix a pollination problem with pruning, or a low-chill mismatch with more water.
First, diagnose where the fruiting cycle stops
Before changing anything, decide what the tree actually did this year. An apple tree with no flowers has a different problem from one with flowers that fall without swelling fruit.
| What you see | Most likely checkpoint | First useful action |
|---|---|---|
| Lots of leaves, no flowers | Age, cultivar, excess vigor, shade, or last year’s pruning | Check tree age, annual shoot growth, light, and whether you removed fruiting wood. |
| Flowers open, then no tiny apples | Pollination, bloom weather, or frost | Confirm a compatible variety blooms at the same time and review the weather during bloom. |
| Tiny apples form, then drop heavily | Frost, stress, disease, poor pollination, or natural June drop | Inspect leaves and fruit, check watering, and thin remaining clusters rather than adding fertilizer. |
| Apples one year, almost none the next | Heavy crop was not thinned or the tree is in a biennial cycle | Thin within four to six weeks after full bloom and moderate the crop load. |
| Small, crowded, shaded fruit | Dense canopy, weak light, or too many apples | Open the canopy with selective cuts and thin fruit; do not top the tree. |
Fruit production begins the previous summer, when the tree makes flower buds for the next spring. That is why a “no apples” diagnosis often needs you to look backward at last year’s crop, pruning, drought, and nitrogen—not just at what is happening today.
Tip 1: Start with the site, soil, and frost pattern
The best variety cannot compensate for roots that sit in saturated soil or a canopy that receives only a few hours of sun. Utah State University Extension’s home-orchard guidance puts site selection, soil, variety, pruning, thinning, and pest management together because fruiting depends on the whole system, not one isolated input. See its apple production and variety recommendations before planting.
Match sun and drainage
Give the tree an open position with at least six hours of direct sun, preferably including morning light. Morning sun dries dew and sprinkler splash from leaves and fruit, which reduces the time conditions stay favorable for disease. Avoid planting where a fence, building, or mature tree shades the apple canopy for most of the day.
Drainage matters just as much. Dig and fill a test hole with water before planting; if water remains for a day or more, correct the drainage or choose a different spot. A low pocket can also collect cold air, making spring frost more likely. A gentle slope or a site with good air movement is usually safer than the lowest part of a yard.
Put roots in the right moisture zone
Apples need steady moisture while they establish, but constantly wet soil deprives roots of oxygen. Remove competing turf in a broad ring, water deeply enough to wet the root zone, and mulch two to three inches deep without touching the trunk. Lawn irrigation is a poor substitute for deliberate tree watering: it can wet foliage, encourage shallow roots, and invite mower or string-trimmer damage.
Do not bury the graft union or root collar. Set a grafted tree so the union remains clearly above the soil line, then water the entire planting area rather than making a narrow, permanently wet bowl at the trunk.
Tip 2: Choose cultivar, chill, bloom, and rootstock together
“Apple tree” is not one set of requirements. A cultivar has a hardiness range, a winter-chill requirement, a bloom period, a harvest window, a mature vigor, and a disease profile. Check all of those before you buy, not just the fruit name on the tag.
Chill hours describe the winter cold a deciduous fruit tree needs before it can resume growth normally. The exact counting method varies, but the practical rule is stable: compare the cultivar’s chill requirement with your local winter pattern and your spring frost risk. The Philly Orchard Project’s chill-hour guide explains why winter cold is part of the crop plan, not an inconvenience to ignore.
Next, check whether the tree will ripen before your usual autumn frost and whether it blooms early enough to be exposed to a late freeze. In warm climates, a high-chill tree may leaf out or flower unevenly. In short-season climates, a late-ripening cultivar may grow well but never finish a good crop.
Why a grafted tree is usually the better bet
A named apple grown from seed is genetically unpredictable. It may be fun to sprout an apple seed, but the resulting tree is not a clone of the apple you ate and may take many years to fruit. A grafted tree combines a named scion—the variety that determines the apple—with a rootstock that influences size, anchorage, vigor, disease tolerance, and often how soon the tree begins bearing.
Buy from a nursery that identifies both the cultivar and rootstock. Utah State University Extension notes that rootstock and scion must be matched thoughtfully; training and pruning cannot overcome poor genetics or a bad combination. If a tag says only “dwarf apple,” ask which rootstock it uses and whether the tree needs permanent support.
Size trade-offs for home orchards
| Tree type | Why gardeners choose it | What to plan for |
|---|---|---|
| Dwarf | Easiest to reach, prune, net, and harvest | Often needs a permanent stake or trellis, regular watering, and closer crop-load management |
| Semi-dwarf | A useful compromise between size and yield | Needs more room and a ladder or long-handled tools as it matures |
| Standard | Stronger, larger framework and more drought buffer once established | Takes longer to bear, needs substantial space, and becomes difficult to prune and harvest |
Rootstock controls more than height. A smaller tree is not automatically a better fruiting tree; it is a better fit only if you can supply the support and water it needs. For a small yard, a well-supported semi-dwarf or dwarf tree that receives regular care can outperform a neglected standard tree simply because its canopy remains reachable and evenly lit.
Tip 3: Build a pollination plan before planting
Most apple cultivars set a more dependable crop when pollen from a different, compatible cultivar reaches their flowers at the right time. Two trees of the same cultivar are not a complete pollination plan, and a random pair may bloom too far apart to help each other.
Find compatible bloom overlap
Choose two different cultivars whose bloom periods overlap. A mid-season bloomer can often bridge an early and a later type, but verify the specific pairing with a local nursery, extension office, or pollination chart. The BC Tree Fruit Production Guide explains the underlying rule: pollination needs a compatible pollen source and active insect pollinators during the short bloom window.
Some cultivars are triploid, meaning their pollen is not a reliable pollinizer for other apples. A triploid tree can still bear fruit when pollinated by other varieties, but it may require two additional compatible trees in the group. ‘Jonagold’ and ‘Mutsu’/‘Crispin’ are examples that need special planning in some pollination charts; check the cultivar’s current nursery or extension listing rather than relying on memory.
One tree can sometimes fruit if it is partially self-fertile, a compatible apple grows in a neighbor’s yard, or a suitable crabapple blooms nearby. Treat that as a bonus, not a guarantee. Ask what varieties are within the pollinators’ flight range, whether they bloom together, and whether fences or buildings separate the canopies. As a rough home-garden target, keep compatible trees as close as practical—often within about 100 feet—while recognizing that bee activity and local weather matter more than a single distance number.
Make the yard bee-friendly without spraying blooms
Apple pollen is heavy and sticky, so insects do most of the transfer. Keep some early-blooming flowers nearby, avoid mowing every nectar source at once, and do not spray insecticides on open apple blossoms or while bees are actively foraging. The BC guide emphasizes that pollination is brief and that pesticide exposure during bloom can reduce both bee activity and fruit set.
If the tree blooms during cold rain, strong wind, or a late freeze, a perfect cultivar pairing may still set poorly. That is a weather limitation, not proof that the tree is sterile. Record bloom dates and weather for two seasons before replacing a variety.
Tip 4: Train young branches before they become a problem
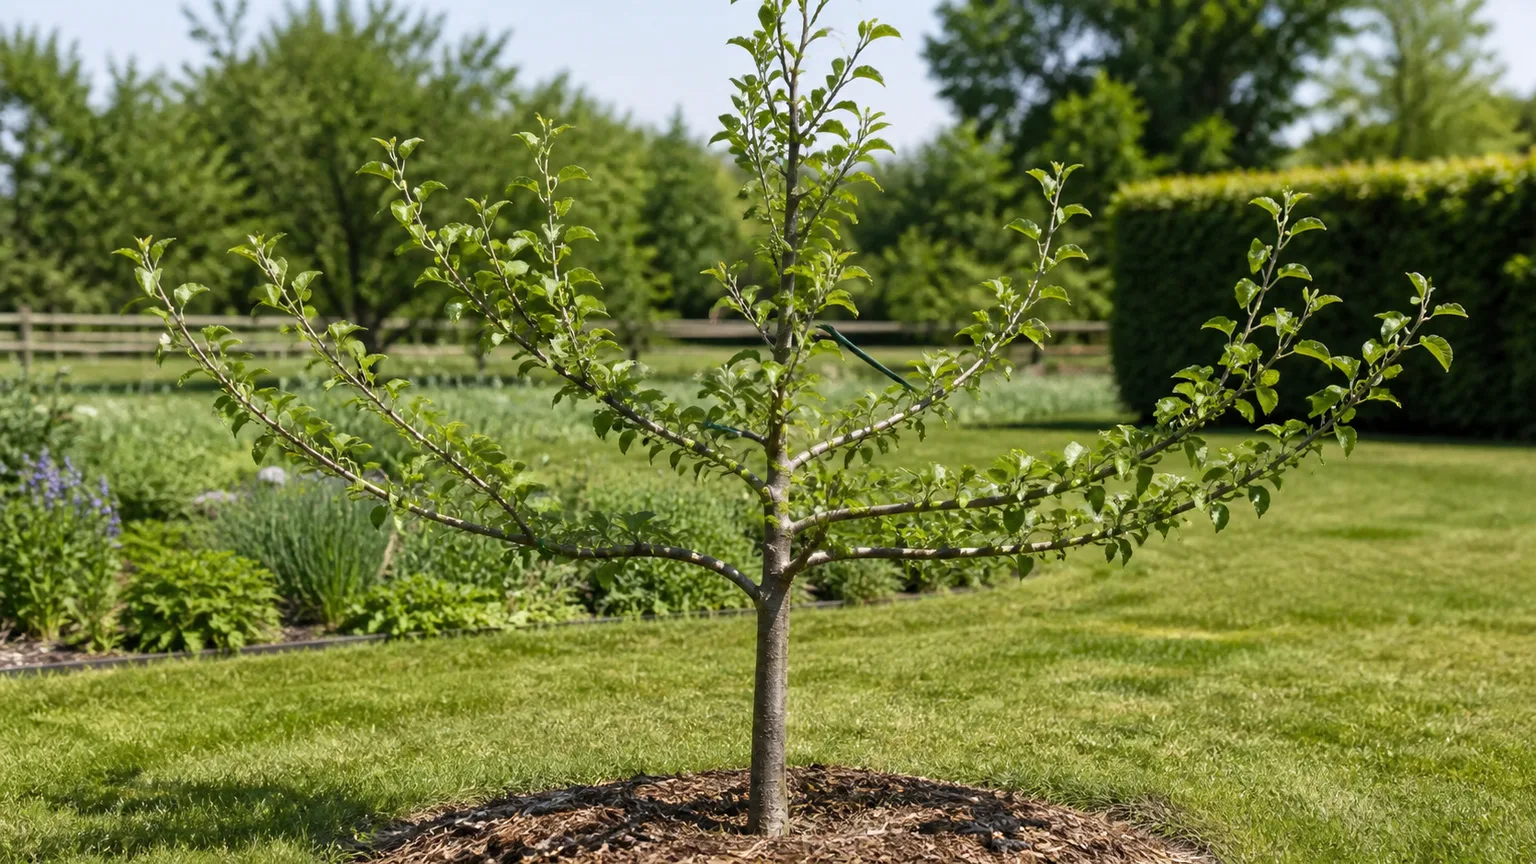
Training is the quiet work that makes future pruning easier. Start with a central leader and well-spaced scaffold branches that form a broad, strong framework. Branches angled roughly 45 to 60 degrees from the leader are generally stronger and more fruiting-oriented than narrow, upright forks or branches that hang far below horizontal.
On a young tree, remove competing leaders and branches that rub, cross, grow sharply downward, or arise in a crowded cluster. Do not strip every side branch just to make the trunk look clean; the tree needs leaves to build roots and future fruiting wood. The goal is a tapered, Christmas-tree-shaped canopy: wider at the bottom, narrower at the top.
For flexible young shoots, a branch spreader, soft tie, or temporary weight can move a branch toward a wider angle without making a large cut. Check ties often so they do not girdle the bark. Utah State University Extension’s training and pruning guide recommends developing the framework early and keeping upper limbs shorter so they do not shade the lower canopy.
Tip 5: Prune for light, fruiting wood, and manageable vigor
Pruning does not create fruit by itself. It creates the light distribution, branch strength, and balance between leafy growth and reproductive growth that let fruiting wood work well.
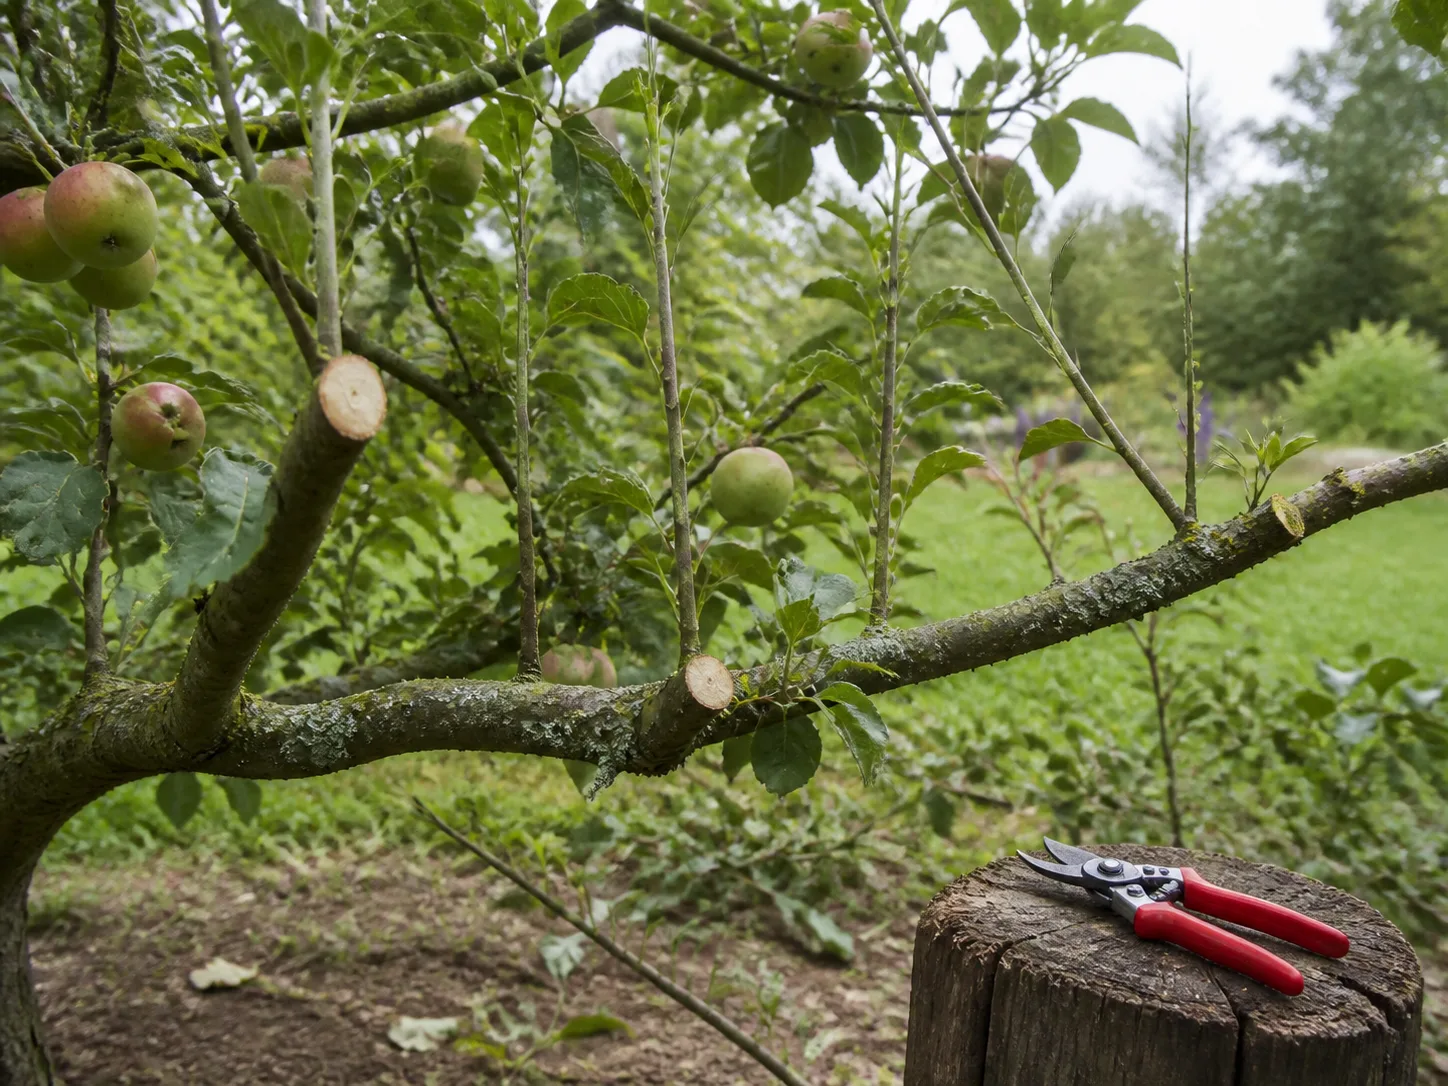
For most home apples, do structural dormant pruning after the coldest part of winter and before spring bud swell, adjusting timing for your local climate. Dormant heading cuts can stimulate vigorous new shoots, so avoid shortening everything at the same height. Use thinning cuts to remove an entire crowded branch back to its junction, preserve a clear central leader, and keep the lower canopy from being shaded.
In summer, remove water sprouts and unwanted upright shoots while they are still small and succulent. Summer pruning can reduce vigor, but it is not a universal calendar rule. If fire blight has been a problem, prune only under the dry conditions and with the sanitation precautions recommended by your local extension service; remove infected wood well below visible symptoms and disinfect tools between cuts.
The common pruning mistakes are predictable: topping the tree, removing too much at once, cutting into the branch collar, leaving stubs, and taking out short fruiting spurs because they look unimportant. A mature apple tree needs a mix of new leaf-bearing shoots and older fruiting wood. If you are facing a neglected, oversized tree, renovate it in stages rather than attempting a dramatic one-year reduction.
Tip 6: Feed and water according to growth, not hope
A tree that receives too much nitrogen often makes long, lush shoots and fewer flower buds. Utah State University Extension specifically warns that overfertilization can reduce fruit production and increase pest and disease susceptibility. “Fruit tree fertilizer” is not a reason to apply nutrients without a soil test.
Use a soil test before correcting pH or adding phosphorus and potassium. For nitrogen, judge the tree’s annual shoot growth, leaf color, overall health, and crop history. A very young tree that is barely growing may need a targeted correction; an established tree making vigorous shoots but no flowers usually needs less nitrogen, not more. Keep lawn fertilizer away from the root zone.
Water deeply and consistently during establishment and during drought, especially while fruit is sizing. Let the soil’s texture and weather determine the interval rather than following a fixed daily schedule. A rain gauge and a check of soil moisture several inches down are more useful than a quick surface sprinkle. Avoid frequent overhead watering that keeps leaves wet, and keep mulch a few inches away from the trunk.
If a tree suddenly stops growing, yellows, wilts despite wet soil, or develops dieback, do not assume it needs fertilizer. Root damage, poor drainage, girdling, disease, or a damaged graft union can look like hunger. Diagnose the root zone and trunk before feeding.
Tip 7: Protect flowers, developing fruit, and next year’s crop
Crop protection starts before you see a pest. Choose disease-resistant cultivars where they are available, remove fallen leaves and mummified apples, keep weeds and tall grass from hiding rodents, and inspect the tree weekly from bud break through harvest. The Gardener’s Path apple-growing guide is useful for the breadth of pest and disease problems that can affect apples, while local extension guidance should control the diagnosis and treatment decision.
Late frost is the hard limit no gardener can prune away. Do not push early growth with unnecessary nitrogen, and avoid placing a tree in a warm reflected-heat pocket that blooms weeks before the rest of the neighborhood. During an alert, protect small trees only with a breathable cover that reaches the ground and can be removed in the morning; never let plastic rest against flowers or foliage.
Thinning prevents biennial swings
Apple trees commonly set more fruit than they can size well. Thin clusters about four to six weeks after full bloom, after the first natural drop has passed but before the tree forms next year’s flower buds. Leave the strongest apple in each cluster and aim for roughly one fruit every six to eight inches along a fruiting branch, adjusting for tree size and cultivar.
Thinning is not admitting failure. It gives the remaining apples more leaf support, improves size and shape, reduces branch breakage, and helps prevent the cycle in which a heavy crop one year suppresses the next year’s flowers. If a young dwarf tree is bending under its first crop, thin more aggressively and support the tree rather than letting fruit weight ruin the framework.
Pests, disease, and wildlife
Use an integrated approach: identify the problem, decide whether the damage justifies action, start with sanitation and physical controls, and follow the product label if treatment is warranted. Do not spray insecticides on open flowers, and do not assume an organic product is harmless to bees. A local extension office can help distinguish apple scab, fire blight, cedar-apple rust, codling moth, aphids, and wildlife damage.
Deer, rabbits, voles, and squirrels can remove buds, chew bark, or take the crop after you have done the hard work. Use a trunk guard that cannot trap moisture against the bark, fence where pressure is high, and keep mulch and weeds from creating a sheltered runway to the trunk.
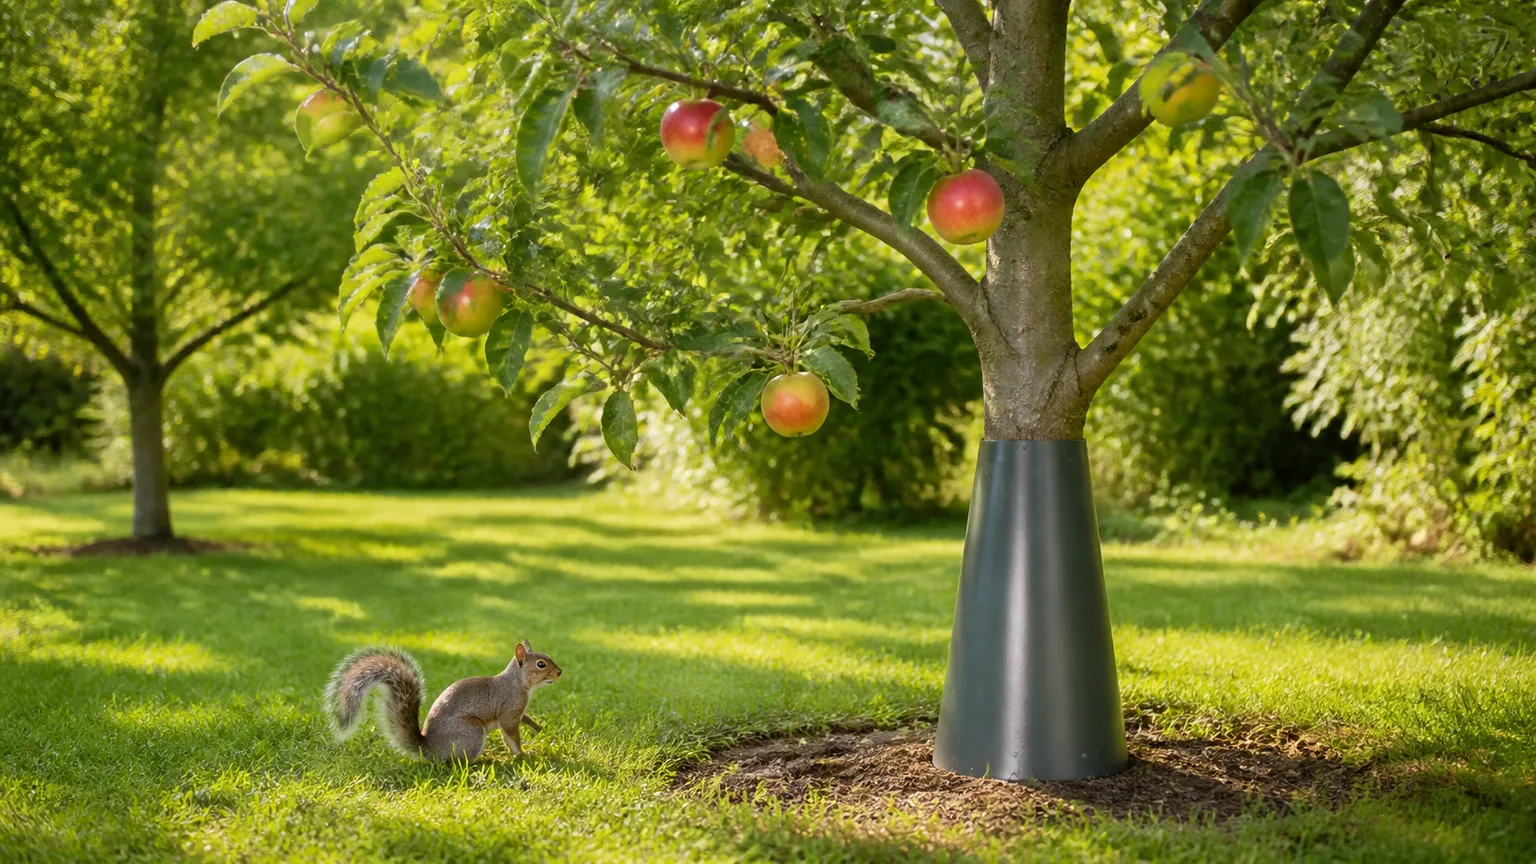
This is the kind of trunk protection that belongs under this part of the plan; the guard must still be checked and adjusted as the trunk grows.
A year-by-year apple tree fruiting plan
At planting.
Confirm the cultivar, rootstock, bloom group, chill requirement, mature size, and pollination partner. Plant at the correct depth in full sun and well-drained soil, remove turf from the root zone, water thoroughly, and install support before the first windy season.
Years one through three.
Prioritize root establishment and the permanent framework over an early crop. Remove blossoms or fruit that would bend a young leader, select well-spaced scaffold branches, keep the central leader dominant, and make only the cuts needed to establish form. Water during dry spells and measure shoot growth before adding fertilizer.
Bearing years.
In late winter, remove dead, diseased, rubbing, crossing, and badly placed wood. Check that the upper canopy does not shade the lower branches. During the growing season, remove water sprouts early, monitor disease and pests, and keep grass and rodents away from the trunk.
Every spring and summer.
Record bloom dates, pollinator activity, frost events, fruit set, thinning date, and harvest date. Thin the crop four to six weeks after full bloom, support branches carrying a heavy crop, and keep a note of which cultivar and rootstock the tree uses. These observations turn a frustrating mystery into a pattern you can act on next year.
What to check when a tree blooms but sets no fruit
Start with pollination, not fertilizer. Ask whether a different compatible cultivar was flowering at the same time, whether the tree is a triploid that needs two partners, and whether cold rain, wind, or pesticide exposure reduced bee activity. If the answer is yes to any of those, the fix is a better pollination plan and a better bloom-time environment.
Next, inspect for frost damage: flowers that turned brown or black in the center, shriveled young fruit, or a sharp freeze during bloom. Then review the previous season’s crop. A tree that carried too many apples, was not thinned, or was severely stressed may have made fewer flower buds for the current year.
If the tree did not bloom at all, check shade, rootstock age, excessive nitrogen, long vigorous shoots, severe pruning, and whether the cultivar fits your winter and growing season. If it bloomed and set fruit but dropped most of it, investigate water stress, poor drainage, disease, insect injury, and natural fruit drop before changing the variety.
Do not make five major changes in one weekend. Correct the most likely bottleneck, record what happens, and give the tree a full season to respond. Apple trees are perennial systems; the useful question is not “What will force fruit this week?” but “Which step in the fruiting cycle needs support before next spring?”
Conclusion
An apple tree that produces fruit is planned before it is planted and managed across more than one season. Put it in sun and well-drained soil, match cultivar and rootstock to the climate, give it a compatible bloom-time partner, train the framework early, prune selectively, avoid unneeded nitrogen, water deeply, thin the crop, and protect the tree from flowers through harvest.
Even with excellent care, a late freeze or a cold, wet bloom can erase one harvest. That is not a reason to abandon the tree; it is a reason to keep records and fix the controllable variables. If you start with the fruiting stage that failed, your next action becomes clear—and the tree has a much better chance of turning spring flowers into apples.



