How to Grow Tomatillos in Your Garden
Grow tomatillos from seed or transplants with clear advice on spacing, pollination, watering, containers, troubleshooting, and harvest.
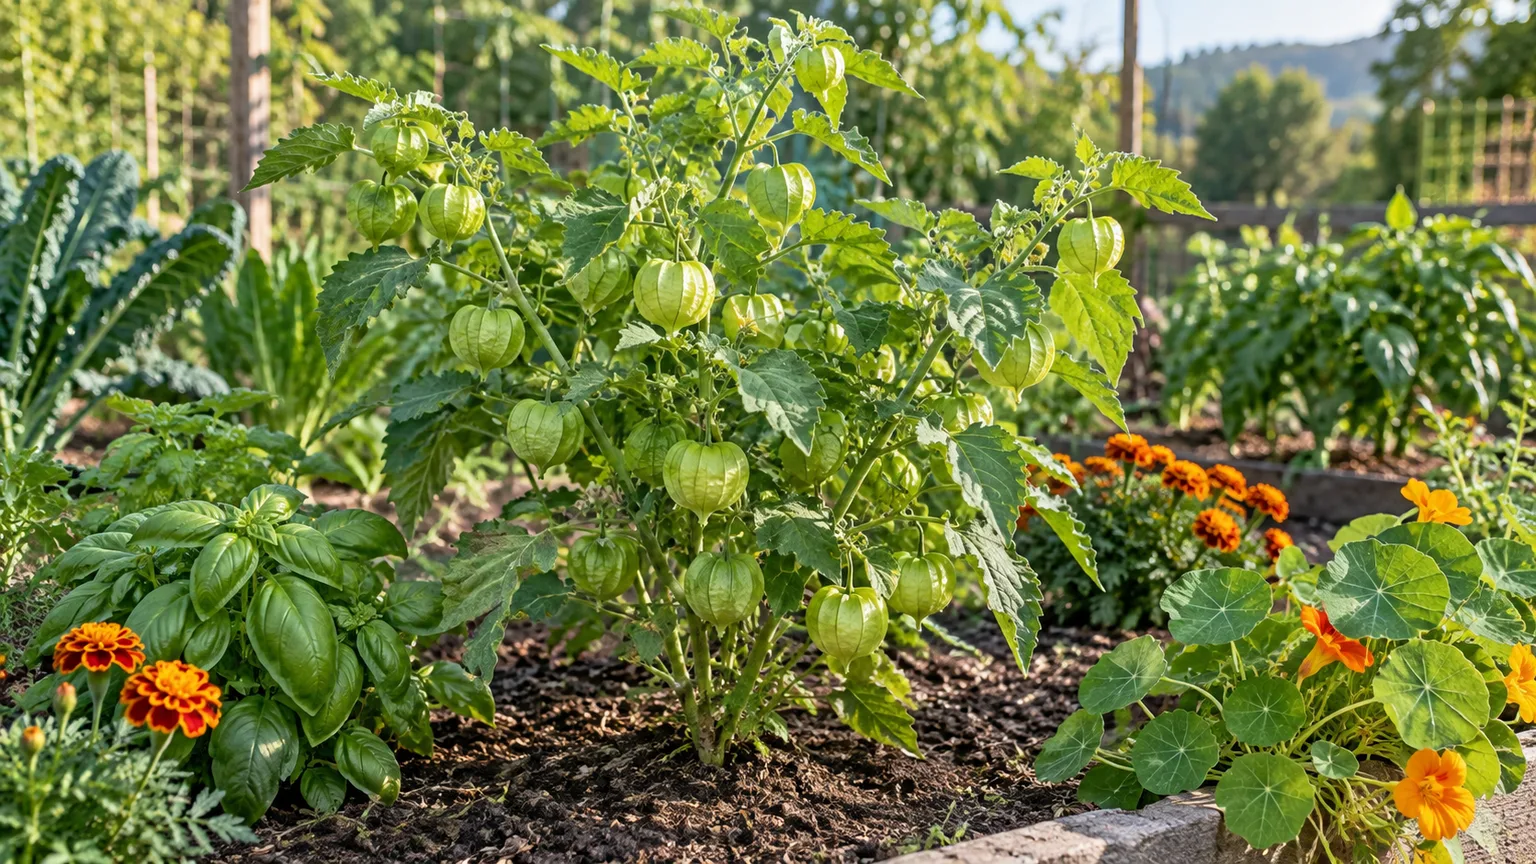
Tomatillos are warm-season plants that can look leafy and vigorous long before they produce a useful harvest. The key is to plan for two plants, because one plant’s flowers usually cannot fertilize one another, then give the pair enough sun, warmth, space, and steady moisture to set fruit.
The fruit develops inside a papery husk, so harvest cues differ from those of a tomato. Once you understand the husk, cross-pollination, and the plant’s sprawling habit, you can grow tomatillos in a bed or large containers without treating every problem like a tomato problem.
The short version: warm soil, two plants, and room to spread
Plant tomatillos outside after frost danger has passed and the soil has warmed. Choose a spot with at least six hours of direct sun, plant two or more tomatillo seedlings near each other, and install support while the plants are still small. Two plants are the practical minimum for pollination; adding basil or flowers nearby does not replace a second tomatillo.
Keep the root zone evenly moist but not waterlogged, and avoid heavy feeding that pushes leaves at the expense of flowers and fruit. Most garden plants begin producing within roughly two to three months of transplanting, but the exact window depends on variety and growing conditions. Extension publications use different maturity ranges and may count from seed or transplant, so use the husk and fruit—not a single calendar number—to judge progress.
Choose a variety and plan for cross-pollination
Tomatillos, often called husk tomatoes, belong to the nightshade family. Extension publications use both Physalis philadelphica and Physalis ixocarpa for cultivated tomatillos, so either name may appear on seed packets. The practical distinction for a home gardener is the cultivar’s fruit color, maturity, and growth habit, not the label’s Latin name.
Green varieties are the most common choice for salsa verde. ‘Toma Verde’ is widely available and tends to spread; ‘Rendidora’ is described by Utah State University Extension as more upright and productive. Purple options such as ‘Purple Coban’ offer a different color and flavor profile, while ‘Pineapple’ is selected for its sweeter, fruitier taste. Treat descriptions as a starting point: seed companies and local garden centers may stock different selections, and maturity can shift in a cool or short season. See the Utah State University Extension tomatillo guide and N.C. Cooperative Extension’s home-garden notes for regional variety examples.
Plan your bed around two compatible tomatillo plants, not one plant plus a different nightshade. The species is generally self-incompatible: pollen from a flower on the same plant is not a dependable route to fruit. Two separate plants give pollinators pollen from another plant; they can be the same cultivar, though growing more than one cultivar can add variety to the harvest. The second plant should be close enough for bees to move between blossoms, but still have room for its mature canopy.
Start tomatillos from seed or transplants
A transplant is useful when your growing season is short or you want to harvest earlier. Starting from seed gives you more choice of varieties, especially purple or less common selections, and avoids waiting for a local nursery to carry a tomatillo start. Either route works as long as you do not move cold-sensitive seedlings outdoors too soon.
Time planting by frost and soil warmth
For an indoor start, sow about six to eight weeks before your expected last spring frost. Set seedlings outside only after frost risk has passed and the soil is warm—around 60°F or above is a useful threshold. In a short-season region, a black plastic mulch or a temporary row cover can help warm soil or protect young transplants, but remove or vent covers when the air inside gets hot; flowers can fail to set under excessive heat.
In long, warm-season regions, you can sow directly outdoors after frost danger has passed and the ground is warm. Direct sowing saves transplant work, but it delays the crop compared with setting out a sturdy start. N.C. Cooperative Extension notes that transplants can mature several weeks earlier than direct-seeded plants, while Utah State University Extension recommends waiting for warm soil and frost-safe conditions. Use your local last-frost date and soil conditions rather than a fixed month: March may be right in one region and far too early in another.
Start seeds indoors for a head start
Use a clean tray or small pot with drainage and a fine seed-starting mix. Sow seeds roughly ¼ inch deep, moisten the mix, and keep it warm and lightly moist while they germinate. Established gardening guides report germination in about one to two weeks under warm conditions; cool mix or drying between waterings can slow or uneven the process. A heat mat can help if the room is cool, but remove the tray from direct mat heat once seeds emerge.
After sprouting, give seedlings strong light from a bright window or a grow light positioned close enough to prevent stretched, weak stems. Keep the mix damp rather than saturated, and thin crowded cells to the strongest seedling.
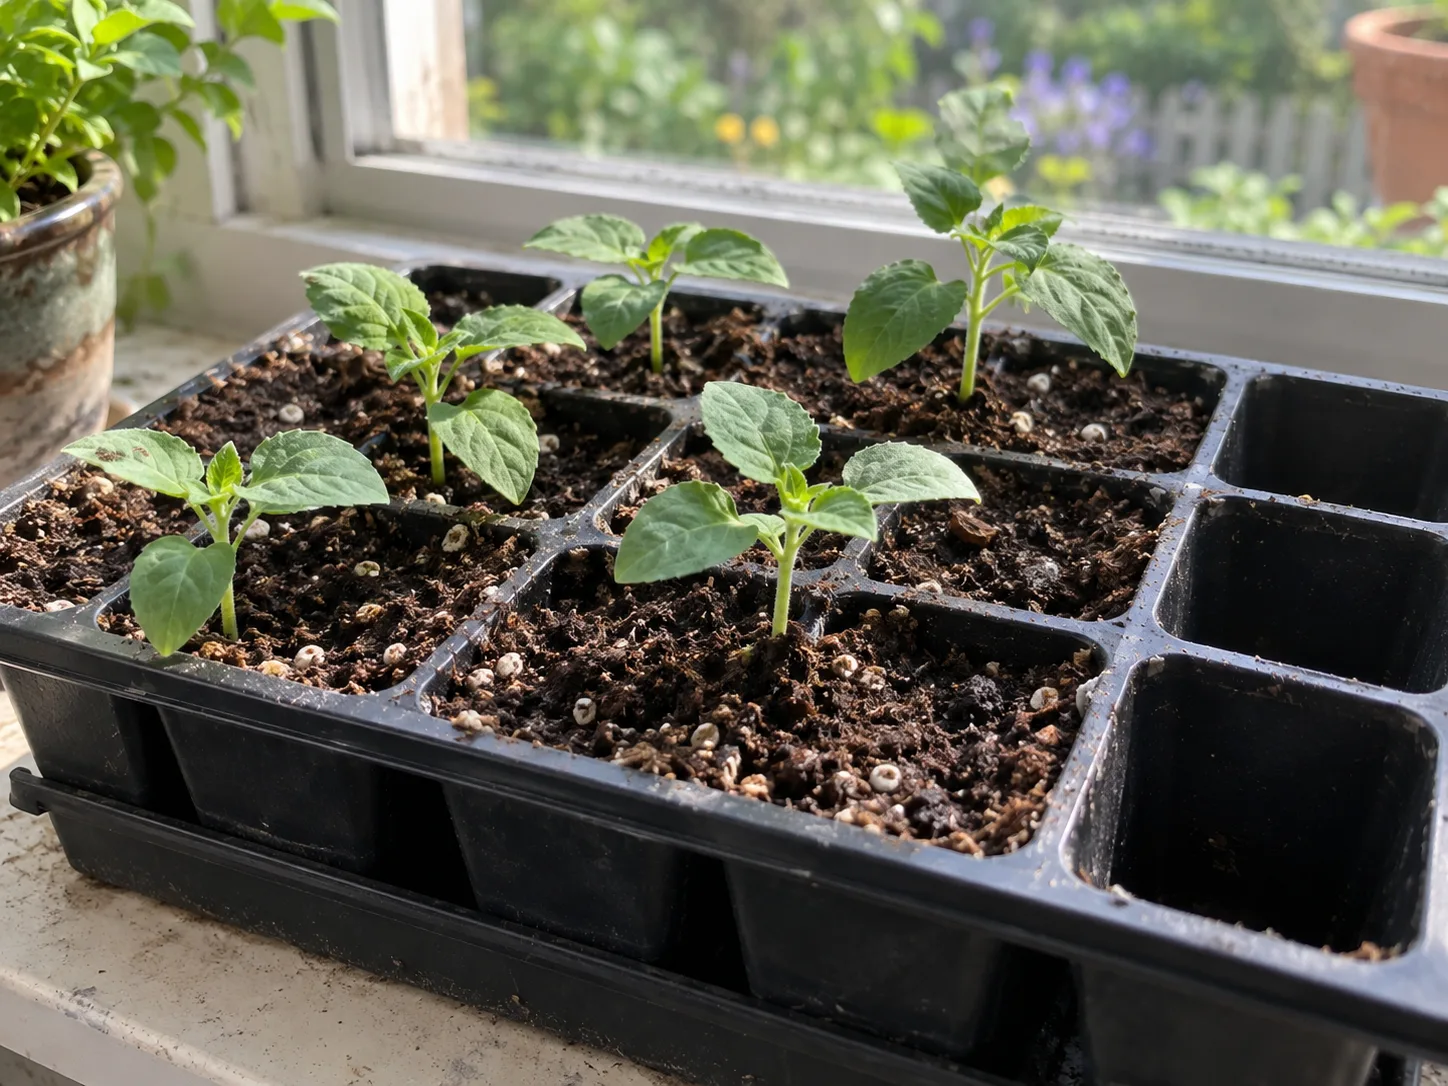
Pot on if roots fill the cell before outdoor planting. About a week before transplanting, harden seedlings off by gradually increasing their exposure to outdoor sun, wind, and cooler nights; placing tender plants straight into a full-sun bed can scorch leaves or stall growth. Epic Gardening’s tomatillo growing guide provides additional seed-starting and transplant timing details.
Give plants room, sun, and support
Tomatillos grow into branching, sometimes sprawling plants rather than tidy upright columns. Full sun helps them flower, and airflow through the canopy makes it easier to inspect leaves and pick fruit. If you have a small bed, plan for the mature spread before planting rather than trying to squeeze a large plant into the gap between two other crops.
Set spacing for the mature plant, not the seedling
A common home-garden starting point is about 24 inches between trained plants, with rows around 3 feet apart. Give sprawling cultivars or unsupported plants more space—closer to 30 to 36 inches between plants and wider paths make harvesting and disease scouting easier. Texas A&M AgriLife Extension lists wider row spacing for some production systems, which shows why layout depends on cultivar, support, and how much access you need. Leave a path where you can reach the center of the plant without stepping into wet soil or crushing stems.
| Growing setup | Practical starting spacing | Best fit |
|---|---|---|
| Caged or staked bed | About 24 inches between plants; rows about 3 feet apart | Compact beds where you can keep stems upright |
| Sprawling plants | About 30–36 inches between plants; wider rows and paths | Large beds with room for branches to spread |
| Containers | One plant per large pot; keep two pots near each other | Patios, poor soil, or gardeners who want better control of drainage |
Spacing recommendations vary because a trained plant occupies less ground than a plant left to sprawl. If leaves stay wet after rain, the center is hard to reach, or branches overlap neighboring crops, thin or redirect the plants before the canopy becomes tangled.
Choose a cage, stake, or trellis before planting
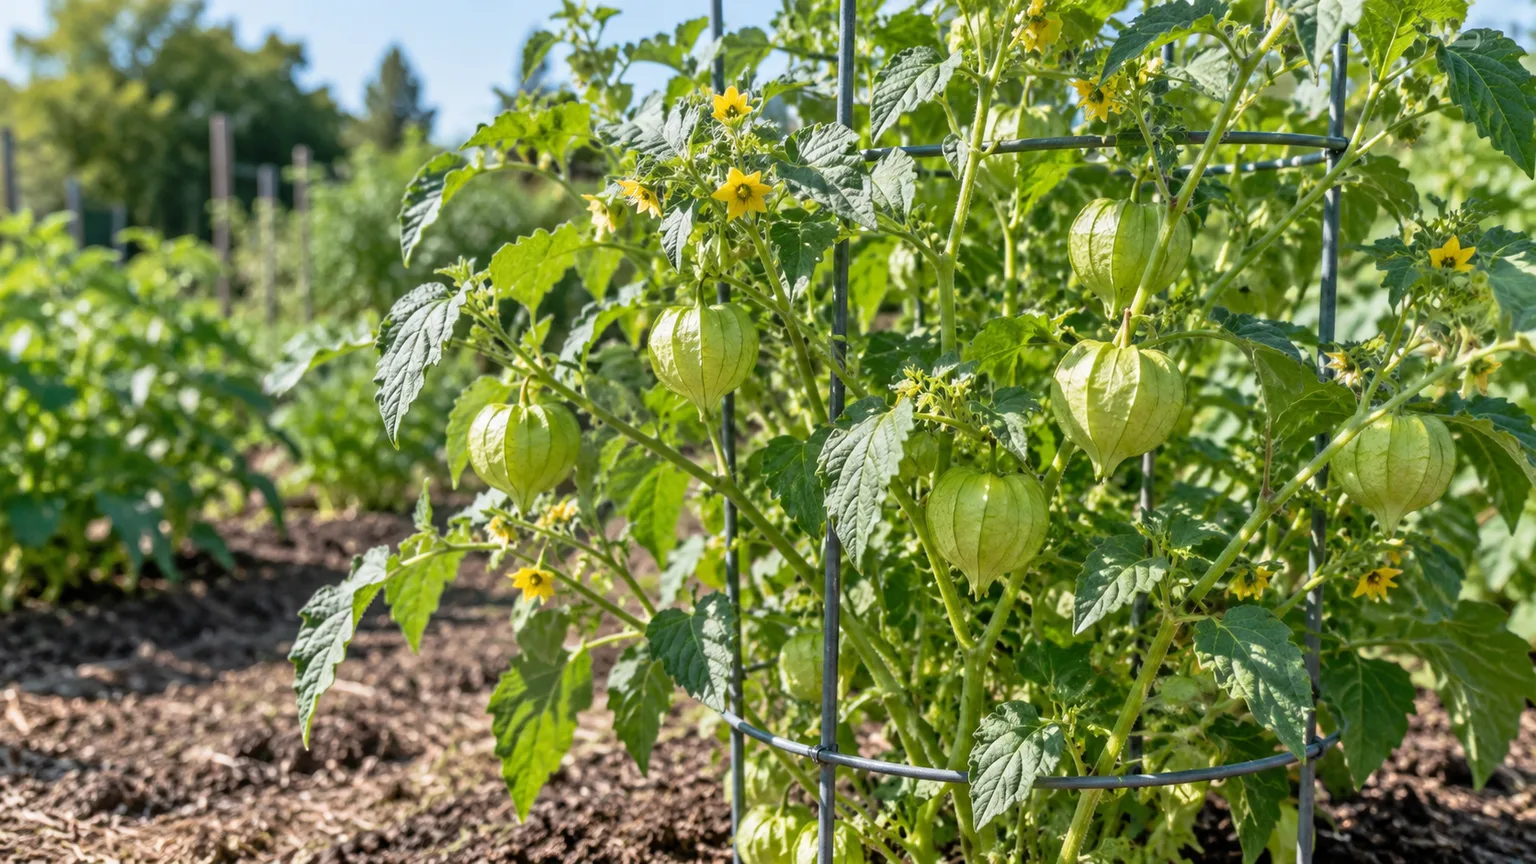
Support is optional for survival but useful for keeping fruit off damp soil and making harvest easier. A sturdy tomato cage works for a bushier plant; a stake with soft ties or a trellis suits gardeners willing to guide new stems as they grow. Install the structure when you transplant so you do not drive a stake through roots later. Utah State University Extension recommends staking or caging to reduce sprawling and improve airflow.
Tie stems loosely, leaving room for them to thicken. Check the ties as growth accelerates, and guide branches before they lie across a path or settle into mulch. You can also let the plant sprawl if you have space and a clean, dry surface below it; expect to spend more time searching under leaves for ripe fruit. A support system matters most where the bed is crowded, the site is humid, or slugs and soil splash are recurring issues.
Get pollination right for fruit set
Tomatillo flowers are yellow and relatively small, but a flower alone does not guarantee a fruit. A pollinator must move pollen between plants, which is why extension guidance recommends at least two tomatillos. One well-watered plant can produce abundant blooms and still leave you with empty husks if it has no nearby partner.
Place the plants close enough that bees can visit both during the same foraging trip. Avoid insecticides that could harm pollinators, and let some flowers in the surrounding garden bloom if you want to support bee activity. If insects are scarce, you can gently brush pollen from an open flower on one plant to an open flower on the second. A paintbrush can help in a protected space, but moving pollen within one plant may not overcome self-incompatibility; the second plant is the important part.
If you planted only one, adding a second seedling nearby is the clearest fix while both plants are still growing. If transplanting is no longer practical, a neighbor’s tomatillo plant close enough for pollinators may help, but a tomato, pepper, or basil plant is not a substitute. N.C. Cooperative Extension and Utah State University Extension both emphasize the need for multiple tomatillo plants for reliable fruit set.
Water and feed for fruit, not just foliage
Tomatillos tolerate some dry weather after they establish, but steady moisture supports flowering and fruit development. Aim for roughly 1 to 2 inches of water per week from rainfall and irrigation, adjusting for heat, wind, soil texture, and container size. Check the soil a few inches below the surface: if it is drying out, water deeply at the base; if it remains wet, wait and improve drainage rather than adding more.
A thick mulch layer helps slow evaporation and reduces soil splash, but keep mulch a little away from the stem. Drip irrigation or a soaker hose directs water to the roots and keeps leaves drier than frequent overhead watering. Containers may need daily checks during hot spells because they dry faster than garden beds. A fixed schedule is less useful than checking the root zone; sandy beds and small pots dry faster than deep, compost-rich soil.
Start with a soil test if you are unsure what the bed needs. Tomatillos do not need a heavy nitrogen boost: too much nitrogen can produce lush stems and leaves while delaying flowering and fruiting. Add compost in modest amounts if soil needs organic matter, and use a balanced vegetable fertilizer only when the soil test or plant condition calls for it. For pots, replenish nutrients with a complete fertilizer at the label rate rather than guessing a concentrated dose. Utah State University Extension cautions against overfertilizing because it can delay fruit set and maturity.
Grow tomatillos in containers
A container is a good option if garden soil drains poorly or you have only a sunny patio. Choose a deep, stable pot with generous drainage holes and fresh potting mix. Get Busy Gardening describes 5 gallons as a minimum for one plant; a larger container, around 10 gallons if space allows, gives a sprawling plant more root room and a bigger water buffer. Smaller pots dry quickly and can turn a manageable watering routine into multiple checks each day.
Remember the pollination requirement when planning the patio. Grow two tomatillo plants in separate large pots and place the pots near each other, or use a single exceptionally large planter only if it can give both plants enough room. Put the support in at planting, then locate the pots where they receive full sun and where you can reach all sides for watering and picking. Water when the surface begins to dry, but make sure excess water can drain freely; a saucer that keeps roots standing in water can cause root problems.
Container plants may need modest feeding more often than in-ground plants because nutrients move out with watering. Follow the fertilizer label, avoid overfeeding nitrogen, and flush the pot with water occasionally if soluble fertilizer salts accumulate. For bed companions and flowers that share a warm-season planting window, see the existing guide to companion plants for tomatillos; keep any companion outside the tomatillo’s mature canopy.
Prune only when it solves a real problem
Routine pruning is not required for a productive tomatillo plant. Remove leaves that are broken, badly diseased, or resting on soil, and cut out a stem only if it blocks airflow or makes the plant unsafe to reach. Use clean pruners and avoid stripping the center bare: leaves produce the energy that supports flowers and fruit.
If a plant is outgrowing its space, pinch a few vigorous tips or redirect branches onto a support rather than repeatedly removing large amounts of growth. Do this early enough that you can still see what you are cutting. Stems that touch the soil can root where they lie, so lifting or tying them up is often simpler than pruning them away. At the end of the season, remove fallen fruit and spent plants to reduce volunteers the following year and make crop rotation easier.
Troubleshoot flowers, husks, and stressed plants
When the plant looks healthy but the harvest disappoints, check pollination, temperature, watering, and maturity before adding fertilizer. Tomatillos can set many flowers before fruit begins to swell, so give young plants time, but investigate if flowers keep dropping or husks remain empty for weeks.
Flowers but no fruit or empty husks
Use this sequence to narrow the cause:
- Count plants. If there is only one, add a second tomatillo nearby; other species do not supply compatible pollen.
- Check whether flowers are open and receiving visitors. A lack of pollinator activity can limit fruit set; in a protected patio, hand-transfer pollen between flowers on two separate plants.
- Review recent temperatures. Extended heat or cold can interfere with flowering and fruit set. Keep plants out of frost and, in a heat wave, provide light afternoon shade if the site is intensely exposed.
- Check moisture at root depth. Severe drying followed by a flood, or soil that stays saturated, stresses flowers and young fruit.
- Wait for the husk to fill. A papery husk can develop before its fruit expands. If the fruit is still small, give the plant time before deciding pollination failed.
These checks are more useful than adding a high-phosphorus fertilizer or spraying an insecticide without identifying a problem. The extension publications from Utah State and Texas A&M note pollination, temperature, and moisture as factors in fruit set; practical guidance from Epic Gardening also highlights pollination and heat when flowers fail to set.
Wilting, spots, and weak growth
A plant that wilts in wet soil may have root trouble rather than a need for more water. Improve drainage, move container plants out of standing water, and avoid repeatedly saturating the bed. If a plant wilts only during a hot afternoon but recovers by morning, check the root zone before irrigating; midday droop alone does not prove the soil is dry.
Inspect both sides of leaves for aphids, flea beetles, cutworms, or other chewing damage. Pick off larger pests when practical and remove badly damaged leaves; identify the insect before choosing a treatment, and follow the product label if a labeled treatment is needed. Mosaic-like mottling, curling, or distorted growth can indicate a virus, which is not cured by fertilizer. Remove severely affected plants and clean tools before moving to healthy crops.
Tomatillos share pest and disease risks with other nightshades, including tomatoes, peppers, eggplants, and potatoes. Rotate where you plant them from year to year, avoid crowding, and water at the soil surface when possible. These habits do not prevent every disease, but they reduce stress and help leaves dry faster after rain.
Harvest and store tomatillos at the right stage
Start checking fruit when the husks are full and beginning to feel papery. A ready tomatillo is firm and has filled most of its husk; some varieties split the husk as the fruit reaches maturity.
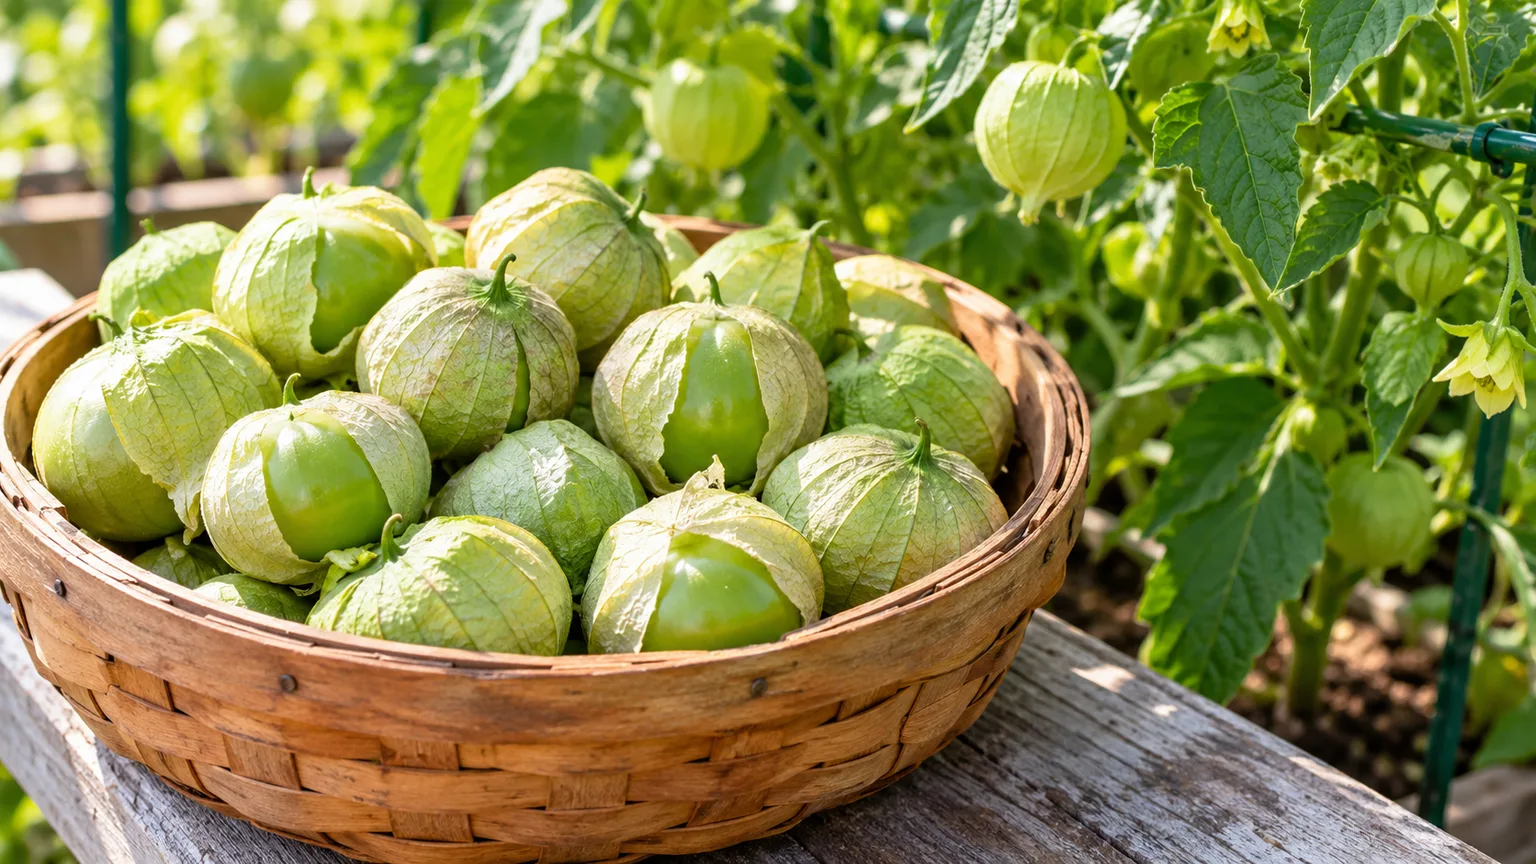
The fruit’s color depends on cultivar: green types are normally harvested green, while purple varieties develop purple coloring. A fruit turning yellow or becoming soft may be past its best flavor, so do not wait for every tomatillo to turn red or yellow like a tomato.
Pick with a gentle twist or snip the stem with clean scissors, taking care not to pull down a branch carrying younger fruit. Check under the plant because ripe fruit may drop. A full-sized fallen fruit can finish ripening in its husk on the counter; discard fruit that is split, moldy, or badly damaged. The husk can feel dry even while the fruit inside remains firm, so judge both the husk fit and the fruit itself.
Peel away the husks and rinse off the sticky coating before cooking or preserving. For short-term storage, keep fruit in its husks in a paper bag in the refrigerator; Utah State University Extension reports storage up to about three weeks under appropriate conditions. Harvest to Table also uses a husk that begins to split as a harvest cue; treat that as a secondary sign, since variety and intended flavor affect the best picking stage. To freeze, remove the husks, wash and dry the fruit, and freeze whole or chopped in a sealed container. Harvest repeatedly as fruit matures rather than stripping the whole plant at once, and protect the crop from frost at season’s end if you want the remaining fruit to finish.
Eat the ripe fruit, not the foliage or stems. N.C. Cooperative Extension cautions that parts of the plant other than ripe fruit are poisonous, so do not eat leaves, stems, or immature fruit; wash the harvested fruit before use.
Conclusion
For a reliable tomatillo harvest, set out at least two plants after frost danger has passed, choose a sunny and well-drained spot, and plan for their branches to spread. Support the plants early if you want easier access and cleaner fruit, keep moisture steady without waterlogging, and resist the temptation to push growth with excess nitrogen.
When flowers fail to become fruit, check whether two plants are close enough for pollination before changing fertilizer or watering. Harvest when each fruit fills its husk and is firm, then use the cultivar’s normal color as a secondary clue. Those few decisions—two plants, warm soil, room, and a full husk—solve most of the common growing frustrations.



