How to Overwinter Geraniums for Bigger Spring Blooms
Save your favorite geraniums before frost with three overwintering methods, a space-saving choice guide, and a spring plan for earlier blooms.
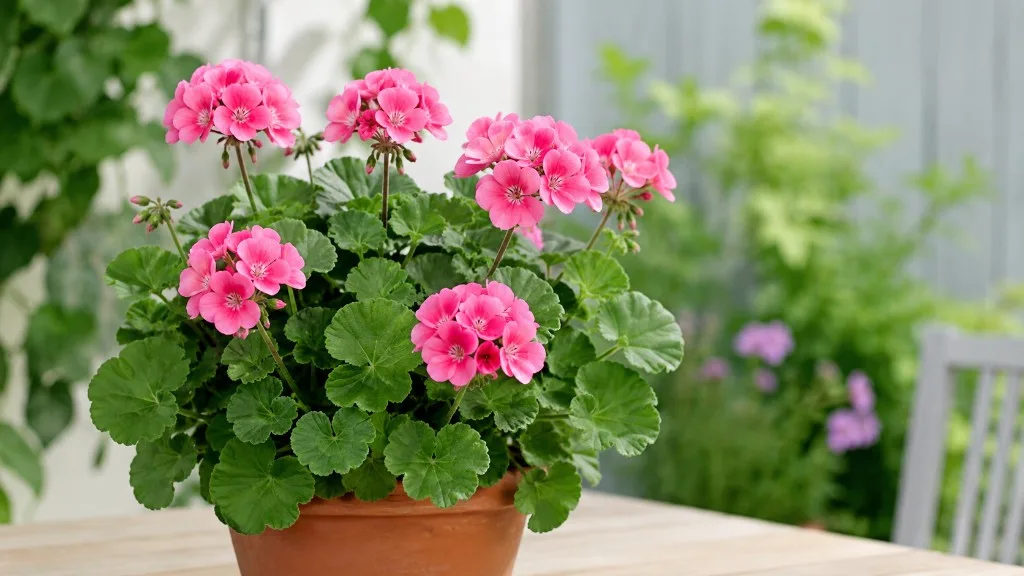
If your summer geranium is still healthy, full, and flowering, do not wait for a frost warning to decide what happens next. The best overwintering method depends on three things you can assess today: how much plant you have, how much indoor light and space you can offer, and whether you have a genuinely cool, frost-free place for dormancy.
There is one naming detail to settle first. The bedding plants sold as geraniums are usually Pelargonium—tender perennials from warm climates—not the hardy Geranium species commonly called cranesbills. Pelargoniums can live for years when protected from freezing weather, and the Royal Horticultural Society describes them as plants that can be overwintered in frost-free conditions or grown as houseplants. This guide is about those tender garden geraniums: zonal, ivy-leaved, regal, angel, and scented-leaved types.
Which Geraniums Actually Need Overwintering?
Treat a bedding geranium as frost-tender unless you know you are growing a hardy cranesbill. Zonal pelargoniums have fleshy stems and rounded, often zoned leaves; ivy-leaved types trail with thick, ivy-shaped foliage; regal and angel types carry showier flowers. Their habits differ, but none should be left outdoors through a freeze simply because a plant label says “geranium.”
The RHS Pelargonium guide makes the useful distinction: Geranium is a different genus from Pelargonium, even though gardeners commonly use geranium for both. Hardy cranesbills are selected for outdoor perennial life, while the colorful bedding pelargoniums that fill patio pots are the plants most gardeners need to bring indoors, take cuttings from, or store dormant.
If you are uncertain, look at the plant’s history rather than relying on the name alone. A plant purchased as a summer bedding annual, grown in a container or hanging basket, and damaged by the first cold snap is almost certainly a tender pelargonium; a spreading border perennial that returns after winter is more likely a hardy Geranium.
Is Overwintering Worth It for Your Plant?
Overwintering is worth the trouble when the plant has a color, scent, flower form, or growth habit you cannot easily replace. It is also useful when you started a favorite cultivar from a cutting or when a mature plant already has a strong root system and a good branching framework. Saving one plant can give you an earlier, larger starting point than buying a small spring plug.
It is not automatically worth carrying every plant indoors. A pest-infested, diseased, badly rotted, or already exhausted plant can spread problems to your houseplants and still fail in winter. If replacing an ordinary plant costs less than the pots, light, inspection time, and indoor space it would occupy, composting it and buying fresh stock in spring is a sensible horticultural decision.
Use this quick rule: choose potted overwintering when you have bright space and want the original plant; choose cuttings when space is tight or you want several compact young plants; choose bare-root dormancy only when you have a reliably frost-free cool storage area and accept a higher chance of loss. You can hedge your bets by keeping the parent in a pot and taking a few cuttings, but do not bring a diseased parent indoors just to preserve it.
Time the Job Before Frost
Start planning four to six weeks before your area’s usual first frost, then move faster if the forecast changes. The hard deadline is not a particular date on the calendar; it is the first night that could expose the plant to freezing air, frozen potting mix, or a cold pocket on a porch. The RHS recommends moving vulnerable plants indoors before temperatures drop, while UW–Madison Extension’s overwintering guidance repeatedly puts preparation before a hard freeze.
That lead time matters because garden-grown plants need to be lifted, potted, inspected, and adjusted before they meet the dry air and lower light of a home. It also gives cuttings time to root while the parent is still actively growing. If a light frost has already touched the foliage but stems remain firm and green, take cuttings immediately and inspect the crown; a plant with blackened, water-soaked tissue is a poor overwintering candidate.
Do the work on a mild, dry day. Avoid lifting a wet root ball and sealing it into storage, and avoid carrying dripping soil straight from a rainy bed into a warm room. A short drying and inspection interval is useful, but do not confuse “let the surface dry” with leaving a tender plant exposed to a forecast freeze.
Prepare a Clean, Healthy Plant
Preparation is where many winter failures begin. A plant can look perfect from across the patio and still carry aphids under leaves, spider mites in dry foliage, fungus gnat larvae in wet mix, or grey mould hidden inside dense growth. The RHS pelargonium growing guide notes that damp conditions and poor air circulation favor grey mould and that pelargoniums can also suffer from pests such as thrips, whitefly, aphids, and fungus gnats.
Wash or wipe the outside of the pot, remove fallen leaves, and check the undersides of leaves, stem joints, and the soil surface. If you find active pests, isolate the plant and treat it only with a product labeled for that use, following the label; do not make an indoor pesticide decision from a generic home recipe. If disease is widespread or stems are soft at the base, discard the plant rather than using your indoor growing area as a recovery ward.
Inspect, quarantine, and label
Keep newly moved geraniums separate from your houseplant collection for at least a week while you inspect them repeatedly. Quarantine is not a dramatic extra step: the temperature change can make pests more visible, and one overlooked aphid colony can establish on nearby plants before you notice the damage.
Label each plant before pruning. Write the flower color, cultivar name if known, and whether it is zonal, ivy-leaved, regal, or scented-leaved. This small habit prevents a spring container from becoming a mystery mix and lets you compare which method actually worked for each type.
Prune according to the method, not by an automatic percentage. A potted plant that will remain in bright active growth may need only a cleanup and a one-third reduction. A plant headed for dormancy can be cut back more strongly, while a cutting needs a short, healthy shoot rather than a heavily woody base. Always cut above a healthy node with clean, sharp pruners.
Method 1: Keep a Potted Plant Growing
This is the most forgiving method for a small number of plants when you have a sunny window, conservatory, greenhouse, or grow light. You keep the root system in a container, let the plant slow down or continue modest growth, and adjust water and feeding to match the light it actually receives.
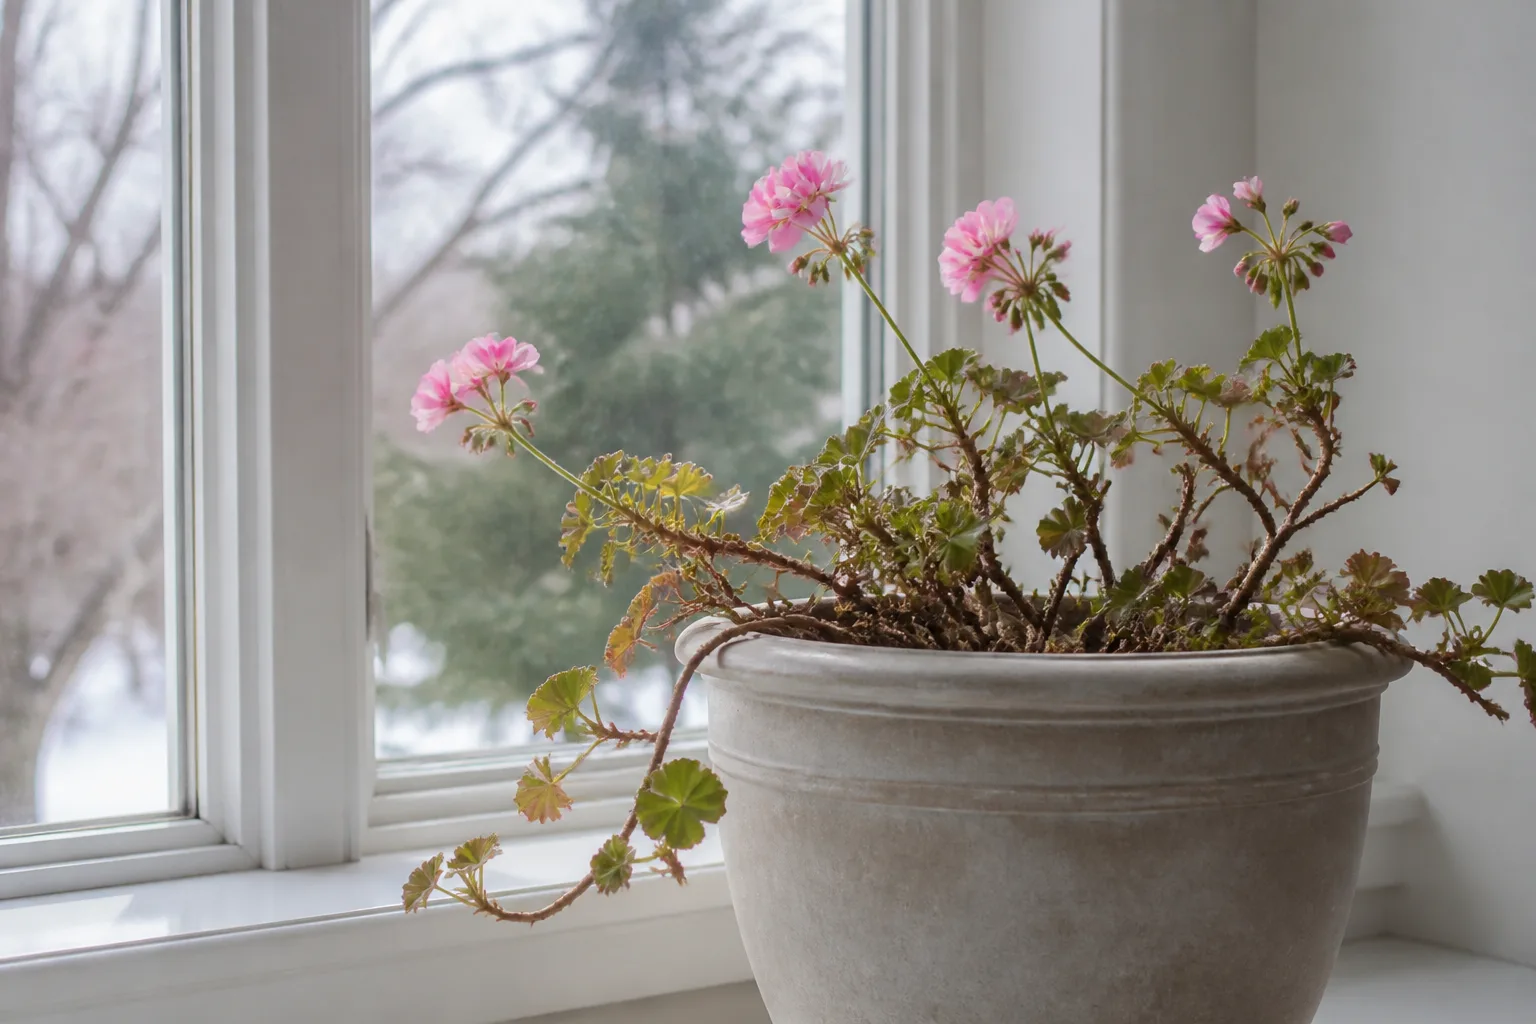
Move an in-ground plant into a pot
For a geranium in the ground, dig wider than you think you need and lift with as much of the root ball intact as practical. Pot it into a clean container with drainage holes that comfortably fits the roots; an oversized pot holds more wet mix than the reduced root system can use. Use fresh, free-draining potting mix rather than bringing heavy garden soil indoors.
For an already potted geranium, you may not need to repot at all. Remove dead growth, check that water can escape, and replace only the top layer of mix if it is crusted or contaminated. If the root ball is tightly circling the pot, move up one size in spring rather than forcing a large winter container that stays wet.
Trim long shoots by about one-third if the plant is crowded or you need to reduce its canopy. Leave enough healthy leaves for the roots to keep supporting the plant, especially if your indoor space is bright and warm. The goal is a compact framework that can branch again, not a leafless stump unless you are deliberately moving into dormancy.
Light, temperature, water, and feeding
Give the plant the brightest practical light you have, while protecting leaves from intense midday glass heat. A south- or west-facing window may work; in a dim winter room, a grow light is more reliable than hoping a distant window will prevent stretch. The RHS says pelargoniums flower best in full light but should be shaded from scorching midday sun indoors or under glass.
Cooler conditions make water management easier. UW–Madison Extension recommends roughly 60–65°F for potted overwintering plants, and the RHS describes cool, frost-free conditions as suitable for overwintering. Keep the plant away from a hot radiator, heating vent, or fireplace, where warm dry air can increase water loss while the potting mix remains wet below the surface.
Water when the upper portion of the mix has dried and the pot feels lighter, then water thoroughly enough to wet the root ball and let excess drain away. Do not water by a weekly calendar, and never leave the pot standing in a saucer of runoff. A low-light plant uses less water than it did on a sunny summer patio, so winter overwatering is a more common threat than mild dryness.
Reduce or pause fertilizer while growth is slow. When days lengthen and new growth resumes, restart with a balanced liquid feed at the label rate, then use a flowering feed only if the label supports that use and the plant is actively growing. Fertilizer cannot compensate for low light, cold roots, or poor drainage.
Method 2: Root Cuttings for Compact Spring Plants
Cuttings are usually the best balance of reliability, space, and spring performance. Instead of preserving the whole mature plant, you preserve pieces of healthy current growth; those pieces root indoors and develop into fresh, branched plants that are easier to fit under a light or on a windowsill.
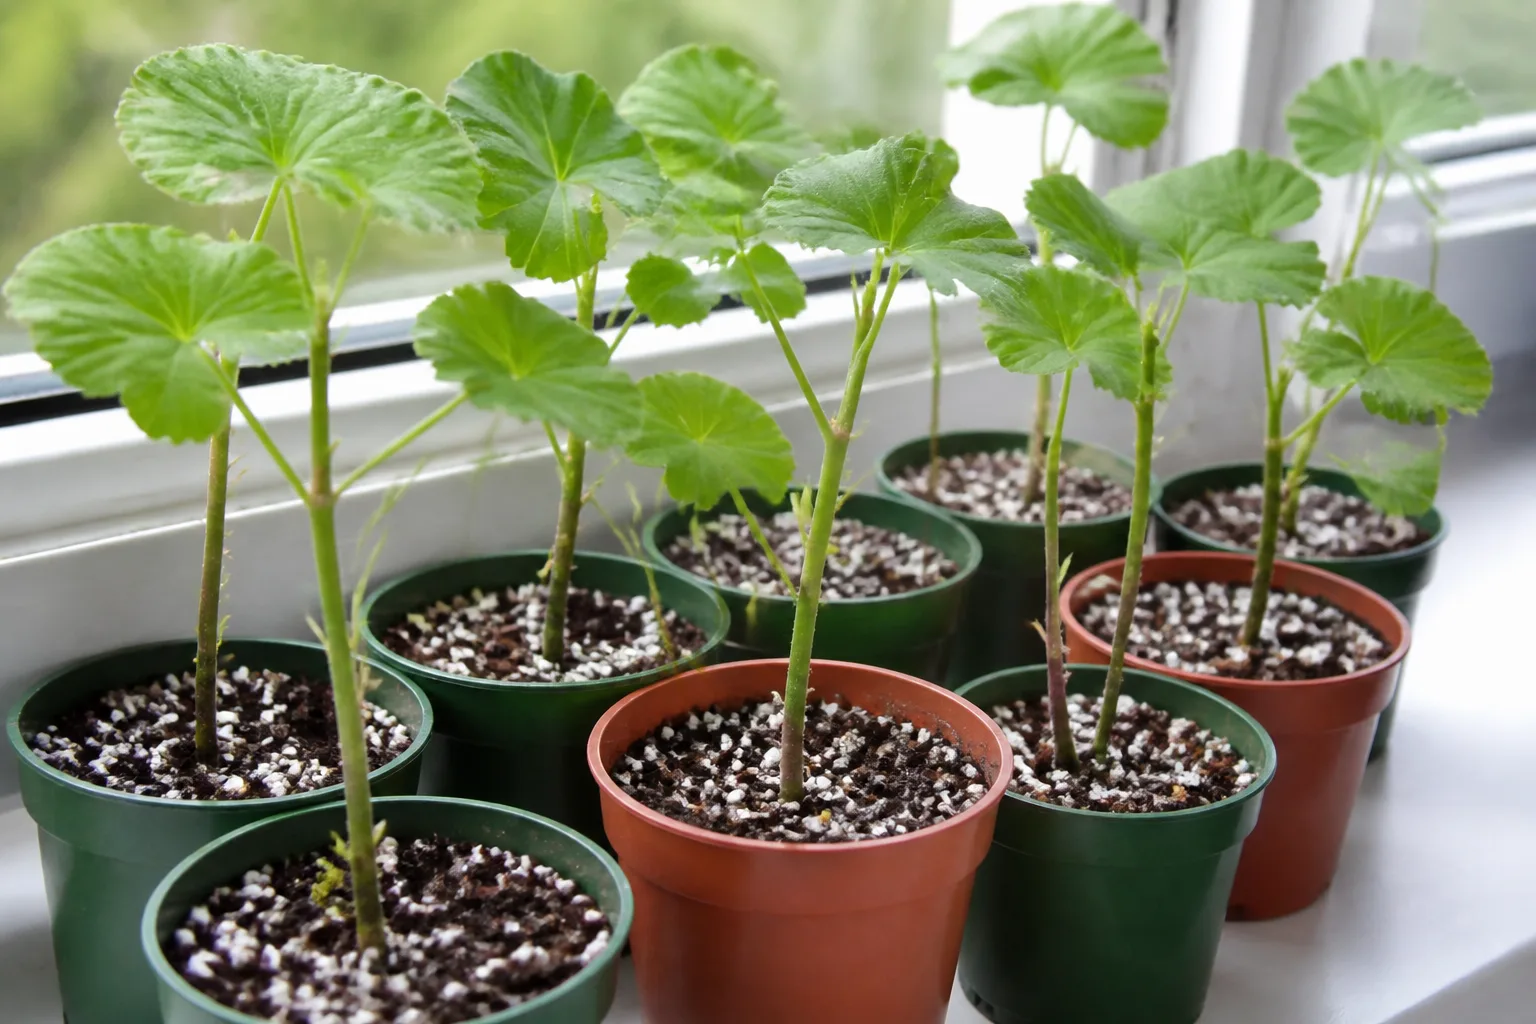
Take and plant cuttings
Choose firm, green shoot tips from a plant that is actively growing and free of pests. Make several cuttings rather than relying on one, because a lost cutting is normal and a batch gives you a better chance of retaining the exact color or cultivar. BBC Gardeners’ World’s geranium cutting guide recommends short cuttings of about 10 cm and notes that regal types can take longer to root than zonal types.
Cut just below a node, where a leaf joins the stem. Remove the lower leaves and any flower buds, leaving one or two leaf sets at the top. Flowers consume energy without helping the cutting root, and buried leaves can rot; the node you bury is the place where roots are most likely to form.
Use a small pot or tray with drainage holes and a loose rooting medium such as peat-free potting mix blended with sharp sand, perlite, or vermiculite. Rooting hormone is optional rather than magical: a light dusting may help, but clean tools, a healthy cutting, good drainage, and steady moisture matter more. Insert the bare lower section deeply enough to support the cutting, firm the medium gently, and water once so the medium is evenly moist.
Geranium cuttings can root in water, but a soil-based medium is the better default for an overwintering batch. Gardeners’ World specifically warns that water-rooted geranium cuttings can turn slimy and still need to be potted later, so the apparent shortcut often adds a transfer step and another chance to damage fragile roots.
Care for cuttings until spring
Place the cuttings in bright, indirect light while roots form. They need enough light to stay sturdy, but harsh direct sun through glass can overheat a small pot and wilt an unrooted stem. Keep the medium lightly and evenly moist; saturated mix deprives the base of oxygen and encourages rot, while a completely dry cutting cannot recover.
Do not seal the cuttings in a constantly wet plastic tent. Some gardeners use a clear bag or dome to slow moisture loss, but ventilation is essential, and BBC Gardeners’ World advises against covering geranium cuttings because mildew can develop on the leaves. If you use a cover in a very dry room, leave an air gap and open it daily.
Expect roots in roughly six to eight weeks, sometimes sooner and sometimes later in a cool or low-light room. Once a cutting resists a gentle tug and shows new growth, pot it individually. Pinch the growing tip after it has established so it branches instead of producing one long stem, then keep it bright and compact until spring.
If you are preserving a patented named cultivar, check its plant tag and local rules before multiplying it for sale or distribution. Rooting a cutting for your own garden may still be restricted for some protected varieties, so the safest practice is to treat propagation rights as a real part of the plant’s identity rather than an afterthought.
Method 3: Store a Dormant Bare-Root Plant
Bare-root storage uses the least light and can save space when you have many mature plants, but it has the narrowest margin for error. It is best for a gardener with a cool, frost-free garage, basement, shed, or unheated porch—not a warm utility room and not an outdoor shed that freezes solid.
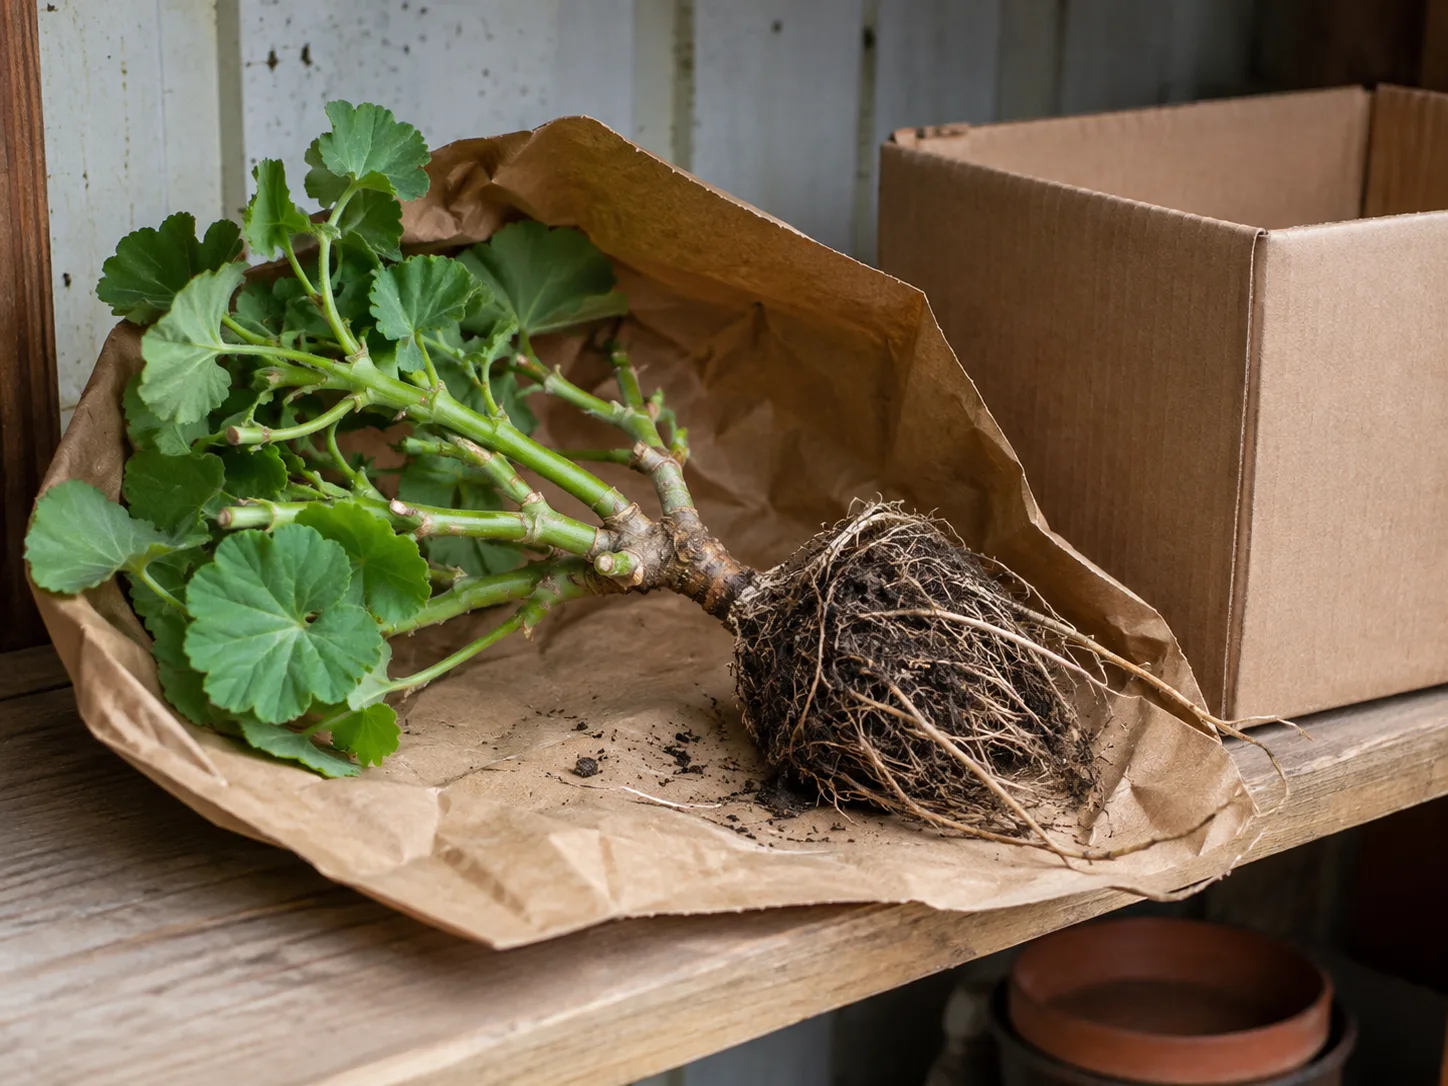
Dry, store, inspect, and rehydrate
Before the first hard freeze, lift the plant or remove it from its container. Shake away loose soil, allow the surface of the roots and stems to dry briefly in a sheltered place, and cut back damaged or excessive top growth. Do not scrub every root clean or leave the plant wet; you want less damp material around the roots, not a desiccated root system.
Store the plant in a breathable paper bag, cardboard box, or suspended position where air can circulate. UW–Madison Extension gives a practical target around 45–55°F for dormant storage, while the RHS describes bare-root plants as needing a frost-free place and says the method is less reliable and best suited to tougher, woody-stemmed varieties. The non-negotiable rule is no freezing; the second rule is no sealed, humid packaging.
Check the plants every two to three weeks. Firm stems and roots are encouraging; shriveled tissue means conditions are too dry, while blackened, soft tissue or mould means moisture and airflow are wrong. Remove affected material immediately and move the remaining plants to a drier, better-ventilated position.
If roots are becoming excessively dry, rehydrate them briefly rather than repeatedly misting the entire plant. A short soak in room-temperature water can restore flexibility, but let the roots drain and surface-dry before returning the plant to storage. In late winter, inspect for firm green tissue, cut back dead sections, soak the roots for a few hours if needed, and pot the plant with two healthy nodes near or just below the surface.
Do not expect a bare-root geranium to look alive in January. Leaf drop and a bare framework can be normal during dormancy, but a plant that is hollow, black, foul-smelling, or brittle all the way through is not going to rebound. If the method is new to you, store only part of your collection this way and use cuttings as insurance.
Choose the Best Method for Your Space
The “best” method is the one whose conditions you can maintain, not the one with the shortest list of steps.
| Method | Best when | Main advantage | Main failure risk |
|---|---|---|---|
| Potted and growing | You have bright light and only a few plants | Preserves the original root system and mature framework | Low light plus winter watering creates leggy growth or rot |
| Rooted cuttings | Indoor space is limited or you want several plants | Compact, relatively reliable, and easy to multiply | Cuttings dry out, rot, or stretch before rooting |
| Bare-root dormancy | You have many plants and a cool frost-free storage spot | Minimal light and little floor space | Storage that is too wet, too dry, warm, or cold kills plants |
If you live in a mild climate where winter nights stay frost-free, you may be able to keep a potted pelargonium outside in a sheltered position, but do not let a warm autumn create false confidence. A single cold front can be more damaging than a whole month of cool weather. In climates where the plant can grow year-round, focus on drainage, light, and pest monitoring rather than forcing dormancy.
Wake Geraniums Up Six Weeks Before Planting
Spring recovery determines whether an overwintered plant gives you an early, full display or spends the first half of the season rebuilding a thin canopy. Begin about six weeks before you expect to plant outdoors, adjusting the schedule for your local last-frost pattern and the actual growth you see.
Prune, pot, feed, and pinch
Start dormant plants with a close inspection. Cut back to firm green tissue, trim damaged roots, and pot into fresh, well-drained mix. Water thoroughly once, let the pot drain, and then move it into bright light; do not keep a freshly potted dormant plant in a dark corner and expect fertilizer to wake it.
For potted plants that remained active, prune winter stretch back to healthy nodes. A hard spring cut can feel severe, but it creates a compact framework with more sites for side shoots. The RHS notes that old pelargoniums can be regenerated by hard pruning in spring, and it recommends pinching shoot tips to encourage branching.
When new leaves are expanding, begin feeding lightly with a balanced fertilizer at the label rate. Once the plant has enough foliage and is visibly growing, a potassium-rich flowering feed may support bloom production, but it is not a substitute for sun. Pinch the tips once or twice before planting out, and remove spent flower heads during the season so the plant keeps producing instead of spending energy on seed.
Harden off without losing new growth
Do not move a tender geranium directly from a warm room to full outdoor sun. The Royal Horticultural Society recommends hardening off tender plants over about two to three weeks so they adjust to cooler temperatures, lower humidity, and moving air. Start with a sheltered, shaded outdoor position for a short period, bring the plants back in at night, and increase light and exposure gradually.
Watch the leaves, not just the calendar. Pale bleaching, crisp patches, or sudden drooping means the change was too fast, while soft new growth in a dark sheltered spot means the plant needs more light without a jump straight to harsh midday sun. Plant out or leave containers permanently outdoors only after frost risk has passed and nighttime conditions are appropriate for a tender plant.
Troubleshoot Weak, Rotting, or Leggy Plants
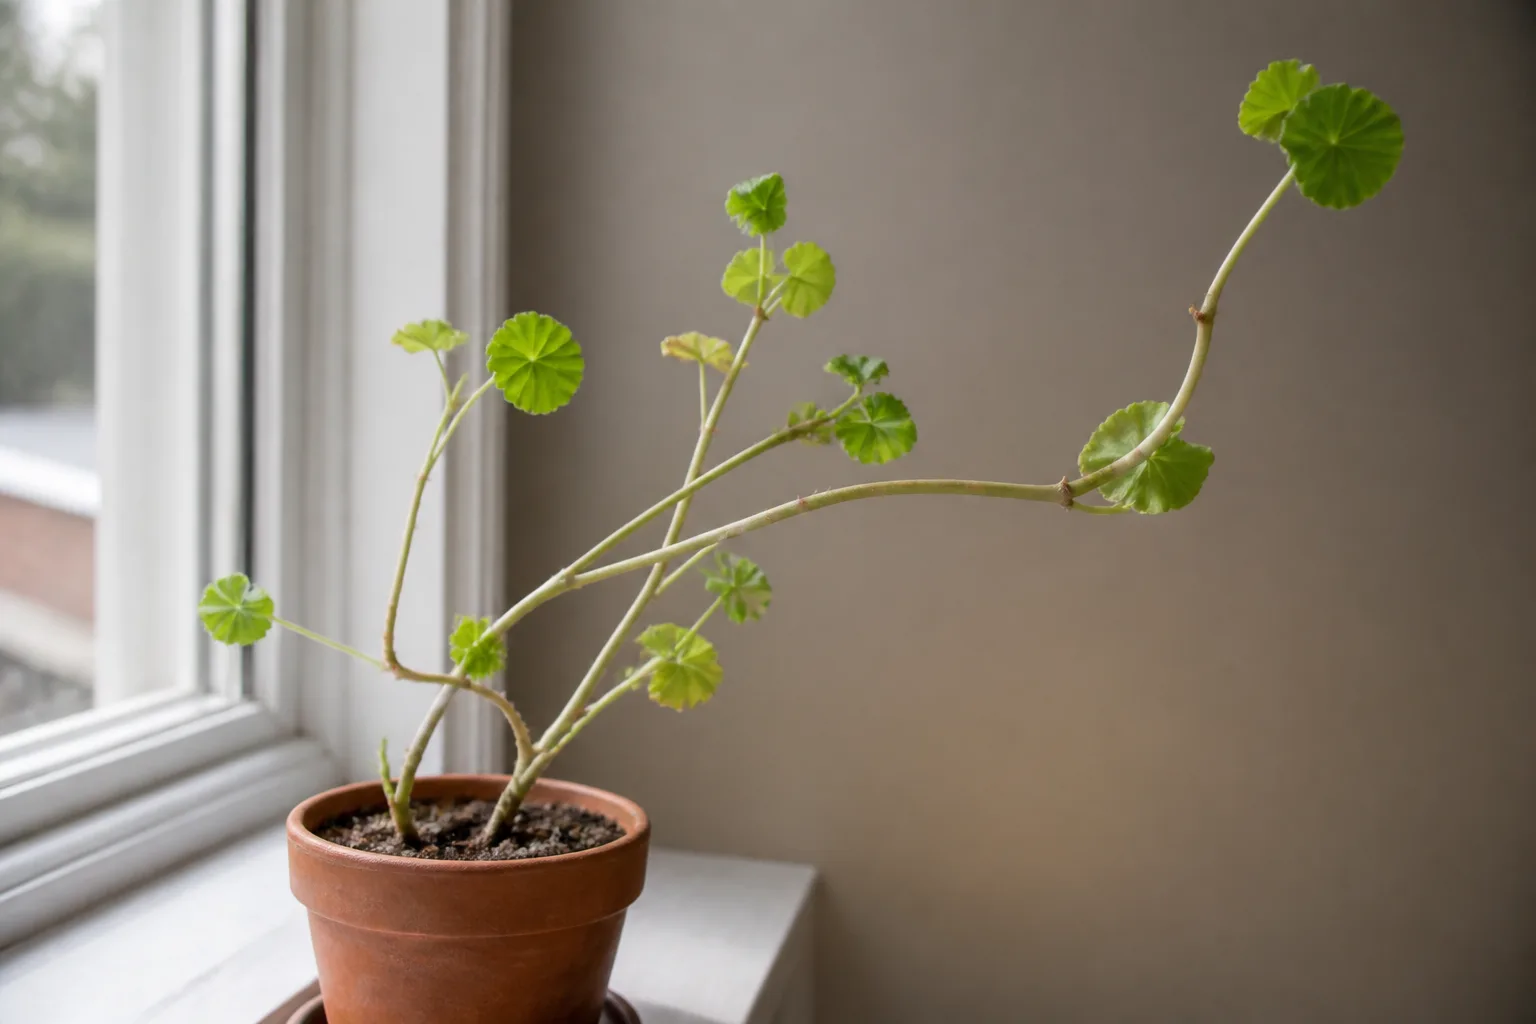
The plant is leggy. Low winter light, warm indoor temperatures, and a plant that is still being fed as if it were on a summer patio are the usual combination. Move it closer to stronger light, reduce fertilizer while growth is weak, and cut back to healthy nodes before spring growth accelerates.
Leaves are yellow and the soil stays wet. Check the pot size, drainage holes, and root condition before adding water or fertilizer. Yellow leaves can be natural aging during dormancy, but a sour-smelling mix, soft crown, or black roots points toward excess moisture and rot; allow the mix to dry appropriately and remove damaged tissue rather than keeping the plant constantly wet.
The plant has white fuzz or grey mould. Remove fallen leaves and affected tissue, improve air circulation, and reduce leaf wetness. The RHS links damp, poorly ventilated conditions with grey mould, so sealing a crowded plant in still humid air usually makes the problem worse.
Tiny insects appear after the move indoors. Isolate the plant again and inspect leaf undersides, stem joints, and nearby pots. Aphids, spider mites, whitefly, thrips, and fungus gnats are all plausible on overwintered pelargoniums; identify the pest before choosing a labeled treatment, and repeat monitoring because one inspection is not proof that the plant is clean.
A bare-root plant looks dead. Scratch a stem lightly with a clean fingernail. Green tissue below the surface means there may still be life, while brown, hollow, brittle tissue throughout the crown suggests the plant has been lost. Pot only the firm sections, keep them lightly moist rather than saturated, and give them bright light and time; dormant plants do not need to be forced with heavy feeding.
Conclusion
The smartest first move is to choose your overwintering conditions before you choose your method. Bring a healthy tender pelargonium in before frost, quarantine it, label it, and match it to the resources you can actually provide: bright light for a potted plant, a clean rooting medium for cuttings, or cool frost-free storage for a dormant bare-root plant.
For the best chance of a bigger, earlier flower display, prioritize a healthy starting plant, strong spring light, compact branching, and gradual outdoor acclimation. Overwintering is not a promise that every plant will survive or that every cultivar will flower on the same schedule, but a well-timed, well-drained plan can turn one favorite summer geranium into a head start for next season.



