How to Prune a Christmas Cactus
Prune a Christmas cactus after flowering for a fuller shape. Use this step-by-step guide to choose cuts, avoid bud loss, and propagate cuttings.
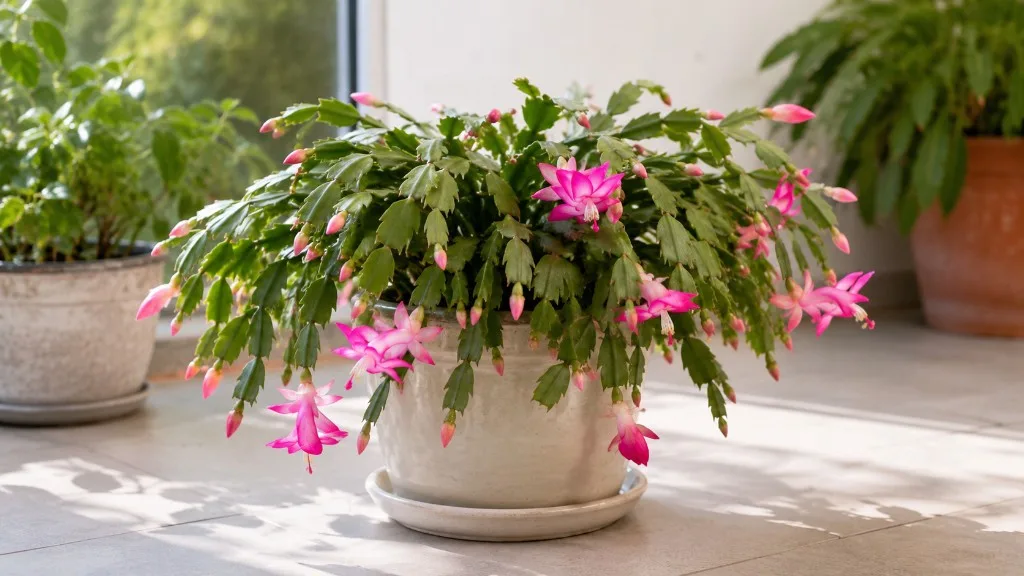
Prune a Christmas cactus after its flowers fade and before vigorous new growth begins. That post-bloom pause is the safest window to shorten long stems, even out a lopsided plant, or remove up to about one-third of a very large specimen. Make each cut at the narrow joint between the flattened segments, where the stem can branch.
The important distinction is that pruning can create more branching sites; it cannot manufacture flowers if the plant is kept in weak light, a waterlogged pot, or warm, brightly lit nights in autumn. A full plan pairs the trim with recovery care and a reliable fall bloom cue.
A healthy Christmas cactus has arching, flattened stem segments and flowers at the tips. Pruning is most useful after the display ends, not while new buds are forming.
The quick answer: prune after flowering, before strong new growth
Wait until the last flowers have wilted and dropped, then look for the first signs of spring growth. In many homes, that means late winter through early spring; a Thanksgiving cactus may finish earlier, while a late-blooming Christmas-cactus hybrid may keep you waiting longer. The plant—not a fixed date—is the better clock.
NC State Extension identifies the familiar Christmas cactus as an epiphytic hybrid, Schlumbergera × buckleyi, with pendulous, segmented stems and winter flowers. Its profile also describes bright indirect light, an airy, well-drained medium, and a reduction in watering after flowering. NC State Extension’s plant profile is useful here because it explains why this “cactus” should not be treated like a desert plant that must be kept dry for months.
If the plant still has open flowers, swelling buds, or tiny new segments at the tips, hold off on shaping. A cut now removes the very ends where flowers are displayed or where the plant is trying to grow. You can remove a broken, black, mushy, or clearly diseased section at any time, but that is sanitation and rescue work—not routine pruning.
Why pruning helps a Christmas cactus
Christmas cactus naturally becomes wider and more pendulous as its stems lengthen. That is attractive in a hanging basket, but a plant grown in a small pot may eventually look thin at the ends, heavy on one side, or too large for its stand. Selective pruning restores balance and gives the plant a manageable framework for new growth.
Flowers form at stem tips. When you shorten a healthy branch after flowering, dormant growth points behind the cut can produce additional segments and branches. Those new tips may become future flower sites, but the result depends on adequate light and a healthy root system. A severely shaded plant may branch weakly; an overwatered plant may not have the roots to support recovery.
The practical goal is not to make every stem the same length. It is to create several strong, evenly distributed ends without removing so much green tissue that the plant loses more stored energy than it can replace. Think of pruning as editing the plant’s outline, not shearing it into a ball.
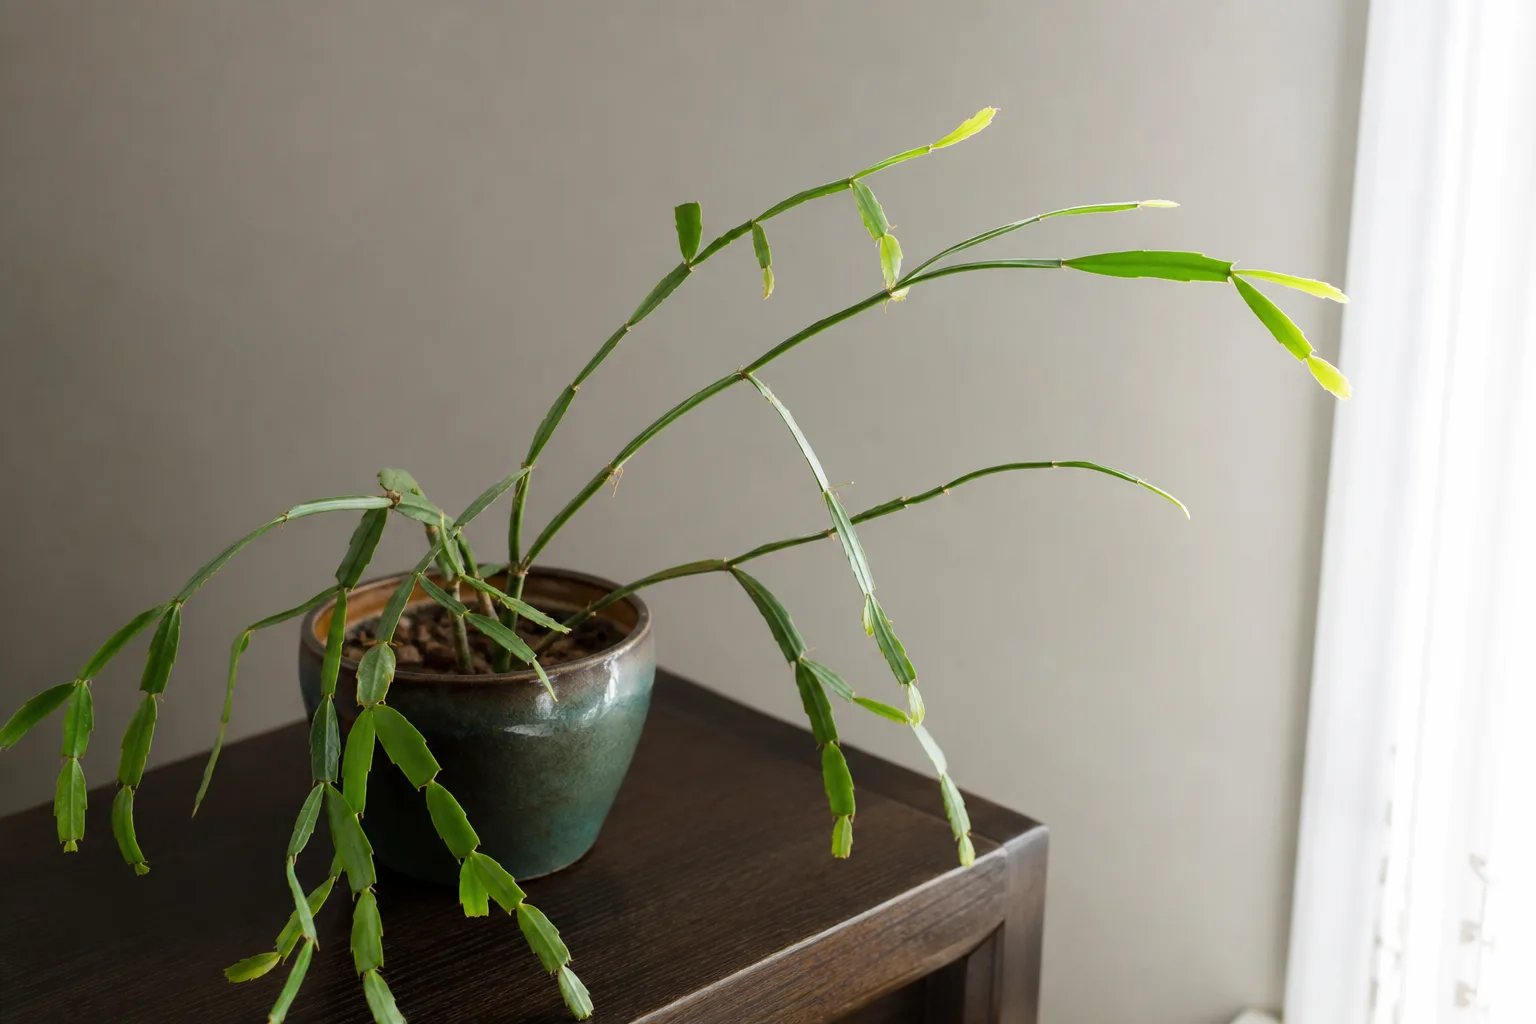
Long gaps between segments and sparse, stretched branches are a signal to check light as well as pruning. Cutting the stems without improving the growing conditions usually recreates the same shape.
The “leaves” are photosynthetic stem segments.
The flat pieces are commonly called leaves, but they are modified stems—often called cladophylls or phylloclades—that photosynthesize. NC State Extension describes them as flat, jointed, spineless segments with rounded notches in the Christmas-cactus hybrid. Each segment is doing work for the plant, so never remove healthy tissue casually just because it looks old or a little wrinkled.
This anatomy makes pruning easy: the plant is already divided into natural units. You do not need to make a long cut through a woody branch or search for a leaf node as you would on a ficus. You are choosing which joints to separate and how many segments to leave behind.
It also explains why a short tip cutting can root. A few intact segments contain enough water and photosynthetic tissue to stay alive while new roots form. The cut should still be treated as a wound: clean tools, a short callus period when appropriate, and a porous medium prevent a simple propagation project from turning into rot.
Choose the pruning window by plant cues
The best timing rule is finished bloom plus a pause before active regrowth. The BBC Gardeners’ World Magazine describes two rest periods for Schlumbergera: one after flowering and another in autumn. During those rests, the plant receives cooler conditions and less water, then returns to more active care when the season changes. Gardeners’ World’s Christmas-cactus guide also recommends removing stem tips after flowering when a plant has become leggy.
Use spent flowers and new growth as your timing markers
Start checking the plant a week or two after the final flower fades. If the segments are firm and green but there is no obvious flush of tiny, pale-green tips, you are usually in a good post-bloom window. If your plant is already pushing new segments, make the trim lighter and finish promptly rather than removing a large portion of fresh growth.
Do not confuse a flower bud with new vegetative growth. Buds are usually plumper and appear at the ends of segments in the run-up to flowering; new growth looks like a smaller, flatter segment extending the stem. When in doubt, postpone a cosmetic prune. Missing one season’s tidy-up is less damaging than removing a crop of buds.
Avoid routine pruning from late summer into fall. That is when holiday cacti are preparing for flower initiation, and the ends you remove may be the ends that would have carried the winter display. A plant that needs an urgent cut because of rot is an exception, but disinfect the tool between cuts and remove the affected material from the potting area.
Decide what kind of pruning your plant needs
Look at the plant from above and from the side before touching a tool. Mark the branches that are crossing, dragging on the floor, noticeably longer than the rest, or bare because of an earlier problem. Then choose the smallest intervention that solves the problem.
Light tip pruning versus size reduction.
Light tip pruning is the default for a healthy plant. Remove one segment from selected branch tips, or two when a stem is unusually long. Spread the cuts around the plant so new branches develop throughout the canopy rather than creating a dense clump on one side.
Selective thinning is better for a crowded interior or a plant with a weak, damaged branch. Remove one entire branch at a joint near its base, but leave neighboring stems to preserve the plant’s structure. Do not excavate the center simply to make it look airy; Christmas cactus can look sparse if too much interior growth is removed.
Size reduction is for an oversized specimen that has outgrown its container, shelf, or hanging basket. Gardening Know How recommends removing no more than one-third of the plant in a year and keeping significant pruning to an occasional maintenance event. Its pruning guide is a useful conservative benchmark: a lighter annual trim is safer than a dramatic haircut every few months.
If a plant has become leggy because it is far from a window, pruning is only half the repair. Move it to bright indirect light after the work, or the next stems will stretch again. If the pot stays wet for many days, correct the mix or drainage before you ask the plant to produce new branches.
Prepare the plant and tools before cutting
Pruning a Christmas cactus is a small job, but preparation determines whether the cuts are clean. Work on a dry day or in a room with good airflow, and avoid watering immediately before you plan to take propagation pieces. A saturated mix is not itself a pruning problem, but it raises the stakes if a torn cutting is then pressed into wet soil.
For a light trim, clean fingers are often enough: hold the segment on both sides of a joint and gently twist until it separates. For a large plant or a stem that does not release neatly, use sharp scissors or bypass pruners. Wipe the blades with 70 percent isopropyl alcohol and let them dry before the first cut; repeat when moving from a suspicious section to healthy tissue.
Set out a clean tray for cuttings, a paper towel for sap or debris, and a small label if you are starting several pieces. Keep the plant stable so a branch does not pull against its neighbors. If it is in a hanging basket, take it down rather than pruning overhead and accidentally twisting the root ball or dropping segments.
Find the safest place to cut
Choose a narrow joint between two segments. The joint should be easy to see, firm, and free of blackening, soft tissue, insect clusters, or obvious scars. A cut at this natural separation point leaves a short, clean wound and encourages branching behind the tip.
For shape, cut a long stem back to the length of the surrounding branches. For a branch that is too heavy or poorly positioned, remove the whole branch at a joint close to—but not flush against—the main crown. Leaving a small, clean joint is preferable to gouging the thickened base.
Epic Gardening’s biologist-authored pruning guide recommends staying in the softer green growth and avoiding the hardened woody area near the crown. Epic Gardening’s five-step pruning guide also notes that the natural joints make the plant straightforward to prune and that each propagation piece should contain several segments. Woody bases are normal on an older Christmas cactus; they are not a sign that you must cut the plant back to soil level.
Never make a random cut through the middle of a segment when a joint is available. It leaves a larger wound, gives you an awkward cutting, and makes it harder to judge whether the remaining tissue is healthy. If a segment is damaged in the middle, cut back to the nearest healthy joint on both sides and discard the compromised piece.
Prune a Christmas cactus step by step
- Confirm the timing. Make sure the plant has finished flowering and has no visible buds that you want to keep. If the plant is limp, yellow, or sitting in wet mix, diagnose that stress before a cosmetic trim.
- Set a target. Decide whether you are removing a few tips, correcting an uneven side, or reducing the total size. Choose the smallest target that meets the need.
- Inspect every selected branch. Follow it from the crown to the end and count the segments. Leave enough healthy green growth to support recovery, especially on a small or recently repotted plant.
- Separate at the joint. Twist cleanly by hand or make one firm snip with sanitized shears. Do not saw back and forth, crush the segment, or pull hard enough to dislodge the plant.
- Step back between cuts. Look at the silhouette after each small group of cuts. A plant that seems uneven on the table may look balanced from its normal viewing angle, and the remaining branches will fill in over time.
- Stop before the plant looks stripped. For a major reduction, use the one-third limit as a ceiling, not a goal. If the plant needs more than that, spread the work across two post-bloom seasons.
- Sort the pieces. Put healthy, firm segments in the propagation tray and discard diseased, pest-covered, or shriveled material. Do not compost a piece that may carry a problem unless your compost system reaches reliable pathogen-killing temperatures.
Shape a healthy plant with selective cuts
For most plants, remove one or two end segments from the longest branches, alternating around the pot. If one side is dense and another is bare, do not cut the dense side down to the bare side immediately. Instead, trim the longest dense stems and improve light to the open side so new growth can develop with a more even distribution.
A useful visual test is to imagine a shallow dome or a balanced cascade. The ends should not all line up like a hedge; the goal is a natural outline with enough space between major branches for light and air. Keep a few of the longest stems if the plant is meant to trail from a basket.
Reduce an oversized plant without stripping it
Divide a large reduction into zones: first remove broken or badly placed branches, then shorten the longest remaining stems, and finally pause to reassess the shape. Never remove one-third from a single side while leaving the other side untouched. Uneven loss can make the plant tip and can expose interior segments to a sudden light change.
Old plants often have a woody center and a skirt of younger green segments. Preserve the mature base unless it is diseased or structurally failing. Green tips are the easiest pieces to root, and the woody framework helps support the new growth that follows.
The one-third ceiling is especially important for a plant with a small root ball, a history of root rot, recent repotting, or low light. If the plant is already stressed, remove only dead or damaged tissue, stabilize its care, and wait for a genuine post-bloom recovery window before shaping further.
Care for the plant after pruning
Place the trimmed plant in bright, indirect light, away from harsh afternoon sun, hot radiators, air-conditioning blasts, and a frequently opened exterior door. NC State Extension describes bright indirect light and moderate temperatures as part of the plant’s baseline culture; its profile also warns that full sun can bleach the stems and that sudden environmental changes can contribute to bud loss.
Do not respond to pruning by soaking the pot every day. Check the top layer and the weight of the container, then water thoroughly when the mix has begun to dry and let excess drain. The plant is an epiphyte from Brazilian coastal forests, but its roots still need oxygen. A permanently wet cachepot is not “extra humidity”; it is a root problem waiting to happen.
For the first week, avoid stacking other stressful jobs on top of the trim. Do not prune, repot, move outdoors, and change the fertilizer routine on the same afternoon. A quiet recovery period makes it easier to tell whether new growth reflects the pruning or whether another problem is still limiting the plant.
The BBC Gardeners’ World guide recommends a cool, drier rest after flowering and another rest in September. That does not mean withholding water until the segments collapse. Reduce frequency as the plant’s growth slows, but water before the pot stays bone-dry for an extended period; the exact interval depends on pot size, mix, light, and room temperature.
Hold fertilizer until the plant resumes active growth, then use a dilute houseplant fertilizer according to its label if the plant is otherwise healthy. Extra fertilizer cannot force branching and may build salts in a small pot. New segments, firm older tissue, and a pot that dries in a reasonable interval are better signs that the plant is ready for normal growth care.
Propagate healthy cuttings from the pieces you remove
Pruning gives you a chance to make new plants, but not every clipped segment is a good cutting. Choose firm green pieces with at least two or three connected segments; longer pieces with three or four segments are easier to handle and give you more tissue to anchor in a pot. Set aside pieces that are bruised, mushy, heavily wrinkled, or covered in pests.
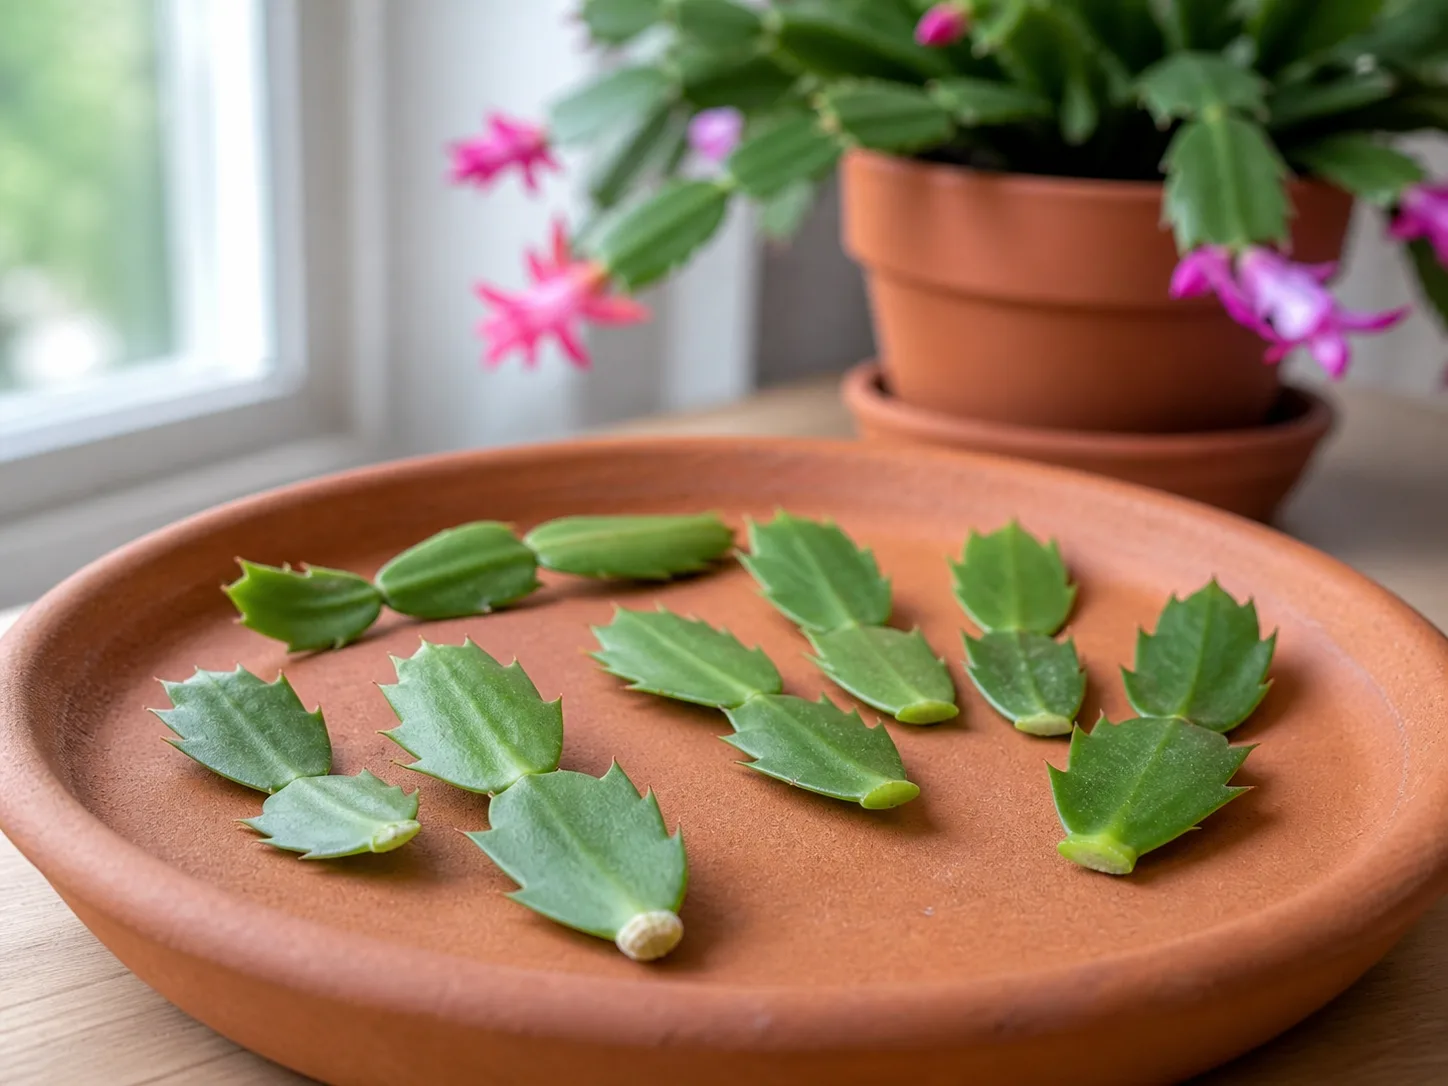
Let healthy segments dry in a shaded, airy place before planting when the cut is fresh. The goal is a dry callus, not a shriveled cutting.
Epic Gardening recommends allowing a cutting to dry for about a day before placing it in moistened mix, while Gardeners’ World uses a day or two for its segment cuttings. Use the wound as the cue: the cut end should feel dry rather than glossy or wet. In a very dry, hot room, do not extend the wait until the piece has lost much of its firmness.
Root cuttings in soil
Soil propagation is the simplest choice when you want the cutting to establish directly where it will grow. Fill a small pot with a porous mix such as a quality potting base amended with perlite and fine orchid bark. The mix should hold a little moisture but drain quickly; dense, wet soil encourages a cutting to rot before it can root.
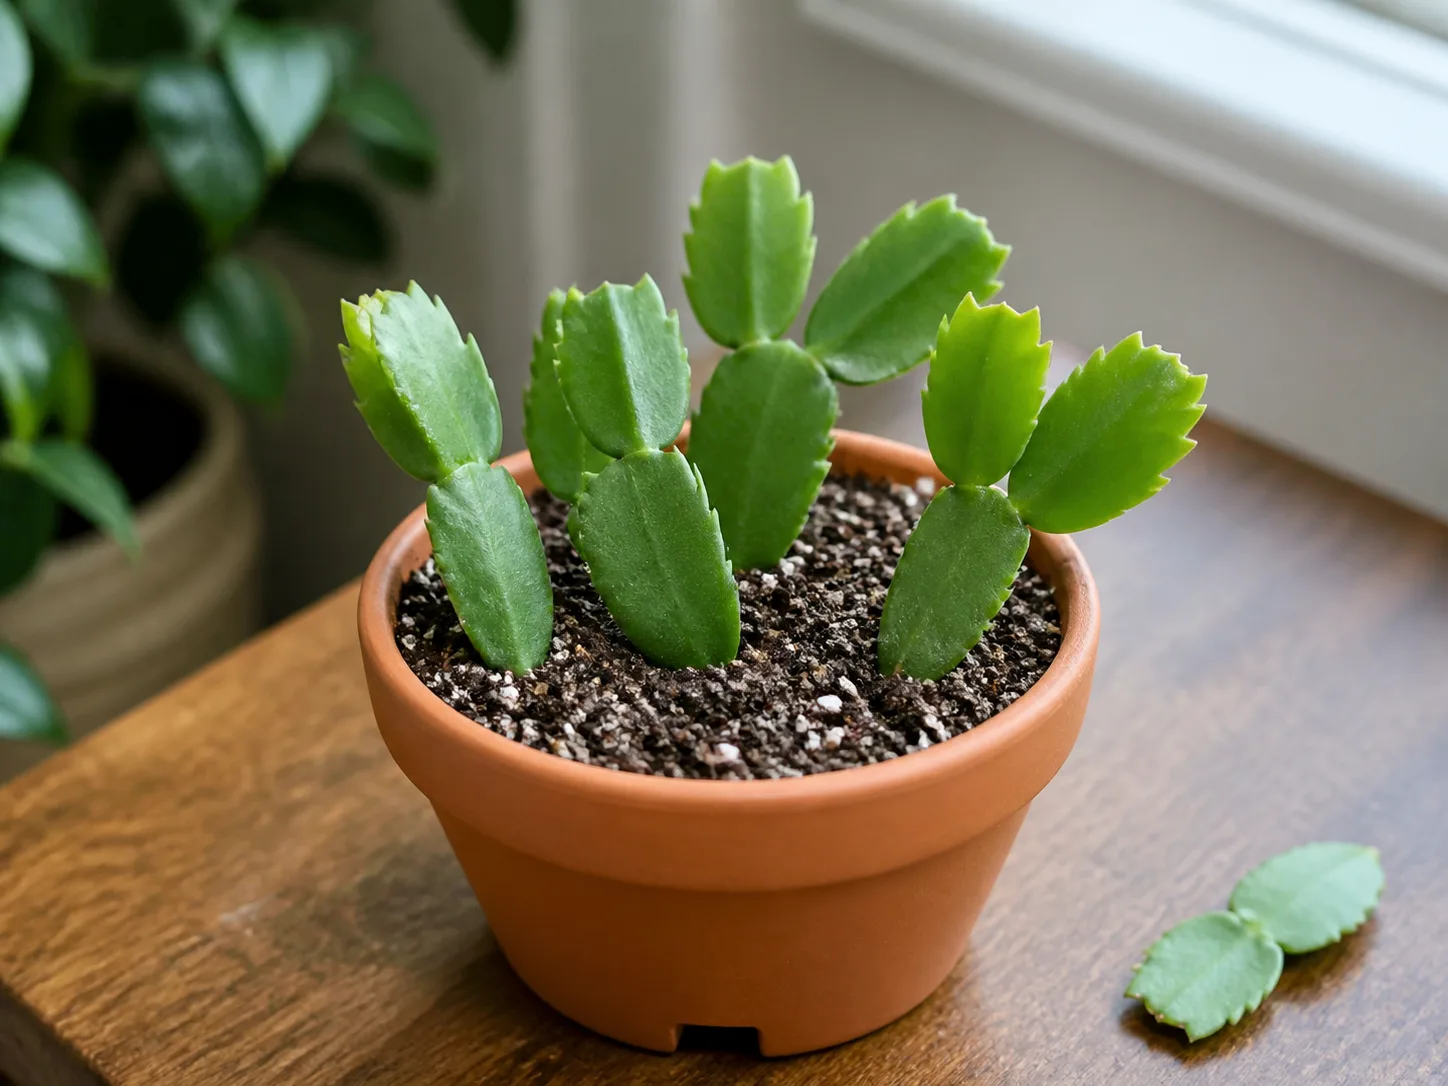
Plant the lower end of a callused cutting into a small, well-drained pot. A few segments together can make a fuller starter plant once they root.
Insert the bottom segment about an inch deep, or deep enough for the cutting to stand upright without burying most of the stem. Water the mix lightly after planting if it was completely dry, then keep it just barely moist rather than constantly saturated. Place the pot in bright indirect light and warmth, but keep it out of direct sun while the cutting has no roots.
Do not tug every day to check progress. After several weeks, a gentle resistance test can suggest that roots have formed, but new growth is the more useful confirmation. If the cutting becomes soft at the base, smells sour, or turns translucent, remove it, cut back to firm tissue, let the new wound dry, and restart in cleaner, drier mix.
Root cuttings in water
Water propagation is useful when you want to watch the roots form, but it adds a transition from water roots to potting mix. Place the lower end of a healthy cutting in a small amount of clean, room-temperature water. Keep only the bottom portion submerged; do not let the upper segments sit in water or let the entire cutting lean into a jar where the stem stays wet.
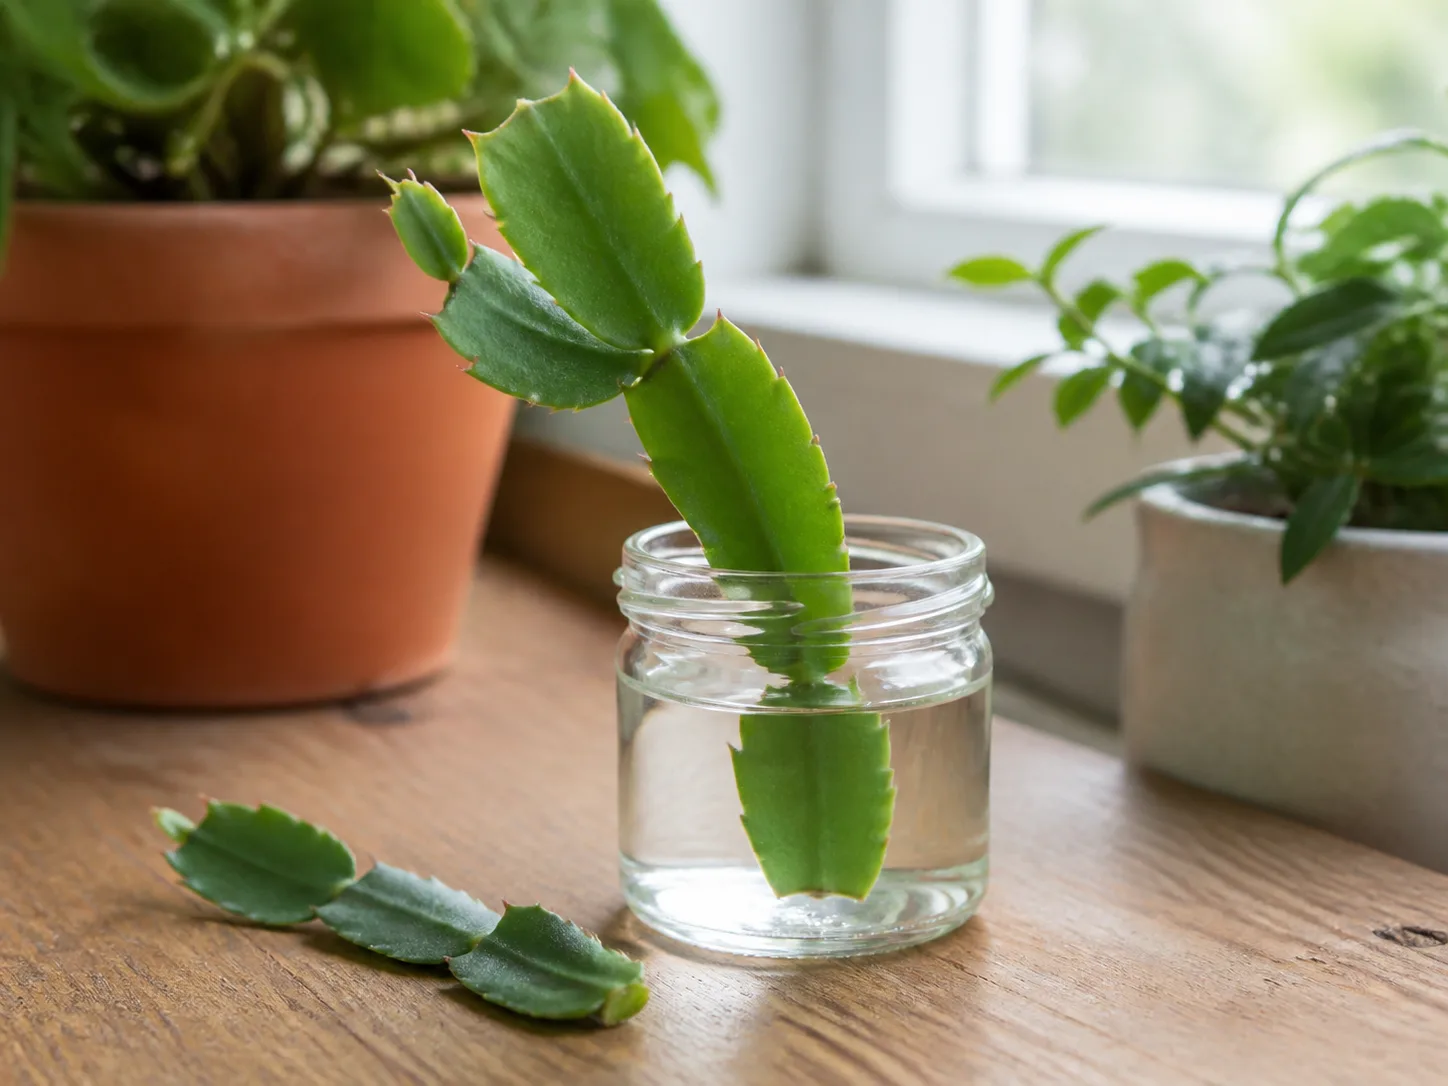
Water rooting works when only the lower end is submerged and the jar sits in bright indirect light. Move the cutting to airy mix once the roots are developed enough to handle planting.
Put the jar in bright indirect light, refresh the water about weekly, and watch for roots rather than a strict deadline. Once the roots are visible and long enough to anchor the cutting, plant it in a small pot of airy mix. Keep that mix a little more evenly moist for the first week or two while the water-grown roots adjust, then return to a normal dry-down rhythm.
Soil and water are both workable; the better method is the one you can monitor without overhandling the cutting. Water gives you a visible rooting cue but creates transplant shock. Soil avoids the transfer step but requires restraint because an unrooted cutting cannot use a pot full of water.
Know when not to prune
Do not routinely prune a Christmas cactus when it is flowering, covered in buds, or in the fall bloom-initiation period. The urge to make a plant look tidy before guests arrive is understandable, but a short delay protects the display. Remove only a damaged or diseased piece and leave the rest alone until the flowering cycle ends.
Do not make a major cut if the plant is already collapsing from root rot, severe underwatering, sunburn, or a pest outbreak. First identify whether the roots are functioning and whether the stems are firm. A wilted plant may need water, a dry-down correction, or root repair—not a dramatic reduction that removes more of its remaining energy.
Also pause when you cannot tell which type of holiday cactus you own and it is carrying buds. Pruning technique overlaps among holiday cacti, but bloom windows do not. Tag the plant, observe the flowers, and wait until the current show is over rather than cutting at a guessed calendar date.
Fix the problems pruning cannot solve
Long, sparse segments: improve light before or immediately after the post-bloom trim. A plant several feet from a window may stay green while producing stretched growth that looks like legginess. Pruning will reset the outline, but only better light can support compact new segments.
Soft or yellow segments: check the pot before watering again. A heavy container with wet mix points toward oxygen-starved roots or rot; a very light container with dry mix points toward dehydration. Remove mushy material and address drainage rather than burying a soft cutting in propagation soil.
Buds falling: do not prune in response. Keep the plant in one stable place, protect it from drafts and heat spikes, and keep the mix from swinging between bone-dry and waterlogged. NC State Extension lists sudden temperature changes, drafts, low humidity, and improper watering among holiday-cactus problems, while its plant profile notes that excessive sun can bleach stems.
No flowers next season: inspect autumn nights, not just the amount of fertilizer. Holiday cacti use shorter day length and cooler conditions as bloom cues. NC State Extension describes bright daytime light, nights around 55–65°F, and at least 13 hours of uninterrupted darkness as part of the flowering setup for Schlumbergera. A lamp, television, or bright hallway can undermine an otherwise healthy plant.
A brown or woody base: do not assume age-related wood must be removed. Older stems naturally harden near the crown and can support the pendulous canopy. Cut into that area only when tissue is dead, diseased, or structurally unsafe; for routine shaping, use the younger green segments near the ends.
Apply the same method to Thanksgiving and Easter cactus—with timing caveats
The same joint-by-joint technique works for Thanksgiving cactus and Easter cactus: wait until flowering is finished, separate firm segments at their natural joints, and keep major cuts conservative. The names are often used loosely in shops, so the plant sold as Christmas cactus may actually be a Thanksgiving cactus with sharper, claw-like segment margins and an earlier bloom.
The timing changes with the plant’s bloom window. A Thanksgiving cactus that flowers in November may be ready for its post-bloom trim before a true Christmas cactus that flowers in December or January. Easter cactus, in the genus Rhipsalidopsis or Hatiora, blooms in spring, so its post-bloom pruning window may fall later.
The University of Minnesota Extension’s holiday-cacti guide groups Christmas, Thanksgiving, and Easter types as holiday cacti but distinguishes their bloom timing and segment features. If your plant’s label is uncertain, match your pruning to the end of its actual flowering cycle. You do not need a perfect identification to make a careful cut, but you do need to avoid pruning while the plant is still setting flowers.
Build next year’s bloom cycle after the trim
The post-bloom prune is the reset; the rest of the year supplies the energy and cues. Give the plant bright filtered light through spring and summer so replacement segments mature. Keep the potting mix airy and water when it begins to dry rather than alternating between desert drought and a standing saucer.
As late summer ends, stop treating new growth as an invitation to keep feeding and cutting. Let the plant settle into a cooler, darker autumn routine. Gardeners’ World recommends a cool rest with less water after flowering and again in September, while NC State Extension specifies long, uninterrupted nights and cooler temperatures as important flowering cues.
In a home, that may mean a cool room where the lights go off at night or a carefully managed cover that stays away from hot bulbs. Give the plant bright daylight, then protect its dark period for several weeks. Once buds are visible, return to steadier moisture and a stable display position; moving a budded plant from a cool room to a hot window or turning it under changing lights is a common way to lose the reward for the earlier work.
Pruning and blooming are linked through this sequence, not through the cut alone: trim after flowers, grow new segments in good light, rest the plant in cool darkness, then leave the budded plant stable. If one of those stages is missing, a perfectly placed cut may still produce a leafy plant with few flowers.
Conclusion
Prune a Christmas cactus after flowering, before strong new growth, and start with the least amount that solves the shape problem. Use the natural joints between segments, keep routine pruning to a light trim, and treat one-third of the plant as a maximum for an occasional size reduction—not an annual target.
Preserve the woody base, disinfect tools, and keep stressed or budded plants out of cosmetic projects. Save firm, healthy pieces to root in airy soil or a small water jar, then give the parent plant bright indirect light, careful moisture, and a quiet recovery period.
The fuller plant you want next winter comes from the whole calendar: good light after the trim, mature green segments through summer, cool uninterrupted nights in fall, and a stable home once buds appear. Pruning creates the opportunity for branching; consistent care decides whether those new tips become the next bloom sites.



