What to Do With Spent Flowers: 8 Useful Ideas
Learn what to do with spent flowers: compost healthy blooms, press flat petals, dry stems, save seed, and make potpourri or sachets safely.
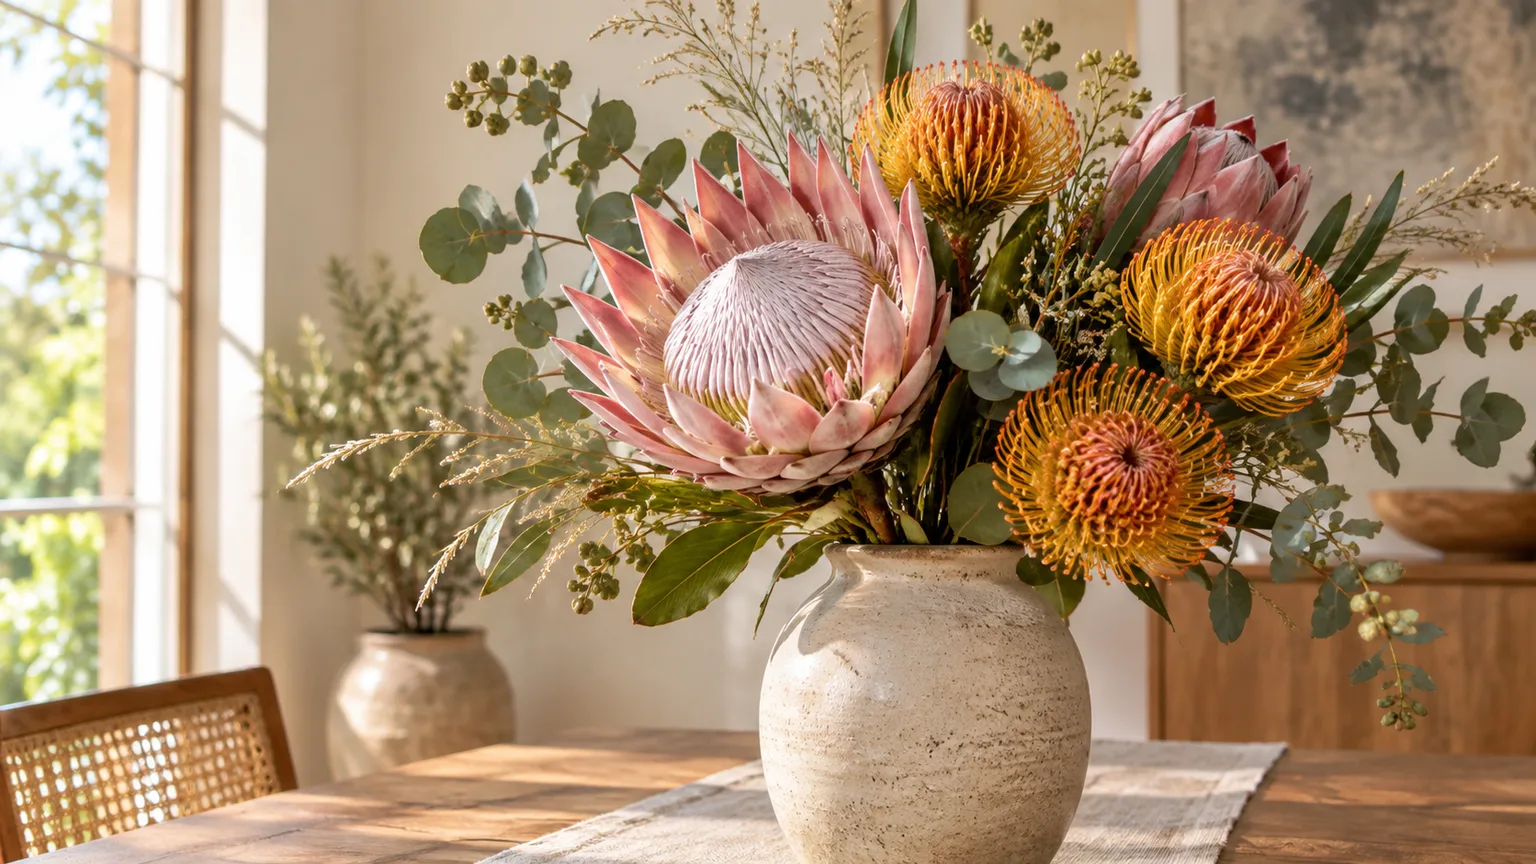
The right way to reuse spent flowers depends on what “old” means. A clean handful of petals from a bouquet can become compost, a pressed keepsake, or potpourri; a flexible garden stem may still be useful in a dried arrangement; and a dry seed head may be more valuable left on the plant than thrown into a compost bin.
Start with one question: is this material healthy, clean, and still worth preserving? If yes, sort it by moisture and shape. The practical choices are composting, light mulch, seed saving, pressing, air drying, desiccant drying, home fragrance, and flat crafts—and each works best for a different kind of faded bloom.
First decide what kind of “spent” flower you have
Flowers from a vase and flowers removed during deadheading look similar in the bin, but they come with different considerations. Garden flowers have a known growing history, while a purchased bouquet may include floral preservative, wire, foam, dyed accessories, or plant material treated with products you cannot identify.
Use this quick sort before you start a project:
- Healthy, clean petals and soft stems: compost them or use a small amount as mulch.
- Dry, flat, colorful blooms: press them for cards, bookmarks, framed art, or paper.
- Dryable stems and flower heads: air-dry them for a vase, wreath, or arrangement.
- Mature garden seed heads: save the seed first, then compost the empty husks.
- Moldy, slimy, diseased, invasive, or chemically questionable material: do not use it for crafts, mulch, or a casual home compost pile.
This simple split prevents the most common mistake: treating every faded flower as interchangeable. A rose that is still structurally beautiful deserves a different destination from a wet, browning bouquet wrapped around a piece of floral foam.
Sort and clean flowers before reusing them
Spread the flowers on newspaper or a washable tray so you can see what is plant material and what is packaging. Remove ribbon, plastic sleeves, decorative wire, rubber bands, stickers, florist picks, and every piece of floral foam before composting or drying anything.
Bouquet waste and garden deadheading are not identical
For a garden flower, look for signs of disease before you handle the spent bloom. Fuzzy growth, spreading leaf spots, blackened or water-soaked stems, unusual ooze, and a problem that has returned year after year are reasons to bag the material or use your local green-waste service rather than moving it into your own compost.
For a bouquet, ask whether you know the source and treatment history. If you cannot tell whether it was dyed, sprayed, or preserved, keep it out of edible gardens and avoid using it as pet bedding, tea, garnish, or anything that touches food; composting is also a judgment call, so municipal collection is the more conservative option for a large or questionable bunch.
Do not rinse flowers simply to make them “clean.” Extra water encourages decay and makes pressing or air drying harder. Instead, pick off damaged petals, shake out loose debris, and move sound pieces into the reuse method that matches their condition.
Compost healthy, untreated plant material
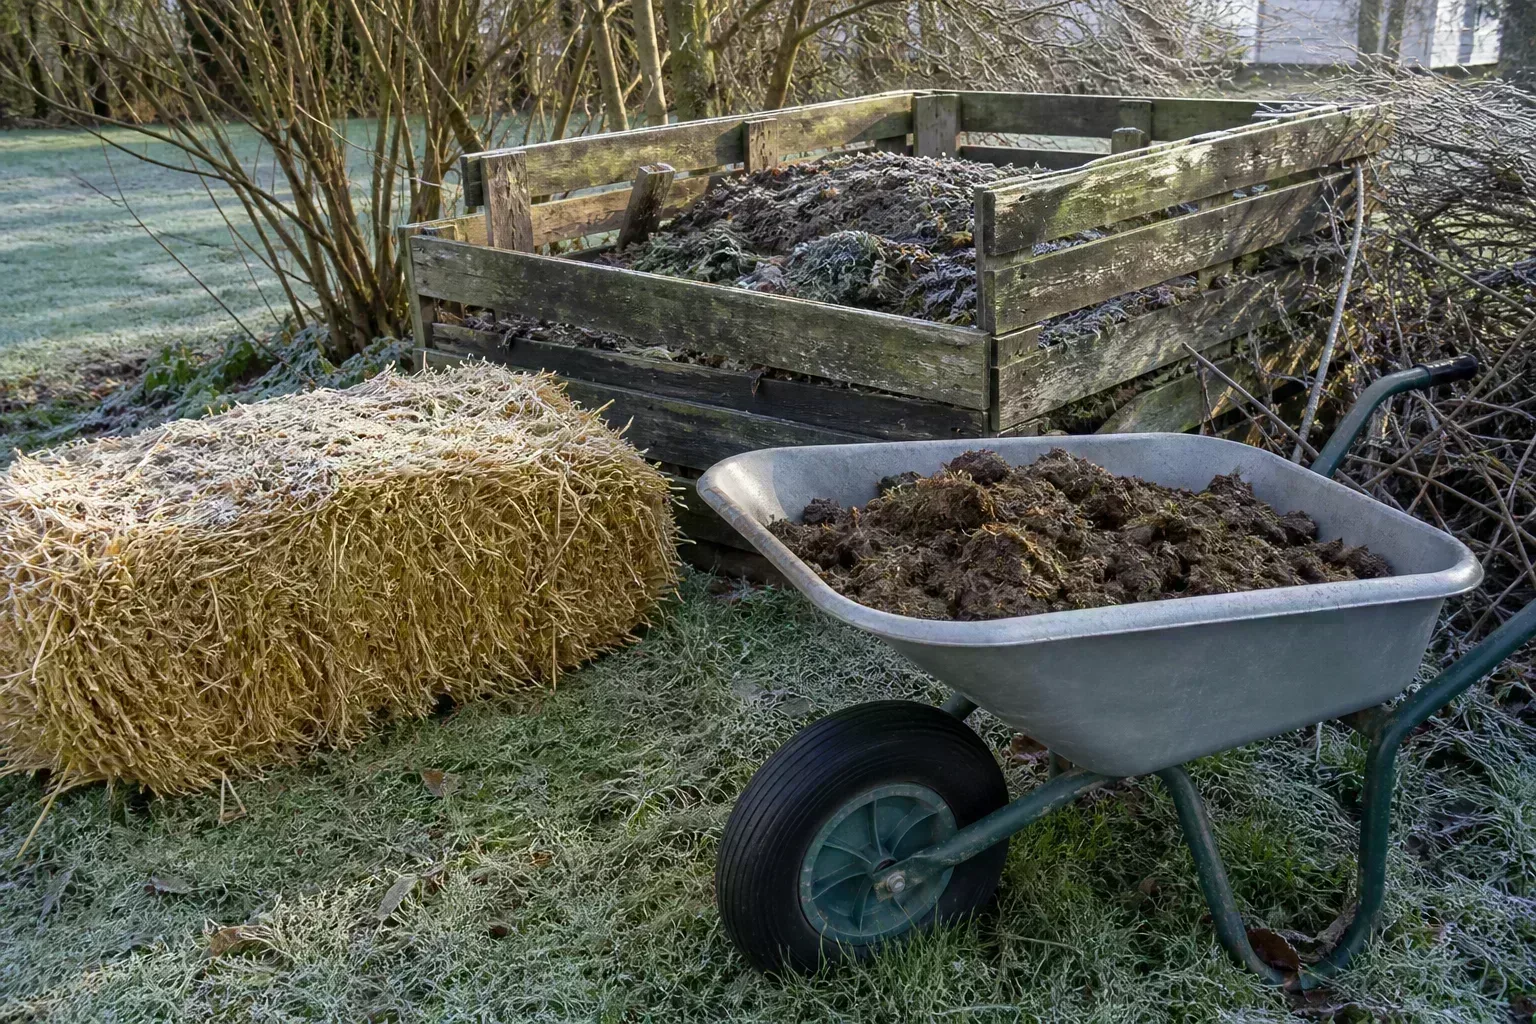
Composting is the best low-effort answer for soft petals, green stems, and garden flowers that are past their decorative peak. Healthy flowers are organic material, so they can return carbon and nutrients to the soil after they decompose—but they are not a substitute for a complete compost recipe or a quick-release fertilizer.
The Colorado State University Extension guidance on using compost explains why the finish matters: immature compost can tie up nitrogen, burn roots, consume oxygen around plants, and fail to destroy pathogens or weed seeds. Finished compost should smell earthy and no longer resemble its original ingredients, and the extension recommends curing homemade compost before treating it as ready for garden use.
Prep flowers for a faster, cleaner pile
Cut long stems into shorter pieces with pruners, and pull apart dense flower heads. Smaller pieces offer more surface area to decomposer organisms and are less likely to form a wet mat that blocks airflow. Mix a handful of fresh flowers into dry leaves, shredded cardboard, or other carbon-rich browns instead of adding a thick layer of petals all at once.
Fresh flowers behave like a moist, nitrogen-rich “green” ingredient; dry petals behave more like a carbon-rich “brown.” You do not need to calculate the exact chemistry of a bouquet, but you should notice the pile’s condition: if it is slimy or smells sour, add dry material and turn it; if it is dusty and inactive, add a little moisture.
Remove all nonplant bouquet parts before they reach the bin. A tiny rubber band or paper tag is easy to miss, but floral foam, plastic, coated ribbon, wire, and synthetic decorations do not belong in finished compost. If your local compost program has a stricter list than your backyard pile, follow the local rule.
Keep diseased, invasive, and seed-loaded material out
The safe home-garden default is to leave clearly diseased plant tissue out of a cool or inconsistently managed compost pile. Colorado State University Extension advises avoiding diseased plants and weeds loaded with seeds unless the pile is managed well enough for all material to reach about 145°F for at least three days, with the outer material turned into the hot center so it heats too.
That temperature is a management target, not something to assume. Many small piles never heat evenly, and the fact that a flower has turned brown does not prove that a pathogen or mature seed has been neutralized. A trusted review from Gardener’s Path on diseased plant compost also emphasizes that pathogen survival varies by disease and composting system.
If you know the plant is invasive in your area, do not compost flowers that have already formed viable seed. Put them in the approved trash or municipal green-waste stream, following local guidance. When in doubt, losing a handful of organic matter is a smaller problem than distributing a disease or a new crop of unwanted plants through homemade compost.
Use petals as a light mulch
Clean petals can serve as a temporary top dressing around an established container plant or ornamental bed when you do not have a compost bin. Scatter a thin, loose layer so the soil surface is partly visible, and keep petals away from the crown and stems.
This works because a light cover can slow surface evaporation and eventually add small amounts of organic matter. It is not a permanent mulch: petals collapse quickly, can mat when wet, and may attract fungus gnats or other decomposers if piled thickly. Treat it as a short-lived layer that you will refresh or rake away as it breaks down.
The method suits dry, clean petals better than whole wet flower heads. If you have a large quantity, use the compost pile instead; if the petals came from an unknown florist treatment, skip the edible herb pot and place them in a nonfood ornamental area only if you are comfortable with the uncertainty.
Save viable seed heads instead of composting them
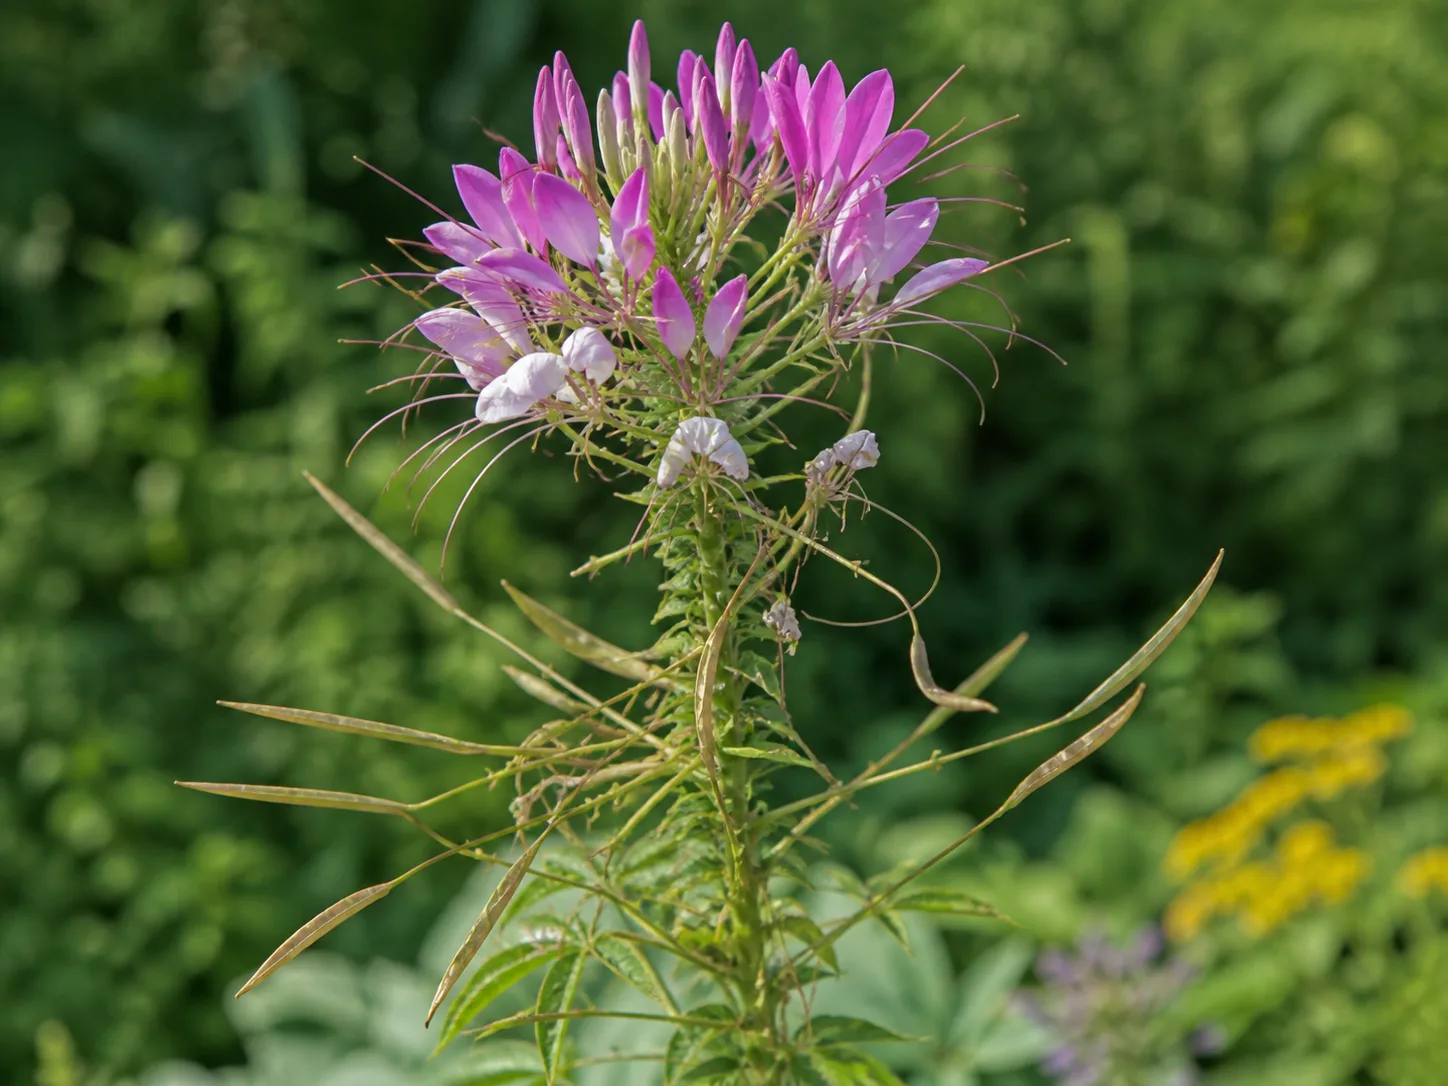
Some “spent” garden flowers are not waste at all—they are seed containers. If you want more of the same annual flower next year, leave a few healthy blooms on the plant until the petals have fallen, the seed head has dried, and the seeds have changed from soft and pale to firm and mature for that species.
Harvest on a dry day after morning dew has evaporated. Place the heads in a labeled paper bag or shallow tray in a dry, airy spot until fully crisp, then shake or rub out the seeds and store them in a cool, dry place. A paper envelope is better than a sealed plastic bag while any residual moisture remains.
Seed saving is not the same as cloning. Open-pollinated flowers may produce seedlings that vary in color or form, and hybrids may not come true to the parent at all. Save seed when you enjoy a little genetic surprise or know the variety is likely to reproduce reliably; otherwise, deadhead the bloom for tidier growth and compost the clean remains.
Never save seed from a diseased plant just because the head looks dry. Some problems can travel on or in seed, and a mature seed head can spread itself around the garden before you notice. Choose a healthy plant, label the variety and year, and save more than you need because germination is never guaranteed.
Press flat blooms for cards and keepsakes
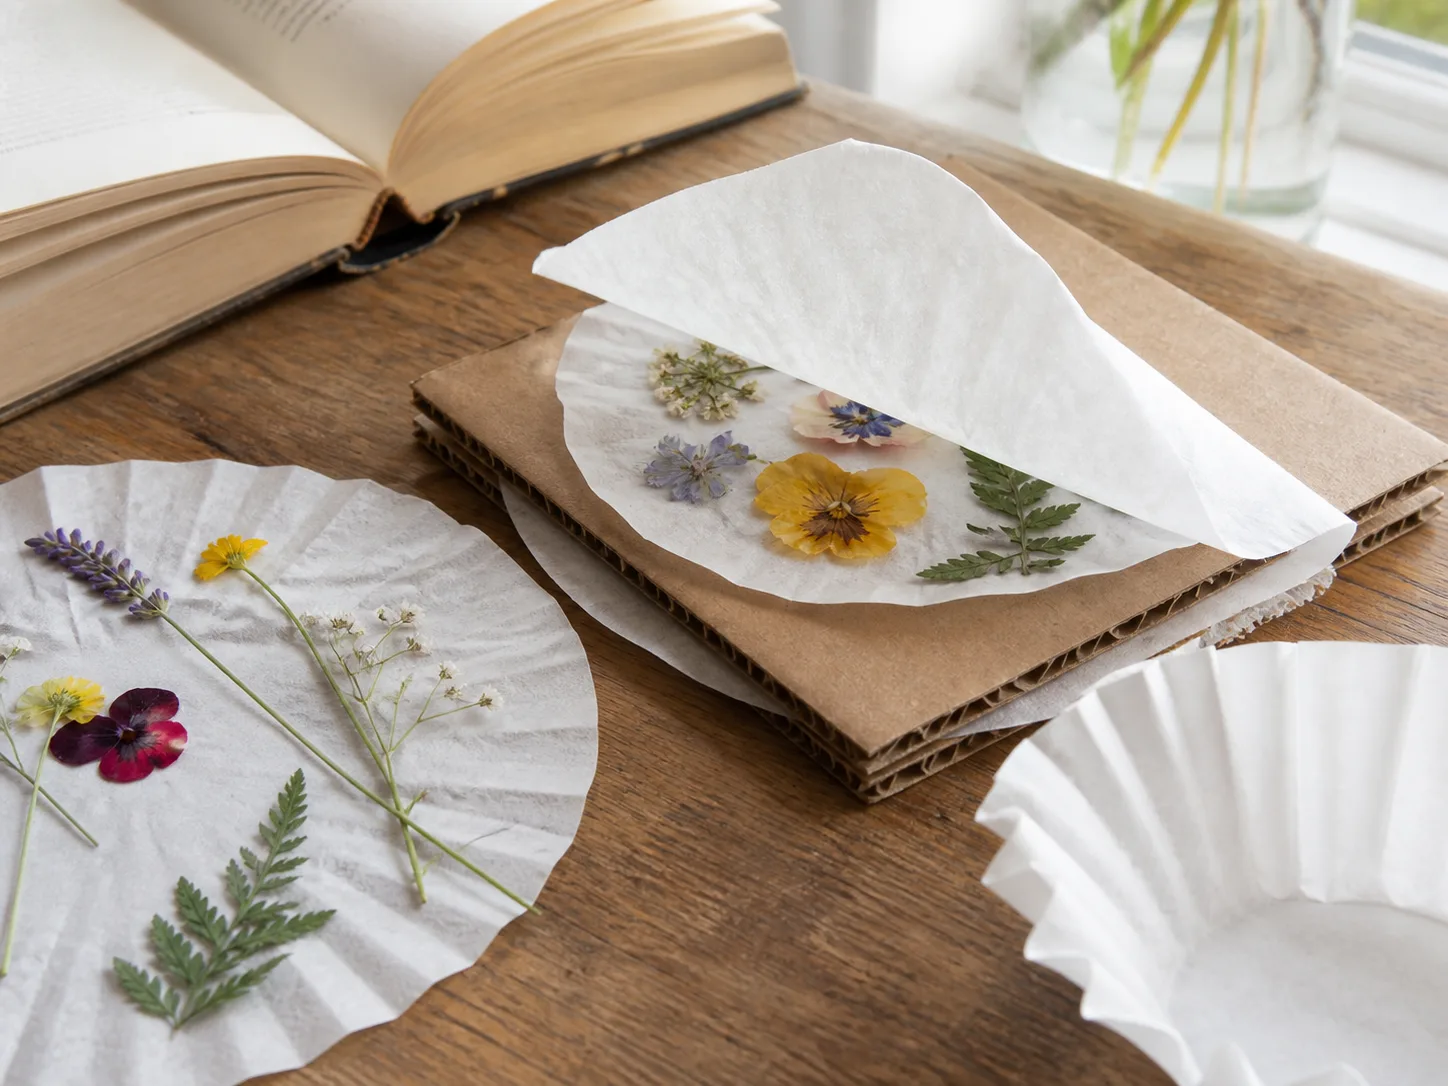
Pressing is the most forgiving preservation method for flowers that are naturally flat or can be opened into a single layer. Pansies, violets, cosmos, small daisies, individual rose petals, fern fronds, and thin leaves usually cooperate better than thick, water-filled blooms.
The University of Florida’s flower-preservation guidance recommends choosing flowers in excellent condition and notes that pressing works especially well for flat leaves and flowers with relatively few petals. The RHS guide to drying and pressing likewise describes simple flowers between paper and a weight as a practical home method.
A simple book-pressing method
- Choose flowers that are clean and only slightly past their peak; pressing cannot repair bruised or moldy tissue.
- Blot any surface moisture, then trim away bulky stems and crowded leaves.
- Place each flower between absorbent paper, leaving room so petals do not overlap.
- Close the paper inside a heavy book and add another weight if the book is thin.
- Check after about a week, replacing damp paper if necessary, then leave the flowers until they feel papery and dry.
Do not press a wet bouquet directly between valuable book pages. Use plain paper or scrap paper, because pigment and moisture can transfer. Once dry, handle the flowers with tweezers or a clean, dry brush and mount them behind glass or in a card where humidity is low.
Pressed flowers are beautiful but fragile. Direct sun can fade them, a steamy bathroom can soften them, and a sealed frame can trap moisture if the material was not fully dry. If you see condensation or a musty smell, remove the flowers, dry them again, and replace any piece showing mold.
Air-dry stems for arrangements and wreaths
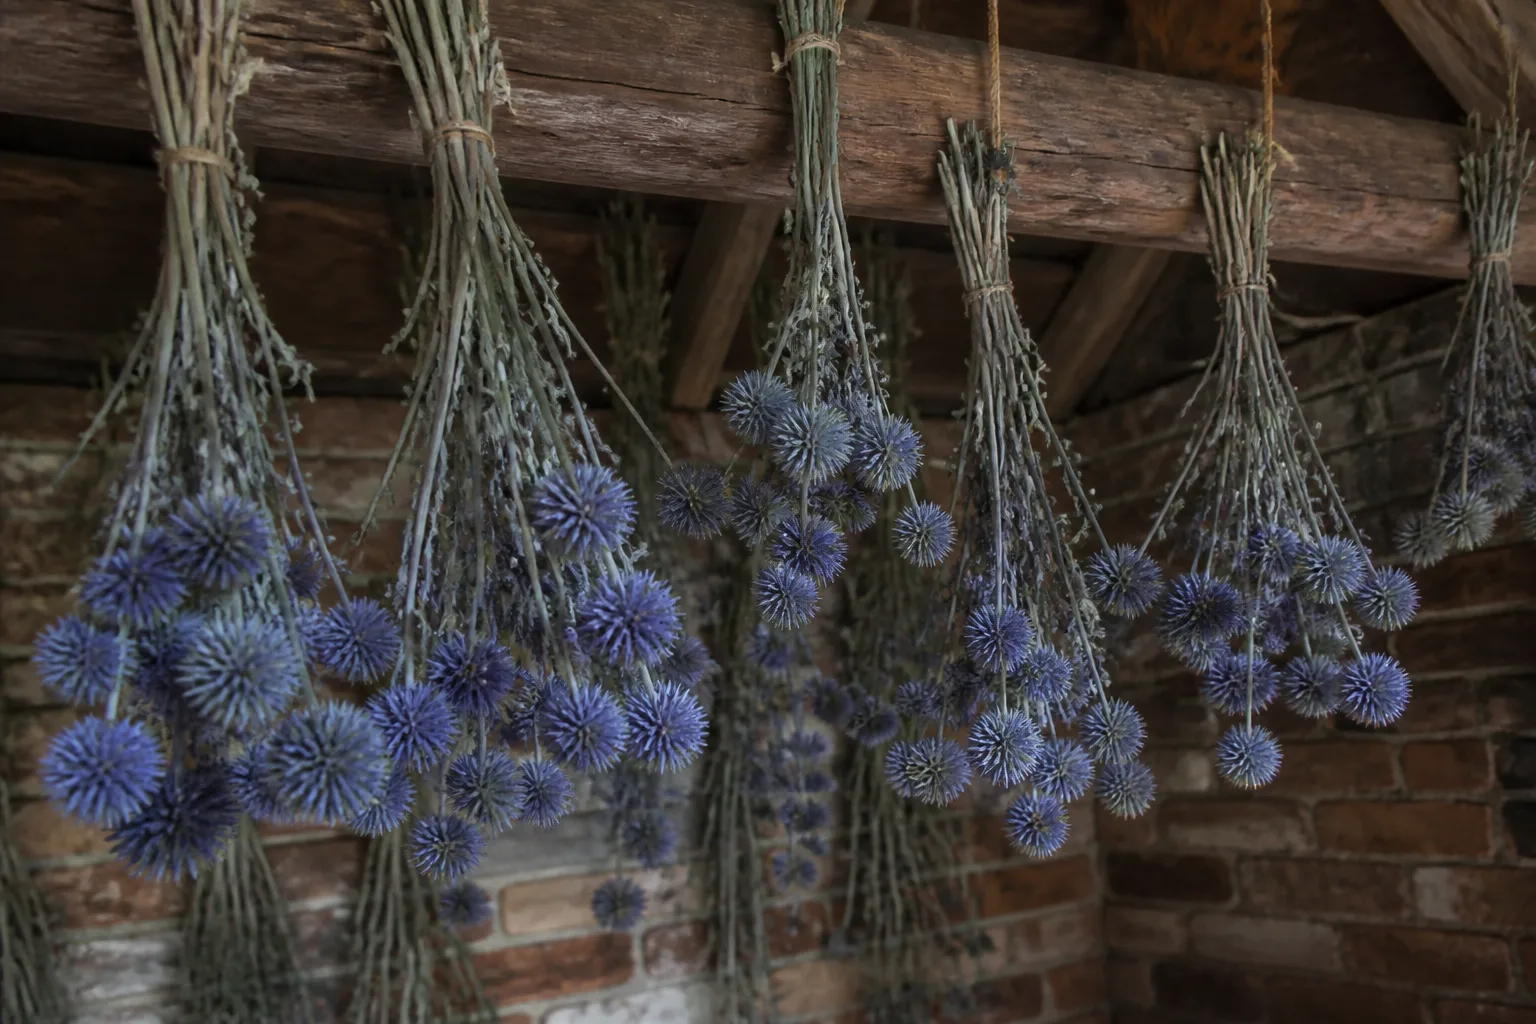
Air drying is the best match for flowers that still have a useful stem and a shape you want to keep upright. Statice, yarrow, strawflower, celosia, globe amaranth, grasses, seedpods, some hydrangeas, and sunflowers can make good subjects, although success depends on how much water the tissue contains and how mature the flower was when you cut it.
The RHS air-drying instructions recommend good-quality stems, removing lower leaves, tying them, and hanging them upside down in low light with good ventilation. That source gives a working range of two to three weeks for many dried plants, while noting that moisture levels can make the process longer.
Prevent mold and brittle stems
Strip off leaves that would sit inside a bundle, because they hold moisture and can decay before the flower head dries. Tie small bunches loosely with a rubber band; as stems shrink, string can loosen and a tight tie can pinch or crush them. The RHS suggests keeping bunches small enough for air movement, and its related guidance recommends no more than about ten stems for suitable everlastings.
Hang the bundle in a dark or dim, dry place with moving air, not in a humid bathroom or a sealed cupboard. Bright sun bleaches color, while stagnant damp air encourages mold; inspect every few days and remove a suspect stem before it touches the rest of the bunch.
Dryness is a physical test, not just a calendar date. A stem should feel firm rather than cool and pliable, the flower head should not sag when moved, and the thickest center should no longer feel damp. If a bloom is crisp on the outside but soft in the middle, give it more time with more space around it.
Dry flower heads with a desiccant when shape matters
Use a desiccant when you care more about preserving a three-dimensional flower head than keeping the stem. Silica gel surrounds the bloom and draws out moisture while supporting the petals, so it can preserve roses, peonies, and other fuller flowers more successfully than pressing or hanging.
The RHS describes placing a flower head in a container, covering it with silica gel, and checking it every couple of days. Fine material can be reused, but follow the product’s safety instructions, keep it away from children and pets, and do not treat a desiccant as edible or interchangeable with food-grade ingredients.
Snip the stem short, place the flower face-up or in the position you want to keep, and add the desiccant slowly so petals are not crushed. Start checking early rather than leaving every flower in the medium for the same number of days; an under-dried bloom can finish later, but an over-dried petal may become brittle when you remove it.
This method takes more supplies and attention than air drying, so reserve it for a favorite flower, a wedding or memorial keepsake, or a craft where the original form matters. For a whole bucket of faded blooms, composting or air drying is usually the more efficient choice.
Make dry potpourri without overpowering the room
Potpourri is an open bowl of dry botanicals chosen for texture, color, and scent. It is a good destination for petals that are too wrinkled for pressing but still clean and attractive, especially rose petals, lavender, scented geranium, calendula, statice, and small flower heads.
Dry the petals in a single layer on a mesh rack, cooling rack, or clean paper in a warm, well-ventilated place away from direct sun. Stir or turn them periodically so the underside does not stay damp. Do not mix in anything that smells musty; one moldy ingredient can spoil the whole batch.
Build the blend around one main scent and one or two supporting textures. Lavender with rose can feel coherent, while five strongly scented flowers may create a muddled result. Add dry citrus peel, herbs, seedpods, cinnamon, or whole spices only when they are fully dry, and let the mixture rest in a closed jar for several days so the scent can settle before you display it.
Think of potpourri as a gentle botanical display, not a guaranteed air freshener. Fragrance fades, and you may be tempted to add essential oil; if you do, use only a tiny amount, follow the product label, and keep the blend away from pets. The ASPCA guidance on essential oils around pets warns that concentrated oils can harm dogs and cats and should be kept out of paws’ reach; households with birds or pets with breathing problems should be especially cautious.
Fill a scented sachet for drawers
A sachet is simply a breathable pouch filled with dry aromatic material. It is more contained than a bowl of potpourri, so it works well in a linen drawer, closet, suitcase, or gift box where loose petals would scatter.
Use only material that is completely dry and free of mold. Fill a cotton, linen, or paper sachet loosely enough that air can pass through, then tie it closed and label the contents and date. Lavender is dependable, while rose petals add color and a softer scent; unscented dried petals can still contribute texture without pretending to perfume a room.
Replace the sachet when it loses its scent or feels damp. Do not place it in a baby’s sleep space, a pet’s bed, or anywhere a child or animal can chew it open. Avoid adding essential oils just to intensify a fading blend; a weaker but uncomplicated sachet is preferable to concentrated fragrance within reach of a curious pet.
Reuse petals in paper, candles, and craft projects
Pressed petals can become greeting cards, bookmarks, gift tags, botanical collages, and handmade paper. Glue them onto the surface of a card with a thin layer of craft adhesive, then store finished pieces flat and dry; adding too many thick petals can make the card buckle or trap moisture.
Dried petals also look good under glass in a small frame, scattered through a clear ornament, or arranged in a shadow box with a label for the occasion. For a child-friendly activity, let children sort by color and shape, but keep brittle pieces out of mouths and wash hands after handling plant material.
Be careful with candles. Loose dried flowers and petals near an open flame can ignite, so do not sprinkle them on top of a candle or bury them beside the wick. Use an LED candle for a botanical centerpiece, or keep pressed flowers on the outside of a glass holder where they cannot enter the flame zone.
A quick decision table for your next handful
| What you have | Best first choice | What to do | When to stop |
|---|---|---|---|
| Clean soft petals and stems | Compost | Chop stems and mix with dry browns | Sour smell, slimy mat, or unknown contaminants |
| A few dry petals, no compost bin | Light mulch | Scatter loosely and keep off stems | Layer mats or stays wet |
| Mature, healthy seed heads | Save seed | Dry in a labeled paper bag, then collect | Head is diseased or seed is invasive in your area |
| Flat, colorful blooms | Pressing | Sandwich between paper and a heavy book | Petals are wet, bruised, or moldy |
| Stems with firm flower heads | Air drying | Strip leaves, tie small bundles, hang in low light | Mold appears or the center stays damp |
| Thick favorite flower head | Silica drying | Cover carefully in a desiccant | Petals become brittle or crushed |
| Fragrant, fully dry petals | Potpourri or sachet | Blend modestly or fill a breathable pouch | Musty smell, dampness, or pet access |
| Too much, too wet, or questionable material | Green-waste service | Follow local disposal rules | Do not spread it through your garden |
Common mistakes that waste spent flowers
Composting a bouquet whole is the fastest way to add plastic, wire, or foam to a system that cannot break it down. Disassemble it first, and treat unknown treatment history as a reason to choose municipal collection or a nonfood use rather than assuming every florist flower is garden-safe.
Pressing flowers that are already wet creates a stained, moldy book page. Blot surface moisture, use fresh absorbent paper, and check the packet after a week; replace damp paper instead of waiting for the flower to dry inside a sealed sandwich.
Air drying in a warm but humid room feels sensible but often produces mold. Low light and ventilation matter more than a hot room, and a small, loose bunch dries more reliably than a dense bouquet.
Using thick petals as a deep mulch turns a quick organic layer into a wet cap. Keep the layer thin, leave the plant crown open, and move larger quantities to compost where the material can be mixed and turned.
Saving immature or diseased seed can waste a season and carry problems forward. Leave healthy heads on the plant long enough to mature, dry them completely, and label what you save; if the head is questionable, compost or dispose of it according to its risk instead.
Adding fragrance without checking the household creates an avoidable safety problem. Concentrated essential oils are not automatically safe because they are plant-derived, and any dried botanical project should be kept away from pets, children, food, and open flames.
Conclusion
Spent flowers are easiest to reuse when you stop treating them as one category. Compost clean, healthy plant material; save mature seed heads; press flat blooms; air-dry sound stems; use desiccant for special three-dimensional flowers; and turn fully dry petals into a restrained potpourri, sachet, or craft.
The best project is the one that matches the flower in front of you and the time you actually have. If the material is moldy, diseased, invasive, contaminated with bouquet hardware, or too uncertain to use safely, choose an approved disposal route and keep the rest of your garden—and your keepsakes—healthier.