Milk Jugs for the Garden: 7 Smart Uses
Turn empty milk jugs into seed starters, frost covers, planters, watering cans, garden tools, and a tidy compost-scrap caddy—with practical limits for each use.
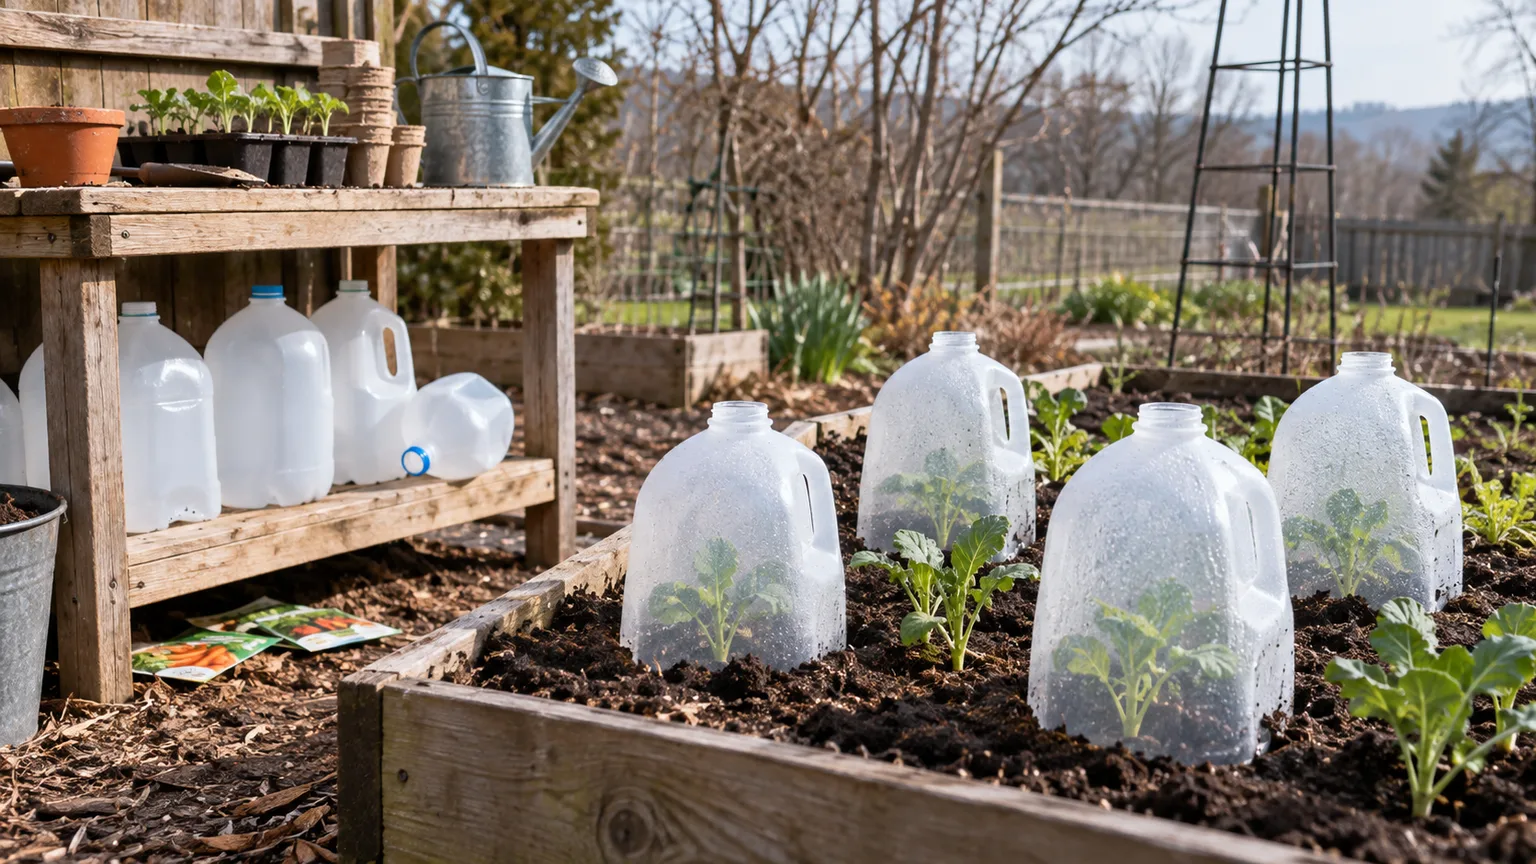
An empty gallon milk jug is awkward to store, too useful to throw away, and usually sturdy enough for one more job. That is why gardeners keep turning them into seed-starting chambers, plant covers, small planters, watering cans, scoops, and kitchen compost caddies.
The trick is to match the jug to the job. A translucent jug can make an excellent outdoor mini-greenhouse for hardy seeds, but it is not a substitute for a grow light or a weatherproof greenhouse. A cut-down jug can shield a seedling from wind, but it can also overheat the plant if you forget to vent it. A jug can carry compost scraps, but only if you keep fats and animal products out.
Here are seven worthwhile uses, with the preparation details and limits that keep each one useful instead of turning into a soggy, moldy, sharp-edged experiment.
The Rule That Makes Any Milk-Jug Hack Work: Clean, Cut, Drain
Before choosing a project, rinse the container thoroughly with warm water and dish soap. Milk residue is an excellent invitation to sour smells and mold, especially when the jug will hold damp soil or warm kitchen scraps. Rinse until the plastic no longer feels slippery, then let it dry.
For any soil project, drainage is non-negotiable. Waterlogged mix deprives roots of air, encourages algae and mold, and makes a light plastic container unstable. The Minnesota Seed Project’s winter-sowing guide, developed with University of Minnesota Extension Master Gardeners, recommends several holes in the base of a jug and enough soil to give seedlings a real root zone.
The third rule is that the jug should have one clearly defined job. Do not use the same container as a seed starter one week, a pesticide carrier the next, and a kitchen scrap caddy after that. Once plastic has held a garden chemical, oily material, or anything you cannot fully wash away, retire it from plant-growing and food-related uses.
Choose the Right Jug and Give It a Job
A rigid, translucent gallon jug is the most useful all-rounder. It has enough height for seedlings, a handle for carrying, and plastic that is usually easy to puncture and cut. Clear juice jugs and large water bottles can work too, but thick plastic may be harder to cut and some shapes do not make a stable base.
Use a smaller carton or jug for shallow-rooted herbs and greens, not for a tomato, squash, or perennial that will quickly outgrow its temporary container. For a cloche, choose a jug wide enough that its sides will not press against the leaves. For a scoop, prioritize the handle and the stiffness of the plastic over transparency.
Discard containers that are cracked, brittle, badly crushed, or impossible to clean. A split bottom leaks; a brittle side can shatter into a sharp edge; and a jug that collapses under a little potting mix will not improve with use.
Cut Plastic Without Making a Safety Problem
Wash the jug before cutting it, then place it on a stable work surface. Scissors are adequate for thinner plastic, but a utility knife can slip, so cut away from your body and keep the other hand out of the blade’s path. An awl or a sturdy nail makes drainage holes with less temptation to force a knife through the plastic.
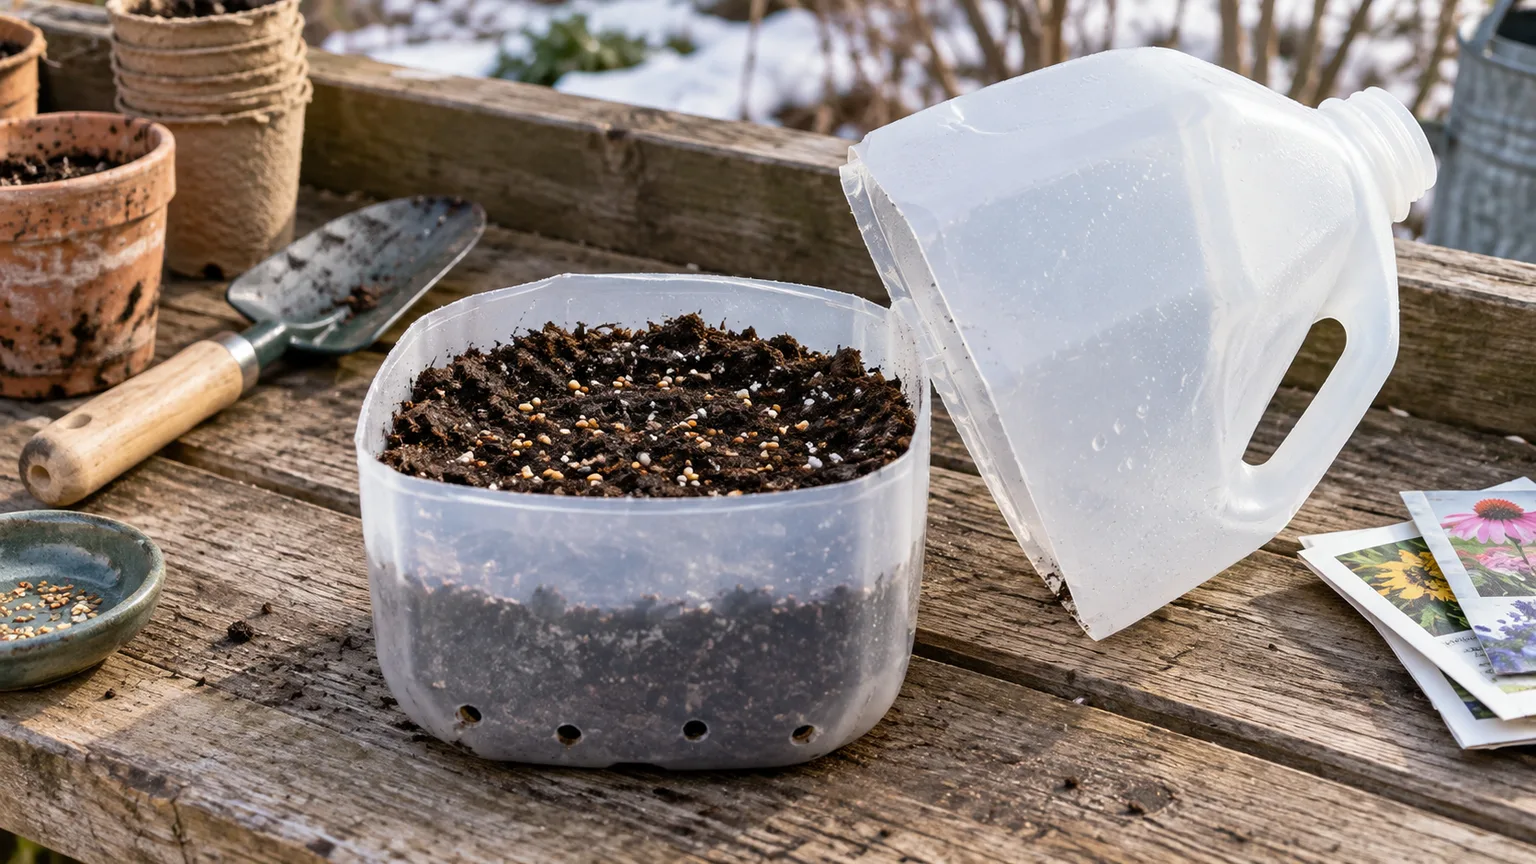
For winter sowing, cut around the jug several inches above the bottom while leaving a section beneath the handle attached. That uncut section becomes a hinge. For a cloche or plant guard, remove the bottom cleanly so the jug can sit over soil. For a scoop, sketch the cut first with a marker and leave the handle attached to the upper section.
Trim or cover any sharp burrs before the jug goes near seedlings, pets, or children. Clear tape over a rough rim can help, but tape is not a structural repair for a cracked container. If a cut looks unsafe, recycle the plastic and start with another jug.
1. Winter-Sow Hardy Seeds in a Mini Greenhouse
This is the clever use most people mean when they talk about milk jugs in the garden. You put cold-tolerant seeds in damp potting mix inside a cut-and-hinged jug, set the container outside, and let the changing winter weather provide the cold, moisture, and light that those seeds are adapted to experience.
The jug is not forcing seeds to germinate in January. It is creating a protected, visible microclimate in which seeds can remain dormant, then sprout when the combination of temperature, moisture, and daylight suits them. West Creek Conservation’s winter-sowing guide describes this as a way to mimic the natural cold exposure that many native seeds need before germination.
Step-by-Step Milk-Jug Winter Sowing
- Prepare the container. Rinse the jug, remove and recycle the cap, and make several evenly spaced drainage holes in the base. Leave the handle intact when cutting around the middle so the upper section can open and close like a lid.
- Add the mix. Put about 3 inches of a loose, well-draining seed-starting or potting mix in the bottom. Level it gently; do not compress it into a dense brick. The Minnesota Seed Project instructions use roughly this depth and emphasize leaving room for roots.
- Moisten before sowing. Wet the mix thoroughly enough that it is evenly damp, then allow excess water to run out. Starting with damp mix is easier than trying to water tiny seeds aggressively after they are in place.
- Sow one plant type per jug. Follow the seed packet for depth. Tiny seeds may need only a surface scattering, while larger seeds need a light covering. Do not invent a universal seed count; seed size, mature plant, and transplant tolerance matter more than filling the container.
- Label twice. Write the plant name and sowing date on the outside with a weather-resistant marker, and put a second label inside the jug. Sun and weather can fade exterior ink, and a mystery clump of seedlings is not a useful spring surprise.
- Close, but do not seal airtight. Bring the hinged top down and secure the seam with clear duct tape or packing tape. Leave the cap off so rain and snow can enter and air can move through the opening.
- Place it where weather can reach it. Set the jug outside in a bright spot protected from the strongest wind, pets, and foot traffic. Do not tuck it under a roof eave, where it may receive light but no rainfall. A shallow tray can keep several jugs together, but it must not hold standing water.
- Monitor instead of forgetting it. Look at the soil and the seedlings after storms, dry wind, and warm sunny spells. The goal is damp mix, not a sealed puddle. The jug should make care easier, not remove the need to notice what is happening.
What to Sow—and What to Skip
Start with the seed packet, not the container. Good candidates are usually hardy perennials, hardy annuals, native wildflowers, and cool-season vegetables or herbs that can tolerate cold exposure or benefit from a period of cold stratification. Natureworks Garden Center’s winter-sowing handout also points to the packet instruction “sow outdoors four to six weeks before the last frost” as a useful clue.
Examples can include milkweed, butterfly weed, snapdragons, calendula, larkspur, sweet peas, kale, spinach, lettuce, and some native plants. The right list changes with your climate and the seed’s biology, so “cold-hardy” is more useful than a fixed list of species. If a packet says the seed needs light, leave it on the surface; if it specifies a depth, follow that depth.
Skip this winter method for tender crops that need warm soil to germinate, such as many tomatoes, peppers, basil, cucumbers, squash, and tropical flowers. They may be grown in a jug later as a spring cloche or temporary planter, but putting them outside through a freezing winter does not turn them into cold-season crops.
Also skip crops that strongly dislike root disturbance when the jug will require teasing apart a dense mat of seedlings. Carrots, parsnips, and some poppies are better direct-sown where they will grow. That recommendation from Natureworks Garden Center is a useful reminder that a successful germination is not the same as an easy transplant.
Venting, Watering, and Transplanting
Germination is the point when the jug changes from a passive winter shelter into a small greenhouse that needs supervision. On a bright, warm day, open the hinged top or remove enough tape to let heat escape. Close it again before a cold night if the forecast calls for conditions the seedlings cannot handle. Do not wait for wilted leaves to tell you that the container stayed too hot.
When the mix looks dry, water gently. A narrow stream can wash seeds to one side or expose roots, so a mister, gentle rose, or bottom-watering tray is safer for very small seedlings. If the jug is constantly wet, move it where it can drain freely and reduce extra water; condensation is normal, but a sour smell, algae, or standing water means the setup is too damp.
Wait until seedlings are sturdy enough to handle and the root mass holds together before dividing them. Two sets of true leaves can be a helpful visual milestone, but it is not a universal appointment. A slow-growing perennial may need more time, while a fast-growing annual may outgrow the jug earlier.
Move seedlings into small pots or a prepared bed according to the plant’s needs and local weather. Even outdoor-raised seedlings benefit from a few days of protection after a disruptive transplant: bright shade, regular moisture, and a gradual return to stronger sun reduce shock. Life in the Finger Lakes’ winter-sowing account notes that the outdoor start often makes seedlings more accustomed to cool conditions, but it does not remove the need for sensible handling.
2. Make a Short-Term Cloche for Tender Starts
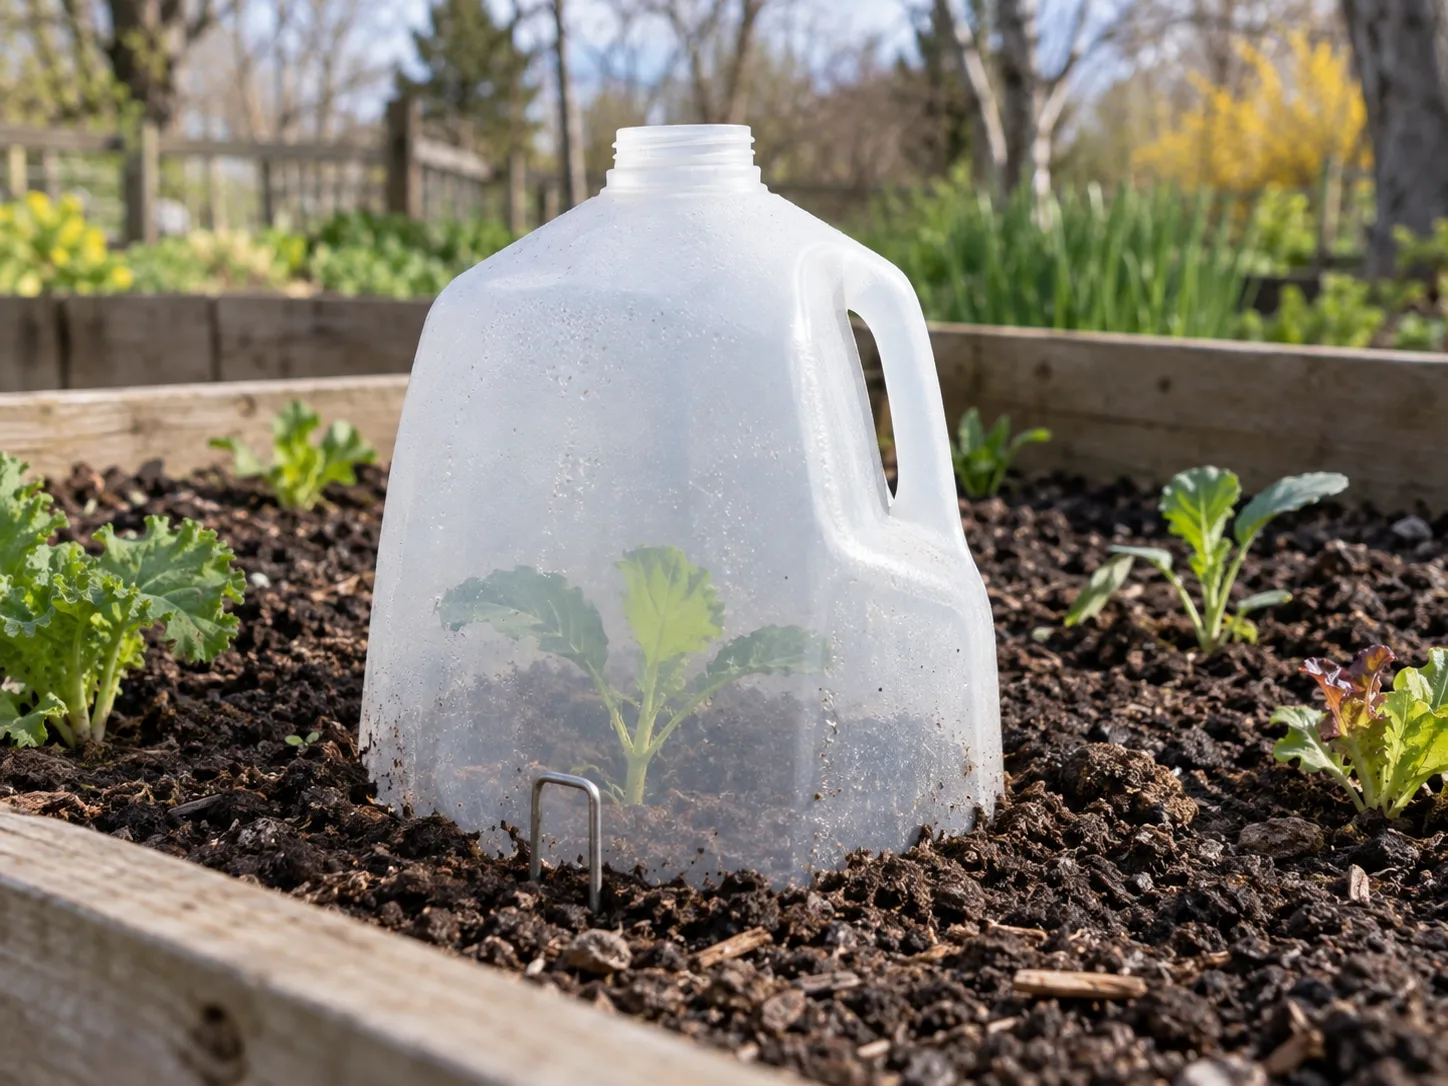
A bottomless milk jug makes a quick cloche—a clear cover placed over a young plant. It can soften the effects of a cool night, block drying wind, and give a newly planted seedling a little breathing room while its roots settle. It also creates a visible barrier against some nibbling animals, although it is not a complete pest-control system.
To make one, cut off the bottom, remove the cap, and set the jug over a small plant after watering the soil. Push the lower rim an inch or two into the soil or anchor it with a small stake or garden staple so the wind cannot roll it across the bed. Leave enough room between the foliage and the plastic that leaves do not sit against wet sides all day.
Frost Protection Is Not Weatherproofing
The open neck is the feature that keeps a cloche from becoming a sealed heat trap. On mild sunny days, remove the jug or open the top fully; replace it for the night only when the plant still needs protection. Lovely Greens’ recycled-container guide makes the same practical point about recycled cloches: ventilation matters, and the cover should come off once the weather and plant no longer need it.
A jug may help with a light, brief chill, but do not treat it as a guarantee against a hard freeze, prolonged cold, snow load, or a windstorm. For a serious frost event, use the protection recommended for the crop and your local conditions—often a proper row cover, a larger cold frame, or moving a container plant to shelter. The jug is a small local aid, not a forecast override.
3. Build a Physical Barrier Around Vulnerable Seedlings
If the main problem is a rabbit, bird, or curious pet rather than cold, use the jug as a collar. Remove both ends so the container becomes a short cylinder, then set it around the seedling and press the lower edge into the soil. The handle can make it easy to lift for watering or inspection.
This works best for a single small plant in a bed with loose enough soil to accept the rim. Keep the top open so the plant receives light and rain, and check often as the seedling grows. A collar that starts as a roomy guard can become a constricting tube in a week, especially around fast-growing greens.
The barrier is physical, not magical. A determined rabbit can reach over it, a vole can approach from below, and a strong wind can lift it. Use mesh or a purpose-built guard when the plant needs protection for more than its vulnerable early stage. Never leave a brittle, sharp-edged ring in the bed where it can cut hands or become plastic litter.
4. Turn Smaller Jugs Into Planters for Herbs and Greens
Small milk cartons and trimmed jugs can hold a temporary crop of lettuce, cilantro, chives, microgreens, or other shallow-rooted plants on a sunny patio, balcony, or windowsill. They are especially useful when you want a few salad leaves close to the kitchen and do not have a traditional planter.
Cut a broad opening in one side, leave enough wall height to contain the mix, and punch drainage holes underneath. Set the containers in a tray that catches drips without leaving the bases submerged. Fill with a quality potting mix rather than dense garden soil, which becomes heavy and compact in a small plastic container.
Sow or plant at a spacing that matches the harvest you want. For cut-and-come-again greens, a dense planting can be intentional if you harvest young leaves; for herbs that you want to keep growing, thin seedlings so air can move and roots have room. Put the container where the crop receives the light it needs, and rotate it if one side leans toward a window.
Drainage, Weight, and Heat Are the Trade-Offs
A milk jug planter is a short-term container, not a lifetime home. Thin plastic flexes, the small base can tip when foliage grows, and the dark soil inside can dry quickly in sun. Translucent walls also let light reach the root zone, so cover the outside with paper or place the container inside a more stable outer pot if roots will remain there for more than a short crop.
Check moisture with your finger rather than watering on a fixed schedule. Small containers can swing from damp to dry faster than a garden bed, but adding water to a jug with poor drainage only makes the swing more dangerous. If roots circle the container, the mix smells sour, or the plant wilts soon after watering, transplant it or retire the container.
Food packaging is a reasonable starting point for this kind of reuse when it is cleaned and used for a crop, but reuse does not remove the need for clean water, clean mix, and ordinary harvest hygiene. Do not use a jug that previously held chemicals or unknown liquids for edible plants.
5. Make a Gentle Watering Can
Keep the cap and turn it into a makeshift rose. Use an awl or small drill bit to make several tiny holes through the cap, screw it back onto a thoroughly rinsed jug, fill with water, and test the flow over an empty tray. Add holes only if the stream is too slow.
This gentle sprinkle is useful for established houseplants, patio pots, and larger seedlings. It is not ideal for fragile germination trays if the holes spit unevenly, and it is not a precise replacement for a narrow-spout can when you need to water the soil without wetting foliage.
The handle is the real advantage: it gives a comfortable grip and makes a half-filled jug easy to control. Use the container for plain water only. Do not mix fertilizer, pesticide, herbicide, bleach, or cleaning products in a repurposed milk jug that might later be mistaken for a watering container. Store it with the cap off when empty so it can dry fully.
6. Cut a Sturdy Scoop for Soil and Compost
A handled milk jug can become a surprisingly useful scoop for dry potting mix, compost, perlite, bark, mulch, or granular soil amendments. Draw a diagonal line from the lower side toward the shoulder, leaving the handle attached to the upper section, then cut slowly and smooth the rim.
The shape is more useful than a flat cup because the handle keeps your hand above dusty material and lets you pour with control. Keep one scoop for clean potting mix and another for compost or outdoor materials if you have enough jugs; separating jobs saves repeated washing and keeps stray fertilizer granules out of seed-starting mix.
Treat the scoop as a light-duty tool. A thin jug may flex when full of damp compost, and the cut rim can buckle if you use it to pry or scrape hard soil. Do not use it for rocks, wet cement, animal waste, or sharp debris. If the handle bends, the plastic whitens from stress, or the rim cracks, stop using it before the scoop fails in your hand.
7. Keep a Kitchen Scrap Caddy for the Compost Pile
The same handle that makes a jug handy in the garden makes it convenient beside a kitchen sink. Cut a wide opening opposite the handle, rinse the inside frequently, and use the container to carry plant-based scraps to an outdoor compost pile or municipal collection bin.
This is a holding container, not a compost bin. A gallon jug is too small and poorly ventilated to balance moisture, carbon, and air for meaningful composting on its own. Empty it regularly, wash it before odors build, and keep the lid off while it is drying.
What Belongs in the Caddy
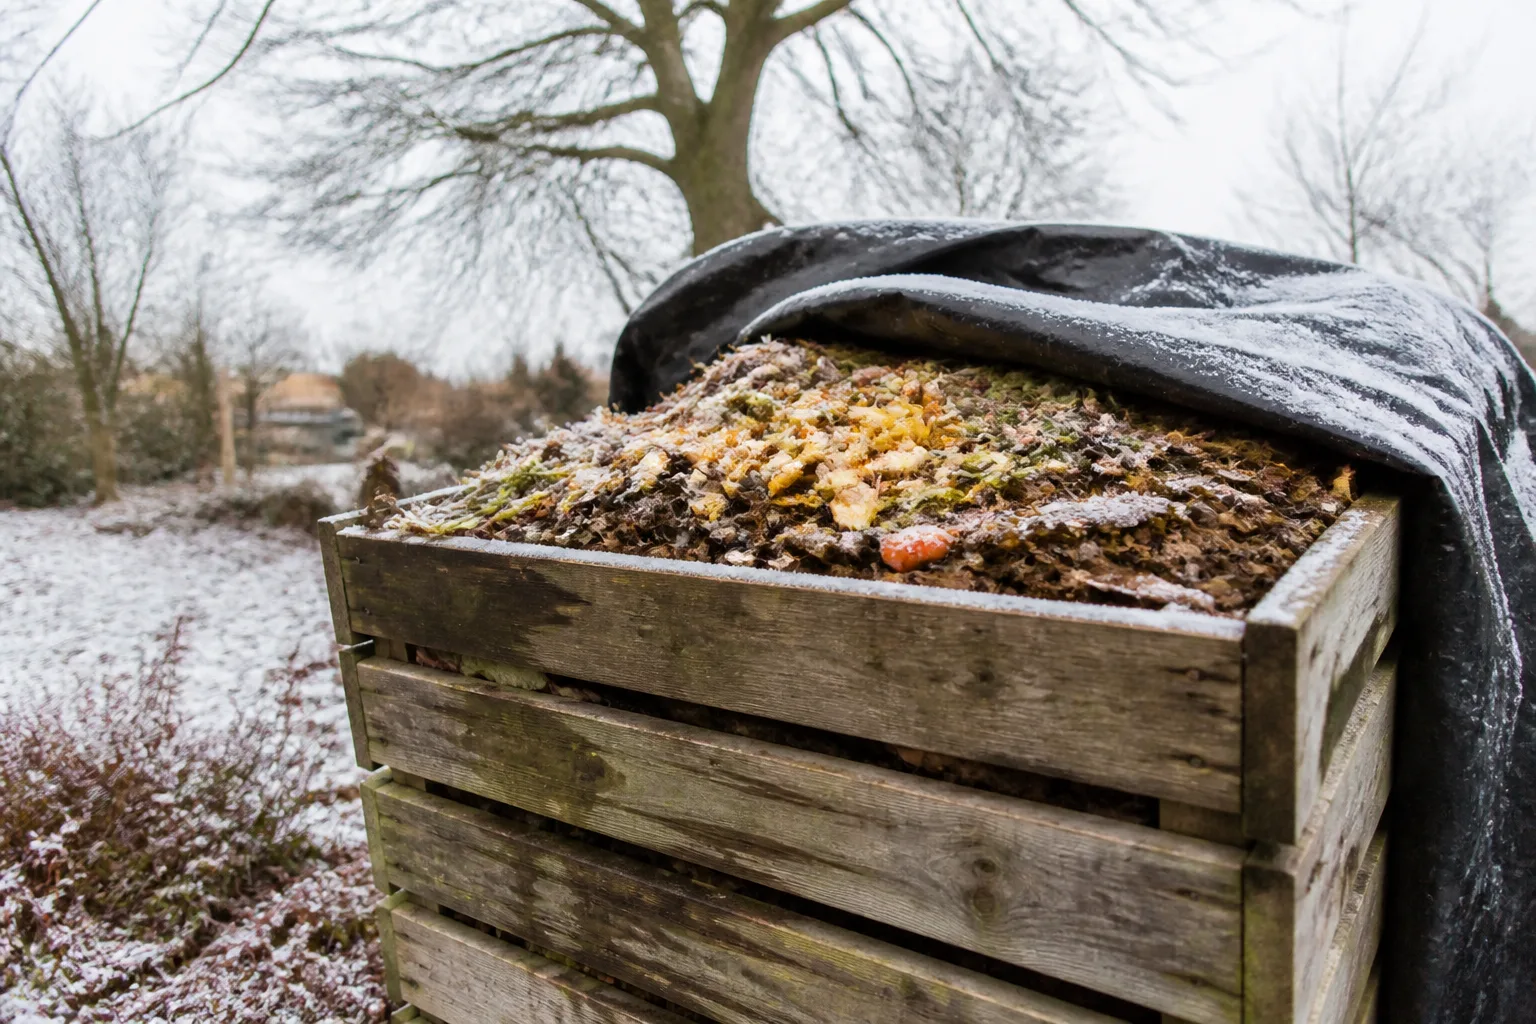
The safest default is a short list of plant-based kitchen waste: fruit and vegetable peels, cores, trimmings, coffee grounds, unbleached tea materials, and crushed eggshells. Add the contents to a properly managed compost system rather than scattering fresh scraps around growing plants.
Penn State Extension’s home-composting guide separates green materials such as fruit and vegetable waste from brown materials such as dry leaves, and explains that finished compost depends on adequate air and moisture. That is why the jug should make transport easier, not become a sealed fermenting bottle.
Keep meat, bones, dairy, cheese, oily foods, salad dressing, fats, pet waste, and visibly diseased plant material out of a basic backyard compost caddy unless your local collection program specifically accepts them. Penn State Extension notes that fats can create odors and attract animals and that diseased material can spread problems through a home pile. Local rules may also limit manure or other inputs, so check them before adding anything unusual.
If the jug becomes smelly, slimy, or difficult to rinse, recycle it and start with a fresh one. The environmental benefit of reusing a container disappears if it creates a hygiene problem or attracts pests to the kitchen.
When Recycling Is the Better Garden Choice
Reuse is worthwhile when it replaces a disposable purchase and the container remains clean, stable, and suited to the job. It is not automatically better to keep a jug in service forever. Thin plastic eventually becomes brittle under sunlight, repeated freezing, washing, and cutting.
Recycle the jug when it cracks, clouds badly, develops a sharp rim, or no longer drains. Retire it immediately from edible crops, seed starting, watering, and kitchen use if it has held pesticide, herbicide, fuel, oil, solvent, or an unknown liquid. Follow your local recycling or household-hazardous-waste rules rather than putting contaminated plastic into a normal bin.
You can also choose the garden’s permanent solution when the temporary one starts costing time. A proper seed tray is easier to label and move; a real cloche vents more predictably; a sturdy watering can pours more evenly; a compost pail cleans more easily. The milk jug earns its place when it solves a small problem simply, not because every piece of plastic has to become a project.
Conclusion
Milk jugs are useful because they combine a handle, a translucent dome, a flexible body, and a nearly free price. Use a gallon jug for winter sowing when the seeds are genuinely cold-tolerant, a bottomless jug for short-term protection, a cut cylinder for a temporary animal barrier, and a smaller container for shallow-rooted greens. The same plastic can become a watering can, a light-duty scoop, or a kitchen scrap carrier.
Start every project with a clean container, safe cuts, real drainage, and a clear end date. Vent covers before they overheat, move seedlings before roots become a tangled mat, keep chemicals away from food and plant uses, and recycle any jug that becomes brittle or contaminated. That is the sensible answer to why gardeners use milk jugs: not as miracle equipment, but as simple tools that are helpful when their limits are respected.