9 Midsummer Gardening Mistakes to Avoid
Avoid common midsummer gardening mistakes with practical fixes for watering, heat, mulch, deadheading, pests, planting, and next season’s blooms.
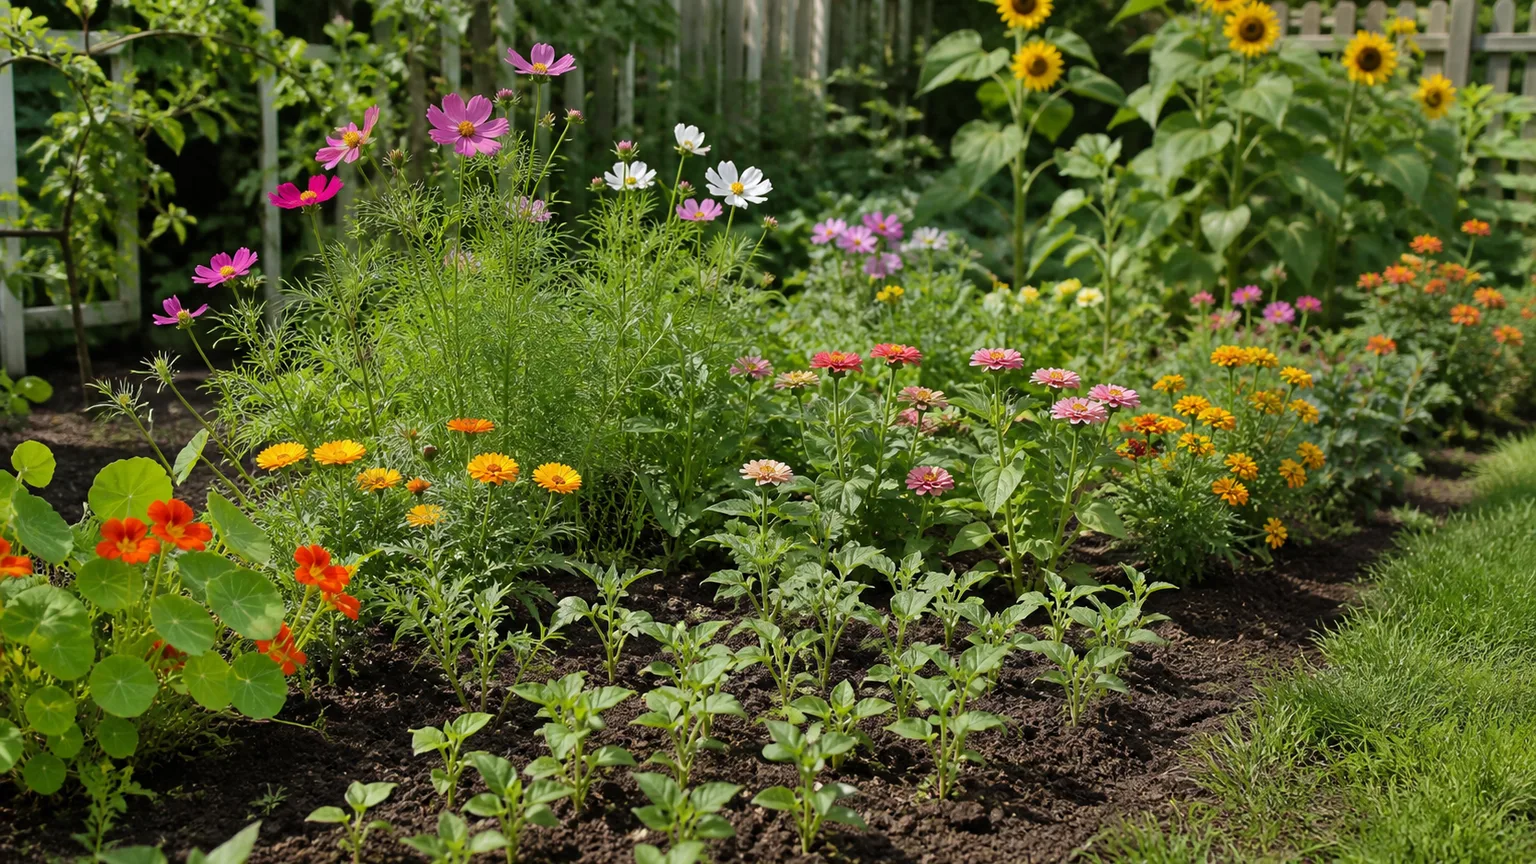
Midsummer exposes the weak points in a garden. A bed that looked effortless in May can suddenly wilt by lunch, bake beside a wall, disappear under weeds, or lose its flowers after one well-intended round of fertilizer. The fix is rarely “do more.” It is usually to stop reacting on autopilot and match the next action to what the plant, soil, and weather are actually telling you.
The timing matters because midsummer is a transition. Plants are using water quickly, roots are competing with vigorous weeds, annuals are trying to set seed, and warm nights can turn a small pest or disease problem into a serious one. These nine midsummer gardening mistakes cover the decisions that most often waste water, shorten bloom, or create a second problem while trying to solve the first.
Midsummer Is a Transition, Not a Maintenance Vacation
The best summer garden routine is a short inspection that you repeat, not a large rescue project you postpone. Walk the bed early in the day once or twice a week and look at the soil, the newest growth, the undersides of leaves, the base of each plant, and any place where water collects or runs off. You are looking for change: a plant that wilts earlier than its neighbors, a stem leaning under new weight, a mulch layer that has settled, or a leaf pattern that is spreading.
Weather changes the answer. A cool, cloudy week after rain does not require the same irrigation as a hot, windy week, and a new transplant does not have the same root system as an established perennial. The National Gardening Association’s summer garden care guidance emphasizes the practical midsummer combination of watering, weeding, deadheading, and scouting; the useful lesson is to treat those tasks as a connected system rather than nine unrelated chores.
Mistake 1: Watering by Calendar Instead of by Root-Zone Need
“It is Tuesday, so I water” is a poor midsummer rule. It may leave shallow-rooted annuals dry during a heatwave, while keeping a poorly drained bed wet enough to deprive roots of oxygen. Frequent, light sprinkling also encourages roots to stay near the surface, where the soil heats and dries fastest.
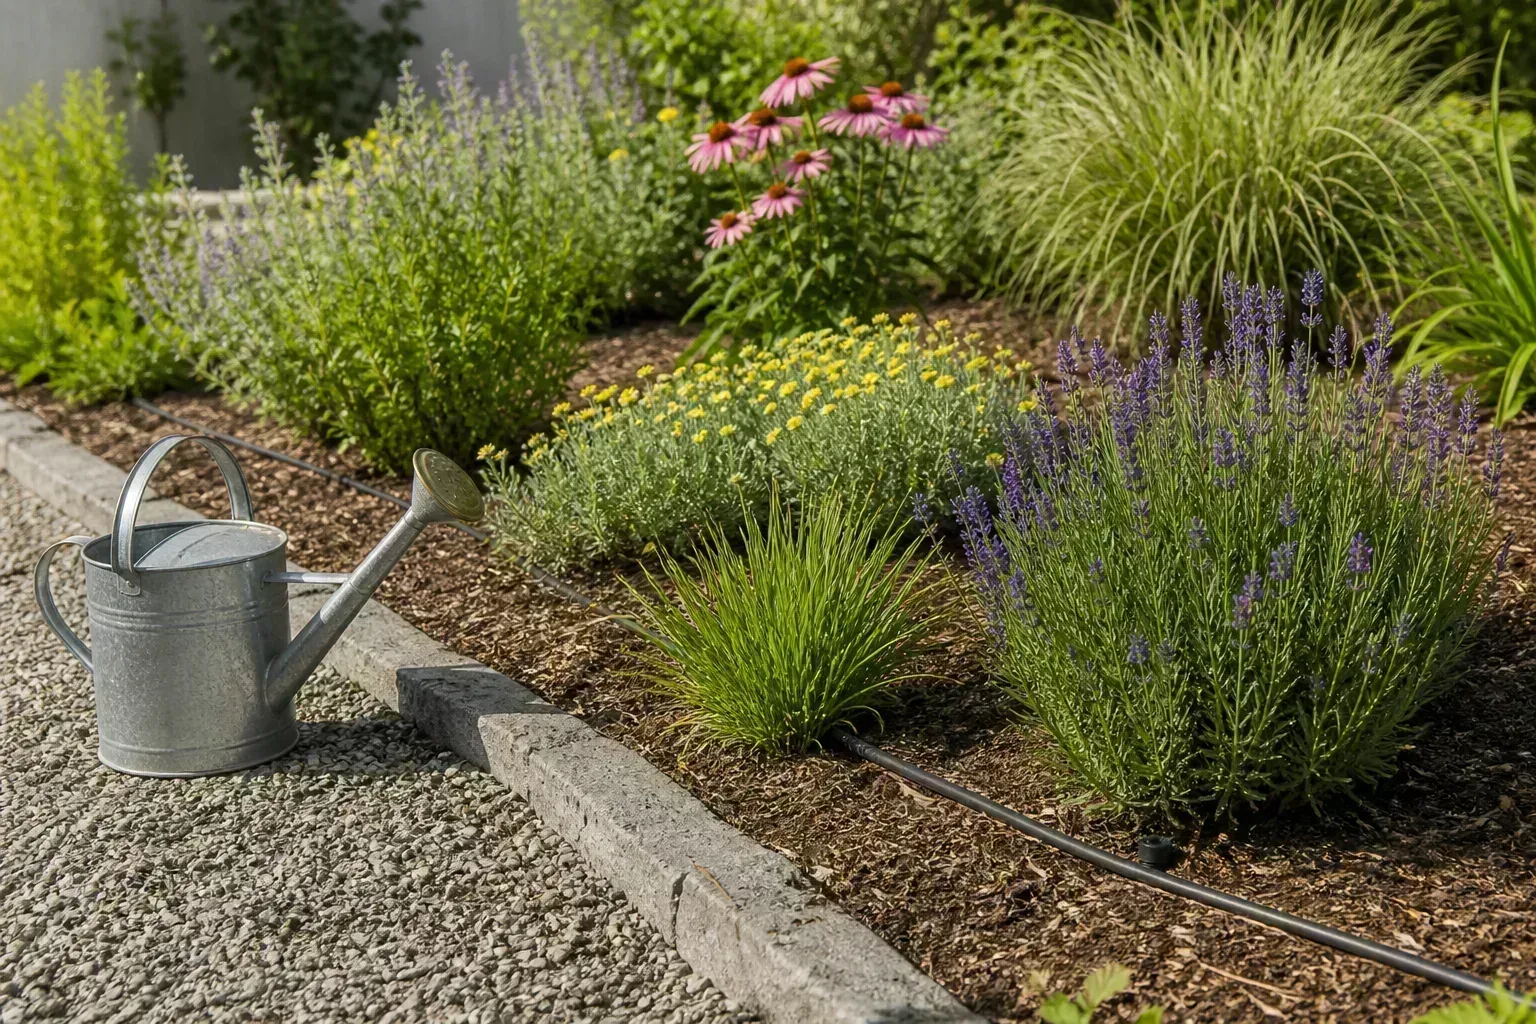
Check the root zone before you turn on the hose. Push a finger or a narrow trowel into the soil several inches away from the stem, where roots are likely to be, rather than judging by the surface alone. If it is dry at the depth where the plant is rooting, water slowly and deeply enough to wet that zone; if it is still cool and moist, wait. In containers, check more often because a small volume of potting mix can dry within a day even when a nearby garden bed is fine.
Use the plant’s age as an exception. A newly planted shrub, seedling, or perennial may need more consistent moisture while it grows roots, even if an established neighbor can tolerate a short dry spell. Drip lines, soaker hoses, or a slow hand-watering pass are usually more effective than a fast spray that runs off compacted soil.
The rough “one to two inches per week, including rain” benchmark sometimes used in summer guidance is a starting point, not a universal prescription. Sandy soil, full sun, wind, containers, dense roots, and hot pavement can raise demand; clay soil, shade, humidity, rainfall, and poor drainage can lower it. Texas A&M AgriLife’s summer heat guidance recommends deep watering less frequently, a finger test, and early-morning irrigation rather than watering too often.
How to tell heat wilt from a thirsty root zone
Many plants wilt briefly during the hottest part of the day because leaves lose water faster than roots can replace it. That is not the same as a plant that is dangerously dry. If the leaves recover in the evening and the soil is moist below the surface, adding water can create a new problem.
Check three things before watering a midday-wilted plant:
- Recovery: Does it look better when the air cools, or is it still limp at dusk and the next morning?
- Soil: Is the root zone dry, or is it wet and heavy?
- Pattern: Is one plant affected, or is the entire bed exposed to the same hot wall, wind, or broken irrigation zone?
Dry soil plus persistent wilt calls for a deep, gentle soaking and a follow-up check. Moist soil plus persistent wilt points you toward damaged roots, poor drainage, stem injury, or disease instead of more water. Texas A&M notes that temporary heat wilt can recover later in the day, while prolonged heat and drought stress can increase susceptibility to pests and disease; that distinction is more useful than a fixed watering schedule.
Mistake 2: Leaving Plants in the Wrong Summer Light
A plant tag’s light description is not a permanent guarantee that the plant will receive the same light all summer. The sun’s angle changes, a nearby tree can leaf out, a building can reflect heat, and a bed that was bright in spring can become shaded by tall plants. On the other hand, a west-facing wall or paved patio can make “full sun” much harsher than an open, breezy bed.
Too much light and too little light create different clues. Sunscald often appears as bleached, tan, or sharply browned patches on the exposed side of leaves, especially after a sudden move or a heatwave. Insufficient light produces stretched stems, smaller leaves, weak flowering, and a plant that leans toward the brightest opening. Watering cannot correct either mismatch.
Read the site, not just the plant tag
Observe the bed at three useful times: morning, the hottest part of the afternoon, and late day. Note whether the soil is shaded but the leaves are exposed, whether a reflective wall is radiating heat, and whether air can move through a dense planting. Sensitive plants may benefit from temporary shade cloth or a move to morning sun, but shade should not be used as a permanent blanket without checking the species’ needs.
Make changes gradually when possible. A plant moved from filtered light into hard afternoon sun can scorch even if the final location is technically suitable, because its leaves have not acclimated. Give it a transition and keep the root zone evenly, not constantly, moist while it adjusts. Conversely, do not move a sun-loving plant into deep shade simply because it drooped once during a hot afternoon; verify the soil and watch its recovery first.
Mistake 3: Treating Soil as a Finished Project
Summer reveals soil problems that spring planting can hide. Compacted soil sheds water, bare soil heats and evaporates quickly, and a bed crowded with weeds forces flowers to compete for the same moisture and nutrients. Adding more fertilizer does not repair any of those conditions.
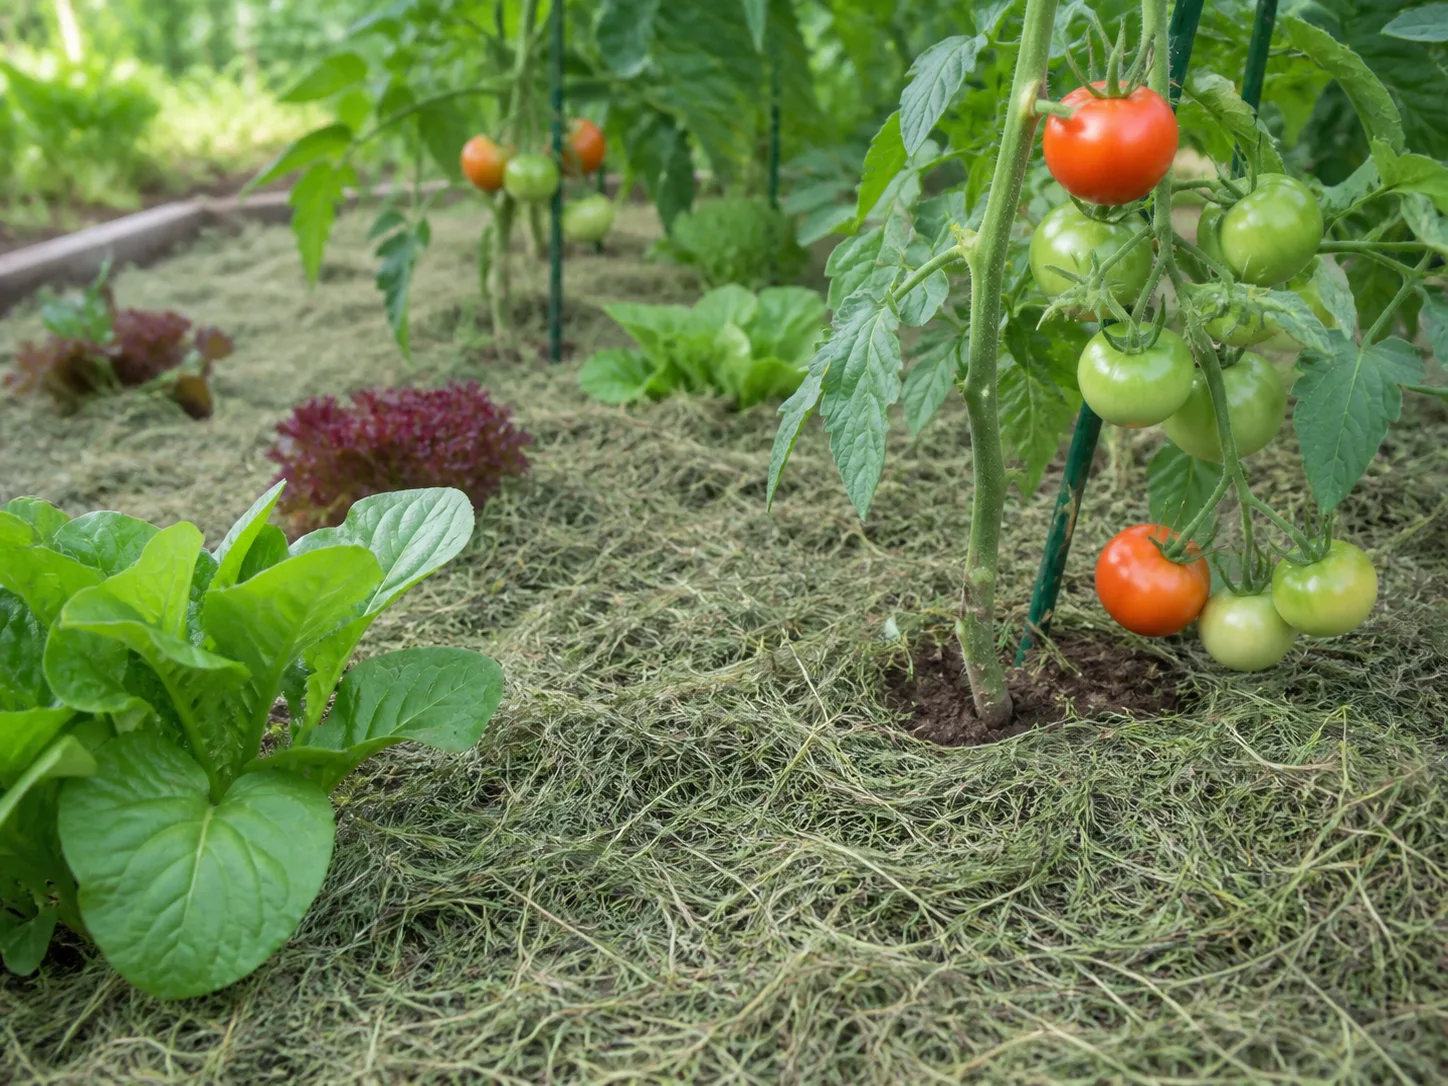
Start with the surface. Pull weeds while the soil is slightly moist so you remove the crown and as much of the root as possible. Avoid deep cultivation around established flowers, where chopping roots can add stress. Then look for a crusted surface, standing water after irrigation, or a hard dry layer beneath a deceptively damp top.
Organic matter is useful, but do not treat every kitchen or lawn leftover as a harmless fertilizer. Finished compost can improve structure when used appropriately, while fresh grass clippings applied in a thick mat can block air and water movement. If you use clippings, apply them in thin, dryable layers and only use material from a lawn that has not been treated with a persistent herbicide.
Mulch helps only when it is applied correctly
Mulch is a tool for moderating the soil surface, not a substitute for watering or a way to bury the plant. A layer of roughly two to three inches is a practical starting point for many flower beds, but depth should be judged around the plant, not measured against the stem. Leave a visible gap around stems and crowns so damp material does not stay pressed against soft tissue.
Use the mulch that fits the bed. Shredded bark, aged wood chips, leaf compost, and other organic materials can suppress weeds and reduce evaporation. Colorado State University Extension’s mulching guidance distinguishes mulch from soil amendments and warns that material mixed into soil behaves differently from material left on the surface. That distinction matters: surface wood chips generally do not create the same nitrogen problem as wood incorporated into the root zone.
Do not create a mulch volcano around trees or pile mulch against flower crowns. Excess depth can reduce air exchange, and a dense layer can slow water infiltration enough that the soil beneath stays dry while the mulch looks wet. After spreading it, water slowly and check whether the moisture reaches the soil. If it beads or runs away, rake the surface lightly, correct the layer, or put irrigation beneath the mulch where appropriate.
Mistake 4: Fertilizing a Heat-Stressed Garden
A plant that looks pale, wilted, or stalled can tempt you to reach for fertilizer. In midsummer, that can be the wrong first move. Fertilizer salts increase the concentration of dissolved material around roots, and a plant already struggling to move water may be less able to handle that extra demand.
Hydrate and diagnose before feeding. If the soil is dry, water deeply and let the plant recover. If the soil is wet, investigate drainage, root damage, light, or disease. If the plant is actively growing and the label, crop, and soil test support feeding, use the product at the stated rate; do not double the dose because the garden looks tired.
Texas A&M’s guidance advises caution with fertilizer during heat and drought, especially when irrigation water is already salty, and recommends using a soil test where appropriate. The National Gardening Association notes that actively producing annuals, vegetables, and container plants may need light feeding during the season, but also says a brief pause is safer during extreme heat. In practice, the decision is not “fertilize or never fertilize.” It is “is this plant growing strongly enough, and is the root zone stable enough, to use the nutrients?”
Avoid a second common mistake: using high-nitrogen feeding to force soft, lush growth in a humid bed. Very tender new growth can be more attractive to some pests and more vulnerable to disease. A plant that is flowering well and has healthy foliage may need water management, support, deadheading, or simply time—not more food.
Mistake 5: Deadheading or Pruning on Autopilot
Deadheading is not the same as cutting a plant back indiscriminately. Removing spent flowers can keep repeat-blooming annuals and perennials producing, but a hard midsummer haircut can remove buds, reduce leaf area, expose stems to sun, or erase seed heads that feed wildlife and provide winter structure.
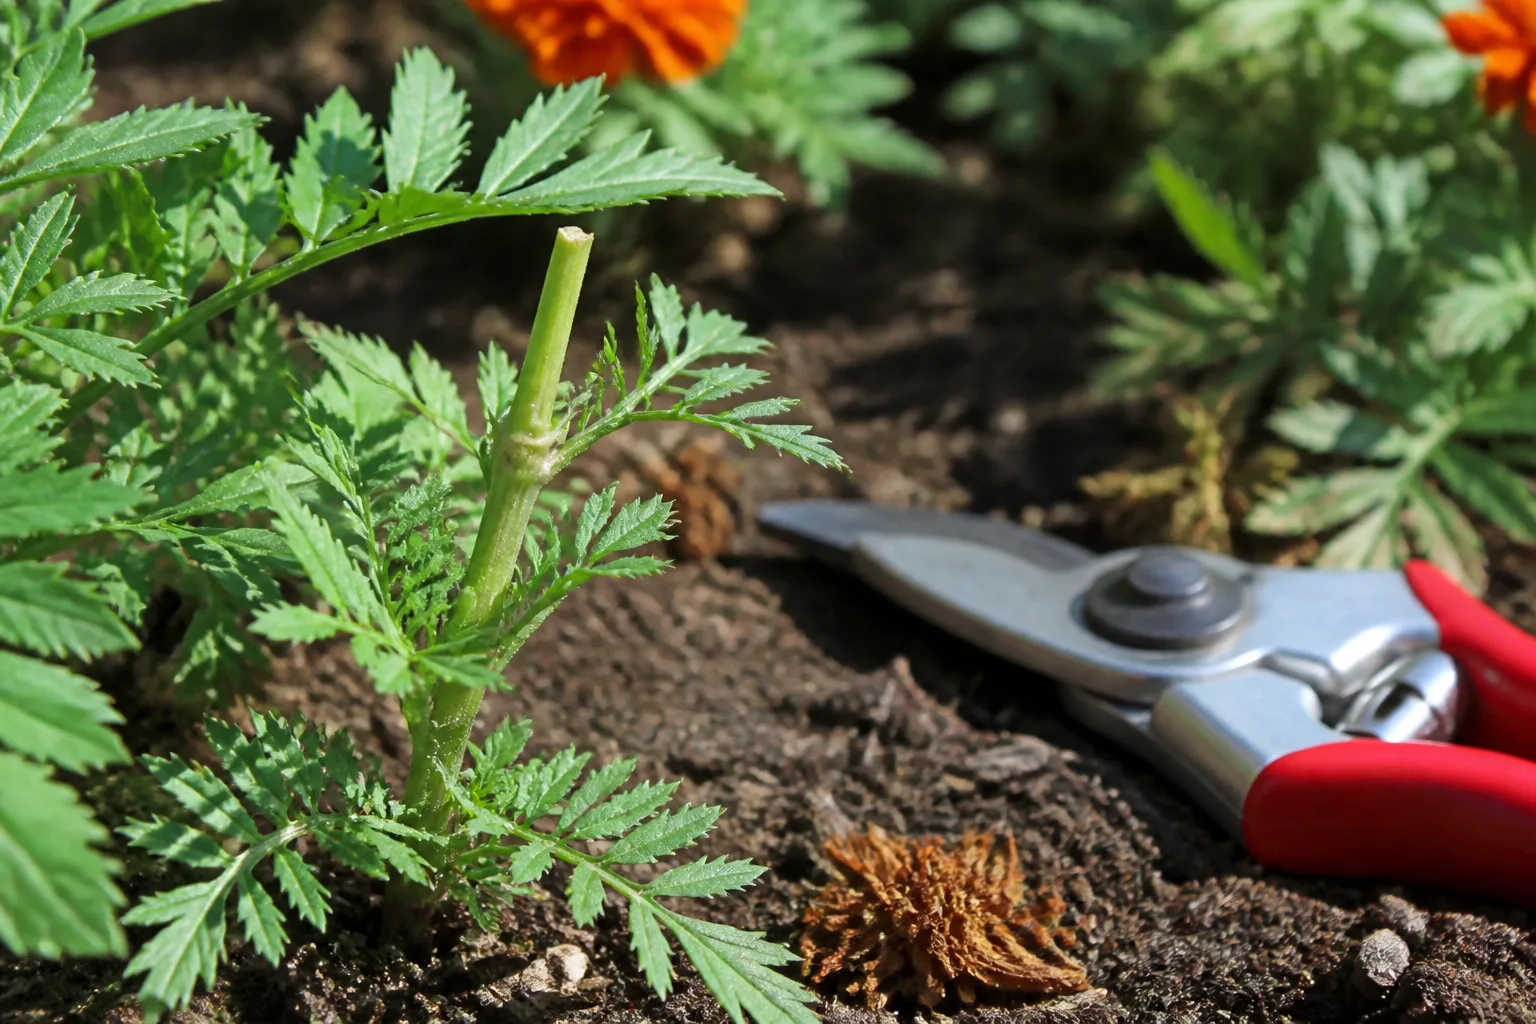
Use the plant’s purpose to decide. Zinnias, cosmos, many salvias, and other repeat bloomers often reward regular removal of spent flowers. Some annuals, including many petunias, impatiens, and begonias, are self-cleaning or need little deadheading. Perennials vary: some rebloom after a cut, some look better if seed heads remain, and some should be left alone while they are building reserves.
Do not prune a heat-stressed plant simply because it looks untidy. Remove dead, broken, diseased, or dangerously crossing growth when there is a clear reason, but postpone routine reshaping until the plant is hydrated and the weather is less extreme. If disease is involved, clean tools between plants and dispose of infected material according to local guidance rather than putting it into a cool backyard compost pile.
The two-minute deadheading rule
Give yourself a small, deliberate target instead of stripping the entire plant:
- Start with spent flowers that are visibly collapsing or beginning to form seed.
- Follow the flower stem down to the nearest healthy leaf joint or branching point.
- Cut just above that point with sharp, clean shears.
- Stop when you reach fresh buds, useful seed heads, or a plant that needs its foliage for recovery.
The National Gardening Association recommends clean, sharp tools and careful deadheading, while Gardening Know How’s deadheading guide explains why repeat-blooming plants often benefit and why self-cleaning flowers or late-season seed producers should not be treated the same way. This is the important midsummer correction: deadhead for the next flush, not for a perfectly empty plant.
Mistake 6: Waiting Until Plants Flop Before Adding Support
Tall flowers and fruiting plants gain weight quickly in midsummer. Tomatoes, lilies, dahlias, delphiniums, sunflowers, and other top-heavy plants are much easier to support before stems lean into neighboring plants or become tangled with irrigation lines.
Install a stake, cage, trellis, or soft tie while the plant is upright. Place the support close enough to work but far enough from the crown that you do not spear roots. Tie in loose loops that allow movement and stem expansion; tight wire or thin string can cut into growing stems.
Support also improves care. An upright plant has better airflow through its canopy, keeps flowers off wet soil, and makes it easier to inspect leaves for pests and disease. If a plant has already fallen, lift it gently, support the main stems in stages, and avoid snapping a stem just to make the bed look orderly. Some broken stems should be removed cleanly; others can recover if the vascular tissue is still connected.
Mistake 7: Treating Every Bug or Leaf Spot as an Emergency
The first response to a chewed leaf should be observation, not a blanket spray. A few holes may be cosmetic, pollinators and predators may be present, and the insect you see may not be the one causing the damage. Spraying without identifying the pattern can kill beneficial insects, leave residue on flowers, and fail to address the real cause.
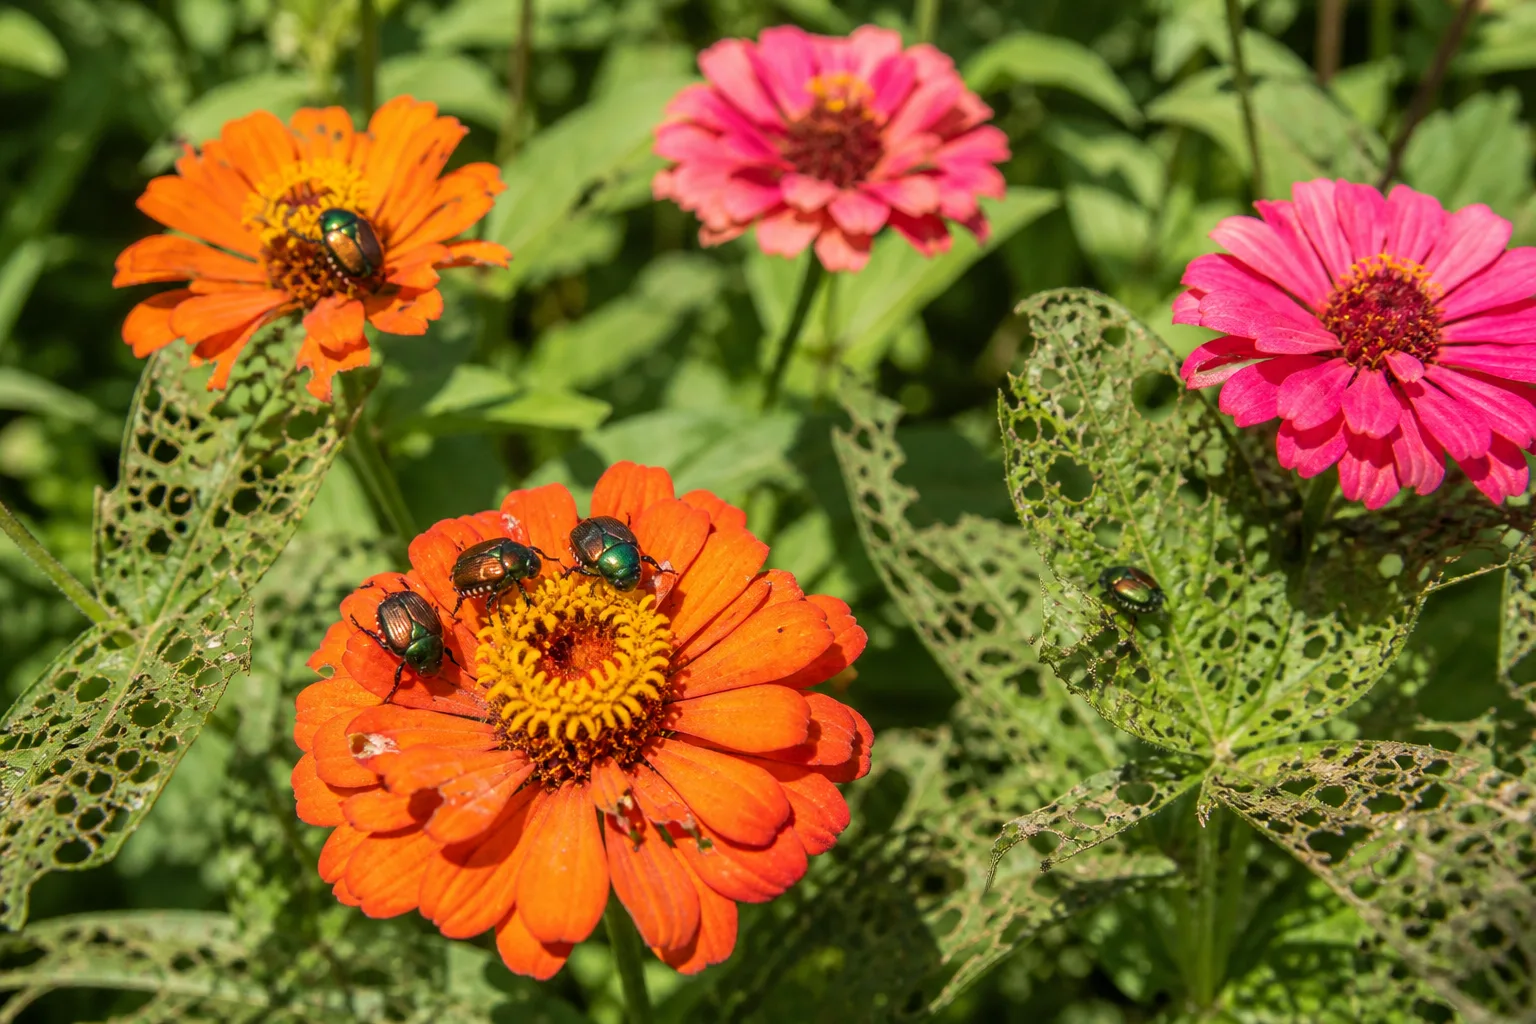
Scout both sides of leaves, new growth, flower buds, and the soil line. Chewed edges and holes suggest a different problem from stippling, sticky residue, webbing, whiteflies, or a spreading powdery patch. Look for the pest, its eggs, frass, or the progression of symptoms. Photographing the same leaf every few days can tell you more than one dramatic glance.
Powdery mildew is a useful example of why midsummer diagnosis matters. Clemson Cooperative Extension’s powdery mildew factsheet describes the familiar gray-white powder on leaves, stems, or flowers and emphasizes spacing, good air circulation, avoiding overhead irrigation, removing infected material, and avoiding excessive nitrogen. It also notes that powdery mildew favors humid conditions and does not require free water on the leaf surface, so simply keeping leaves dry is not a complete cure.
If a treatment is warranted, identify the crop and follow the product label, including application timing, protective equipment, harvest interval, and heat restrictions. Never assume that a homemade spray is safe for every flower, edible crop, pollinator, or temperature. For late-season leaf disease on a deciduous plant, removal of severely affected leaves may be more sensible than repeated spraying, especially when the plant has already stored much of the season’s energy.
A simple scouting loop for midsummer
Use the same four-part loop each time you inspect:
- Find the pattern: one leaf, one plant, a row, or the whole bed?
- Check the environment: dry soil, standing water, crowded foliage, reflected heat, or broken irrigation?
- Look for evidence: insects, eggs, webbing, powder, chewing, spots, or mechanical damage?
- Choose the smallest effective response: hand-pick, prune one affected leaf, improve airflow, adjust irrigation, or seek a verified treatment.
The goal is not to make every leaf perfect. It is to keep a small problem from becoming a stressed, sprayed, and harder-to-diagnose garden.
Mistake 8: Assuming It Is Too Late to Plant
“Midsummer is too late to plant” is as unhelpful as “midsummer is the perfect time to plant everything.” The right answer depends on the plant, local climate, remaining growing season, heat, root condition, and whether you can provide establishment care.
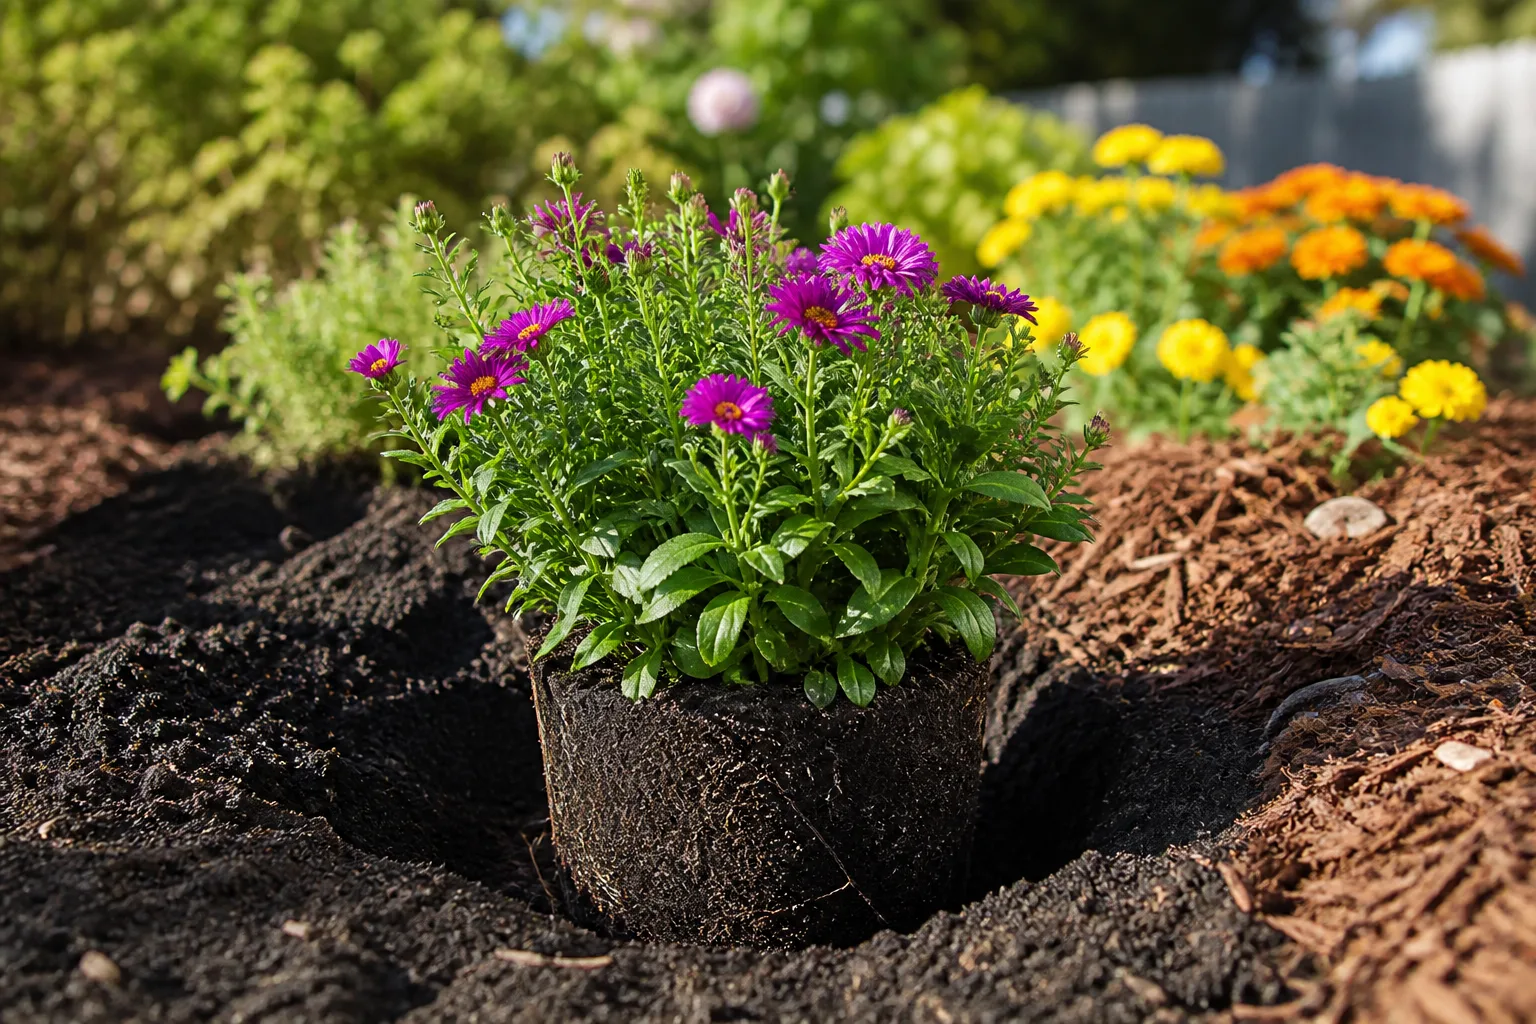
A container-grown flower planted into prepared soil may have plenty of time to establish for fall color. The National Gardening Association lists midsummer planting opportunities such as dahlias, cannas, begonias, chrysanthemums, Japanese anemones, and fall asters, while also pointing to succession sowing for quick crops. That does not mean every transplant will succeed in every region. A newly planted root ball in a heatwave needs closer monitoring than an established plant, and a tender species planted just before an early freeze may not repay the effort.
Before planting, check three calendars: the plant’s days to bloom or harvest, your local first-frost or extreme-heat pattern, and the next week’s weather. Plant late in the day or on a cooler, cloudy stretch when possible. Water the root ball thoroughly, settle soil around it without compacting, mulch the surrounding soil with the stem kept clear, and provide temporary shade if the foliage is exposed to abrupt afternoon sun.
Midsummer is also a good time to plant for the next season, not just the next flower. Some seeds can be started for fall planting or overwintering, while bulbs and spring-flowering plans may need ordering or preparation before the ideal window passes. Timing is a local decision; use your extension service, seed packet, and hardiness-zone information rather than a universal month on a calendar.
Mistake 9: Planning Only for Today’s Flowers
A garden can look full in July and still be headed for an empty August. If all the plants flower at once, if every spent bloom is removed, or if no support and succession plan exists, the bed may lose color and structure just when heat is most demanding.
Look for the handoff between what is blooming now and what will carry the next month. Keep some plants for seed, allow late-season bloomers to develop, and fill gaps with plants that fit the remaining weather rather than buying whatever is flowering at the nursery. This is also the point to photograph combinations you like, note which corners dry fastest, and record where afternoon shade or wind changed performance.
Build a four-week handoff plan
Spend ten minutes on a simple sequence:
- This week: check irrigation, remove competitive weeds, support leaning plants, and add or correct mulch.
- Next week: deadhead only the plants that will rebloom, inspect leaf undersides, and mark any plant that needs more shade or airflow.
- In two weeks: sow or plant a suitable succession crop or fall-flowering plant if your climate and remaining season allow it.
- By the end of the month: save seed from the plants you want to repeat, review what failed, and order or plan the next season’s additions.
This kind of planning keeps the garden from becoming a series of emergencies. It also makes restraint easier: you are less likely to cut every seed head, overfeed a tired plant, or install a random replacement when you already know what the bed needs next.
A Practical 20-Minute Midsummer Garden Reset
When the garden feels overwhelming, use a timer. In the first five minutes, inspect moisture and irrigation: check one container, one sunny bed, one shaded bed, and any plant that wilted. In the next five, pull only the largest weeds, clear mulch from stems, and check that water can reach the soil.
Use the third five minutes for structure and flowers. Tie one leaning plant, remove broken or diseased tissue, and deadhead one repeat-blooming plant without stripping useful foliage or seed heads. Finish by checking the undersides of leaves and writing down one follow-up task instead of trying to solve every issue at once.
After the reset, water only where the root-zone test says it is needed. Delay fertilizer until the plant is hydrated and actively growing, delay routine pruning during severe heat, and identify a pest or disease before treating it. Small, accurate interventions protect more of the garden than a large reaction that treats every symptom as the same problem.
Conclusion
The most damaging midsummer gardening mistakes come from confusing activity with care: watering on a schedule instead of reading the soil, adding fertilizer to a stressed root system, pruning for neatness, spraying before identifying a pest, or assuming the season has only one planting window. A resilient garden is not one that never wilts or loses a leaf. It is one where you notice change early and choose a response that fits the plant and the conditions.
Check moisture at the root zone, adjust light when the site changes, use mulch with restraint, support growth before it falls, deadhead selectively, scout twice before reaching for treatment, and keep a plan for the next flush of flowers. Those habits preserve water, reduce unnecessary stress, and give your garden a better chance to stay generous through the rest of summer.



