How to Start a No-Dig Garden Step by Step
Start a no-dig garden with cardboard, compost, leaves, and mulch. Get a practical recipe, planting timeline, material cautions, and maintenance plan.
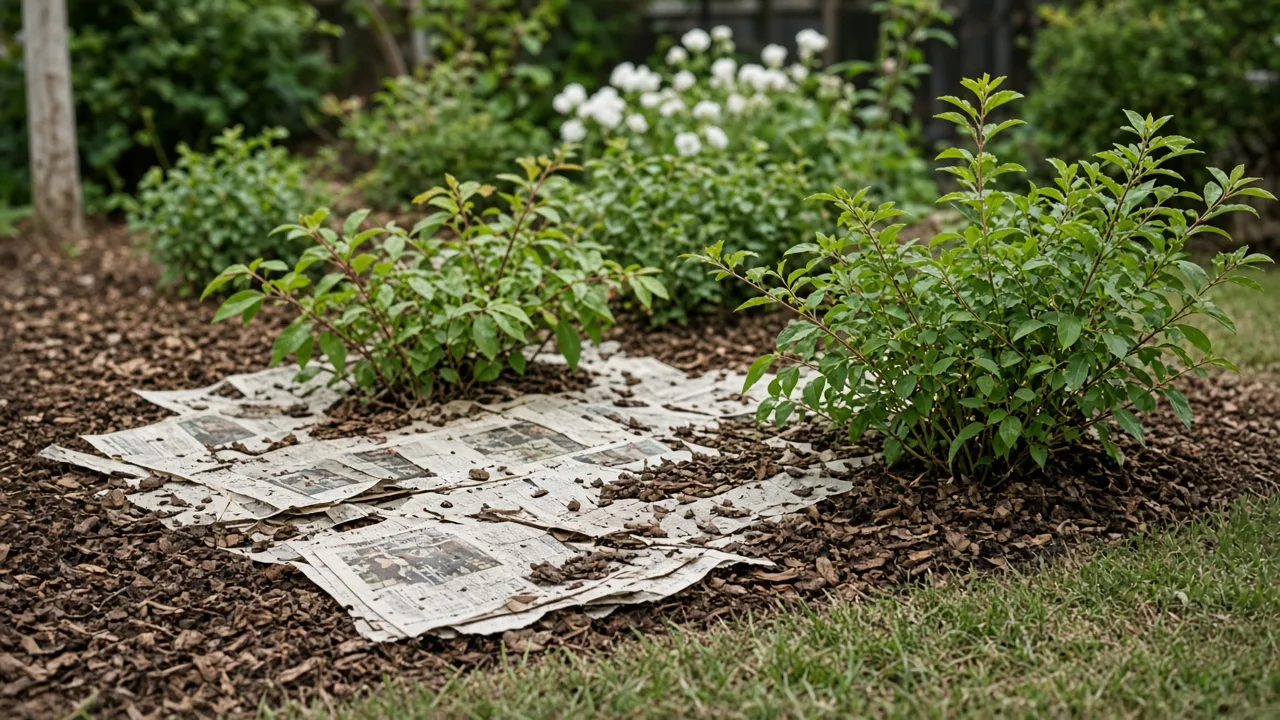
You can turn a patch of lawn, compacted soil, or an empty raised frame into a productive garden without rototilling it. No-dig gardening builds the bed from the surface down: a light-blocking layer stops existing growth, and compost, leaves, straw, and other organic materials gradually become a loose root zone.
The method is simple, but “put cardboard down and pile stuff on top” leaves out the decisions that determine whether it works. The site must drain, the barrier must overlap, the organic matter must be safe and mature enough for the planting you want, and the finished bed must be thick enough to outlast settling. Think of no-dig as a controlled soil-building project, not a shortcut that makes every problem disappear overnight.
Why no-dig gardening works for new and tired beds
Digging turns and breaks the soil to make a planting surface. No-dig gardening leaves the existing soil in place and adds organic matter above it, so soil organisms, roots, and natural channels are disturbed as little as possible. The Royal Horticultural Society explains that this surface-fed approach can support soil structure, soil fauna, and fungal networks while reducing the work of cultivation. RHS guidance on no-dig gardening is a useful reference for the underlying process.
The cardboard or newspaper is mainly a temporary light barrier, not the finished soil. It smothers grass and many annual weeds while the layers above it hold the paper in place and keep it damp. As the barrier softens, worms and other decomposers create openings between the old ground and the new bed. The roots of established plants can eventually move through that interface, provided the area is not waterlogged.
The biggest practical gains are less physical strain, fewer weed seeds brought to the surface, better protection from rain impact, and a steady supply of organic matter. A surface layer can also reduce evaporation, but it does not replace irrigation during a dry spell. Nor does it repair a drainage problem: if water has nowhere to go, adding more moisture-holding material can make the root zone worse.
No-dig is especially useful for a new vegetable bed, a small ornamental border, a bed over turf, or a raised frame where buying a full volume of soil would be expensive. It is less useful when you need a finished bed today, have contaminated fill to deal with, or are trying to establish a deep-rooted tree in shallow, saturated ground.
No-dig, no-till, sheet mulching, and lasagna gardening
These terms overlap, but they describe slightly different emphases. No-dig is the broadest practice: avoid turning the soil and feed the surface with compost or another suitable organic mulch. No-till usually describes the same low-disturbance principle in a vegetable-growing or soil-health context.
Sheet mulching focuses on covering an existing surface, often lawn, with a light-excluding material and an organic mulch. Lasagna gardening or sheet composting emphasizes alternating carbon-rich brown materials with nitrogen-rich green materials so the stack decomposes in place. A single bed may honestly be all four: no-dig in principle, sheet-mulched at the base, and lasagna-layered while it is being built.
The distinction matters because a thin annual mulch is not the same as a new lasagna bed. A mature bed may need only about 2 to 4 inches of finished compost or other well-rotted organic matter on top each year. A new bed over lawn needs a continuous barrier and a substantially deeper growing layer so plant roots do not immediately meet cardboard, sod, or a dense mass of fresh material.
Choose a site that will drain and stay accessible
Start with sunlight, water, slope, and access rather than with a pile of cardboard. Most vegetables need a site with several hours of direct light; flowers and herbs vary, so match the bed to the plants before you build it. Place the bed near a hose or rainwater source, but not where roof runoff repeatedly floods it.
Avoid a low pocket that stays slick after rain, the drip line of a thirsty tree, and ground contaminated by unknown spills or treated fill. A no-dig layer can improve soil structure over time, but it cannot make a floodplain behave like a well-drained bed. If the area is only occasionally wet, a raised frame with open contact to the ground may help. If water stands for days, solve the drainage issue first.
Give yourself a path and a reachable width. A bed roughly 4 feet wide is easy to reach from both sides for many gardeners; narrow it if the bed touches a wall or fence. Do not make the bed so wide that you have to step into it. Walking on the finished growing area compresses the very structure you are trying to build.
Ground-level bed or raised frame?
A ground-level no-dig bed is the most economical choice when the soil drains and you can define the edges with a spade, boards, stones, or a mown strip. It lets roots move into the soil below and requires less imported material. The edge is still important: grass creeping sideways can defeat a perfect cardboard layer.
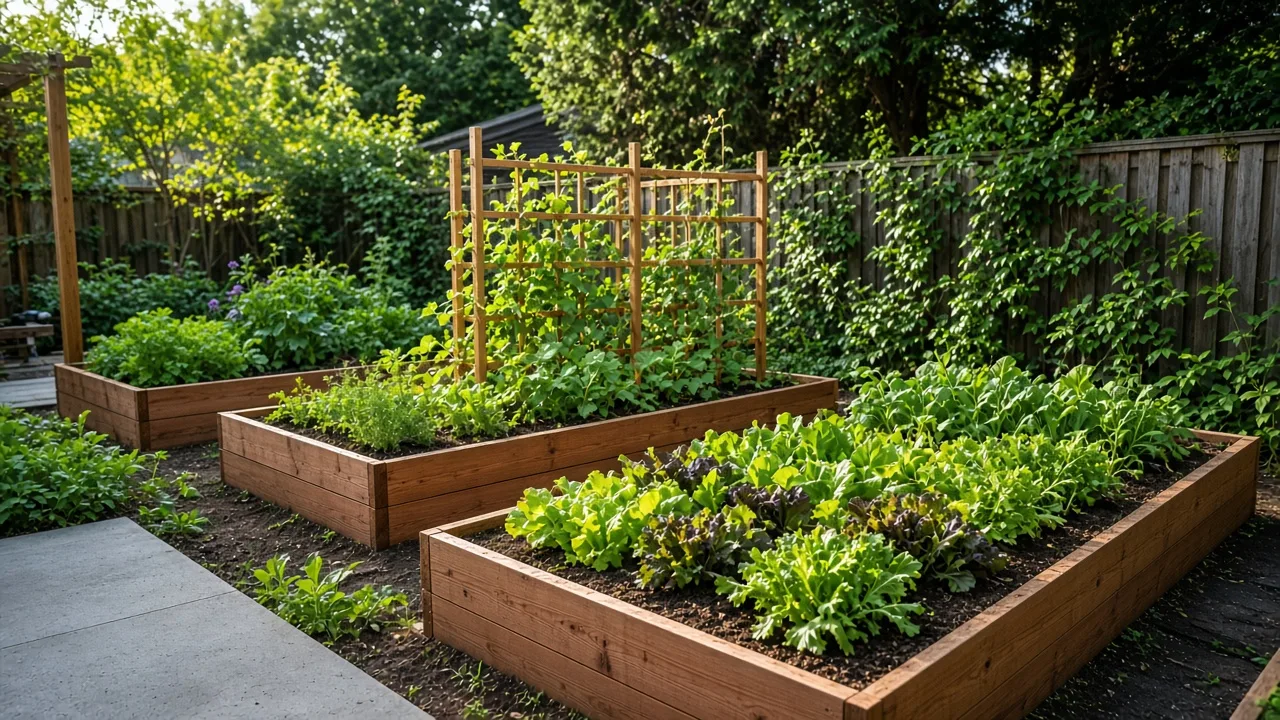
A raised frame gives you a clear boundary and more control over height, which is valuable on heavy soil or a site that is prone to waterlogging. It does not need a solid floor. In fact, lining the bottom with plastic or landscape fabric can trap water and block roots. Set the frame on the ground, remove only large perennial crowns or woody roots that would interfere with the bed, and fill it with an open-bottom no-dig stack.
Gather materials with a safety check
You need a light-blocking base, organic matter, water, and a way to contain or edge the bed. The exact ingredients can vary; no-dig is not a recipe that depends on one branded product. What matters is that the base is continuous, the layers are moist but airy, and the material has a known history.
The weed-suppressing base layer
Use plain corrugated cardboard with tape, staples, glossy coatings, and plastic removed. Overlap sheets by at least 6 inches so grass cannot find a seam. A double layer is helpful over vigorous turf or a bed with many annual weeds; it is not necessary to keep adding cardboard between every organic layer.
Plain brown paper or several layers of uncoated newspaper can work when cardboard is scarce. Avoid glossy magazines, heavily coated packaging, plastic-lined paper, and anything with chemical residue. The barrier should be wettable and biodegradable. Water it as you lay it, because dry cardboard can shift in the wind and shed rain before the bed is weighted down.
Perennial weeds need special attention. Bindweed, couch grass, quackgrass, bamboo, and deep-rooted dandelions may persist under a new bed or reappear at the edges. Pulling crowns and tracing the bed boundary before covering is worth the effort. Do not assume that a taller stack guarantees that a persistent rhizome has died.
Carbon, nitrogen, and finished organic matter
Brown or carbon-rich materials include dry leaves, shredded paper, straw, small untreated branches, aged wood chips, and sawdust used sparingly. Green or nitrogen-rich materials include fresh grass clippings, leafy plant trimmings, vegetable scraps, coffee grounds, and manure. Finished compost and well-rotted manure are already partly decomposed, so they function as a planting medium or surface amendment rather than as raw fuel for a hot compost pile.
Use a mixture instead of building a thick, water-shedding slab of one material. A practical cold-composting approach is roughly two parts brown material to one part green by volume, with enough water that the stack feels like a wrung-out sponge. The proportions do not need laboratory precision, but a bed made entirely of dry leaves may settle rapidly, while a bed made mostly of wet grass can mat, smell, and exclude air.
Source matters more than the label “organic.” Do not use pet waste, meat, grease, diseased plant material, treated lumber, or sawdust from painted or preserved wood. Be cautious with hay, manure, compost, and grass clippings from unknown sources: persistent lawn herbicides can survive in some organic materials and injure broadleaf crops. If you cannot learn what was sprayed or how the material was composted, leave it out of an edible bed.
For a practical example of the cold-composting approach, compare the material cautions and approximate brown-to-green balance in this Piedmont Master Gardeners guide to lasagna mulching. A separate Hobby Farms overview of lasagna gardening also illustrates the useful shortcut of adding a mature top layer when a bed must be planted before the lower stack has finished decomposing.
The Royal Horticultural Society’s composting guidance recommends balancing leafy green material with woody or paper-based brown material and keeping the process moist without making it anaerobic. Its composting advice is helpful when you are deciding whether a material belongs in the bed now or should go through a compost pile first.
Build the bed in a dependable sequence
The best time to build is when you have enough material to finish the bed in one session. Fall is convenient because leaves are abundant and a winter resting period can do much of the decomposition. Late winter or early spring can also work if the ground is not waterlogged and you have finished compost for the top. In a hot, dry climate, build after rain or plan to irrigate each layer so the cardboard and organic matter do not dry into separate, shifting sheets.
Prepare the ground and set the edges
Mow grass as short as practical and remove large weeds, seed heads, woody stems, and obvious perennial crowns. You do not need to strip the sod or till the area. If the soil is severely compacted, use a garden fork to make spaced openings by rocking it gently and lifting it out; avoid turning the soil over. This lets water and roots enter without creating a new layer of upside-down soil.
Mark the shape before you start adding material. Set boards, stones, or logs around the perimeter if the slope or wind could carry the stack away. Keep wood away from direct contact with edible crops if it is treated or of unknown origin. A simple edge also makes it easier to mow around the bed and spot grass trying to creep back in.
Lay, wet, and overlap the barrier
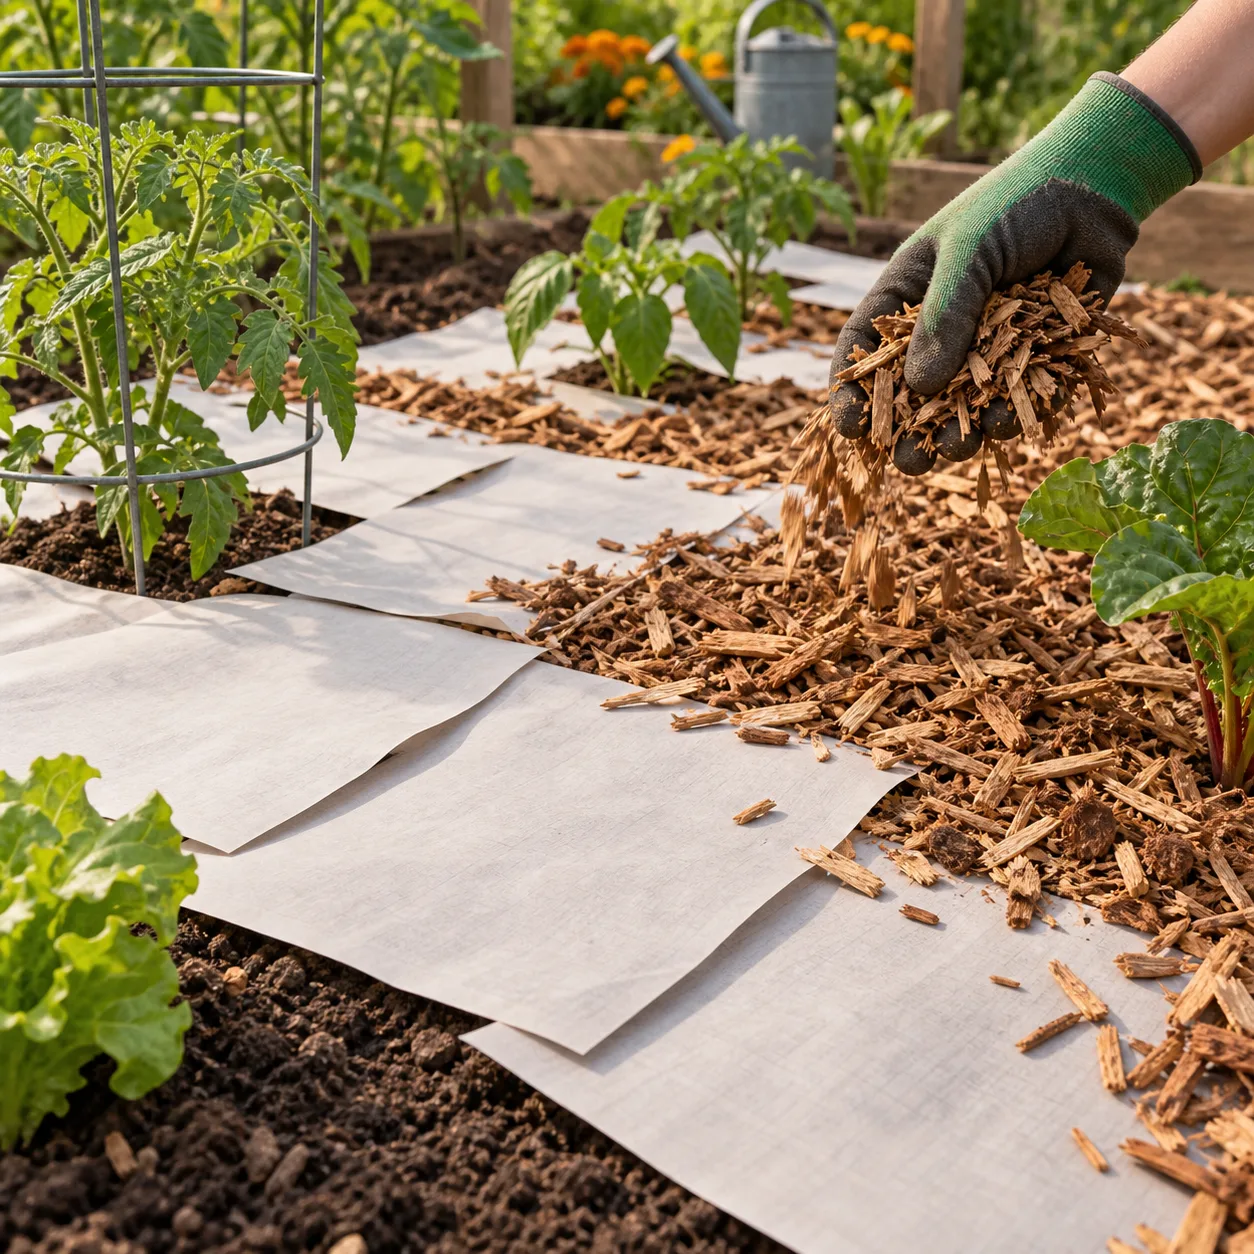
Cover the entire footprint with overlapping cardboard, extending it slightly beneath the edge. Patch gaps around corners and posts with smaller pieces, then soak the sheets thoroughly. The goal is not to create an impenetrable permanent floor; it is to make a dark, damp interval long enough to weaken the plants underneath while the bed takes shape.
Lay the cardboard directly on the ground rather than on a thick layer of dry leaves. A loose material under the barrier can create air pockets, and an intact grass mat can continue growing through the easiest gaps. Weight the wet sheets quickly with a shallow layer of compost or leaves if you are building in stages.
Stack, water, and cap the layers
Add a broad layer of finished compost or well-rotted manure first if you plan to plant soon. Then alternate moist brown and green materials, keeping each layer loose enough for air to move. A workable new bed might look like this:
- Mown or cleared ground.
- Overlapping, soaked cardboard.
- About 2 to 4 inches of finished compost or aged organic matter.
- A 4- to 8-inch layer of shredded leaves, straw, or other brown material.
- A 2- to 4-inch layer of grass clippings, leafy trimmings, or other green material.
- Another brown layer, followed by green if you have enough material.
- A final 3- to 6-inch cap of finished compost, leaf mold, or fine mulch.
For a new bed, aim for about 12 to 18 inches of finished depth after settling. You can build the raw stack higher—often 18 to 24 inches—because leaves, grass, and other loose materials collapse as they decompose. A very tall stack is not automatically better; it costs more to fill and can stay unstable or dry inside if the ingredients are poorly balanced.
Water each layer as you build. The stack should be damp throughout but never dripping or ponded. Finish with a carbon-rich cap or a thick layer of finished compost so wind does not scatter the lighter material. In an exposed site, use branches, a temporary net, or the bed edge to hold it together; do not cover a food garden with plastic and forget about airflow.
Decide when the bed is ready to plant
There are two legitimate timelines. If the bed is built with a thick top layer of mature compost or well-rotted organic matter, you can plant into that top zone immediately. If the surface consists mostly of fresh leaves, grass, manure, or kitchen scraps, wait several months—often over fall and winter—before treating it as finished soil.
The bed is ready for general planting when it has settled, no longer heats or smells strongly, holds together as a dark crumbly material, and has no obvious slimy or sour pockets. A few recognizable twigs are not a problem, but a hot, steaming layer or a strong ammonia odor is a reason to wait. Organic matter that is still actively decomposing can compete for oxygen and nitrogen around young roots.
The immediate-planting workaround
If you have a planting deadline, do not sow tiny seeds directly into raw layers. Add a continuous top layer of finished compost or a suitable soil-compost blend deep enough for the crop’s roots, then plant into that layer. This creates a temporary root zone while the lower materials continue breaking down.
Use sturdy transplants for the first planting when possible. Small lettuce or carrot seeds are more vulnerable to uneven moisture, coarse particles, and a surface that settles. Larger transplants, potatoes placed into small holes, squash, beans, and many annual flowers can be easier to establish, provided the planting zone is mature and you keep the crown or stem above the wet mulch.
Choose crops that suit a fresh bed
No-dig beds can grow vegetables, herbs, annual flowers, and many perennials. Start with crops that do not require a perfectly uniform, stone-free root zone: lettuce, kale, beans, cucumbers, squash, peppers, tomatoes, annual flowers, and leafy herbs are forgiving when the top layer is finished and the lower layers are still settling.
Root crops deserve more planning. Carrots, parsnips, and beets can be excellent in a deep no-dig bed once it is fine and well decomposed, but fresh wood, sticks, clumps, and compacted cardboard can fork or distort roots. Potatoes can be planted into loose organic matter and covered as they grow, but keep the material moist and do not let it become a dry shell that sheds water.
Perennials and shrubs can be planted into a no-dig border, but dig only the individual planting hole you need. Set the root ball at the correct height, spread compost around it, and leave the crown or trunk base clear. No-dig means minimizing disturbance, not refusing to use a trowel for a plant that needs a properly sized root space.
If you are growing vegetables year after year, rotate crop families when space allows. No-dig reduces disturbance; it does not remove the possibility of crop-specific pests and soil-borne disease building up in one place. Changing where you grow tomatoes, beans, brassicas, and root crops is still useful bed management.
Maintain fertility without turning the soil
Maintenance is mostly a cycle of observation and top-dressing. After harvest, remove diseased plants and mature weed seed heads, then add a thin layer of finished compost or well-rotted organic matter to the surface. Do not fork it in. Rain, roots, worms, and other soil life will carry fine material downward without the broad disruption of cultivation.
Water when the root zone is dry, not simply because the surface looks pale. A mulch-fed bed may need less frequent watering, but newly built layers can dry unevenly, especially along the edges and above cardboard. Drip irrigation or a slow, deep soak is more dependable than brief sprinkling that wets only the top.
Keep mulch off stems, crowns, and the trunks of woody plants. A small clear ring improves airflow and makes it easier to see slugs, rot, and rodent damage. Pull small weeds while they are easy to remove, and slice weeds at the surface with a hoe in established beds rather than turning the whole bed over.
Top up the bed as it settles. A new stack may lose a surprising amount of height in its first season, which is normal decomposition rather than failure. Add finished compost in modest layers rather than trying to restore the original raw height with a fresh load of grass or manure.
Common failures and the practical fixes
Grass returns through the seams. The usual causes are unoverlapped cardboard, a thin barrier, a vigorous rhizome, or grass entering from the edge. Patch the gap, remove the runner or crown, and maintain a clean boundary. Do not keep piling mulch over a perennial weed that is visibly growing.
The bed smells sour or stays slimy. Too much wet green material, heavy rain, or compacted layers has pushed out air. Open a few spaces with a fork or add dry leaves and coarse carbon on top; if the material is still hot or foul, delay planting until it has matured. A no-dig bed should be biologically active, not anaerobic.
Seedlings struggle even though the bed looks rich. Fresh compost, manure, or raw mulch may be immature, salty, herbicide-contaminated, or too coarse for roots. Move seedlings into a clean finished top layer, check the source of the inputs, and avoid adding fertilizer to an already stressed root zone until you know what is wrong.
Water runs off instead of soaking in. Dry cardboard, whole leaves, and fine mulch can initially repel water. Wet the bed slowly several times, break up matted leaves at the surface, and keep the top covered with a material that accepts water. If the ground below is saturated, stop adding water-holding material and improve drainage.
The bed collapses too quickly. A stack made mostly of leaves, grass, or fresh scraps contains a lot of air and water that disappear as decomposition begins. Rebuild height with finished compost and a stable brown material, and accept that a first-year bed needs topping up. Building the raw stack 18 to 24 inches high helps, but it cannot prevent all settling.
Slugs or rodents take over. Damp organic matter can create shelter, particularly in cool climates or beds beside tall grass. Keep the bed edge trimmed, avoid burying large food scraps, remove hiding places near seedlings, and inspect under loose mulch. If the pressure is severe, use a thinner surface layer around vulnerable seedlings and reserve fresh scraps for a managed compost system.
The material source is uncertain. This is the one problem that cannot be fixed by layering. If hay, manure, compost, or clippings may contain persistent herbicides, do not use them around edible crops until you have reliable information or have tested a small batch with sensitive plants. The cheapest material is not a bargain if it damages an entire growing season.
Conclusion: start small and let the soil settle
No-dig gardening works because it combines a temporary weed barrier with a long-term surface-feeding habit. Choose a sunny, drainable site; overlap and soak plain cardboard; use clean, known materials; build a loose, moist stack; and finish with mature compost if you need to plant soon.
The most reliable first project is a bed small enough to finish, water, and observe. Let the layers settle when you can, top-dress with finished compost each season, and treat weeds, drainage, and material quality as design problems rather than as afterthoughts. You do not need to dig the whole garden to improve it—you need to disturb less, cover the soil, and keep adding the right organic matter at the surface.



