Philodendron Squamiferum Care: The Climber’s Guide
Philodendron squamiferum care made practical: choose the right light, water by root-zone condition, train the vine, and fix common problems.
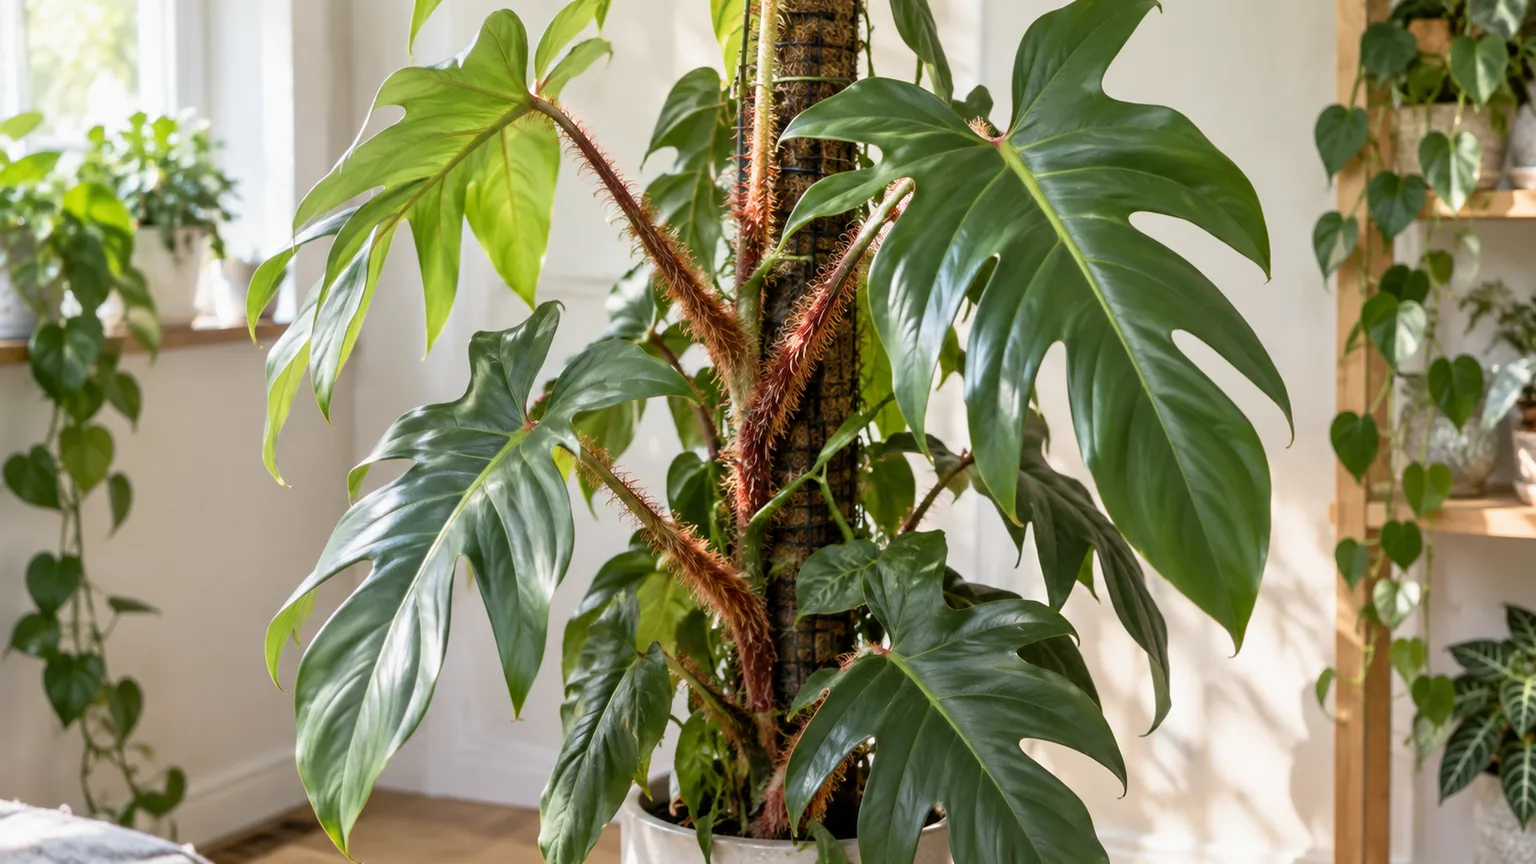
Philodendron squamiferum is a tropical climbing aroid best known for two features: deeply lobed green leaves and petioles covered in reddish bristles. It is sometimes sold as the red bristle philodendron or hairy philodendron. The plant is not difficult because it is delicate; it is difficult because its best form depends on a combination of bright filtered light, an airy root zone, and something to climb.
The most useful way to care for it is to treat it as a climber rather than a generic leafy houseplant. Give it light strong enough to support active growth, let the mix dry partly without turning bone-dry for weeks, and attach the stem to a support as it grows. Kew lists the species as accepted and native to the Guianas and northern Brazil, where it grows as a climber in wet tropical habitat (Kew Plants of the World Online).
Quick Care Profile
| Care factor | Practical target | What to watch |
|---|---|---|
| Light | Bright, filtered or indirect light | Bleached patches mean the light is too harsh; long gaps between leaves mean it is too dim |
| Water | Thorough watering after the upper root zone dries partly | Wet soil plus yellowing is more urgent than a plant that is a few days late |
| Soil | Chunky, fast-aerating aroid mix | A pot that stays heavy and wet is a root problem waiting to happen |
| Pot | Drainage hole and only a modest size increase | Oversized pots dry slowly around a small root ball |
| Temperature | Warm, stable indoor conditions; avoid cold drafts | Cold and wet together cause more trouble than either alone |
| Humidity | Average home humidity can work; moderate humidity improves leaf edges | Humidity cannot compensate for weak light or poor drainage |
| Support | Moss pole, plank, trellis, or sturdy stake | A climbing plant may become sparse if it is left to sprawl without enough light |
| Feeding | Dilute balanced fertilizer during active growth | Salt crust, brown margins, or stalled roots mean pause and flush |
These are starting points, not a calendar. A small plant in a porous mix near a bright window may need water much sooner than a large plant in a cool room. Check the root zone and pot rather than trying to make the plant fit a universal “once a week” routine.
What Makes Philodendron Squamiferum Different
The plant’s bristles are on the petioles—the stalks that connect each leaf blade to the stem—not on the leaf surface. New growth may look less dramatic than mature growth, and young plants can have fewer or shallower lobes. Do not reject a healthy juvenile plant because it does not yet resemble a mature specimen; leaf shape, internode length, and support all change as the vine develops.
NC State Extension describes philodendrons as tropical forest plants that commonly climb trunks or grow as epiphytes, with aerial roots that can attach to a pole or trellis (North Carolina Extension Plant Toolbox). That growth habit explains why a squamiferum placed on a bright shelf may stay healthy but still produce small leaves and long gaps. The plant is capable of climbing; it needs a useful surface, enough light, and steady growth to make that behavior pay off.
When buying, inspect the newest leaf, the stem between leaves, and the base of the plant. Avoid a specimen with a soft stem, sour-smelling mix, widespread webbing, or leaves that are collapsing while the pot is saturated. A rarer plant is not automatically a better plant, and a small rooted cutting with a firm node can be a safer purchase than a large stressed specimen.
Light and Placement
Place Philodendron squamiferum in bright indirect light or filtered sun. An unobstructed east window is a good starting point; a west or south window may work a few feet back or behind a sheer curtain. Costa Farms recommends roughly 3 to 4 feet from an unobstructed east- or west-facing window and notes that artificial plant lights can work when a large window is not available (Costa Farms).
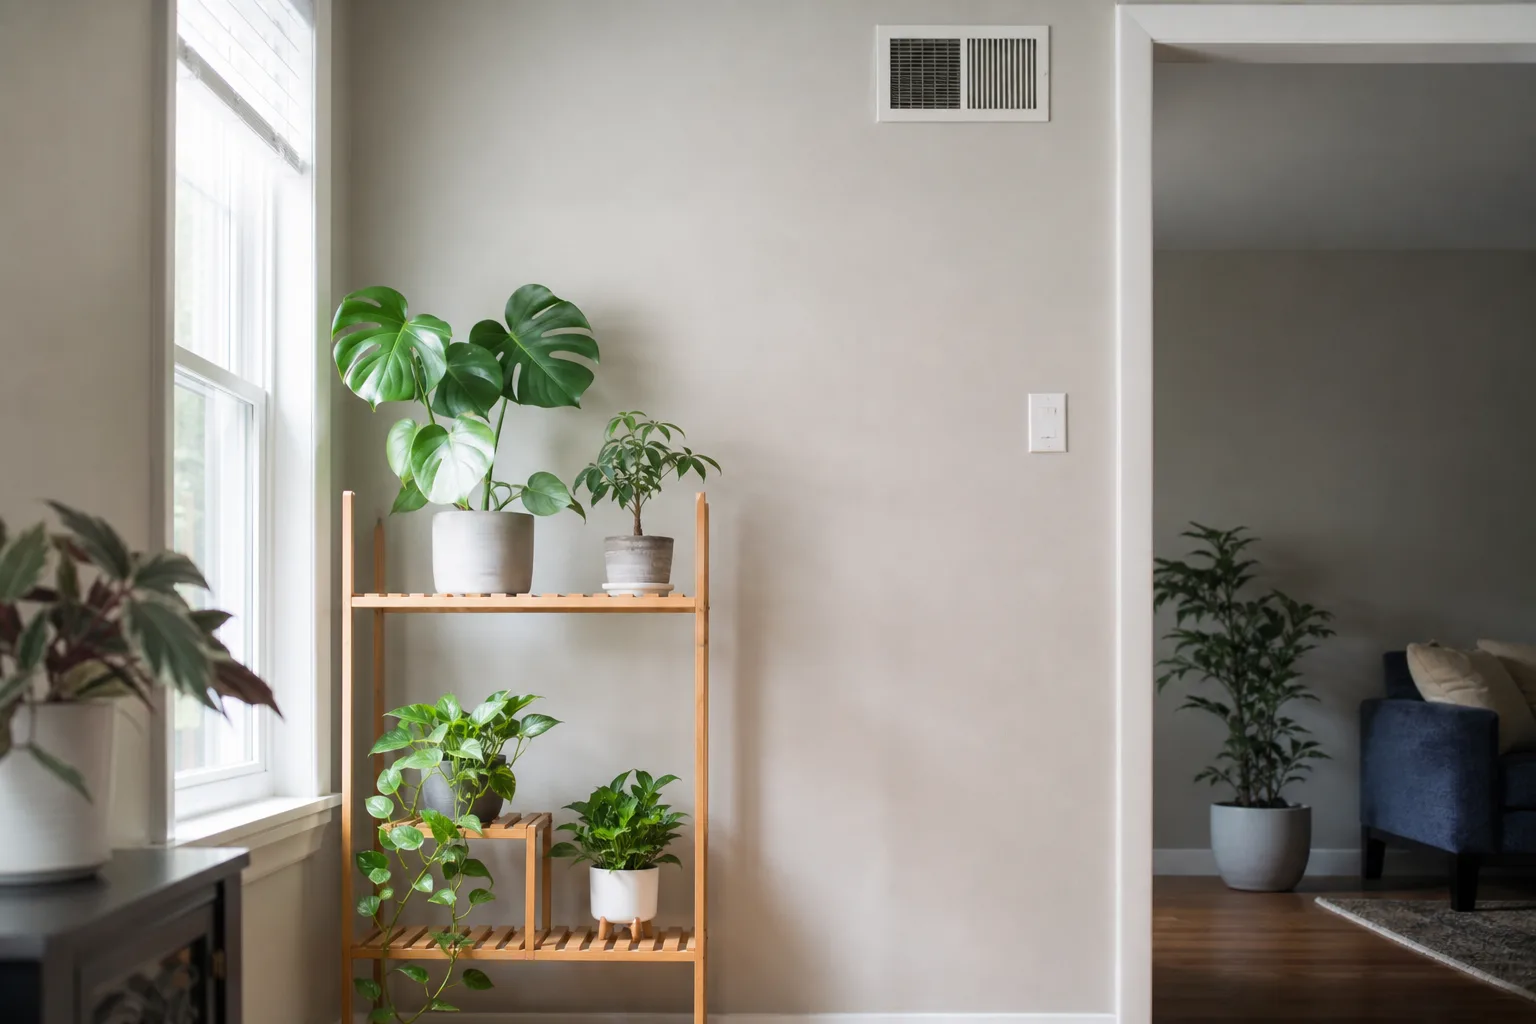
Direct midday sun through glass can bleach or scorch the leaves, especially after the plant has been growing in a dim nursery. Acclimate it gradually: start farther from the glass, then move closer over one to two weeks while watching the newest leaves. Pale tan patches that stay fixed are more consistent with sun damage than with a watering problem.
Low light is a different kind of failure. The plant may remain green, but it will use water slowly, stretch between leaves, lean toward the window, and struggle to size up. If the newest leaf is consistently smaller and the stem is extending without becoming fuller, improve light before adding fertilizer. More food cannot turn insufficient light into growth.
Rotate the pot every week or two if the light is one-sided. Keep the plant away from a heating or cooling vent, but do not place it in a dark bathroom simply because the humidity is higher. Light drives the growth that lets the plant use water and nutrients; humidity is supportive, not a substitute.
Watering Without Root Rot
Water thoroughly when the upper part of the mix has dried and the pot has become noticeably lighter. Pour slowly until water runs from the drainage holes, then empty the saucer or cachepot. This wets the whole root ball and removes some accumulated fertilizer salts; repeated small sips can leave the center or lower mix in an unhealthy pattern of alternating wet and dry pockets.
The exact interval changes with pot size, season, light, temperature, and mix. A bright summer plant may need water every several days, while a dim winter plant may take two weeks or more. “Every seven days” is only a reminder to check, never a reason to water when the mix is still wet.
How to Test Before Watering
Use three checks together:
- Push a finger or wooden skewer into the mix below the surface. The top should be dry or partly dry, but do not let the entire root ball turn dusty and hydrophobic every cycle.
- Lift the pot and compare its weight with how it felt just after a full watering. The lighter it feels, the more likely the plant is ready.
- Look at the plant’s context. A droop in bone-dry mix supports watering; a droop in heavy, cold, wet mix points toward root stress instead.
If water rushes straight through the sides of a dry root ball, the mix may have pulled away from the pot. Set the nursery pot in a shallow dish of water for 15 to 30 minutes, then remove it and drain fully. Do not leave it standing in water overnight. Bottom watering is a rehydration technique, not a permanent reservoir.
What Wet-Soil Wilting Means
Wilting does not always mean thirst. Roots need both water and air, and a saturated mix can limit oxygen around them. If the leaves droop while the pot remains heavy, stop watering and inspect the drainage hole, compacted areas, and stem base. A sour smell, black or mushy roots, and yellowing older leaves strengthen the case for root damage.
Letting the plant dry a little between waterings is safer than keeping it constantly wet, but do not swing to severe drought as a cure. Repeated hard drying can cause curled leaves, crispy edges, and root loss in fine roots. The goal is a root zone that is moist after watering and progressively airier as it dries—not a swamp and not a desert.
Soil, Pots, and Repotting
Philodendron squamiferum needs a mix that drains quickly while still holding enough moisture for active roots. The phrase “well-draining” is not a recipe by itself. It means water can move through the container and the spaces between particles refill with air instead of remaining packed with water for days.
Choose an Airy Mix and Right-Sized Pot
Start with a quality indoor potting mix, then add structure. A practical blend is roughly two parts potting mix, one part orchid bark, and one part perlite or pumice. Adjust the ratio to your room: add more aeration if the pot stays heavy for many days, or keep a little more fine mix if the plant dries almost immediately in a hot, bright space.
The pot must have an open drainage hole. A decorative pot without drainage can hold an inner nursery pot, but remove that inner pot for watering and let it finish draining before returning it. Gravel placed at the bottom of a sealed pot does not create a drainage layer; it reduces the depth of usable soil while water still collects above it.
Choose a container only one size larger than the current root ball. A huge pot may look like room for future growth, but the unused mix stays wet after the roots have taken up the available water. Root rot often begins with this mismatch, not with a single generous watering.
Know When Repotting Is Actually Needed
Repot when roots are circling densely, emerging from the drainage hole, the mix has broken down into a dense mass, or water either sits on top or races through without wetting the root ball. Slow growth alone is not enough evidence; low light, cold temperatures, pests, and seasonal dormancy can all slow a healthy plant.
Spring or the beginning of active growth is the gentlest time to repot. Move up one pot size, keep the plant at the same depth, and disturb only loose outer mix unless you are removing rot. After repotting, water once to settle the mix, drain thoroughly, and resume checking rather than watering repeatedly to relieve transplant stress.
Temperature, Humidity, and Airflow
Warm, stable indoor conditions suit this tropical species. Keep it away from cold window glass, exterior doors, and air-conditioning blasts. NC State Extension gives philodendrons a general preference for about 65–85°F (18–29°C), but the practical rule is to avoid abrupt changes and especially avoid cold conditions combined with a saturated pot.
Average household humidity is often workable. Higher humidity can support cleaner leaf edges and easier propagation, but the plant does not need a sealed jungle terrarium. If a hygrometer shows very dry air and the leaf margins are crisp, move the plant away from heat, group it with other plants without crowding, or run a clean humidifier nearby.
Airflow matters as humidity rises. Still, wet air around wet leaves can encourage spotting, and crowded foliage is harder to inspect for pests. Keep leaves from touching a cold window, give the plant gentle circulation, and avoid routine misting as the main humidity strategy. Misting wets the leaf briefly; it does not reliably raise room humidity for long.
Feeding, Pruning, and Support
Feed during active growth, usually spring through early fall indoors. Use a balanced liquid houseplant fertilizer at a conservative dilution, such as one-quarter to one-half of the label rate, every four to six weeks. Water first if the root ball is dry, and do not fertilize a freshly repotted, wilted, or root-damaged plant.
If you see white crust on the soil, browned margins after feeding, or a plant that has stalled despite good light, pause fertilizer and flush the pot with plain water. The goal is not maximum feeding; it is enough nutrition to support steady leaves without creating a salt problem.
Prune for a clear reason. Remove dead or badly damaged leaves at the base of the petiole, shorten an unruly vine above a healthy node, or take a cutting to create a second plant. Do not cut healthy leaves merely to make a mature plant look juvenile. Existing leaves will not become larger after pruning; new growth reflects the conditions that follow.
Train the Vine on a Moss Pole
A moss pole is optional, but support is useful if you want the plant’s climbing habit and larger mature foliage to show. A trellis, rough plank, coir pole, or sturdy stake can work if the stem can stay close to it. The aerial roots need a surface to contact; a decorative smooth rod may hold the vine upright without giving it a useful climbing texture.
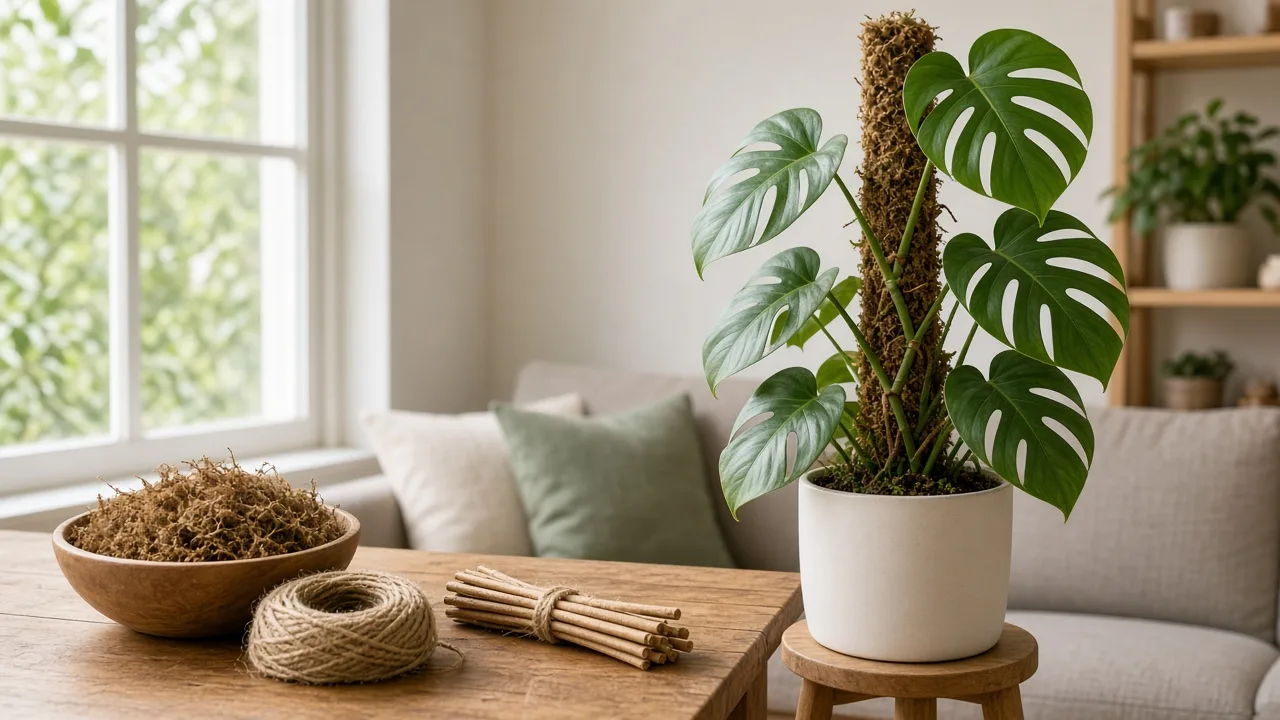
Install support before the vine becomes heavy. Place the pole close to the back of the root ball without spearing the densest roots, then use soft ties to hold the stem—not the leaf stalks—against it. Aim aerial roots toward the support, but do not force brittle roots or bury the stem deeply to make it “reach.”
Keep the support only as moist as your setup can manage. A wet pole beside a poorly draining pot does not fix root-zone problems and may keep the lower stem too damp. Light, warmth, and a gradual attachment routine matter more than buying the largest pole.
If you prefer a compact plant, prune the growing tip and root the cutting. A plant allowed to trail can remain attractive, but it may produce smaller leaves and longer gaps than a well-lit plant trained upward. Choose the form that fits your space instead of treating one growth habit as the only correct one.
Propagation by Stem Cutting
Propagate from a healthy stem section that includes at least one visible node. The node is the point where a leaf, aerial root, or dormant bud joins the stem; a leaf without a node cannot make a new vine. Use a clean, sharp blade and avoid taking material from a plant that is actively declining or carrying pests.
Cut just below a node, leaving one or two leaves on the top section. Remove any leaf that would sit in water or below the propagation mix. If the cutting has an aerial root, keep it near the moist rooting medium rather than burying a long section of stem.
Water Versus Soil Propagation
Water propagation makes the node easy to see and helps you monitor early roots. Put the node below the waterline, keep leaves above it, place the container in bright indirect light, and refresh the water every few days. Once roots are a few inches long and the cutting is actively growing, pot it into a loose mix and keep the first few weeks evenly but not heavily moist.
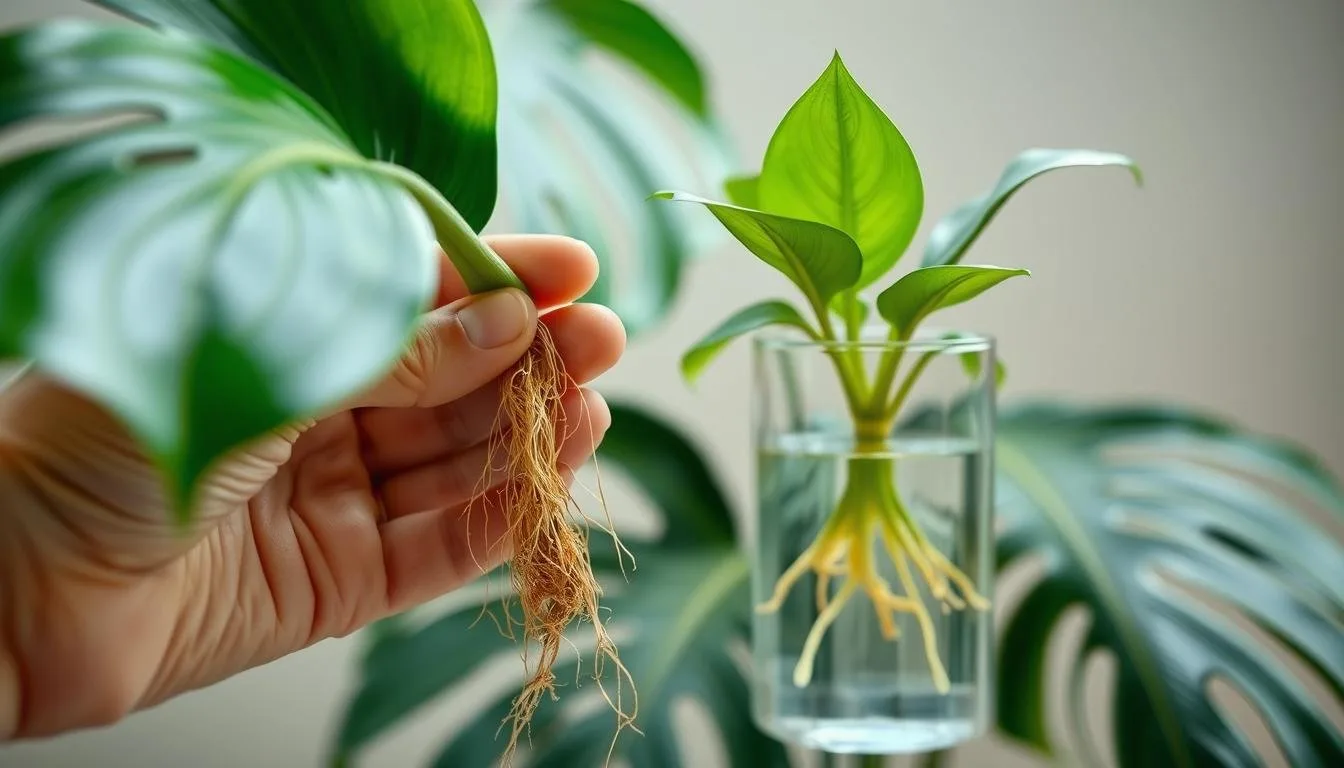
Soil propagation avoids the transition from water-grown roots to potting mix. Place the node into lightly moistened, airy mix, secure the cutting so it cannot wobble, and use a loose humidity cover only if the room is very dry. Open the cover regularly for airflow and remove it once new growth begins.
Water is easier to inspect, while soil can make the final transition simpler. Neither is magic. A cutting without a node, kept cold and soggy, can fail in either medium; a warm, healthy cutting with a node can root in both. Expect several weeks rather than an exact promise, and judge success by resistance to a gentle tug plus new growth—not by one tiny root alone.
Troubleshooting Yellow Leaves, Brown Tips, and Pests
Troubleshoot in order: root-zone moisture, light, temperature, roots, and pests. One symptom can have several causes, so diagnose the pattern across multiple leaves and the recent care history instead of treating the most visible mark with a random product.
Yellow Leaves and Wet-Soil Stress
One older leaf yellowing slowly can be normal aging, especially if new growth is healthy. Several yellow leaves in quick succession, particularly with a pot that stays wet, point more strongly to excess moisture, low light, compacted mix, or damaged roots. Check the pot before watering again.
If the mix is dry and leaves are limp, underwatering is plausible. Rehydrate thoroughly, then adjust the pot, light, and interval so the plant does not cycle from bone-dry to saturated. If the mix is wet, improve drainage and wait; adding water to a wet, wilted plant usually deepens the problem.
Brown Tips, Curling Leaves, and Pests
Brown crispy tips usually begin at the edge and may follow very dry air, inconsistent watering, root damage, fertilizer salts, or heat from a window or vent. Raise humidity only after checking the roots and watering pattern. A humidifier cannot repair roots that are not functioning.
Curling or drooping leaves in dry mix suggest thirst or heat stress; curling in wet mix suggests root trouble. Brown spots with a spreading halo, a persistently wet leaf surface, or poor airflow deserve closer inspection rather than a blanket humidity fix. Remove badly damaged tissue with clean scissors, but keep partly green leaves while the plant is recovering because they still contribute energy.
Inspect leaf undersides, petiole bases, and new growth for fine webbing, stippling, cottony clusters, or shell-like scale. RHS lists scale and glasshouse red spider mite among possible pests for the species (Royal Horticultural Society). Isolate a suspect plant, wash accessible pests away, and use only a product labeled for the intended pest and indoor plant. Repeat treatment according to that product’s label; a single spray rarely reaches eggs or hidden adults.
Toxicity and Safe Placement
Keep Philodendron squamiferum away from children and pets that chew plants. Philodendron tissues contain insoluble calcium oxalate crystals that can cause immediate mouth pain, swelling, drooling, vomiting, or difficulty swallowing when eaten. Iowa State University Extension gives the same warning for philodendrons and related species (Iowa State University Extension), and Poison Control explains that sap can also irritate skin and eyes (Poison Control).
Wear gloves when pruning if you have sensitive skin, wash your hands after handling sap, and keep fallen leaves out of reach. If a person or animal chews the plant, remove plant material from the mouth without forcing fluids and contact a poison center, veterinarian, or emergency service for symptoms such as severe swelling, persistent drooling, trouble swallowing, or breathing difficulty. This is a safety reason to choose a stable, inaccessible plant stand—not a reason to panic over ordinary handling.
Conclusion
Philodendron squamiferum grows best when you match its care to its identity: it is a warm tropical climber with a strong preference for filtered light, an airy root zone, and something sturdy to climb. Start with bright indirect light, a draining pot, and a mix that contains real air space. Water when the root zone has partly dried, not because a calendar says it is time.
Then decide what form you want. Train the vine upward for stronger structure and potentially larger leaves, or prune and propagate it if you prefer a fuller, shorter plant. Check new growth to judge progress, inspect the pot before treating yellow leaves, and treat humidity as a supporting condition rather than a cure-all. With those priorities in place, this unusual red-bristled philodendron can become a durable, dramatic houseplant instead of a guessing game.



