12 DIY Plant Cages and Supports That Actually Hold
Build 12 DIY plant cages and supports for tomatoes, beans, peas, cucumbers, grapes, and houseplants, with sizing, anchoring, crop fit, and safety tips.
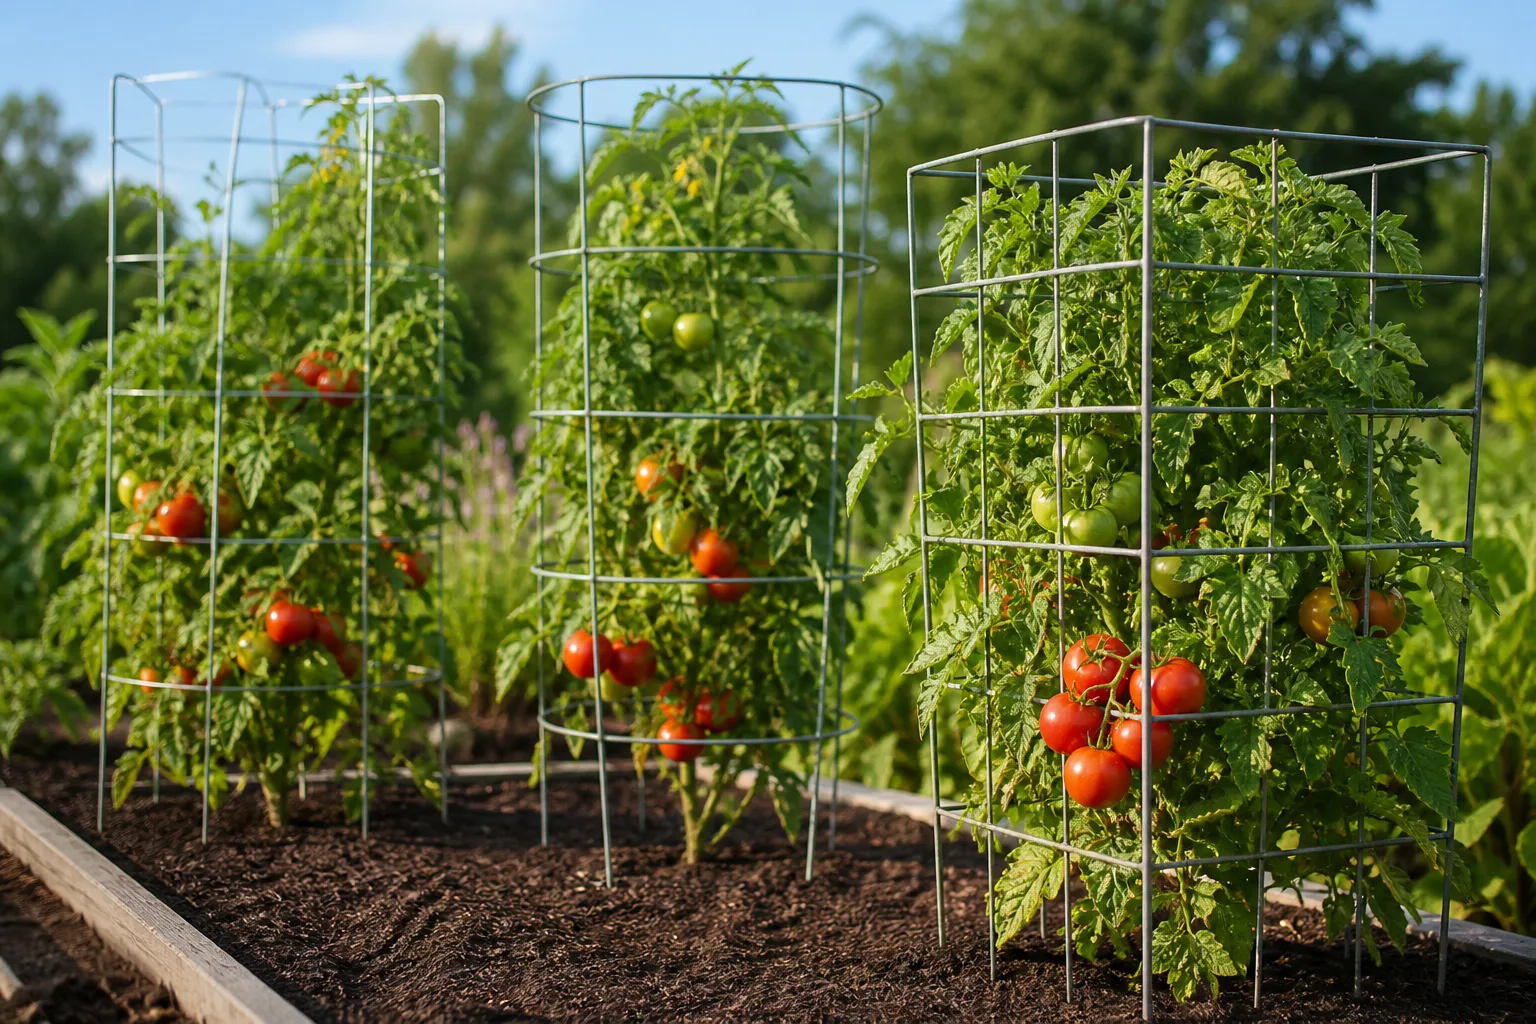
A useful plant support does three jobs: it carries the mature plant’s weight, lets you reach the harvest, and stays anchored when foliage catches wind. The right DIY design depends less on how attractive it looks empty than on whether it suits the plant’s growth habit. A tomato cage surrounds a bushy plant; a trellis gives a climbing vine a surface; stakes and twine carry a row; an arbor supports a long-lived woody climber.
Start by identifying what you are growing. Pole beans twine around narrow poles, while peas and cucumbers use tendrils that need something thin to grab. Tomatoes do not climb by themselves: branches need to be tucked, tied, or woven into a frame. Large melons and squash add a separate problem—the fruit load—and may need individual slings even when the vine can climb.
Choose a support by growth habit, footprint, and harvest
| Plant or situation | A good starting design | Main trade-off |
|---|---|---|
| One or two large tomatoes | Remesh cylinder or square wire cage | Strong, but takes storage space and needs safe wire handling |
| A long row of tomatoes | Florida weave | Economical per plant, but needs repeat tying and sturdy end posts |
| Pole beans or peas | Bamboo tripod, twine grid, A-frame, or arch | Easy vertical growth; mesh and spacing determine how easy harvest is |
| Cucumbers or small-fruited vines | Flat panel or arch | Saves ground space; check that fruit does not wedge in the grid |
| Grapes and established perennial vines | Braced arbor or permanent wire trellis | Long-lasting, but must be built for years of woody growth |
| Indoor climbing houseplant | Small bamboo or twig ladder | Light and removable; should support stems without crowding the pot |
These are starting points, not load ratings. A support that works in a sheltered courtyard can fail in an exposed bed, and saturated soil may not hold a shallow post. Extension guidance recommends setting stakes deeply enough to resist wind and choosing mesh strength for the crop; University of Minnesota Extension notes that larger, more vigorous vines need heavier mesh and that larger squash and pumpkins are too heavy to trellis. (University of Minnesota Extension’s trellis guidance)
Pay attention to how you plan to harvest. A tight mesh might hold vines but block your hand from reaching a tomato. A high arch may be sturdy but awkward to weed beneath. A row trellis can make picking faster, but you must visit it regularly to add the next layer of support. The best design is the one you can safely install and maintain at the pace the plant grows.
Twelve DIY plant cages and supports
1. Remesh cylinder cage for tomatoes
For a heavily branched tomato that you do not want to prune to one leader, make a cylinder from concrete-reinforcing mesh (“remesh”). A common build starts with a panel about 4 feet wide and 7 feet long. Cut a 56- to 60-inch length for the cage circumference, curl it into a cylinder, and fasten the overlapping vertical wires with short pieces of galvanized tie wire. That circumference makes a cage roughly 18 inches across; the remaining panel height sets the cage height.
Choose a mesh opening large enough for a hand and ripe fruit to pass through. The University of Minnesota describes 4-inch square openings as useful for tomato cages and notes that stiff reinforcing mesh can be difficult to cut. Wear gloves, long sleeves, long pants, and eye protection, and use bolt cutters rather than forcing small snips through heavy wire. If you can avoid cutting, the project is simpler: select a panel width that yields the desired cage height and leave the cut edges pointed downward into soil.
Install the cage while the tomato is still small. Drive two sturdy stakes inside opposite sides of the cylinder and tie the mesh to them at more than one height; otherwise a ripe, wind-catching plant can lift or lean the cage. This is a durable, low-pruning option, but it is bulky to store. (University of Minnesota Extension; Homestead and Chill’s remesh cage tutorial)
2. Square wire cage for tomatoes and peppers
A square cage is easier to fit along a raised-bed edge than a round cylinder. Cut four equal panels from stiff welded garden wire, then connect the vertical edges with reusable wire ties or bolts and washers to form a box. For a single plant, a footprint around 18 to 24 inches square and a height near 4 feet is a practical starting size for a compact tomato or pepper; increase the height for a larger tomato and add vertical stakes at two corners.
Do not confuse lightweight chicken wire with structural welded mesh. Chicken wire bends readily and its small openings can make pruning and picking frustrating. If a panel bows when you press it, it is unlikely to improve when a wet plant leans against it. You can make this version collapsible by using latches or removable bolts at the corners, which lets each panel lie flat for winter storage.
The box shape gives branches support from all sides, but it can create a dense canopy if plants are crammed too close together. Keep the center open enough for airflow and reach through the openings before you commit to the mesh size. For a tall or exposed site, stake the box separately rather than relying on its legs alone.
3. Bamboo tripod or quadpod for compact crops
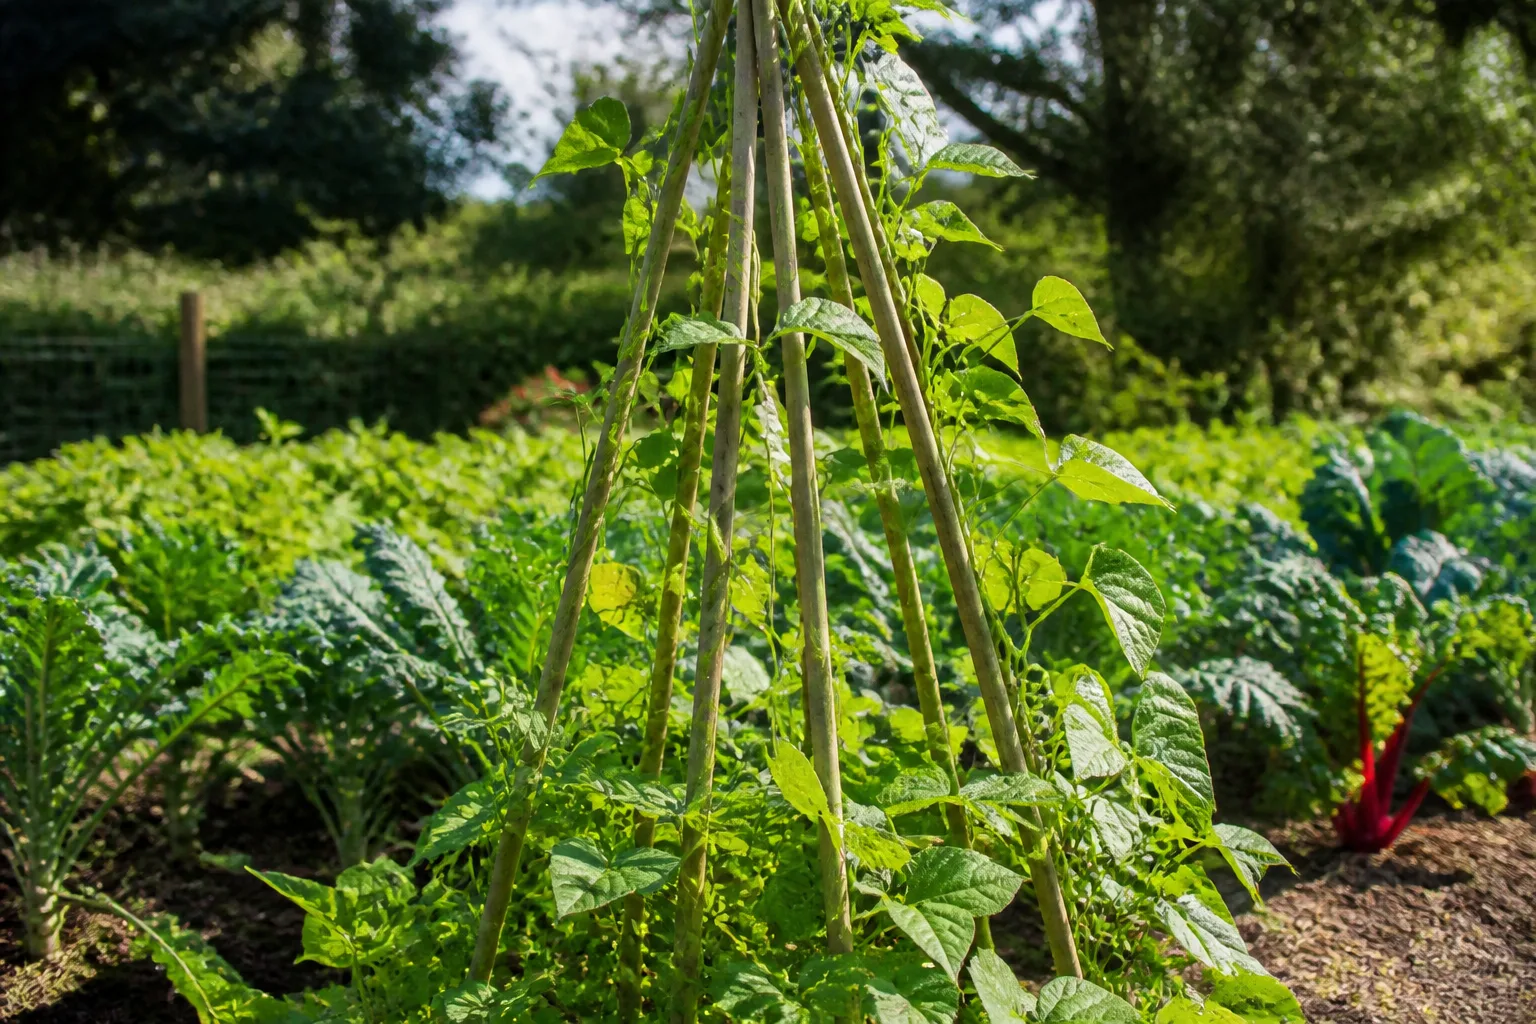
A bamboo tripod is quick to build for a patio tomato, pepper, eggplant, or a few climbing beans. Push three poles into the soil in a wide triangle around the young plant, bring the tops together, and lash them securely with twine. For a broader plant or heavier load, add a fourth pole and tie horizontal rings of twine around the legs at 8- to 12-inch intervals. The horizontal wraps turn three or four bare poles into a cage-like ladder that catches branches.
Use long, thick poles for indeterminate tomatoes; short garden-center stakes will not become stronger because they are tied together. Set the feet outside the root ball and push them several inches into firm soil, deeper in loose or windy sites. Put the structure in place at planting time so you are not driving poles through a web of established roots later.
This design stores in a small bundle and uses inexpensive materials, but twine can loosen as it gets wet and bamboo can split at the lash point. Check knots after storms and use broad, soft plant ties if you need to secure a stem. A bamboo teepee is also a simple option for pole beans, which climb naturally; bush beans generally do not need a trellis. (Utah State University Extension’s bean guide)
4. Florida weave for a long tomato row
If you have several tomatoes in a row, a Florida weave uses fewer materials than a separate cage for every plant. Drive a stout stake at each end of the row and between every one or two plants. Tie twine to the first post, run it along one side of the tomato stems, loop it around each stake, then return on the opposite side so the vines sit between two parallel strands. Add another paired layer as the plants grow.
Use posts tall and thick enough for the mature row, and anchor the end posts especially well because they carry tension from every strand. A common home-garden starting point is 4- to 6-foot stakes with the lower foot set into the soil; taller, vigorous tomatoes may require taller posts. Twine should hold stems upright without cinching them. Natural fiber can be composted with the vines at season’s end, while UV-resistant synthetic twine generally lasts longer but should be removed before composting.
The weave is fast and economical once installed, but it is not a set-and-forget cage. Add support layers before the vines flop across the path, and thread twine so it does not rub a fruit cluster. Utah State’s tomato guidance describes stake-and-weave systems for determinate varieties, with additional strings added as plants grow. (Utah State University Extension on tomato staking)
5. Flat cattle-panel trellis for tomatoes or cucumbers
A flat livestock panel makes a rigid, reusable trellis along the back of a bed. Set two T-posts or stout wooden posts several feet apart, orient them so the panel’s broad face is stable, then fasten the panel securely at several points on each post. A standard panel is unwieldy; use a helper to position it and do not leave it unsecured while working. For a narrow bed or container row, a smaller welded panel attached to a wood frame can be easier to handle.
Plant along one side and guide young shoots through the openings. Beans and peas can grip a coarse mesh with tendrils; tomatoes need to be tied or trained through openings. Cucumbers can climb the panel, but check growing fruit often so it does not become trapped between wires. An inclined panel can make fruit easier to see and pick, though it needs extra bracing if it leans far from vertical.
A flat panel uses less walkway clearance than an arch and can be unfastened from posts for storage. Its downside is that a loaded panel acts like a sail in a gust. Anchor the posts independently, set the panel before planting, and avoid attaching it only to a loose raised-bed board. (University of Minnesota Extension)
6. Cattle-panel arch or tunnel for beans and cucumbers
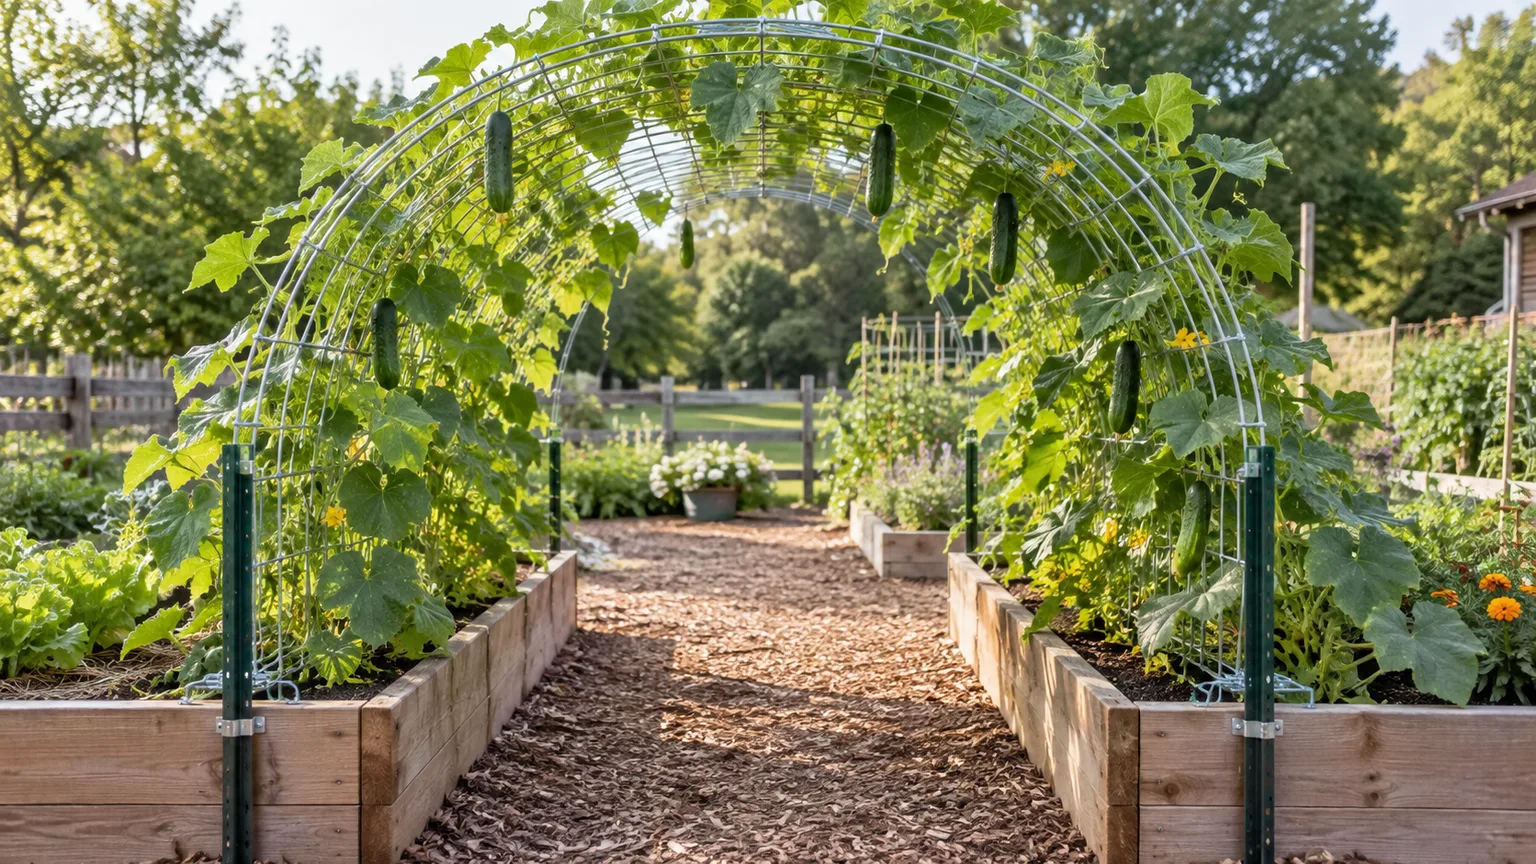
To make a walk-through arch, bend a 16-foot livestock panel between two parallel beds or rows and fasten both sides to ground-driven T-posts. A practical span is around 5 feet; a narrower span forces a sharper bend, while a wider one can bow at the feet. Several arches in sequence create a tunnel, but each panel needs its own post attachment. If you cannot transport one long panel, two shorter welded panels can meet at a peak with a crosspiece to prevent the top from folding inward.
This is among the strongest garden structures for pole beans, cucumbers, and light vines because its curve carries load into both sides. Position crops on the outside edges where roots have room and fruit is reachable. Train cucumber shoots into the grid early; small fruit can hang through larger openings, but inspect it so it does not wedge. Heavy melons or squash require individual slings and a structure built for the added weight; large pumpkins should stay on the ground.
Panel flex can be forceful, and the ends are heavy and awkward. Work with another adult, wear gloves, and secure posts before fastening the panel. Replace sun-damaged plastic ties each season or use corrosion-resistant wire. Savvy Gardening’s cattle-panel instructions likewise call for multiple posts, secure attachments, and two people to bend the large panel. (University of Minnesota Extension on trellised fruit)
7. Wood-frame twine grid for annual vines
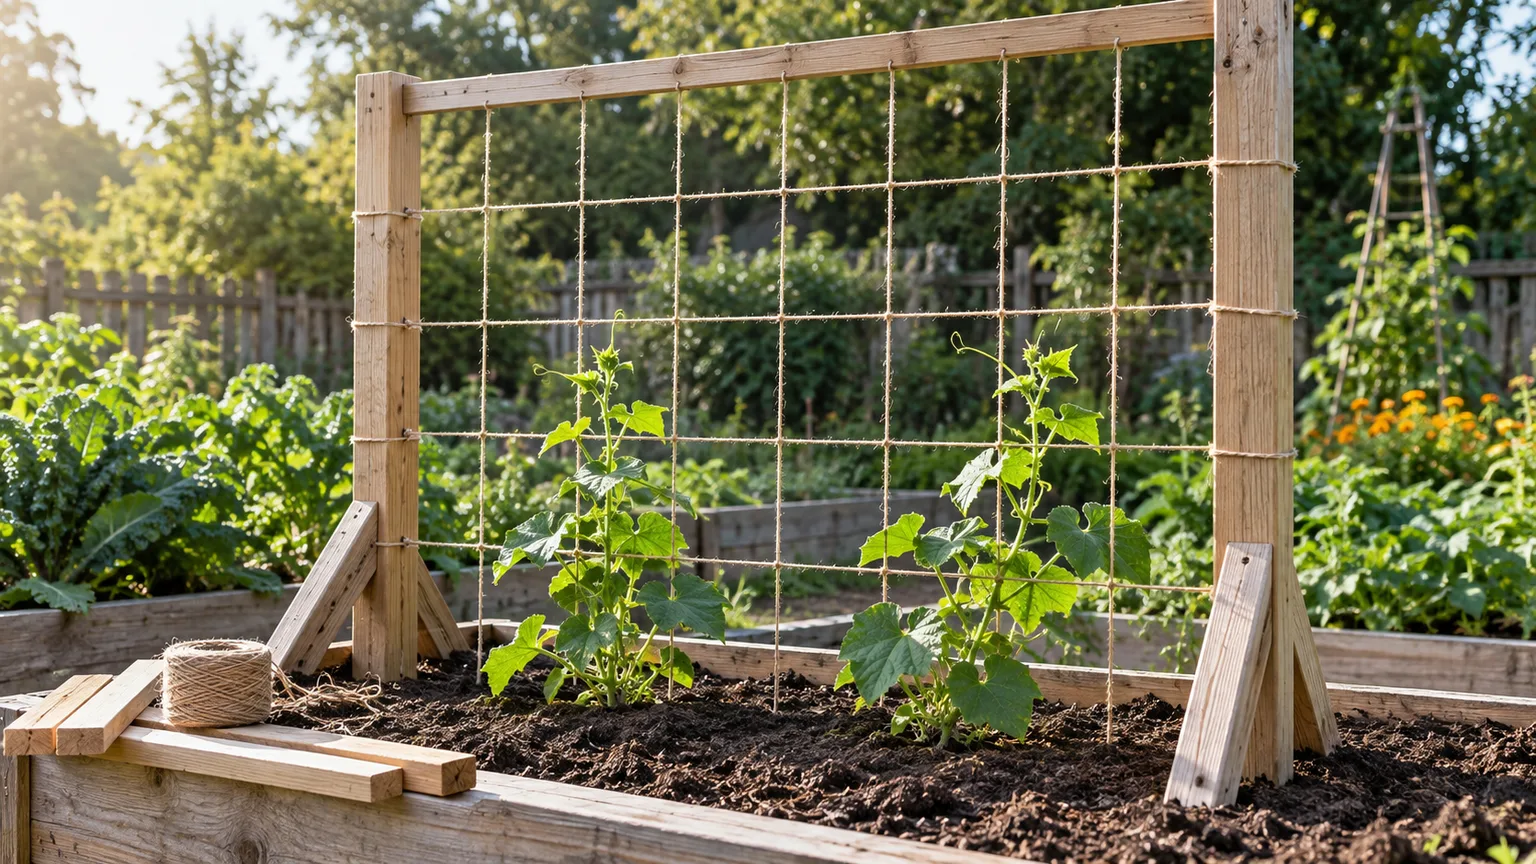
A framed grid is a flexible, lower-cost alternative when heavy metal mesh is unnecessary. Screw two vertical 2-by-2 posts to a top rail, add diagonal braces at the back, and stretch garden twine between the uprights in a grid with roughly 6- to 8-inch openings. Tie the intersections or wrap each strand around the frame so tension cannot pull the whole grid loose. Set the feet in soil or attach the frame firmly to a raised-bed structure.
This support works well for pole beans, peas, sweet peas, and lighter cucumbers. Use durable outdoor lumber and keep the frame from rocking before planting. Twine that can be composted is convenient for annual vines, but natural fibers weaken outdoors: check tension during the season and replace sagging strands. A tighter grid makes it easier for tendrils to find a hold, while a larger grid is easier to reach through at harvest.
At the end of the season, cut away the dead vines before they dry into a knot. Remove and compost untreated plant-safe twine, then store the frame under cover. The central choice is durability versus disposal: synthetic netting may last longer, but loose netting should not be left where birds or wildlife can become entangled.
8. Folding A-frame trellis for peas and cucumbers
An A-frame gives plants two climbing faces and folds flat when the season ends. Build two matching rectangular frames from rot-resistant lumber, hinge them together along the top, and fasten mesh or netting to each face. A spreader chain or removable crossbar keeps the feet from sliding apart. Make the base wide enough to stand steadily and stake the feet if wind or soft soil can shift them.
Peas and pole beans suit the fine mesh; cucumbers can use larger mesh or welded grid. Plant on both outside faces so you can harvest without crawling under the frame. If you add tomatoes, remember that they must be tied or woven into the trellis rather than expected to climb. Larger fruit loads also call for stronger framing than lightweight seedling netting.
A hinged frame is handy when you rotate crops: fold it, move it, and open it over a different bed next year. Avoid very fine hardware cloth as a climbing surface; it can be sharp, makes harvest harder, and does not offer convenient hand openings. Fine Gardening’s A-frame project shows the useful combination of a hinged frame and replaceable feet, with the width contributing to stability.
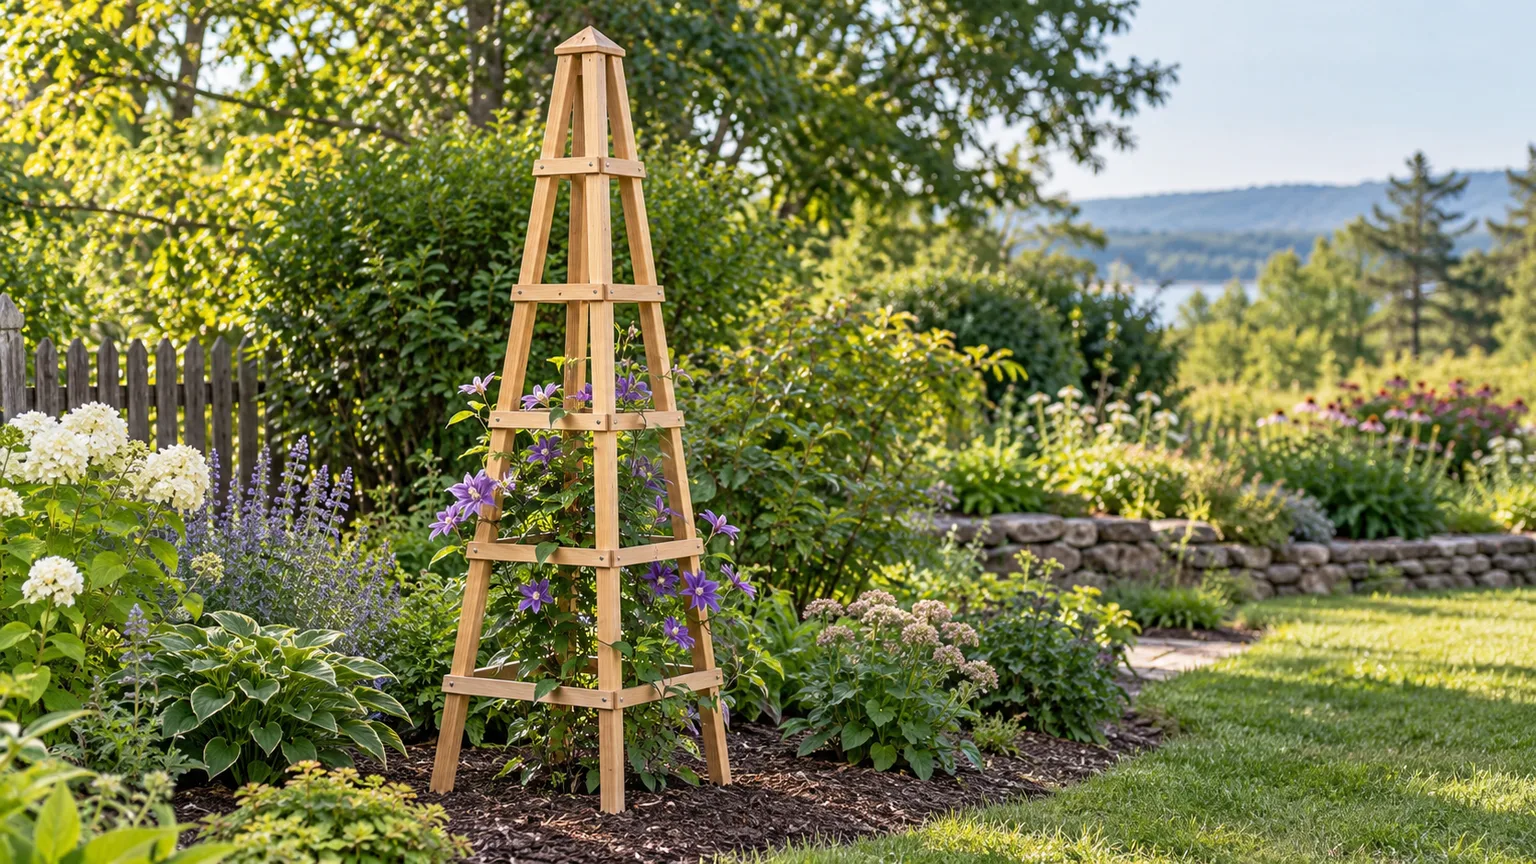
9. Bamboo obelisk for pole beans and flowers
A four-legged obelisk is a tidier alternative to a simple tripod and works in a round bed or large container. Arrange four poles as a square, leaning them slightly inward so they meet above the plant. Lash the apex first, then add three or four horizontal rings of twine or thin crosspieces. The rings keep the legs from spreading and give twining plants intermediate places to grip.
For beans, set the base wide enough that the structure does not rock when vines pull on it. For sweet peas or climbing annual flowers, the obelisk can be slimmer, but add vertical strings between the rings so tendrils can climb. If the base is in a pot, insert the poles near the pot edge without blocking drainage or pushing into the main root crown. Keep the top tie snug and recheck it after rain.
Bamboo is light and easy to store, but weathered poles can crack and thin twine can cut into stems. Use a soft tie around any plant stem you attach directly, and let tendrils do the climbing where possible. This design is decorative as well as functional, though it is not meant to carry a heavy harvest of large squash or gourds.
10. Pea-stick fence from pruned branches
A pea-stick support is the fastest no-purchase option for short peas and compact sweet peas. Push clean, forked branches into the row at intervals of a few inches, with the twig tips reaching slightly above the expected plant height. Cross a few branches between neighboring sticks so the fence does not fall in one direction. Place it beside the seed line at planting, then let tendrils catch on the smaller twigs.
Choose sturdy, dry, non-thorny branches with multiple fine side shoots. Avoid diseased prunings and species with irritating sap. The branches do not need to form a perfect grid; peas only need enough thin contacts to keep stems from matting across the soil. Because this is a light support, it is not suitable for indeterminate tomatoes, full-size cucumbers, or a wind-exposed spot.
Twig supports are biodegradable and can go into a brush pile or be chopped after harvest. They can also be difficult to remove if vines wrap tightly around every fork, so pull them before the plants become brittle. For taller pole beans, use a stronger tripod or panel rather than extending pea sticks beyond their stable height.
11. Garden arbor for grapes and perennial climbers
A permanent arbor is the right project when the plant will live for years and develop woody stems. Build two braced side frames from outdoor-rated posts and crossbeams, then connect them with roof slats or tensioned wires. Set the posts in ground-rated footings or another foundation appropriate to the site and local conditions; a shallow stake-and-twine frame is not a substitute. Leave enough height and width for a person to walk beneath and prune the canopy.
Grapes need a strong framework and planned annual pruning. Train a trunk up each side, then guide fruiting canes along the top wires or beams rather than letting an unmanaged tangle fill the roof. Roses, wisteria, and other vigorous woody climbers also become much heavier than young nursery plants suggest. Size the structure for mature stems, wind, and the fact that wet leaves and fruit add weight.
This is the most demanding option in the list: it uses more lumber, tools, and site preparation, and may need local building guidance if it is large or attached to a structure. Its advantage is longevity and shade. Build it once in a place that receives appropriate light and where roots will not interfere with paths or foundations; moving an established grapevine is harder than moving an annual trellis.
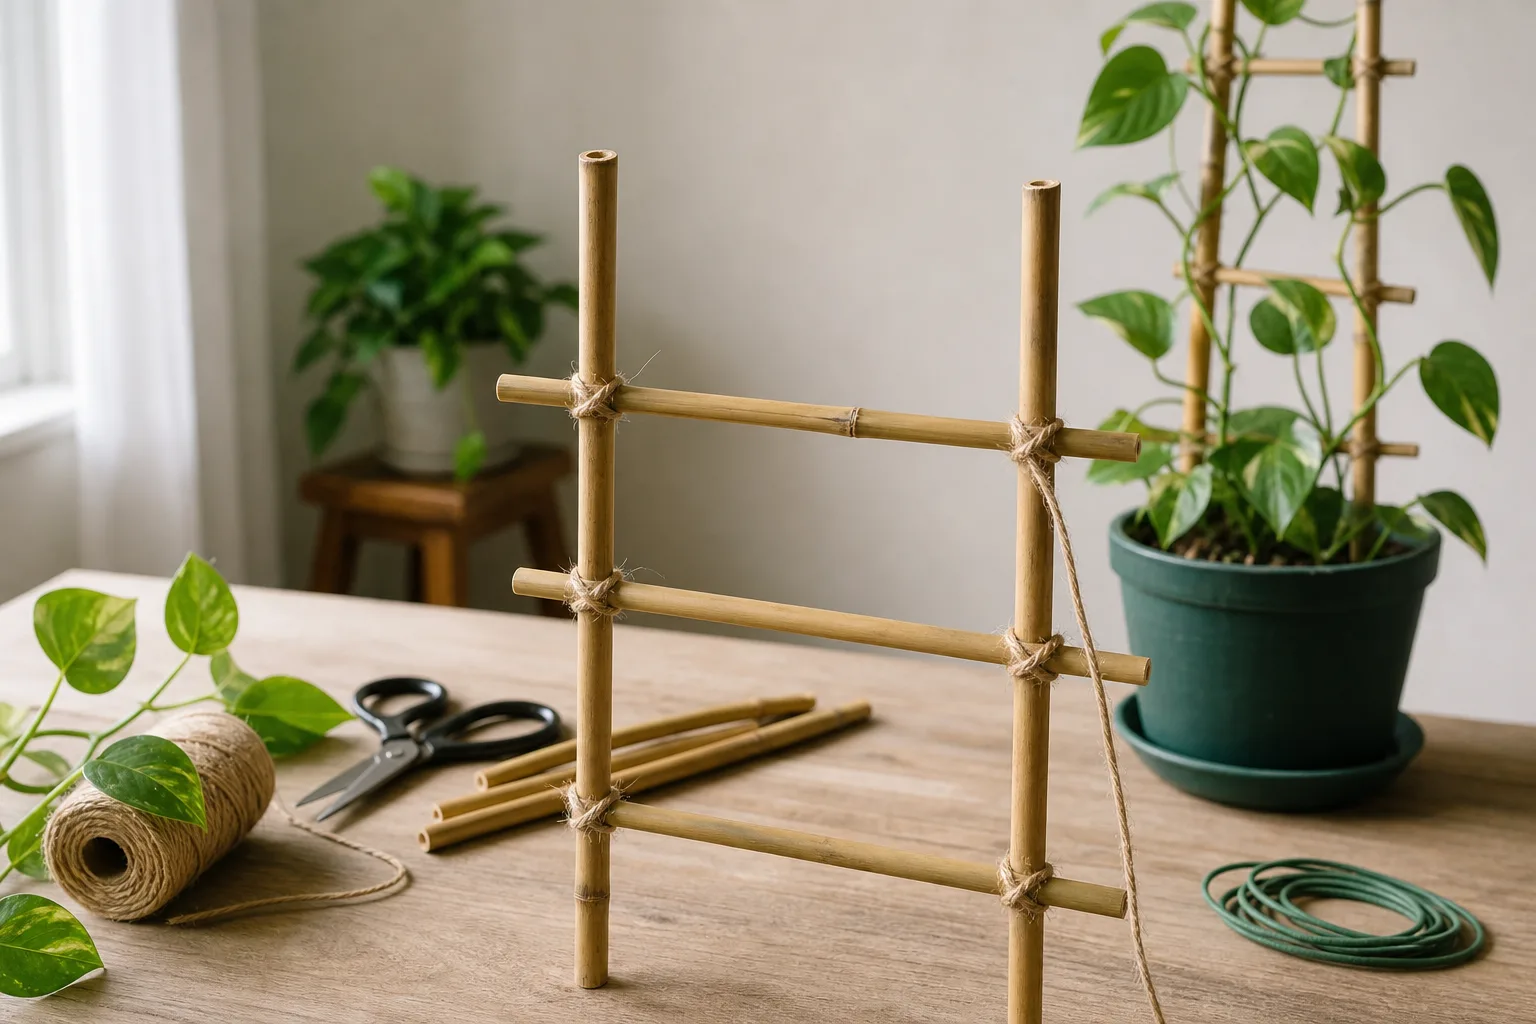
12. Tabletop twig trellis for indoor vines
For a pothos, heartleaf philodendron, or another climbing houseplant, make a small ladder from two straight twigs or bamboo skewers and several short crosspieces. Tie the joints with cotton string, insert the feet near the inside edge of the pot, and attach the vine loosely with soft plant ties. Size the trellis to the current plant and pot rather than building a tall top-heavy tower that can tip the container.
Use clean, dry, pest-free branches, and smooth any sharp ends that could scrape leaves or damage the pot. A narrow ladder or fan shape fits a compact pot; a wider fan spreads stems while keeping the plant close to a wall or support. Do not force a thick or brittle vine around a sharp corner. Guide flexible new growth in small increments and allow aerial roots to attach naturally if the species does that.
An indoor support should be removable without unpotting the plant. If the trellis is deeply embedded and roots have grown around it, wait until repotting rather than yanking it through the root ball. This small-scale design uses the same principle as an outdoor trellis—give a climbing stem a stable surface—but its load is the plant, not a wind-catching wall of foliage.
Build for wind, weight, and harvest access
The weakest part of a homemade support is often its connection to the ground, not the mesh itself. A tall, leafy trellis catches wind like a screen. Drive posts deep enough for your soil and expected load; the University of Minnesota gives a 6-foot stake driven 1 foot into the ground as one example, while emphasizing that strength depends on plant vigor, stake type, and depth. In a raised bed, the fill can be loose and shallow, so attach the frame to structural bed members or use stakes that reach the ground below it.
Design the openings around your hand and the fruit, not just around the tendril. For tomatoes, a broad opening lets you guide branches and pick fruit without pulling the whole stem through a small hole. For peas, fine twine or small mesh openings help tendrils find a grip. For melons that are appropriate to trellis, make a sling from wide cloth and support each fruit as it grows; narrow string can cut into the rind or stem. Keep large pumpkins and heavy squash on the ground rather than trusting an improvised net.
Reused materials can be useful, but inspect them. Discard bent, cracked, rust-through, splintered, or sharp-edged pieces. Do not use wire fencing with an unknown chemical coating around edible crops if you cannot confirm that it is appropriate for garden use. If a support seems too flimsy when empty, it will not become reliable once the plant is mature and wet.
Install early, train gently, and maintain the structure
Put the cage, trellis, or stake into place at planting or while the plant is still small. A late stake can sever roots, and threading a large tomato through a narrow cage can snap stems. Penn State Extension advises placing supports for peas about 3 inches from the seed at planting; the same timing principle applies to other crops even when their exact spacing differs. (Penn State Extension’s pea-growing guide)
As shoots lengthen, weave them gently through mesh or tie them with soft, loose loops. Check the support about once a week during rapid growth and after strong wind. Reposition ties before stems thicken, tighten loose connections, and remove a branch that has become wedged rather than forcing it through wire. A couple of minutes of early training is easier than untangling an entire vine later.
At season’s end, cut away vines before they dry into wire, rinse soil from reusable pieces, and store wood and metal under cover if possible. Replace twine and UV-damaged cable ties instead of trusting brittle fasteners next spring. Check permanent posts for movement after frost heave or heavy rain. When a cage tips, note whether the cause was shallow legs, a loose stake connection, or an unbalanced plant, then strengthen that failure point before replanting.
Conclusion
Choose a support by the mature plant and the way you want to harvest it. Remesh cages and square frames suit bushy tomatoes; a Florida weave handles a row; bamboo, twine grids, and A-frames suit light climbing crops; rigid panels and arches carry more vigorous vines; and a permanent arbor is worth the work for a long-lived climber.
Install the structure while roots are young, anchor it for the wind at your site, and inspect it as the crop gains weight. Those three decisions matter more than decorative details—and they are what turn a DIY plant support from a spring project into something that works through harvest.



