Identify Black Spots on Tomatoes and Save Your Crop
Black spots on tomatoes can mean blossom end rot, anthracnose, bacterial disease, or early blight. Learn how to tell them apart and what to do next.
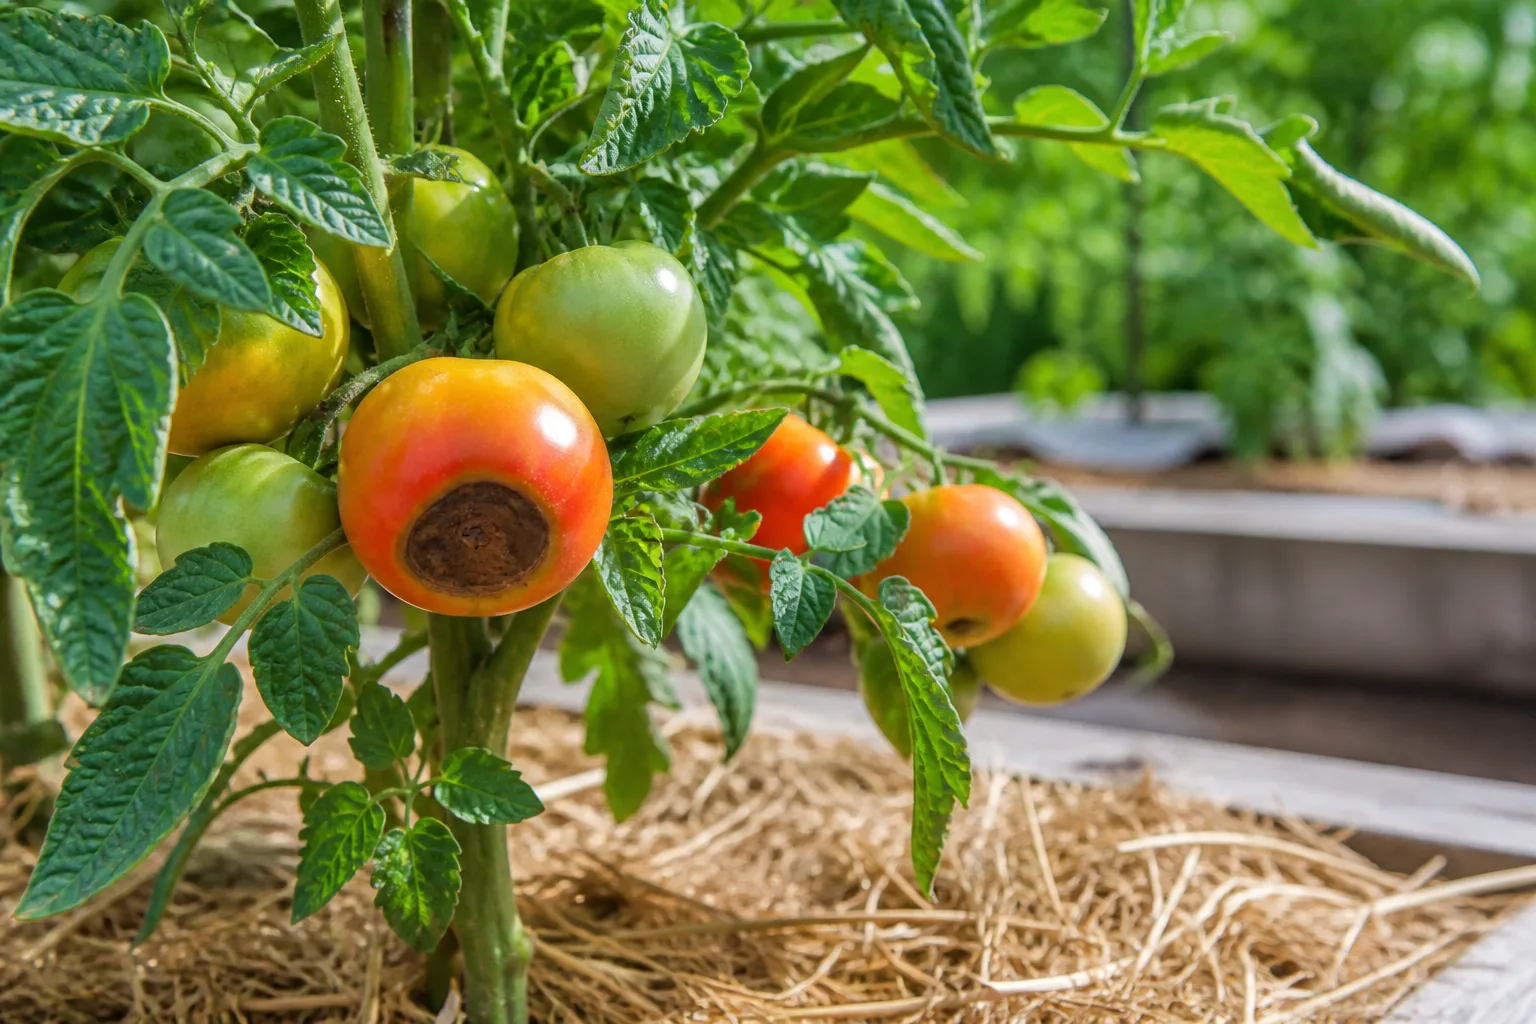
Black spots on tomatoes are a symptom, not a diagnosis. A dry, sunken patch at the blossom end usually points to blossom-end rot, while small raised spots, concentric rings, water-soaked borders, or lesions near the stem can indicate a bacterial disease, anthracnose, early blight, an insect wound, or another problem entirely.
Start by turning the fruit over and looking at the plant around it. Where the spot starts, what the tissue feels like, and whether the leaves and stems are spotted will tell you more than the color alone. Epic Gardening makes the same useful broad point in its tomato black-spot overview: dark marks can come from disease, pests, weather, or a physiological problem, so treating the color without identifying the pattern is a fast way to miss the cause (Epic Gardening).
Start With Where the Spot Is
The bottom of a tomato is the blossom end—the end opposite the stem and calyx. A lesion that begins there and stays fairly localized belongs in a different diagnostic category from a spot that starts at the stem end, clusters on the shoulders, or appears across leaves and stems.
Use the table as triage, not as a laboratory diagnosis. Several problems can overlap, and a damaged tomato can develop a secondary rot that obscures the original pattern.
| What you see first | Most likely direction | What to inspect next |
|---|---|---|
| Dry, sunken, brown-to-black patch exactly at the blossom end | Blossom-end rot | Recent dry spells, heat, drainage, roots, and fertilizer concentration |
| Small circular spots that deepen, develop rings, or spread as fruit ripens | Anthracnose | Fruit touching soil, wet weather, old debris, and other nightshades nearby |
| Raised dark spots with a water-soaked edge that later crater | Bacterial spot | Spotted leaves, wet handling, overhead irrigation, and plant-to-plant spread |
| Pinpoint raised black specks on young green fruit | Bacterial speck | Cool, wet weather, tiny leaf spots, and contaminated seed or transplants |
| Large leathery lesion near the stem or calyx, with target rings on older leaves | Early blight | Lower-canopy defoliation, soil splash, warm wet weather, and crop history |
A 60-Second Diagnostic Check
First, inspect the position. Rotate the fruit instead of looking only at the side that faces you. Blossom-end rot is centered at the end where the flower was attached, but disease lesions may sit on the shoulders, near the calyx, or anywhere on the skin. A mark that seems to be on the bottom because the fruit is hanging low may actually be a side lesion or a wound from soil contact.
Next, use a clean finger to assess the texture without pressing hard. Blossom-end rot is often dry, papery, shrunken, or leathery; anthracnose is initially small and sunken, then can become soft as the lesion expands; bacterial spot and speck begin as raised or slightly blistered marks; and a secondary rot feels wetter and softer than the original lesion. Do not handle multiple plants with wet hands or tools, because moisture and handling can help move bacterial pathogens.
Then inspect the plant. Look at the oldest leaves first for early blight’s larger target-like lesions, the younger leaves for bacterial spotting, the undersides of leaves for insects, and the stems for dark elongated marks. Finally, write down what happened in the previous week: drought, a heavy rain, a clogged emitter, overhead irrigation, intense heat, pruning while foliage was wet, or a new fertilizer can be more revealing than a single fruit.
1. Blossom-End Rot
Blossom-end rot is the most common explanation for a black bottom on an otherwise normal-looking tomato. It is a physiological disorder associated with insufficient calcium reaching the developing fruit, not a contagious infection. Calcium may be present in the soil, yet the plant can still fail to deliver enough to rapidly expanding fruit when water uptake is interrupted or roots are stressed (NC State Extension) (University of Connecticut Extension).
The first sign is usually a small, pale brown or water-soaked area at the blossom end of a green tomato. It enlarges as the fruit grows, darkens to brown or black, sinks, and becomes dry or leathery. A plant can remain green and vigorous because the problem is localized to fruit tissue rather than a whole-plant infection.
How to Recognize Blossom-End Rot
Location is the strongest clue: the lesion starts at the bottom, not around the stem scar. It may cover a large section of the end in a severe case, but it generally has a distinct boundary between sound tomato skin and the dead tissue. The fruit can ripen normally on the upper portion while the lesion remains dark and sunken.
The tissue may soften if fungi or bacteria colonize the damaged area later. UConn notes that a blossom-end lesion that is thin and papery is more consistent with the disorder alone, while a soft lesion suggests secondary infection. That distinction matters because a secondary rot changes a food-quality decision and means the original moisture problem is no longer the only concern (University of Connecticut Extension).
The usual triggers are uneven water supply, high heat, salinity, damaged roots, waterlogged soil, or excessive growth pushed by nitrogen. A container that dries to the root ball and is then flooded is a classic risk pattern, but a saturated bed can create the same uptake problem by removing oxygen from the root zone. Penn State’s field experience also shows why inspecting irrigation matters: drought stress and clogged drip emitters can occur even when a garden appears to have an irrigation system (Penn State Extension).
What to Do for Affected Fruit
Do not try to repair the black patch. It will not turn back into healthy tomato tissue, and a calcium product applied after the lesion appears cannot rebuild the damaged cells. Remove fruit that is badly affected, soft, leaking, moldy, or attracting insects, then use the plant’s recent history to correct the cause.
Use this order:
- Check moisture below the surface. Dig several inches away from the stem. If the soil is dry through the active root zone, water slowly and deeply; if it is muddy or stays wet, stop adding water and investigate drainage.
- Check the delivery system. Confirm that each drip emitter or soaker section is flowing. Also check whether a timer ran through a storm or skipped watering during a hot, windy stretch.
- Protect roots. Avoid deep hoeing around established plants, fertilizer piles against the stem, and transplanting or pruning that removes too much root or leaf area at once.
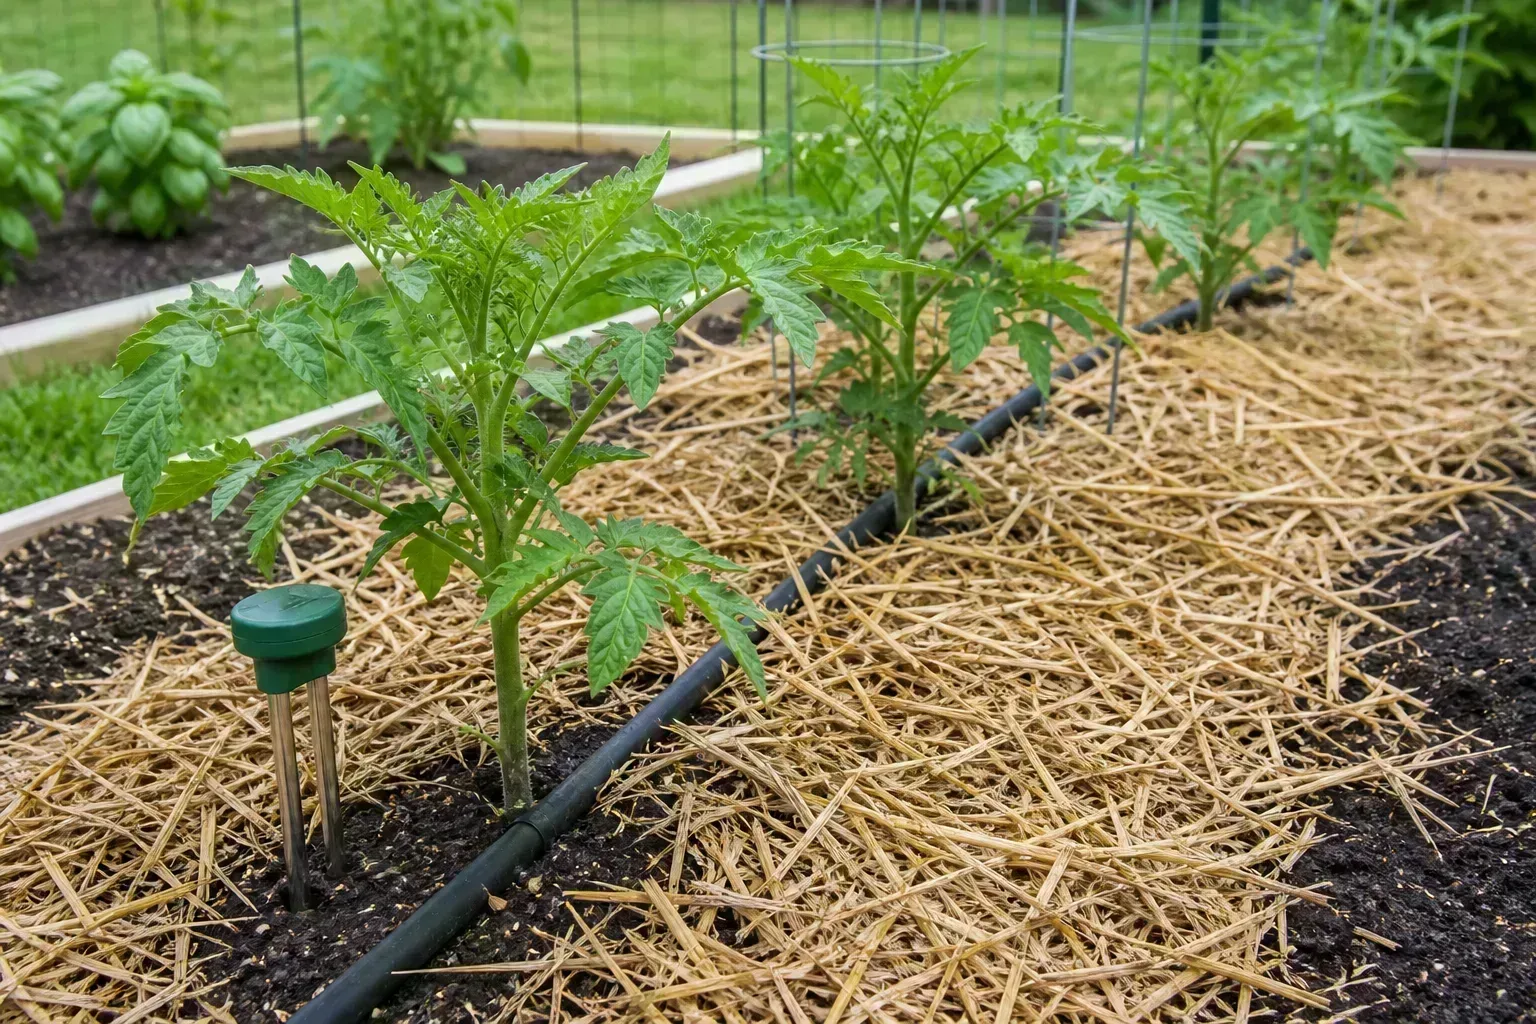
- Buffer the next week. Add a clean layer of mulch after the soil is warm, keep it off the stem, and adjust watering to the soil rather than following a fixed calendar.
- Test before amending. If the problem returns, use a soil test to evaluate pH, calcium, and overall fertility before adding lime, gypsum, calcium nitrate, or another supplement.
For a deeper prevention sequence focused specifically on this disorder, see the LeafyPixels guide to preventing blossom-end rot on tomatoes. For this broader black-spot problem, keep scouting the leaves and fruit: a second symptom can signal a disease rather than a calcium-uptake issue.
2. Anthracnose Fruit Rot
Anthracnose is a fungal fruit rot caused by several Colletotrichum species. It often becomes obvious as tomatoes approach ripeness, even when the fruit was infected while still green. The disease is favored by free moisture, mild-to-warm conditions, soil splash, and fruit or plant debris that carries the pathogen; the Pacific Northwest Pest Management Handbooks describe ripe fruit as increasingly susceptible and infected fruit as the major symptom (Pacific Northwest Pest Management Handbooks).
Signs That Distinguish Anthracnose
Anthracnose usually begins as small, circular, slightly sunken spots rather than one broad patch centered only on the blossom end. The lesions enlarge, become more concave, and may develop concentric rings. Their centers can turn tan and contain tiny dark specks, which are structures that produce spores. In warm, wet conditions, the rot can penetrate the fruit quickly.
The plant may also have small dark leaf or stem lesions, but fruit spotting is often the feature that brings the problem to attention. A fruit can look sound at the first picking and then develop a circular sunken lesion during ripening on the counter, especially if it was harvested from a wet canopy or had been in contact with contaminated debris. A peer-reviewed study of tomato anthracnose likewise describes the disease as a threat to fruit quality and food value, which is why sanitation and harvest timing matter even when the plant is still producing (peer-reviewed tomato anthracnose study).
Anthracnose is easy to confuse with blossom-end rot when a lesion sits low on the fruit. The deciding clues are the circular, expanding pattern and ringed or speckled center of anthracnose versus the broad, dry, blossom-end-centered patch of blossom-end rot.
Contain It Before the Next Harvest
Pick ripe or nearly ripe fruit promptly during wet weather, and remove fruit with expanding lesions from the garden. Do not leave infected tomatoes on the soil or in a cull pile beside the bed; spores can build up there and splash onto lower foliage or later fruit. If you handle a visibly rotting fruit, wash your hands and clean the harvest container before moving to healthy plants.
Keep fruit off bare soil with mulch and support. Water at the base with drip irrigation or a soaker hose, and avoid working among the plants while leaves are wet. A three-year rotation away from tomatoes and other nightshades is a strong long-term sanitation step when anthracnose has been a recurring problem, because the pathogen can persist in debris and several host weeds.
Fungicides, where appropriate, are protectants or suppressants rather than erasers for lesions that already exist. Product registrations, preharvest intervals, and crop labels vary by location. If spots are spreading despite dry-foliage and sanitation changes, ask your local Extension service for a diagnosis and use only a product currently labeled for tomatoes and the suspected disease.
3. Bacterial Spot
Bacterial spot causes small dark spots on leaves and raised brown-to-black lesions on tomato fruit. As the fruit expands, the lesions can look sunken because healthy tissue grows around them. Older spots may become scabby, cratered, or cracked at the edge, but they are usually scattered across the fruit rather than confined to the blossom end.
The disease is favored by warmth and high moisture. UConn’s IPM guidance describes fruit spots that begin with a water-soaked border, become slightly raised, and can enlarge to roughly a third of an inch; leaf symptoms can range from discrete dark spots to a blighted appearance when moisture is heavy (University of Connecticut Extension bacterial disease guide). The plant may lose leaves, leaving developing fruit exposed to sunscald, so a bacterial outbreak can create more than one kind of blemish.
Bacterial spot spreads easily through splashing water, contaminated seed or transplants, wet tools, and handling plants while the canopy is wet. A copper-based product may be included in an Extension disease-management program, but sprays are not a cure for tissue that is already spotted. The more durable response is to remove heavily affected material, keep new growth dry, and avoid carrying the bacteria from one plant to the next.
If spots appear on several leaves and fruit after a period of warm rain, treat the whole bed as a sanitation problem. Do not simply remove the one worst tomato and continue overhead watering; that sequence leaves the conditions that caused new infections in place.
4. Bacterial Speck
Bacterial speck is another bacterial disease, but it favors cooler, wet conditions than bacterial spot. It produces tiny, superficial, raised black specks on green fruit. The specks may become shallow pits as the tomato expands, and the tissue around them can stay green longer while the rest of the fruit colors.
The size of the lesion is the useful field clue. UConn describes speck fruit lesions as less than one-sixteenth of an inch across, with a distinct margin; the disease can also create small dark spots on leaves, stems, and petioles. You cannot reliably identify the bacterium by eye alone, but the combination of pinpoint raised marks, cool wet weather, and young green fruit makes bacterial speck more plausible than blossom-end rot (University of Connecticut Extension bacterial disease guide).
Spot vs. Speck in the Garden
| Clue | Bacterial speck | Bacterial spot |
|---|---|---|
| Typical fruit mark | Pinpoint, raised, superficial black speck | Larger raised lesion that can become scabby or cratered |
| Weather preference | Cool to mild and persistently wet | Warmer and persistently wet |
| Fruit pattern | Often most noticeable on small green fruit | May enlarge as fruit develops and crack at the edge |
| Leaf pattern | Small dark spots, sometimes with a pale ring | Spots can be larger, greasy-looking, angular, or blighting |
| Best response | Clean planting material, dry foliage, sanitation, rotation | The same foundation, with extra attention to contaminated debris and peppers in rotation |
The table is a working distinction, not a promise of species-level identification. Bacterial spot and speck can occur together, and both can be confused with early blight or physical damage. If the diagnosis affects a large crop or a saved seed supply, submit a sample to a plant diagnostic clinic rather than labeling every dark dot yourself.
Slow the Spread With Sanitation and Dry Foliage
Use certified disease-free seed and healthy transplants, inspect starts before planting, and disinfect trays, stakes, and reusable supports. Avoid pruning, tying, harvesting, or brushing through the canopy while it is wet. If you must remove a leaf or fruit, work from healthy plants toward affected plants, then clean the tool before using it again.
Mulch keeps contaminated soil from splashing onto low leaves and fruit. Drip irrigation is preferable to overhead watering, and early-day irrigation gives foliage more time to dry. UConn recommends at least a one-year rotation for bacterial speck and a two- to three-year rotation without peppers for bacterial spot; follow local guidance if your region has a different crop sequence recommendation (University of Connecticut Extension bacterial disease guide).
5. Early Blight
Early blight is caused by the fungus Alternaria solani. It usually announces itself on the lower, older leaves first, but it can also infect tomato fruit. On fruit, lesions commonly develop near the calyx or stem end and become dark, leathery, and sunken; on leaves, brown spots can expand and form concentric “target” rings.
Utah State University Extension describes early blight as a warm, wet-weather disease whose spores can come from soil debris, seed, rain, overhead irrigation, and heavy dew. When the lower canopy defoliates, fruit loses leaf cover and becomes more vulnerable to sunscald, which can add pale or dark patches that are not the original disease (Utah State University Extension).
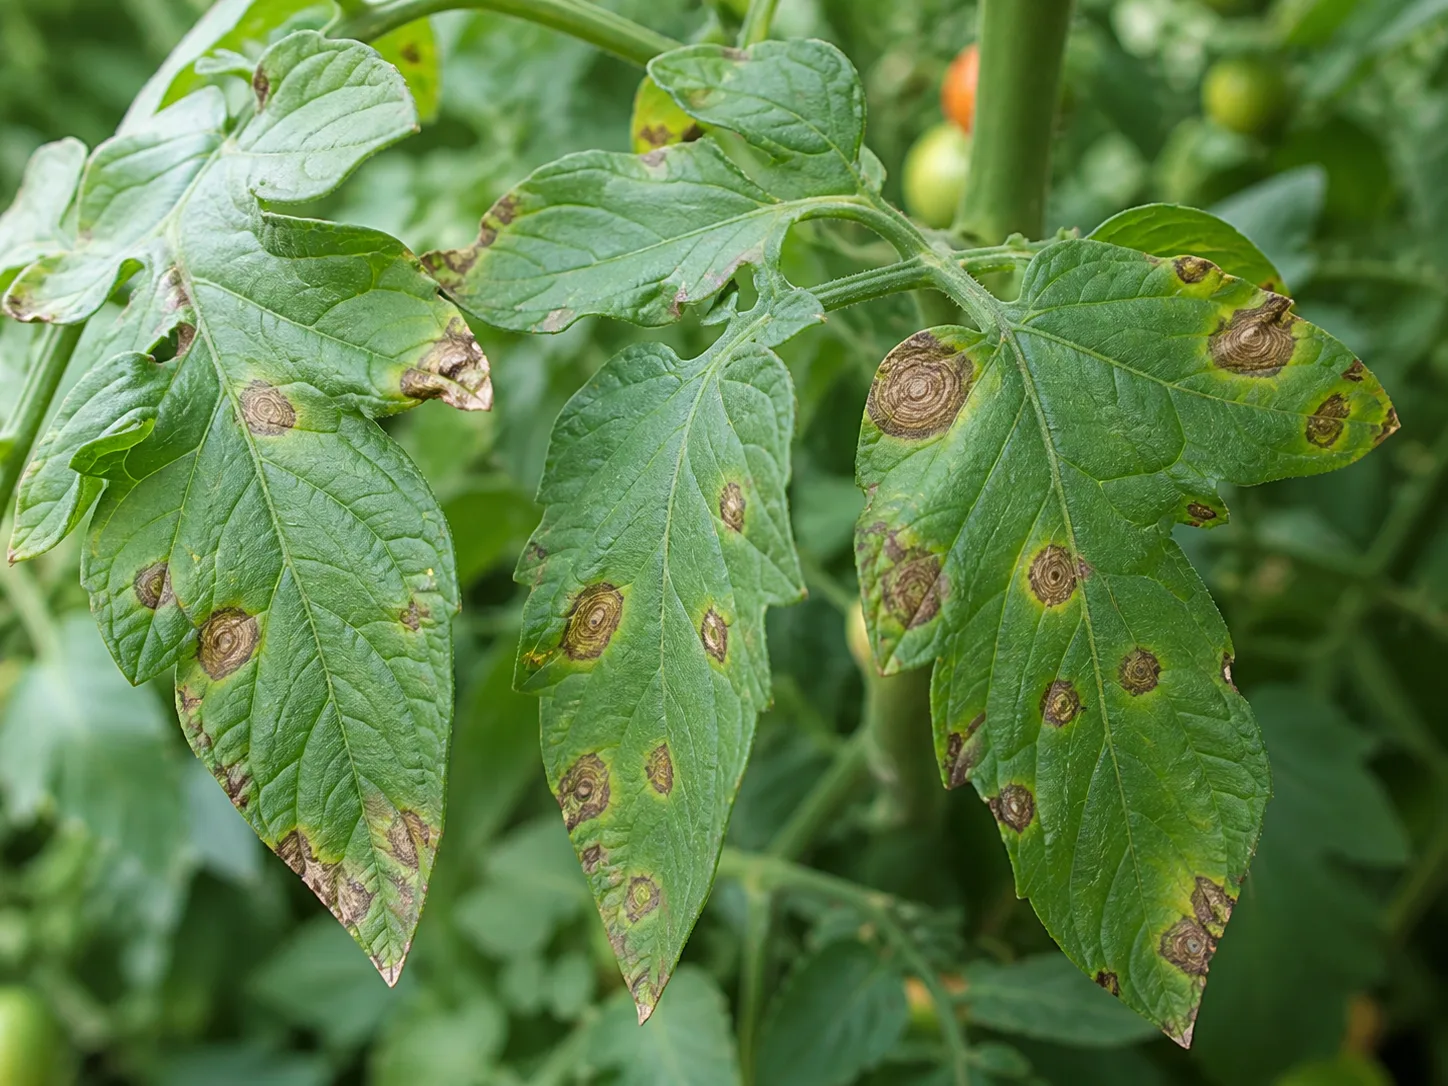
Find the Target Pattern and Calyx-End Lesion
Look for the disease connection across the plant. A single dark fruit mark at the blossom end with otherwise clean foliage points more strongly toward blossom-end rot. A leathery lesion near the calyx plus expanding target spots on lower leaves points more strongly toward early blight. That pattern is not a substitute for a lab diagnosis, but it tells you where to focus your first response.
Remove badly infected leaves and fruit as soon as practical, placing them in the trash or another disposal route that does not return visibly diseased material to a cool home compost pile. Keep the lowest leaves from resting on soil, but do not strip a healthy plant bare in an attempt to create airflow; excessive leaf removal exposes fruit to sunscald and adds plant stress. Support the plant, apply mulch, water at the base, and clean up volunteers and nightshade weeds that can carry the disease.
Rotate out of tomatoes, peppers, eggplants, and potatoes for at least two seasons where space allows, and use resistant cultivars when selecting next year’s plants. A labeled fungicide can protect new tissue when early blight is a recurring, serious problem, but it will not make target spots disappear. Use the label and local Extension recommendations for timing, harvest intervals, and resistance management.
Look-Alikes That Also Turn Tomato Tissue Dark
Not every dark mark is one of the five problems above. Sunscald usually appears on fruit exposed after heavy leaf loss or sudden intense sun, often as a pale, yellow, white, or tan leathery patch on the shoulder or side. Rain check creates many fine concentric cracks and rough russeted areas, especially after drought followed by heavy rainfall. Penn State notes that fruit size, cultivar, rainfall, temperature, and leaf cover all influence this disorder, so it should not be mistaken for a contagious rot (Penn State Extension).
Insect feeding and physical wounds can create pale corky areas, pinprick holes, or bruises that later turn brown or black as secondary organisms enter. Inspect the shoulders and stem end, look under leaves, and check whether the mark is a single wound or a pattern repeated across many fruits. A pest-related blemish usually does not behave like a uniform, dry blossom-end lesion.
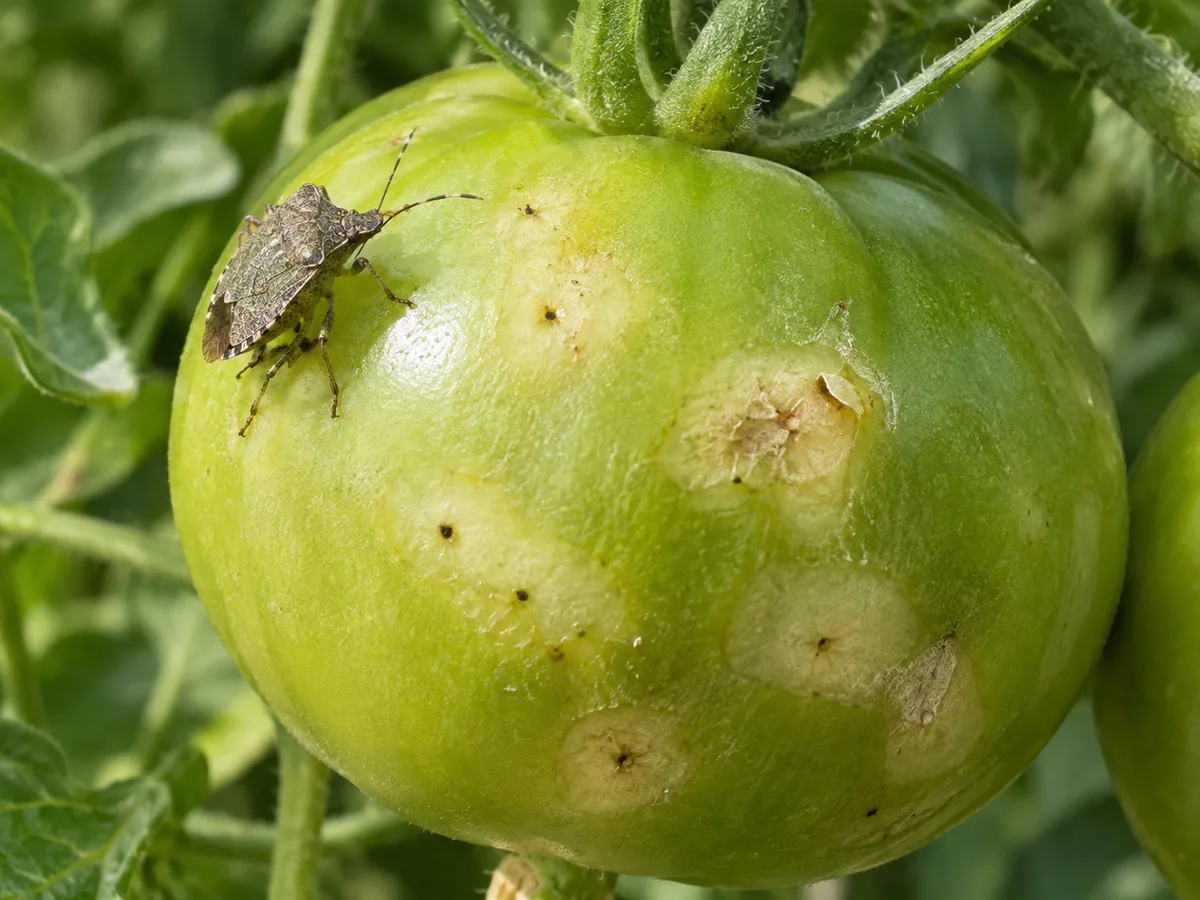
Catfacing, hail, rubbing against a cage, and fruit touching wet soil can also make an opening that later rots. The practical rule is to diagnose the original pattern before treating the later blackening. If the tissue is now soft, wet, or foul-smelling, the original cause may be hidden; remove the fruit and monitor nearby plants for the earlier symptom.
A Practical Cleanup and Prevention Plan
Once you have removed the worst fruit, make the next inspection systematic. Savvy Gardening’s practical tomato guidance emphasizes mulch, deep watering rather than a shallow “splash,” and keeping low foliage away from soil; those habits are useful because they address both moisture stress and pathogen splash (Savvy Gardening).
- Separate the problem fruit. Pick visibly rotten fruit into a bag or bucket, not onto the soil between plants. Do not save seed from fruit affected by a suspected bacterial disease.
- Inspect the whole plant. Check leaves, stems, the underside of foliage, and fruit at every stage. Photograph a fresh lesion before it becomes soft if you may need an Extension diagnosis.
- Correct water delivery. Check the soil several inches down, confirm emitters, account for rainfall, and adjust containers more often than in-ground beds. The goal is even moisture with drainage, not permanently wet soil.
- Keep soil from splashing. Use clean straw, shredded leaves, or another suitable mulch once the soil is warm. Leave a small gap around the stem and replenish mulch as it thins.
- Dry the canopy. Water at the base, provide support, and space plants so foliage can dry. Avoid handling plants while wet.
- Sanitize and rotate. Remove crop debris, clean stakes and pruners, control volunteer tomatoes and nightshade weeds, and rotate the bed away from related crops when disease has recurred.
- Choose the next cultivar deliberately. Disease resistance can lower risk, and smaller-fruited varieties may be less prone to blossom-end rot, but no cultivar can overcome a drought-stressed, waterlogged, or infected site.
When a Spray or Soil Amendment Is Justified
Do not use a calcium amendment because one tomato is black, and do not use a fungicide because a leaf is speckled before you check the pattern. A soil test is the right tool for deciding whether pH or calcium needs correction; it is not a guarantee that calcium will reach fruit if roots are damaged or moisture is swinging between drought and saturation.
Lime raises pH, so it belongs in a plan for acidic soil when the test supports it, not as a generic blossom-end-rot cure. Gypsum can supply calcium without the same pH effect as lime, but it still adds a nutrient and is not automatically useful. High-nitrogen feeding can create lush growth and extra salt stress while failing to correct the real problem.
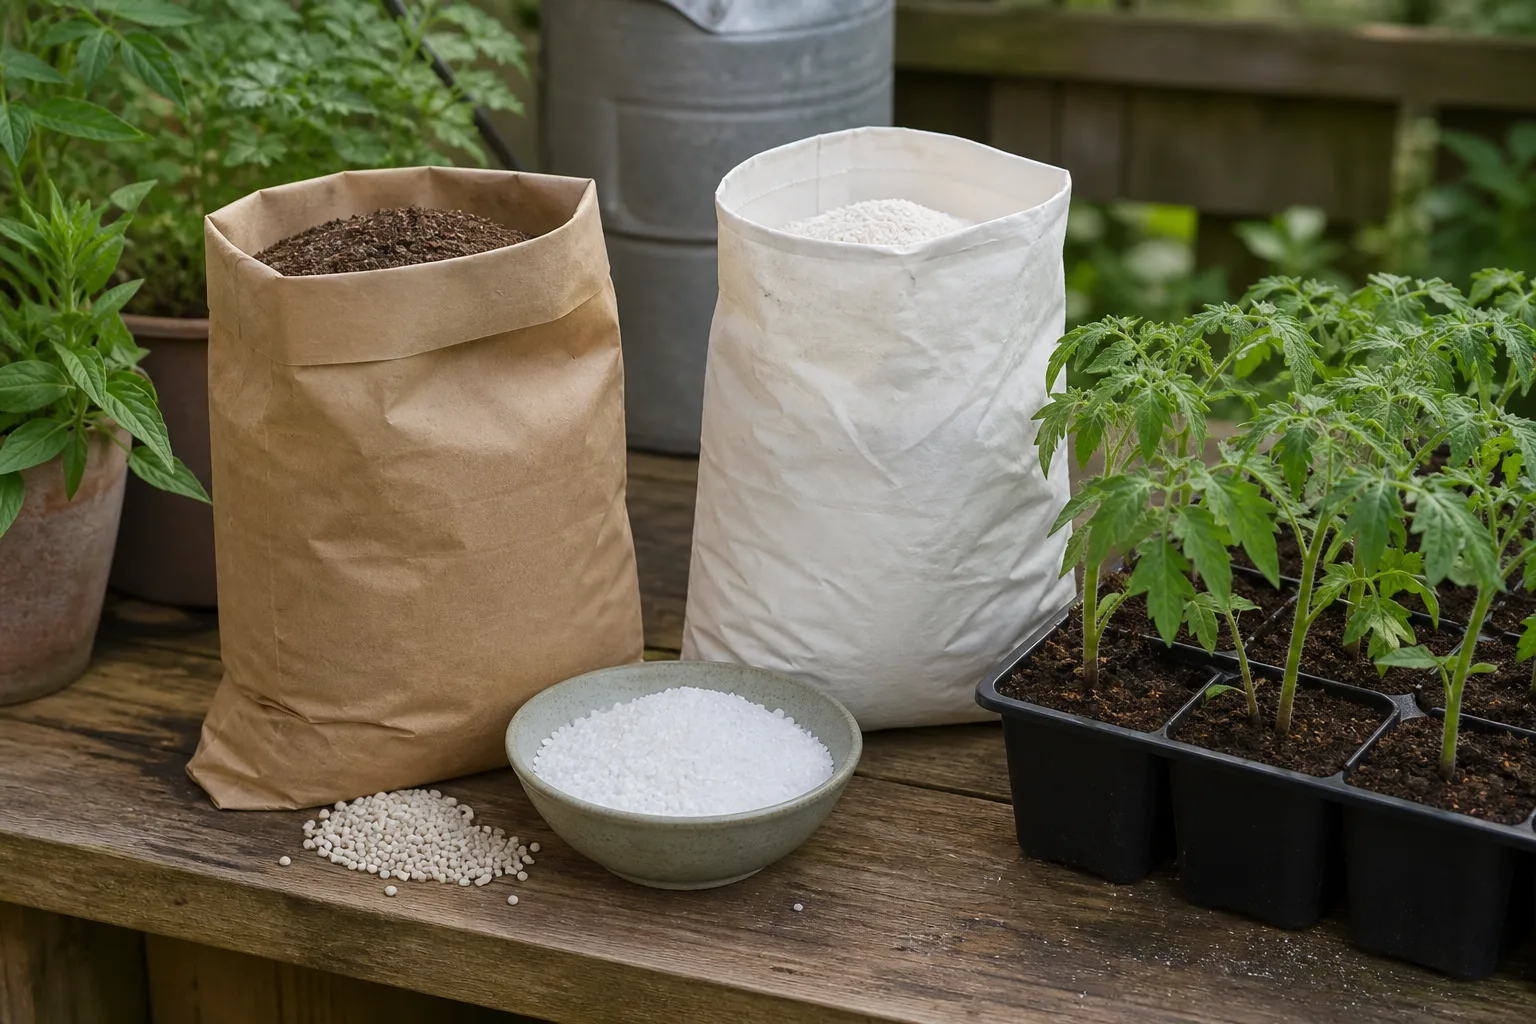
Foliar calcium is an area where recommendations vary by product, crop, and local guidance. NC State describes labeled calcium chloride sprays as a possible tomato measure at specific rates, while UConn limits foliar use to situations where deficiency is seen, and the Pacific Northwest handbook warns that excess calcium can reduce yield or injure foliage. The safe takeaway is to correct watering and root conditions first, then follow a current label or local Extension recommendation if a documented deficiency or recurring problem justifies a product (NC State Extension) (University of Connecticut Extension) (Pacific Northwest Pest Management Handbooks).
For bacterial spot, bacterial speck, anthracnose, and early blight, a product may protect new tissue or slow spread, but it cannot sterilize a diseased plant. Use only products labeled for tomatoes and the target disease in your location, observe preharvest and reentry instructions, and do not copy a concentration from an unrelated crop, a different country, or an old blog post.
Can You Eat a Tomato With a Black Spot?
The answer depends on the cause and the condition of the fruit, not just the size of the spot. A tomato with a small, dry, isolated blossom-end-rot lesion and firm, sound tissue elsewhere may be trimmed for immediate use, but the damaged portion should be removed generously and the fruit should not be stored for later. Blossom-end rot itself is not contagious, yet the dead tissue can become an entry point for bacteria or fungi.
Discard the whole tomato when the lesion is soft, wet, fuzzy, leaking, foul-smelling, fermented, or spreading into the flesh. Also discard fruit with multiple disease lesions, an unknown internal rot, or damage that makes it impossible to separate sound tissue confidently. Do not taste-test a questionable tomato, and do not put visibly rotten fruit into a home compost pile that does not reliably heat.
If only the skin is marked by a superficial bacterial spot or an insect wound, cutting away the affected area still does not make the fruit suitable for storage. Use sound fruit promptly after washing it under running water, keep it separate from clean harvested tomatoes, and treat the remaining plants—not the blemished fruit—as the part of the crop you can still protect.
Conclusion
When tomatoes develop black spots, turn the fruit over before reaching for calcium or a spray. A dry lesion centered at the blossom end suggests blossom-end rot; circular sunken rings suggest anthracnose; raised dark lesions point toward bacterial spot or speck; and a calyx-end fruit lesion paired with target-ringed lower leaves raises early blight.
Remove fruit that is rotting, inspect the plant and root-zone history, then stabilize moisture, keep foliage dry, mulch against soil splash, sanitize tools and debris, and rotate crops when disease recurs. The damaged tomato will not heal, but a careful diagnosis today can still protect the next truss and give you a healthier starting point next season.