How to Grow and Care for Snow Peas
Learn how to grow snow peas with the right planting window, trellis, watering routine, container setup, harvest timing, and practical fixes for common problems.
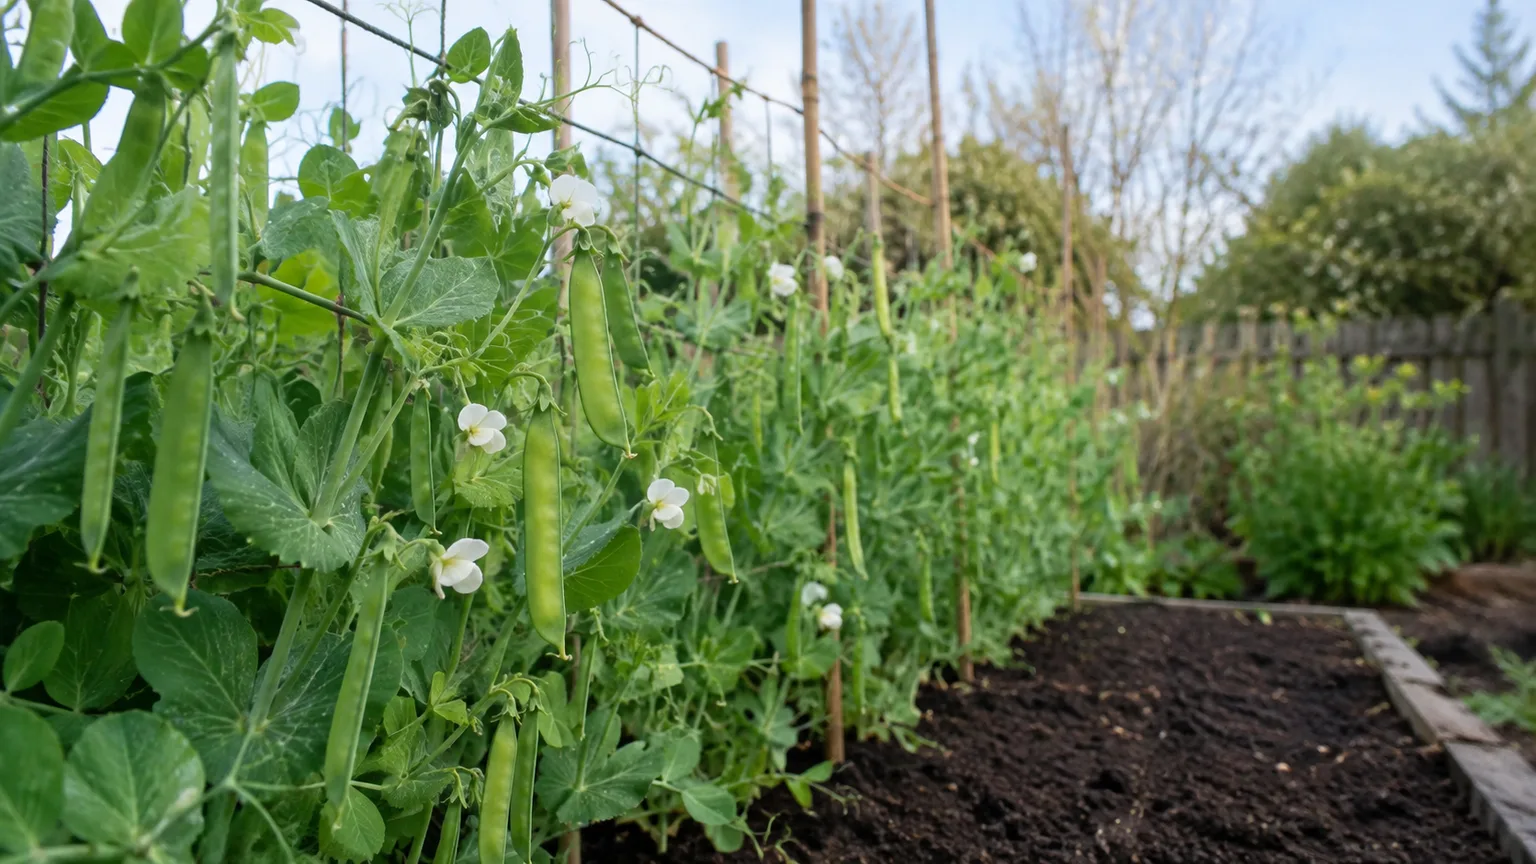
Snow peas reward good timing more than elaborate equipment. Sow them while the weather is cool, give the vines a support they can grasp, keep the root zone evenly moist, and pick the flat pods before the peas swell. The crop is quick enough for a small garden, productive enough for a raised bed, and attractive enough to grow beside flowers or along a balcony trellis.
The main mistake is treating snow peas like a warm-season bean. They are cool-season legumes, and their quality drops quickly when heat, drought, or missed harvests push the plant toward seed production. The guide below connects the calendar to temperature and plant stage so you can grow them in spring, fit a fall crop into a mild climate, or make a container planting work with realistic expectations.
Snow Peas at a Glance
Snow pea is the edible-podded form of Pisum sativum var. macrocarpon. The plant is an annual climbing legume with tendrils, white to pink or mauve flowers, and flat green pods that are eaten whole while the seeds are still small. The RHS plant profile describes it as a full-sun plant for moist but well-drained soil, with a typical height of about 1 to 1.5 meters.
| Need | Practical target |
|---|---|
| Best season | Early spring; fall in regions with a long, mild cool season |
| Light | About 6 to 8 hours of sun; some afternoon shade helps during a warm fall start |
| Soil | Fertile, moisture-retentive, and well drained; roughly pH 6.0 to 6.8 is a useful target |
| Sowing depth | About 1 inch, or follow the seed packet if it differs |
| Seed spacing | About 2 to 3 inches for a row; use the packet for the cultivar |
| Support | Netting, pea sticks, chicken wire, or a narrow trellis for most varieties |
| Water | Even moisture, with extra attention from flowering through pod fill |
| Harvest | Flat, crisp pods with tiny seeds just beginning to show |
Snow peas are not the same as shelling peas. Shelling peas are grown until the seeds swell and are removed from the pod; snow peas are grown for the tender pod wall. Sugar snap peas are also eaten pod and all, but their pods are rounder and fleshy rather than flat. That difference matters because a snow pea that looks “full” may already be past its best eating stage.
Understand Snow Peas and Choose a Variety
Start with the space and the season you actually have. Dwarf or bush types such as ‘Oregon Sugar Pod II’ are easier to contain in a large pot or a short bed, though they still benefit from light support when pods weigh down the vines. Tall types such as ‘Mammoth Melting’ need a higher, sturdier trellis and make better use of a vertical garden. ‘Oregon Giant’ and ‘Avalanche’ are other commonly grown snow pea choices; availability and days to maturity vary by seed company, so treat the packet as the final authority.
Choose a fast variety for a short fall window, one with disease resistance if powdery mildew is common in your late season, and a dwarf type if the only support you can provide is a cage or a small balcony trellis. If you want tender shoots as well as pods, select a vigorous variety and sow an extra short row for shoots rather than stripping the fruiting plants.
For a longer harvest, combine an early and a later variety or sow small batches in succession. Succession sowing does not make snow peas tolerate summer heat; it spreads your harvest across the part of the season when temperatures are suitable.
Time Planting Around Temperature, Not Just the Calendar
For a spring crop, sow outdoors as soon as the soil is workable and no longer waterlogged, usually several weeks before the average last frost. Young pea plants tolerate light frost, but flowers and developing pods are more vulnerable than seedlings. A practical rule is to count back roughly four to six weeks from the last frost date, then adjust for the variety’s maturity and your actual soil conditions. The RHS pea-growing guide recommends waiting until the soil is around 10°C (50°F) for reliable outdoor germination, while other successful growers sow earlier in cold but workable ground; the important distinction is between cool soil and saturated soil.
Snow peas grow best in a cool stretch, roughly 55 to 70°F (13 to 21°C). When daytime heat begins to stay in the upper 70s or climbs toward 80°F, flowering and pod quality can decline; sustained hot weather usually ends the crop. This is why a sowing that looks “late” on the calendar can outperform an earlier one if the early bed is cold and wet, while a spring planting can fail even when the seedlings looked healthy if the first heat wave arrives before pod set.
For a fall crop, work backward from the first expected frost and the seed packet’s days to maturity. Aim to sow about eight to ten weeks before that frost, allowing time for germination and for the plants to flower before severe cold. Late-summer soil may be too hot for quick germination, so keep the seedbed moist, mulch the surface, and use light shade or a location with afternoon protection until temperatures ease. The Savvy Gardening snow pea guide describes late summer or early fall sowing for a second crop, while the Epic Gardening guide emphasizes that the right window is the local stretch of mild weather, not a universal month.
If your climate stays warm through summer, do not force a crop into the hottest months. In a mild-winter region, snow peas may be a fall-to-winter or winter-to-early-spring crop. In a cold region, spring may be the only practical season. Row covers can protect young plants from light frost, but they cannot turn hot weather into pea weather.
Prepare the Bed and Plant Snow Pea Seeds
Pick a sunny, sheltered bed with good airflow and soil that drains freely after rain. Digging deeply is less useful than correcting a compacted or poorly drained root zone: snow peas need moisture, but their roots should not sit in stagnant water. Work in finished compost if the soil is poor, and remove perennial weeds before the vines make the row difficult to reach.
Avoid placing peas immediately after peas, beans, or another legume in the same bed. Rotating away from legumes for a couple of seasons reduces the chance that pea-specific soilborne problems build up. The RHS crop planner also makes a useful planning point: row spacing is not only about plant size; it creates room for airflow, weeding, and harvesting.
Direct-Sowing Outdoors
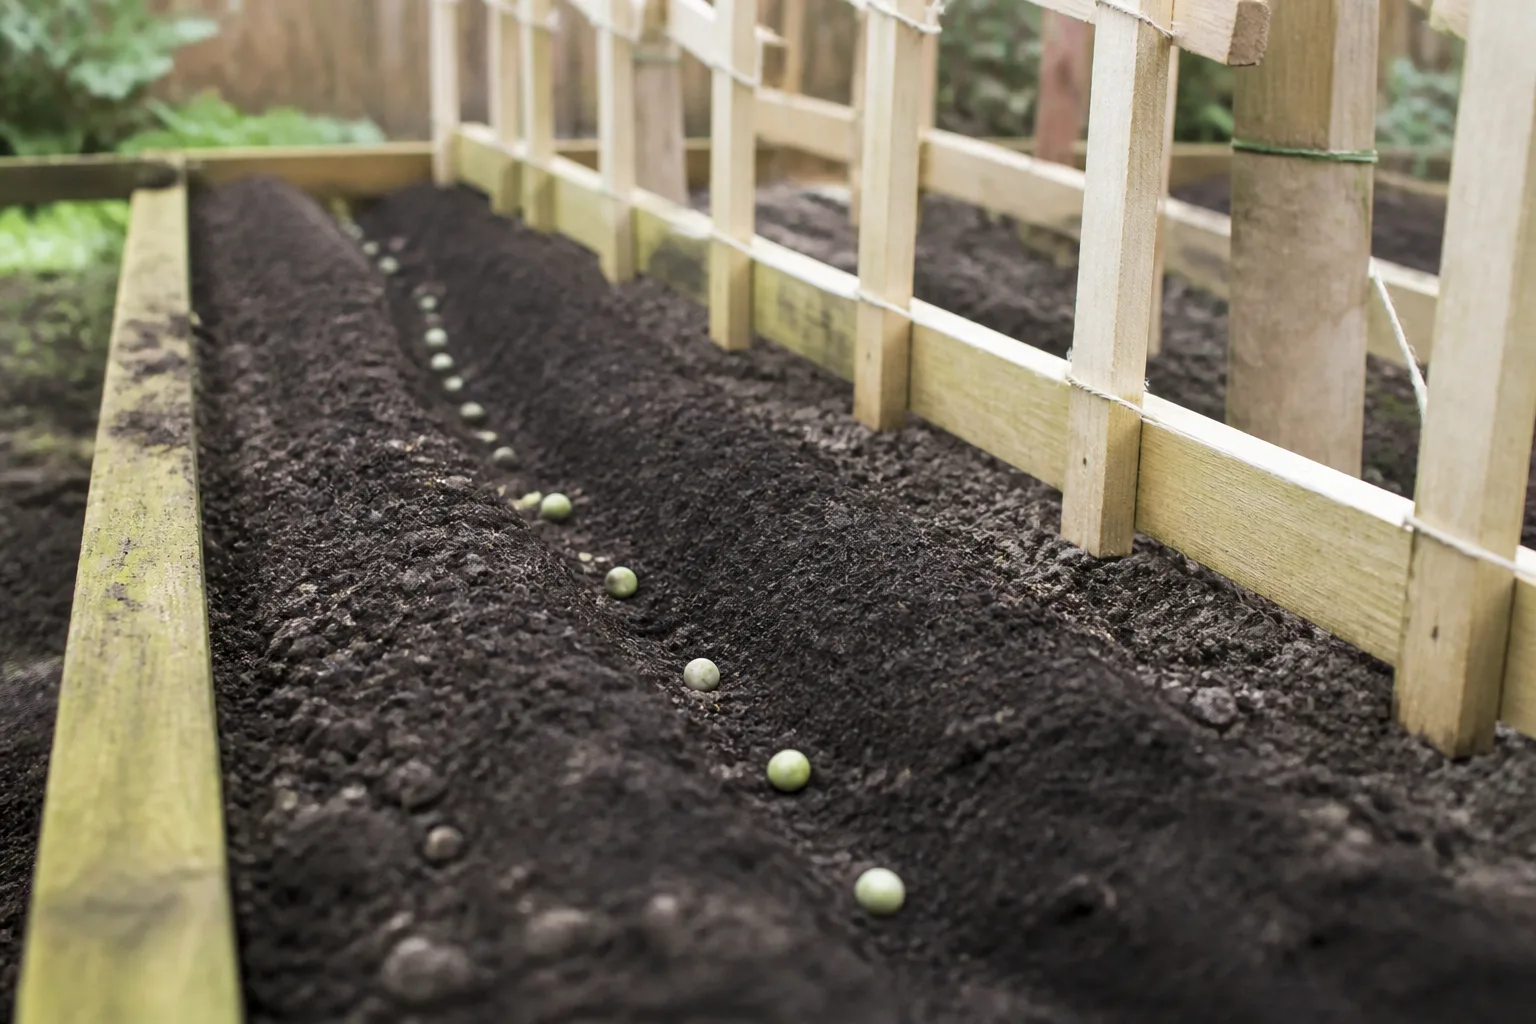
Install the support first, then make a shallow furrow about 1 inch deep. Sow seeds about 2 to 3 inches apart, cover them with fine soil, and water gently enough that the seed stays in place. If your packet recommends a different spacing, follow it; vigorous cultivars and narrow raised beds can be planted more densely than a wide, hard-to-access row, but density should never make the foliage stay wet and airless.
Space rows according to the plant’s eventual height and the support you plan to use. For a tall double row, leave enough room between the rows to attach the trellis and reach both sides; for a dwarf triple row, a shallow broad trench can make good use of a small bed. In any layout, leave a harvest path or make sure the bed is reachable from an edge.
Keep the seed zone evenly moist until seedlings emerge, often in about one to two weeks depending on temperature. If rain or a hard stream of water exposes the seeds, cover them immediately with loose soil. Do not pull crowded seedlings just to make the row look tidy: close spacing is often acceptable for peas, and cutting an extra plant at soil level avoids disturbing the shallow roots of its neighbors.
Starting Indoors or in a Protected Space
Direct sowing is usually simplest, but a protected start can prevent mice, slugs, or a short fall season from leaving gaps in the row. Sow one seed per deep cell, small pot, or biodegradable tube, then transplant while the plants are young and before roots circle the container. The RHS recommends deep modules or tubes and notes that plants can be planted out once they are established; BBC Gardeners’ World Magazine describes the same principle using a length of guttering that can slide into a prepared trench.
Harden seedlings off before moving them outdoors. Water the tray first, slide out the root ball with minimal disturbance, and set plants at the same depth they were growing. A protected start is most useful when it solves a specific problem—cold, mice, or a short season—not as a default replacement for direct sowing.
Do not soak pea seed automatically. A short soak is a practical option some gardeners use to soften the seed coat, but it is not a cure for cold, wet soil and it can create problems if soaked seed is left warm or handled roughly. Sound seed, correct depth, and a prepared bed matter more than a soaking ritual.
Install Support Before Vines Need It
Snow peas climb with tendrils rather than twining thick stems around a pole. They need a narrow surface they can hook, such as pea netting, chicken wire, a grid trellis, or twiggy pea sticks. A smooth, oversized pole is harder for a young tendril to grasp than a fine mesh or a web of small twigs.
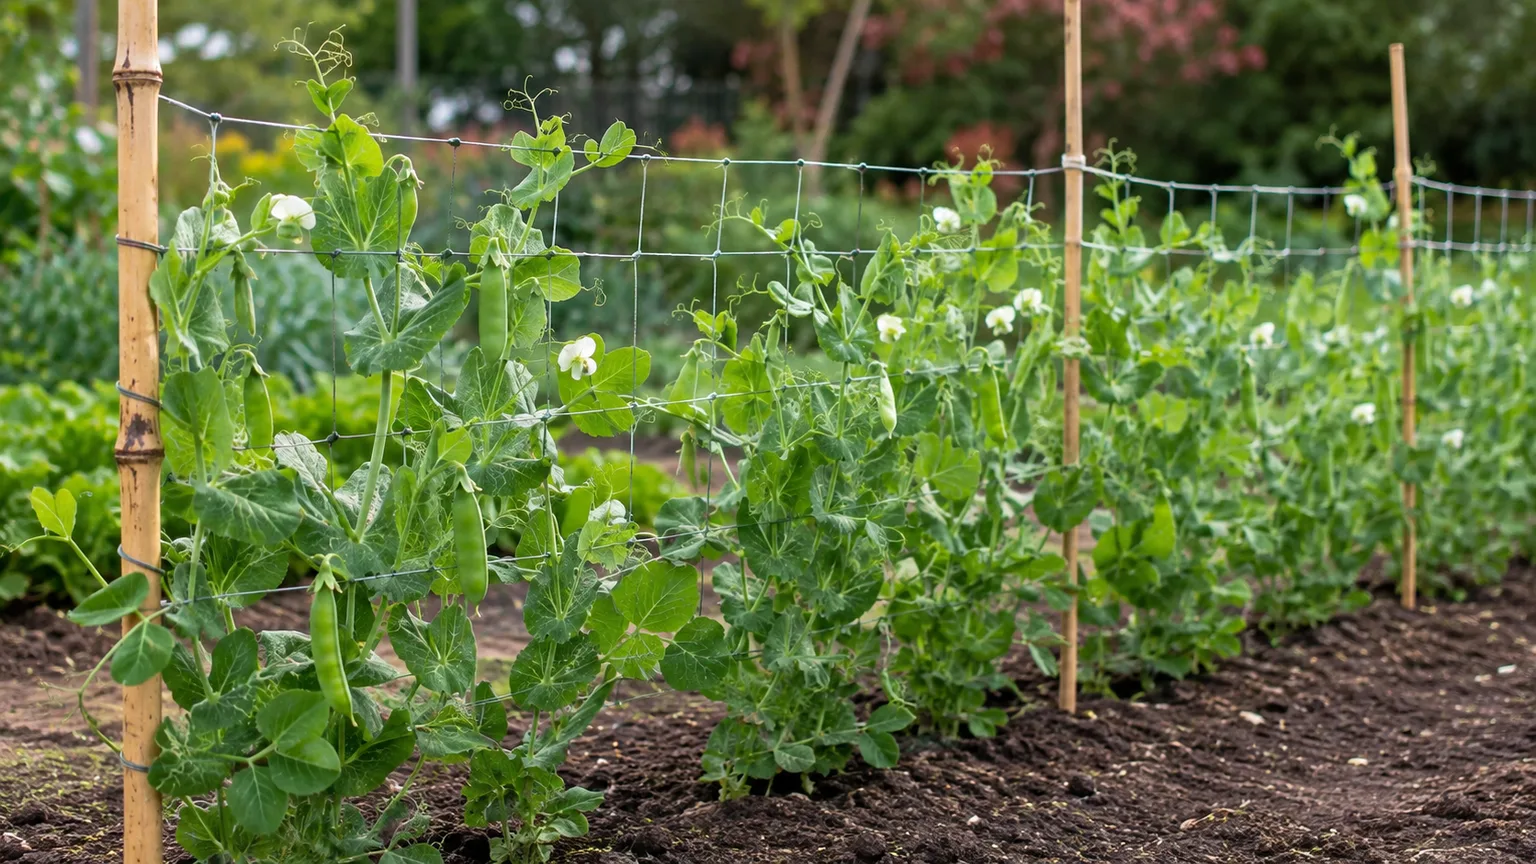
Put the support in place before planting or immediately after sowing. The young vines search for something to catch, and pushing stakes through an established row can cut roots. Set the bottom of netting close enough to the ground that seedlings can reach it quickly, anchor the top securely, and choose a height that matches the cultivar rather than the height of the seedling in front of you.
For a dwarf variety, a short cage or a line of brush may be enough. For a tall variety, use sturdy stakes and a support that will not bow when the vines are wet or carrying pods. The RHS cultivation guidance recommends netting, chicken wire, bamboo canes, or pea sticks according to plant size, and the practical reason is simple: upright foliage dries faster, pods stay cleaner, and harvesting does less damage to the plant.
Care for Snow Peas Through the Growing Season
Snow peas do not need a complicated fertilizer schedule. Their success depends on the interaction of light, cool temperatures, moisture, airflow, and regular picking. If one of those is badly wrong, adding fertilizer usually makes the problem harder to read.
Light, Moisture, and Mulch
Aim for six to eight hours of sun, especially in spring. In a warm fall start, a site with bright morning sun and some afternoon shade can keep the root zone and foliage cooler while the plants establish. Too much shade produces thin, reaching vines and fewer pods; too much heat can end the crop even in full sun.
Keep soil consistently moist but never muddy. An inch of water per week is a useful dry-weather benchmark, but check the soil at root depth instead of watering by calendar alone. Water when the surface is drying and the root zone is no longer evenly damp, then soak deeply enough to reach the roots. Prioritize steady moisture from flowering through pod development, because drought at this stage makes pods less crisp and can shorten the harvest.
Water at the soil line in the morning when possible. Wetting dense pea foliage late in the day increases the period when leaves stay damp, which favors fungal problems. A thin layer of compost or other suitable organic mulch helps the soil hold moisture and reduces weed competition, but keep it slightly away from the stems so the crown stays airy.
Feeding and Nitrogen Fixation
If the bed contains finished compost and the plants are a healthy green, additional fertilizer is usually unnecessary. Avoid high-nitrogen feeding: it can produce a wall of leaves without solving poor light, heat, bad pollination, or a missed harvest. The RHS guide recommends feeding container-grown peas after flowering with a high-potassium liquid feed because potting mix has limited reserves; in a fertile bed, that routine is not automatically needed.
Peas can form root nodules with beneficial bacteria that help fix atmospheric nitrogen, but inoculant is not magic and it does not replace good soil. It can be worth considering when peas have not been grown in the bed before, when the packet is not pre-inoculated, or when local extension guidance recommends it. Follow the product label, keep the inoculant compatible with peas, and do not mix it into hot fertilizer or let treated seed sit in direct sun. If plants are pale, check drainage, roots, temperature, and watering before assuming the answer is more nitrogen.
Growing Snow Peas in Containers
Snow peas can grow in a container, but the pot must be heavy enough to resist a top-heavy trellis and large enough that the root zone does not swing from wet to dry every day. Choose a container with drainage holes, at least about 10 to 12 inches deep, and preferably 18 inches wide or more for a useful row. The RHS recommends a container at least 45 cm (18 inches) wide for peas; a narrow pot may grow vines, but the harvest will be small and the support unstable.
Use a quality potting mix amended with a modest amount of compost, not heavy garden soil that compacts in a pot. Add the trellis before sowing, place the container where it gets sufficient light without becoming a heat trap, and sow a compact or dwarf snow pea at the packet spacing. A large window box can work if it is deep, drains freely, and has a support at the back.
Containers need more frequent moisture checks than beds. Feel the mix a couple of inches down, water thoroughly when it begins to dry, and empty any saucer so roots are not left standing in water. If the vines are healthy but the crop is disappointing, the limitation may be root volume and heat rather than a care failure; use containers for fresh handfuls of pods, not the same yield you would expect from a long garden row.
Harvest Pods and Pea Shoots at the Right Stage
Begin checking the vines as soon as flowers fade and small pods appear. Snow peas are ready when the pod is flat, crisp, and only slightly translucent, with tiny seeds that are just beginning to show. Some cultivars are best picked around 2 to 3 inches long, while others grow longer without becoming tough, so the seed packet and your tasting are better guides than a single universal length.
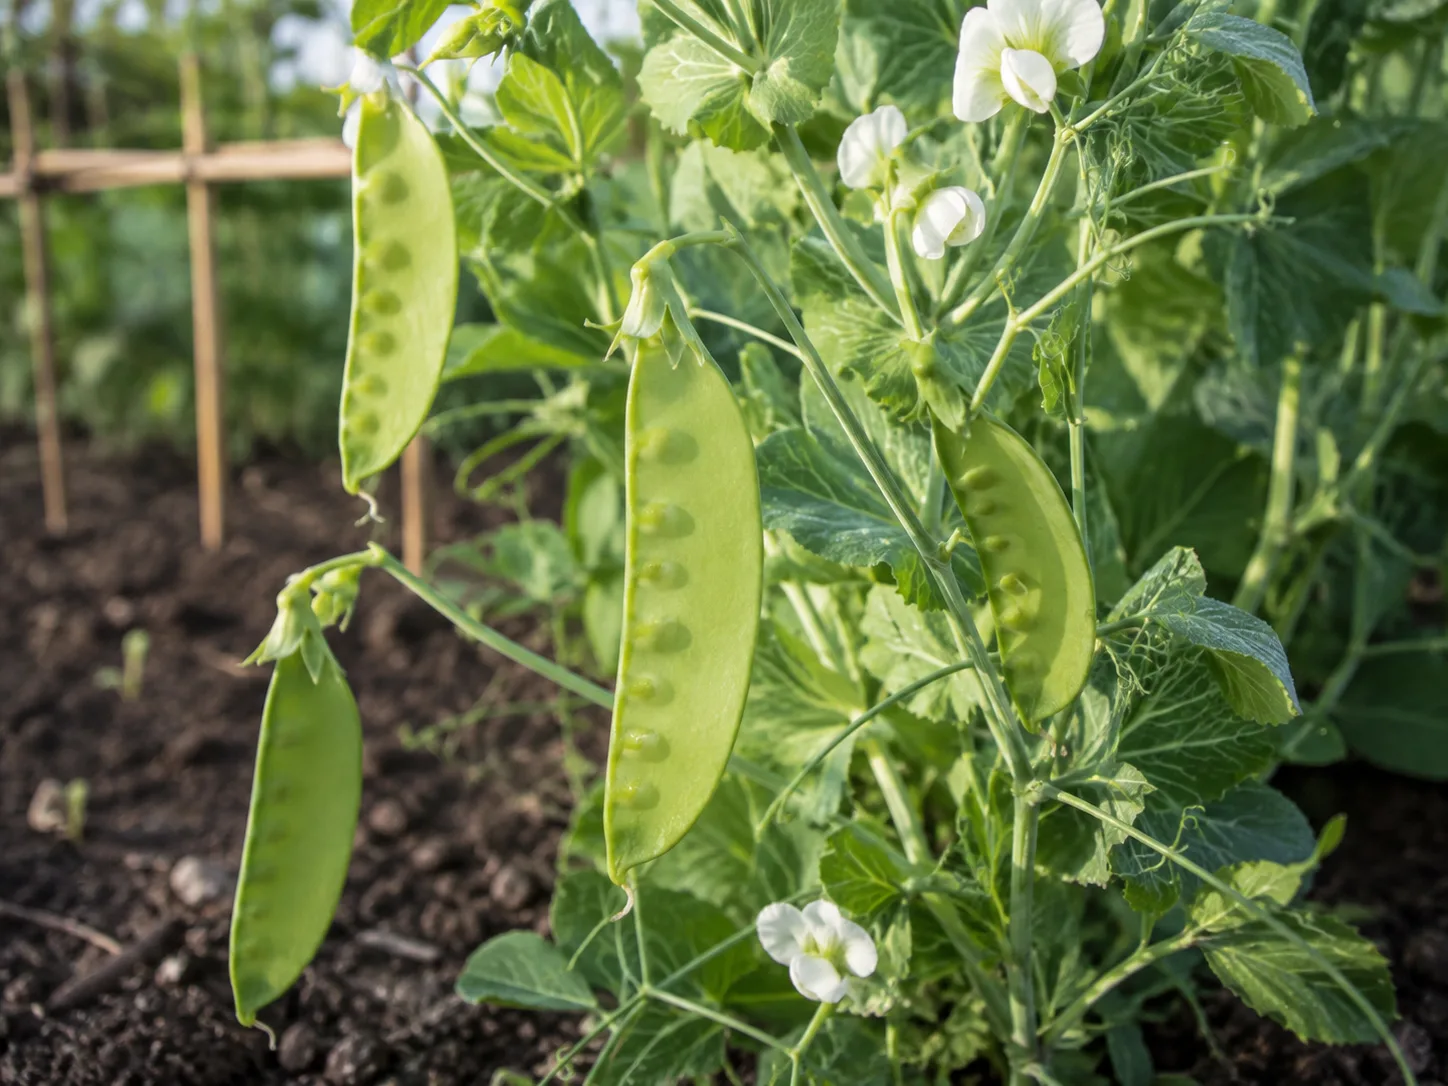
Pick every day or every other day during the flush. Work from the lower part of the plant upward because lower pods often mature first, and look under the leaves where pods hide. Use two hands: hold the vine with one hand and snip or snap the pod with the other. This avoids pulling the plant off the support or tearing a flowering stem. BBC Gardeners’ World Magazine recommends harvesting mangetout as the peas just begin to form, while the RHS advises picking pods at about 7.5 cm (3 inches) when the peas are starting to develop.
If a pod is rounded with large peas, it is no longer at classic snow-pea quality. It may still be edible, but it will be less tender and more substantial; remove it rather than leaving it on the vine if your goal is continued production. A plant allowed to mature many pods switches energy toward seed production, so frequent picking is a crop-management step, not just a kitchen preference.
Pea shoots and tendrils are edible, but harvest them selectively. Pinch a few tender tips from a plant grown for shoots, or sow a separate short row for repeated cuttings. Removing too many growing tips from a pod crop reduces the plant’s ability to keep climbing and flowering.
Store and Use a Snow Pea Harvest
Snow peas are sweetest and crispest soon after picking. Refrigerate them promptly in a breathable container or loosely wrapped produce bag, and avoid sealing wet pods in airtight plastic. Use them raw, quickly stir-fried, steamed, or added at the end of cooking so the pod stays bright and crisp. BBC Gardeners’ World reports that fresh peas can keep for about a week in the refrigerator, but quality is best earlier.
For a surplus, blanch pods briefly, cool them quickly, drain thoroughly, and freeze in a single layer before packing. Blanching slows quality loss but cannot rescue pods that were already fibrous or overmature. Label the date and use the oldest packets first.
Troubleshoot Common Snow Pea Problems
Start with the plant stage and the pattern of damage. A seed that never emerged, a seedling cut at the soil line, a yellow plant with rotten roots, and a white-coated mature vine are different problems even though each may be described as “peas failing.” The RHS snow pea profile lists powdery and downy mildews, foot and root rot, Fusarium wilt, pea and pod spot, viruses, aphids, pea and bean weevils, pea moth, thrips, pigeons, slugs, snails, and mice among possible problems.
Yellowing, Stunting, or Dying Vines
Check water and roots first. Yellowing after heavy rain, a sour smell, soft roots, or a plant that pulls up easily points toward poor drainage or root rot; improve drainage, stop watering until the root zone begins to dry, and remove badly collapsed plants. Yellowing only on older leaves after a long harvest can be normal aging, but widespread pale growth suggests a root, light, temperature, or nutrition problem rather than a need for random fertilizer.
If seedlings disappear overnight, inspect for slugs and snails around the soil surface. If seeds vanish before germination, suspect mice or other rodents and use protected starts or a physical cover. Pigeons and rabbits can strip young foliage, so netting may be more useful than treating the soil. If a whole section of the row wilts while neighboring plants remain healthy, remove the affected plant and rotate peas away from that bed; soilborne diseases are not fixed by spraying leaves.
Few pods with lots of leaves usually means the crop is too warm, too shaded, overfed with nitrogen, overcrowded, or not being picked. Check the forecast and light first, then pause nitrogen and begin frequent harvests. Pea flowers are generally self-pollinating, so hand-pollination is rarely the first fix; heat and plant stress are more likely explanations in an outdoor row.
White Coating, Spots, or Insect Damage
A white, dusty coating on leaves is consistent with powdery mildew, especially as weather becomes warmer and drier or the foliage is crowded. Remove badly affected leaves, improve airflow, water the soil rather than the foliage, and clean up diseased debris after the crop. Resistant varieties and generous spacing help, but no variety is immune in every garden.
Aphids gather on tender tips and flower stems. Knock small colonies off with a firm water spray and reassess after a day or two; preserve lady beetles, lacewings, and other beneficial insects where possible. Use only a product labeled for edible crops and follow its label, including harvest intervals, if a heavier infestation requires treatment.
Notched leaf margins on young plants can indicate pea and bean weevils, while holes or larvae inside pods point to a different pest and require closer inspection. Fine mesh can exclude some flying pests, but it also excludes pollinators; use it before flowering or remove it when flowers need access unless you have a specific reason to hand-pollinate. Do not diagnose every spot as a fungal disease: weather injury, chewing, and normal aging can look similar.
Save Seed and Clear the Bed
Snow peas are annuals, so the spring or fall planting will eventually finish. For seed saving, leave a few healthy pods on an open-pollinated plant until they are full-sized, dry, and papery. Pick them when the seeds rattle, then air-dry the pods or seeds further in a cool, dry place before storing them in a labeled airtight container. Do not save seed from a hybrid if you expect the next generation to match the parent.
When production ends, cut the vines at the soil line instead of yanking them out. Leaving the roots in place allows their organic matter and any nitrogen-containing nodules to decompose in the bed, while removing the above-ground material reduces disease carryover. If the foliage was visibly diseased or heavily infested, discard it according to local guidance rather than adding it to a home compost pile that will not heat reliably.
Conclusion
The reliable way to grow snow peas is to match the crop to its weather window. Sow into workable, well-drained soil while conditions are cool; select a variety whose height and maturity fit your space; install a fine support before the tendrils search for one; and keep moisture steady without creating a soggy root zone.
Then harvest by touch and timing, not by waiting for the pod to look impressive. Flat, tender pods with tiny seeds are the goal, and frequent picking keeps the plant focused on new flowers. If you plan the season around temperature rather than a fixed date, snow peas can give a surprisingly generous crop from a narrow bed, a raised row, or a well-supported container.



