How to Plant Seed Potatoes: A Reliable Garden Guide
Learn how to plant seed potatoes in garden rows, raised beds, grow bags, or pots, with clear timing, spacing, hilling, watering, harvest, and storage guidance.
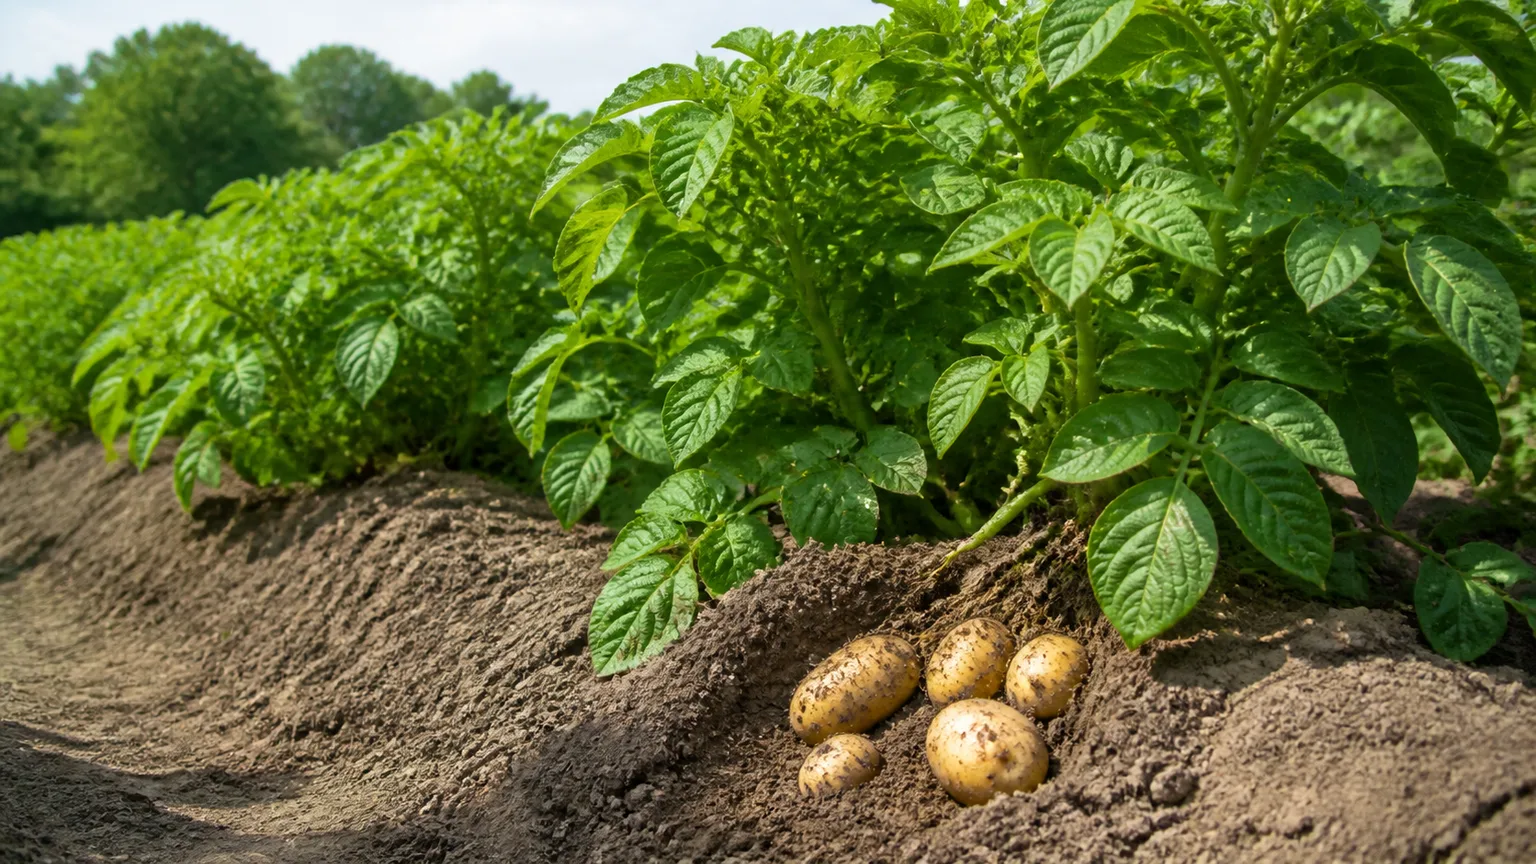
Planting seed potatoes is simple once you understand what the “seed” is doing underground. A seed potato is a piece of a potato tuber, and its eyes are dormant buds that can produce stems, roots, and a new crop. Your job is to give that piece clean soil, enough warmth, reliable moisture, and darkness around the developing tubers.
For most home gardens, the dependable sequence is: buy certified disease-free seed, wait until the soil is workable and warmed, cut large tubers into blocky pieces or plant small ones whole, place them eyes-up, cover lightly, and add soil as the stems grow. The details change slightly in a row, raised bed, grow bag, or pot, but the principle stays the same.
What seed potatoes are—and what they are not
Seed potatoes are tubers grown and handled specifically for planting. They are not botanical seed, and they do not need to be the tiny, perfect potatoes sometimes sold as “new potatoes.” A full-size tuber can be seed stock if it is healthy and has viable eyes, but commercial seed is usually sized and inspected to make planting predictable.
Potatoes reproduce vegetatively: the new plant is a clone of the plant that produced the tuber. Each eye is a bud set into the skin, usually visible as a dimple or small sprout. When planted, the eye grows upward while roots form below; underground stems called stolons then produce additional tubers around the buried stem.
That biology explains two common instructions that can otherwise feel arbitrary. Eyes need to face upward so shoots reach the surface efficiently, and the stem needs to be covered gradually because tubers form above the original seed piece. The goal is not to bury one potato as deeply as possible; it is to create a loose, dark, expanding root zone.
Choose a variety for your harvest goal
Choose the variety before you choose the planting method. Early varieties mature sooner and are useful when your season is short, when you want tender new potatoes, or when a container needs to finish before late-season heat or frost. Maincrop varieties take longer but are better candidates for a substantial storage harvest if your season is long enough.
Also choose for the kitchen. Waxy potatoes hold their shape in salads and soups, while floury or starchy types are often better for baking, mashing, or fries. Fingerlings and specialty colors can be rewarding, but unusual shape or skin color does not compensate for a variety poorly suited to your climate.
If you garden where summers become hot early, plant as soon as the soil is ready and favor early or mid-season stock. If your growing season is long and your goal is winter storage, a maincrop may be worth the added time, provided you can protect the plants from late blight, pests, and hard freezes. Record the variety and planting date; “potatoes” is too broad a label to help you plan next year.
Buy clean, certified seed stock
The best first investment is healthy planting material. Utah State University Extension says to plant foundation or certified seed and to discard tubers or seed pieces showing decay; its guidance also warns that cool, wet soil increases seed-piece decay. Read the extension guidance on seed handling and soil temperature.
Certified seed is produced under a system intended to reduce important seed-borne diseases. That matters because a diseased tuber can introduce a problem before you have seen a single leaf, and crop rotation cannot undo a rotten seed piece already in the row. Grocery potatoes may be treated to slow sprouting, may be a variety selected for a different region, or may carry disease that you do not want in your soil.
When the seed arrives, inspect every tuber. Keep firm potatoes with intact skin and healthy-looking eyes. Reject soft, wet, cracked, badly bruised, or visibly rotting pieces; do not try to cut around decay and save the rest. The University of Maine’s Potato Facts bulletin emphasizes that seed quality affects establishment, vigor, and final yield long before fertilizer or extra labor can help.
Choose the planting window
Plant seed potatoes in early spring when the ground is workable, drainage is good, and the soil has warmed enough to support emergence. A calendar date is only a rough guide because a sunny sandy bed may warm earlier than a shaded clay bed in the same town. Avoid planting into cold, saturated soil just because the packet says it is time.
As a practical benchmark, Utah State University Extension recommends a moderately moist, uniform seedbed around 50 to 60°F (10 to 16°C). Soil below about 45°F (7°C) and wet conditions raise the chance that cut pieces will fail to heal or decay before they sprout. If the weather is unsettled, a raised bed or well-drained container can be ready before a heavy in-ground bed.
The plants tolerate a light frost better than many warm-season vegetables, but fresh shoots can be damaged by a freeze. If sprouts are already above ground and a freeze is forecast, cover the row with soil, compost, straw, or a breathable frost cover overnight. Remove dense covers when the weather warms so the foliage does not stay damp and compressed.
Wait for workable, warm soil
Squeeze a handful of bed soil. It should crumble when pressed rather than form a shiny, sticky lump. If it clings to tools and smears in the planting trench, wait; working wet soil creates compaction that is difficult for potato roots and tubers to push through.
Warmth and moisture need to be considered together. A dry, warm bed may need a light pre-plant watering, while a wet bed needs time and drainage rather than more compost dumped into the hole. The ideal planting medium feels like a damp sponge: moist enough to support initial rooting, never puddled.
Chit seed potatoes only when it helps
Chitting, or green sprouting, means encouraging short, sturdy sprouts before planting. Set the tubers in a single layer with most eyes facing upward in a cool, bright place out of direct sun. The aim is a firm green or purple sprout roughly 1 inch long, not a tangle of long, pale growth.
Chitting can make sense for early varieties, short seasons, or a gardener who wants to see which tubers are viable before they go into the bed. The RHS explains how to chit early potatoes and why light produces stronger sprouts than darkness. It is optional, though; healthy seed planted at the right soil temperature can emerge well without pre-sprouting.
The trade-off is handling. Long sprouts break easily, and a broken sprout is lost stored energy. If the seed is already sprouting, plant it carefully rather than trying to rub the shoots off. If you need to delay planting, move the tubers to a cooler, dark, frost-free place for a short time, but do not let them shrivel.
Decide whether to cut or plant whole tubers
Small seed potatoes can be planted whole. Larger ones can be cut into pieces to create more plants, but every piece must carry at least one healthy eye and enough stored food to support emergence. For a home garden, blocky pieces around golf-ball size are a useful visual target; avoid thin slivers, wedges with little flesh, and pieces that were torn rather than cleanly cut.
Use a clean, sharp knife and cut shortly before planting. The University of Maine recommends seed pieces in an approximate 1.5- to 2-ounce range and cautions against undersized pieces; its cutting and curing details are especially useful when handling a large amount of seed. Bigger is not automatically better: an oversized piece has more cut surface to heal and may waste energy on wound protection.
After cutting, place the pieces in a single layer in a dry, shaded, airy spot for about two days so the cut surface can callus. Do not wash the tubers first, and do not leave freshly cut pieces in a cold, wet trench. If your planting window is immediate or the soil is marginal, planting small whole tubers is often safer than making lots of vulnerable cut surfaces.
Gather tools and prepare the bed
You need a sharp knife if cutting, a hoe or shovel for trenches and hilling, a garden fork for harvesting, a measuring tool, and clean water. For containers, add a pot or grow bag with generous drainage holes and a lightweight potting mix; ordinary garden soil often compacts in a container and holds too much water.
Choose a site with full sun and good air movement. Potatoes perform best in loose, well-drained soil with organic matter, but avoid fresh manure, which can damage roots and add excess salts or nitrogen. A soil test is more useful than guessing at fertilizer, especially if the bed has produced potatoes, tomatoes, peppers, or eggplant recently.
Rotate potato-family crops to a different part of the garden when possible. The RHS grow-your-own potato guide recommends changing the planting area to reduce the buildup of soil problems. Rotation is not a guarantee against disease, but it lowers the chance that the same crop family is repeatedly exposed to a persistent problem.
Plant seed potatoes in garden rows
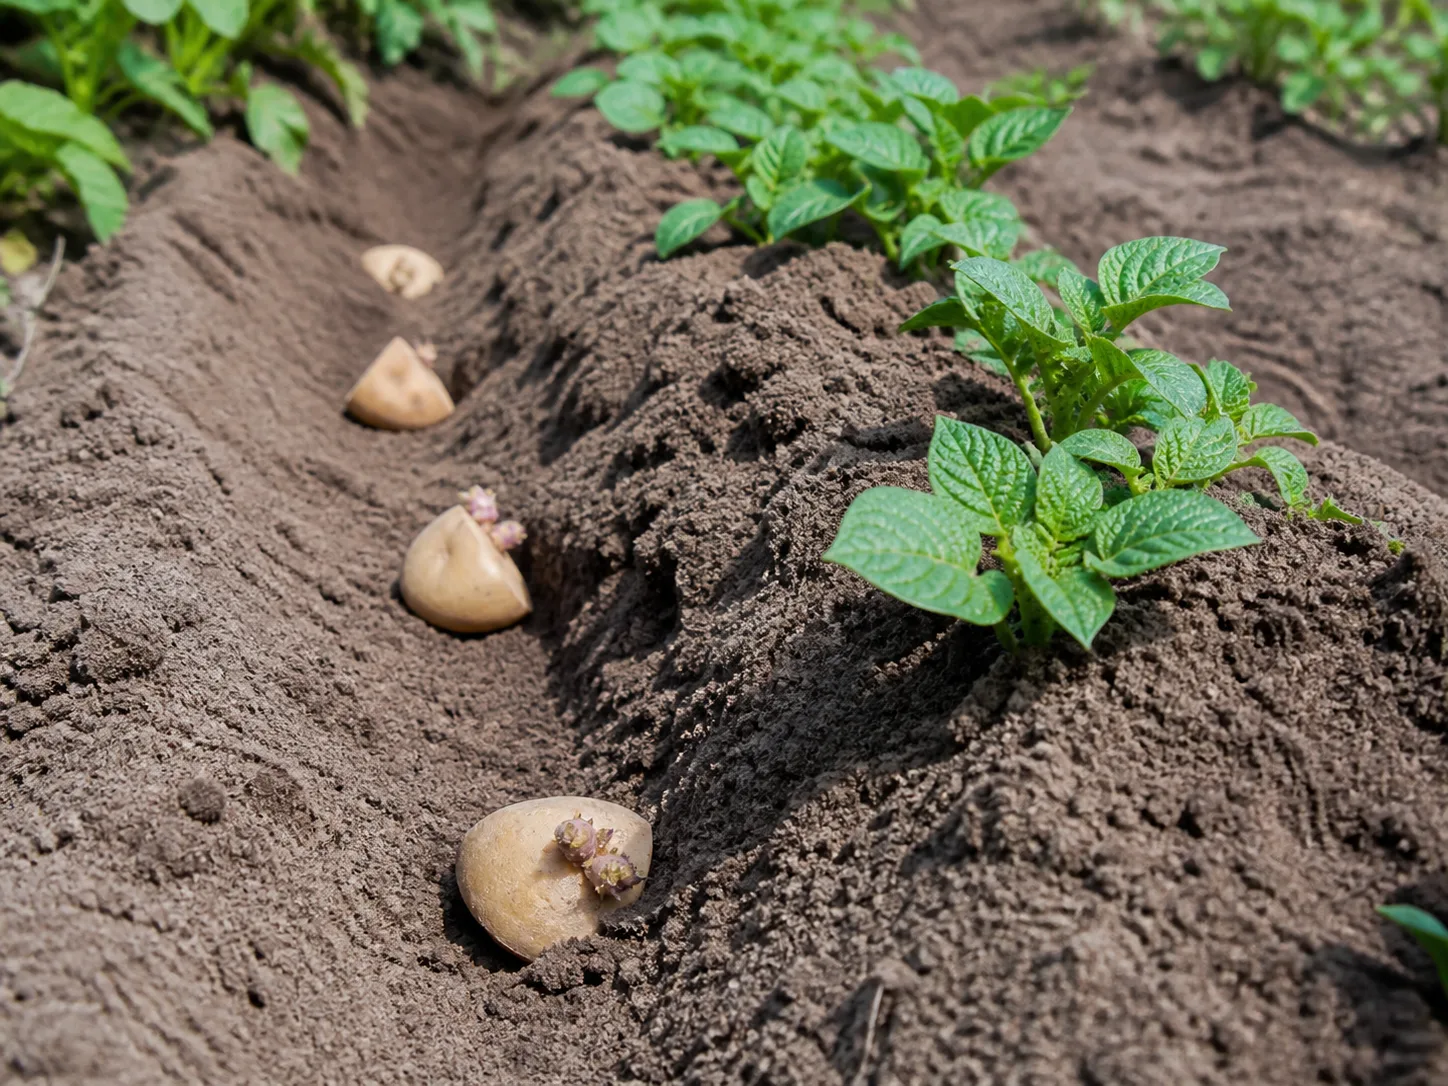
Dig a trench about 4 to 6 inches deep in loose soil, or make individual holes at the same depth. Set each seed piece with the eyes or sprouts facing up and the cut side down when that orientation is obvious. Cover with roughly 2 to 4 inches of soil at first rather than filling a deep trench to the top.
For a typical home planting, space pieces about 10 to 12 inches apart and leave 18 to 24 inches between rows. Early varieties can be closer; large maincrop plants need more room. The RHS uses a deeper 6-inch planting and wider spacing for many of its conditions, so treat these figures as a practical range rather than a rigid formula. Dense planting produces more stems competing for water and nutrients, while excessive spacing wastes bed area.
Water only enough to settle the soil if the bed is dry. Do not soak a cold planting just to make it feel finished. Shoots may take a few weeks to appear, especially in cool conditions; digging up a quiet seed piece too early can break the first roots and create the problem you were trying to diagnose.
Set depth, spacing, and orientation
Depth is a starting position, not a contest. Planting too shallow leaves new tubers close to light and makes green potatoes more likely; planting too deep in heavy, cold soil can delay or prevent emergence. Aim for enough soil above the seed piece to hold moisture and block light, then add more as the plant grows.
If a sprout is already present, keep it upright and cover it gently. If a piece has several eyes, spread those eyes across the top rather than placing every bud against the trench wall. A missing or broken eye does not doom the whole piece, but it may mean fewer stems and a smaller set of tubers.
Plant seed potatoes in pots and grow bags
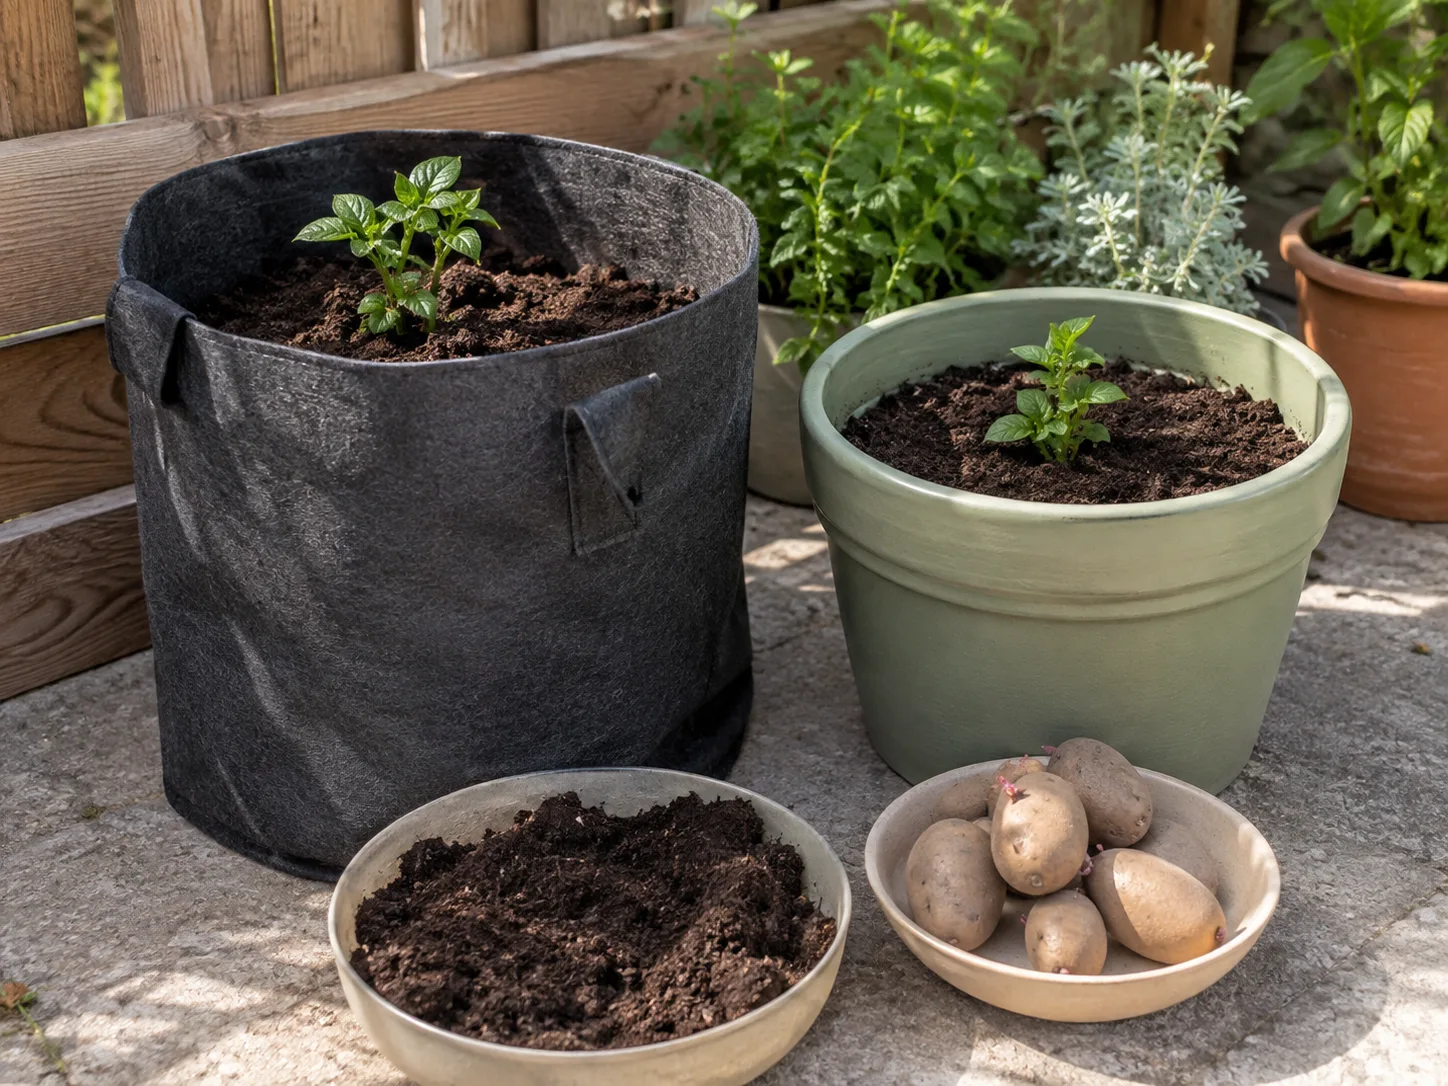
Containers are useful for patios, small gardens, poor native soil, or gardeners who want an easier harvest. Use a pot at least 12 inches wide and deep with drainage holes, or a sturdy grow bag with holes at the bottom. Early varieties are usually the easiest fit because they mature in less time and do not require a very tall column of mix.
Fill the container one-third to one-half full with a free-draining potting mix amended modestly with compost. Set one seed potato per roughly 12-inch pot, or follow the volume rule of about 2.5 to 3 gallons of growing medium per cut piece. Cover the tubers with 2 to 3 inches of mix, water lightly if the mix is dry, and keep the container in full sun.
As stems grow, add several inches of mix or clean straw at a time, leaving the top leaves exposed. This is container hilling. Keep adding material until the container is nearly full, then maintain even moisture. Container plants dry faster than in-ground rows, but watering until the mix stays saturated is just as damaging as letting it become bone dry.
Epic Gardening’s container-potato guide makes an important practical point: drainage holes matter more than a layer of rocks at the bottom. Rocks do not fix a poorly draining container and can leave a saturated zone above them. Elevate the pot if needed so water can exit freely.
Hill gradually to protect developing tubers
Hilling means drawing loose soil, compost, or mulch around the lower stems as the plant grows. Start when shoots are about 6 to 9 inches tall, adding a few inches while leaving the top leaves exposed. Repeat once or twice as the plant gains height; the final mound often reaches about 8 to 12 inches above the original bed surface.
Hilling does three jobs. It creates more dark, loose soil in which stolons can form tubers, protects shallow tubers from sunlight, and gives tender stems some frost protection. A potato exposed to light can turn green and accumulate glycoalkaloids; green tubers should not be eaten.
Do not bury the entire plant in one heavy operation, and do not scrape hard against the stems or roots. If your soil is compacted, use clean straw or a blend of soil and compost rather than making a dense wall. Hilling helps, but it cannot compensate for poor seed, waterlogged soil, a variety that is too late for your season, or severe disease.
Water and feed for steady growth
Keep the root zone consistently moist while plants are actively growing, especially when flower buds appear and tubers are sizing. Let the surface begin to dry, then water deeply enough to reach the root zone. In a container, water until some drains from the bottom, then check the mix again rather than following a fixed daily schedule.
Avoid the two extremes that cause the most trouble: repeated shallow sprinkles that leave the lower root zone dry, and constant saturation that starves roots of air. Uneven moisture can contribute to misshapen tubers, cracking, or hollow centers, while late-season overwatering encourages rot and makes harvest difficult.
Potatoes do not need an aggressive feeding program in fertile ground. If a soil test or weak growth indicates a nutrient need, use a vegetable fertilizer according to its label and avoid pushing excessive nitrogen, which can favor leaves over tubers. Container plants have less nutrient reserve and may need a balanced feed after several weeks, but mix quality and drainage come first.
Prevent frost, pests, and disease
Healthy seed and crop rotation are the first disease controls. Keep foliage as dry as practical, water at the soil surface in the morning, and remove severely diseased material rather than composting it unless your compost system reaches a reliable pathogen-killing temperature. If plants collapse early, do not assume they have simply matured; inspect stems, leaves, soil moisture, and tubers.
Potato beetles, slugs, wireworms, and blight pressure vary by region. Walk the planting every few days so you find chewed leaves, egg clusters, holes in tubers, or dark lesions early. Hand-pick manageable pests, use physical covers where appropriate, and choose varieties with useful disease resistance for your area. Pesticides are not a default step; any product must be legal for the crop and used exactly as its label directs.
Protect shoots from a late frost with a temporary cover or an extra layer of loose soil. Keep mounds intact after heavy rain, because exposed tubers can green quickly. If the bed stays wet, improve drainage for the next crop instead of adding more water or fertilizer to rescue the current one.
Harvest new potatoes for immediate eating
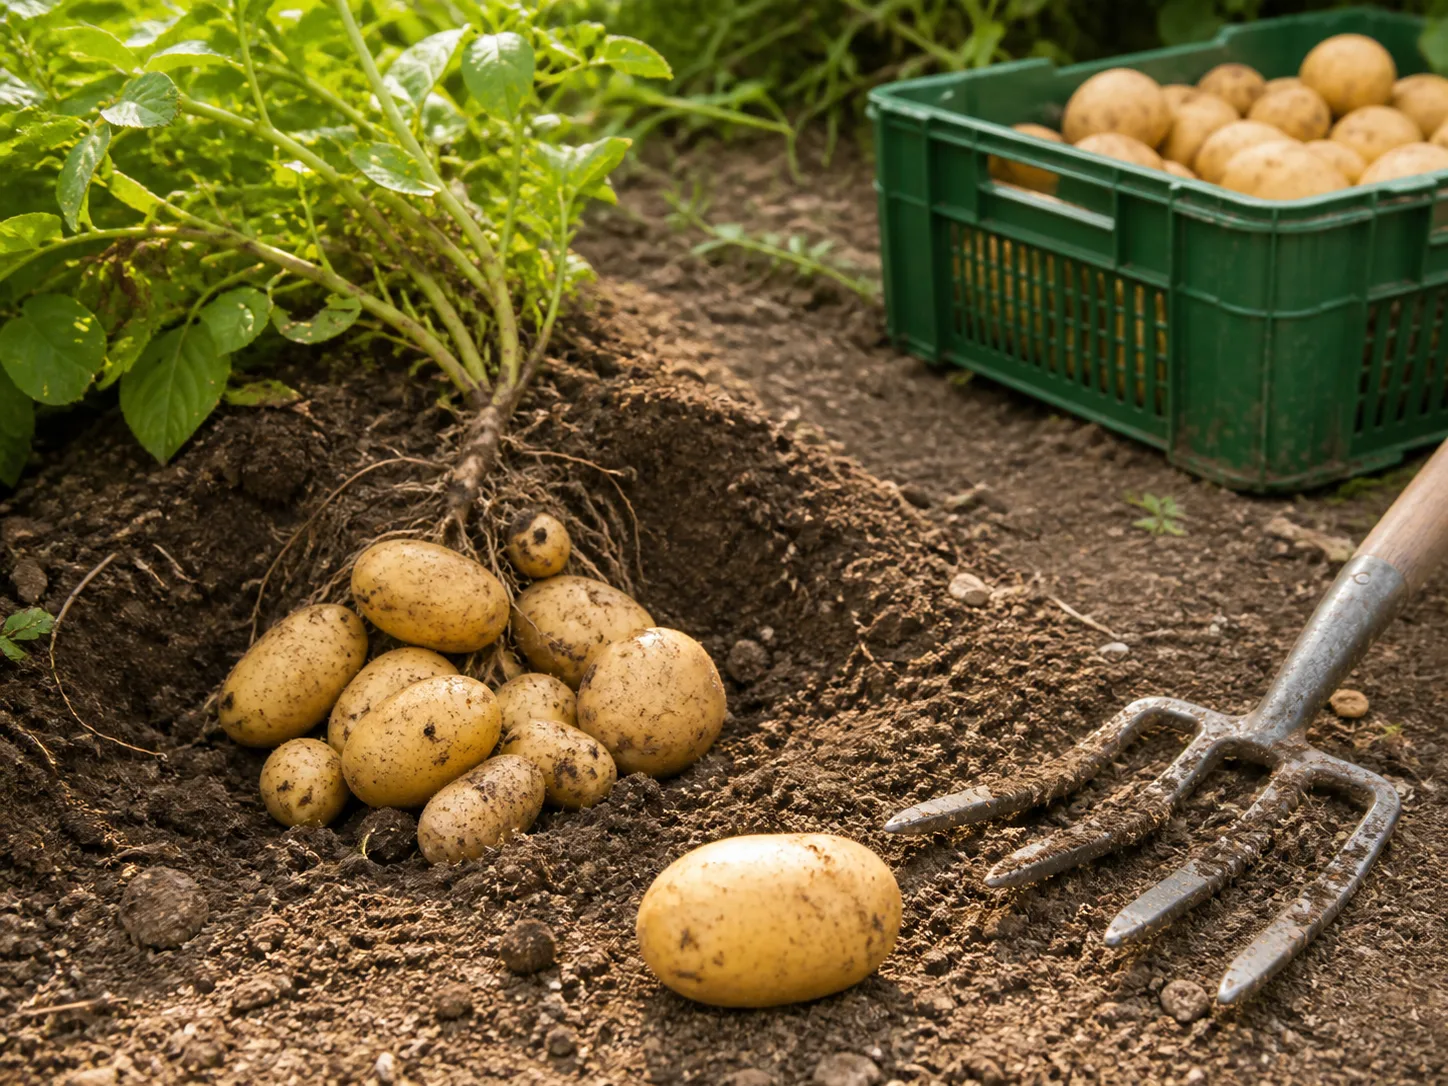
New potatoes are immature tubers harvested for fresh eating rather than long storage. Depending on variety and weather, you can begin checking after flowering starts or when the plants look established. Move soil aside gently near the edge of a plant, feel for a tuber of useful size, and replace the soil if you want the crop to continue sizing.
Harvesting a few tubers this way lets you sample the crop without lifting the whole plant. Use a hand fork or your fingers rather than stabbing blindly with a shovel. The thin skins of new potatoes are easily scraped, so cook them soon and handle them gently.
Flowering is a clue, not a guarantee. Some varieties flower lightly or not at all, and heat, drought, or disease can change the schedule. For a more reliable decision, combine the variety’s stated maturity range with the plant’s overall health and a careful test dig.
Harvest mature potatoes for curing and storage
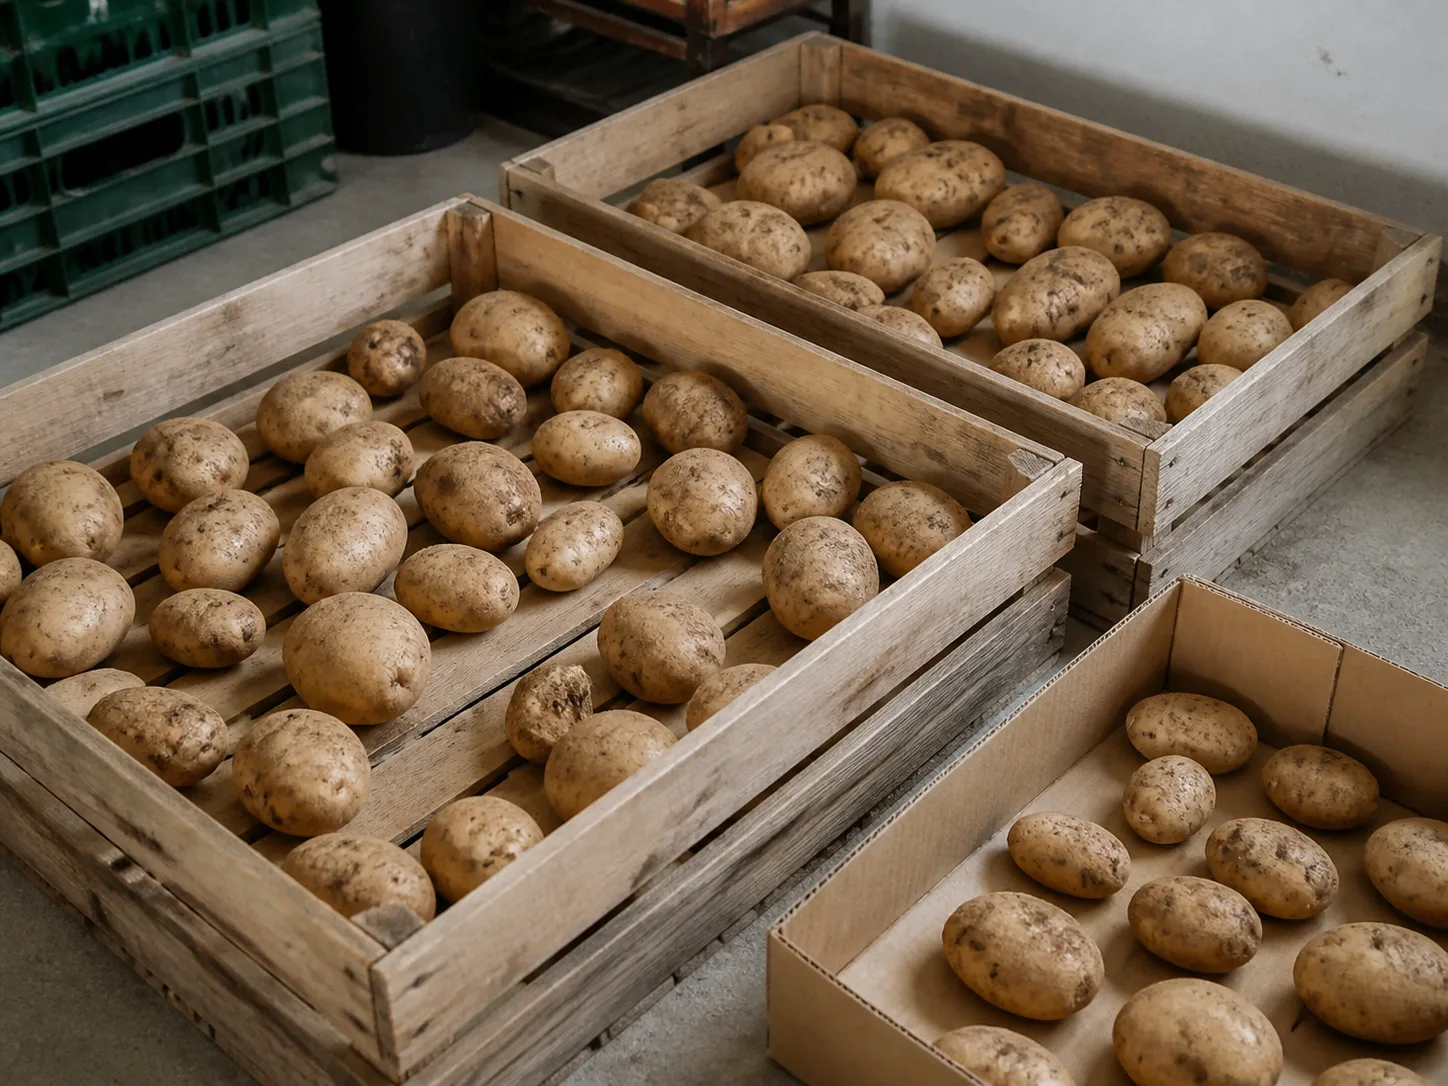
For storage potatoes, wait until the foliage yellows and dies back naturally, or until the variety reaches its expected maturity. The RHS potato-growing guidance recommends lifting maincrop potatoes after the tops have yellowed and allowing them to dry before storage. If the tops die suddenly well before the expected date, investigate disease, frost, drought, or waterlogged soil before treating it as maturity.
Stop routine watering as the plants finish, unless severe heat or drought would leave the crop stressed. Choose a dry day and loosen the soil with a garden fork well away from the base of the plant. Lift the mound from underneath, then search by hand for stragglers so you do not spear the tubers.
Leave soil on the potatoes while they dry; do not wash a storage crop. Cure sound tubers in a dark, dry, well-ventilated place for about 1 to 2 weeks, keeping them out of harsh sun. This lets the skin toughen and minor surface scuffs dry. Discard or use first any potato that is soft, cut, green, or visibly diseased.
Once cured, store only undamaged potatoes in darkness with airflow, such as a breathable sack, slatted crate, or open cardboard box. Check the crop every couple of weeks and remove any soft or rotting tuber. The RHS harvest and storage advice notes that maincrop potatoes can last for months under suitable conditions, but storage life depends on variety, temperature, humidity, curing, and bruising.
Troubleshoot a poor potato crop
No shoots: The seed may be dormant, the soil too cold, the piece too deep, or the piece rotten. Wait long enough for the variety and temperature, then gently inspect one edge plant. Next time, improve drainage, use healthy seed, and plant at the recommended depth.
Soft seed pieces: Cold, wet soil, damaged cuts, undersized pieces, or diseased stock are likely causes. Remove the failed pieces, let the bed dry if possible, and avoid replanting with questionable tubers. Utah State University Extension’s seed-handling guidance is a useful reference for the relationship between soil warmth and decay.
Many leaves but few potatoes: Excess nitrogen, crowded plants, drought during tuber set, insufficient light, or a late variety can all contribute. Do not keep adding fertilizer. Check moisture, confirm that hilling has kept tuber-forming stems dark, and allow enough time for the variety to mature.
Green potatoes: Light reached the tubers because the planting was too shallow, soil washed away, or the mound was not maintained. Do not eat green potatoes; cover exposed tubers promptly, and harvest heavily greened ones for disposal rather than trying to peel away the color.
Small, cracked, or misshapen tubers: Uneven watering, compacted soil, heat, crowding, or low fertility may be involved. Compare the problem’s pattern across the row: a whole bed affected by drought points to moisture management, while isolated damage may indicate pests or stones. A soil test can prevent guesswork before the next planting.
Foliage dies early: Look for black or brown lesions, insect damage, a damaged stem base, or soggy soil. Harvesting may still be possible if the tubers are sound, but a crop that collapses early is not automatically ready for storage. Keep questionable plants and tubers out of next year’s seed stock.
Conclusion
The reliable way to plant seed potatoes is to manage the start underground: use clean stock, wait for warm and workable soil, give each piece a healthy eye and enough stored energy, and keep the planting evenly moist without making it soggy. Plant 4 to 6 inches deep in rows, or start containers only partly full so you can hill as stems grow.
Choose early varieties for a short season or fresh new potatoes, and choose a suitable maincrop when you have time for a storage harvest. Hilling keeps developing tubers dark, careful watering prevents stress, and a dry, gentle harvest protects the crop’s storage life. If you record the variety, planting date, soil conditions, and harvest result, the next crop becomes a refinement of what you learned rather than another guess.



