12 Common Houseplant Problems: Causes and Fixes to Try
Yellow leaves, brown tips, drooping, spots, or sticky foliage? Match 12 houseplant symptoms to likely causes and safe first steps, then test what fits.
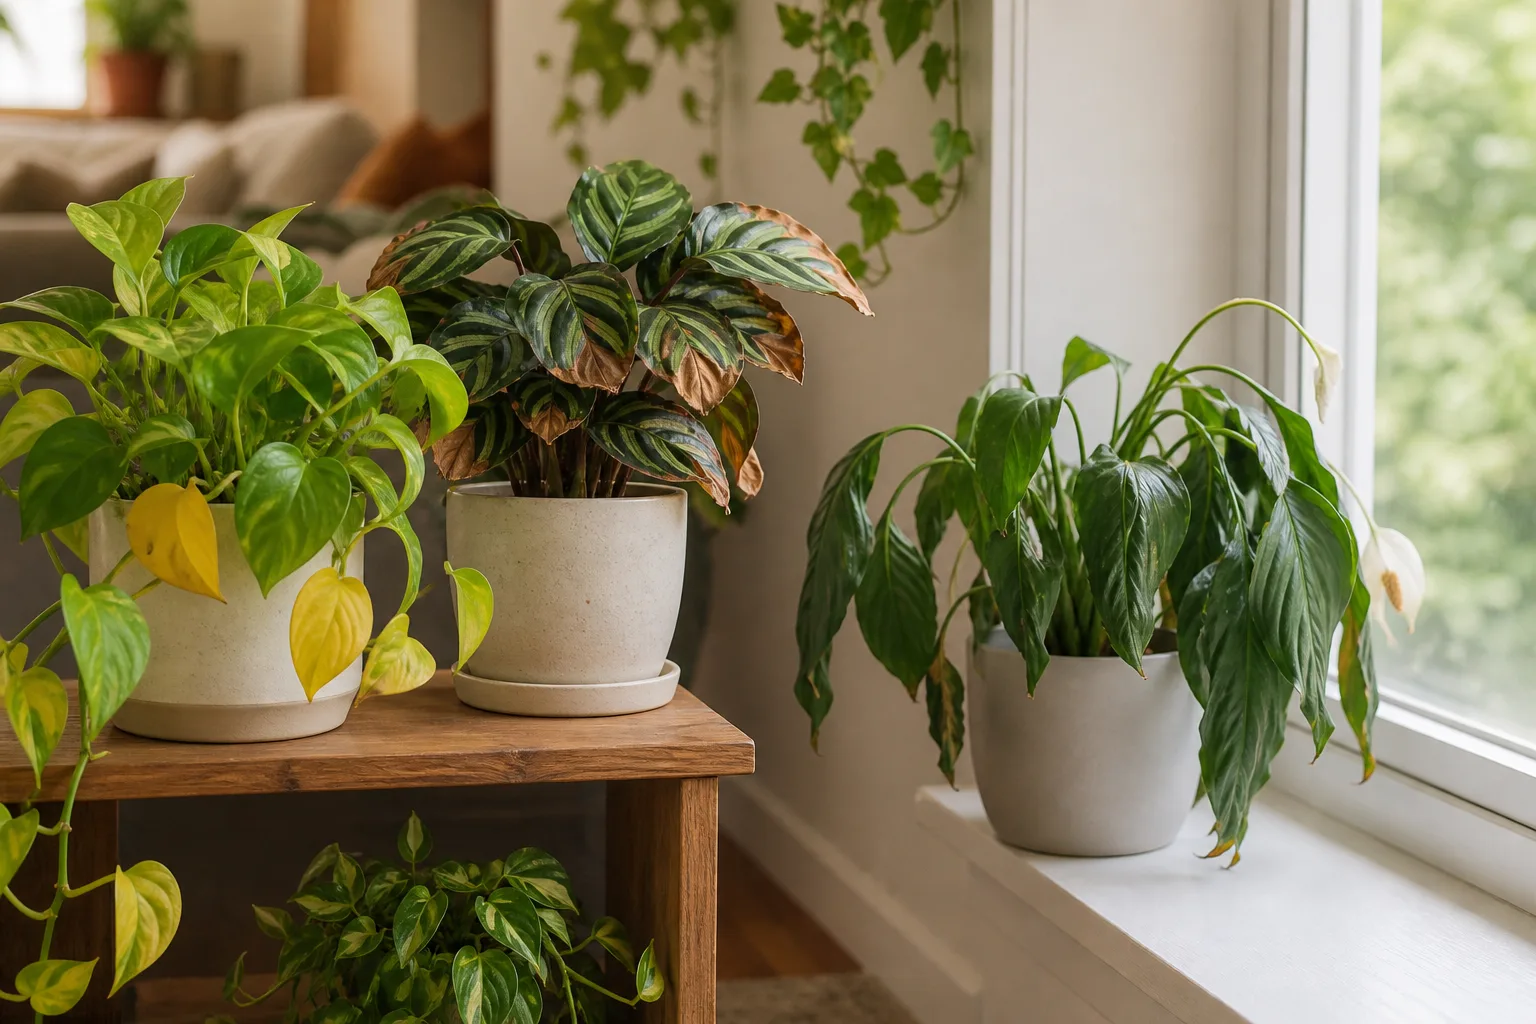
A yellow leaf, a curled edge, or a sudden droop can have more than one cause. The useful question is not only “What does this symptom mean?” but “What else should I see if that explanation is right?” A plant with dry soil and a light pot needs a different response from one that droops while its mix is wet.
Start by looking for a pattern across the whole plant. Note whether the damage is on old or new leaves, whether it affects one side or every stem, how quickly it is spreading, and what changed recently. The University of Florida’s houseplant diagnosis guidance makes the key point: yellowing and wilting are symptoms, not diagnoses. Moisture, roots, light, and pests need to be checked before choosing a treatment.
This guide covers 12 common problems and the best first check for each. If you need a fast visual scan, the houseplant symptom checker is a useful companion; here, the emphasis is on confirming likely causes and knowing when a stronger intervention is justified.
Start With Evidence, Not Another Dose of Water
Before you change care, take a quick baseline. Photograph the plant from the same angle you can use again, note which leaves are affected, and check the pot rather than relying on a watering calendar. Many houseplant problems come from water, light, roots, or indoor conditions, while pests and disease call for different checks; UC IPM’s houseplant problem guide groups symptoms by these competing causes.
Use the sequence below to avoid treating a clue as proof:
| First clue | Check next | What it can help distinguish |
|---|---|---|
| One old lower leaf fading | New growth and the rest of the plant | Normal aging versus a spreading problem |
| Several limp or yellow leaves | Soil moisture below the surface and pot weight | Dry roots versus roots short of oxygen |
| A spot or patch | Whether it is dry, wet-looking, raised, or expanding | Scorch or injury versus possible leaf disease |
| Sticky film or speckling | Undersides, leaf joints, and stems | Sap-feeding insects or mites |
| New growth distorted | Pests, light, and root condition | Feeding damage versus a broader care problem |
These clues narrow the next check; none is conclusive alone. A symptom appearing on one leaf after a move is different from the same mark appearing on fresh leaves across the plant.
Check soil moisture and roots only when the clues point there
Push a finger or clean wooden skewer into the potting mix a little below the surface, then lift the container. A dry mix and unusually light pot support underwatering; a heavy pot that remains wet while the plant wilts raises concern about waterlogging or damaged roots. Check that the inner nursery pot has drainage and that a decorative outer pot or saucer is not holding runoff against it.
Do not unpot a plant just because one old leaf yellowed. If several leaves decline while the mix stays wet, the stem base softens, or there is a sour smell, inspect the roots gently. Healthy roots are generally firm; roots that are brown or black, soft, or losing their outer layer suggest root damage. UF/IFAS notes that waterlogged roots may smell unpleasant because low-oxygen conditions support bacteria, which does not by itself prove a contagious disease. The appearance of the roots and the history of wet soil matter more than smell alone.
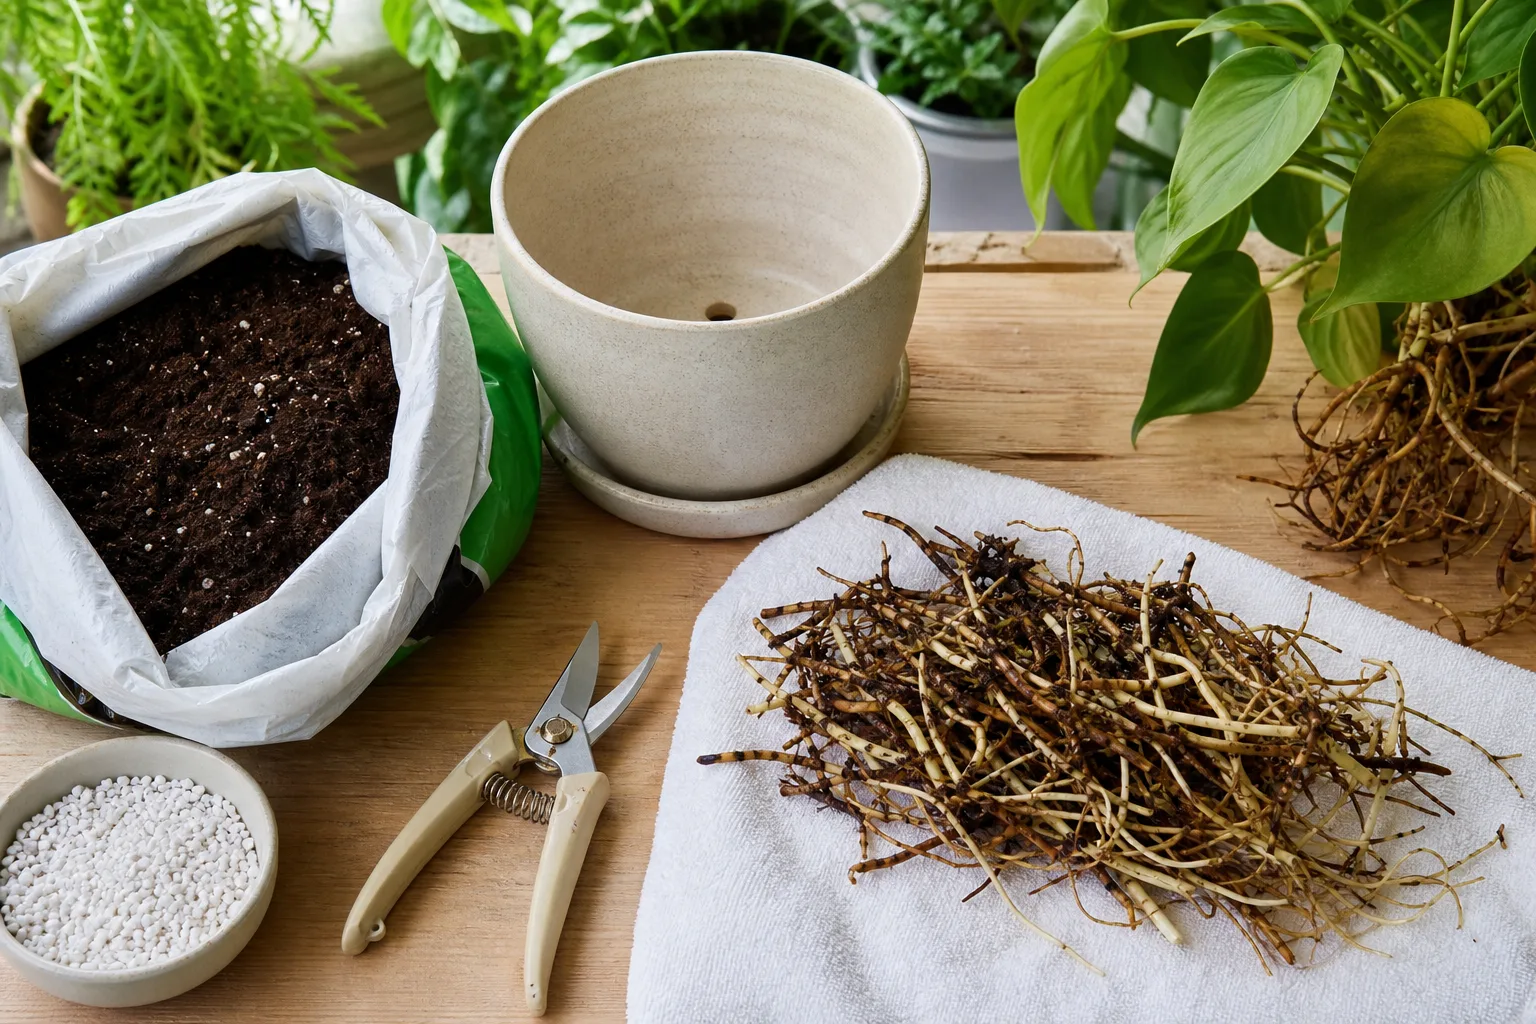
Read the pattern, leaf age, and recent changes
Compare old leaves with the newest ones. A single oldest leaf fading slowly while new growth stays normal can be ordinary leaf turnover; pale or distorted new leaves deserve more attention. Also check the side of the plant facing a window, the distance from glass, nearby vents or radiators, and whether the plant was recently moved, repotted, fertilized, or brought home.
Look under leaves and around stem joints before concluding that a curled, yellow, or misshapen leaf is a watering problem. Spider mites often leave pale stippling and sometimes fine webbing; thrips can leave silvery scars and black specks; scale, mealybugs, and aphids can leave sticky honeydew. If you find a pest or spreading leaf lesions, isolate the plant from nearby houseplants while you identify the problem.
12 Houseplant Problems and the First Clue to Check
A leaf symptom is most useful when paired with a second clue: soil condition, where on the plant it appears, or what has changed. Work through the closest match, then test one likely cause before changing several parts of the routine.
1. Curled leaves
Leaves may curl inward to limit water loss, but the shape alone cannot tell you whether the plant is dry or overwatered. Check the mix and the texture of the leaf: dry soil with crisp edges points toward thirst or heat, while yellowing, soft leaves, and persistently wet mix point toward root stress. Distortion concentrated on fresh tips also calls for a close pest check.
If the plant is dry, water the root ball thoroughly and let excess drain. If the mix is wet, do not add more water; remove standing water and assess drainage. Move a plant away from a hot pane, heater, or strong draft only when its position matches the pattern, and make light changes gradually. Curling can also come from aphids or other sap-feeders, so inspect new growth before treating it as a watering issue.
2. Yellowing leaves
Yellowing often reflects stress, but a single lower leaf does not automatically mean the plant is failing. If the oldest leaf yellows one at a time and stems and new growth remain firm and green, normal aging is plausible; Epic Gardening’s houseplant-care overview makes the same distinction between age-related leaf loss and a care problem. Multiple soft yellow leaves on a heavy, wet pot shift suspicion toward overwatering or poor drainage; yellowing with a light pot and dry mix makes underwatering more likely.
Yellowing on new leaves, yellow between green veins, or a whole plant turning pale can involve light, nutrients, root damage, or pests. Do not add fertilizer as a diagnostic experiment: weak or damaged roots may be unable to use it, and excess fertilizer can create salt injury. First check soil, drainage, leaf age, and the undersides of leaves. If the cause is not clear and the problem is progressing, Clemson’s houseplant disease and disorder guidance is a useful reference for comparing patterns.
3. Brown tips and edges
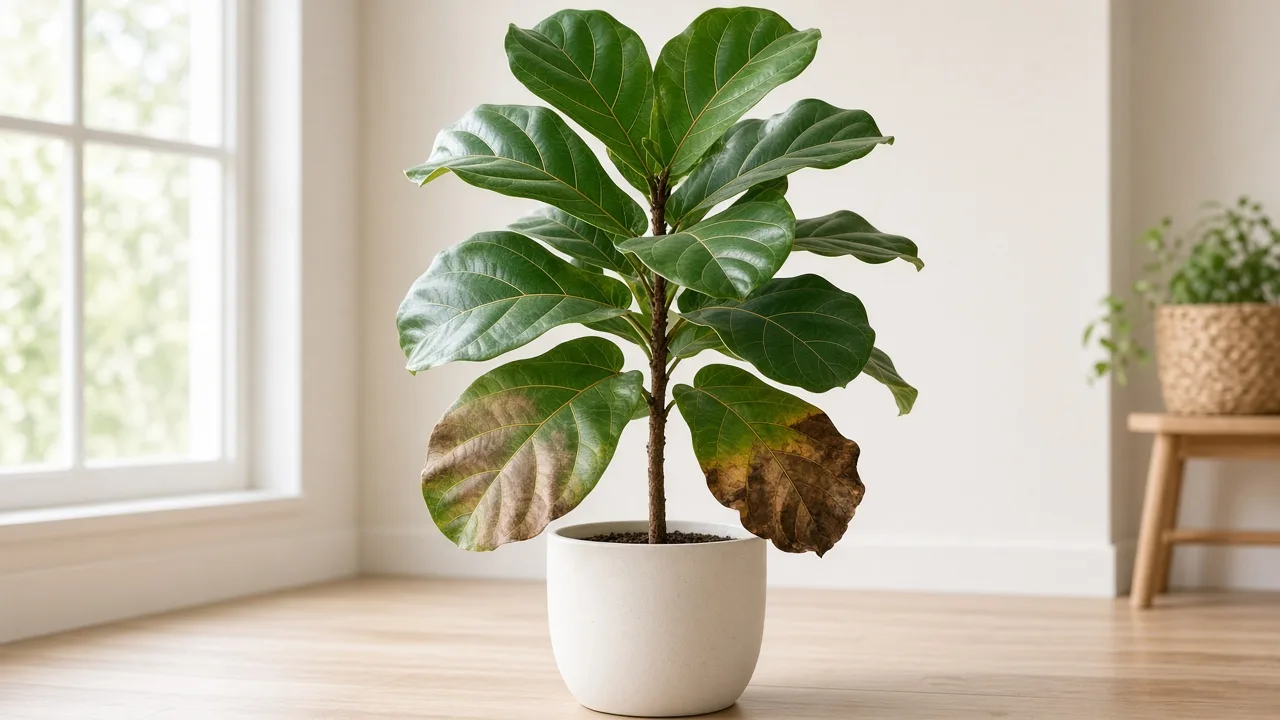
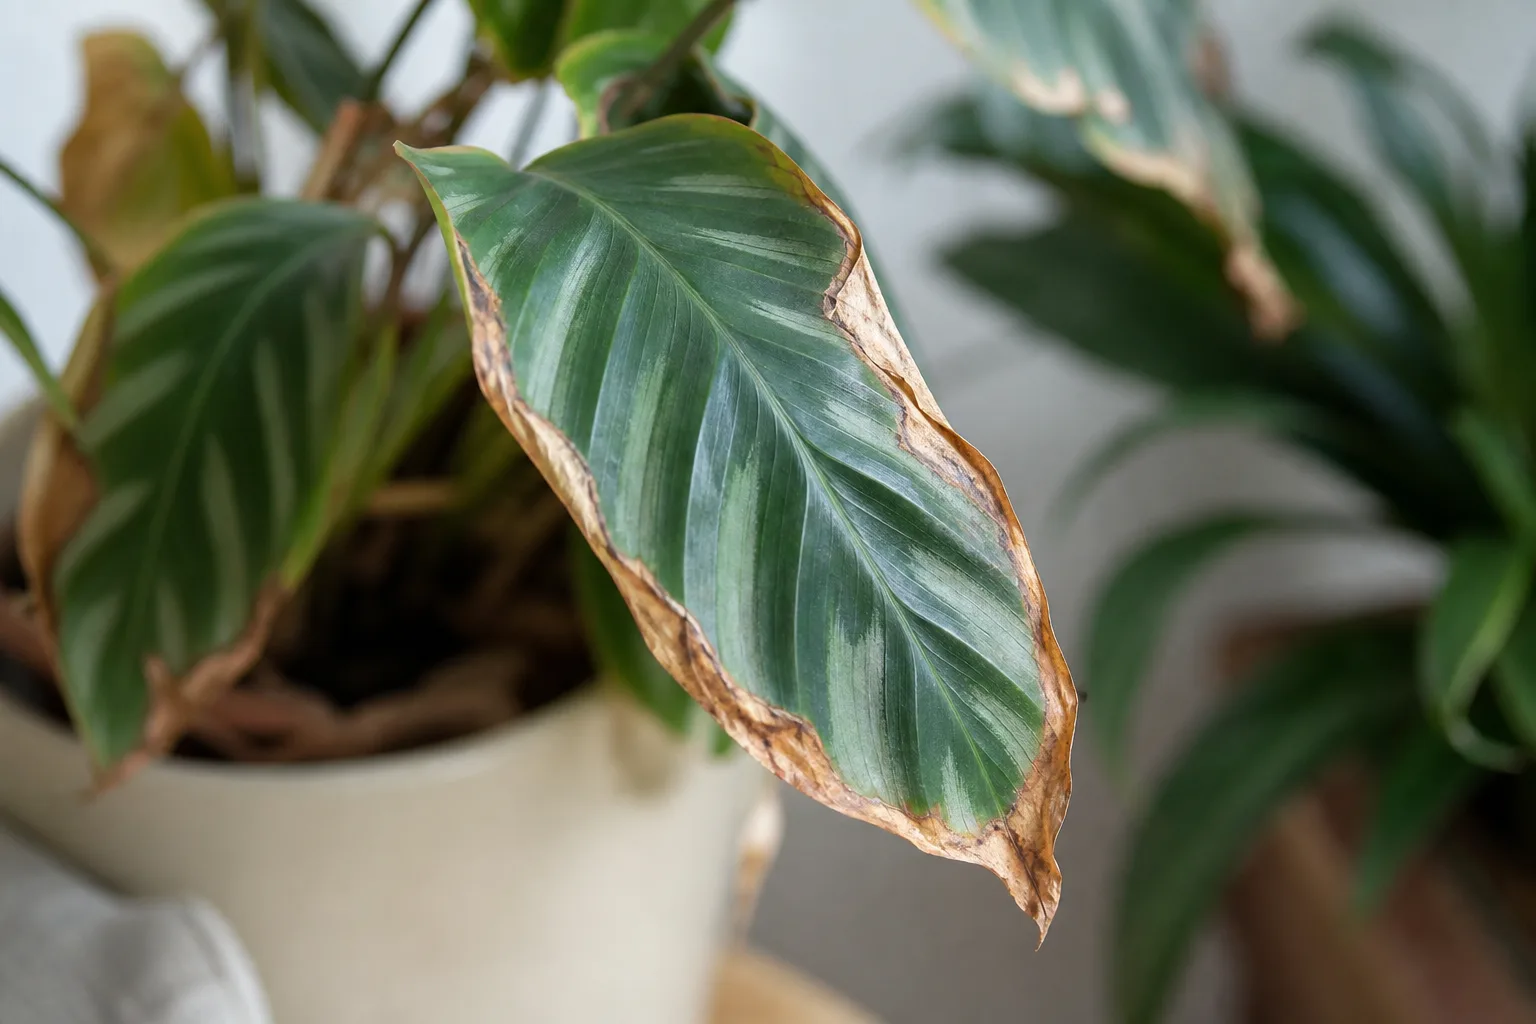
Crispy brown tips can follow uneven watering, dry air, fertilizer salts, water-quality sensitivity, direct heat, or root injury. UC IPM lists several of these causes together, so the margin by itself does not justify adding humidity or fertilizer. Check for a white crust on the mix or pot rim, review recent feeding, and consider whether brown areas face a hot window or vent. The Connecticut Agricultural Experiment Station’s houseplant guidance notes that soluble-salt injury can look like root decline, so a crust is a clue to review feeding and water quality, not a reason to apply more fertilizer.
Keep watering matched to the plant and its current light, rather than repeatedly soaking it to chase old damage. If the root zone dries hard between waterings, adjust the timing; if salts are visible, pause fertilizer and flush only if the pot drains freely. Brown tissue will not turn green again. Houseplant Journal’s example of brown, crispy Monstera tips shows why an occasional old blemish can remain even when the plant is growing well; if you trim a tip, leave a narrow strip of brown instead of cutting into green tissue.
4. Wilting or drooping leaves
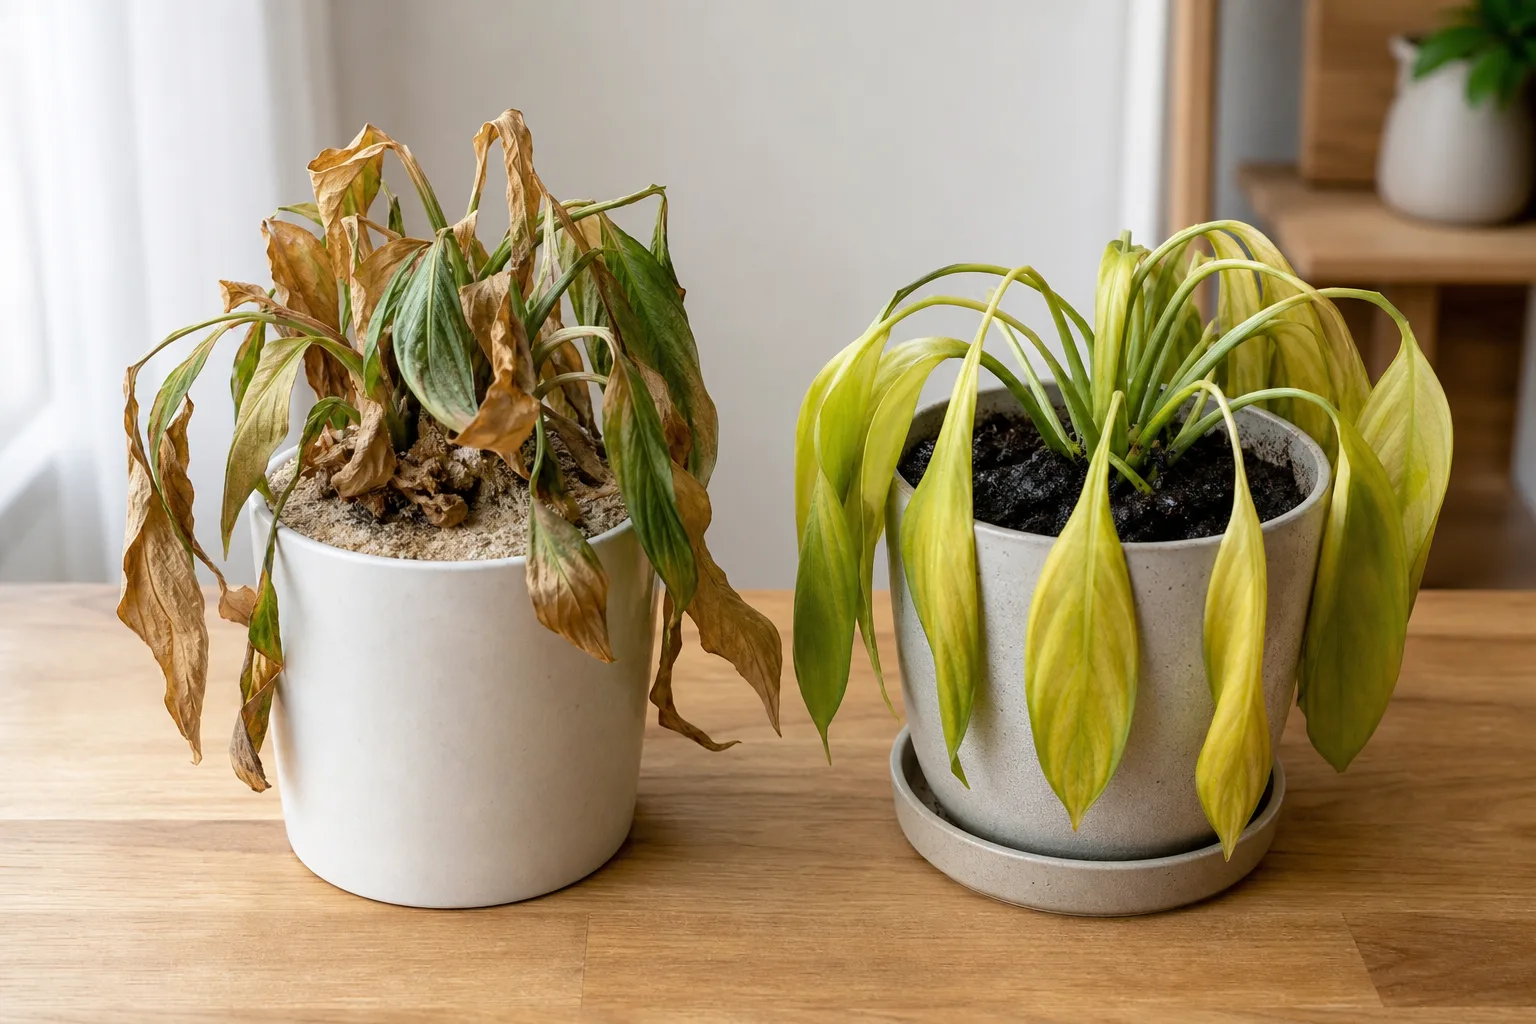
Drooping happens when leaves cannot hold enough water, but roots can lose that ability in dry soil or in saturated soil with too little oxygen. Check the pot weight and moisture below the surface before watering. Dry mix, a light pot, and leaves that perk up after a proper soak support underwatering; wet mix, soft stems, or continuing wilt on a heavy pot point toward root trouble.
If the plant is dry, water slowly until the entire root ball is moist and let it drain. If it is wet, empty the saucer or cachepot and pause watering. Inspect roots if the wilt continues or the base is soft. Heat, a recent move, or transplant shock can also cause temporary droop; in that case, hold the plant in stable conditions rather than repeatedly moving or repotting it.
The difference between a thirsty plant and a waterlogged one is easier to see side by side than from leaf posture alone:
5. Sticky leaves
A clear, shiny film on foliage is often honeydew, a sugary waste product made by sap-feeding insects. Aphids, soft scale, mealybugs, and whiteflies are common suspects; hard scale covers and small insects can be difficult to notice until the leaves feel sticky. Check the undersides, veins, leaf axils, and stems, and look for ants or dark sooty growth.
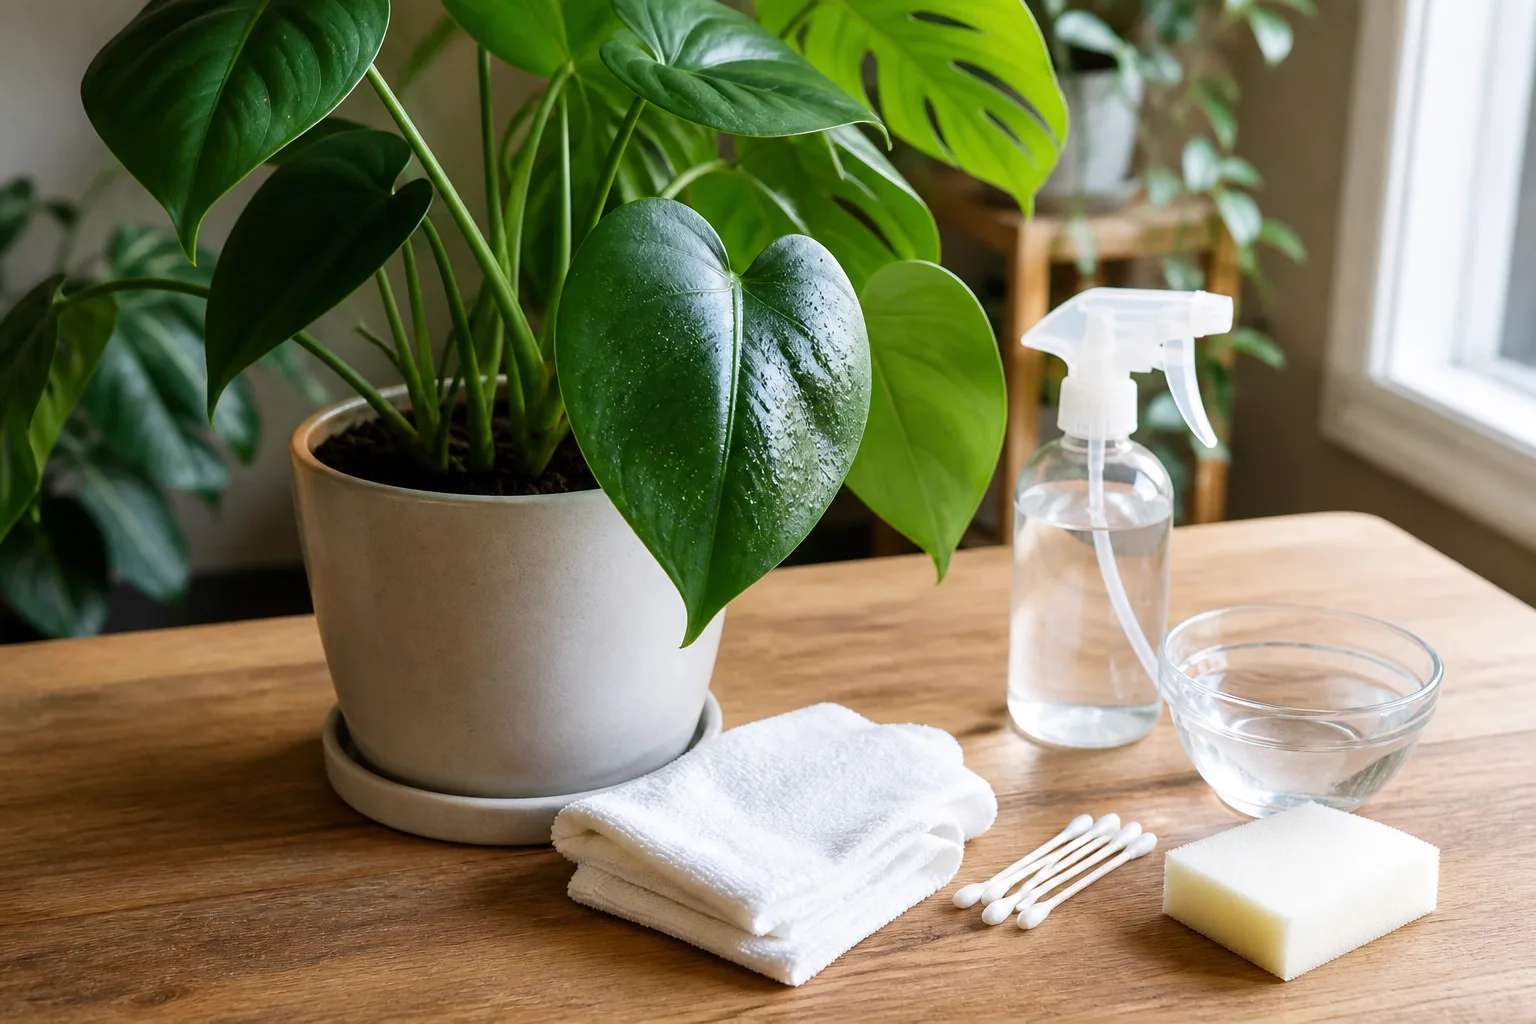
Isolate the plant, rinse or wipe the leaves, and identify the pest before choosing any treatment. A wash can remove exposed insects, but it may not reach protected scale or eggs, so recheck new growth and leaf joints over the next couple of weeks. If water alone is not enough, UC IPM recommends using only a product labeled for indoor use on the plant and pest, following its label; do not spray an unidentified substance or assume a home remedy is harmless.
6. Wrinkled or puckered leaves
Wrinkles can develop when a plant loses water faster than its roots replace it, but the clue is stronger in thick-leaved plants such as hoyas or succulents, where leaves may become visibly deflated. Check whether the mix is dry through the root zone and whether water is soaking in evenly. If dry soil pulls away from the pot wall or sheds water down the sides, the root ball may need slow rewetting.
Wrinkling with wet soil is not a reason to water again. Inspect roots and drainage instead, and look for fine stippling, webbing, or distorted new growth that may point to mites or other pests. Low humidity can contribute for sensitive tropical plants, but first confirm that the plant is not dry, waterlogged, or infested. Change one condition at a time and watch new leaves; old creases may remain.
7. Brown, black, or water-soaked spots
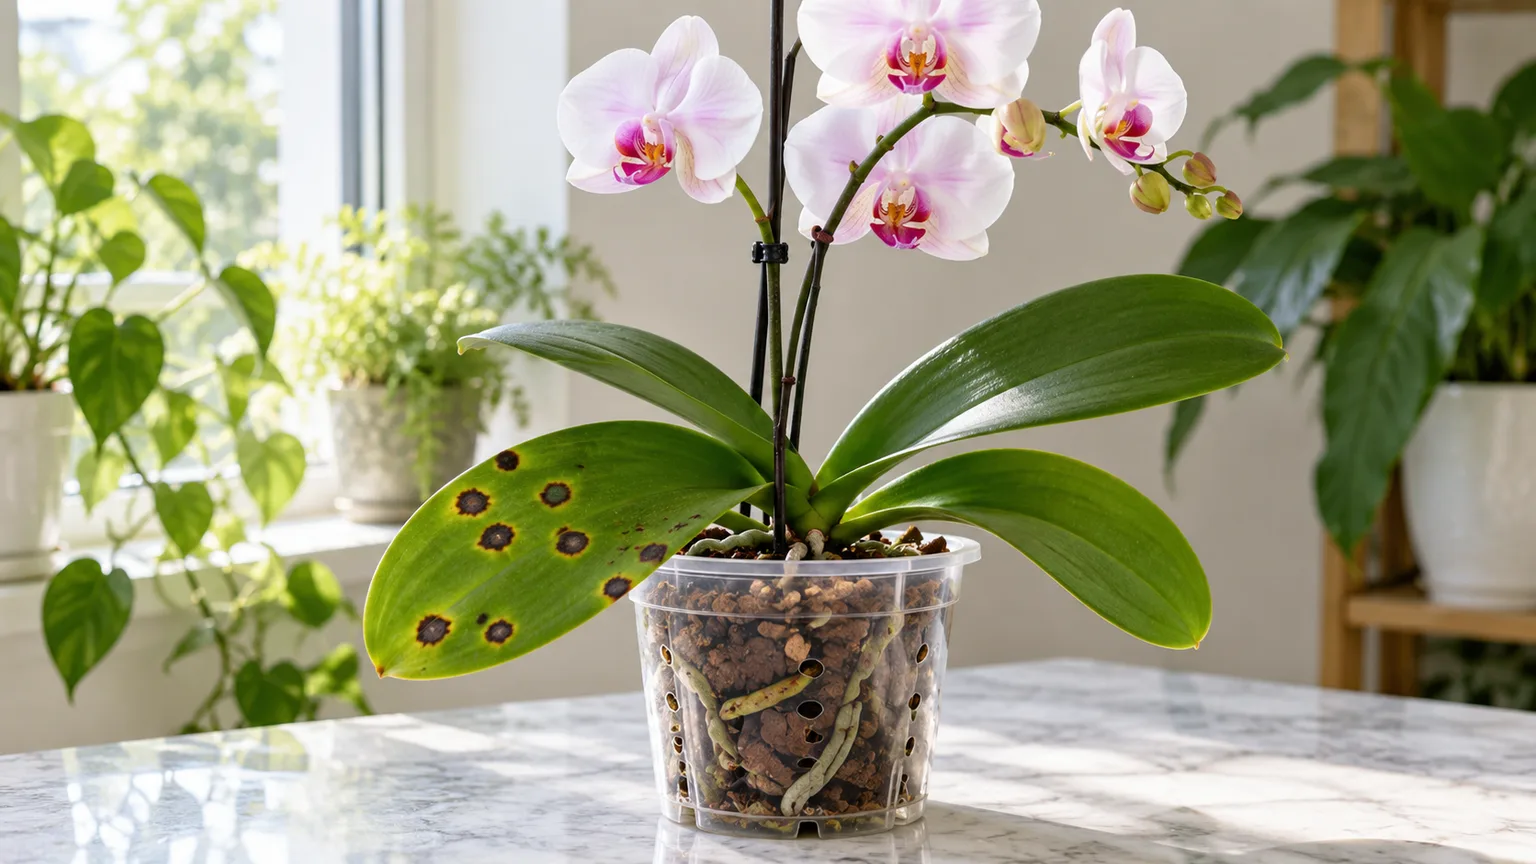
A dry, bleached patch on the window-facing side may be sun scorch, while a soft, dark, water-soaked mark or a spot with a spreading yellow edge deserves closer attention. Fungal and bacterial leaf spots can look similar to physical damage, and they cannot be identified reliably from color alone. The University of Florida’s plant pathology guidance notes that many houseplant issues are environmental, while disease symptoms can include wet-looking lesions or expanding, target-like spots.
Mark the edge of a suspicious spot or photograph it so you can tell whether it is expanding. If several new lesions appear, isolate the plant, avoid splashing its leaves, and remove badly affected tissue with clean tools. Improve airflow and allow foliage to dry promptly after watering. Do not apply a fungicide or insecticide until you have a plausible diagnosis and a product label that covers that plant and problem.
8. Faded or bleached leaves
Pale leaves may result from insufficient light, sudden exposure to stronger sun, root stress, or nutrient uptake problems. A washed-out plant with stretched stems and smaller leaves is more consistent with too little usable light; a bleached patch on the side facing a window suggests scorch. Stable cream or yellow variegation that follows the leaf’s normal pattern is not the same as fading across previously green tissue.
Review the plant’s position and any recent move before feeding it. Increase light gradually if stems are stretched and growth is weak, or filter direct afternoon sun if damage is localized to the window side. When pale new growth appears despite suitable light and healthy roots, nutrient or pH issues become more plausible and may require testing rather than a random dose of fertilizer.
9. White powder or mold
White marks on a leaf and fuzzy growth on the soil are different problems. Powdery mildew forms irregular white or gray patches on foliage; mineral residue is often a more even, crusty deposit, while webbing or cottony flecks may indicate pests. Powdery mildew is possible on some indoor plants, but do not label every white mark a fungal disease.
A surface layer of white mold on potting mix can be saprophytic fungi feeding on organic matter, not a root pathogen. Epic Gardening’s horticulture-reviewed explanation of white mold on houseplant soil describes it as a clue to conditions such as persistent surface moisture, not proof that roots are infected. Let the surface dry as the plant’s needs allow, improve airflow, and check drainage. If the mold is on leaves, isolate the plant if it is spreading and remove affected tissue; a soil-surface fungus and a leaf disease should not receive the same treatment.
10. Ragged or chewed leaves
Irregular holes or missing edges can come from a pet, a person brushing past the plant, or a chewing pest that entered with a plant moved outdoors. Examine fresh damage and both sides of nearby leaves; existing holes will not close, so the useful clue is whether new ones appear. Fine stippling, silvery scarring, sticky residue, or webbing suggests sap-feeding pests rather than chewing.
Move the plant out of reach if a pet is investigating it, and inspect the soil surface, stems, and leaf undersides after dark if chewing continues. Remove only leaves that are mostly damaged or decaying. Avoid broad pesticide use indoors when you have not identified the pest; a plant may be scratched or chewed by something in the home, not by an insect that needs spraying.
11. Small or misshapen new leaves
A plant producing progressively smaller leaves may be short on light, root-restricted, or stressed by poor drainage. A leaf that opens twisted, puckered, or scarred shifts attention toward thrips, mites, or other feeding damage, especially when distortion repeats on successive new leaves. Look for insects, dark specks, silver patches, or stippling before assuming the plant needs fertilizer.
Check root restriction only if the plant dries unusually fast, roots circle the pot, or growth has stalled after a long period in the same container. Repot into a pot only modestly larger when the root system actually fills the old one; a much larger pot can leave excess mix wet for too long. For a plant with healthy roots and no pests, compare current light with the plant’s needs and wait for the next leaf to judge whether the correction helped.
12. Leggy or stalled growth
Long gaps between leaves, thin stems leaning toward a window, or a plant that has stopped making new growth often point to inadequate light. But growth naturally slows when days are short, temperatures change, or a plant is dormant, and some species are naturally open or trailing. Compare the newest growth with the plant’s own earlier shape before calling it a problem.
If stems stretch toward a window, move the plant closer to suitable light in stages; do not push a shade-adapted plant into hot direct sun. Check that pests, compacted mix, and root restriction are not limiting growth. Fertilizer cannot substitute for light or healthy roots, and feeding during a slow-growth period may add salts without solving the cause. Judge the result by compactness and size of new leaves, not by old stretched stems returning to their former shape.
Stabilize the Plant Without Making the Diagnosis Harder
Once one cause is more likely than the others, make the smallest change that addresses it. Correct a dry root ball with a thorough drink, remove standing water from a wet one, filter a harsh beam of sun, or isolate a plant with visible pests or expanding lesions. Do not water, fertilize, repot, prune, and relocate on the same day unless an immediate problem such as a broken stem or standing water makes that necessary.
Use a short observation window. Take another photo after several days for fast-changing wilt or spots, and compare the next new leaf for slower problems such as low light or root restriction. Existing brown areas, holes, and yellow leaves usually stay damaged; success means the decline stops and later growth looks healthier. Madison Moulton’s practical houseplant-care guidance for Epic Gardening similarly cautions against repeatedly changing care before you can tell which adjustment helped.
A simple log can make an ambiguous case easier to judge. Record the date, affected leaves, soil feel below the surface, pot weight, last watering, recent feeding, and any change in light or temperature. Take a photo from the same angle every few days; old marks may persist even when no new ones appear. If spots or distortion continue on fresh growth, photograph both sides of the leaf and the whole plant. When you ask a local extension office, plant clinic, or knowledgeable nursery for help, include the plant name if known and its watering and light history. Those details let someone compare likely causes without guessing from a single damaged leaf.
For suspected insects, keep the plant separated and recheck it every few days; treatment may need to be repeated according to the product label and the pest’s life cycle. For disease-like lesions, keep leaves dry, remove affected tissue with clean tools, and ask a local extension or plant diagnostic service to identify the problem if new spots keep appearing. If most roots are soft, the stem base is collapsing, or an infestation persists despite careful, correctly labeled treatment, it may be kinder and safer for nearby plants to discard the plant.
Conclusion
The same leaf symptom can come from different problems, so the best fix starts with a confirming clue. Check soil moisture and pot weight for wilt, compare old and new leaves for yellowing or distortion, and inspect leaf undersides when foliage is sticky or speckled. Reserve root inspection, repotting, fertilizer, and sprays for cases where the pattern gives you a reason to use them.
Make one measured change, then judge recovery by what the plant does next. A damaged leaf may never look normal again, but healthy new growth and a symptom that stops spreading are better evidence that you found the right cause.