When and How to Harvest Chives for Better Flavor
Learn when chives are ready, where to cut for regrowth, how to harvest flowers, and the best ways to refrigerate or freeze fresh chives.
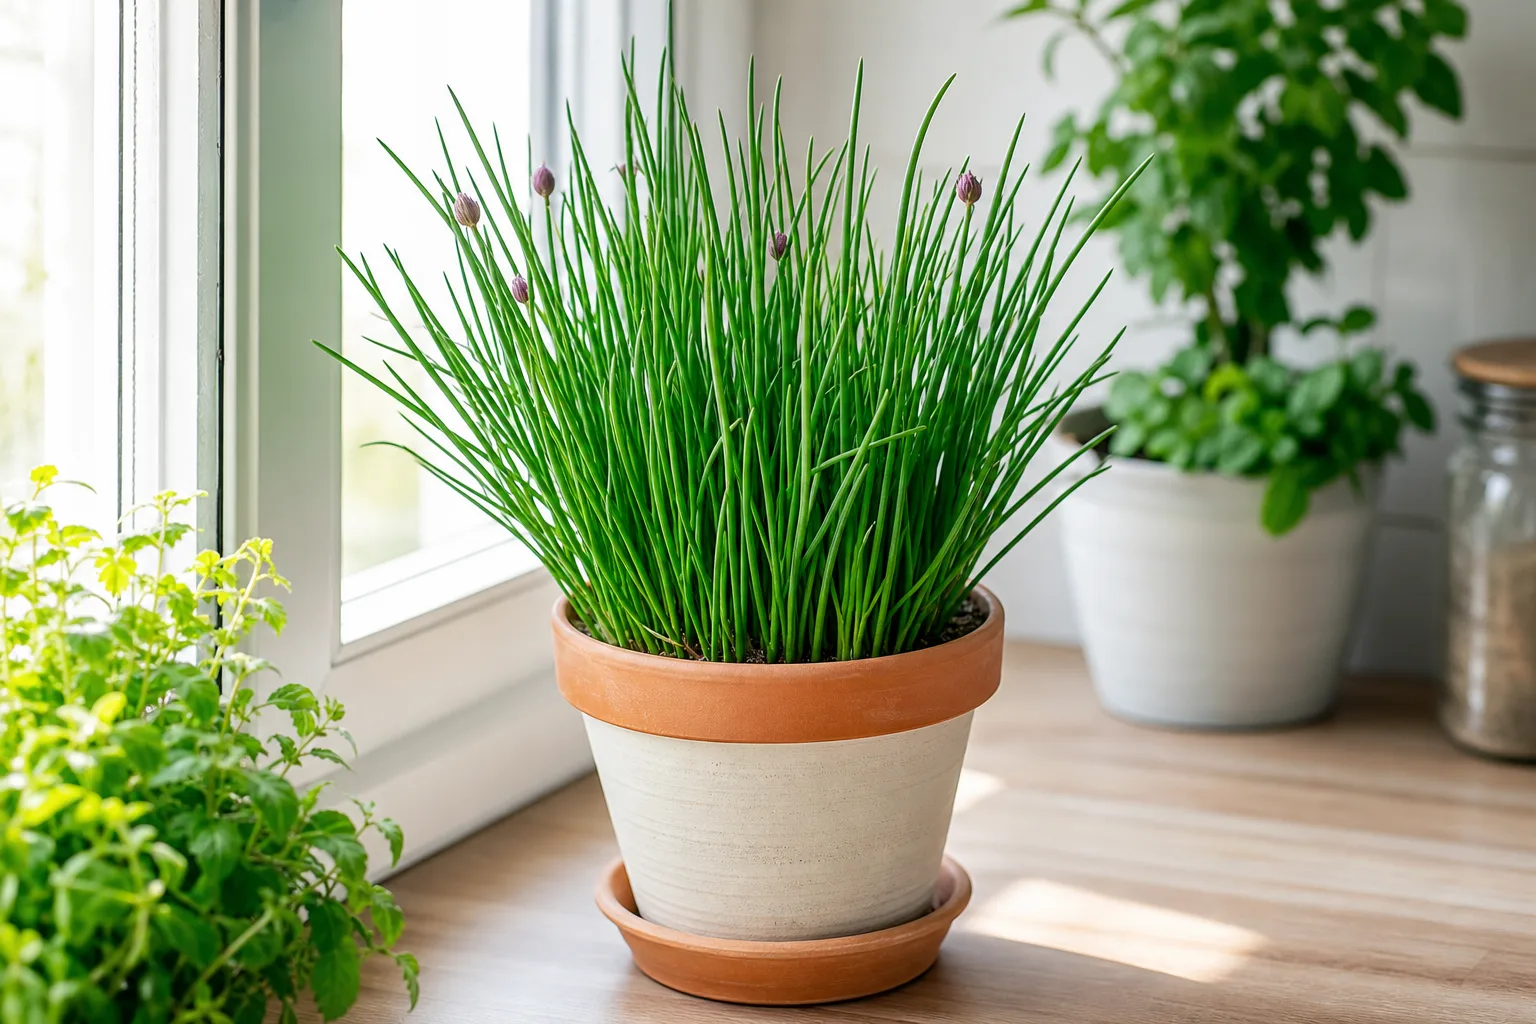
Chives are ready to harvest when they have made a sturdy, useful clump of upright green blades—not because a calendar says they must be picked. For most established plants, that means cutting a few leaves when they are long enough to use, or shearing the clump when you need a larger batch. The cut should be clean and close to the soil without slicing into the crown or pulling the bulbs.
The simplest repeat-harvest method is to use sharp scissors, gather only what you need, and cut from the outside of the clump inward. Leave the small center blades in place. Harvest on a cool, dry morning after dew has lifted, then chill or use the leaves promptly. This protects texture and gives the plant a functioning growing point for its next flush.
Chives (Allium schoenoprasum) are perennial members of the onion family. Garlic chives (Allium tuberosum) behave similarly but have flatter leaves and a stronger garlic note. Both can be harvested repeatedly, although growth slows in heat, during drought, and as the plant enters winter dormancy. A good harvest respects those limits instead of treating the clump as an endlessly replenishing bundle.
The short answer: cut healthy blades, not the crown
Start harvesting when the leaves are tall enough to handle without tearing and the clump is actively producing new growth. Six inches is a useful starting point for many plants, but it is not a pass-or-fail measurement. A vigorous plant can be picked a little earlier for tender leaves; a small transplant should be allowed to establish more foliage before a substantial cut.
Cut the leaves about one-half to one inch above the soil surface. This leaves the bulb and crown below ground while removing old or usable foliage. Do not yank a blade upward. A pulled plant may bring up a bulb and roots, which is thinning or division, not harvesting.
The most important visual test is the center of the clump. If it has many small new blades, take outer leaves and leave that center untouched. If the center is thin, yellow, soft, or barely growing, harvest lightly and investigate water, light, drainage, crowding, or seasonal dormancy before taking more.
Know which chives you are growing
Common chives have hollow, round leaves and usually produce pink, lavender, or purple flower heads. Garlic chives have flatter leaves and typically white flowers. Siberian garlic chives are less common but are also perennial. All are edible, but their texture, flowering time, and regrowth speed can differ.
Identification matters because a flower stalk is not the same as a leaf. Flower stems are tougher and often emerge above the leaf canopy. They can be harvested for blossoms, but cutting only the visible flower head leaves the stalk behind. Cut the entire flower stem at its base if you want to remove it.
Chives also form clumps that enlarge over time. If the center becomes congested, leaves may be thinner even though the plant is healthy. The answer is not always more fertilizer or more aggressive harvesting. Dividing a large clump every few years in a suitable growing season can restore spacing and give each section room to make stronger leaves.
Use plant condition, not the calendar, to choose harvest day
Pick when the foliage is upright, green, and firm. Leaves that are flattened by rain, heat-stressed, or yellowing at the base are not a good signal that the plant needs a large cut. Remove damaged tissue if necessary, but do not confuse cleanup with a kitchen harvest.
In spring, chives often grow quickly and tolerate regular light cutting. In summer, heat can slow new leaves and make a container dry out rapidly. In autumn, a final useful cut may be worthwhile before growth declines. In cold climates, the top growth can die back while the bulbs remain alive; cutting dormant plants will not produce an immediate flush.
First-year clumps need a lighter harvest
A first-year plant is building roots and a bulb cluster as well as leaves. Take a few leaves or one modest cut, then give it time to recover. Established clumps can support more frequent harvesting because they have more stored energy and more growing points.
If you started chives from seed, the seedlings may be ready at different times. Harvest only the strongest plants rather than flattening a whole row. A purchased transplant may establish faster, but transplant shock, hot weather, and a small pot can still make the first harvest lighter than the label suggests.
Choose morning timing and dry foliage
The best routine is to harvest in the morning after dew or irrigation has dried but before the day becomes hot. Cool, hydrated leaves are easier to cut cleanly and tend to hold their texture longer than foliage picked after hours of sun and wind.
Dry leaves are also easier to inspect. If the clump is wet from rain, wait when practical. Wet tissue bruises more readily in a storage container, and damp cut surfaces can deteriorate faster. If you need to remove a broken or diseased stem immediately, make that sanitation cut first, then wait for dry conditions for the edible harvest.
Prepare scissors and a clean harvest container
Use sharp kitchen scissors, herb snips, or clean garden scissors. A sharp blade makes a quick cut rather than crushing the hollow leaf. Wipe soil from the blades before moving between clumps. If a plant has visible disease or rot, clean the tool before cutting a healthy plant.
Bring a shallow bowl or basket. Do not pack a large harvest into a deep container where the lower leaves are compressed. Keep the cut leaves out of direct sun while you finish. A soft cloth or paper towel can be useful later, but do not rub tender chives vigorously.
How to harvest individual chive leaves
Individual harvesting is best when you want a steady supply for eggs, potatoes, salads, sauces, and garnishes. It also gives a small plant the best chance of continuing to produce.
The five-cut routine
- Inspect the clump and choose firm green leaves, skipping slimy, broken, or heavily damaged tissue.
- Start at the outside edge, where the oldest usable leaves are usually located.
- Gather a few leaves loosely between your fingers without bending the center blades.
- Make one clean cut about one-half to one inch above the soil line.
- Repeat in several parts of the clump rather than stripping one small section bare.
The cut ends may look blunt, and that is fine. Do not make repeated sawing motions or crush the leaves with a dull knife. If you need only a tablespoon, cut only that amount. Chives do not improve because they were cut just to meet an arbitrary harvest quota.
When a whole-clump cut makes sense
Shearing the entire clump is useful when the plant is mature, crowded, or producing more than you can use leaf by leaf. It also makes sense before a period of hot, dry weather if the plant has a strong root system and you can provide follow-up water. Cut all usable foliage to the same height, leaving the crown intact.
Do not make a whole-clump cut just after transplanting, during severe drought, or when the base is soft and declining. A full cut removes the plant’s current photosynthetic surface. A healthy perennial usually responds, but the recovery window depends on roots, temperature, moisture, light, and variety.
If you need to thin an overgrown patch, lift and divide a section rather than pulling random stems. Replant healthy divisions at the same depth and water them in. Treat the removed bulbs as a propagation or thinning job, not as a normal harvest.
Harvest chive flowers without losing control of the patch
Chive blossoms are edible and attractive in salads, herb vinegar, compound butter, and savory garnishes. They also feed pollinators. Letting some flower is reasonable when you want blossoms or seed, but a patch can self-sow if mature seed heads are left in place.
For a fresh flower, cut the entire stalk at its base. Use the same clean, quick motion as for leaves. If you want to preserve pollinator value, leave some flower heads and remove others after they fade. Remove mature seed heads before seeds scatter if you want the clump to stay where it was planted.
Flowers can make the leaves coarser or less mild for a short period because the plant is allocating energy to reproduction. That does not make the plant unusable. Harvest the tender leaves around the flowering period, or cut the plant back after flowering when conditions support regrowth.
What changes when chives are in a container
Container chives can be harvested the same way, but the smaller root zone changes how quickly the plant recovers. Check moisture more often, especially on a sunny balcony or in a dark pot. A container that dries completely may produce thin, limp leaves even if the garden clump looks fine.
Choose a pot with drainage holes and enough width for a clump to expand. Avoid leaving the pot standing in a saucer of water. Water thoroughly when the mix begins to dry, then let excess drain. Do not respond to slow regrowth by constantly soaking the roots; poor drainage can be as damaging as drought.
For a small pot, harvest a few leaves from different sides and wait for new growth before taking another large cut. If the container has become crowded, divide it while the plant is actively growing rather than repeatedly removing the entire canopy.
How to harvest indoor chives
Indoor chives need strong light and reasonable airflow. A bright windowsill can supply a useful harvest, but a plant kept in dim light may make pale, floppy leaves. Rotate the pot so growth is not permanently leaning toward one direction.
Cut indoor leaves as soon as they are useful. Because indoor temperatures can remain warm through winter, the plant may keep making leaves, but growth can still slow if light is short. Avoid placing the pot against a cold pane or directly above a hot radiator.
If you move an outdoor clump indoors, inspect for insects and let excess outdoor moisture drain before bringing it inside. A sudden change in light can also cause slower growth. Treat the first indoor harvest as a small test, not proof that the plant can supply a kitchen indefinitely without repotting or division.
Help chives regrow after cutting
Regrowth begins at the crown and depends on the plant having healthy roots, moisture, light, and suitable temperatures. Keep the soil evenly moist while new leaves appear, but never water on a rigid calendar. Feel the soil or check the container weight and adjust for weather.
Leave the center of a small clump alone when repeat harvesting is the priority. For a whole-clump cut, leave a small amount of green tissue above the soil rather than cutting into the bulb or crown. Mulch can moderate soil moisture outdoors, but keep mulch away from the crown so it does not stay wet.
Thin leaves after cutting usually point to one of four causes: the plant was harvested too heavily, it is crowded, the roots are stressed, or conditions are outside its preferred growth range. Give it time before adding fertilizer. Extra nitrogen can produce soft growth without fixing poor drainage, low light, or a damaged root system.
Store fresh chives for the next few days
Chives have their best aroma and texture fresh. Use them as soon as possible, but a careful refrigerator routine can keep a small harvest useful for several days. Remove damaged leaves, avoid soaking the whole batch, and refrigerate them loosely rather than compressing them.
For a short supply, stand the cut ends in a small glass with a little clean water and cover the leaves loosely. Change the water if it becomes cloudy. Another option is to wrap the dry leaves loosely in a slightly damp towel and place them in a ventilated container. The goal is to prevent wilting without trapping condensation.
Wash immediately before use when possible. If you wash before storage, dry the leaves thoroughly. Excess surface water is a common reason tender herbs become slimy in the refrigerator.
Freeze chives for cooked dishes and longer storage
Freezing is usually more successful than drying when you want chive flavor later. Frozen chives soften, so reserve them for soups, sauces, eggs, potatoes, herb butter, and other cooked or mixed dishes rather than expecting a crisp garnish.
Snip clean, dry leaves into small pieces. Spread them in a single layer on a tray and freeze until firm, then transfer them to an airtight freezer container. You can also portion them into an ice-cube tray with water or oil. Label the container with the date and intended use.
Thawing and refreezing reduce quality. Take only the portion you need and return the rest promptly to the freezer. Frozen herbs can remain usable for months, but aroma gradually fades. If the color, smell, or texture seems poor, use a small amount in a cooked dish rather than treating the batch as fresh.
Common harvesting mistakes and their fixes
Pulling instead of cutting: If a bulb comes up, the plant was removed rather than harvested. Cut remaining leaves and replant any healthy division at the correct depth.
Cutting into the crown: A cut below the leaf bases can damage the growing point. Move the next cut slightly higher and let the plant rebuild.
Taking every leaf from a young plant: A new transplant needs foliage to establish. Harvest lightly and wait for a fuller clump.
Cutting wet foliage and sealing it in a bag: Dry the leaves or wait to harvest. Condensation and bruising shorten storage life.
Ignoring flower stems: Remove the whole stem at the base if you want leaves, or harvest the blossom intentionally. Do not leave a tough stalk mixed with tender blades.
Assuming a fixed schedule: Chives grow faster in cool, bright weather and slower in heat, drought, and winter. Inspect the plant rather than cutting every seven days automatically.
Adding fertilizer when regrowth is slow: First check root moisture, drainage, light, crowding, and season. Feeding a stressed or dormant plant is rarely the first fix.
A simple harvest schedule through the seasons
In early spring, begin with small cuts as soon as new growth is substantial enough to handle. Harvest every few days or once a week according to how quickly the clump replaces leaves. Leave enough center growth for continued expansion.
In summer, harvest in the morning and check containers daily during hot weather. If leaves are repeatedly limp or thin, reduce the size of each cut and correct the root-zone problem. Flowering can be part of the summer cycle; decide whether you want blossoms, seed, or more tender leaf production.
In autumn, take the amount you can use before growth slows. In climates where chives die back, do not force winter harvests from dormant outdoor plants. An indoor pot may provide occasional leaves if it has adequate light, but its growth will still be slower than a vigorous spring clump.
After any substantial cut, watch the center for new blades rather than cutting again on a predetermined date. This simple observation is more reliable than a promise that every plant will regrow in the same number of days.
Conclusion: harvest often, cut cleanly, and use chives fresh
The best way to harvest chives is to match the size of the cut to the strength of the plant. Take outer leaves for a continuous supply, shear a healthy established clump when you need volume, and always protect the crown below the cut. Harvest after dew dries, keep tools clean and sharp, and cool the leaves quickly.
Treat flowers as a useful choice rather than a problem: use them, leave some for pollinators, or remove the whole stalk before seed dispersal. For storage, refrigerate a small harvest for immediate use and freeze chopped leaves for cooked dishes. With those few decisions, chives remain a reliable cut-and-come-again herb instead of a plant that is repeatedly weakened by guesswork.
The practical guidance here is consistent with the Royal Horticultural Society’s chive growing advice, North Carolina Extension’s chive profile, and the University of Minnesota Extension’s herb harvesting guidance. These references agree on the useful basics—chives are perennial, regular cutting is compatible with continued growth, and harvest quality depends on plant condition—while local weather and the plant’s root system determine how quickly a particular clump replaces leaves.



