Why Is My Cedar Tree Turning Brown? 6 Causes
Cedar foliage turning brown? Learn how to distinguish normal inner needle drop from drought, winter injury, root problems, pests, and disease—and what to do next.
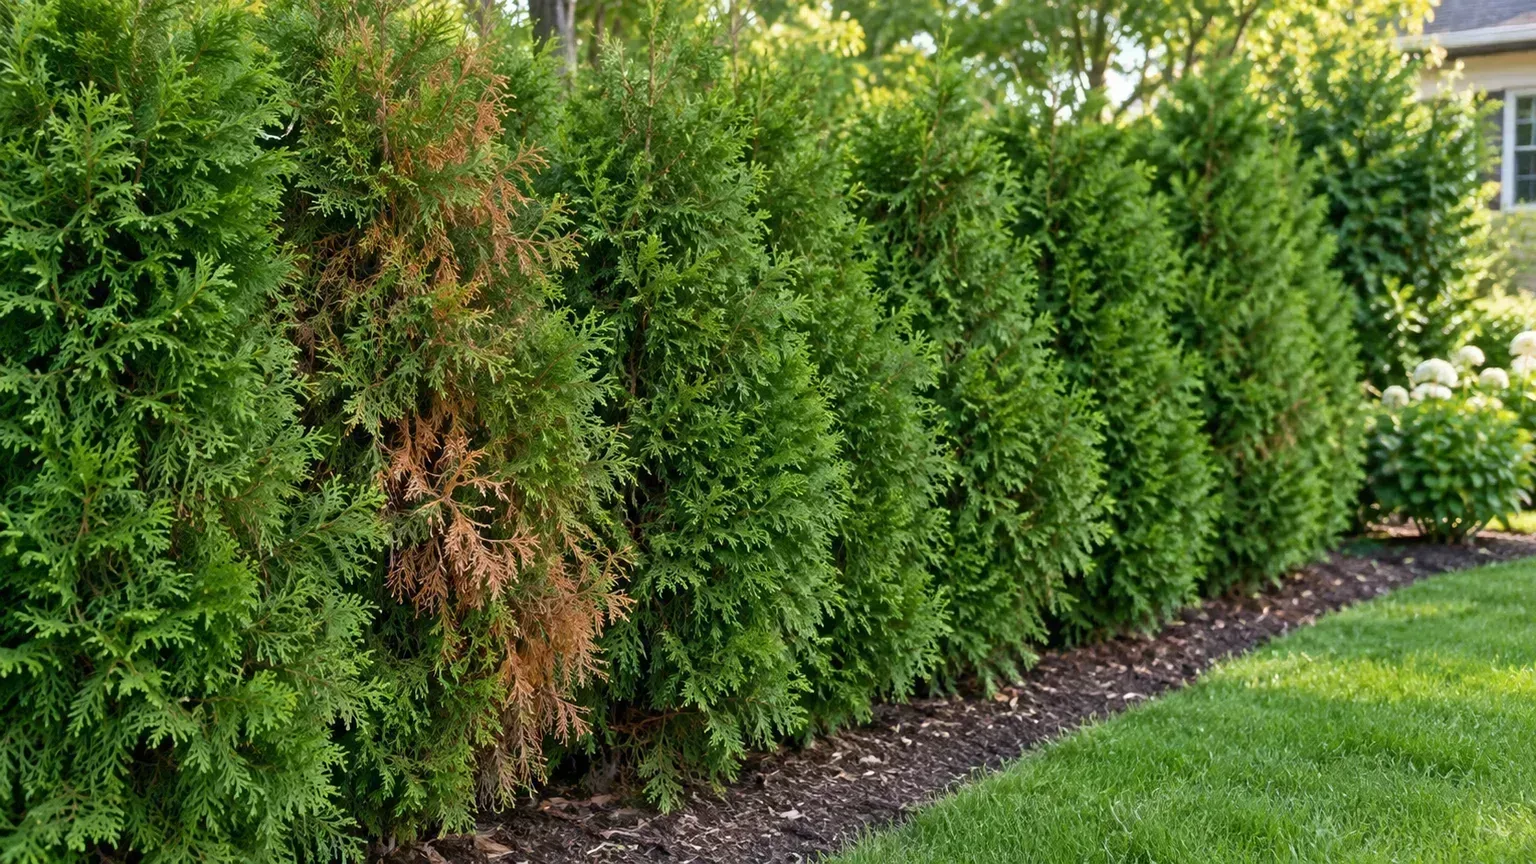
A cedar turning brown is not automatically dying. The most useful clues are which foliage browned, when it started, and whether the change is spreading: a little brown foliage inside an otherwise green evergreen in fall can be normal, while brown outer tips after a dry spell, a one-sided winter patch, hanging caterpillar cases, or progressive branch dieback point to different problems.
Before watering, pruning, or spraying, check the pattern and the soil. “Cedar” can refer to arborvitae, junipers, or true cedars, and the right diagnosis varies by species; the six causes below cover common landscape cases, with a separate check for chemical and soil look-alikes.
Diagnose the pattern before you treat it
Look at the whole tree from several angles, then inspect a few affected branches from the outer tips toward the trunk. Note whether the damage is inside or outside the canopy, limited to one face, scattered through the crown, or moving from lower branches upward. Also write down when it began and any recent change: planting, construction, irrigation, a heat wave, a hard winter, road salting, or lawn spraying.
| What you see | More likely explanation | First useful check |
|---|---|---|
| Older foliage browns evenly inside; tips stay green | Seasonal foliage drop | Check season and look for active growth at branch ends |
| Outer tips are dry after heat or drought | Water stress or transplant shock | Feel soil below the surface in several spots |
| Browning follows the sunny or windy side after winter | Winter injury or salt splash | Compare exposed and sheltered sides; note nearby pavement |
| Whole sections fade while soil stays wet | Drainage, root injury, or root disease | Check puddling, grade, and the root flare without digging |
| Brown hanging cases or stippled foliage | Caterpillars or mites | Inspect branches closely; use a white-paper tap test for mites |
| Scattered twig tips die, sometimes with dark spots | Needle blight or another disease | Photograph symptoms and ask an extension clinic before treatment |
These are clues, not diagnoses. Several stresses can happen together—for example, drought can weaken a newly planted arborvitae, then mites or a fungal blight can add damage—so correct an obvious care problem while keeping an open mind about what else may be involved.
First, identify which “cedar” you have
Check the plant tag, invoice, or planting plan if available. Many landscape hedges are arborvitae, including eastern or northern white cedar (Thuja occidentalis) and western red cedar (Thuja plicata); “red cedar” may also mean an eastern juniper, while a true cedar belongs to the genus Cedrus. These are different plants, even though their common names overlap. Penn State Extension and Proven Winners’ arborvitae guide describe arborvitae as Thuja and note the common white-cedar name.
The distinction matters most when you see a pest or disease. Texas A&M AgriLife reported browning of Ashe junipers—often called cedars in Central Texas—associated with juniper budworms; that regional insect report should not be generalized to every Thuja or Cedrus hedge. If the species is unknown, photograph the entire tree, a close view of the foliage, and any cones or pest cases before seeking help.
Read where the browning starts and how it spreads
Seasonal shedding usually affects older foliage toward the interior, while the outer sprays and branch tips remain green. Stress often shows up first at exposed tips or across one side; root trouble can cause more general fading, and chewing or disease tends to create identifiable marks, cases, or scattered dying twigs. A branch that is brown all the way to its base and snaps easily is more concerning than a few dry inner sprays.
Do not diagnose from a single brown twig. Compare at least three areas—affected, nearby green, and the sheltered side—and check the ground around each tree in a hedge, since one plant can suffer from a blocked emitter, compacted soil, or a localized pest outbreak while its neighbors remain healthy.
1. Seasonal inner foliage drop
Evergreen does not mean every leaf or scale stays green forever. Older interior foliage ages, turns yellow or brown, and falls as the plant replaces it; on arborvitae this is often easiest to notice in autumn, especially after a dry summer or on recently transplanted trees. If the brown material is mostly shaded inside the canopy and the branch ends remain green and flexible, seasonal shedding is the leading explanation. Horticulturist Melinda Myers describes this inner browning as normal when the outer foliage is healthy, and Penn State Extension also notes that arborvitae shed older foliage in fall.
The amount varies with species, cultivar, age, weather, and the tree’s recent stress. A dense hedge can hold years of old foliage inside, so a sudden release may look dramatic even when the growing tips are fine. Gently part the outer sprays and look for green scales behind them; do not assume the entire plant is sick just because fallen brown foliage collects underneath.
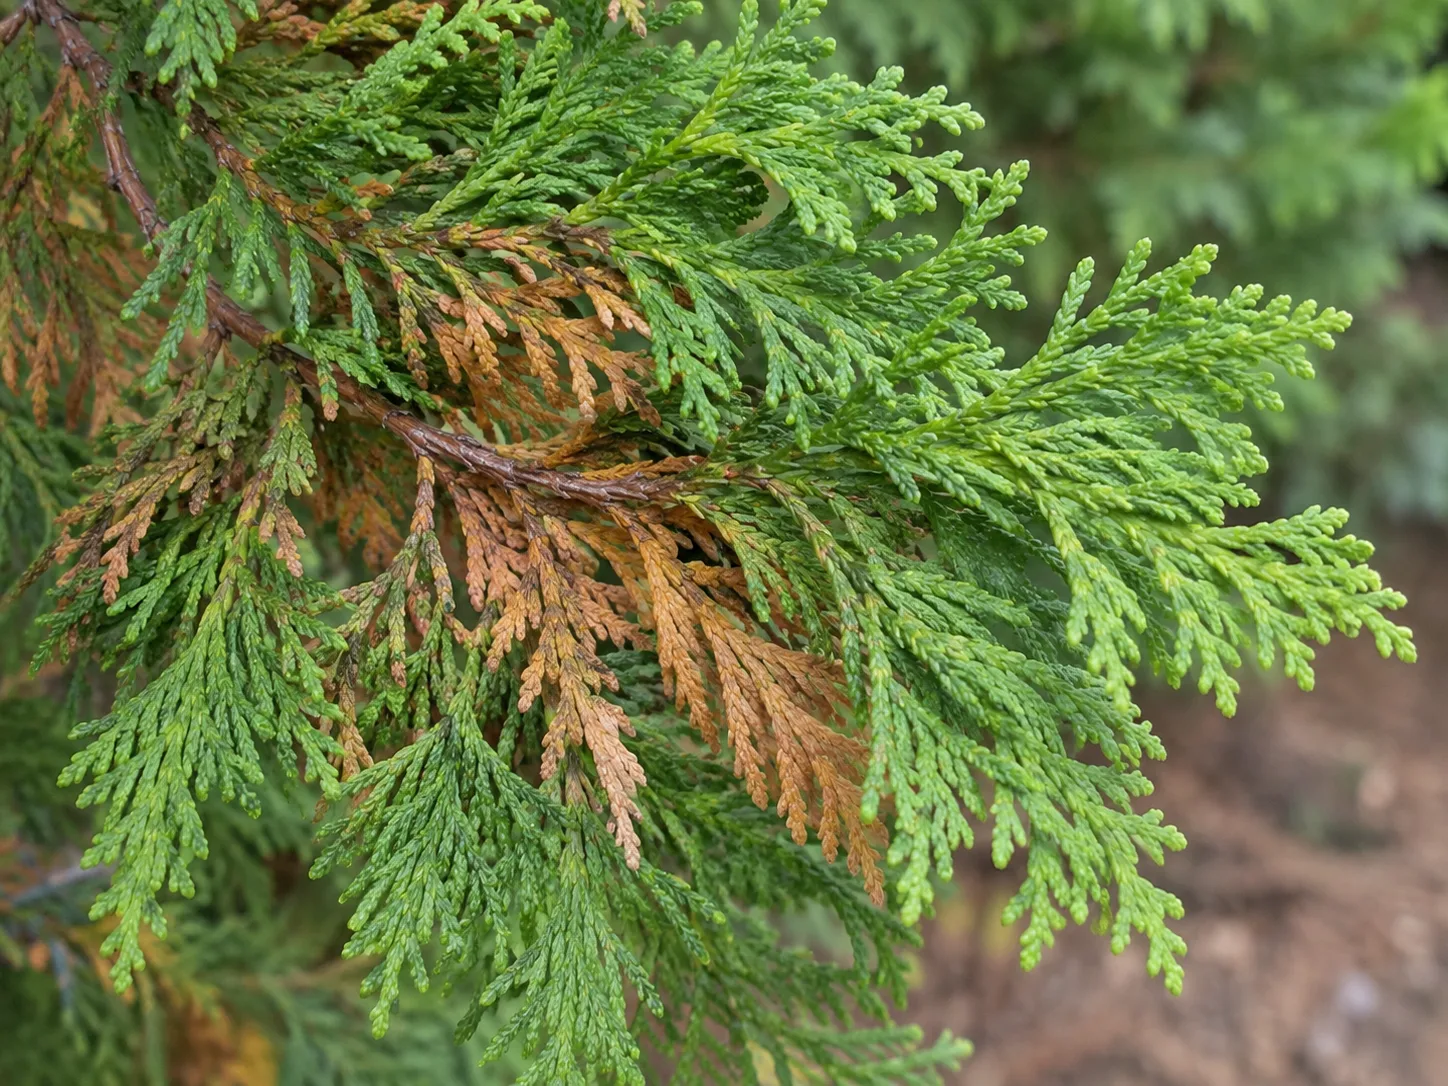
Usually, no treatment is needed. Rake or blow out loose dead foliage if it is piling up, but avoid aggressive thinning that exposes inner branches to sun and wind. Continue normal moisture checks during dry weather; if browning begins at the branch tips, appears on one exposed face, or keeps advancing into green growth, investigate the other causes rather than calling it seasonal drop.
2. Drought, heat, or transplant stress
Many arborvitae are shallow-rooted and can lose moisture faster than their roots replace it during hot, windy weather. Newly planted trees are at greater risk because their root systems have not spread into surrounding soil; a root ball can dry out even while the soil a few inches away feels damp. Brown, crisp outer tips after a dry spell are a common warning, but similar symptoms can follow root disturbance, a severed root, or a hedge planted too tightly for the site.
Check soil moisture several inches down near the edge of the root ball, then in a second spot under the canopy. If it is dry there, water slowly over the root zone so moisture has time to soak in instead of running off; if the soil is already moist, do not add more simply because foliage is brown. Penn State Extension notes arborvitae prefer moist, well-drained soil and are not drought-tolerant, while Proven Winners also advises supplemental water during prolonged heat or dry spells.
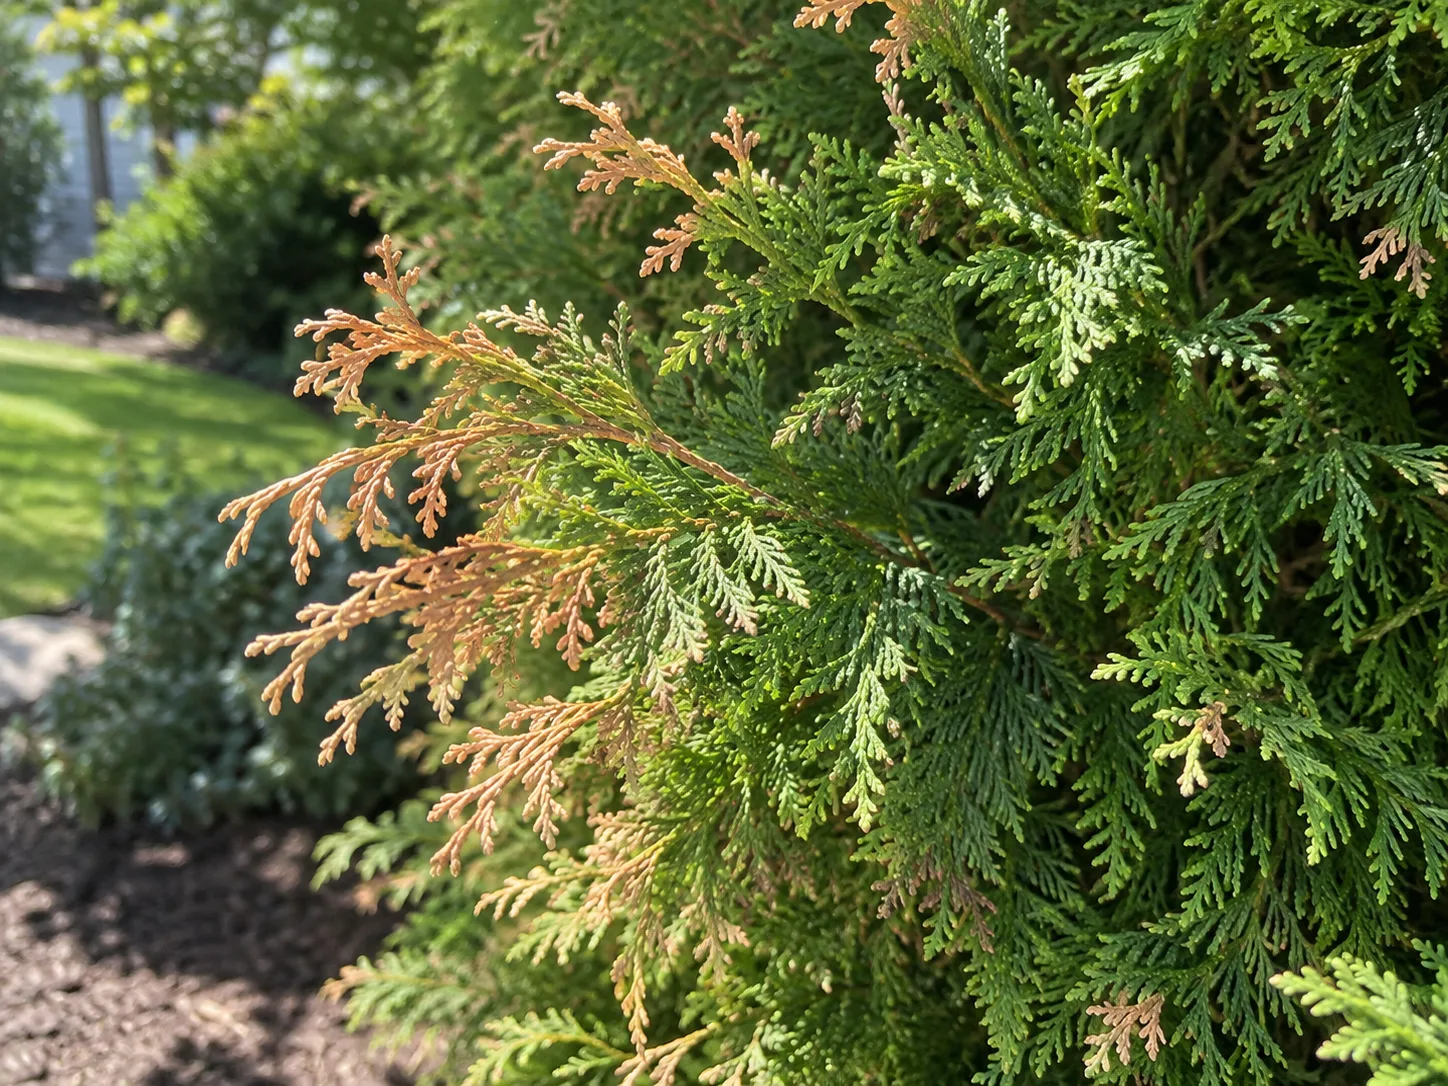
For newly planted trees, inspect moisture more often through the first growing seasons, adjusting for rain, soil texture, slope, and temperature instead of following a fixed calendar. A soaker hose or drip line can distribute water over the root zone; a brief sprinkle on the foliage wets needles without reliably replenishing deeper roots. Keep a 2- to 3-inch layer of organic mulch over the root area, but pull it back from direct contact with the trunk and root flare.
Give a stressed tree time after correcting the cause. Brown scales will not turn green again, so judge recovery by whether remaining foliage stays firm and whether new growth appears in the next active flush. Do not fertilize to force a quick flush: fertilizer cannot replace damaged roots, and extra salts can add stress when a tree is already struggling.
3. Winter burn and de-icing salt
Evergreens continue to lose water through their foliage in winter, but frozen soil can limit how much the roots take up. Cold wind, bright winter sun, and alternating freeze-thaw conditions can therefore dry exposed foliage, often leaving browning on the side facing prevailing wind, afternoon sun, or a reflective wall. Penn State Extension notes winter wind can brown arborvitae foliage, and Glover Nursery’s practical arborvitae guide similarly describes winter burn after cold winds and low soil moisture.
Road and sidewalk salt can create a related pattern when salty spray hits the foliage or salty runoff reaches roots. Browning concentrated on the pavement-facing side, a history of heavy de-icer use, or damage that appears after winter maintenance raises suspicion, but does not prove salt injury; wind exposure and drought may affect the same face. Avoid repeating salt applications near the root zone where practical, and redirect concentrated runoff away from the hedge.
Before the ground freezes, water the root zone during a prolonged dry fall if the soil is dry and drains well. In winter, water only during a thaw when the ground is unfrozen and the root area is actually dry. A loose burlap screen on the windward side can reduce exposure on a vulnerable hedge; do not wrap foliage tightly in plastic or tie branches so firmly that they rub and break.
Wait until spring growth begins before deciding how much winter-damaged foliage is dead. If buds and branch tips remain alive, the tree may push new growth; if a section stays brown and brittle, prune only as far back as living foliage. Do not expect every arborvitae to fill bare old wood, particularly after severe injury.
4. Waterlogged soil, root damage, or root rot
Too much water can produce symptoms that look like drought: roots short of oxygen cannot function normally, so the crown fades even though the ground is wet. Risk rises in low spots, heavy or compacted soil, planting holes that act like bowls, over-irrigated lawns, or places where roof or pavement runoff collects. If browning progresses while soil stays saturated, adding more water is the wrong first response.
Check for standing water after rain, a persistently muddy root zone, blocked drainage, or a trunk buried under piled soil or mulch. You can inspect the root flare at the surface, but do not trench around the tree or excavate major roots to “check” them; that can injure a tree that might otherwise recover. The Pacific Northwest Plant Disease Management Handbooks describe arborvitae root-rot cases associated with poorly drained, wet sites and oxygen-depleted roots, and note that foliage discoloration alone cannot identify which pathogen, if any, is present.
Let the soil begin to dry between irrigations, repair a leaking line, and correct surface drainage if that can be done without changing the grade around the trunk or cutting major roots. A mature hedge in poorly drained soil may need an arborist to assess whether regrading, drainage work, or removal is safer; simply digging a trench through the root zone can create another problem. Avoid applying a fungicide based only on brown foliage: the same handbook says chemical control is not recommended unless Phytophthora has been identified, and even confirmed cases may be too advanced for treatment to help.
If the whole tree or successive trees in a row are declining, especially with loose bark, a soft root collar, or white fungal growth under bark, arrange a professional assessment. Root disease cannot be reliably diagnosed by looking at the canopy alone, and different organisms require different management. A soil or plant sample taken through a local extension diagnostic clinic is more useful than a broad-spectrum product chosen from a symptom photo.
5. Insects feeding on foliage or bark
Pest damage is more likely when browning is localized, irregular, and accompanied by visible feeding signs. Look inside and outside the canopy, including the undersides of sprays and the bark of affected branches; a quick look at the front of the hedge can miss small cases or mite stippling. Do not spray on suspicion alone, because stress and normal shedding can look similar and broad treatment can harm beneficial insects.
Bagworms and juniper budworms
Bagworms make spindle-shaped silk cases camouflaged with small pieces of host foliage. The cases hang from branches and can resemble tiny brown cones; feeding removes foliage around them, and heavier or repeated infestations may leave sparse patches or kill sections. NC State Extension lists arborvitae, cedar, and juniper among bagworm hosts, and recommends scouting for cases because overwintering eggs can be inside them.
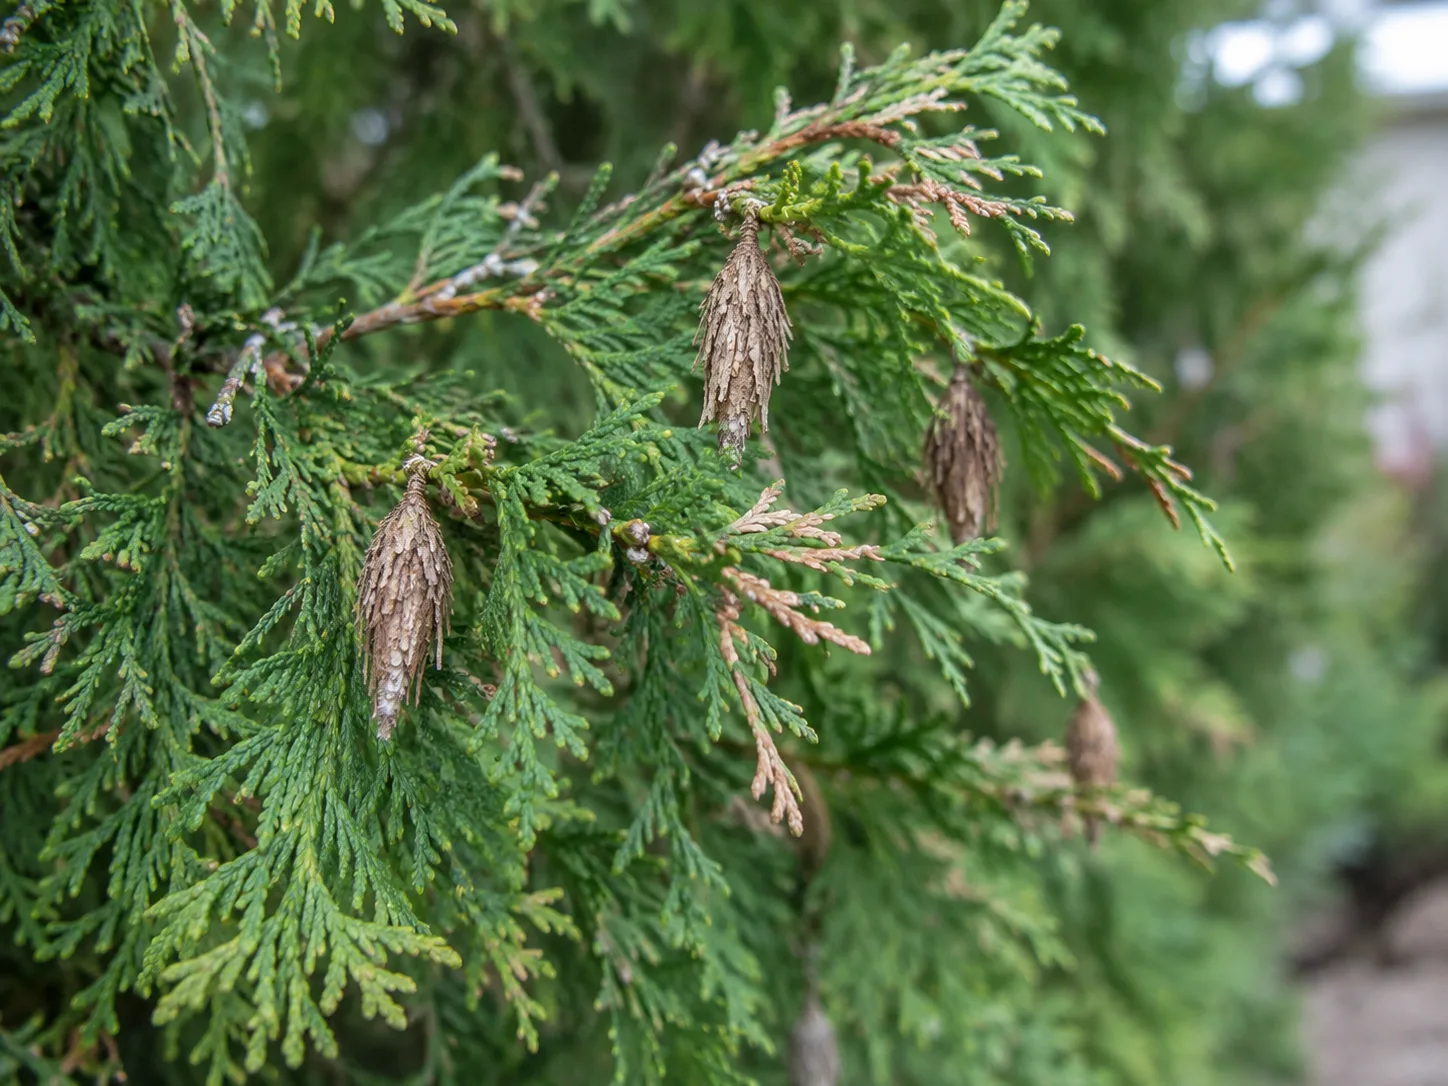
On a small, reachable tree, hand-pick and destroy the cases during fall and winter, or prune infested tips into a bag and discard them. Do not leave cases on the ground beneath the plant: eggs may survive and hatch later. On a tall hedge or a heavy infestation, ask a local extension office or licensed arborist about timing; caterpillars are easier to manage when small, and timing differs by region. The Purdue Extension bagworm guide explains why late, large cases are much harder to treat.
Juniper budworms are a different caterpillar and matter especially where Ashe juniper is locally called cedar. Texas A&M AgriLife reported a Central Texas outbreak in which larvae fed on juniper foliage and formed silken tubes near branch tips; drought and spider mites could add stress. If you see silk tubes or caterpillars on a juniper, identify the plant and pest before choosing a treatment, and follow current local extension advice rather than assuming bagworm timing or products apply.
Spider mites and bark beetles
Spider mites can cause fine yellow or gray stippling that merges into bronze or brown foliage. Hold a sheet of white paper beneath a suspect branch and tap it; tiny moving specks may be mites, but confirm with a hand lens or extension office before treatment. Mites can build up in hot, dry conditions, yet similar dull foliage can result from drought, so check soil moisture and inspect several branches first.
Bark beetles are a different concern, particularly when one or more branches suddenly “flag” brown while the rest of the tree is green. Tiny holes, boring dust, galleries under loose bark, or resin may point to a wood-boring pest, but signs vary by beetle and cedar species. Keep the tree adequately watered when conditions are dry, and have an arborist identify suspected beetles promptly; insecticides applied after beetles enter the bark often cannot reach them, so preventive spraying is not a general fix.
6. Fungal needle blights and cankers
Fungal disease is possible, but browning alone does not establish it. Arborvitae needle blights can begin as brown, dry branch tips and progress to twig dieback; scattered affected points in the canopy, small dark fungal structures, or damage that expands after wet weather make disease more plausible than uniform inner shedding. Purdue’s landscape diagnostics describe Phyllosticta and Pestalotiopsis needle blights on arborvitae and explain that visual symptoms overlap, so exact identification may require microscopy.
Prune out small, clearly dead or diseased twigs in dry weather, cutting back to living foliage and cleaning tools between affected plants. Remove infected debris rather than leaving it under the hedge, and improve airflow by avoiding tight shearing and crowded planting where feasible. Purdue’s report notes that these fungi often exploit trees already weakened by drought, freezing injury, rough pruning, or transplant shock, and that fungicides are not generally recommended for this stress-related problem.
If multiple branches keep dying, lesions are spreading, or the plant is valuable, send a well-chosen sample to a plant diagnostic clinic before treating. A fungicide cannot restore dead foliage, and a product that targets one pathogen will not solve another cause such as wet roots, salt injury, or mites. Take photos of the whole tree and close-ups of both healthy and affected growth so the diagnostician can compare patterns.
Chemical and soil problems that mimic disease
A sudden brown patch on the side facing a recently treated lawn may follow herbicide drift or overspray. Salt splash, a fertilizer spill, fresh construction, soil fill over roots, or a sudden change in irrigation can also damage foliage without producing a recognizable insect or fungal sign. Look for a clear boundary that matches the spray direction or runoff path, and ask what was applied, when, and at what rate before trying to counteract it.
Do not add fertilizer, lime, sulfur, or “root tonic” simply because the foliage is brown. Arborvitae tolerate a range of soil pH, and a nutrient deficiency should be supported by a soil test rather than guessed from a browning canopy. If fertilizer or salt may have accumulated, first confirm that the site drains; flushing poorly drained soil can make root stress worse. For a suspected herbicide exposure, keep the product label and contact the applicator or local extension service with the active ingredient and timing.
A recovery plan that avoids making browning worse
The first goal is to stop the injury, not to force new green growth. Correct only the conditions you can confirm: water a dry root zone slowly, pause irrigation in saturated soil, reduce salt or spray exposure, and remove confirmed pest cases. Then photograph the same branches and overall tree from the same angles so you can tell whether damage is stable or advancing over the next few weeks.
What to do in the first 48 hours
Start with three low-risk checks. First, feel soil at several points below the surface; second, inspect branch tips and inner foliage for seasonal patterns, cases, stippling, or spots; third, note recent weather, planting, irrigation, construction, or chemical applications. If soil is dry, water deeply once and recheck later; if it is saturated, stop supplemental watering and address the drainage source instead of adding another treatment.
Do not prune every brown branch immediately. Evergreen foliage can retain a brown winter or drought scar after the original stress has ended, and cutting too soon can remove living tissue. If there are clearly dead, broken, or infested branches that pose a safety or spread concern, remove only what you can reach safely with clean tools; leave high branches and large limbs to a qualified professional.
What to monitor through the next growing season
Look for healthy buds and new tips during the plant’s normal flush, not instant color returning to old brown scales. Mark one affected branch with a loose tag and compare it with a green branch every few weeks; record whether the browning spreads, stays in the same patch, or drops naturally. A tree can recover from a brief stress while retaining permanent bare gaps where old foliage died.
Maintain even, site-appropriate moisture through establishment and extended dry spells, keep mulch off the trunk, and avoid aggressive shearing into leafless interior wood. If you have a hedge, water the root zone of each plant rather than assuming one emitter or soaker hose wets every root ball equally. Reassess after each major season; persistent decline despite correcting moisture and exposure is a reason to request a diagnosis, not to stack on more products.
When to call an arborist or plant clinic
Get help if browning advances quickly, affects a large part of the crown, appears in several trees at once, or comes with loose bark, large dead limbs, fungal growth at the base, or suspected boring insects. Also call when the tree is near a structure, power line, or public path; evaluating and pruning tall or unstable trees is not a DIY task. A certified arborist can inspect canopy, trunk, root flare, and site conditions together rather than guessing from a photograph.
For smaller or uncertain cases, a county extension office or university plant clinic can help identify a pest or disease from a sample. Include a clear photo of the whole plant, close-ups of both green and brown foliage, the plant’s approximate age, recent weather, watering history, and any herbicide or fertilizer application. If a clinic requests a sample, follow its collection instructions so the tissue arrives fresh and representative.
Conclusion
The pattern is your best first clue: brown inner foliage in fall with healthy tips is often normal, while dry outer tips, winter-exposed patches, wet soil, insect cases, or scattered dieback point to problems that need a different response. Identify the cedar, check soil moisture before changing irrigation, and treat only a cause you can support with visible signs or a reliable diagnosis.
Correcting drought, drainage, or pest pressure can protect living growth, but dead brown foliage will not turn green again and bare old wood may stay bare. If the browning keeps spreading or you find signs of root or trunk trouble, ask an arborist or plant clinic to identify the cause before applying another treatment.