Kale Pruning Guide: Outer Leaves, Timing & the Growing Point
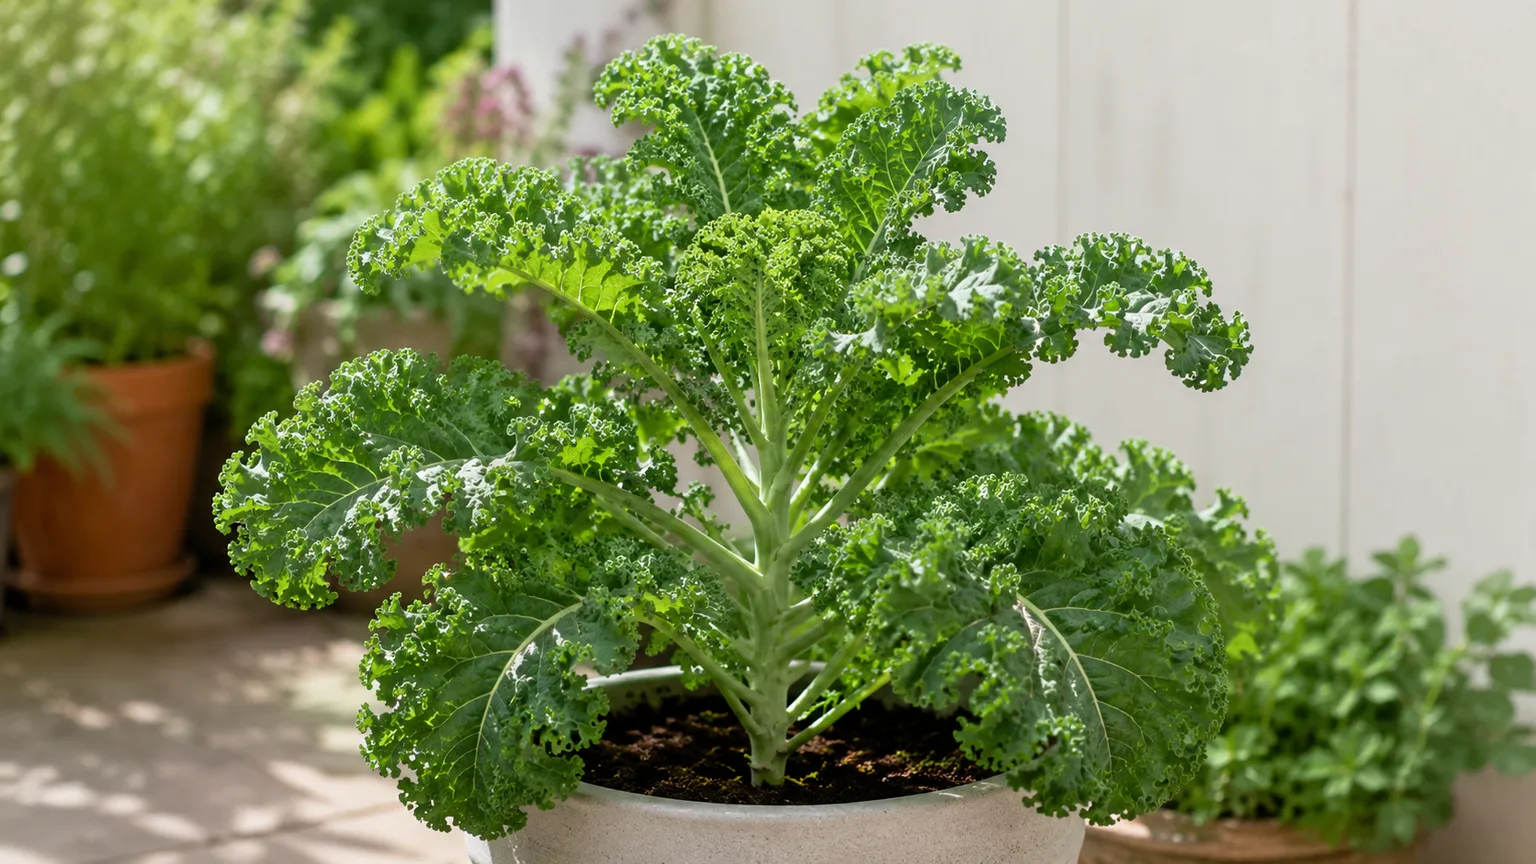
Kale Pruning Guide: Outer Leaves, Timing & the Growing Point
Kale Pruning Guide: Outer Leaves, Timing & the Growing Point
First, remove only fully yellow, wilted, or clearly damaged outer kale leaves. Cut each leaf stalk near its base with clean scissors or bypass pruners, working from the bottom of the plant upward—and stop before you touch the tight central growing point. After that single cleanup leaf, decide whether you are harvesting for the kitchen or only tidying the plant.
Kale (Brassica oleracea var. acephala) is a cool-season leafy brassica grown for repeated leaf picks, not a woody shrub you shape with heading cuts. Missouri Botanical Garden describes kale as loose, upright, wavy-edged leaves that do not form a cabbage head—the name acephala means headless. Home “pruning” is really selective leaf harvest plus sanitation: take mature outer leaves, protect the crown, and remove failing tissue before pests and rot move inward. For whole-plant context—season timing, cultivar size, and container spacing—start with the Kale overview.
Quick answer
During active cool-season growth, harvest the lowest usable outer leaves and leave the central bud intact so the plant can keep producing (UF/IFAS Gardening Solutions; RHS). RHS advises picking two or three lower leaves per plant at a time for mature plants, or using cut-and-come-again picks once seedlings reach about 10–15 cm (4–6 in). UF/IFAS caps each session at roughly one-third of the foliage. Pruning cannot fix heat bolting, chronic drought, or dim winter shade—stabilize light and watering before expecting a stripped plant to refill quickly.
What “pruning” means on Kale
Unlike houseplants you tip-prune for bushiness, kale renews from a single crown at the soil line. New leaves unfurl from the center; the oldest leaves sit on the outside and eventually yellow. Your job is to remove those outer leaves at the right size while the crown stays intact.
Three jobs show up in pots and garden rows:
| Situation | Action | Timing | Outcome |
|---|---|---|---|
| Yellow, spotted, or chewed outer leaf | Sanitation cut at stalk base | Anytime | Less pest habitat; clearer view of crown |
| Large lower leaves ready to cook or blend | Harvest pick of outer leaves only | Cool season, leaves firm | Kitchen crop; stimulates younger growth |
| Dense baby-leaf row or bolting flower stalk | Thinning or bolt removal | Baby stage or early bolt | Airflow; redirects energy if caught early |
There is no useful “top the main stem for branching” step on standard kale. Height control comes from cultivar choice, spacing, and stopping harvest when heat triggers flowering—not from shearing the rosette flat.
When to prune or harvest Kale
Best season for regular picks
Kale develops its best texture in cool weather. In most Indian plains, sow from October into November and harvest through winter; cooler hill districts can stretch the season longer. Hot lowland spells make leaves coarse and can push mature plants toward flowering—see the overview for season limits.
For mature plants, RHS notes harvest from autumn onward in its climate; adapt that rhythm to your local cool window. Harvest to Table suggests beginning leaf picks when plants reach about 8–10 inches tall, then harvesting outer leaves every one to two weeks during active growth.
What you can remove anytime
Fully yellow, collapsed, or clearly diseased outer leaves can be removed whenever you see them. That is sanitation, not a heavy prune. Also remove leaves coated in aphids or caterpillar frass if washing is impractical—then inspect the aphid guide before the colony moves inward.
Defer large harvests when the plant was just transplanted, the pot is waterlogged, or midday heat is wilting healthy leaves. A stressed crown needs stable care more than another strip of foliage.
What to check before cutting
Before your first harvest leaf, confirm four things:
- Crown condition: The central cluster should be firm and green, not slimy or pinched. If the growing point is damaged, the plant may not regrow leaves.
- Leaf age: Outer leaves should be full-sized for your cultivar—Missouri Botanical Garden notes leaves are often harvested near hand size on mature plants.
- Moisture and roots: Kale has shallow roots; limp plants in dry mix need water, while wilt in wet soil may signal overwatering or root rot.
- Light quality: Leggy, pale plants stretched toward a window need brighter winter sun before you solve the problem with more cutting—read leggy growth on kale and not enough light first.
Tools and sanitation
Use sharp bypass pruners, kitchen scissors, or a harvest knife for thick Lacinato stems. Dull blades crush stalks and leave ragged edges that dry slowly.
Wipe blades with 70% isopropyl alcohol before you start and when moving between brassica beds. Kale shares diseases with cabbage and broccoli; clean tools reduce the chance of spreading club root or black rot on contaminated soil particles.
Wash hands and tools after handling leaves with pest damage. Bag and discard badly diseased foliage instead of composting it in small home piles.
The first cut to make
After inspection, take one lowest outer leaf that is either kitchen-ready or clearly failing. Grasp the petiole, pull it slightly outward, and snip close to the main stem without gouging neighboring leaves or the crown. Pause.
If the crown looks healthy and you still need greens, take the next oldest outer leaf on the same plant. Stop when you have removed roughly one-third of the foliage or enough for one meal—whichever comes first (UF/IFAS Gardening Solutions).
How to prune kale step by step
- Work outside in: Start with the lowest, oldest leaves that are full size. Young inner leaves stay for continued photosynthesis.
- Cut at the stalk base: Slice cleanly where the leaf meets the stem. Leaving long stumps invites rot on dense curly types.
- Rotate plants: In a row or multiple pots, pick a few leaves from each plant rather than stripping one bare.
- Inspect the crown: After picking, the central bud should still look tight and upright. If you expose bare stem above the crown, you cut too high on young plants.
- Water and wait: Irrigate if the top 2–3 cm of mix is dry, following your watering rhythm. Do not fertilize as a “prune reaction”; feed only on your normal schedule from the fertilizer guide.
For baby-leaf sowings, RHS allows cutting the whole small rosette once, expecting regrowth from the stump. That is a deliberate crop finish, not the same as repeatedly scalping a single mature plant.
How much you can safely remove
Treat one-third of the leaf area per plant per session as a practical ceiling (UF/IFAS Gardening Solutions). RHS’s “two or three lower leaves” guidance matches that scale on a typical plant.
Removing more at once starves the crown during cool weather recovery and can stall regrowth. If you need a large batch for cooking, harvest from several plants evenly instead of one.
Where to cut—and what to avoid
Cut: Outer leaf petioles at their attachment point; spent lower leaves that shade the crown; soft bolt stems if you catch flowering early (see below).
Do not cut: The central growing point, the crown itself, or so many inner leaves that the plant cannot photosynthesize. Avoid stripping every leaf from a single immature seedling unless you are abandoning that plant.
On tall Scotch or Lacinato types, older leaves can look like a short trunk—still harvest from the bottom upward. The living growing point remains at the top center of the rosette, not along the bare stem scar.
Yellow, brown, damaged, and bolting growth
Yellow lower leaves often mean normal aging, but check watering if many leaves yellow at once. Remove yellow tissue to improve airflow and pest visibility.
Brown crispy margins usually trace to drought or salt stress rather than a need for harder pruning—see brown tips on kale before repeated leaf stripping.
Pest-damaged leaves: Remove heavily mined or caterpillar-chewed blades; keep partially green leaves if more than half the surface still works.
Bolting: Kale is a biennial that flowers in its second year or when heat stresses mature plants (Missouri Botanical Garden; RHS). Once a thick flower stalk elongates, leaf quality drops. You can snap or cut the bolt early and keep picking side leaves for a short time, but plan a fresh sowing rather than expecting summer leaves on the same plant in hot plains climates.
Aftercare and recovery
After a moderate harvest, keep the root zone evenly moist but not saturated—kale regrows fastest when cool nights and steady moisture align (UF/IFAS Gardening Solutions). Afternoon shade during rare warm winter spells reduces wilt on freshly picked plants.
Expect usable regrowth within one to two weeks in active cool weather if one-third or less was removed. Slow growth after pruning often reflects heat, nitrogen-poor soil, or root stress—not “lazy” plants.
Signs pruning worked: new leaves unfurl from the center, remaining blades stay firm, and outer picks repeat on a steady rhythm.
Signs you overdid it or timed poorly: crown wilts, inner leaves bleach or stall, pest damage concentrates on the few leaves left, or the plant bolts immediately in heat.
Mistakes to avoid
- Shearing the entire rosette off a mature plant and expecting the same crown to feed you all summer
- Cutting the central bud while learning “cut-and-come-again” harvest
- Harvesting wet, muddy leaves and storing them—wash after picking, not before heavy field cuts
- Ignoring leggy growth and harvesting harder instead of adding sun
- Composting club-root or black-rot plants in the same bed without rotation
- Using dirty pruners between brassica patches
When not to prune
Skip non-urgent harvests when seedlings are still establishing roots, pots are sodden, or heat is wilting healthy midday leaves. Remove only diseased tissue if sanitation demands it.
Also pause if plants show transplant shock—wait until new leaves look firm, then resume light outer picks. Ornamental flowering kale grown for color is usually not a repeat harvest crop; treat those rosettes as seasonal displays rather than kitchen stock.
Related Kale guides
- Kale overview — cool-season timing, cultivar size, and when the season ends
- Kale light — winter sun and shade during warm spells
- Kale watering — shallow roots and even moisture after harvests
- Kale soil — fertile, draining mix that supports regrowth
- Kale fertilizer — feeding during leaf expansion, not as a prune reaction
- Kale propagation — succession sowing when bolting ends the crop
- Leggy growth — fix stretch before harder harvests
- Brown tips — margin damage that pruning cannot cure