How to Propagate Monstera Peru from Node Cuttings
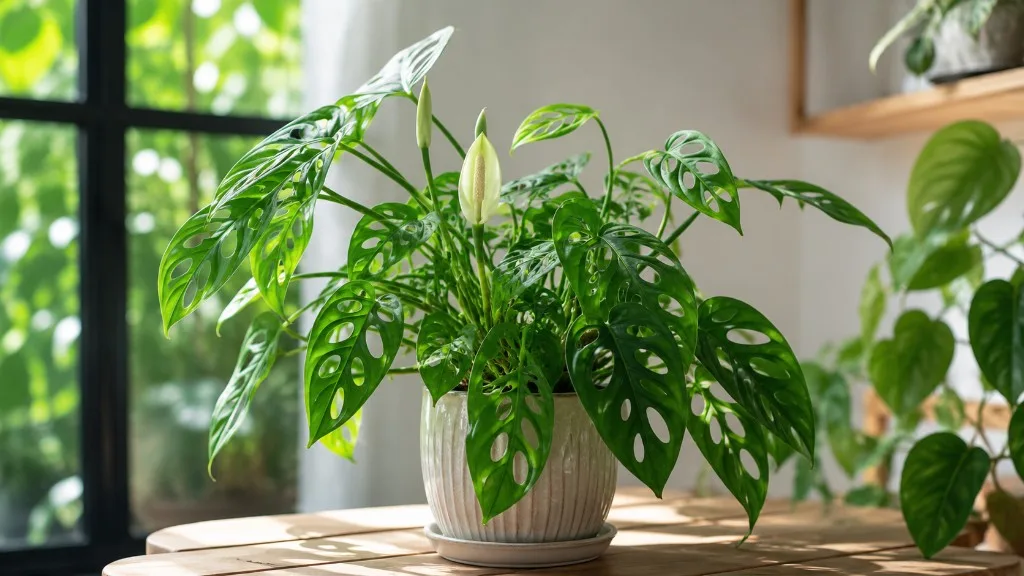
How to Propagate Monstera Peru from Node Cuttings
How to Propagate Monstera Peru from Node Cuttings
Monstera Peru propagation works best from node-bearing stem cuttings, not from single leaves. The plant is sold under familiar trade names such as Monstera Peru, Monstera karstenianum, Green Galaxy Monstera, and Monstera sp. Peru, but current Kew taxonomy treats Monstera karstenianum as a synonym of Philodendron opacum. That naming caveat matters for trust, but it does not change the practical propagation rule: this is a climbing aroid, and new vines come from stem nodes.
The most reliable home methods are water rooting, damp sphagnum moss, and air layering. Use water when you want visibility, moss when the cutting already has aerial roots, and air layering when the stem is valuable or the internodes are so tight that you want roots before making the final cut. For the full plant identity and care baseline, start with the Monstera Peru overview; this page stays focused on multiplying a healthy plant.
Quick Answer: Propagate a Node, Not a Leaf
Take a healthy vine section with at least one node and preferably one leaf. Cut just below the node with clean scissors, keep leaves above the waterline or moss surface, and place the node in room-temperature water, damp long-fiber sphagnum, or a wrapped moss layer while the stem is still attached. Penn State Extension lists air layering or stem cuttings as the easiest Monstera propagation methods, and NC State Extension also lists propagation by stem cutting and layering for climbing Monstera.
In warm, bright indoor conditions, expect root initials in a few weeks and pot-up readiness once roots reach roughly 2.5 to 5 cm (1 to 2 inches). Treat that as a practical grower range, not a promise. Cool rooms, dim light, stressed parent plants, stale water, and soggy moss all slow rooting or invite rot.
Monstera Peru Naming Note
Most plant owners search for this plant as Monstera Peru, so this guide uses that name. Botanically, Kew lists accepted Philodendron opacum as an Araceae climbing epiphyte native from southeastern Nicaragua to Ecuador in wet tropical forest. That supports the practical indoor logic: keep propagation warm, airy, humid enough, and tied to nodes that naturally anchor climbing stems.
Because there are few extension trials written specifically for “Monstera Peru,” this guide separates source-backed aroid propagation principles from Peru-specific grower interpretation. Node requirement, stem cutting, layering, sanitation, toxicity, and support guidance are source-backed. Exact rooting speed, small starter-pot sizing, and water-versus-moss transition details are conservative indoor recommendations based on the plant’s compact climbing habit and the LeafyPixels Monstera Peru care cluster.
Before You Cut: Identify a Real Node
A node is the swollen point on the main vine where a leaf petiole attaches and where an aerial root or dormant bud may appear. On Monstera Peru, internodes can be short and partly hidden by thick leaf bases, so do not cut only the petiole. You need a small section of the main stem around the leaf attachment.
Viable cuttings usually have one of these combinations:
| Cutting type | Viable? | Notes |
|---|---|---|
| One node plus one leaf | Yes | Best beginner cutting |
| Two nodes plus one or two leaves | Yes | Establishes faster if the parent can spare it |
| Node with aerial root but no leaf | Sometimes | A “wet stick” can work, but it is slower and easier to rot |
| Leaf and petiole only | No | May stay green temporarily but will not become a vine |
| Stem internode with no node | No | No bud point for new growth |
Iowa State University Extension describes stem-tip and node cuttings as houseplant propagation material, with lower leaves removed so the stem can sit cleanly in the rooting medium. That general mechanism applies here: the node is where new roots and shoots can organize.
What This Guide Is Based On
This rewrite was checked against botanical taxonomy records, extension propagation references, and the existing Monstera Peru care cluster. There is no original LeafyPixels photo trial attached to this page yet, so the article does not claim measured success rates from a specific batch of Peru cuttings. If you want to document your own attempt, record parent health, cutting count, medium, room temperature, light level, first root date, pot-up date, failures, and first new leaf.
The strongest practical inference is that Peru should be treated as a compact climbing aroid rather than as a giant split-leaf Monstera. That means smaller starter pots, careful moisture control, early support, and patience. Peru often feels slower than thin-leaved vines in the same room, but a firm node with clean tissue is more important than chasing speed.
Choose Your Method: Water vs Moss vs Air Layering
| Method | Best for | Watch-outs | When to choose it |
|---|---|---|---|
| Water rooting | Beginners, node visibility, quick rot checks | Water roots are fragile; jars can stagnate | Use for your first cutting or a clean tip cutting |
| Sphagnum moss | Cuttings with aerial roots, growers comfortable checking moisture | Moss can become anaerobic if packed wet | Use when you want roots to adapt more easily to potting mix |
| Air layering | Valuable vines, bare lower stems, short internodes | Slower setup; moss wrap must not dry out | Use when you want roots before cutting from the parent |
NC State Extension Gardener Handbook frames vegetative propagation as a way to reproduce selected parent plants and explains that cuttings and layering are both asexual propagation methods. For Monstera Peru, that means you preserve the parent’s puckered leaf character by cloning stem tissue rather than starting from seed.
Best Time and Parent Plant Readiness
Take cuttings in spring through early fall when the parent plant is actively growing. A warm room, bright indirect light, and a hydrated parent give the node enough energy to root. If the parent has been recently repotted, is fighting pests, or has yellowing leaves on wet mix, stabilize it first.
Good parent material has firm stems, firm puckered leaves, no sour smell from the pot, and at least a few nodes you can remove without stripping the entire vine. Water the parent the day before if the mix is dry. Avoid taking a cutting from a cold windowsill or a plant that has just been moved from low light to bright light; let new conditions settle first with help from the Monstera Peru light guide.
Tools, Sanitation, and Sap Safety
Use sharp scissors or bypass pruners, a clean jar or propagation box, long-fiber sphagnum if using moss, a small pot with drainage for later pot-up, and gloves if sap irritates your skin. Wipe blades before cutting and between suspect stems. NC State’s propagation handbook emphasizes clean stock plants, clean tools, and suitable media because propagation wounds are easy entry points for decay.
Handle cuttings away from pets and children. UF/IFAS notes that Monstera and Philodendron are Araceae plants associated with needle-like insoluble calcium oxalate irritation. Fresh cut surfaces expose sap, and propagation jars can put chewable plant pieces at table or windowsill height.
Step-by-Step: Take a Monstera Peru Cutting
- Choose a healthy vine with visible nodes and at least one leaf per cutting.
- Find the node: the main-stem joint where the petiole, aerial root, or bud attaches.
- Cut 0.5 to 1 cm below the node, leaving a small stem stub below the node.
- Remove any leaf that would sit underwater or be buried in moss.
- Keep the top leaf if it is healthy; it helps photosynthesis while roots form.
- Let heavy sap flow slow for a few minutes before placing the node in water or moss.
Do not cut midway through a bare internode and expect branching. If you are also shaping the parent plant, use the Monstera Peru pruning guide to decide where the parent cut should sit above a node.
Water Propagation Method
Water propagation is the most forgiving method when you are learning node anatomy. Place the cutting in a clear glass with the node and any aerial root submerged and all leaves above the waterline. Put the glass in bright indirect light, not direct sun that heats the water. Replace water when it turns cloudy or smells stale, and rinse the jar if algae builds up.
Roots usually start as small white or pale nubs at the node or aerial root. Wait until roots are long enough to anchor in mix, roughly 2.5 to 5 cm (1 to 2 inches), before potting. Do not fertilize the jar; unrooted cuttings need clean water and oxygen more than nutrients.
Weekly Water-Rooting Checks
| Stage | What you want to see | What to do |
|---|---|---|
| Week 1 | Firm node, clear water, no black mush | Refresh water if cloudy |
| Weeks 2-3 | Root initials or swelling at node | Keep light and warmth stable |
| Weeks 3-6 | Roots lengthening, leaf still firm | Prepare a small pot and chunky mix |
| Pot-up stage | Firm roots 2.5-5 cm long | Pot into moist aroid mix and support gently |
If the node turns black and soft, discard the rotted tissue and sanitize the vessel before trying again. If the leaf yellows but the node stays firm, wait; a single-leaf cutting sometimes sacrifices the leaf while rooting.
Sphagnum Moss Propagation Method
Moss works well for Monstera Peru cuttings that already have aerial roots. Moisten long-fiber sphagnum, then squeeze it until it feels like a wrung sponge. Pack it loosely around the node in a clear cup or propagation box with small vents. The goal is damp and airy, not compressed and dripping.
Open the container at least weekly. If moss smells sour, looks slimy, or stays wet at the bottom, increase ventilation and replace bad moss. Pot the cutting once roots are firm and visible through the moss. Leave a little moss attached rather than tearing new roots bare; remove only loose, decaying strands.
Air Layering for Valuable or Leggy Vines
Air layering roots the node before you detach the cutting. It is the safest method for a prized vine, a bare lower stem you want to restart, or a tight-internode section where you cannot confidently cut a generous node piece. The parent plant continues feeding the stem while roots form.
Wrap damp sphagnum around a node, cover it with clear plastic, and secure both ends loosely enough for airflow checks. Check every one to two weeks. When roots hold the moss together, cut below the rooted layer and pot it into a small container. Penn State Extension names air layering alongside stem cuttings for Monstera propagation, which is why it deserves space here rather than being treated as an advanced gimmick.
Potting Up Rooted Cuttings
Use a small pot with drainage, usually 8 to 10 cm (3 to 4 inches) for a single-node Peru start. A compact starter pot is easier to manage because extra wet mix around a small root system encourages rot. Fill with the Monstera Peru soil mix: potting mix amended with perlite and orchid bark so it drains quickly but does not dry instantly.
Pre-moisten the mix, set the rooted node just below the surface, and keep petioles above the soil. Water once to settle the mix, then let the top couple of centimeters begin to dry before watering again. Resume the normal Monstera Peru watering rhythm only after the cutting has anchored and pushed a new leaf.
Training Cuttings on a Board or Pole
If you want shingling or compact climbing growth, install support at pot-up or within the first month. Kew’s accepted-name record describes Philodendron opacum as a climbing epiphyte, and Wisconsin Horticulture Extension describes juvenile Monstera seedlings as shingle plants climbing trunks toward brighter positions. Indoors, a cork board, wood plank, coir pole, or moss pole gives young nodes something to follow.
Tie stems loosely so the node rests near the support. Keep the support lightly moist when aerial roots are attaching, but do not keep the pot soggy to wet the pole. Train early; retrofitting a long trailing vine later usually leaves bare gaps between leaves.
Common Failures and How to Fix Them
| Problem | Likely cause | First fix |
|---|---|---|
| Leaf stays green but no vine grows | Leaf-only cutting without node | Start over with stem node tissue |
| Cutting rots in water | Submerged leaf, stale water, weak stem | Remove leaves below water, clean jar, use firm cutting |
| Moss grows mold | Moss too wet or sealed too tightly | Replace bad moss, squeeze drier, add ventilation |
| No roots after 6-8 weeks | Cold, dim, stressed parent, or buried node | Move to warmer bright indirect light and check node firmness |
| Roots form but plant collapses after pot-up | Potted too early, mix too dry/heavy, pot oversized | Use moist chunky mix and a smaller pot |
| New vine grows leggy | Rooted cutting kept too dim or unsupported | Improve light and add support early |
The reset protocol is simple: discard soft tissue, clean the vessel, recut only if there is healthy node tissue above the damaged area, and restart in fresh water or properly damp moss. Do not try to rescue a mushy node with fertilizer.
Pet and Child Safety During Propagation
Propagation creates small, loose plant pieces that are easier for pets to reach than a mature potted specimen. The ASPCA lists Swiss cheese plant as toxic to cats and dogs, with oral irritation, burning, drooling, vomiting, and difficulty swallowing after chewing. Because Monstera Peru is sold in the Monstera/aroid trade group and the accepted taxonomy is still Araceae, treat every cutting, leaf, and jar as unsafe for chewing.
Keep jars and moss boxes in closed rooms or on high shelves, not on low windowsills. Bag trimmings immediately, wash tools, and wash your hands after handling sap. If a pet chews a cutting, contact a veterinarian or ASPCA Poison Control rather than waiting for symptoms to escalate.
First Three Months After Potting
The first three months are about root establishment, not fast display growth. Keep the cutting in bright indirect light, stable warmth, and modest humidity. Avoid fertilizer until the first new leaf hardens; roots that just left water or moss are easily burned by salts.
Expect the first new leaf to be smaller than mature parent foliage. Deeper puckering and larger leaves return as the cutting roots through the pot, climbs support, and receives enough light. If the pot stays wet for more than ten to fourteen days, improve light, check mix structure, or move to a smaller container rather than watering by habit.
When to Use This Page vs Other Monstera Peru Guides
Use this propagation page when you are cutting, rooting, potting up, or troubleshooting new Monstera Peru starts. Use the Monstera Peru pruning guide before cutting a parent vine for shape. Use the soil guide when choosing pot-up mix, the watering guide after roots enter soil, and the light guide when rooted cuttings stretch or lose embossed texture. The overview covers identity, toxicity, and care defaults.
Related Monstera Peru Guides
- Monstera Peru overview - identity, taxonomy caveat, toxicity, and full care defaults
- Monstera Peru pruning - where to cut the parent vine before rooting trims
- Monstera Peru soil - chunky pot-up mix and starter pot sizing
- Monstera Peru watering - dry-down checks after roots enter soil
- Monstera Peru light - placement for compact new growth and stronger texture
Conclusion
Monstera Peru propagation succeeds when you respect the node. Choose a firm, healthy stem section, root the node in clean water, damp airy moss, or an air layer, then pot up before roots become long and brittle. Keep the first pot small, the mix chunky, and support close to the node if you want the new vine to climb instead of trail. The practical checklist is simple: real node, clean cut, warm bright indirect light, no soggy medium, careful pot-up, and pet-safe placement.