Brown Tips on Philodendron White Princess: Causes, Checks &
Quick answer
Brown tips on Philodendron White Princess almost always start in the white sectors, which carry little chlorophyll and lose moisture faster than green tissue. The usual causes are dry air, watering swings, too much direct sun, or fertilizer salt buildup. First step: water the pot deeply until it drains, return the plant to bright indirect light out of direct sun, and make only that one correction before judging the result.
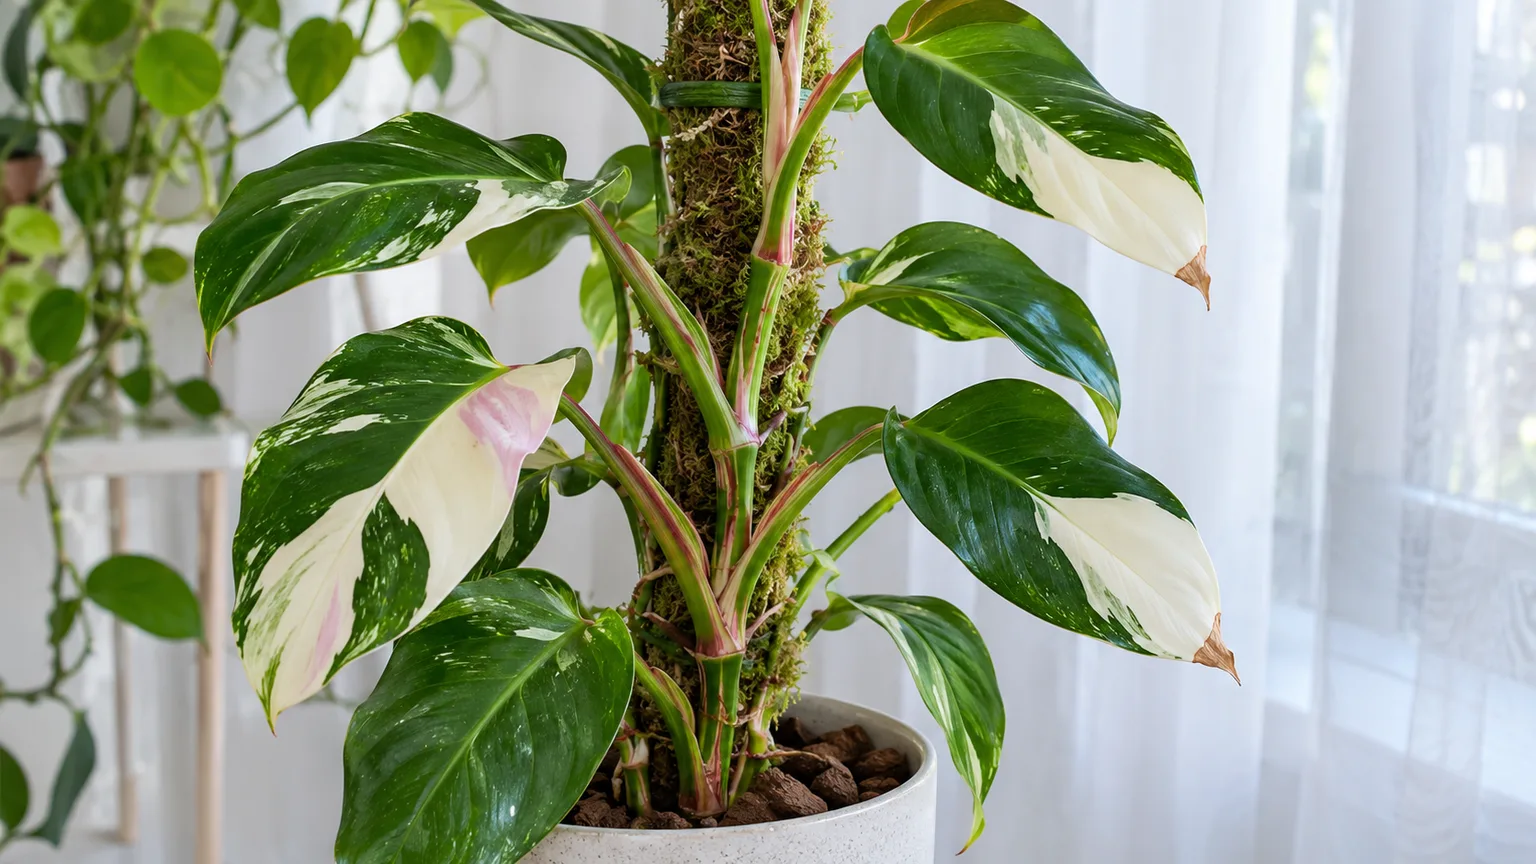
Brown Tips on Philodendron White Princess: Causes, Checks & Fixes
This guide covers brown tips on Philodendron White Princess. See also the general Brown Tips guide, watering, and light pages for this plant.
Brown Tips on Philodendron White Princess: Causes, Checks & Fixes
Quick answer
Brown tips on Philodendron White Princess almost always start in the white sectors, which carry little chlorophyll and lose moisture faster than green tissue. The usual causes are dry air, watering swings, too much direct sun, or fertilizer salt buildup. For how tip burn works across houseplants in general, see our brown tips guide. On White Princess, the pattern usually shows up as crisping confined to pale edges and points while green tissue still looks fine.
First step: water the pot deeply until water runs from the drainage holes, then return the plant to bright indirect light out of direct sun. Make that single correction, then watch the next new leaf before changing anything else.
What brown tips look like on White Princess
On this plant, tip burn is a white-tissue problem before it is a whole-leaf problem. Expect dry, papery crisping that starts at the leaf point or along the outer edge of white and cream sectors, often with a thin tan border between dead and living tissue. Pink-flushed areas near the stems can crisp the same way. Green sectors on the same leaf frequently stay glossy and firm, which confuses owners into thinking the plant is both healthy and dying at once.
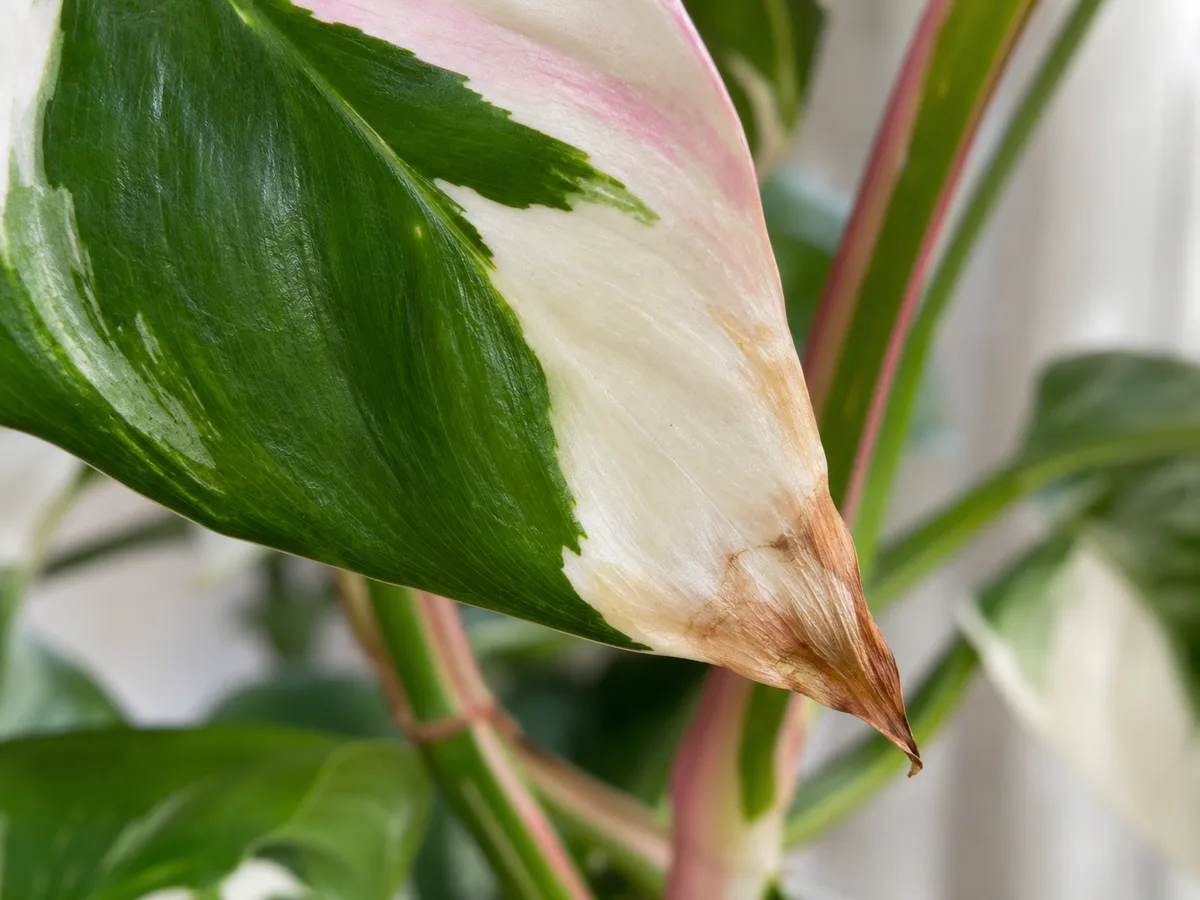
Brown tip burn often begins in low-chlorophyll white tissue while adjacent green tissue remains firm.
Because white areas have almost no pigment to disguise damage, even minor stress shows immediately. Texture matters more than color for diagnosis: dry and papery means moisture, light, or salt stress, while soft, dark, or spreading marks point toward something worse. Confirm the plant is truly a White Princess by the green stems with pink striping, since White Wizard and White Knight brown in the same spots but need slightly different light handling.
Why the white tissue browns so easily
White Princess is a variegated Philodendron erubescens, and its pale sectors photosynthesize poorly compared with green tissue. Those sectors run hotter in direct sun and transpire moisture they cannot easily replace, so any gap in watering or humidity lands on them first. A plant that looks perfectly watered for its green leaves can still be marginal for its white ones.
Three plant-specific factors stack the odds. First, this variety wants brighter indirect light than plain green philodendrons to hold its variegation, yet its white patches scorch in direct midday sun, so the light window is narrower than owners expect. Philodendrons belong in bright but indirect light, out of direct summer sun that scorches leaves. Second, the upright, self-heading growth keeps leaves exposed to room air rather than sheltered under a canopy, so dry indoor air and radiator drafts hit leaf edges directly. Third, enthusiastic feeding leaves salts in the chunky aroid mix, and leaf margins are the first tissue to show that stress.
How to confirm the cause
Work through these checks in order before treating anything.
- Soil moisture at depth. Push a finger 3 to 5 cm into the mix, the same depth used for routine watering checks. Powder-dry mix with crispy white edges points to underwatering or long dry gaps. Soggy mix with browning that crosses into green tissue points toward root stress instead.
- Damage map. Browning confined to white edges and points suggests dry air, watering swings, or mild salt stress. Browning plus bleached patches in the middle of white sectors after a move suggests sun scorch. Even browning across green and white alike suggests fertilizer or water-quality causes.
- Salt and feed history. Look for a white crust on the soil surface or pot rim and count recent feedings. Heavy or frequent feeding before symptoms appeared implicates salts, since excess fertilizer makes tips of leaves curl and brown.
- Light and air changes. Ask what changed in the last two to four weeks: a move closer to glass, a new grow light, a radiator switching on, or an air-conditioner draft. White sectors answer light and air changes within days.
- Roots if in doubt. If more than one leaf is browning fast or green tissue is involved, slip the nursery pot off and inspect. Firm, pale roots mean the problem is above the soil line; brown, mushy, or sour-smelling roots mean root trouble driving the tip damage. Brown tips may signal over-watering or more likely under-watering, which is assessed by checking the roots.
The first fix to try
Water deeply and reposition, then stop. Drench the mix evenly until water flows from the drainage holes, empty the saucer so the pot never sits in standing water, and place the plant in bright indirect light such as an east window or a meter or two back from south or west glass. Review the plant’s normal light needs while you choose the spot, favoring brightness without direct midday rays.
Do nothing else for at least a week. No fertilizer, no repot, no misting blitz, no pruning spree. One correction lets you read the plant’s response; stacking fixes hides which one worked.
Step-by-step recovery
Once the first fix is in and the plant has had a few days to respond, proceed by severity.
- Stabilize the watering rhythm. Let the top 3 to 5 cm dry between waterings, then water thoroughly. Shallow sips that wet only the surface leave the lower root zone alternating between dry and soaked, and leaf tips pay for that swing.
- Flush salts if the history fits. If you found crust or heavy feeding, run plain room-temperature water through the pot several times so it drains freely, which helps wash excess salts through the pot. Resume feeding only when clean new growth appears, at half the label rate.
- Soften the water if tips stay crispy. Where tap water is hard or fluoridated, tip burn can persist despite good watering, since fluoride or chlorine in tap water ranks among the standard causes. Collect rainwater or let tap water stand overnight, and avoid softened water high in sodium.
- Raise humidity steadily. Group plants, use a pebble tray with the pot above the waterline, or run a humidifier nearby. P. erubescens prefers warm temperatures and high humidity, and steady background moisture protects white edges better than bursts of misting that wet leaves and invite spots.
- Trim dead edges last. Once new growth looks clean, snip only fully brown tissue with clean scissors, leaving a sliver of dead margin so you never wound living tissue. Trimming is cosmetic and belongs at the end, never as the treatment itself.
Recovery timeline
Browned edges will not heal, and on erubescens types there is no way to reverse the damage once leaf margins dry out. Judge recovery by halt, not repair: the crisp border should stop advancing within one to two weeks of a correct fix. The next new leaf, which takes two to four weeks to expand in the growing season, should emerge with intact tips.
Worry if browning keeps marching into green tissue, new leaves emerge already tipped brown, or stems soften. Those signs mean the diagnosis was wrong or roots are involved, and the plant needs unpotting and root inspection rather than more surface tweaks.
Lookalikes worth ruling out
- Sun scorch patches sit in the middle of white sectors as bleached tan areas, not just at edges and points. They follow a move into direct sun within days.
- Fertilizer burn browns margins evenly across green and white tissue, often with crust on the mix and a recent feeding behind it. Confirm against the plant’s normal feeding rhythm before feeding a stressed plant.
- Cold or draft damage blackens edges quickly after exposure near glass or vents in winter, sometimes with a water-soaked look first.
- Pest rasping, especially thrips or mites on new growth, distorts young leaves with silvery or stippled marks rather than clean dry crisping. Check leaf undersides with a lens.
- Natural aging drops the oldest lower leaf whole, yellowing first, while tip burn strikes leaves of any age at their extremities.
- Root rot yellows and wilts across the plant with soft stems and foul mix, a whole-plant decline rather than edge crisping.
Mistakes to avoid
Do not fertilize brown tips away; feeding a stressed plant deepens salt injury. Do not repot on day one unless roots prove rotten, since disturbed roots supply even less water to already-crisping edges. Do not move the plant between windows every few days chasing perfect light, because each move resets its acclimation. Check that the potting mix still drains freely before blaming the watering schedule, but change the mix only when it stays soggy or collapses. Finally, do not over-mist white leaves to compensate for dry air; standing droplets on fragile pale tissue cause spots that look like a new disease.
How to prevent it next time
Prevention on White Princess is routine stability, not heroics. Water by finger test at 3 to 5 cm, hold the bright-indirect position year-round, and feed lightly only in active growth with an occasional plain-water flush. Keep humidity steadier through winter heating season when indoor air dries most. Give the upright stems a moss pole or support so new leaves expand in stable air rather than sprawling across hot sills. New white-heavy leaves are the canaries: if their tips stay clean for a month, the routine is right.
Related tool
Use the Brown Tips Diagnosis Tool to rank the likely causes for your plant’s exact pattern before changing more than one variable at a time.