Repotting Philodendron Xanadu: When, How & Pot Size
Repotting Philodendron Xanadu: When, How & Pot Size
Repotting Philodendron Xanadu: When, How & Pot Size
By Sai Ananth · Reviewed by LeafyPixels Review Board · Last reviewed 2026-07-01
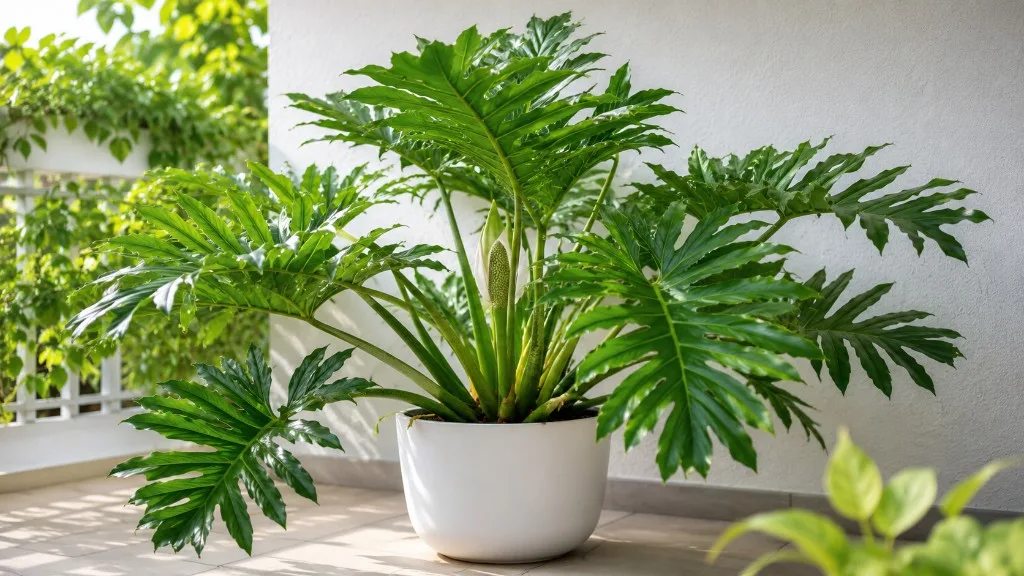
Philodendron Xanadu (Thaumatophyllum xanadu) is a self-heading tropical bush with deeply lobed, glossy leaves — not a vine that wants a moss pole at repot time. When roots outgrow a nursery pot, the job is less about vertical climbing support and more about refreshing airy mix, choosing a modestly wider stable pot, and protecting the central crown while you work. Done well, a spring repot gives this floor-friendly philodendron room to spread evenly and produce the dense mounded shape it is known for. Done poorly — oversized container, soggy old peat left in place, or repotting during a dim winter stretch — you get weeks of drooping lobes and a pot that stays wet long after you thought you were being careful.
This guide covers when Xanadu actually needs repotting, how that differs from vining philodendrons like Pink Princess, the exact pot and mix choices that match our soil guide, and how to read the first firm new lobed leaf as your clearest recovery signal after the move.
Illustrative Scenario: A Typical Indoor Xanadu Repot
Picture a 14 cm nursery pot Xanadu on a bright living-room shelf. New lobed leaves have slowed despite consistent watering and good light. Water runs through in minutes without wetting the center, roots peek from drainage holes, and the mix smells slightly stale — not sour yet, but tired. In mid-April, you choose a routine upgrade repot: slide into a 17 cm wide pot (not tall and narrow), refresh with 75 % potting soil and 25 % perlite, tease circling outer roots gently, and skip fertilizer for one month. Mild droop on the outermost leaves lasts about a week. At week three, a new leaf unfurls with deep lobes and firm petioles. That tells you roots have reconnected; the repot worked.
If your plant matches only one symptom — say, a single yellow lower leaf — scroll to the routine vs rescue table before you unpot. Yellowing often traces to overwatering or root rot rather than tight roots alone.
Quick Answer — When to Repot Philodendron Xanadu
Repot Philodendron Xanadu every one to two years, or sooner when roots circle drainage holes, water runs straight through without absorbing, or growth stalls in spring despite good light and balanced feeding. Spring is the best time for houseplant repotting because roots grow into fresh mix as seasonal growth resumes. Choose a pot only 2–5 cm (1–2 inches) wider than the current one, refresh with standard potting mix plus 20–25 % perlite, and do not add a moss pole — this cultivar stays bushy on its own. Skip fertilizer for four to six weeks after the move. Mild drooping for one to two weeks is normal; the first firm new lobed leaf is your best sign that roots have reconnected.
Why Xanadu Repotting Differs From Vining Philodendrons
Collectors familiar with climbing philodendrons often reach for a moss pole at every repot. Xanadu breaks that template. Clemson HGIC describes ‘Xanadu’ as a dense, low-growing self-heading type with deeply dissected lobes, maturing around three feet tall and five feet wide — a spreading bush, not a stem that wants to attach upward. Our overview guide notes the same habit: give horizontal space for the crown to fill evenly instead of expecting split leaves from a pole.
Self-heading crown, not a climber
Self-heading philodendrons send leaves from a central clump rather than elongating vines. Roots fill pots symmetrically from the crown downward, which means Xanadu can look modest above soil while the bottom third of the rootball is already a dense mat. That hidden tightness is why the plant still drinks on schedule yet stops pushing new lobes — the roots have nowhere left to go.
No moss pole — give the bush horizontal room instead
Vining types produce adventitious roots along stems that attach to moss or bark. Xanadu does not use that architecture indoors. Installing a pole during repot adds top weight and root disturbance with no horticultural benefit. If you want a taller philodendron look, choose a different species; for Xanadu, repot into a stable wide-base container that will not tip as the bush spreads.
Wide spread habit and pot stability
Because Xanadu fills sideways, a tall narrow decorative cachepot looks elegant but tips easily once foliage matures. At repot time, favor width over height within the one-size-up rule, and confirm the new pot sits flat on its saucer with the crown centered. Clemson HGIC warns that long petioles on self-heading types are brittle — place the finished plant out of traffic paths so stems are not snapped during the recovery weeks.
Routine Repot vs Rescue Repot: Which Session Are You In?
Not every unpotting is the same job. Matching your session type prevents treating rot like a simple size upgrade — or delaying a rescue because the calendar says wait until spring.
| Signal | Routine upgrade repot | Rescue repot |
|---|---|---|
| Root color | Mostly white or tan, firm | Brown, mushy, or foul-smelling |
| Growth | Stalled but leaves still firm | Widespread wilt, collapse, or spreading yellow |
| Timing | Spring–early summer preferred | Any season if rot is active |
| Pot direction | One size up (2–5 cm) | Often same size or smaller after trimming |
| Root handling | Tease circling tips; keep ball mostly intact | Trim rot; may need division backup |
| Fertilizer | Wait 4–6 weeks | Wait until firm new growth; see root rot guide |
Penn State Extension recommends repotting in spring when roots will grow into new potting mix as active growth resumes — ideal for routine upgrades. When mushy roots or sour mix are present, treat it as rescue work even in winter, using a modest pot, temperatures above 18°C (65°F), and cautious watering checks until spring.
When to Repot Philodendron Xanadu
Calendar reminders help, but root condition should drive the decision. The RHS philodendron guide notes philodendrons can usually stay in their original container for at least a couple of years, or until roots become densely packed — then spring is the best time to repot. NC State Extension lists practical signals: mix drying very quickly, lower leaves yellowing, slow growth despite spring feeding, and roots visible from drainage holes or the soil surface.
Plan a full repot every one to two years for an actively growing indoor Xanadu in a 12–20 cm grow pot. Bright rooms with even light may hit the one-year mark; cooler winter homes may sit comfortably for two. Repot sooner if you find mushy roots, a sour smell, or root rot symptoms — that becomes a rescue repot even outside the ideal season.
Do not repot just because one lower leaf yellowed. Yellow leaves often trace to overwatering, cold drafts, or natural aging on outer lobes. Repotting an already stressed plant stacks variables and makes diagnosis harder. Confirm the root zone is the bottleneck — circling roots, fast dry-down, or salt-crusted mix — before you commit.
Do not repot a brand-new nursery plant on day one unless the mix is clearly failing or pests are visible. Quarantine, learn the pot’s dry-down rhythm for two to three weeks, then repot in the next active growth window if roots are already tight. The overview guide covers first-month stability in more detail.
Top-dress vs full repot
Top-dressing — scraping the top 3–5 cm of depleted mix and replacing it with fresh perlite-enhanced soil — works when roots are healthy, drainage is still acceptable, and pot size is still appropriate. Choose full repot when two or more root-bound signals appear together, the mix smells sour, or water channels through a hydrophobic mat without wetting the center.
Choosing the Right Pot Size and Material
Oversized pots are the most common repot mistake on Xanadu. The RHS warns that if the pot is much bigger than the rootball, compost stays wet longer, which can cause roots to rot — especially dangerous on a self-heading plant with one central crown sitting in unused soggy soil.
One size up only (2–5 cm wider)
NC State Extension recommends a container no more than 2 inches (about 5 cm) larger in diameter than the current one. For metric growers, think 2–5 cm wider — enough room for fresh mix around the rootball, not a swimming pool of peat. After repotting, the top of the rootball should sit slightly below the pot rim with space left for watering, as Penn State Extension describes.
Wide-base pots for spreading crowns
Xanadu’s mature spread can reach five feet wide outdoors (Clemson HGIC); indoors it still pushes sideways before it pushes tall. A pot that is slightly wider than deep improves stability and matches how roots explore horizontally. Avoid decorative tall cylinders that look proportional to one leaf but not to the whole bush six months later.
Terracotta vs plastic trade-offs
Penn State Extension notes unglazed clay is porous and pulls water from mix, reducing waterlogging but requiring more frequent checks — useful if you tend to overwater. Plastic retains moisture longer, which suits steady watering rhythms in bright rooms. Either works if drainage holes are open and you judge dryness at 3–5 cm depth, not by calendar.
Soil Mix to Use at Repot Time
Replace mix entirely at full repot — do not leave a dense peat core inside a fresh airy shell. For Xanadu, use standard potting mix plus 20–25 % perlite for drainage, matching our dedicated soil guide. The RHS philodendron guide recommends a loose, free-draining slightly acidic compost (pH roughly 5–6) — most quality peat-free houseplant mixes already fall in range.
DIY at repot: blend 75 % quality potting soil and 25 % perlite by volume; add a handful of orchid bark only if the new pot is large or your room runs humid. Penn State Extension stresses using soilless potting mix, not garden soil, to avoid pests and poor drainage indoors. Moisten the mix before repotting so it absorbs water evenly on the first soak.
Step-by-Step: How to Repot Philodendron Xanadu
Before you start
Gather a new pot with drainage holes, fresh mix, gloves (philodendrons contain irritating calcium oxalate crystals — ASPCA lists philodendron as toxic to pets), and space to work. Water lightly the day before so the rootball releases more easily, as Penn State Extension recommends. If reusing a pot, wash and sanitize with one part bleach to nine parts water, then rinse thoroughly.
Eight-step procedure
- Slide the plant out by tipping the pot and supporting the rootball — do not yank brittle petioles. NC State Extension advises holding the plant between fingers over the soil while tapping the rim.
- Inspect roots. White or tan firm roots are healthy. Trim mushy brown sections with clean shears on rescue repots only.
- Tease circling outer roots gently so they point outward — cut and unwind severely matted circles if needed so roots can grow normally.
- Remove degraded surface mix if salts crust the top inch; keep the core rootball intact on routine repots.
- Add moist mix to the new pot so the rootball top will sit about 2–3 cm below the rim.
- Center the plant at the same depth as before — never bury the crown deeper to stabilize a leaning bush.
- Backfill around sides, firm lightly by tapping the pot — do not compact wet mix after watering.
- Water once thoroughly until excess drains, then empty the saucer. Wait for top 3–5 cm dry-down before the next soak.
Division when multiple crowns are visible
Xanadu’s primary propagation method is division at repotting when you see multiple active growth points with their own root clusters. Use a clean knife to separate sections, pot each division into its own modest container, and treat divisions as post-repot seedlings — no fertilizer until each shows new growth. Divisions are more shock-sensitive than a single intact bush; keep them in bright indirect light and avoid simultaneous pruning on the same day.
Post-Repot Care for the First Four Weeks
Watering after the move
The first soak settles mix around roots. After that, return to check-first watering — insert a finger or chopstick to 3–5 cm depth and water only when dry, as our watering guide describes. A freshly repotted Xanadu in a slightly larger pot may take longer to dry than before; that is normal and not permission to pour on schedule.
Light and temperature
Keep medium to bright indirect light steady — do not hide the plant in a dim corner “to rest.” Avoid cold drafts below about 15°C (59°F) (RHS philodendron guide); philodendron roots lose function in chilled wet mix. Do not move the pot, change light, and repot in the same week.
Skip fertilizer until new growth
Hold liquid fertilizer for four to six weeks after repotting, even during spring. Fresh roots need time to colonize mix without salt pressure. When a firm new lobed leaf opens, resume half-strength monthly feeding per our fertilizer guide.
Common Repotting Mistakes on Xanadu
Oversized pots and wet unused soil
Jumping from a 12 cm to a 25 cm pot “for future growth” leaves a ring of permanently wet peat around a small rootball — the classic setup for root rot on a self-heading crown. One size up only.
Burying the crown or breaking brittle petioles
Deep planting suffocates the crown and invites stem rot. Self-heading philodendrons already sit low; repot at the same soil line. Support the plant by the rootball, not by grabbing leaf stalks.
Repotting a brand-new nursery plant on day one
Retail mix is not always ideal, but immediate repot plus acclimation shock plus new light often produces drooping leaves that look like failure. Quarantine first unless roots are clearly circling or mix is sour.
When to use this page vs other Philodendron Xanadu guides
Use this repotting guide when roots are circling, mix is exhausted, or you are planning a spring upgrade or division on a stable plant. Use the soil guide for mix ratios and container material between repots. Use watering and light guides to fix daily rhythm — repotting does not solve chronic overwatering in dim corners. Use propagation for division detail beyond the repot session. Use a problem page when symptoms are already present — yellow leaves, root rot, or drooping leaves — rather than re-reading general care.
Related Philodendron Xanadu guides
- Overview — growth habit, toxicity, first-month quarantine
- Soil — perlite ratios, pH, terracotta vs plastic
- Watering — 3–5 cm dry-down checks after repot
- Light — keep brightness steady through recovery
- Propagation — division timing and aftercare
- Fertilizer — when to resume feeding post-repot
- Pruning — trim damaged lobes after root work stabilizes
Conclusion
Philodendron Xanadu repotting is a spring-friendly root refresh, not a moss-pole installation. Repot when roots circle, mix fails, or growth stalls — using a pot only 2–5 cm wider, 75/25 soil and perlite, and the same crown depth as before. Protect brittle petioles, divide only when multiple crowns warrant it, and read one firm new lobed leaf as proof the bush has settled. If symptoms persist beyond three weeks, diagnose watering and root health before repotting again.