How to Grow and Care for American Elderberry
Learn how to grow American elderberry with the right site, spacing, watering, pruning, propagation, harvest timing, and raw-fruit safety.
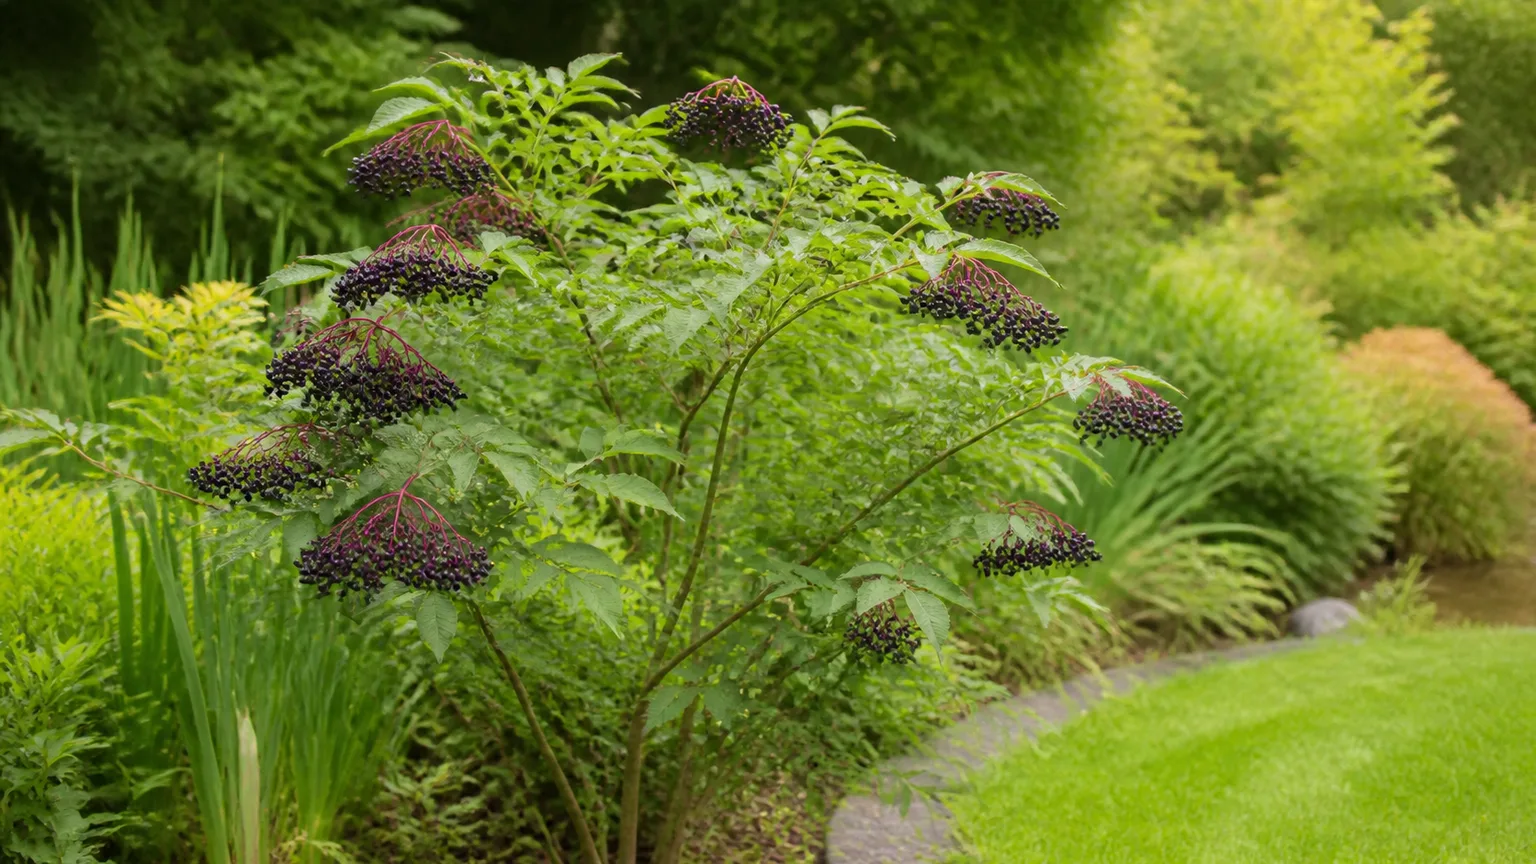
American elderberry (Sambucus canadensis) is a good match for the part of a yard where many shrubs struggle: a sunny, moisture-retentive edge that is not permanently waterlogged. It produces fragrant white flower clusters in early summer, purple-black fruit later in the season, and dense cover for birds and beneficial insects. The same vigor that makes it productive also means you need a plan for suckers, mature width, and harvest access before planting.
The short version is simple: give it at least six hours of sun, rich soil that stays evenly moist but drains, room to spread, and a late-winter pruning routine. If fruit is the goal, grow two different cultivars when possible. If people or pets can reach the planting, treat every raw or unripe fruit and every leaf, stem, and root as a safety concern.
Know What American Elderberry Needs Before You Plant
American elderberry is a deciduous, multi-stemmed shrub or small tree native across much of eastern and central North America. A mature plant commonly reaches 5 to 12 feet tall and 6 to 12 feet wide, although cultivar, climate, soil, and whether suckers are removed can push the footprint beyond the number on a plant tag. Its opposite compound leaves usually carry five to eleven sharply toothed leaflets, while flat-topped flower clusters become heavy, drooping fruit clusters in late summer and fall.
NC State Extension describes it as tolerant of a wide range of wet-to-dry soils, with best performance in rich, moist, slightly acidic soil and sun to partial shade. The same profile places it in USDA Zones 4–8 and warns that it can become weedy through root suckers. Use those ranges as a starting point, then check a local nursery or cooperative extension office for cultivars that reliably fruit in your winter and summer conditions. (NC State Extension)
This is not the ideal shrub for a tightly clipped foundation bed. It naturally forms an open, arching thicket, and canes may bend under flowers, fruit, wet snow, or wind. It is better at the back of a mixed border, along a fence, beside a pond or swale, or in a native planting where a little informality is an asset. For a broader native planting, pair its moisture preference with other regionally appropriate plants in a native perennial garden, rather than placing it in the driest part of the yard.
Choose a Site That Matches Its Mature Size
Balance Sun, Moisture, and Drainage
Full sun—roughly six or more hours of direct light—usually gives the heaviest flowering and fruiting. American elderberry tolerates partial shade, but a shaded shrub often makes plenty of leafy growth with fewer flower heads and a smaller crop. In a hot climate, morning sun with some afternoon shade can reduce water stress, but shade is not a substitute for irrigation during a dry spell.
Look for soil that holds moisture after watering yet lets excess water move away from the crown. A low place that stays damp after rain can be excellent; a hole that remains submerged for days is not. If your soil is heavy clay, choose a naturally draining spot or raise the planting row rather than simply adding more organic matter to a saturated hole. In sandy soil, compost and a mulch layer help, but you will still need a consistent watering plan.
Test soil before adding lime, sulfur, or large amounts of fertilizer. A slightly acidic to neutral root zone is a reasonable target, but a test tells you what is actually limiting growth. Mix finished compost into poor soil, keep fresh manure away from roots, and avoid building a rich pocket that drains differently from the surrounding ground.
Plan for Suckers and Access
American elderberry spreads by underground shoots, so decide whether you want a contained shrub or a small colony. For a wildlife hedge, suckers can fill gaps and create cover. For a fruit patch, remove unwanted shoots while they are small so the plant’s energy and your harvest stay concentrated in accessible canes.
Allow at least 6 feet between plants as a minimum starting point, and use more space—often 8 to 10 feet—when cultivars are vigorous, when you need to walk between plants, or when you want airflow around fruit clusters. Put the row where a hose, drip line, bird netting, and a wheelbarrow can reach it. A planting that looks roomy in its first year can become a tangled wall surprisingly quickly.
Plant American Elderberry Correctly
Plant container-grown or dormant bare-root stock in spring once the soil is workable, or in fall early enough for roots to settle before the ground freezes. Avoid planting into frozen, waterlogged, or blazing-dry soil. Water a container plant thoroughly before removing it, and keep bare roots cool and damp until they go into the ground.
Dig a hole two to three times wider than the root ball and no deeper than the root system needs. Set a container plant at the same level it was growing; keep the crown at or just above the surrounding soil rather than burying the lower stems. Loosen circling roots, backfill with native soil amended with a modest amount of compost, and water slowly to settle air pockets.
Apply 2 to 3 inches of shredded bark, leaf mold, or finished compost over the root zone, leaving a few inches clear around the stems. Mulch should reduce evaporation and weeds without becoming a wet collar against the crown. If you are planting a pair for fruit, install both at the same time so they establish on a similar schedule.
Water, Mulch, and Feed for Steady Growth
Keep new plants evenly moist through their first growing season. Rather than sprinkling a little every day, water slowly enough to wet the root zone several inches down, then check the soil before watering again. During hot, dry weather, the top layer may look dry even when deeper soil is moist; during fruit development, do not allow the root zone to swing repeatedly from saturated to bone-dry.
Drip irrigation or a soaker hose is especially useful because it delivers water at the base and keeps leaves, flowers, and fruit drier than overhead irrigation. Refresh mulch as it settles, pull weeds before they compete with shallow roots, and keep grass from growing into the planting. Those simple steps often do more for an elderberry than a stronger fertilizer.
Elderberry is a moderate feeder, not a plant that needs constant doses. Spread a thin layer of finished compost each spring and use a balanced fertilizer only if growth, soil testing, or local extension advice supports it. Excess nitrogen can create long, soft canes and abundant foliage without improving flowers or fruit. Never use a generic fertilizer rate as a substitute for the product label and a soil test.
Improve Fruit Set With Pollination and Cultivar Choice
A single elderberry may flower and set some fruit, but planting two different cultivars is the more dependable choice when you want a substantial harvest. Put them close enough for pollinators to move between flower clusters, while still leaving room for air circulation and picking. A second plant is also insurance against one cultivar having a poor bloom or fruiting year.
Which Cultivars Fit a Home Garden?
Choose cultivars from a nursery that can tell you how they perform in your region. ‘Adams’ and ‘York’ are commonly grown fruiting selections; ‘Johns’, ‘Nova’, and ‘Kent’ also appear in home-garden recommendations. The best pair is not always the two names with the largest advertised clusters—it is the pair that is hardy for your site, ripens within your growing season, and can be pruned and netted without becoming unmanageable.
If foliage is your priority, NC State Extension lists ‘Aurea’ for golden leaves and ‘Laciniata’ for deeply dissected, lacy foliage. Ornamental cultivars can still support wildlife, but confirm the nursery’s fruiting information before buying one for cooking. Cultivar names and availability vary, so local advice is more useful than a universal ranking.
Prune Elderberry With a Renewal System
Prune in late winter or very early spring while the shrub is dormant and before new growth hides the structure. Start by removing dead, broken, diseased, or badly damaged canes at the base. Then remove the oldest, thickest canes—especially those over three years old—and keep a balanced group of strong younger canes with open space between them.
The goal is renewal, not shearing. Elderberries fruit on young lateral growth and on two- and three-year-old wood, while older canes become less productive. A practical routine is to remove roughly one-third of the oldest canes each winter, leaving about five to nine healthy, well-spaced canes on a productive shrub. Cut suckers that are outside the footprint at soil level rather than repeatedly clipping their tips, which can encourage a brushy response.
If the plant has been neglected, renovate in stages if you can: remove the worst old wood first, improve access and airflow, then reassess the next winter. A severely overgrown plant can tolerate harder renewal, but a single drastic cut may sacrifice a season’s crop. Choose the level of pruning based on whether your priority is fruit this year, a smaller shape, or a complete reset.
Propagate From Cuttings, Suckers, or Seed
Cuttings are the best route when you want a new plant that matches a named parent. Rooted suckers are faster when you already have an established shrub and do not mind creating a clone. Seed is possible, but seedlings can vary from the parent and generally require patience and a cold period before reliable germination.
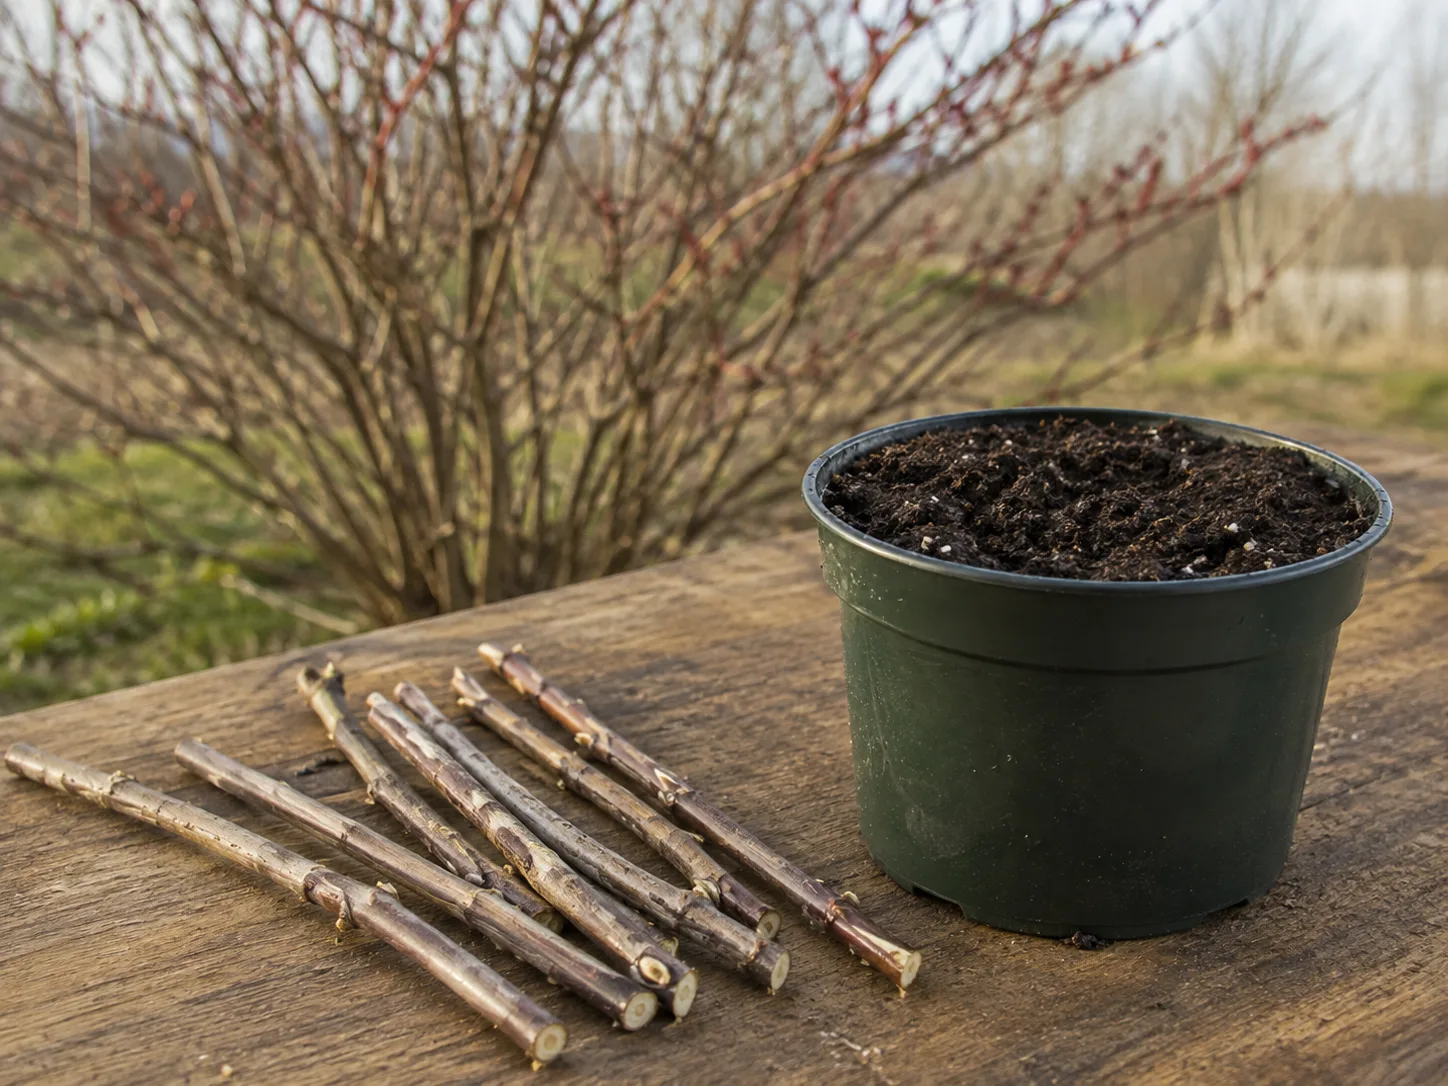
Root Dormant Hardwood Cuttings
Take hardwood cuttings in late winter before the buds break. Select healthy, pencil-thick growth from the previous season and cut sections with several visible buds. Keep track of which end is the base: a straight cut at the bottom and an angled cut at the top can prevent accidental upside-down planting.
Insert the cuttings into a clean, free-draining propagation mix or a prepared nursery row, leaving one or two buds above the surface. Firm the mix around the stem, water it in, and keep it evenly moist but never waterlogged. Bright shade is safer than intense midday sun while roots form. Once the cutting has made strong roots and new growth, harden it gradually before transplanting.
Softwood cuttings taken in the growing season can also root, but they lose moisture quickly and need closer humidity management. For most home gardeners, dormant hardwood is less fussy, easier to store briefly, and better aligned with the annual pruning window.
Decide When to Lift Suckers or Sow Seed
Lift a young rooted sucker while the parent is dormant or just before strong spring growth. Dig wide enough to capture its own roots, sever the connecting root cleanly, and replant it at the original depth. Water the division thoroughly and protect it from drought while it re-establishes.
Use seed when you want genetic variety, a wildlife planting, or an experiment rather than an exact cultivar copy. Clean ripe fruit from the seed, follow a reputable cold-stratification method, and expect uneven germination. Do not plant a seedling in the only carefully contained space in your yard until you know how vigorous it will be.
Grow Elderberry in a Container When Space Is Limited
A large container can make elderberry possible on a patio and can slow the spread of root suckers, but it does not turn a vigorous shrub into a small houseplant. Choose a pot at least 24 inches wide and deep, with a drainage hole and enough weight that a mature shrub will not tip. Use a quality potting mix rather than garden soil, which compacts in a container.
Containers dry out faster than beds, especially when roots fill the pot. Check moisture often, water deeply, and never leave the pot standing in a saucer of water. Place it in full sun in mild climates, or give it some afternoon protection where summer heat makes the root ball dry rapidly.
Feed lightly in spring, repot during dormancy when roots circle the container, and expect more winter root exposure than an in-ground plant. In cold areas, move the pot to a sheltered spot or insulate it before hard freezes. A container is a good containment strategy for one ornamental plant; it is less practical if your main goal is a large, low-maintenance fruit harvest.
Protect Flowers and Fruit From Common Problems
Most elderberry problems become easier to manage when the planting has light, airflow, steady moisture, and clean ground beneath it. Aphids may cluster on soft new growth, spider mites are more likely during hot, dry weather, and borers can weaken stems. Inspect the undersides of leaves and the bases of canes weekly during active growth before reaching for a spray.
Leaf spot and powdery mildew can appear when foliage stays wet, airflow is poor, or the shrub is crowded. Remove badly affected leaves and fallen debris, water at soil level, and thin congested growth during dormancy. For a broader explanation of the white coating and cultural controls, see our guide to powdery mildew. If a pesticide is necessary, use only a product labeled for the crop and problem in your location, and follow the harvest interval exactly.
Birds, wind, and winter snow are often bigger threats to a backyard crop than insects. Stake or support a young plant if it is exposed, choose a sheltered site, and use bird netting only after fruit begins to color. Netting should be secured without trapping birds or other wildlife, and it should be removed after harvest. Leaving every berry for yourself defeats one of elderberry’s best wildlife uses, so decide how much crop you actually need before covering the whole shrub.
Harvest Elderberries Safely and Use Them Well
Harvest flower heads on a dry day when they are fully open if you want elderflowers, but remember that every flower cluster removed is a fruit cluster you will not harvest later. For berries, wait until clusters are fully colored dark purple to nearly black and individual fruits look plump. Green, red, or pale fruit is not ready merely because nearby clusters have begun to ripen.
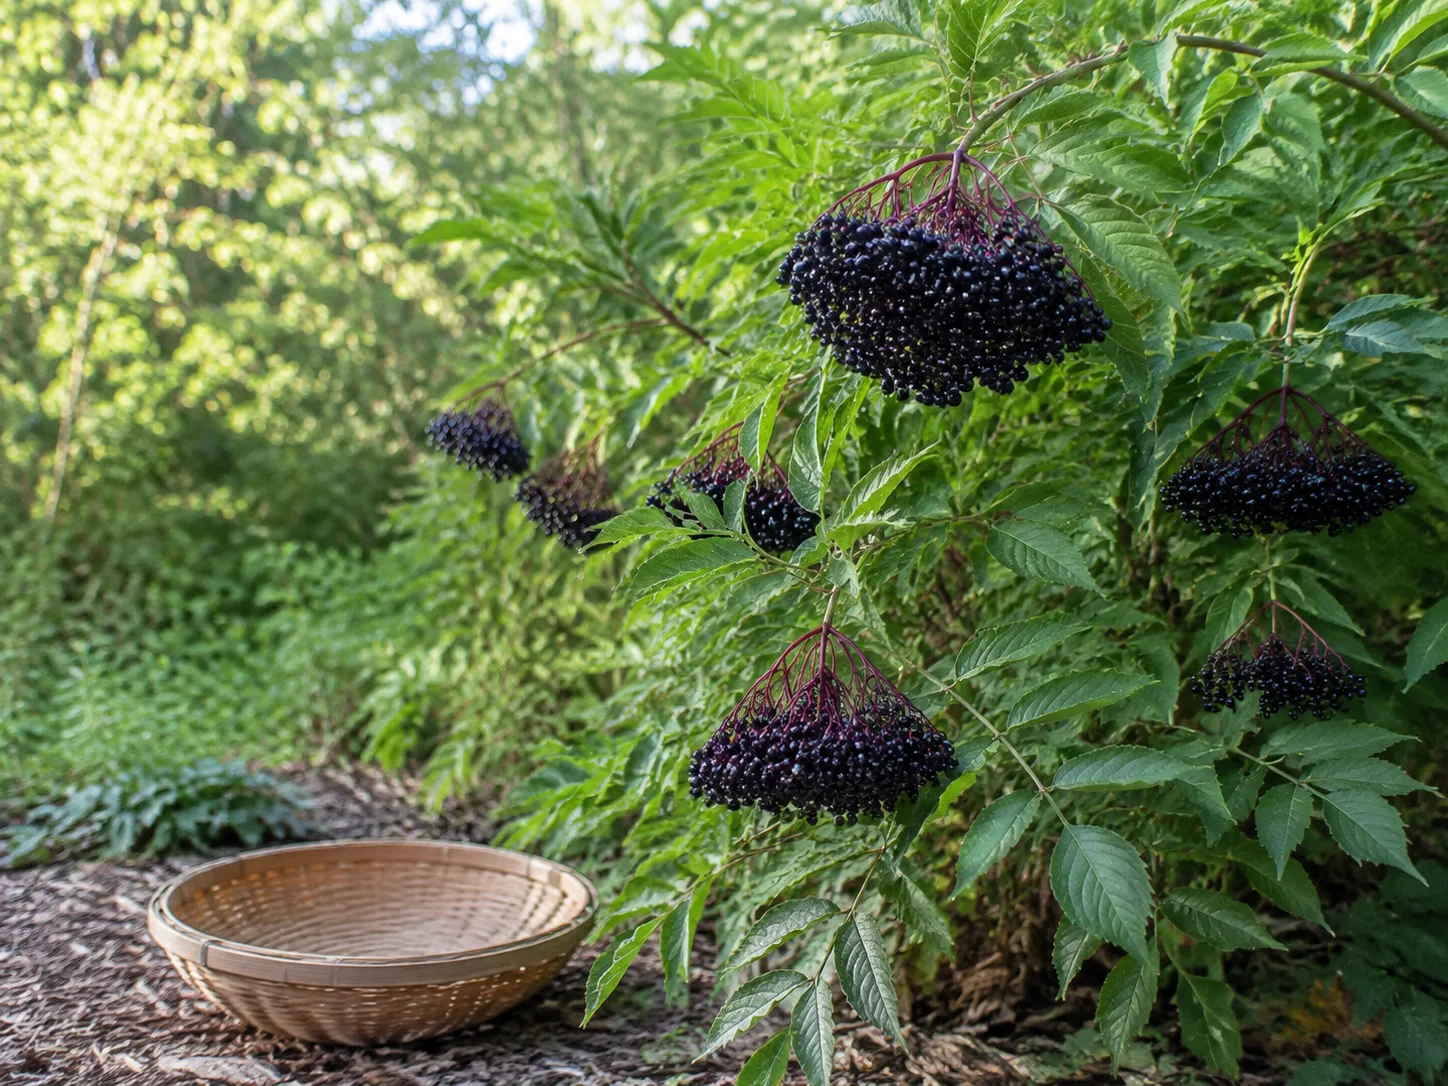
Cut whole clusters with clean pruners and keep them cool. Strip berries from the stems before cooking, sort out unripe fruit and debris, and refrigerate or freeze what you cannot process promptly. Ripe fruit is small and fragile, so a shallow container is less likely to crush it than a deep bucket.
Do not eat raw elderberries as a snack from the shrub. NC State Extension notes that unripe fruit is more toxic than fully ripe fruit and that cooking helps inactivate the cyanogenic glycoside; Ohio State also advises avoiding the leaves, stems, bark, and seeds in home preparations. Pet Poison Helpline reports that the plant, uncooked fruit, and excessive supplement exposure can cause vomiting and diarrhea in pets. (NC State Extension; Ohio State University; Pet Poison Helpline)
Cook ripe, cleaned berries into a recipe that reaches a thorough simmer or boil, such as a jelly, syrup, sauce, pie filling, or other tested preparation. Do not treat a homemade elderberry mixture as medicine or assume that a supplement has the same safety profile as cooked fruit. Keep harvested berries and plant prunings away from children and pets, and contact a veterinarian or poison-control service promptly if a pet may have eaten the plant.
Conclusion: Give Elderberry Room, Moisture, and a Yearly Reset
American elderberry is easiest when you work with its nature instead of trying to make it behave like a tidy evergreen. Plant it where moisture is dependable, sun is generous, and a 6- to 12-foot shrub will not block a path; add a second cultivar if fruit matters; mulch rather than overfeed; and remove old canes every late winter so young wood can carry the next crop.
Your first-year priorities are establishment and observation, not a maximum harvest. Watch how quickly the soil dries, mark the canes you want to keep, remove unwanted suckers while they are small, and decide whether birds, flowers, or berries are sharing the planting. With that modest annual reset—and with every harvested fruit cooked—American elderberry can become a productive native shrub instead of an unruly surprise.



