Overwatered Mums: 6 Signs and How to Save Them
Learn the six signs of overwatered mums, how to confirm the problem at the roots, and the safest recovery steps for pots and garden beds.
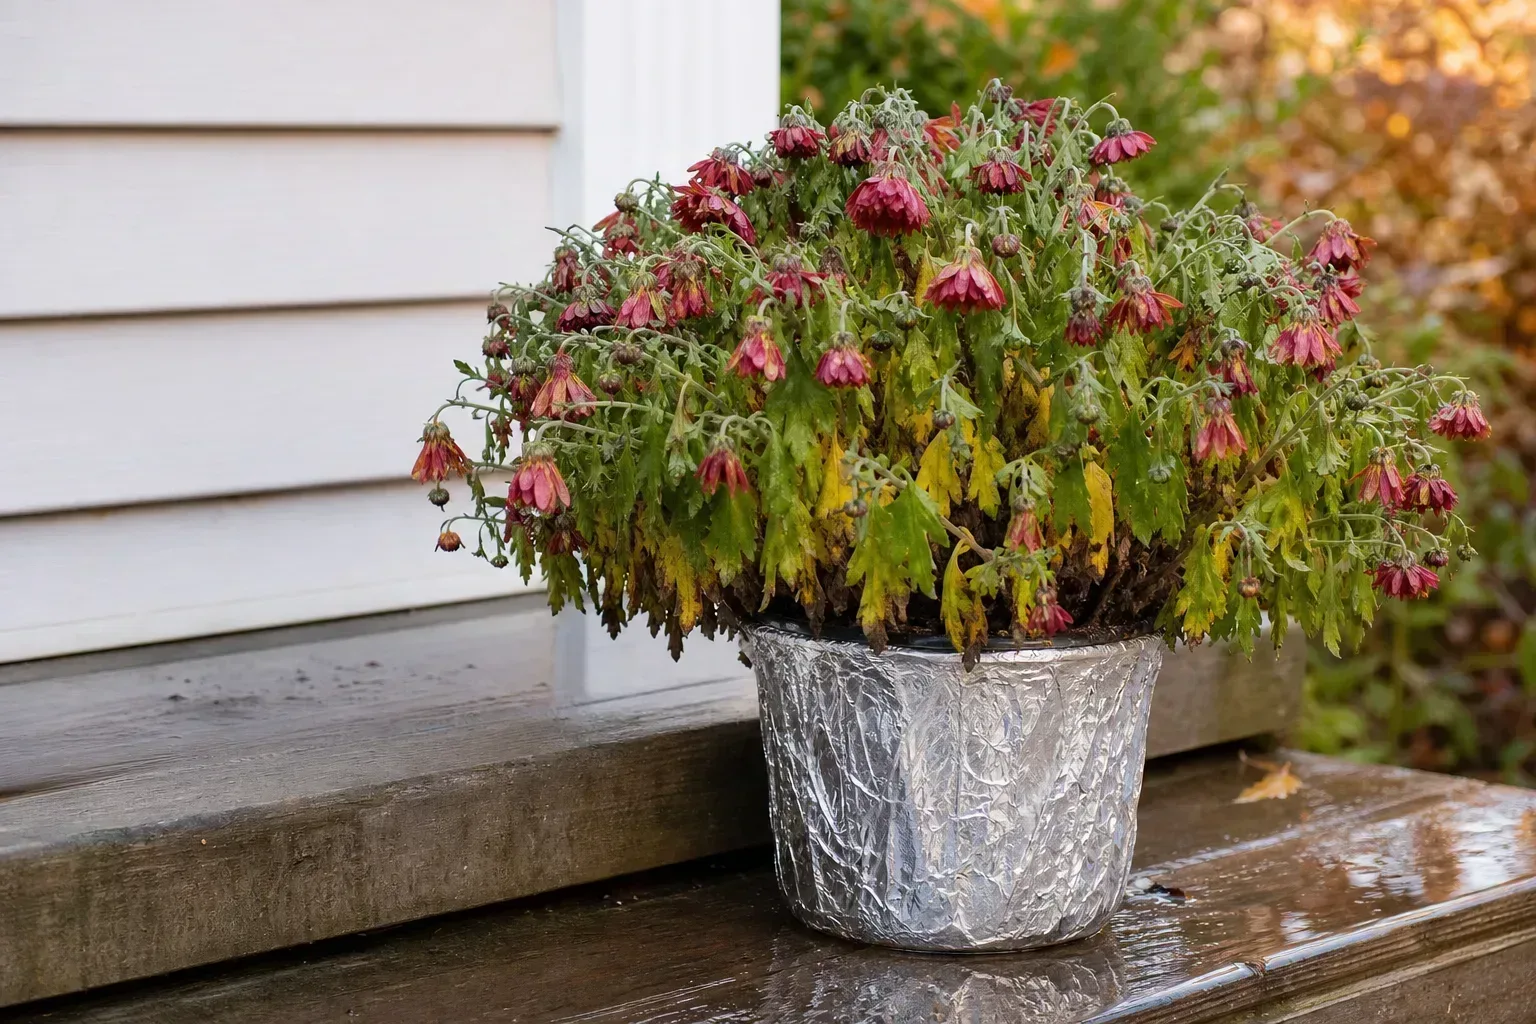
An overwatered mum can look thirsty, which is why gardeners often make the problem worse. The leaves droop, the flowers lose their lift, and the soil feels damp, so another drink seems logical. But when roots sit in saturated mix, the air spaces that normally supply oxygen disappear. The plant can wilt even though water is everywhere around it.
The quickest way to check is not to count days since the last watering. Push a finger, chopstick, or moisture meter several inches into the root zone, then inspect the pot and saucer. If the mix is wet below the surface, drainage is slow, and the plant is declining in a pattern that starts low or at the crown, pause watering and work through the checks below. Mums prefer consistent moisture, but consistent moisture is not the same as constantly wet soil.
Start with the soil, not the calendar
Garden mums and florist mums are often sold in compact containers at the exact time fall weather begins to cool. That combination creates a trap: the plant may have a dense, root-filled nursery pot, a decorative cover pot that traps runoff, and less evaporation than it had at the garden center. A watering routine that was reasonable on a hot, sunny patio can be too frequent after a cloudy week or a cold night.
The right question is, “How wet is the root ball right now, and can excess water leave?” A container mum should be watered thoroughly when its mix is beginning to dry, with water able to run from the drainage holes. It should not sit in runoff afterward. For garden beds, check the soil several inches down and look at the weather before irrigating; rainfall and heavy clay can keep the root zone wet long after the surface looks ordinary.
Extension guidance supports this balance. Purdue Extension advises thorough watering that soaks the soil to roughly 5 to 6 inches while avoiding frequent, light watering, which encourages shallow roots and conditions favorable to disease. UF/IFAS Gardening Solutions likewise recommends well-drained soil and watering as needed rather than a universal schedule.
If a mum has only one slightly yellow lower leaf and the soil is drying normally, do not diagnose overwatering from that symptom alone. If several symptoms arrive together—wet soil, yellowing, wilt, declining buds, and a soft crown—the diagnosis becomes much more plausible and the first action is to stop adding water.
The six signs of overwatered mums
No single leaf symptom proves that a mum has received too much water. Use the pattern, the root-zone moisture, and the plant’s growing conditions together. These six signs are most useful when they appear alongside soil that stays wet longer than expected.
Yellow leaves, especially low on the plant
The first visible warning is often a group of pale or yellow leaves near the bottom of the mound. Older leaves are closest to the wettest, least-aerated part of the root zone, and a stressed plant may shed lower foliage before the newest growth changes. Yellowing that spreads across the plant while the soil remains wet deserves a water-and-drainage check before you add fertilizer.
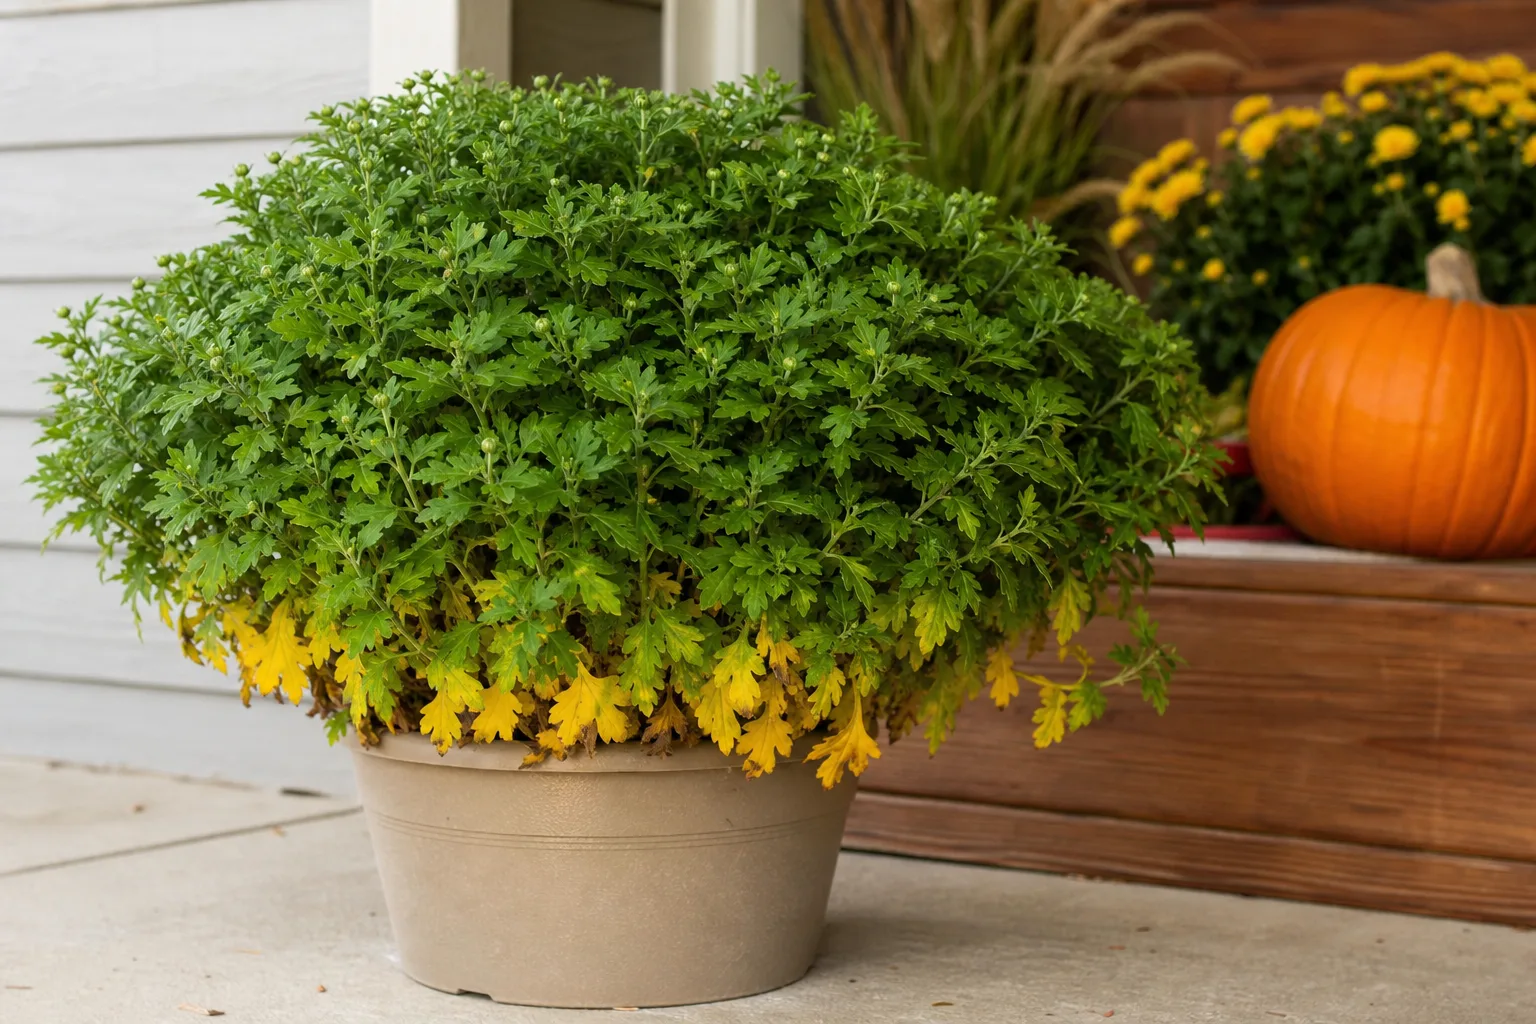
Look at the pattern before you act. Uniform yellowing with damp soil points toward root stress; tiny pale speckles, fine webbing, or insects under leaves point more toward spider mites or another pest. Brown spots with distinct margins, powdery growth on foliage, or buds that soften and fail to open can indicate disease rather than simple excess irrigation. NC State Extension’s chrysanthemum profile lists several disease and pest problems, a useful reminder that a yellow leaf is a symptom, not a diagnosis.
Remove leaves that are fully yellow or collapsing, but do not strip every leaf from the plant. Green foliage still supplies energy for recovery. More importantly, do not try to “correct” yellow leaves with a heavy feeding. Roots that are short on oxygen or already damaged are poorly positioned to use fertilizer, and extra salts can add another stress while you are trying to stabilize moisture.
Wilting while the soil is still wet
Wet-soil wilting is the sign that most clearly contradicts the usual watering instinct. Healthy roots need both water and oxygen; in a saturated root ball, oxygen movement slows and damaged roots cannot support normal water uptake. The leaves then lose firmness even though the mix feels moist.
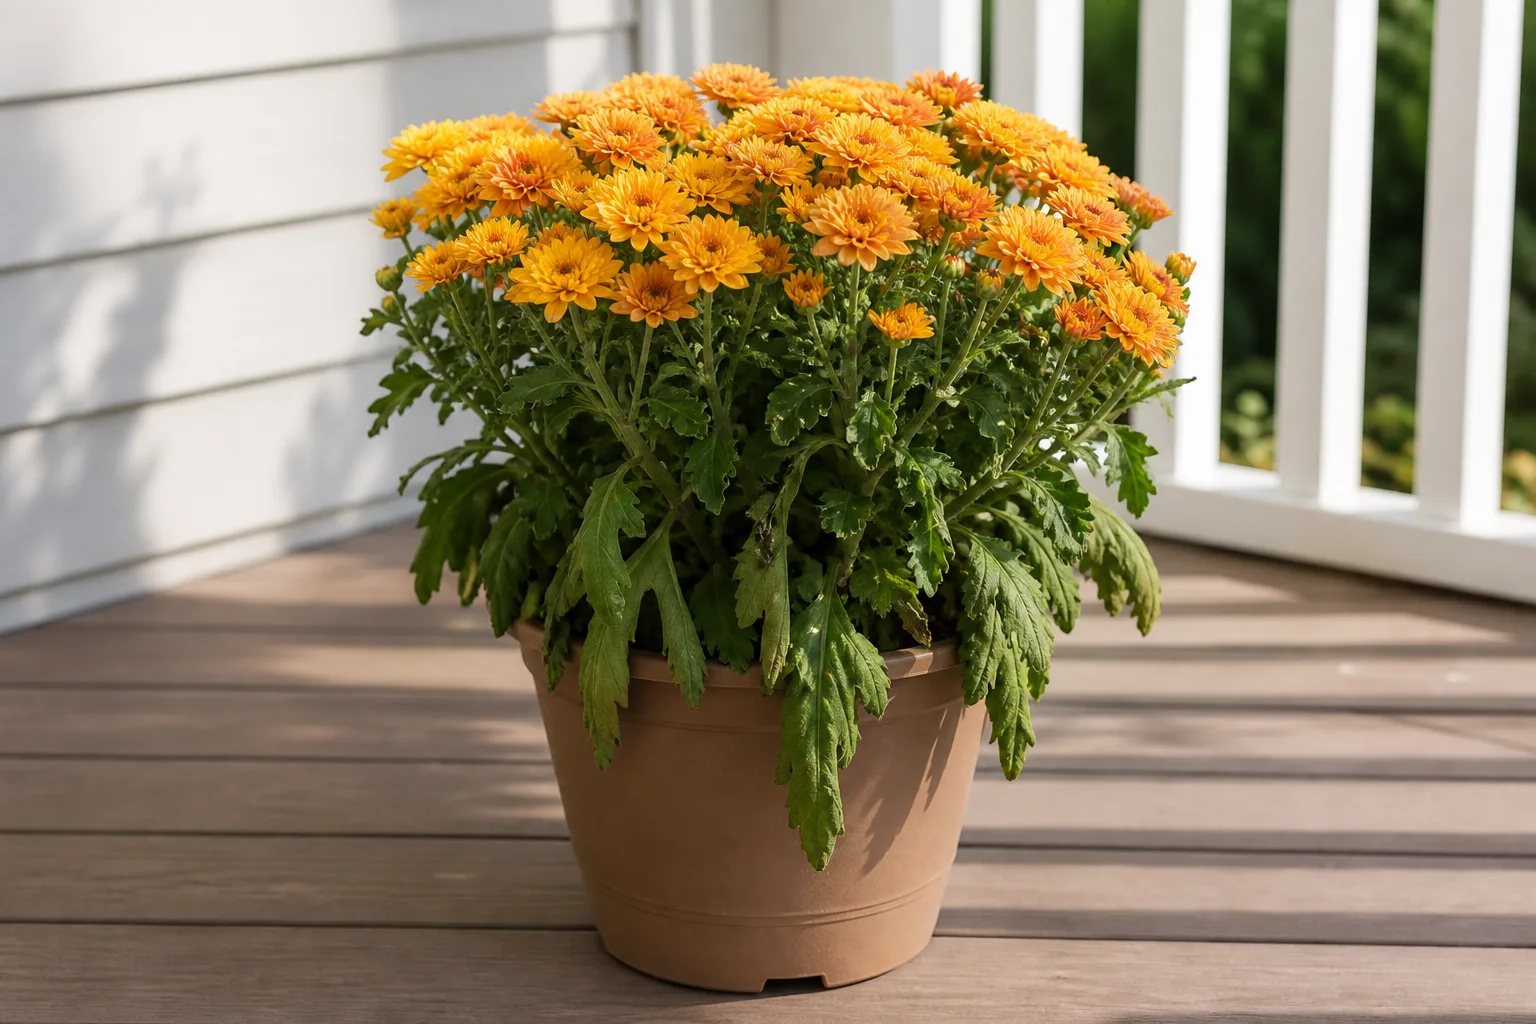
Confirm the contradiction in two places. First, feel the soil below the surface rather than trusting a dry-looking crust. Second, lift the pot if possible. A container that still feels unusually heavy several days after a thorough watering is telling you that the root ball has not dried at a useful pace. Check the saucer and the cover pot too; a nursery pot can have drainage holes while the outer pot holds the drained water against them.
Wilting can still mean thirst. An underwatered mum usually has dry, shrinking mix, a lighter pot, and leaves or flowers that recover at least partially after a thorough drink. If the dry mix has pulled away from the sides of the container and repels water, rehydrate it slowly in stages or use a brief bottom soak, then let it drain completely. Do not give an extra drink to a mum that is limp in wet soil until you have investigated the cause.
Stunted growth and fewer buds
A mum that stays green but stops developing buds may be dealing with root stress rather than a simple lack of fertilizer. Roots in poorly aerated soil cannot maintain normal nutrient and water movement, so the plant diverts energy toward survival. This is especially noticeable in late summer and early fall, when a healthy garden mum should be building or opening flower buds.
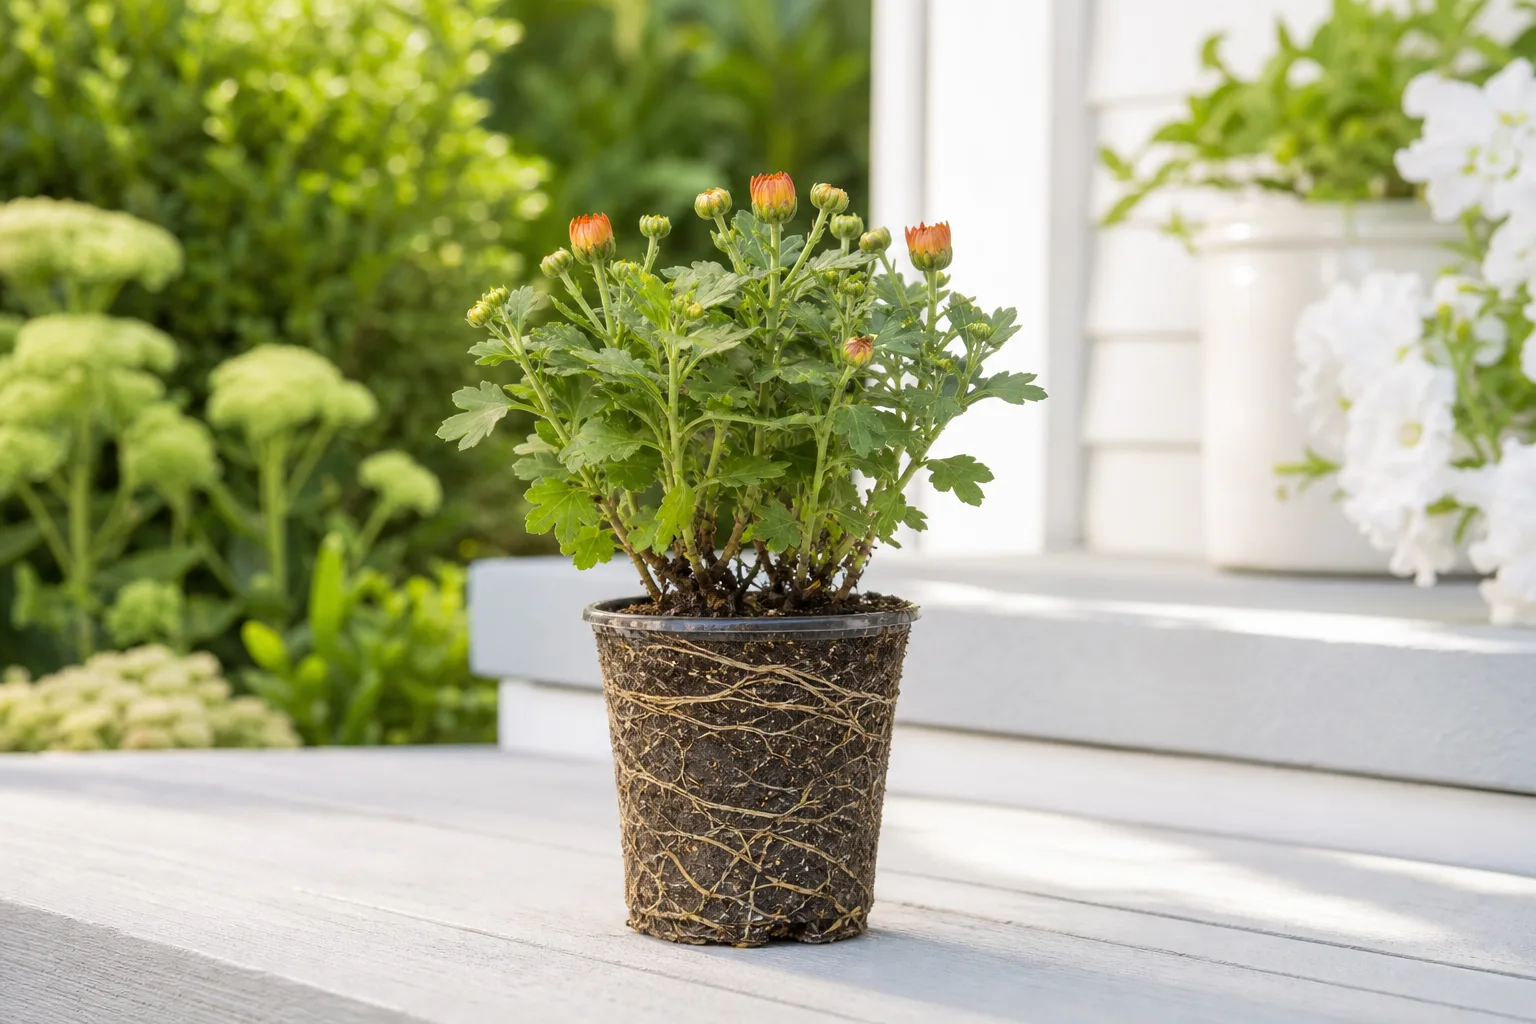
Compare the newest growth with older growth. If the plant has stopped extending, the stems are weak, and the soil remains wet, check drainage before feeding. If the plant is compact but its buds are forming on schedule, slow growth may simply reflect cultivar, temperature, low light, or the end of the season. Utah State University Extension notes that neglected mums may produce weak branches, yellowish leaves, and few small flowers, but those symptoms are not specific enough to replace a soil check.
Pests can also reduce buds. Inspect the growing tips and the undersides of leaves for aphids, thrips, or sticky residue. A water correction will not solve an insect problem, and an insecticide applied to a plant already stressed by saturated soil may make the situation harder to read. Diagnose the growing point and root zone separately.
Early leaf drop
Some older leaves naturally decline as a flowering plant changes pace, and a mum may lose damaged foliage after cold nights or rough handling. The concern is early, progressive leaf drop paired with wet soil, yellowing, or a weak crown. A plant that loses several leaves over a short period is reducing its canopy because the roots are no longer supporting it well.
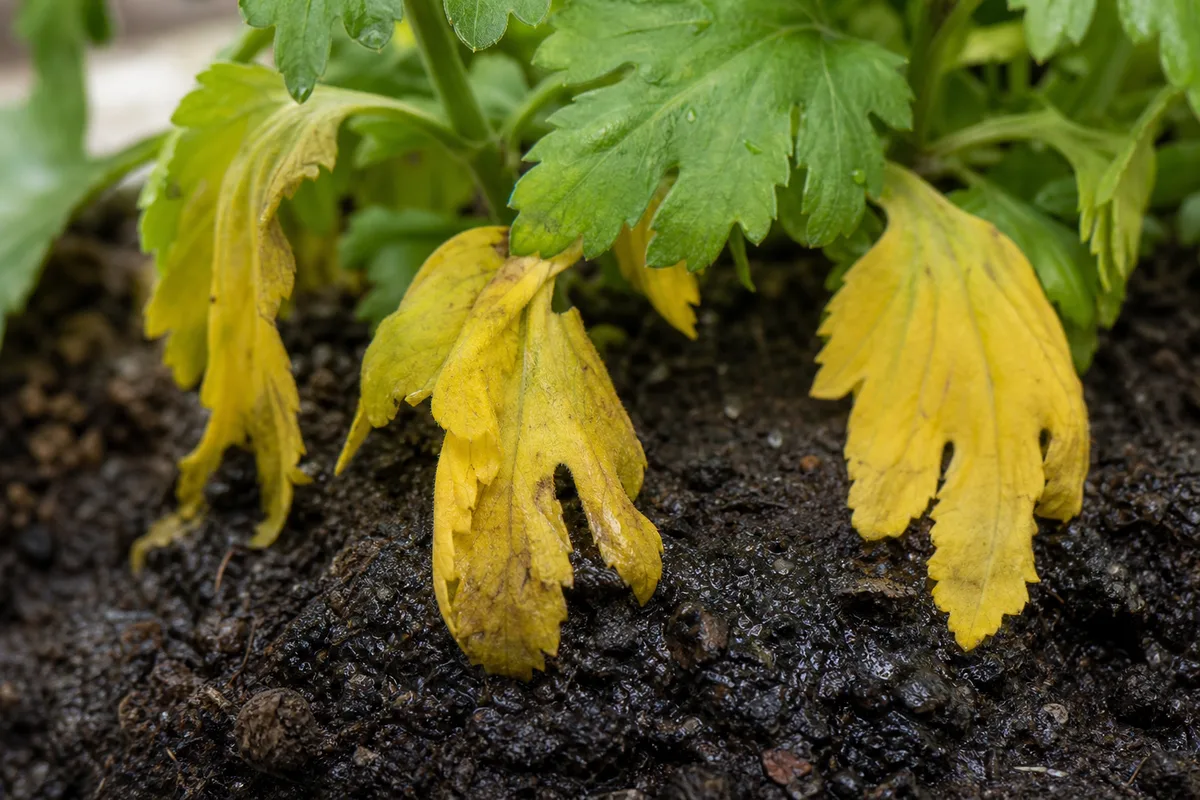
Check where the drop begins. Leaves falling from the lower interior while newer tips remain firm can be an early root-zone warning. Leaves with fine stippling or webbing suggest mites; leaves with discrete lesions suggest a leaf disease; leaves damaged on one side after cold exposure may have an environmental explanation. Take a photo before removing suspicious foliage so you can compare the pattern over several days.
Do not confuse dead flower heads with a failing root system. Spent blooms can brown and collapse while leaves remain healthy. Deadheading those flowers improves appearance, but it does not fix waterlogged soil. The root-zone check still decides whether watering should resume.
White mold or algae on the soil surface
White, threadlike fungal growth or a green film on the surface usually means the top layer is staying damp long enough for opportunistic organisms to grow. It is a useful moisture clue, not proof that the roots are already rotting. Poor airflow, dense organic material, shaded placement, and fallen petals can all help surface growth develop.
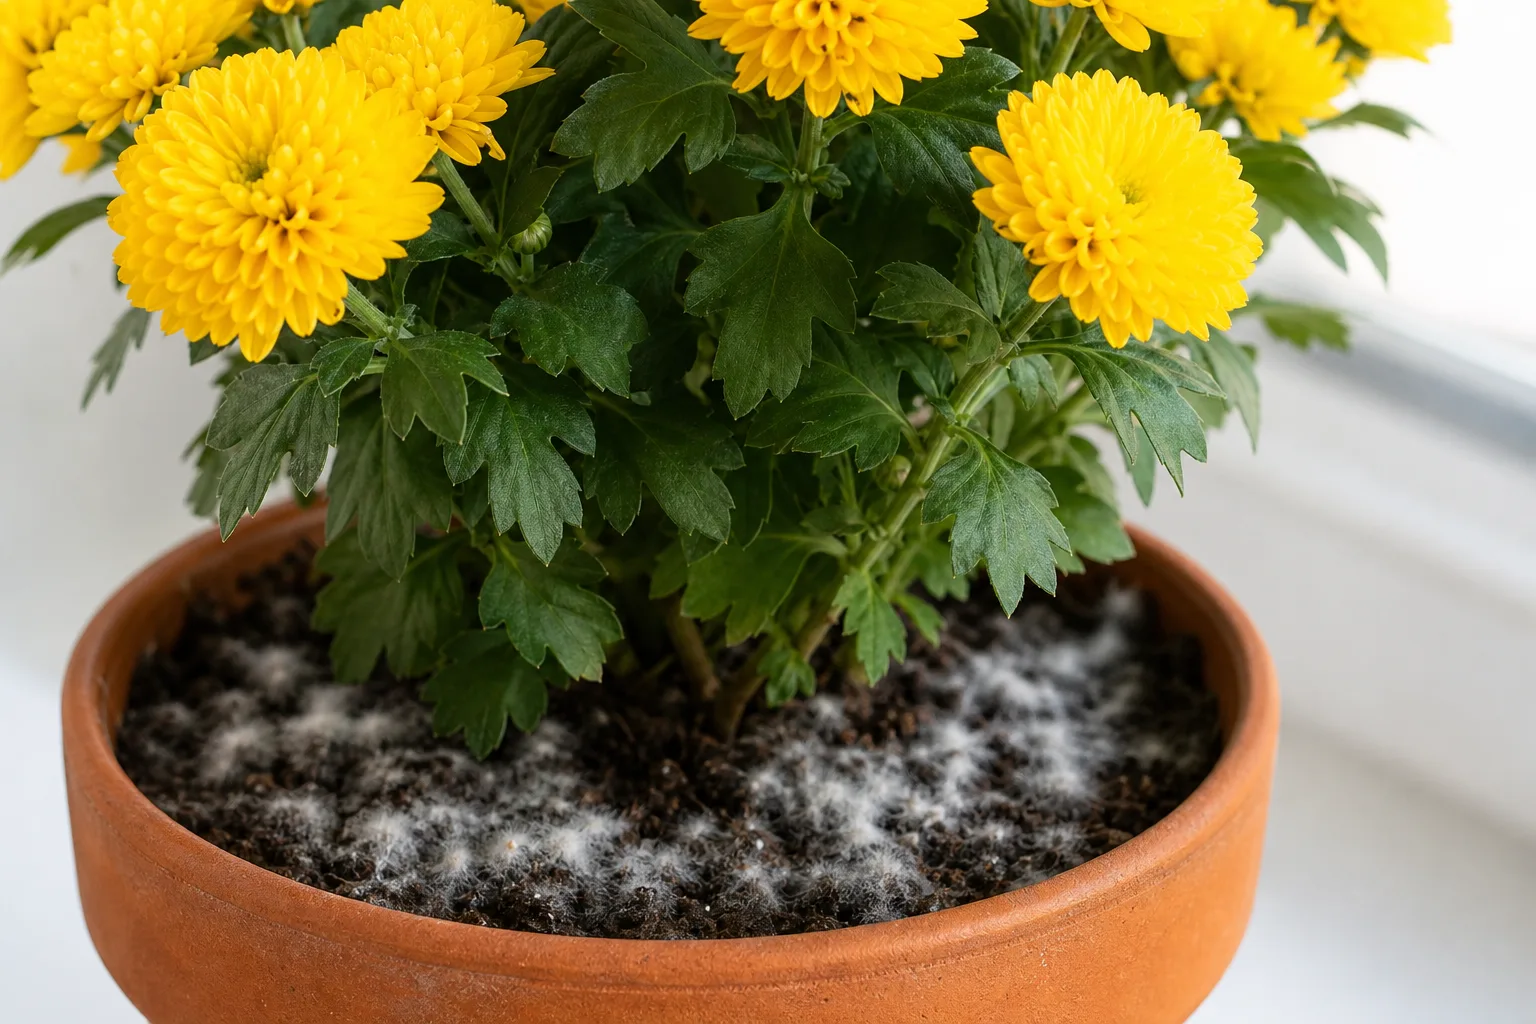
Scrape off the affected surface material, remove fallen leaves and petals, and improve airflow around the plant. Then address why the mix stays wet. If the pot drains freely and the root ball is only moderately damp, allowing the surface to dry between waterings may be enough. If the soil is wet all the way down, the pot has no drainage, or the mum smells sour, treat the mold as a warning to inspect deeper rather than as the main disease.
Surface mold is different from powdery mildew on leaves. Nebraska–Lincoln Extension’s garden chrysanthemum guide describes powdery mildew as grayish-white patches on foliage that later yellow and wither. That calls for a foliage and airflow diagnosis; simply waiting for the soil surface to dry will not address a disease established on leaves.
Mushy or blackened stems at the base
Soft, dark tissue where stems meet the soil is the most urgent sign in this list. It can indicate crown or stem rot, especially when the plant smells sour, leans easily, or collapses in sections. Overwatering does not automatically create one specific disease, but persistently wet conditions favor the decay and pathogen problems that can damage stems and roots.
Press the lower stem gently with a clean finger. Firm green or tan tissue is less alarming than tissue that dents, separates, or feels hollow. Look at the soil line from several angles; dense foliage can hide a localized rotting crown. Remove only tissue that is clearly dead, using clean pruners between cuts, and do not bury a soft stem under fresh mix.
If the entire crown is mushy, the plant pulls apart at the soil line, or most roots are soft and brown, recovery is unlikely. If only a small section is affected and the remaining crown and roots are firm, the plant may still have a path forward after the wet conditions are corrected. Avoid applying an unlabeled home remedy to the foliage or soil; cultural correction and sanitation matter more than a random spray.
Overwatering, underwatering, or disease? Read the pattern
Use this quick comparison before you repot:
| What you observe | More consistent with overwatering | More consistent with underwatering | More consistent with pest or disease |
|---|---|---|---|
| Soil several inches down | Damp or saturated for too long | Dry, shrinking, or hard to re-wet | May be normal moisture |
| Pot weight | Heavy well after watering | Very light | Not diagnostic |
| Leaves | Yellowing, limp, or dropping | Limp, curled, crisp, or papery | Speckles, webbing, lesions, powder, or insects |
| Stems and roots | Soft crown; brown, mushy roots | Dry, brittle roots in severe cases | Lesions, cankers, or disease-specific patterns |
| First action | Stop water; restore drainage | Rehydrate slowly, then reset the schedule | Isolate or identify the pest/disease before treatment |
The table is a starting point, not a substitute for looking at the root ball when decline continues. Temperature and light change the rate at which a plant uses water, and a recent move can create transplant shock. Purdue Extension also recommends direct-to-soil watering and keeping foliage dry because repeated wet foliage and shallow watering can increase disease pressure.
Inspect the root ball before guessing
Unpot a mum when the soil stays saturated, the pot smells sour, water refuses to drain, the crown is soft, or the plant continues to decline after the surface has dried. Slide the root ball out while supporting the stems. You do not need to destroy a mildly stressed plant just to look at one root, but persistent wetness makes a root inspection more valuable than another calendar adjustment.
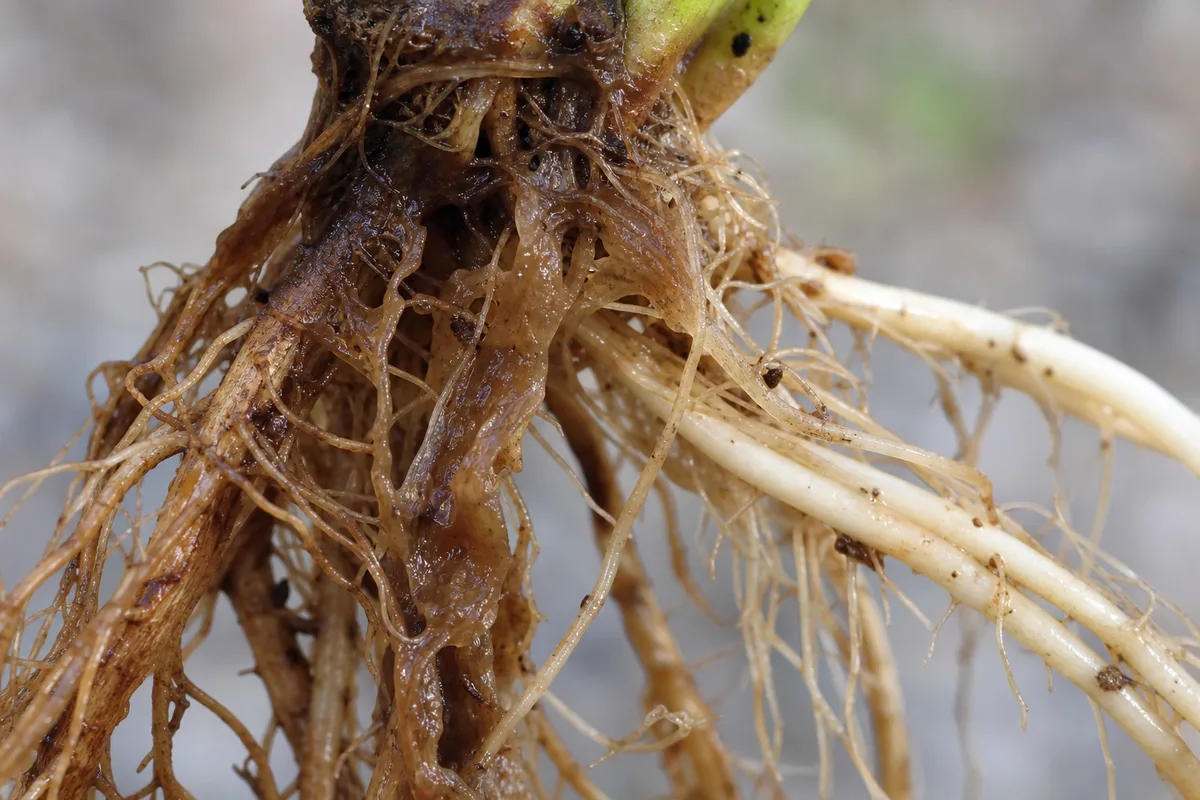
Healthy roots are generally firm and light-colored, though exact color varies with the mix and the plant. Rotten roots are soft, slimy, hollow, or easy to pull apart; a sour smell strengthens the case. Brown color alone is not enough because potting mix stains roots and older roots can naturally darken. Inspect texture, firmness, smell, and how much of the root system remains attached.
The recovery plan for a waterlogged mum
Recovery depends on how long the root zone has been wet and how much living tissue remains. A plant that was watered twice during a rainy week may recover after drainage improves. A mum with a collapsing crown and widespread root rot needs triage, and it may not be salvageable. Start with the least disruptive steps, then escalate when the evidence calls for it.
1. Stop adding water and remove standing water
Move a potted mum out of rain and away from a cold, shaded corner, but keep it in bright light appropriate for the plant. Empty the saucer and remove the nursery pot from any decorative cachepot that is holding runoff. Do not place the pot on a solid surface that blocks its drainage holes.
Leave the plant alone until the root zone begins to dry. “Let it dry out” does not mean baking a damaged plant in hot sun or allowing the entire root ball to become bone-dry. It means restoring a balance in which the mix contains air again. Keep checking below the surface rather than watering because the top looks lighter.
2. Fix the drainage bottleneck
Find the actual bottleneck before changing soil. A blocked hole, pot liner, saucer, water-filled cover pot, compacted mix, or heavy clay bed can each keep water around the roots. In a container, confirm that water exits promptly from more than one opening and that the container is not dramatically oversized for the root ball. A large pot can hold a wet volume of mix longer than a small root system can use.
For an in-ground mum, do not simply water less if the planting site collects rain. USU Extension recommends fertile, well-drained soil and notes that extremely heavy soils may require drainage improvements. A raised or slightly mounded bed, added organic matter worked through the bed rather than a thin surface layer, and a better-drained location can solve a structural problem more reliably than frequent shallow irrigation.
3. Treat root or crown rot as an urgent problem
If roots are soft and collapsing, rinse away enough mix to see the extent of damage. With clean pruners, remove roots that are clearly rotten until the remaining tissue is firm. Do not cut healthy roots just because they are brown from soil. If the crown is soft, remove only the collapsing section; a firm crown with a few viable roots has a better chance than a plant whose stem base has turned to mush.
Set the cleaned plant aside briefly so cut surfaces are not immediately packed into saturated mix. Then use a clean container with drainage and fresh, airy potting mix. Do not reuse the old wet mix around a recovering plant, and do not share pruners between a visibly diseased mum and healthy plants without cleaning them. Severely affected plants may be better discarded rather than spread through a bed or collection.
4. Repot only when the evidence supports it
Repotting can rescue a plant from a failing pot or rotted mix, but it also disturbs roots. Do it when the container cannot drain, the mix has collapsed or remains wet, roots are rotting, or the plant is badly root-bound and the old root ball cannot be managed. Do not repot a healthy mum just because one leaf yellowed.
Choose a pot only modestly larger than the remaining root ball, with open drainage holes. Set the plant at the same depth; burying the crown or stem base creates a new rot risk. Fill around the roots with fresh mix, press gently to eliminate large air gaps, and do not add a large dose of fertilizer at repotting. Water just enough to settle fresh mix if the roots were cleaned, let excess drain, and then wait for the root zone to reach the next appropriate dry-down point.
Expect damaged leaves and flowers to remain damaged. Recovery shows up first as firmer new growth, a stable crown, a normal drying rhythm, and no new yellowing—not as old leaves turning green again. If decline continues after drainage and roots are corrected, revisit pests, disease, cold injury, low light, and cultivar timing rather than repeating the same watering change.
Prevent the same problem next fall
Container mums need a drying rhythm
Container mums can dry quickly in sun and wind, especially when root-bound. That is why practical gardening sources often recommend frequent checks for potted mums, while extension guidance avoids a fixed schedule. Gardening Know How and Farmers’ Almanac both emphasize checking container conditions rather than treating every day as identical.
Water when the upper root zone has begun to dry but before the plant is repeatedly wilting. Apply water to the soil until some drains out, then empty the saucer. In a very small or root-bound pot, check more often; in a large, shaded, cool, or rain-exposed pot, check less often. A pot that is still heavy and damp does not need water because a label or routine says it is “mum watering day.”
Keep the pot where it receives strong light and air movement without being exposed to constant pounding rain. Space multiple pots so foliage can dry, remove fallen leaves, and water the soil rather than spraying the flowers and leaves. These habits support both moisture control and disease prevention. A container-care guide from Stacy Ling also highlights the way pot size, placement, and fall conditions change how long a potted mum lasts.
In-ground mums need drainage and weather checks
Mums planted in a garden bed usually need less intervention than a porch pot once established, especially when rainfall is regular. Water deeply during dry weather, then allow the soil to begin drying instead of applying a little every day. Keep the foliage as dry as practical and provide enough spacing for air circulation.
The variety matters too. NC State Extension describes garden-hardy and florist-type mums as different groups, and not every fall-bought plant is equally suited to overwintering in every climate. A plant weakened by an unsuitable site, late planting, cold injury, or poor drainage may show yellow leaves and few flowers for reasons that watering alone cannot fix.
Use mulch to moderate soil swings, but keep it off the crown and do not pile wet material against stems. In a heavy or low bed, solve the site problem before increasing irrigation. Nebraska–Lincoln Extension recommends sunny, well-drained conditions, proper spacing, and watering early enough for leaves to dry before night; those details are more useful than a universal “water every X days” rule.
Conclusion
The clearest sign of an overwatered mum is not a yellow leaf by itself. It is a declining plant paired with a root zone that stays wet: limp leaves despite damp soil, progressive yellowing or leaf drop, fewer buds, surface mold, or a soft dark stem. Check the soil depth, pot, saucer, weather, pests, and—when decline persists—the roots.
Start by stopping additional water and removing standing water. Correct the drainage bottleneck, inspect for rot if the plant smells sour or the crown softens, and repot only when the container or root system truly requires it. Once the mum stabilizes, replace the calendar with a drying rhythm that changes with sun, temperature, pot size, rain, and airflow. That is how you keep fall color from becoming a root problem.