How to Grow Hardy Mums for Blooms Year After Year
Hardy mums can return, but cultivar, planting time, drainage, and winter weather matter. Follow this plan for stronger roots and dependable blooms each fall.
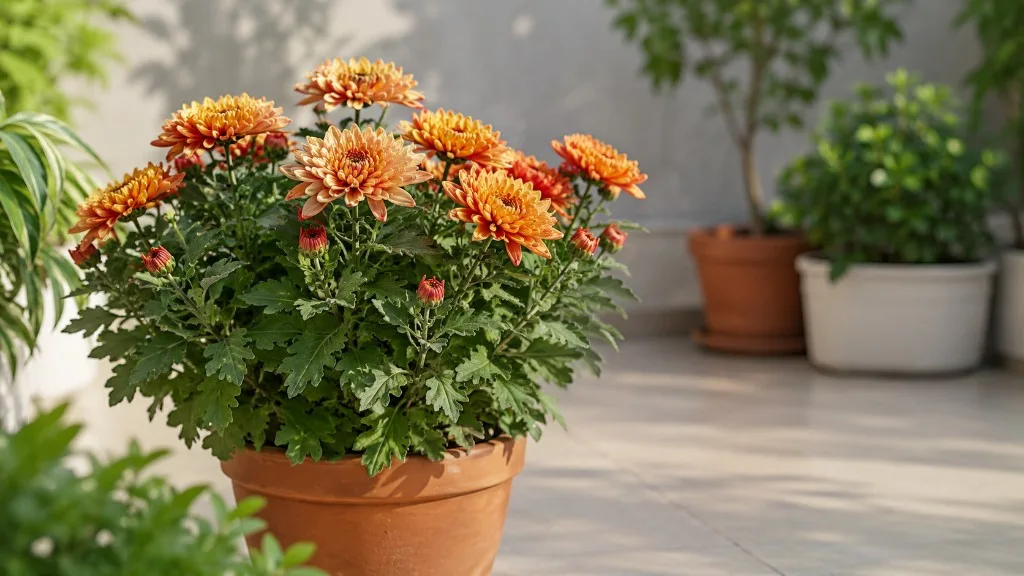
Hardy mums can return and flower again, but the word hardy is not a promise. The plant’s cultivar, the time it went into the ground, drainage around its crown, and the winter it faces all affect survival. If you want a reliable perennial instead of a single fall display, buy a garden mum rated for your climate, plant it while the growing season is still long, and protect its roots from waterlogging and repeated freeze-thaw cycles.
The highest-odds approach is simple: choose a named garden cultivar in spring, give it a sunny and well-drained bed, keep it evenly watered through summer, pinch young stems before buds form, and leave the dormant crown undisturbed through winter. A mum bought in full bloom in October can still be planted, but a late start makes it a gamble—especially where winters are cold or wet.
The short answer: start with a garden mum and plant early
If a mum is to bloom for more than one season, it needs to survive winter first. Start with a garden-grown cultivar whose tag lists hardiness appropriate for your location.
Plant it in spring or early summer, not just before the first freeze, so it has time to root into surrounding soil. Then prioritize drainage: a hardy plant can still die if its crown sits in cold, saturated ground.
In much of the United States, garden mums are commonly sold for Zones 5–9, but individual cultivars vary. A zone rating describes broad average winter lows, not every site’s wind, snow cover, soil moisture, or freeze-thaw pattern. Virginia Cooperative Extension notes that survival also varies with cultivar, culture, location, and winter severity. Treat the tag as a starting point, then ask a local nursery which selections persist in gardens near you.
What “hardy mum” means—and what it does not
“Garden mum” and “florist mum” describe different growing purposes more than two neatly separate species. Both can be sold under Chrysanthemum × morifolium, a complex group of hybrids.
Garden selections are chosen for landscape performance; florist types are often grown under controlled greenhouse conditions for a timed, dense show of flowers. A florist mum may look lush yet have little time to establish roots before it is sold in autumn.
That distinction matters because a blooming plant is not necessarily prepared for winter. A garden mum planted in May has months to grow roots and adapt to the bed.
A florist mum purchased at peak bloom in October has already spent much of the season in a pot and may be entering dormancy as it is moved outside. NC State Extension describes mums as herbaceous perennials, but also notes that cold-climate plants may need different overwintering conditions. “Perennial” describes the life cycle under suitable conditions; it does not mean every retail pot will survive every garden.
Choose a garden cultivar that fits your winter
Shop by the plant tag, not just by flower color or the word “hardy.” Look for a named cultivar and a hardiness range, ideally one tested in your region.
If the tag is missing, ask whether the plant is intended for a landscape bed or primarily for seasonal container display. A local grower can often tell you which series reliably returns after your area’s typical winter.
Check the crown and root ball too. A healthy plant has firm stems, clean foliage, and roots that are not black, mushy, or sour-smelling. Some roots showing at the drainage holes are normal; a tightly circling, dry root mass may need loosening at planting.
Avoid plants with widespread leaf spotting, collapsed stems, or a saturated pot. No visual clue can guarantee hardiness, so use plant health as a quality check—not as a substitute for the cultivar label.
If your winters regularly fall below the cultivar’s listed range, do not expect mulch to turn a tender mum into a cold-hardy one. Choose a more suitable perennial for the site, grow the mum as seasonal color, or keep the pot in a protected, cool place. Matching the plant to the climate is more dependable than trying to rescue a mismatched selection after a severe winter.
Plant in spring for the strongest root system
Plant established garden mums after the danger of hard frost has passed and the soil can be worked. In many climates that means spring; in colder areas, planting earlier gives roots a longer runway before winter. The RHS growing guide likewise recommends putting young plants outside after frost risk has passed and notes that hardy garden chrysanthemums may still need winter protection.
An autumn plant can survive if it is hardy, planted early enough, and grown in well-drained ground, but odds decline as the soil cools. Virginia Cooperative Extension explains why: mums are naturally flowering in the short-day period of fall, rather than prioritizing new root growth. Epic Gardening’s planting guidance describes fall planting as most workable when roots still have roughly six to eight weeks before a hard freeze; that window is not available everywhere. If you already have a fall-bought pot, plant it promptly if the ground is workable, water it in, and mulch after frost.
Think of its first winter as a trial rather than a sure thing. For a planned perennial bed, buy in spring instead.

Give mums sun, air, and fast-draining soil
Choose a spot with at least six hours of direct sun during the growing season. In very hot regions, some late-afternoon shade can reduce heat stress, but deep shade encourages stretched stems and fewer flowers. Check the site in summer, when deciduous trees are leafed out; a bed that looks bright in October may be shaded for much of the period when the mum is building stems.
Mums like consistent moisture, not permanently wet roots. They perform best in soil that drains after rain.
If water stands in the bed the morning after a storm, choose another location, improve the grade, or plant in a raised bed rather than filling a small hole with a different soil mix. A pocket of loose potting mix surrounded by dense clay can behave like a basin and collect water around the roots.
Leave enough space for the cultivar’s mature width so air can move between plants and foliage dries after rain. Crowding makes it harder to inspect stems and can encourage leaf diseases.
A sheltered site is helpful, but avoid a tight corner where roof runoff repeatedly saturates the soil. Mum flowering responds to shortening autumn days, while a healthy display still depends on enough sun through the growing season.
Plant a mum in the ground step by step
- Water the pot first. A moist root ball is easier to handle and less likely to shed dry soil when removed.
- Prepare a wide planting area. Loosen soil across an area wider than the pot instead of digging a narrow, deep pocket. Mix in a modest amount of finished compost if the soil is poor, but do not use compost to compensate for a site that stays waterlogged.
- Free circling roots. Slide the plant from its container. If roots form a dense mat, gently tease the outer layer apart or make a few shallow vertical cuts with a clean knife. Keep the crown intact.
- Set the plant at its original depth. Backfill around the roots, firm gently, and water so soil settles without burying the crown.
- Mulch the soil surface. A light organic layer helps even out moisture and suppress weeds. Keep mulch a little away from the stem bases so the crown is not held continuously wet.
Space plants according to the cultivar’s mature width; a small starter pot can become a broad mound. If the label is unavailable, leave more room than the pot size suggests and thin or divide the clump later rather than planting several crowns shoulder to shoulder.

Follow a simple spring-to-spring care calendar
| Season | What to do | What to avoid |
|---|---|---|
| Spring | Plant or divide; remove dead stems once new growth is visible; begin pinching after stems establish | Digging up a crown before you can see where new shoots are emerging |
| Early summer | Keep moisture steady; pinch shoot tips to encourage branching; weed and check airflow | Letting plants become crowded or drought-stressed |
| Mid to late summer | Stop pinching early enough for buds to form; reduce unnecessary feeding | Late pinching or high-nitrogen fertilizer that delays flowering |
| Fall | Enjoy flowers; water during dry spells; let a new planting continue rooting while weather permits | Cutting green stems or assuming a newly bought pot is winter-ready |
| After frost through winter | Protect crowns with loose mulch where needed; keep containers from freezing solid | Packing wet leaves tightly over the crown or leaving pots exposed in severe cold |
| Spring return | Pull winter mulch back gradually; remove dead growth; wait for basal shoots | Declaring the plant dead before the crown has had time to wake |
Use the calendar as a sequence, not a set of fixed dates. Frost timing, cultivar, and local conditions vary. The plant’s stage—new shoots, growing stems, forming buds, or dormancy—is a better cue than a date on a generic checklist.
Water for steady growth without soggy roots
Newly planted mums need regular water while roots spread into the bed. After establishment, check the soil rather than following a rigid weekday schedule.
If the top inch or two is dry and rainfall has been light, water deeply at the base. During hot weather, flowering, or a dry spell, the plant may need water more often; in cool, rainy weather it may need none.
Water the soil, not the foliage, when practical. This reduces the time leaves stay wet and makes it easier to spot symptoms. A layer of mulch can slow surface drying, but it cannot fix poor drainage.
If the plant wilts even though the soil is wet, pause watering and inspect the crown and roots rather than adding more water. Soft stems at the soil line or a sour-smelling root ball point to a root-zone problem, not thirst.
Container mums dry faster than plants in the ground. Check the pot daily during warm, windy weather, make sure excess water can drain freely, and do not let the container sit in a filled saucer. Containers also expose roots to colder air on every side during winter, so their care cannot be inferred from an in-ground hardiness label.
Feed lightly and stop before late growth
For an in-ground bed, start with reasonably fertile soil and use a soil test if growth is consistently weak. Compost used as a surface mulch is often enough in a healthy garden bed.
If you fertilize, apply a balanced garden fertilizer according to its label during active spring growth; avoid repeated heavy doses and do not push soft new growth late in the season. A lush plant is not automatically a stronger overwintering plant.
Container plants use up nutrients faster because water drains through a limited volume of potting mix. Feed only during active growth and follow the product label.
When buds are forming, stop routine high-nitrogen feeding; the plant’s priority is flowering and preparing for dormancy, not a flush of tender leaves. Soil conditions and local growing-season length determine whether extra feeding is useful at all.
Pinch stems for a compact mound of flowers
Pinching removes the growing tip so side shoots develop, producing a fuller plant with more flowering stems. Begin when new spring growth is established and shoots are roughly 6–8 inches tall.
Use clean fingertips or pruners to remove the top half-inch or so just above a leaf pair. Repeat on new side shoots every few weeks while there is time for the plant to branch and still set buds.
The stop date is the part that needs local judgment. Mums form fall buds as days shorten, so pinching too late can remove developing tips and delay flowers until frost. Stop by mid-summer in many northern gardens, with the precise deadline depending on cultivar and expected bloom.
The RHS guide describes pinching young plants in early summer and continuing on sideshoots until about midsummer. NC State Extension advises multiple spring and summer cutbacks, with the final one around mid-August in its regional guidance. These recommendations are not contradictory so much as climate- and cultivar-specific: follow the plant tag or a local extension calendar, and stop earlier when your fall arrives early.
Do not pinch a plant that is already covered with buds or flowering. Enjoy its bloom, then return to shaping the new basal growth next spring. If a mum is naturally compact and the tag says pinching is unnecessary, leave it alone; cutting every plant on the same schedule can reduce rather than improve its display.
Understand why mums bloom in fall
Garden mums are short-day plants: shortening autumn days and longer nights help trigger flowering. That is why a healthy mum can grow leafy stems all summer and then flower as the season changes. A plant kept under bright nighttime lighting may not follow the same schedule as one in an ordinary garden bed, and cultivar timing also affects whether it flowers early, midseason, or late.
Once buds are visible, stop pinching and keep soil moisture even. A dry spell can shorten the display, while heavy shade can leave the plant with fewer blooms.
Flowers may continue for weeks in mild weather, but no care routine can hold them indefinitely through hard frost. Deadhead spent blooms if you want a tidier appearance; deadheading does not replace spring pinching or winter protection.
Protect established mums through winter
The main winter risks are a cultivar that is not cold-hardy enough, a crown left in saturated soil, and repeated thawing and freezing that lifts shallow roots. Mulch can buffer temperature swings, but it cannot compensate for all three. Winter care should protect a well-sited crown without keeping it warm and wet for too long.
Leave old stems until spring in cold climates
After a hard frost has browned the top growth, resist cutting the plant flush to the ground in autumn, particularly where winters are cold or snow provides insulation. Old stems can help trap leaves and snow around the crown and make it easier to find the plant in spring. Virginia Cooperative Extension recommends leaving the foliage and stems through winter and adding light, airy mulch over the crown.
The practical reasoning is similar in Gardener’s Path’s overwintering guidance: dormant stems can help hold protective material in place, and shallow crowns benefit from insulation against winter swings. In a mild, persistently wet garden, prioritize airflow and drainage rather than piling on mulch.
If stems are diseased or collapsed in a mild, wet climate, remove the affected material after frost and dispose of it rather than leaving visibly infected debris over the plant. Otherwise, wait for spring. Cut dead stems back once you can see new growth, taking care not to clip the low shoots emerging at the crown.
Add loose mulch after frost
Once the plant has gone dormant after hard frost, add about 3–4 inches of loose straw, pine needles, or airy shredded bark over and around the crown in climates where winter protection is useful. Extension advice and mulch depth vary by region, so follow local recommendations in especially cold areas.
Avoid compacted, wet material that smothers the crown or holds water against the stems. Keep runoff moving away from the plant.
Freeze-thaw heaving is especially hard on shallow roots: expanding and contracting soil can lift a crown, exposing it to drying wind. An airy mulch layer moderates those swings.
In spring, remove or pull it back gradually once the worst cold has passed and shoots begin to appear. The Virginia Cooperative Extension guidance calls for removing protective mulch by early to mid-April in its region; use your local spring pattern instead of copying that calendar date everywhere.
Give container mums extra root protection
A pot is more vulnerable than a garden bed because cold reaches the root ball from the sides as well as the top. A cultivar hardy in the ground may not be hardy in an exposed container.
In cold regions, the most reliable option is to sink the pot into the ground for winter, move it to an unheated sheltered space where it will not freeze solid, or plant it in the garden early enough to establish before cold weather. Keep dormant roots barely moist, not bone-dry and not waterlogged.

Restart care when new shoots appear
Mums can be slow to emerge, so do not dig up a crown just because the bed looks empty early in spring. Pull mulch back a little and inspect the crown; wait for new shoots to appear at or near soil level. The timing varies with winter severity, soil temperature, and cultivar.
If the crown is still firm, give it more time. A dark, mushy crown with no signs of life after neighboring perennials have resumed growth is less promising.
Once shoots are visible, clear away dead stems, remove excess winter mulch, and check that the crown is not sitting under wet debris. Resume normal watering as growth begins, but let the soil drain between waterings.
This is also the safest time to divide a congested clump or plant a new mum. Start pinching only after fresh stems are growing strongly.
Divide crowded clumps to keep them vigorous
Many garden mums lose vigor as their crowns age and become crowded. Divide in early spring as growth begins, not in fall when the plant is preparing to flower and overwinter.
Lift the clump carefully, separate vigorous outer sections with roots and several shoots, and discard a hollow or woody center if it has declined. Replant divisions at the same depth and water them in.
Division gives crowded plants more room and creates extra plants without relying on seed, which may not come true to the parent cultivar. NC State Extension recommends spring division every few years to prevent congestion. If a particular clump has been declining for several seasons, division is a useful reset—but it will not correct poor drainage or an unsuitable hardiness rating.
Troubleshoot a mum that will not return or bloom
| What you see | Likely cause to check first | Next step |
|---|---|---|
| No shoots after winter | Late planting, cold-sensitive cultivar, crown heaving, or crown rot | Check the crown gently; improve drainage and choose a locally hardy cultivar for a replacement |
| Long, floppy stems | Too little sun, crowding, or missed spring pinching | Increase sun exposure if possible and pinch next season while shoots are young |
| Lots of leaves but few flowers | Pinching continued too late, shade, or nighttime light | Stop cutting once buds should be forming; review light and cultivar timing |
| Yellowing or spotted leaves | Water stress, poor airflow, or a leaf disease | Check soil moisture and inspect both leaf surfaces; remove badly affected debris and avoid overhead watering |
| Stems soften at the soil line | Saturated soil or crown/root rot | Stop watering temporarily, improve drainage, and do not bury the crown in wet mulch |
Do not diagnose every yellow leaf as a virus or reach immediately for a pesticide. Older lower leaves can yellow naturally, while widespread spotting, distortion, webbing, or rapid collapse points to a different issue.
Inspect the pattern, look under leaves for pests, and compare the bed’s moisture with recent rainfall. If symptoms spread despite correcting water and light, ask a local extension office or plant clinic to identify the problem before applying a treatment.
Conclusion
Hardy mums return most reliably when the plant is truly suited to the local winter and has time to establish before facing it. Buy a named garden cultivar with a suitable zone rating, plant in spring, give it sun and drainage, and pinch only while there is enough season left for fall buds to form. After frost, protect the crown without packing wet material over it; in spring, wait for new shoots before cutting or dividing.
Those steps improve the odds, but they cannot make every mum permanent. A late-bought florist pot, an unusually severe winter, or a wet bed may still end the plant’s run.
When a mum fails, use the cause as a guide for the next choice: start with a more cold-tolerant cultivar, plant earlier, or move it to a better-drained site. That is how autumn color becomes a repeatable garden plan instead of an annual guessing game.



