How to Grow and Care for Creeping Phlox
Learn how to grow creeping phlox with the right light, soil, spacing, watering, pruning, division, bloom care, and practical troubleshooting.
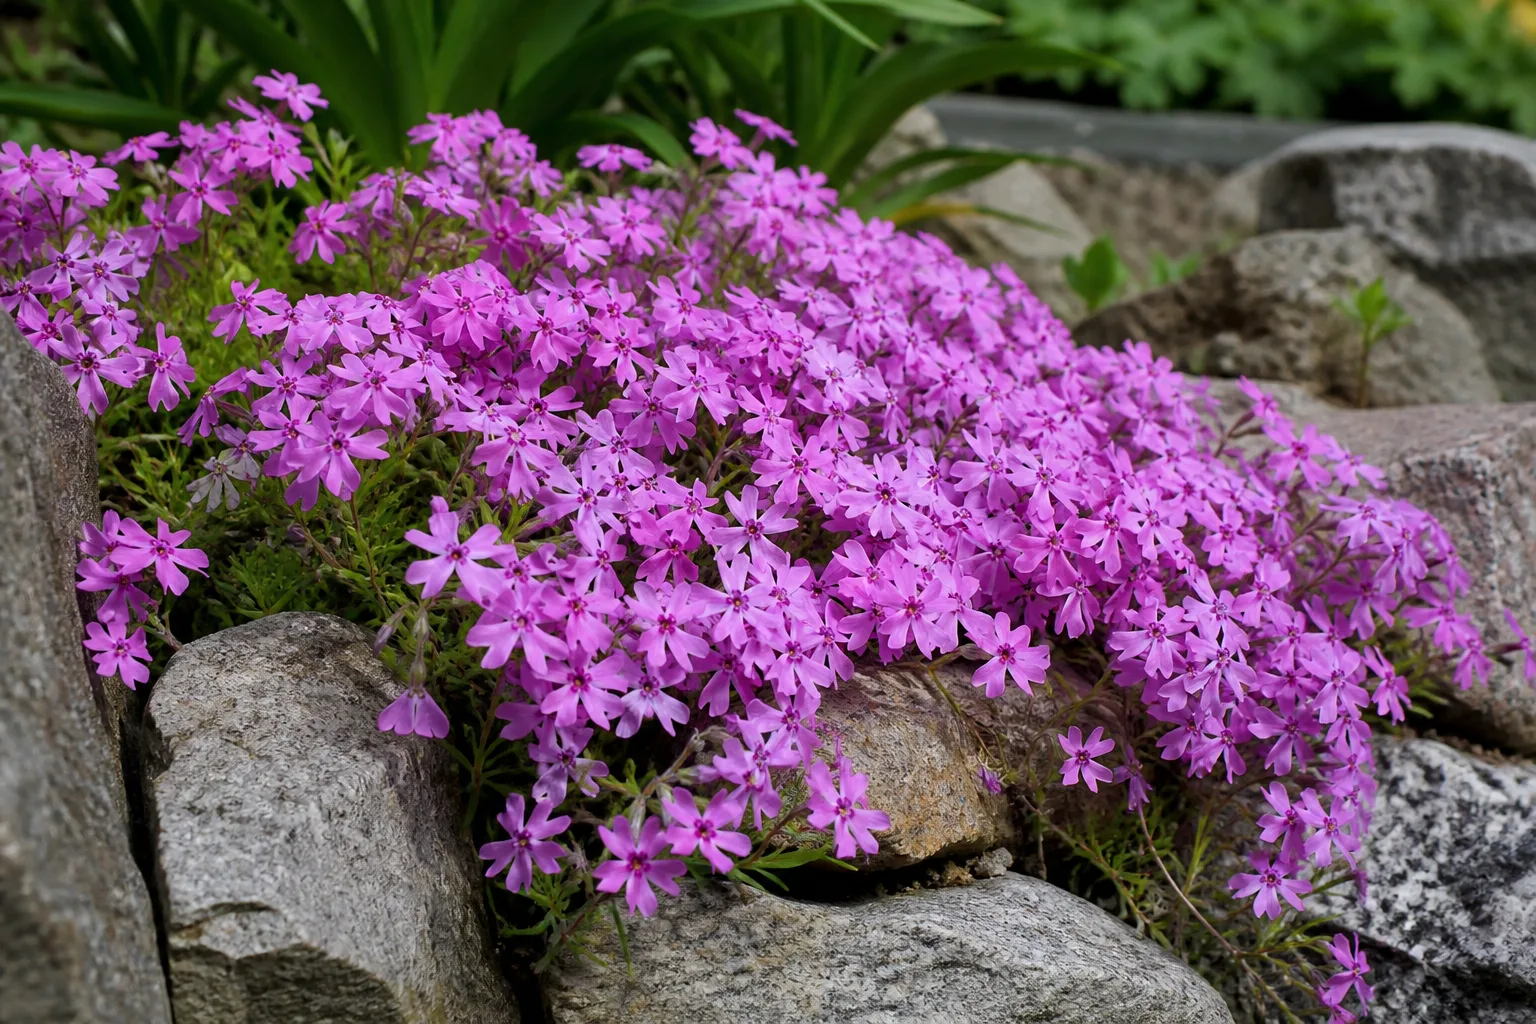
The phrase creeping phlox can send two very different plants home with you. This guide focuses on true creeping phlox, Phlox stolonifera: a low, spreading perennial from Appalachian woodland and stream-bank habitats that likes moisture, humus, and partial shade. Many nurseries also use the name for moss phlox, Phlox subulata, a sun-loving plant for dry rock gardens.
That distinction is not botanical trivia. It determines whether the plant should go under a tree or on a sunny wall, whether you should amend with compost or prioritize sharp drainage, and how you interpret a patch that is yellow, sparse, or refusing to bloom. Check the italic botanical name on the label before changing the soil or moving the plant.
The first decision: which “creeping phlox” do you have?
Both plants make low mats and flower in spring, so they are easy to confuse in a garden center. The quickest field clues are the leaves, the setting, and the way the plant spreads: true creeping phlox has broader oval leaves and leafy runners that root at their nodes, while moss phlox has narrow, needle-like foliage and a tighter cushion-like habit. A practical phlox guide from Gardening Know How makes the same larger point: “phlox” is a group of plants with meaningfully different cultural requirements, not a single care recipe.
| Feature | True creeping phlox | Moss phlox |
|---|---|---|
| Botanical name | Phlox stolonifera | Phlox subulata |
| Best light | Partial shade to full sun in cooler conditions | Full sun; light afternoon shade can help in hot areas |
| Soil | Moist but well drained, often humus-rich | Well drained to sharply drained, often sandy or gritty |
| Habit | Loose-to-dense mat from rooting stolons | Dense cushion or mat from fine stems |
| Typical use | Woodland edge, shaded slope, border front, under shrubs | Rock garden, sunny bank, wall, dry edge |
| Main mistake | Letting the root zone dry or bake | Keeping the crown wet through winter |
True creeping phlox: Phlox stolonifera
True creeping phlox is a mat-forming herbaceous perennial with sterile, leafy stems that travel horizontally and root at nodes. Upright flowering stems rise above the mat in spring, carrying loose clusters of fragrant, tubular flowers with five rounded lobes. Depending on the cultivar, flowers may be lavender, purple, pink, blue-violet, or white.
The plant is native to parts of the Appalachian region. NC State Extension describes it as a ground cover for full sun to partial shade, moist well-drained soil, and uses such as rock gardens, edging, light-traffic areas, and slopes. Its “drought tolerance” is mainly an established-plant trait; newly planted divisions and nursery transplants still need reliable moisture while roots move into surrounding soil. (NC State Extension Plant Toolbox)
Expect a plant roughly 6–12 inches tall and about 9–18 inches wide at maturity, although a favorable patch can continue outward through stolons. The spread is useful where you want living cover, but it is not a substitute for a walkable lawn. Treat it as an edge, slope, woodland carpet, or light-use ground cover, not as a turf that can absorb repeated foot traffic.
Moss phlox: Phlox subulata
Moss phlox is the plant most people picture when they imagine a carpet of pink flowers cascading over a sunny rock wall. Its narrow evergreen leaves make a dense cushion, and its flowers smother the mat in mid- to late spring. It is more comfortable in lean, gritty, fast-draining soil than P. stolonifera.
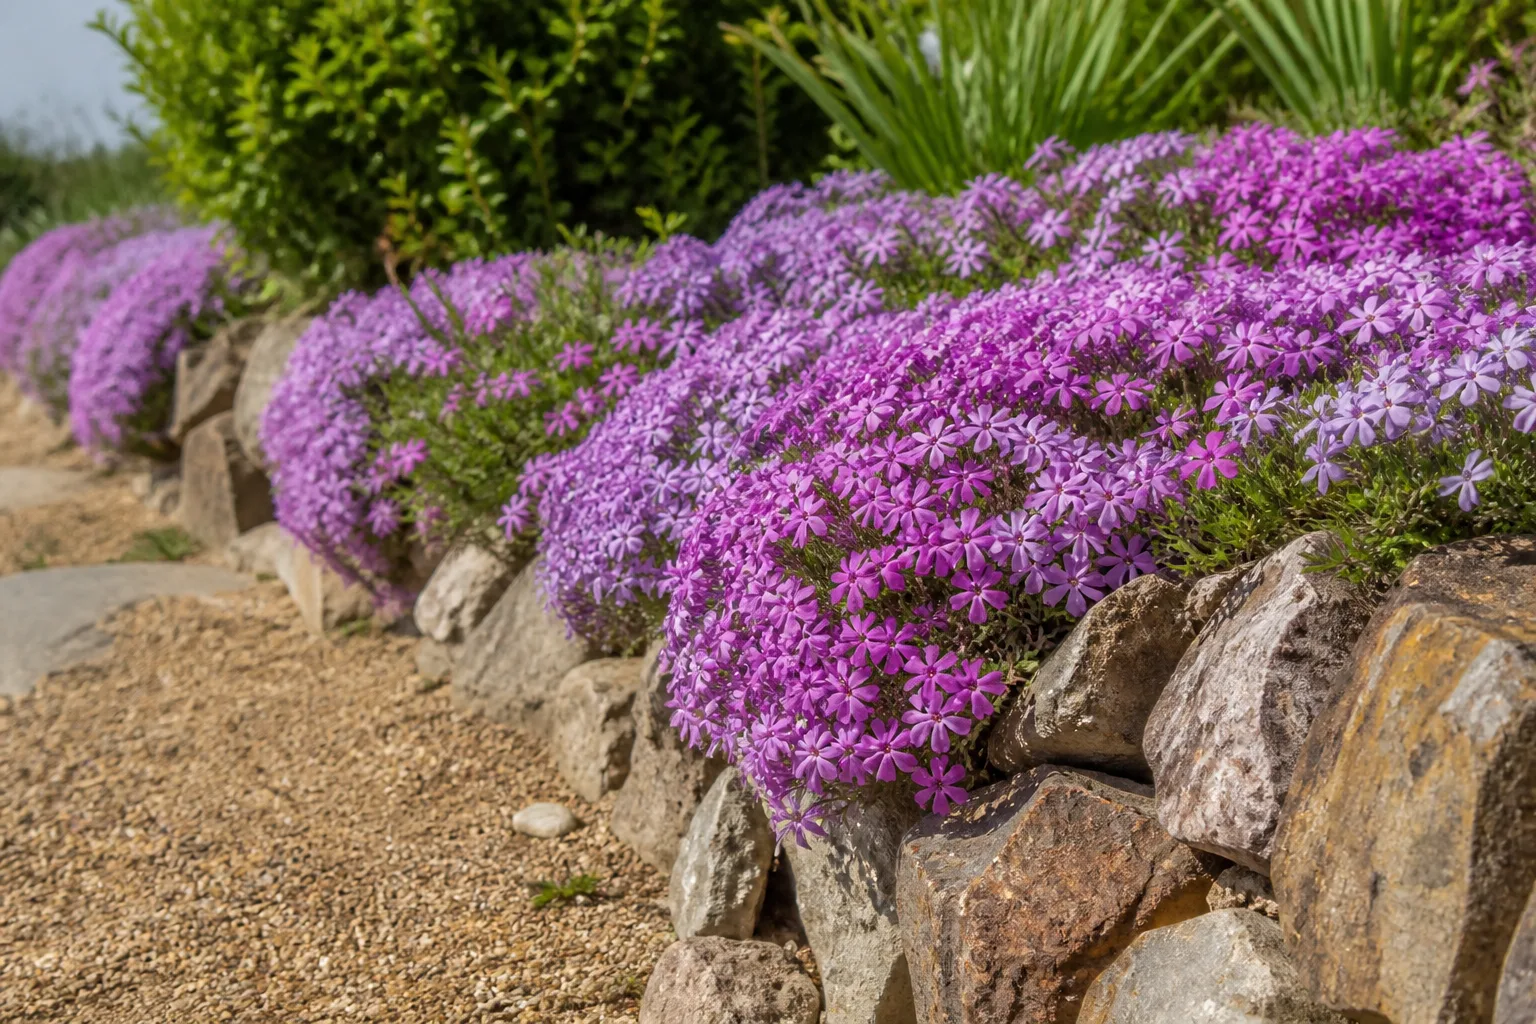
This related species matters here because the common-name overlap is a frequent cause of failed plantings. BBC Gardeners’ World Magazine lists P. subulata for well-drained, light or sandy soil and describes it as a front-of-border plant for sun; it also notes that the foliage is useful ground cover but the flowering period is relatively short. (BBC Gardeners’ World Magazine) If your plant has fine needle-like leaves and is thriving on a dry, bright slope, it is probably moss phlox rather than true creeping phlox.
Choose the right job for this plant
True creeping phlox earns its space where a low plant can knit together without competing with thirsty or aggressive neighbors. Use it at the front of a border, along a woodland path, beneath open shrubs, over a gentle bank, or in a native-plant bed where spring flowers and a low evergreen-to-semi-evergreen mat are useful.
It is especially good at softening a hard edge. Let stolons reach toward a retaining wall or path, then trim the few that cross the boundary instead of shearing the entire planting on a schedule. On a slope, a mass of rooted runners can help hold surface soil, but it will not stabilize a serious eroding bank by itself; drainage, grading, and deeper-rooted plants may still be necessary.
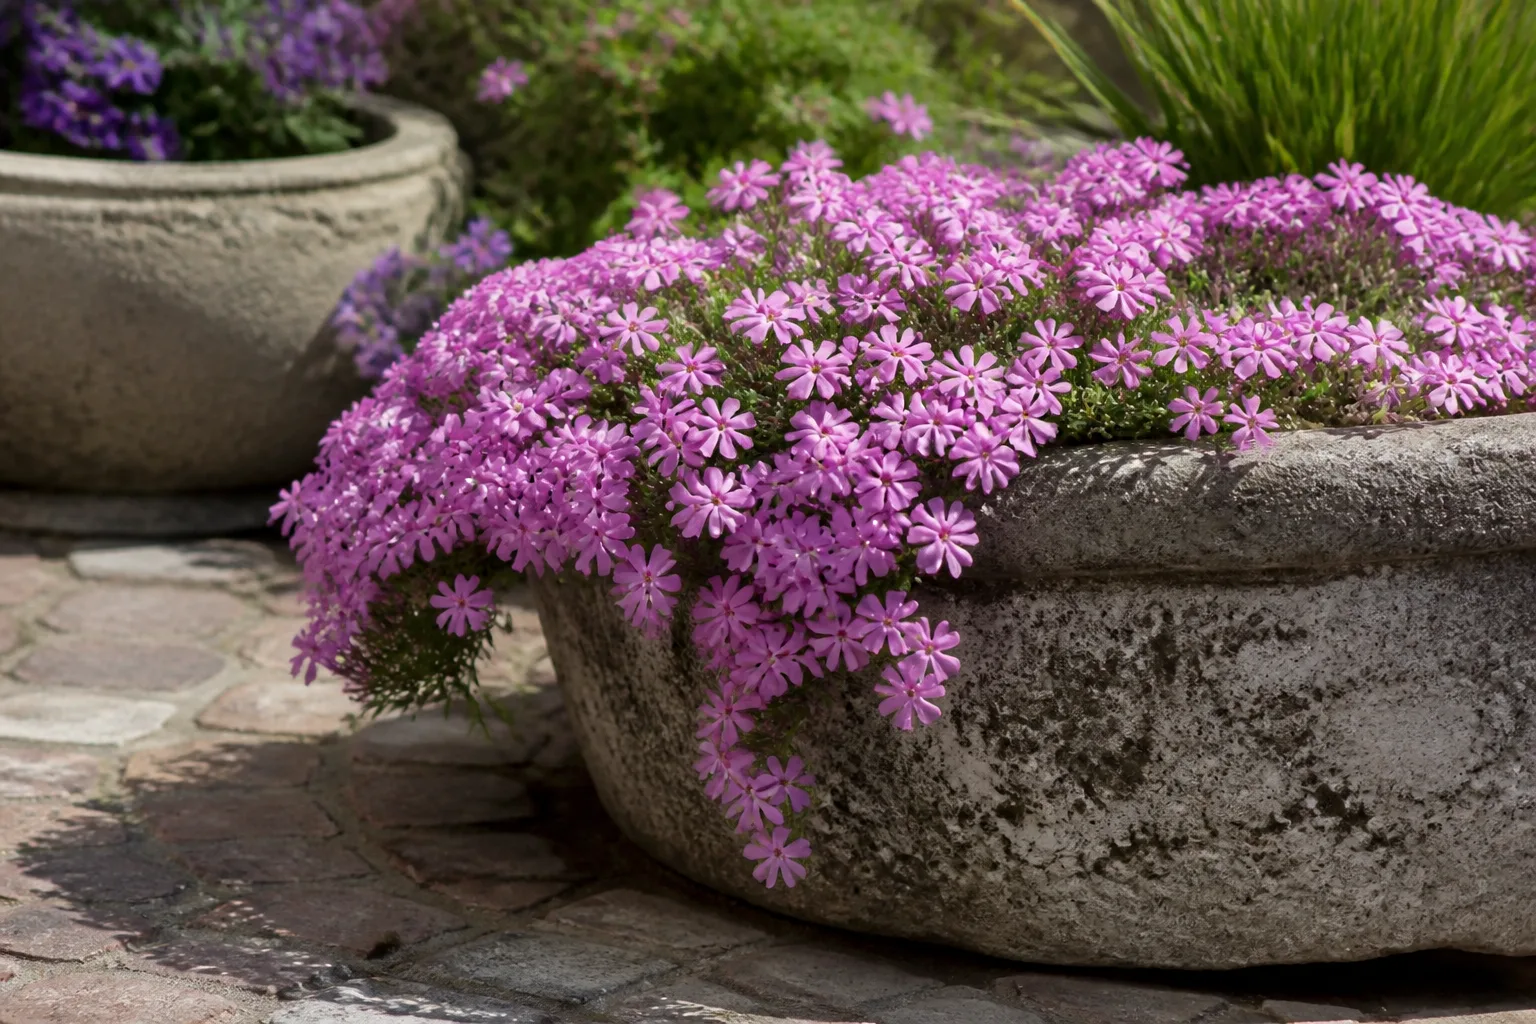
The plant can also grow in a broad container or trough, provided the mix stays evenly but not constantly wet and the pot drains freely. Container roots experience hotter, faster-drying conditions than roots in the ground, so a pot on a sunny patio behaves more like a small microclimate than a woodland edge. Use a container for a seasonal display or a shaded balcony, not as proof that the plant wants dry, baked conditions.
Planting site: light, soil, and drainage
For Phlox stolonifera, start with bright partial shade: morning sun, dappled light beneath an open canopy, or several hours of direct light followed by protection from hot afternoon sun. More light often means more flowers, but full, reflected afternoon heat can increase water demand and scorch a plant that is adapted to cooler, moisture-retentive conditions.
Deep shade is a different problem. The foliage may survive, but stems can stretch, the mat may thin, and flowering can become disappointing. If the plant receives less than two hours of direct sun and the canopy is dense, move it toward the edge of the shade rather than adding fertilizer to compensate for missing light.
The best soil is moisture-retentive but well drained. In practical terms, a handful of soil should hold together briefly when squeezed, then crumble rather than smear into a dense ribbon. The plant does not require a laboratory-perfect pH; NC State Extension and RHS both show tolerance across acid, neutral, and alkaline conditions when moisture and drainage are appropriate. (Royal Horticultural Society plant profile)
Avoid a low pocket where rain collects, a downspout outlet, or compacted clay that remains shiny and airless after storms. Constant saturation deprives roots of oxygen and creates a better environment for rot than for a vigorous ground cover. Conversely, a shallow, exposed bank that dries within hours of watering may be a better home for P. subulata than for P. stolonifera.
Improve soil without making a wet site wetter
Work a modest amount of finished compost into compacted soil before planting, but do not fill a poorly drained bed with rich organic material and assume the problem is solved. Compost improves structure over time; it does not create an outlet for standing water. If water remains after a day or two, solve grading, compaction, or drainage first, or choose a plant adapted to that wet location.
Clear perennial weeds before planting because stolons have an easier time rooting when they are not forced to compete with an established grass or bindweed system. A thin organic mulch can suppress new weeds and slow evaporation, but keep it off the crown. Mulch piled against the center of a low mat traps humidity and hides soft stems.
How to plant creeping phlox
Plant container-grown creeping phlox in spring or early fall, when the soil is workable and the air is not at its hottest. Spring gives a small division a long growing season to establish; early fall can be excellent in regions with a reliable stretch of mild soil before hard frost. In a cold climate, avoid planting so late that the root ball is still loose when the ground freezes.
Before removing the plant from its pot, water it thoroughly. Dig a hole as deep as the root ball and about twice as wide, tease out circling roots only if they are truly bound, and set the crown at the same level it occupied in the container. Backfill with the excavated soil, firm gently, and water slowly enough to settle air pockets without turning the bed into mud.
Do not bury the crown under several inches of compost or mulch. The center of a mat should remain close to the soil surface, with runners able to contact soil and root. If you are planting beside a wall or under shrubs, leave a small gap between the new plant and masonry or woody stems so air can move and irrigation can reach the root zone.
Spacing and first-year watering
For a connected ground cover, begin with roughly 12–18 inches between plants, then adjust for the size of the divisions and how quickly you want the bed to close. Tighter spacing produces a faster-looking carpet but raises the initial cost and can reduce airflow; wider spacing saves plants but leaves more room for weeds during the first seasons.
Water every few days during the first couple of weeks if rain is absent, then shift to a deeper, less frequent rhythm as the root ball begins to grow outward. The exact interval depends on soil, temperature, wind, and container size. Check the soil 2–3 inches down: if it is dry at that depth and the plant is wilting outside the hottest part of the afternoon, water the root zone thoroughly; if it is cool and wet, wait.
Keep weeds small while the mat is filling. Pulling a weed after it has woven through stolons can damage the phlox, while a quick hand removal when the weed is young is usually simple. Avoid broad, routine herbicide use around a low ground cover unless the product label specifically permits that use and you understand the risk of injuring the phlox.
Watering after establishment
Once rooted across its planting area, true creeping phlox is more forgiving, but “established” does not mean “never water.” NC State Extension says to keep it moist during the first year and notes strong drought tolerance after establishment. In a normal garden, that translates to watering during prolonged dry spells, heat waves, and the first season after division rather than watering by a fixed weekly calendar.
Water at the soil line in the morning when possible. A slow soak that reaches the root zone is more useful than a brief sprinkle that wets only the surface, and dry foliage by evening reduces the length of time leaves stay wet. In a shaded bed, do not increase irrigation simply because the soil surface looks dry; scrape back mulch and check below the surface first.
There are two opposite warning signs. A plant that wilts but perks up overnight may be reacting to heat or a dry root zone; a plant with yellowing leaves, soft stems, or a sour-smelling, constantly wet root zone is more likely being overwatered. Fix the watering pattern and drainage before reaching for a fertilizer or disease product.
Fertilizing: use a light touch
Creeping phlox is not a heavy feeder, and a naturally rich woodland soil may need no supplemental fertilizer after planting. A thin layer of finished compost in spring is a reasonable default. If a soil test or consistently weak growth shows a real nutrient shortage, use a balanced, slow-release fertilizer according to its label rather than scattering a large amount over the mat.
The trade-off is important: nitrogen can produce greener leaves without producing more flowers when the plant already has adequate fertility. Excess lush growth also creates a denser, slower-drying canopy. If the plant is pale, compare light, root moisture, and soil condition before assuming it needs feed; a shaded or waterlogged plant cannot convert fertilizer into a healthy bloom display.
Avoid fertilizing drought-stressed or freshly divided plants. Watering and root contact come first. Feed only after the plant is actively growing and the soil is moist, and keep granules away from the crown.
Pruning and deadheading
Pruning is optional for a healthy patch, but the timing and purpose should be clear. After the spring flowers fade, lightly shear or trim the top portion of the mat if stems are floppy, the edge is untidy, or the center is becoming too dense. Cutting back by about one-third is a conservative starting point; step back as you work so you do not expose the crown or remove all green growth.
Deadheading is also optional. Remove spent flower clusters if you want a cleaner display or want to limit self-seeding, but do not cut into the plant while it is still carrying unopened buds. RHS lists no routine pruning as necessary for P. stolonifera, while Missouri Botanical Garden notes that a post-flowering cut can reduce mildew pressure and self-seeding. (Missouri Botanical Garden Plant Finder) For a species-by-species pruning calendar, see our phlox pruning guide.
Do not give true creeping phlox a hard fall haircut simply because a bare bed looks tidy. Its foliage contributes to winter protection and structure. Remove fallen leaves that mat against the crown, and save major renovation for after flowering or for division when the patch is actively growing.
Propagating by division and layering
Division is the most dependable home method. It also solves two problems at once: you get new plants, and you refresh a patch that has become thin in the center or congested at the edges. Divide in spring as new growth starts or in early fall while the soil remains workable, choosing a cool, overcast day if possible.
Use this sequence:
- Prepare the new planting site before lifting the parent plant.
- Water the patch the day before if the soil is dry.
- Lift a section with a sharp spade, keeping several leafy stems and a useful amount of rooted soil together.
- Separate the section at natural points, or cut cleanly through the root mass; avoid making tiny fragments with no crown or roots.
- Replant at the original depth, firm the soil, and water immediately.
- Keep divisions evenly moist until they show new growth and resist a gentle tug.
You do not always need to dig the entire plant. Because stolons can root at their nodes, you can sometimes lift a well-rooted edge section and leave the parent undisturbed. This is a form of practical layering: peg a healthy runner against moist soil, let it root, then sever it from the parent once it has its own roots. It is slower than taking a large division but useful when the planting is young or the center is difficult to access.
Seed and stem cuttings are possible, but they are less predictable for a named cultivar and less straightforward for a gardener who simply wants another patch. If flower color or habit matters, divide a plant whose traits you already like instead of expecting seed-grown offspring to be identical.
Blooming: timing and how to improve the display
True creeping phlox blooms in spring, with exact timing shifting by latitude, winter, and exposure. Flowering stems rise above the mat and carry fragrant clusters of small, tubular, five-lobed flowers. The show may last several weeks, but rain, heat, drought, and the plant’s age all influence how long the display looks full.
To improve bloom, work backward from the likely cause of weak flowering. A plant in deep shade needs more usable light, not more fertilizer. A plant in a hot site that repeatedly wilts needs a better-matched location or more dependable root-zone moisture. A mature patch that has become woody or hollow in the middle may need division and replanting rather than a heavier feeding schedule.
Avoid high-nitrogen lawn fertilizer near the bed. It can push soft foliage at the expense of flowers and may make the mat harder to keep dry. Keep a modest mulch layer, weed competition low, and the plant’s runners in contact with soil; these basics do more for a sustainable bloom display than chasing a precise fertilizer ratio.
Troubleshooting leaves, stems, and flowers
Start with the root zone and the plant’s identity before diagnosing a disease. A yellow leaf on an older shaded stem does not carry the same meaning as a whole mat turning yellow in saturated clay, and a short bloom season is not automatically a cultural failure. Look for patterns across the plant, inspect the soil below the surface, and change one major condition at a time.
Yellow leaves or sparse growth
Yellowing across the lower or interior foliage often points to too much moisture, poor drainage, or insufficient light. If the soil is wet several inches down, reduce irrigation and improve drainage; if the plant sits in dense shade, move it toward brighter filtered light. If only a few older leaves yellow while new growth is firm and green, seasonal aging or normal shading may be involved.
Sparse growth can result from a newly planted division, competition from weeds, a site that dries too quickly, or runners that have not yet rooted. Gently check whether a runner has roots at its nodes. If not, press it into contact with moist soil and pin it lightly rather than cutting it away.
When leaves are pale but the plant is in good light and well-drained soil, a soil test is more informative than guessing. Do not correct an unmeasured nutrient problem with repeated fertilizer applications; excess salts or nitrogen can create a second problem while leaving the original cause untouched.
Soft stems, black roots, or leaf spots
Soft stems and dark, mushy roots are a drainage emergency. Pull back mulch, check how quickly the bed dries after rain, and inspect the crown and roots. If the root mass is mostly sound, move or replant a healthy, firm section into better-drained soil; if tissue is broadly collapsed, remove the affected material and dispose of it away from healthy planting areas.
Leaf spots are not a diagnosis by themselves. Note whether spots are expanding, whether the leaves are staying wet overnight, and whether stems are also soft. Improve spacing, remove badly affected debris, water at the base, and avoid working through wet foliage. The RHS lists powdery mildew, grey mould, and stem and bulb eelworm among possible problems for P. stolonifera, while NC State lists black root rot and Phytophthora blight and root rot among documented disease problems. (RHS creeping phlox profile) (NC State Extension Plant Toolbox)
Spider mites, slugs, nematodes, and mildew
Spider mites are more likely during hot, dry stress. Look for fine stippling, dusty-looking foliage, or webbing on the undersides of leaves. First reduce plant stress with a thorough root-zone watering if the soil is dry, then use a strong but non-damaging stream of water to dislodge pests; repeat observations matter because one treatment rarely resolves an active population. Avoid spraying a stressed plant in hot sun, and follow every pesticide label if a product becomes necessary.
Slugs favor damp shelter and tender growth. Remove boards, dense debris, and wet mulch touching the crown, then hand-pick or use a labeled control according to local directions. A slug problem in a persistently wet bed is a site signal as much as a pest signal.
Stem and bulb eelworm, also called a nematode problem in some guidance, is harder to manage once a planting is affected. If stems distort, growth declines in patches, or symptoms recur despite better water and light, isolate the affected material, avoid moving divisions from that patch, and ask a local extension service for confirmation. Do not assume every spot is a nematode and destroy a healthy plant without checking.
Powdery mildew is more likely when foliage is crowded, the air is stagnant, or the plant swings between stress and wetness. Thin surrounding growth, improve morning light and airflow, water the soil rather than the foliage, and remove badly affected leaves. A post-bloom trim can help open the mat, but pruning alone will not fix a wet, shaded site.
Winter and seasonal care
In the ground, established P. stolonifera is commonly grown in USDA Zones 5–9, with actual survival affected by snow cover, exposure, drainage, and the plant’s establishment. Missouri Botanical Garden lists Zones 5–9 and describes the plant as tolerant of drought, erosion, rabbits, deer, and urban conditions, but tolerance is not the same as immunity to a bad site. (Missouri Botanical Garden Plant Finder)
In late fall, remove diseased debris and leaves that form a wet blanket over the crown. Leave healthy foliage in place unless it has collapsed, and keep winter mulch loose and shallow. A new fall division needs more protection from freeze-thaw lifting than an established mat; water it before the ground freezes if the soil is dry, but do not keep it saturated.
Containers deserve extra caution. The plant’s in-ground hardiness does not transfer perfectly to an exposed pot because roots experience colder temperatures and faster moisture swings. Use a substantial, freely draining container, protect it from severe winter exposure, and check the mix during dry winter weather when the ground is not frozen.
Conclusion: match the plant to the place
The best creeping phlox care plan begins with a label, not a watering schedule. For true creeping phlox, Phlox stolonifera, choose partial shade or gentle sun, humus-rich soil that drains, steady moisture during establishment, and enough room for stolons to root. Prune lightly after spring flowering only when the mat needs shaping, and divide when a mature patch becomes thin or crowded. If you grow several kinds of phlox, our complete phlox care guide compares their light, moisture, bloom, and mildew needs.
If the plant has needle-like leaves and is growing on a hot rock wall, you may have moss phlox, P. subulata, with a different ideal site. Once the botanical name and the garden conditions agree, most of the remaining work is simple: keep weeds down, avoid saturated soil, protect airflow, and let the plant do what its runners were built to do.



