7 Reasons Dieffenbachia Leaves Turn Yellow and Fixes
Diagnose yellow dieffenbachia leaves by pattern, soil moisture, roots, light, and pests. Get safe next steps without following a fixed watering calendar.
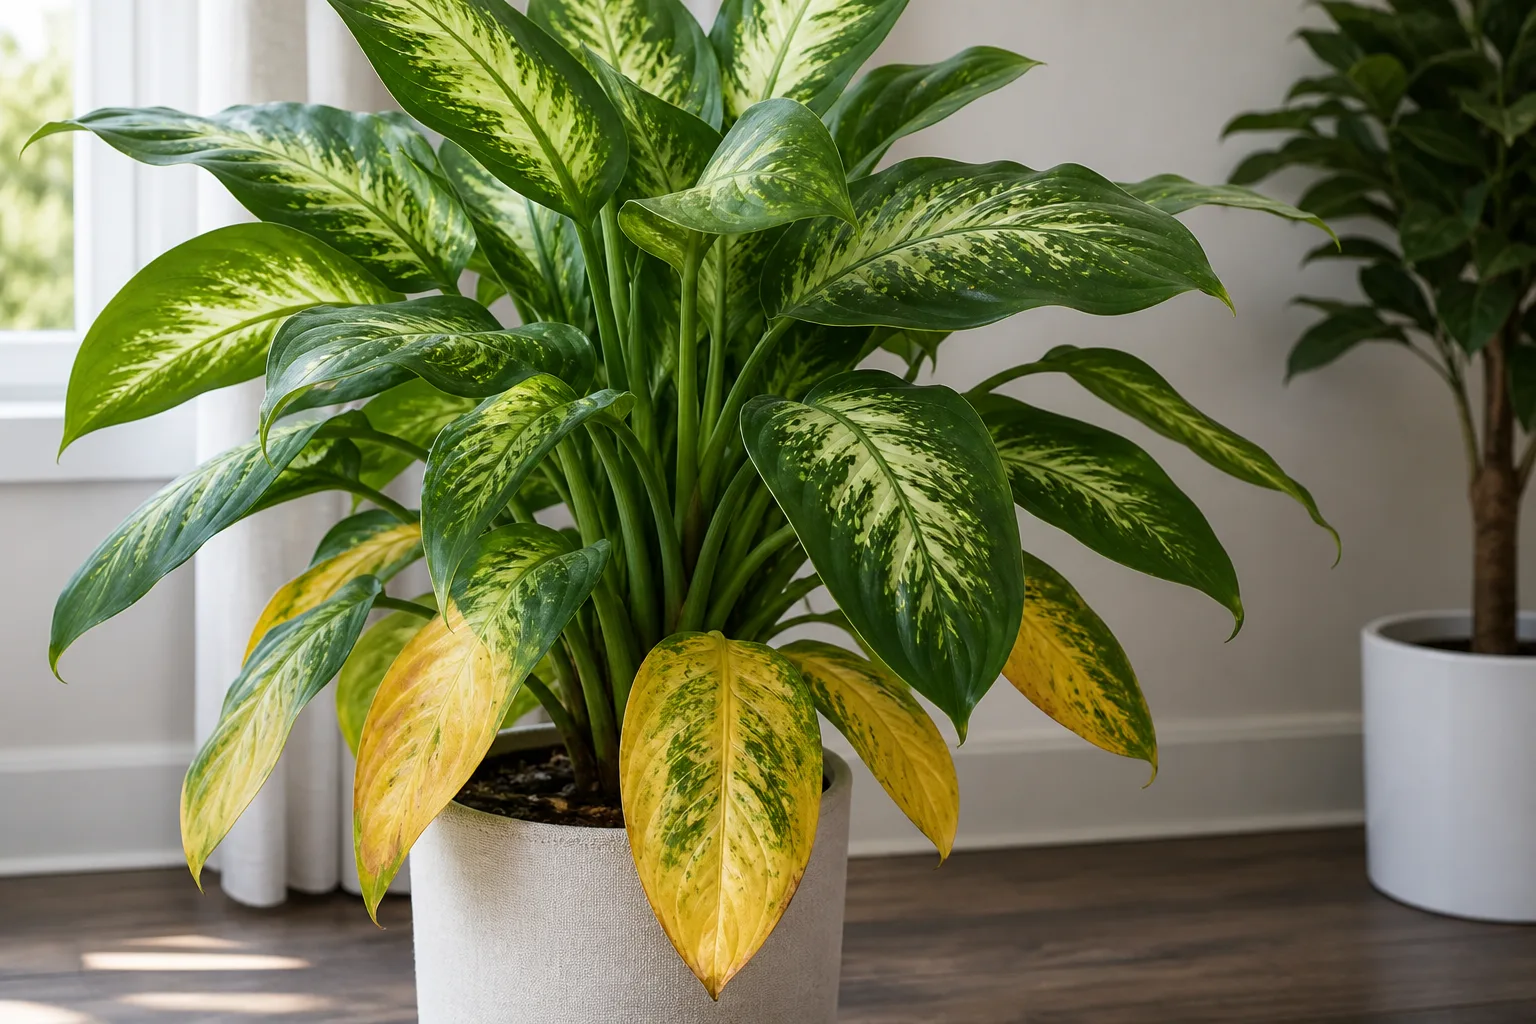
A yellow dieffenbachia leaf is a clue, not a diagnosis. One older leaf fading near the base can be normal, while several leaves yellowing at once can point to wet roots, a dry root ball, a light change, pests, or cold exposure. Start by noting which leaves are affected and what the soil and roots are doing; adding water just because foliage looks droopy can worsen root damage.
Dieffenbachia, also called dumb cane, naturally has cream, white, or yellow markings within its green leaves. Those stable patterns are part of the plant’s variegation. New discoloration looks different: it spreads or changes on leaves that were previously green, often alongside a change in texture, growth, or the plant’s environment. North Carolina State Extension describes Dieffenbachia as a plant that prefers indirect light, moderate temperatures, and soil that is allowed to dry at the surface between thorough waterings (North Carolina State Extension’s Dieffenbachia profile).
First, read the yellowing pattern
Before changing care, take a quick inventory. Is the yellow leaf the oldest one at the bottom, or are several leaves—including new ones—changing together? Are the affected leaves soft, limp, crispy, spotted, sticky, or webbed? Those details narrow the possibilities more reliably than “yellow” alone.
Check moisture a little below the surface, not just the top crust. Then lift the pot if you can compare its weight with how it feels after a thorough watering; a pot that remains heavy while the plant wilts deserves a different response from one with bone-dry mix. Also look at the drainage holes, the saucer, the stem bases, and the undersides of leaves.
| What you notice | What to check next |
|---|---|
| One slowly fading lower leaf; healthy new growth | Natural aging and recent leaf drop |
| Several yellow leaves with wet, heavy soil | Drainage and roots before watering |
| Dry mix, light pot, crispy edges | Thoroughly rehydrate the root ball |
| Pale, stretched growth far from a window | Light level and direction |
| Bleached or papery patches facing glass | Direct sun or an abrupt move |
| Fine stippling, webbing, sticky residue, or bumps | Pests on leaf undersides and stems |
| A recent cold window, open door, or heating/cooling vent | Temperature exposure and drafts |
These patterns are clues, not proof. Water stress can look similar in opposite conditions, low light can make the pot dry slowly, and more than one issue can be present at once. If the evidence points to wet soil, do not “test” your diagnosis by watering again.
1. Natural aging
A dieffenbachia grows new leaves from the top and may gradually shed its oldest foliage at the bottom. If one lower leaf yellows slowly while the stem remains firm and upper leaves look healthy, that is usually part of ordinary turnover rather than a crisis. The plant may look a little taller or more cane-like as lower leaves age out.
Watch the pace and pattern. Several lower leaves dropping rapidly, yellowing that moves into younger leaves, or a soft stem base is not the same as losing an occasional old leaf. In that case, check the root zone, temperature, and pests instead of assuming every yellow leaf is harmless.
You do not need to fertilize or repot a plant to stop one old leaf from aging. Wait until it is mostly yellow, then remove it if you want a tidier plant. Healthy foliage still supports the plant, so avoid stripping several partly green leaves at once.
2. Overwatering or poor drainage
When potting mix stays wet for too long, roots have less oxygen and can become damaged. The foliage may yellow, growth can stall, and the plant may wilt even though its soil is wet. A blocked drainage hole, a nursery pot left inside a water-filled cachepot, compacted old mix, or a pot that is much too large can keep the root ball damp longer than expected.
Look at the combination of evidence: persistently damp mix, a heavy pot, yellowing across multiple leaves, and wilt that does not improve after the soil dries. If the lower stem becomes soft or the mix smells sour, the problem may be advanced. A leaf turning yellow alone does not establish overwatering.
Do not follow a fixed number of days between waterings. Let the upper inch of mix dry, then water thoroughly so the root ball is moistened and excess water can escape through the drainage holes; empty the saucer afterward. North Carolina State Extension gives this surface-dry cue for Dieffenbachia, but the time it takes depends on pot size, mix, light, temperature, and season.
When to inspect the roots
Unpotting is useful when the plant is declining in wet soil, has a soft or collapsing base, or continues to wilt despite moisture. It is unnecessary for a single old yellow leaf when the plant otherwise looks well. If you do inspect, firm roots are reassuring; dark, soft, mushy roots or an unpleasant odor support a root-rot concern. The UW Plant Disease Diagnostics Clinic notes that root-rotted houseplants can wilt despite wet soil, develop yellow or red foliage, and have soft brown roots (Wisconsin Horticulture’s houseplant root-rot guide).
For a plant with a few damaged roots, use clean scissors to remove only tissue that is clearly soft and dead, then pot it in fresh, free-draining mix in a container with drainage. Do not upsize dramatically; a much larger volume of mix can stay wet around a smaller root system. If most roots or the cane base are rotten, recovery is less certain, so avoid promising that a fungicide or emergency repot will reverse the damage. The Wisconsin guide cautions that houseplant root rots are difficult to diagnose by sight and does not recommend fungicides as a general home treatment.
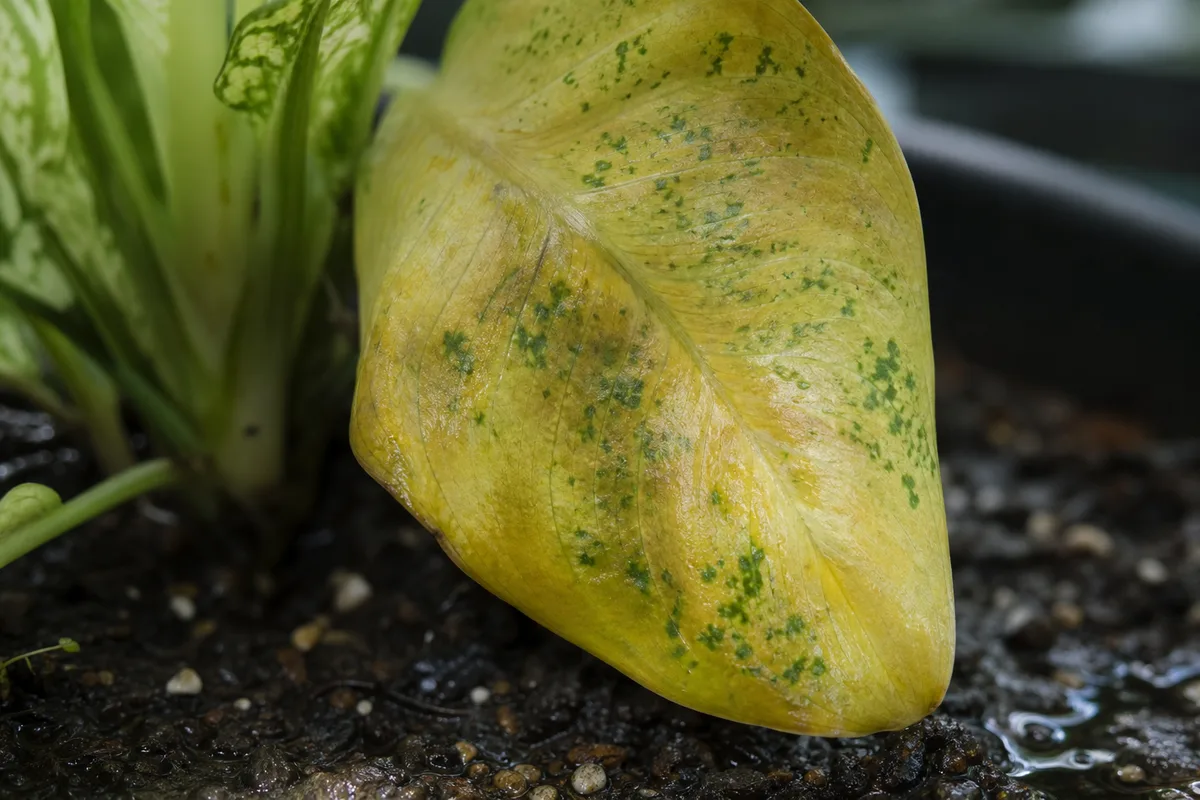
Wet soil and yellow foliage call for a drainage and root check; leaf color by itself cannot confirm root rot.
3. Underwatering or an unevenly dry root ball
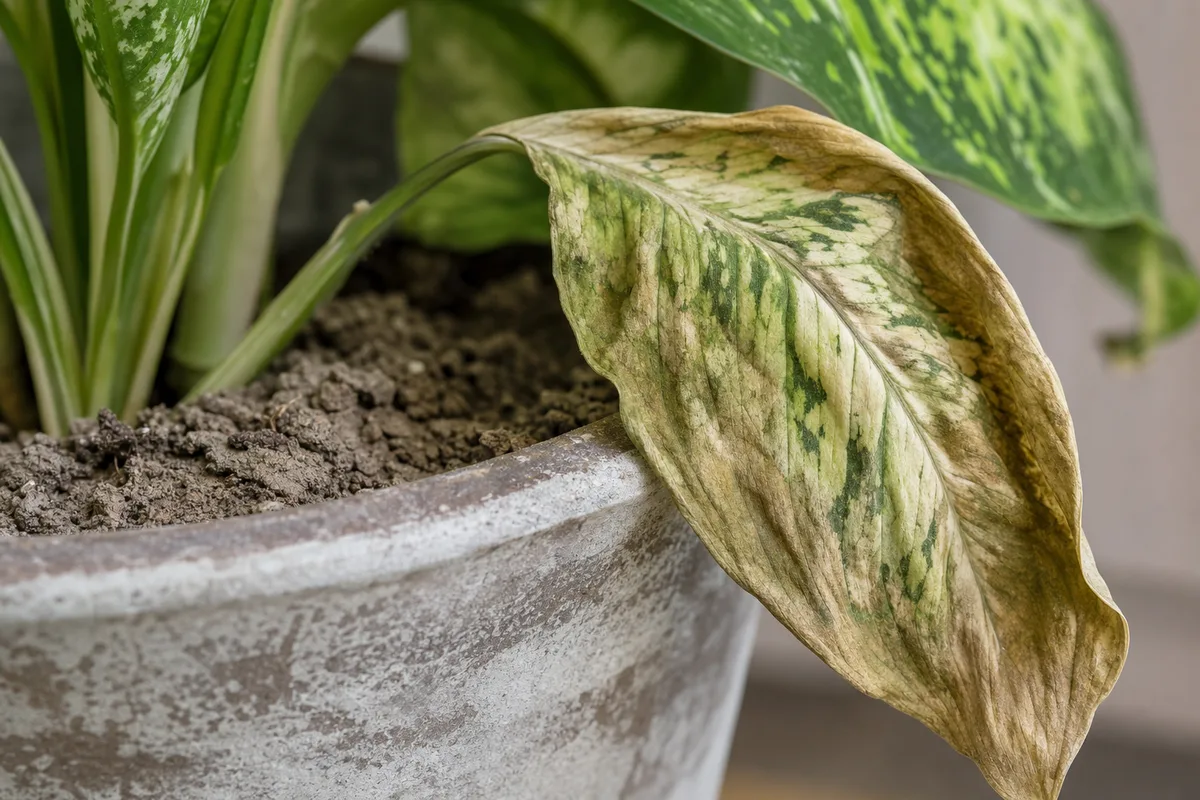
A plant that dries too far can also yellow and droop. The mix may feel dry well below the surface, the pot may be unusually light, and the leaf edges can become papery or crisp. This is different from the heavier, wet pot that raises concern about damaged roots, although an old compacted root ball may be dry in one place and damp in another.
If the mix is dry through the root zone and water runs straight down the sides, the center may have become difficult to rewet. Slowly water the soil surface in several passes until the root ball absorbs moisture and water begins to drain. You can also briefly set a pot with drainage holes in a shallow basin so the mix can wick water upward, then remove it and allow it to drain fully; do not leave the plant standing in water.
After a thorough drink, check the plant again rather than repeating the watering immediately. A plant that perks up as the root ball rehydrates was likely thirsty, but yellow tissue may remain discolored. If it keeps drooping while the soil is damp, return to the root inspection rather than adding more water. The useful rule is to respond to measured soil moisture, not to a weekly reminder or leaf droop alone.
4. Too little indirect light
A dieffenbachia can tolerate a somewhat dimmer spot, but very low light slows growth and changes how quickly the pot uses water. Look for a combination of long spaces between leaves, stems leaning toward a window, smaller new leaves, and soil that stays damp much longer than it did in a brighter position. Low light can contribute to yellowing, but it is not the only possible explanation for a pale plant.
Move it gradually toward brighter indirect light—near a bright window but out of harsh direct rays. A sheer curtain or a position a short distance from a sunny window can soften the light; do not choose a window direction by itself, because trees, buildings, glass, and season change the actual exposure. Rotate the pot occasionally if growth is reaching strongly in one direction.
Give the plant time to respond. Existing yellow leaves will not turn green simply because the light improves, and a sudden move into intense midday sun can create a second problem. Judge the adjustment by whether new leaves develop with healthy size and color and whether the soil begins to dry at a reasonable pace.
5. Direct sun or a sudden light change
Dieffenbachia foliage can scorch when strong sun reaches it directly, especially through glass during a bright part of the day. Damage often appears on the most exposed leaves as bleached, pale, dry, or papery patches; it may be localized rather than a uniform yellowing of the whole plant. A recent move from a shaded room to a sunny sill is a useful clue.
Shift the plant out of the direct beam while keeping it in a bright area. A sheer curtain works if you want to keep it near the window, and a gradual transition is safer than repeatedly moving it between deep shade and full sun. Scorched tissue does not heal back to green, so focus on protecting the remaining foliage and watching new leaves.
Do not automatically move every yellowing plant farther from light. A leggy plant with slow soil dry-down may need more indirect light, while a leaf with a sharply bleached window-facing patch may need less direct exposure. The direction of the change depends on the symptom pattern.
6. Sap-feeding pests
Spider mites, scale, aphids, mealybugs, and whiteflies can weaken a dieffenbachia by feeding on its sap. Yellowing from pests often comes with other evidence: fine pale speckles, webbing, sticky honeydew, cottony clusters, tiny insects, or small bumps attached to stems and leaf veins. A general yellow color without insects or feeding marks does not prove an infestation.
Isolate the plant while you inspect it so that a confirmed pest problem is less likely to spread. Check the undersides of leaves, the joints where petioles meet the cane, new growth, and nearby plants; a hand lens can help with mites and immature insects. Spider-mite feeding can make foliage look finely stippled, while mealybugs look cottony and scale insects can resemble fixed brown or tan bumps. Epic Gardening’s plant-specific overview also describes mite webbing and leaf discoloration as clues to check together rather than treating color alone as a diagnosis (Epic Gardening’s Dieffenbachia yellow-leaf guide).
How to inspect and respond
If you find a small number of pests, wipe them away or rinse foliage where practical, keeping the plant separated as you monitor it. For a larger infestation, use only a product labeled for the pest and indoor ornamental plants, and follow its label for dilution, coverage, repeat treatment, ventilation, and pet or child precautions. Test a small area first if the label recommends it, because sprays can injure foliage under some conditions.
Coverage matters: contact products only work where the spray reaches, so leaf undersides and stem joints cannot be skipped. Recheck every few days and repeat only as the product label directs; eggs or hidden insects can survive an incomplete first pass. Do not mix pesticides, apply an outdoor-only product inside, or treat with neem or soap as if every homemade concentration were automatically safe.

Fine stippling and webbing are stronger spider-mite clues than yellowing alone.
7. Cold drafts and temperature swings
A plant can react to a sudden change even if the room generally feels comfortable. A cold window at night, an exterior door that opens often, a strong air-conditioning stream, or hot dry air from a heating vent can expose leaves to stress that is not captured by the thermostat across the room. Lower leaves may yellow or drop after a cold event, while repeated stress can affect more of the plant.
North Carolina State Extension advises protecting Dieffenbachia from cold drafts and direct sun. Move the pot away from the draft or vent, but keep its new location bright enough; placing it in a dark corner may trade one stress for another. If you are not sure when the temperature changes, compare the plant’s position with the room and window at night, not just the daytime temperature.
Make one stable adjustment and watch the newest growth. A plant that has lost a leaf after a brief chill may not need repotting, pruning, or extra fertilizer. Avoid trying to compensate for cool conditions with extra water: a cool, dim plant usually uses water more slowly.
When the seven common causes do not fit
A plant with widespread yellowing and no clear watering, light, pest, or temperature clue may have more than one stressor, or a less common issue. Check whether the pot is root-bound, whether old mix has collapsed, whether feeding has been excessive or absent through active growth, and whether the marks are actually lesions rather than an even color change. Keep notes on what changed and when so you do not make several corrections at once.
Nutrient or fertilizer stress
Nutrient deficiency is possible, particularly if growth has been weak for a long time and the plant has not received any feed during active growth. But a yellow leaf is not a reliable nitrogen test: root damage can prevent nutrient uptake even when fertilizer is present, and a damaged root system will not be repaired by feeding it more. Gardening Know How describes both nutrient-related yellowing and browning margins from excess fertilizer in its Dieffenbachia disease overview (Gardening Know How’s Dieffenbachia troubleshooting guide).
If roots are healthy and the plant is actively growing, use a balanced houseplant fertilizer at the label rate rather than increasing the dose to force recovery. If there is a crust on the mix, a history of repeated feeding, or burned tips and margins, pause fertilizer and review the product directions; flushing is appropriate only when the pot drains freely and the roots are not already waterlogged. Do not fertilize a dormant, cold, or badly stressed plant in hopes that food will restore yellow leaves.
Leaf spot and other disease
A disease becomes more plausible when discoloration forms discrete spots or lesions that enlarge, develop a distinct halo, appear on several leaves, or spread after foliage stays wet. Some leaf-spot diseases can have brown, tan, or black centers with yellow around them, but spots can also result from physical injury, pests, or abiotic stress. A photograph can help document progression, but visual symptoms rarely identify the pathogen with certainty.
Avoid splashing water from one plant to another, remove severely affected foliage with a clean tool, and isolate the plant if symptoms are spreading. Do not reach for a fungicide based on yellow color alone: the wrong product may not help, and product legality and directions vary. If the plant continues to decline or the diagnosis would change treatment, a local extension office or plant disease clinic can assess a sample; the UW clinic specifically warns that very few plant diseases can be diagnosed accurately by eye.
A safe recovery sequence
Work from the least invasive check to the most invasive one. First, decide whether yellowing is limited to one old leaf or is affecting multiple leaves. Next, feel the mix below the surface and check the pot’s drainage; if it is wet and the plant is wilting, do not add water.
Then inspect both sides of the leaves and the stem joints for insects, webbing, sticky residue, or spreading spots. Review recent moves and exposures—sun through glass, a cold window, open door, AC, or heater—and adjust the position if the timing fits. If no clue stands out, avoid a pileup of remedies; take a dated photo and compare new growth after one targeted change.
Repot only when the roots or the condition of the mix justify it. A loose, fresh, well-draining mix and a pot with drainage help prevent persistent waterlogging, but a healthy plant does not need an emergency repot just because a lower leaf turns yellow. When repotting a damaged plant, choose a pot close to the remaining root mass rather than a large decorative container full of slow-drying soil.
Make only one major change at a time unless there is an urgent hazard, such as confirmed pests near other plants or a pot without drainage holding water. Do not combine a new watering routine, fertilizer, pesticide, and repotting all at once; if the plant improves or worsens, you will not know which action mattered. Record the change and allow enough time for new growth to show whether conditions have stabilized.
Remove yellow leaves carefully
A mostly yellow leaf will not return to its former green pattern. You can leave a partly green leaf while it is still supporting the plant, then remove it when it is largely yellow, dry, or damaged. Use a clean, sharp tool and cut the petiole near its base without nicking the cane.
Wear gloves when pruning, washing sap from the plant, or repotting. North Carolina State Extension flags Dieffenbachia as potentially toxic if chewed and advises washing hands after handling; keep cut foliage and sap away from children and pets, and avoid touching your eyes or mouth. Clean the tool before using it on another plant, especially if you suspect a spreading leaf-spot problem.
Conclusion
A yellow dieffenbachia leaf can mark normal aging, but widespread yellowing deserves a closer look at the soil, roots, light, pests, and recent temperature changes. The most important first choice is whether the root ball is wet or dry: water only when the surface has dried, and inspect roots if a plant wilts in persistently wet mix. Change the condition that the evidence supports, protect the plant from sap exposure while pruning, and judge recovery by healthy new growth rather than expecting damaged leaves to turn green again.