How to Grow and Care for Ficus Tineke
Grow a fuller Ficus Tineke with practical guidance on bright light, soil, dry-down watering, repotting, pruning, propagation, pests, and pet safety.
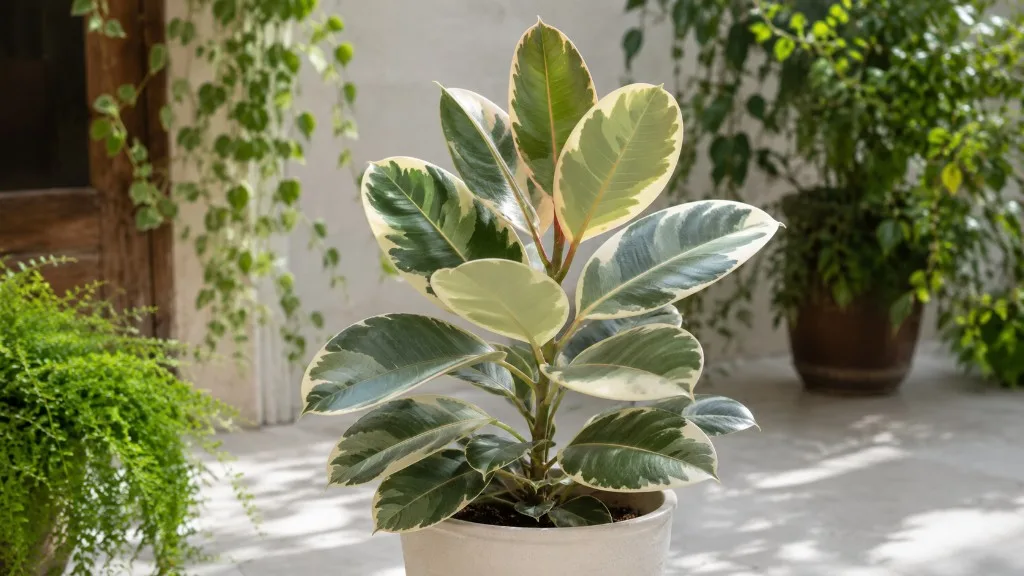
Ficus Tineke is the variegated form of Ficus elastica, the rubber plant with broad, glossy leaves patterned in green, cream, and white, sometimes with a blush of pink on new growth. It is forgiving about an occasional missed watering, but it is not a low-light plant if you want to keep that painterly pattern.
The most useful care rule is to balance three things: bright filtered light, a root zone that dries between thorough waterings, and stable warmth. When the plant struggles, check those variables in that order before adding fertilizer, changing soil, or moving it repeatedly. The RHS guide to ornamental figs describes rubber plants as robust, long-lasting houseplants that still need bright light, regular watering, and protection from cold fluctuations.
What Ficus Tineke Is—and What Makes It Different
‘Tineke’ is a named cultivar of Ficus elastica in the mulberry family, Moraceae. The species is a tropical evergreen tree in nature, where it can become enormous; indoors it stays manageable because the container, light, root space, and pruning limit its growth. The RHS plant profile for Ficus elastica lists it as a houseplant and conservatory plant with moist but well-drained growing conditions.
The cream and white parts of a Tineke leaf contain less chlorophyll than the green parts. That is why this cultivar needs a brighter position than a solid-green rubber plant such as ‘Burgundy’: it has less green tissue available to capture light. A dim corner may keep the plant alive while new leaves become smaller, greener, farther apart, and less distinctive.
Tineke is sometimes confused with ‘Ruby’, another variegated rubber plant. ‘Ruby’ usually shows stronger red or pink tones, while Tineke is known for cream-and-green marbling with pinkish new sheaths. Care is broadly similar, but any variegated rubber plant needs more usable light than a solid-green one.
The Quick-Care Routine
Use this as a starting point, then adjust it to the speed at which your own pot dries. A plant in a bright, warm room may use water much faster than the same plant in a cool, dim room.
| Care point | Reliable starting rule | What tells you to adjust |
|---|---|---|
| Light | Bright, filtered light; gentle morning sun is usually easier to manage than afternoon sun | Green, stretched growth suggests too little light; bleached or crispy patches suggest too much |
| Water | Check the top 1–2 inches of mix; soak when that layer is dry, then drain fully | Wet mix for many days means less frequent watering or a more open mix |
| Soil | Airy houseplant mix in a pot with drainage holes | Sour-smelling, compacted, or slow-draining mix needs attention |
| Temperature | Warm and steady; protect it from cold drafts and air-conditioning blasts | Sudden leaf drop after a move or draft points to environmental shock |
| Feeding | Half-strength balanced fertilizer about monthly during active growth | Skip feeding a stressed, recently repotted, or dormant plant |
| Maintenance | Rotate occasionally, wipe dust from leaves, and inspect leaf undersides | Leaning, pests, or dusty foliage can reduce the plant’s performance |
Think of this as a monitoring system rather than a weekly checklist. If the soil is still damp, do not water because the calendar says it is time. If the plant is actively growing and the mix dries quickly, do not withhold water just because your usual watering day has not arrived.
Choose Light by Watching the Variegation
Place Ficus Tineke close to a bright window where the light is filtered by a sheer curtain or softened by distance. An east-facing window is often an easy fit because it provides gentler morning sun; a south- or west-facing window can also work if the plant is set back or the strongest afternoon rays are filtered. The RHS growing guidance specifically notes that variegated forms need more light than green-leaved plants and can tolerate a few hours of gentle morning or evening sun.
Do not interpret “indirect light” as “across the room from a window.” Glass, a wall, and several feet of distance can reduce usable light dramatically. Tineke can survive medium light for a while, but its growth will be slower and the new leaves may carry less cream. Turn the pot a quarter turn every week or two so it does not lean permanently toward the window.
Signs the Plant Needs More Light
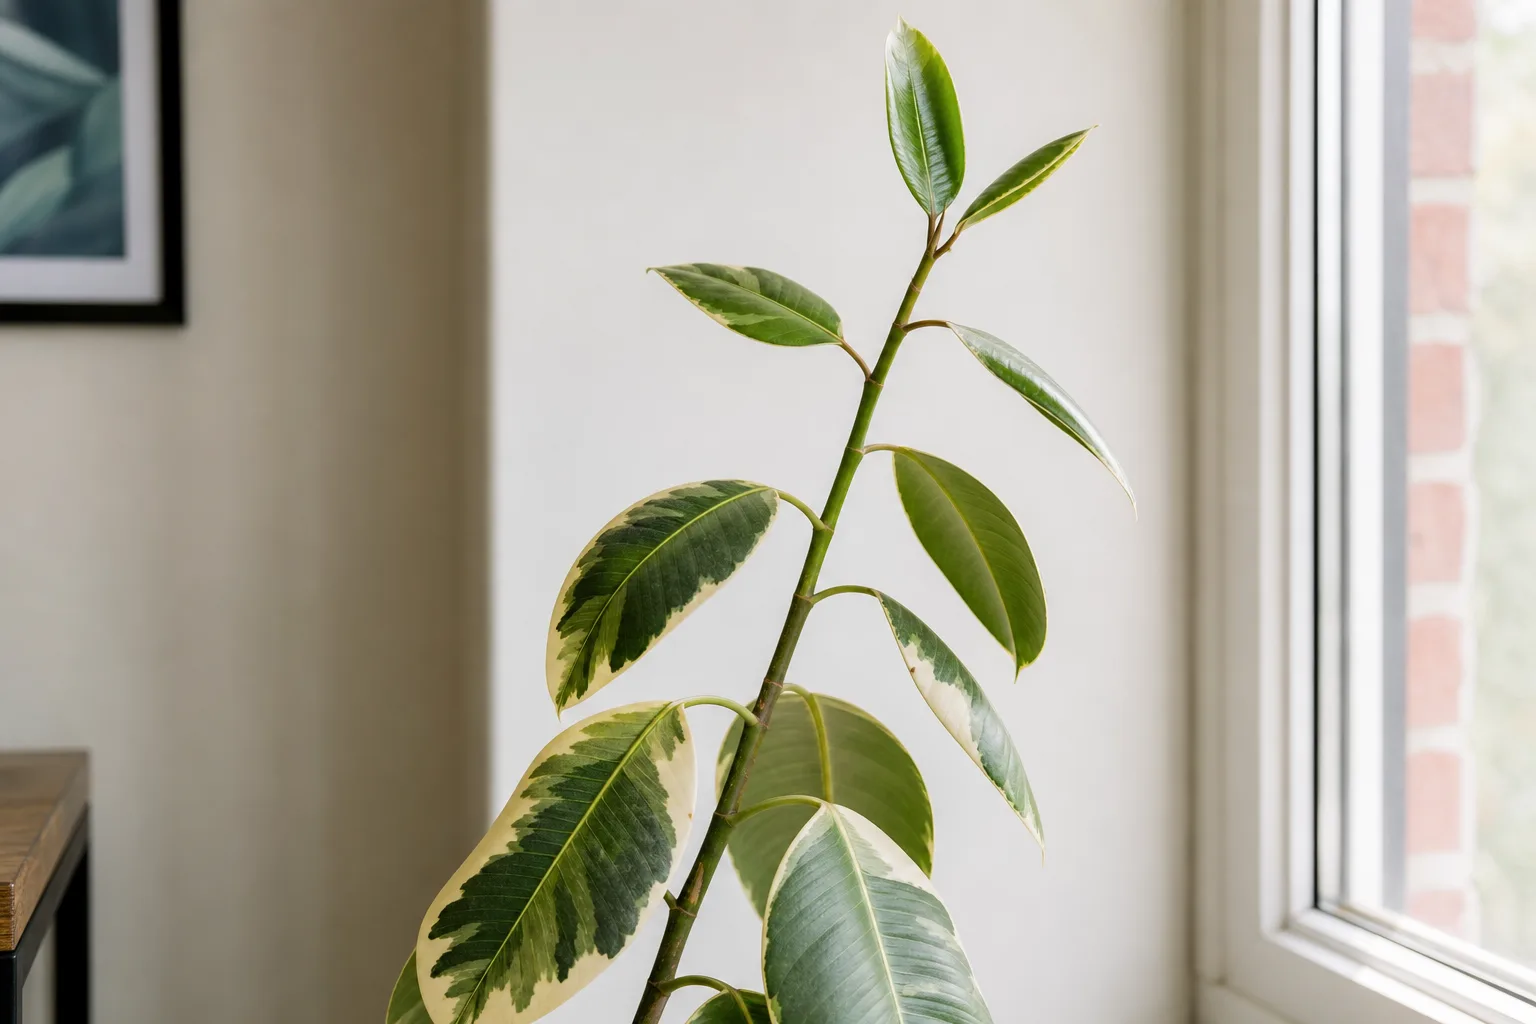
The earliest clue is usually not a completely green plant; it is a change in new growth. Watch for longer gaps between leaves, a stem that bends toward the window, smaller leaves, slower emergence from the red sheath, or new leaves with noticeably less cream than the older foliage. Move the plant closer to a bright source gradually rather than placing a dim-grown plant into intense midday sun in one step.
Fading on an old leaf is permanent. Better light can help future leaves show stronger variegation, but it cannot repaint tissue that has already matured. If one vigorous all-green shoot appears on a variegated plant, remove it back to a point where the stem still carries variegated growth; otherwise that stronger green branch may outgrow the slower variegated stems.
Water by Dry-Down, Not by Calendar
Water Ficus Tineke when the upper 1–2 inches of potting mix feel dry, then let excess water escape. That may be about every 7–14 days during active growth in a typical indoor pot, but the interval changes with pot size, light, temperature, mix, and season. A fixed “once a week” rule is useful only if you still check the soil.
The goal is not to keep the soil bone-dry for long periods. It is to give the roots air between thorough drinks. Overwatering usually means the roots are kept wet too often or the pot drains poorly, not that one generous watering was automatically a mistake.
How to Water Through the Pot
- Push a finger into the mix or use the pot’s weight as a second check. The surface can look dry while the center remains wet, especially in a large decorative pot.
- When the upper layer is dry and the plant is otherwise stable, water slowly over the soil until a little runs from the drainage holes.
- Let the pot drain completely. Empty the saucer or cachepot so the base does not sit in runoff.
- Return the plant to its light position and check again when the same upper layer dries.
Water at the soil line rather than repeatedly wetting the foliage. Wipe the broad leaves with a clean, damp cloth when dust builds up; clean leaves make it easier to see pests and help the plant use the light available to it.
In winter or during a long cloudy spell, the plant usually grows more slowly and the pot stays wet longer. Increase the interval, but still water thoroughly when the dry-down cue arrives. In a bright, heated room, the mix may dry faster than expected; check it rather than assuming winter means no water.
Use an Airy Mix and a Drainage Pot
Ficus Tineke does not need a specialized branded soil. It needs a mix that holds some moisture while leaving air spaces around the roots. A quality houseplant mix amended with perlite and fine orchid bark is a practical starting point; the exact ratio matters less than whether water moves through the pot instead of forming a heavy, wet plug.
Use a container with open drainage holes. A decorative cover pot without holes is fine as an outer cachepot, but the plant must be grown in an inner pot that can drain. Do not add a gravel layer inside the pot as a substitute for drainage; it reduces the depth available to roots without solving a blocked or water-retentive mix.
If water takes a long time to pass through, the mix has collapsed, or the pot remains heavy for many days, diagnose the root zone before changing the watering reminder. A chunky mix cannot rescue a pot with no outlet, and a drainage hole cannot compensate for watering again while the root ball is still saturated.
Keep It Warm, Stable, and Moderately Humid
Aim for ordinary warm indoor conditions, roughly 60–80°F (16–27°C), with no sudden drops. Keep Tineke away from a door that opens to cold air, a drafty window in winter, or an air-conditioning vent. A sharp change can trigger leaf drop even when the soil and light are otherwise reasonable.
Average home humidity is usually adequate if watering and light are consistent, but very dry air can worsen crispy margins and make spider mites more likely. A room humidifier is the most controllable option. Grouping plants can modestly soften the air around them, while a properly set-up pebble tray may help nearby humidity for a small area; the pot must sit above the waterline, and the tray should never turn into a second water reservoir for the roots.
Do not use misting as a substitute for humidity control or root care. Wet leaves in stagnant air can stay damp without fixing dry room air, and misting cannot correct an overwatered pot, a pest outbreak, or a sun-scorched leaf.
Feed During Active Growth
Feed in spring and summer when the plant is making new leaves. Use a balanced liquid houseplant fertilizer diluted to half the label strength about once a month, applied to already-moist soil. The RHS profile also recommends a high-nitrogen fertilizer during growth and sparse watering in winter; the practical point is moderate, seasonal feeding rather than constant fertilizer.
Skip fertilizer when the plant is cold, dormant, newly repotted, root-damaged, or already showing crispy fertilizer-burned margins. More fertilizer cannot compensate for too little light. If Tineke is barely growing because it is in a dim room, increase usable light first and wait for healthy new growth before feeding more.
Prune for Shape—and Handle the Sap Safely
Pruning is useful when Tineke has become tall, one-sided, or sparse at the base. In active growth, make a clean cut just above a leaf node to shorten a stem and encourage buds below the cut to develop. A single upright stem may branch after its top is removed, but it may also take time; pruning is a shaping tool, not an instant fullness button.
Remove dead leaves at the petiole and cut out damaged or diseased tissue with clean shears. Wear gloves, protect the floor and furniture, and wash tools afterward: Ficus elastica releases sticky white latex sap from wounds. The RHS guidance warns that fig sap can irritate skin or aggravate allergies, so avoid touching your eyes while pruning and rinse promptly if sap contacts skin.
Keep the plant where children and pets cannot chew it. The ASPCA’s Ficus elastica database page currently does not provide a detailed matching entry and warns that its plant list is not all-inclusive; that is a reason not to assume this cultivar is pet-safe. If a pet chews the plant, remove access and contact a veterinarian or an appropriate poison-control service with the botanical name rather than waiting for symptoms.
Propagate Ficus Tineke Without Wasting a Cutting
Ficus Tineke can be propagated, but it is less forgiving than a pothos cutting dropped into water. Every cutting needs at least one healthy node, the point where a leaf or branch joins the stem. A leaf without a node may stay green for a while but cannot produce a new stem on its own.
Propagate in spring or early summer when the parent plant is actively growing. Use a clean, sharp blade, wear gloves for the sap, and keep the cutting warm in bright filtered light. Expect patience: a cutting that looks unchanged for weeks is not necessarily dead, but blackening, mushiness, or a sour-smelling medium is a bad sign.
Stem Cuttings and Air Layering
For a stem cutting, take a 4–6 inch section with at least one strong node and one or two leaves. Remove lower foliage, let the latex stop flowing, and place the node in a small pot of moist, airy medium; a loose humidity cover can reduce moisture loss, but it should not press against the leaf or trap stale, dripping conditions. Keep the medium lightly moist, never saturated, and wait for resistance or new growth before assuming roots have formed.
Water propagation is possible, but it is not the only or always the best route for rubber plants. The Epic Gardening rubber plant guide recommends warm indirect light and humidity around cuttings, while the RHS propagation guidance also lists semi-ripe cuttings and air layering as suitable methods. For a large plant you do not want to shorten, air layering is often the better choice: root a selected stem while it remains attached, then sever it after a visible root system forms.
Repot Without Creating a Wet Root Ball
Repot when roots circle tightly, emerge from drainage holes, the plant is unstable, the mix has broken down, or water runs straight through because roots occupy nearly all the pot. If none of those signs is present, repotting on a calendar can create a larger wet root zone than the plant can use.
Move up only one pot size, usually about 1–2 inches wider. A much larger container holds more unused mix, stays wet longer, and raises the risk of root rot. Repot in spring when possible, keep the stem at the same depth, fill around the root ball with fresh airy mix, and water once to settle it before letting the pot drain completely.
After repotting, give the plant stable light and warmth. Do not respond to temporary droop by watering repeatedly; check the mix first. A recently disturbed root ball may need time to resume normal water use, especially if you also moved it to a darker location.
Troubleshoot Leaves in the Right Order
Symptoms overlap, so start with the root zone, recent changes, and light exposure. Do not diagnose a yellow leaf from color alone, and do not make five changes at once; otherwise you will not know what helped.
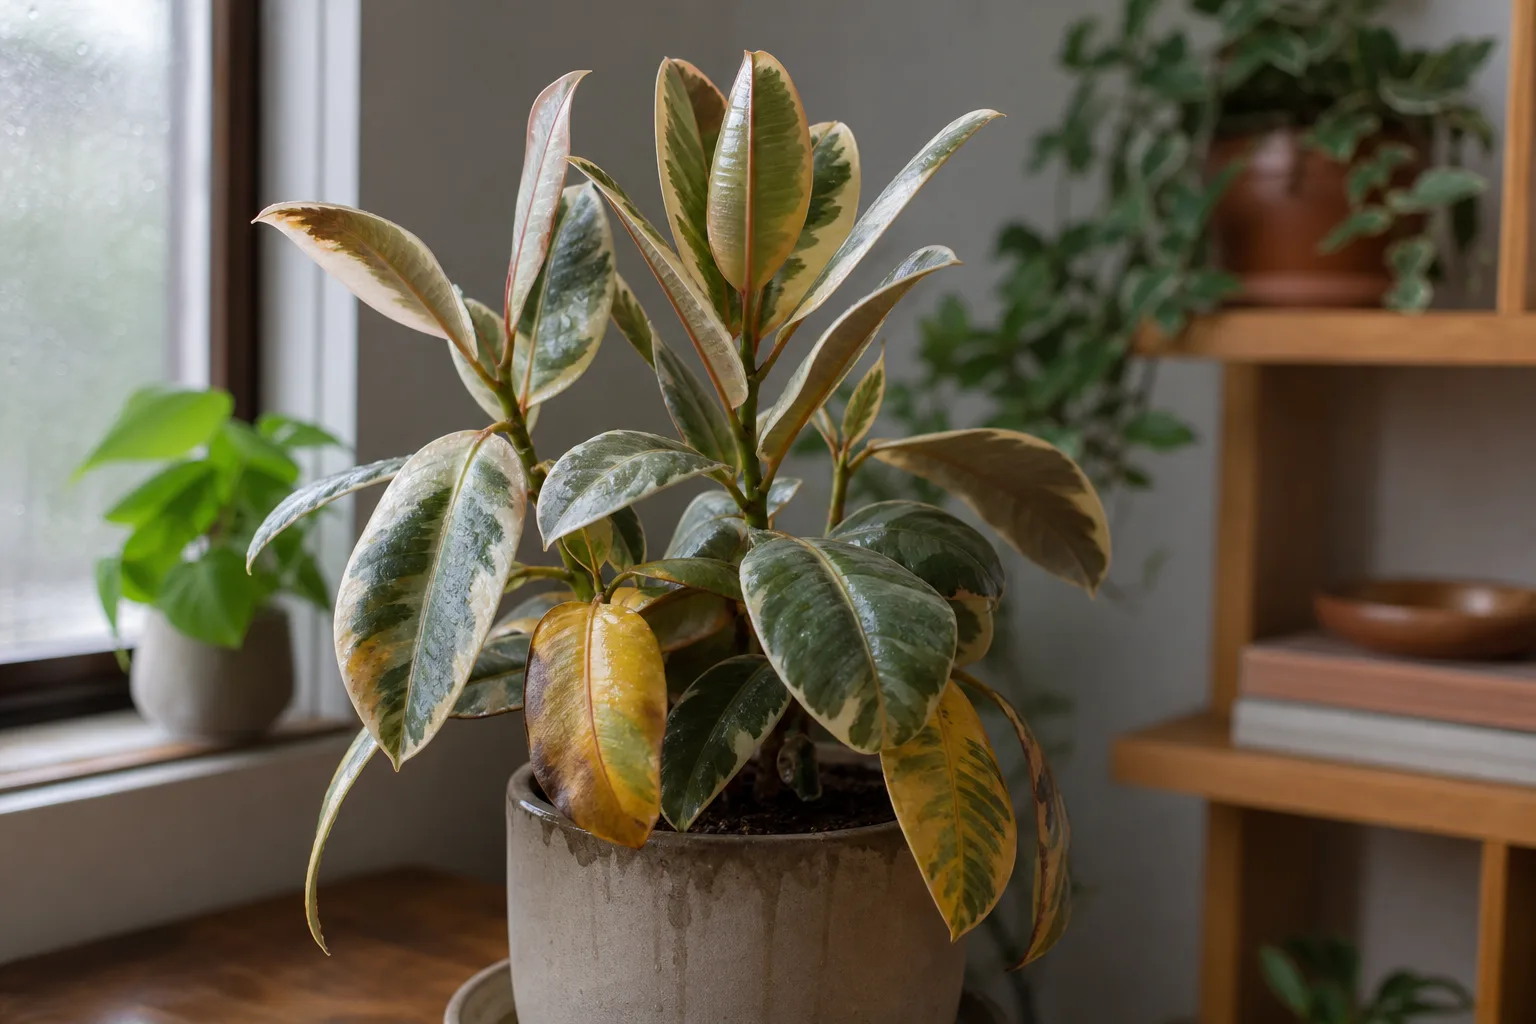
Yellow leaves: One older lower leaf yellowing and dropping can be normal aging, but several yellow leaves with wet mix point first to overwatering or poor drainage. Pause the watering schedule, confirm the pot drains, and inspect the roots if the mix stays wet or the base smells sour. Firm, pale roots are reassuring; dark, mushy roots require removal of dead tissue and fresh, airy medium.
Sudden leaf drop: Check for a recent move, cold draft, air-conditioning blast, sudden change in light, root disturbance, or a watering swing. Ficus can respond dramatically to environmental change, so restore a stable position and correct the actual soil problem rather than moving it from window to window.
Brown, crispy tips or cream patches: Inspect the pattern and the soil together. Crispy damage on the window-facing side after a move toward strong sun suggests scorch; crisp margins with a very dry root ball suggest drought stress or dry air; dark, soft damage with persistently wet mix suggests root trouble. The brown tissue will not turn green again, so improve conditions for the next leaves and trim only if the damaged edge is distracting.
Green, stretched growth or fading variegation: Treat this as a light problem first. Move the plant closer to a bright filtered window or add a suitable grow light, then wait for new growth to judge the result. Do not expect mature leaves to regain cream, and do not feed heavily to solve a light deficit.
Inspect and Treat Common Pests
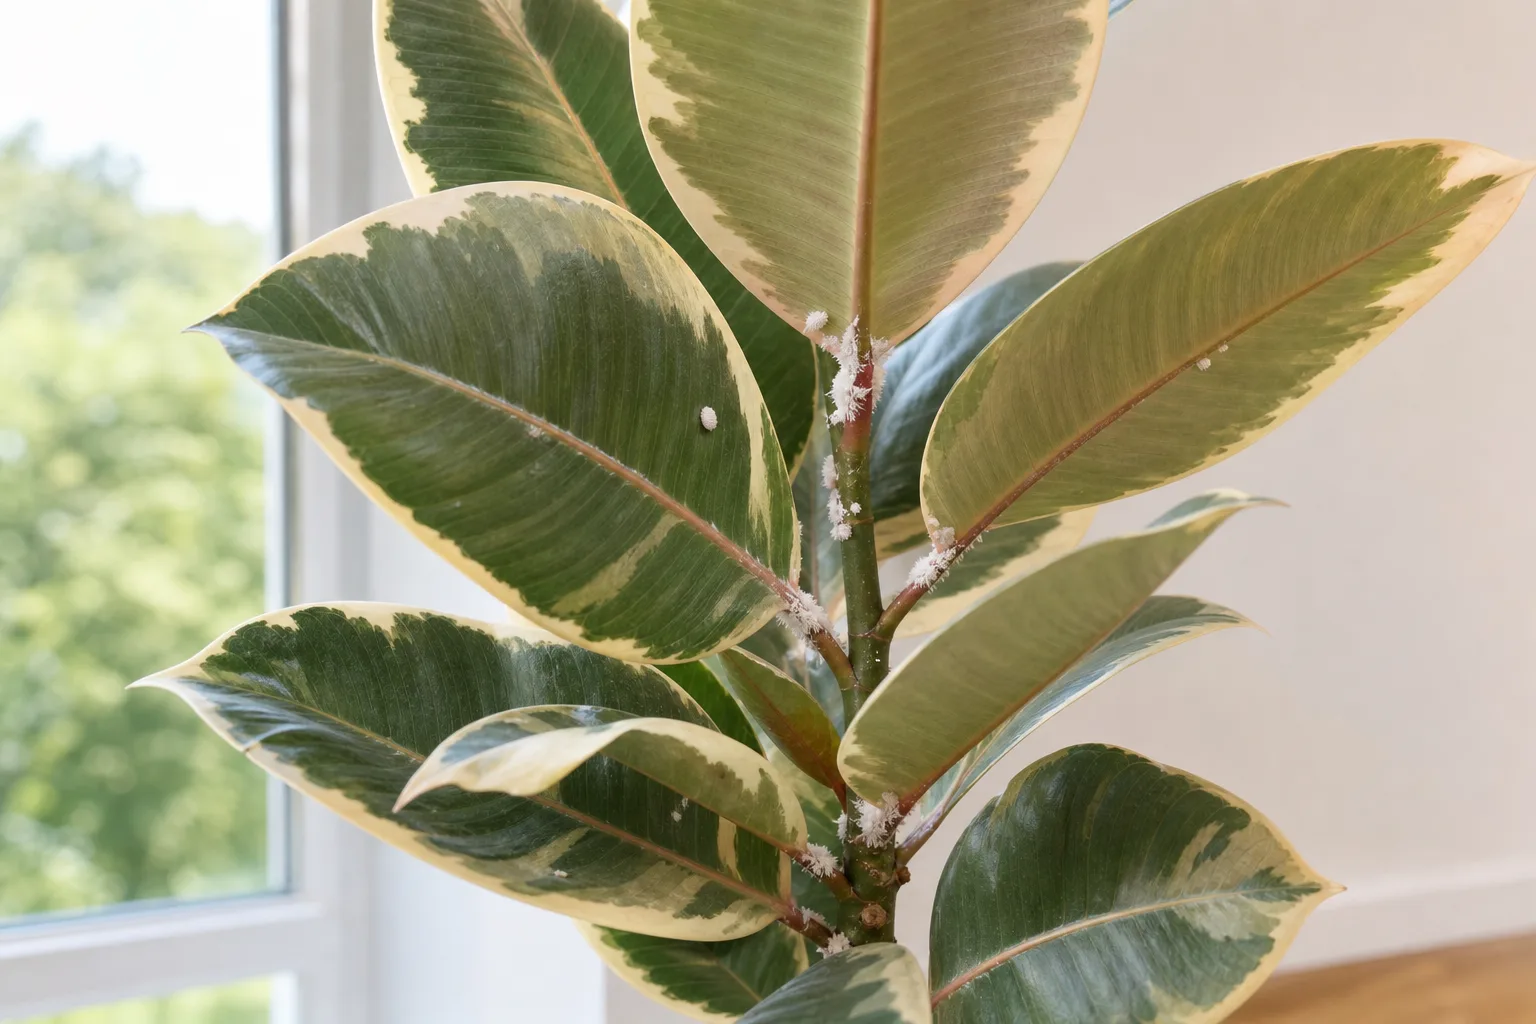
Check the upper and lower leaf surfaces, petioles, stem joints, and the soil line whenever you water. The RHS ornamental fig guide names red spider mites, mealybugs, and scale among the pests to watch, and early discovery is much easier to manage than a plant-wide infestation.
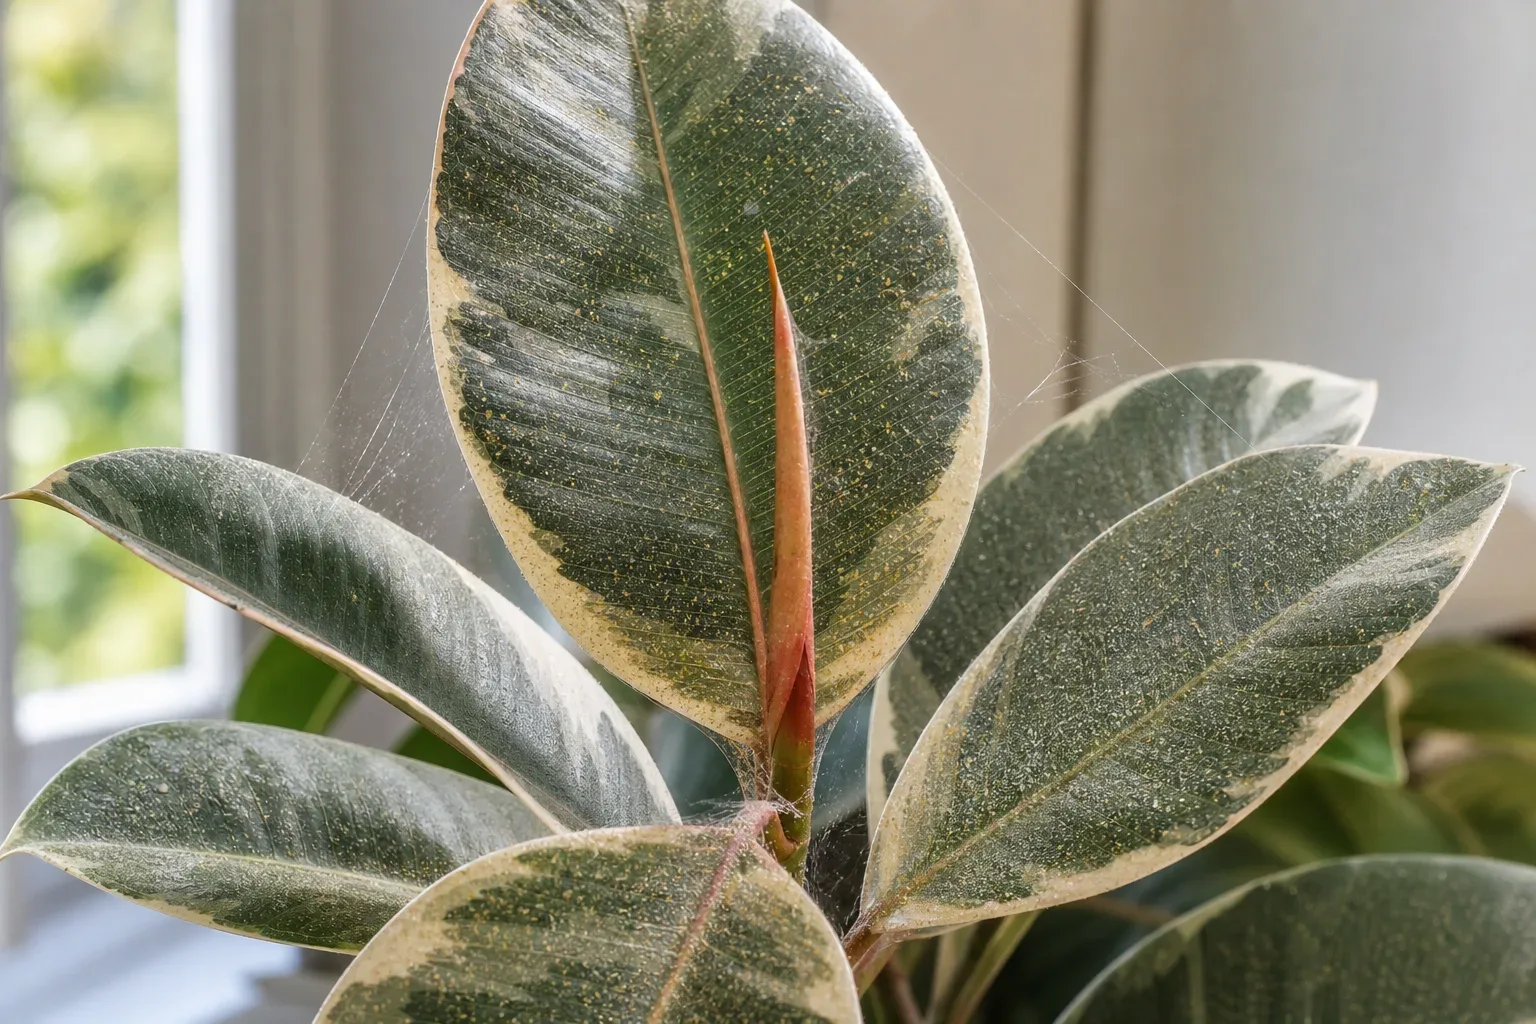
The clues are distinct enough to guide a first response: fine webbing and pale stippling suggest spider mites; white cottony clusters suggest mealybugs; hard brown bumps or sticky residue suggest scale. Fungus gnats are a different clue—small flies around a pot—and usually send you back to the question of why the mix is staying wet.
Isolate the plant before treating it. Wipe or rinse what you can see, remove individual scale or mealybugs with a cotton swab, and repeat inspections weekly because one pass rarely reaches every life stage. If you use insecticidal soap or horticultural oil, choose a product labeled for indoor plants, follow its label exactly, test a small area first, and keep the plant out of direct sun until treated foliage is dry. Do not pour unlabelled kitchen products or concentrated oils into the soil, and do not use a pesticide as a substitute for fixing chronically wet soil or very dry air.
Should You Grow Ficus Tineke Outdoors?
Use Ficus Tineke outdoors only in a warm, frost-free climate and treat it as a container plant unless you have verified local conditions. Published hardiness ranges for Ficus elastica vary, but the practical boundary is clearer than a zone number: prolonged temperatures near 50°F (10°C) or below, frost, cold rain, and sudden exposure to strong sun can damage it.
Acclimate it over a week or two. Start in bright shade, add gentle morning light gradually, and protect it from hard afternoon sun and wind. Outdoor containers dry faster, so check the root zone more often, but do not let warm weather trick you into keeping the pot constantly saturated. Bring it inside before cool nights, and inspect for hitchhiking pests before placing it near your indoor collection.
The species can become a large tree in tropical conditions, far beyond the scale of a houseplant. That is why outdoor planting deserves more caution than moving a pot onto a balcony: roots, size, local climate, and regional planting rules all matter. The RHS profile is a useful reminder that the plant is naturally a substantial evergreen tree even though nurseries sell it in compact indoor sizes.
Conclusion
Ficus Tineke stays attractive when you give its variegation enough light without abruptly scorching it, let the upper soil dry before soaking the root ball, and use a pot and mix that drain freely. Keep the plant warm and stable, feed only during active growth, and treat pruning, propagation, and pet placement as tasks that deserve gloves and a little planning.
If a problem appears, start with the simplest observation: is the mix wet or dry, has the light changed, and are there pests on the leaf undersides? That short check will usually point you toward the right first correction—and spare the plant the stress of being moved, watered, fertilized, and repotted all at once.



