3 Main Types of Peas: Shelling, Snow, or Snap?
Compare the 3 main types of peas—shelling, snow, and snap—by pod, flavor, harvest timing, space, and care, with practical planting and picking tips.
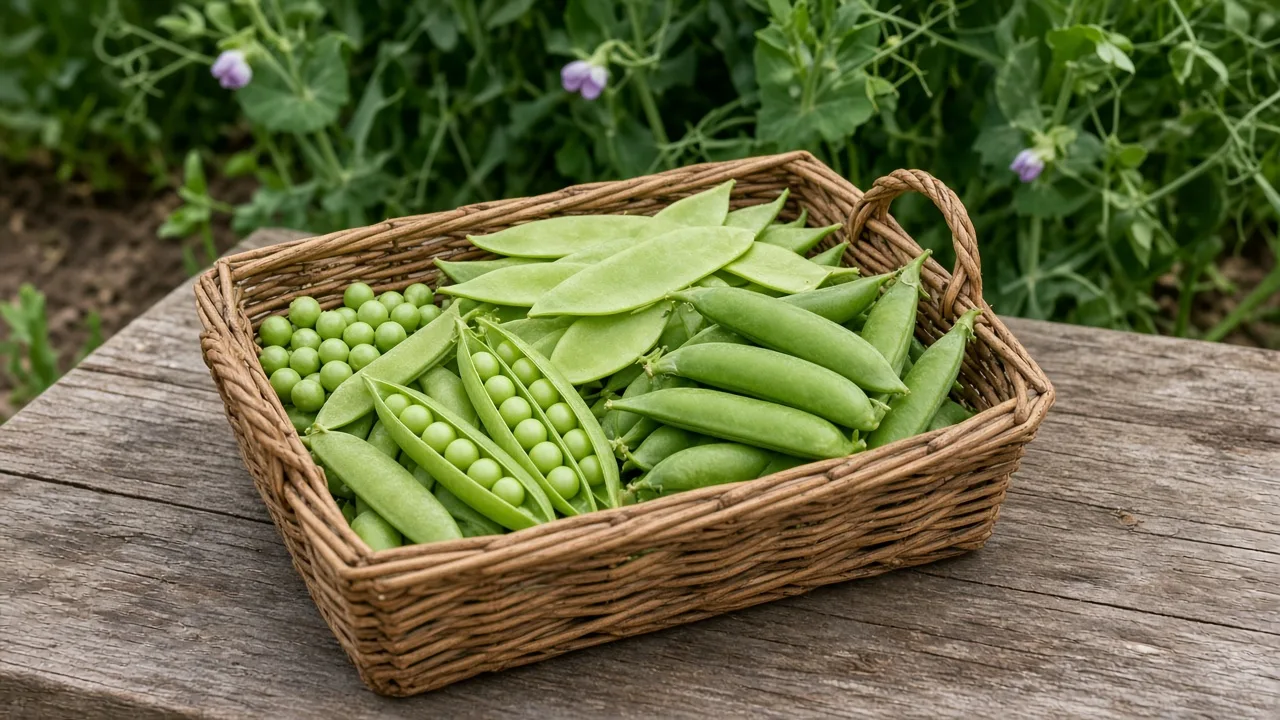
The three main types of peas are shelling peas, snow peas, and snap peas. They all belong to the cool-season species Pisum sativum, but they were selected for different pod qualities: shelling peas are grown for the seeds inside, snow peas for their flat tender pods, and snap peas for their crisp, fleshy pods plus the peas inside.
That distinction is more useful than the name on the front of a seed packet. If you decide first whether you want to shell peas, stir-fry flat pods, or eat a crunchy snack straight from the vine, choosing a variety becomes much easier. The same decision also tells you when to harvest, how much support to provide, and whether a compact container crop is realistic.
The quick answer: shelling, snow, or snap?
Choose shelling peas—also called English peas or garden peas—if you want plump, tender green peas for a bowl, soup, side dish, or freezer. Choose snow peas, sometimes called mangetout, if you want flat, edible pods with tiny seeds for salads and quick cooking. Choose snap peas, also called sugar snap peas, if you want the broadest fresh-eating window: the round pod and the developing peas are both edible.
| Pea type | What you eat | Pick when | Best fit |
|---|---|---|---|
| Shelling, English, or garden pea | Seeds; pod is fibrous | Pods are filled but not yellowing | Fresh peas, soups, side dishes, freezing |
| Snow pea or mangetout | Entire flat pod | Pod is crisp and seeds are barely visible | Stir-fries, salads, fast cooking |
| Snap or sugar snap pea | Entire thick, rounded pod and seeds | Pod has swollen but tender peas | Snacking, salads, roasting, light steaming |
All three are grown in a similar cool, moist, well-drained bed. The important difference is not whether the plant can grow—it is whether you will catch the correct stage before heat and seed maturity turn a tender crop tough.
The pod tells you which pea you planted
Common names blur together because the plants look similar while they are young. Look at the pod once it forms, then use the harvest test rather than relying on a catalog photo. Penn State Extension describes the same three Pisum sativum types and notes that the edible-pod forms are harvested young, while the shelling type is opened so the seeds can be eaten.
Shelling peas: grow the seeds, discard the pod
Shelling peas have a firm, rounded pod with a fibrous inner lining. Even when the pod is young, it is not the part you normally eat; the goal is to let the seeds swell until they are tender and sweet, then open the pod and remove them. “English pea,” “garden pea,” and “green pea” usually refer to this group, not to a separate growing method.
The trade-off is labor. A basket of shelling peas looks generous until you open the pods, so grow a longer row if you want enough for a meal. The reward is a concentrated, classic pea flavor that is hard to reproduce once the fresh seeds have sat for days; Gardener’s Path likewise recommends eating shelled peas quickly because their quality fades faster than that of snow or snap peas.
Snow peas: harvest the flat pod
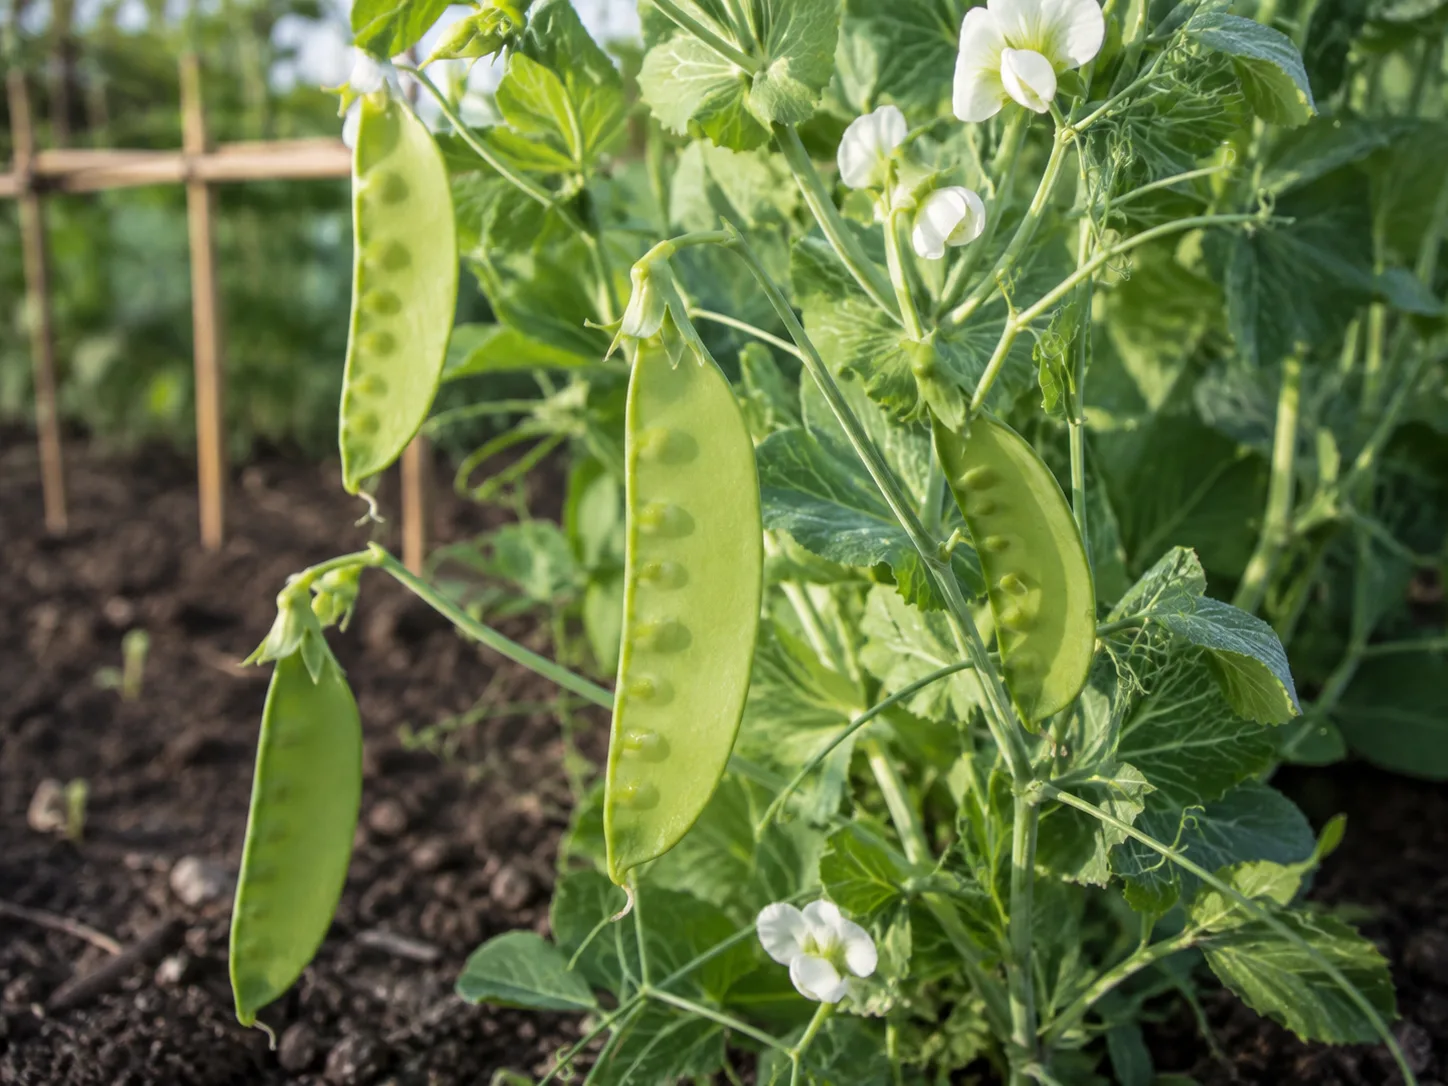
Snow peas are flat and thin, with seeds that remain small when the pod is at its best. The whole pod is edible, usually with the string removed if the variety develops one. Harvesting is a visual and tactile job: pick when pods are crisp, tender, and still mostly flat, before the individual peas make large bumps.
Their shape makes them useful in a small harvest. You do not spend time shelling, and a handful can go straight into a stir-fry, salad, noodle dish, or quick sauté. Tall snow pea vines may still need a trellis, while dwarf types can work with shorter brush or netting; the RHS pea-growing guide lists both flat-podded mangetouts and rounded sugarsnaps as edible-pod choices but keeps their pod shapes distinct.
Snap peas: eat the pod and the swollen seeds
Snap peas combine the full seeds associated with a garden pea with an edible pod. The pod should become plump and rounded, but not leathery or stringy. When picked at the right stage, it has a crisp bite and a sweet, fresh flavor; overripe pods can still be cooked, but they lose the raw-snacking texture that makes snap peas popular.
“Sugar snap” is the common name you will see most often, while “snap pea” is the shorter name used on many seed packets. Some varieties are stringless, but do not assume that every packet is: test the first few pods and pull away the string if needed. The crop is forgiving in the kitchen, but the plant is not forgiving about missed picking—mature pods signal the vine to put more energy into seed production.
Choose the type by how you will eat it
The best pea is the one you will harvest on time. A gardener who loves frozen peas but dislikes picking every day may be happier with a shelling variety and a planned freezer batch; someone who snacks while watering may get more value from snap peas, even if the total seed yield is smaller.
Choose shelling peas for fresh peas and freezing
Shelling peas make sense when the seed is the destination. Look for a variety described as sweet, productive, good for freezing, or suitable for an early or main crop, then compare its listed days to maturity with the length of your cool spring. ‘Green Arrow’, ‘Lincoln’, and ‘Little Marvel’ are familiar examples, but availability and performance vary by region.
Smooth-seeded shelling peas are generally favored for earlier sowing because they tolerate colder conditions better than wrinkled types. The RHS notes that wrinkled peas are often sweeter but better suited to later spring or summer sowing; in a short season, an earlier smooth type can give you a harvest even if it is not the sweetest option in the catalog.
Choose snow peas for fast, tender cooking
Snow peas are a good choice when you want the shortest path from garden to pan. They are particularly useful when your household cooks stir-fries, salads, or other dishes where a crisp vegetable is added at the end rather than simmered for a long time.
For a low bed or container, start with a dwarf or compact variety. For a tall bed, choose a variety whose listed height matches your trellis and whose disease-resistance notes fit your climate. ‘Oregon Sugar Pod II’, ‘Oregon Giant’, and ‘Mammoth Melting Sugar’ are examples commonly listed in horticultural growing guides, but the seed packet should decide the final spacing and expected height.
Choose snap peas for snacking and mixed harvests
Snap peas are the easiest recommendation for a first-time grower who wants to eat directly from the plant. The pod is useful at more than one stage: young pods are slender and crisp, while slightly fuller pods offer a larger bite as long as they remain tender.
Compact choices such as ‘Sugar Ann’ or ‘Cascadia’ can suit smaller gardens, while ‘Super Sugar Snap’ and other tall types reward a sturdy, higher support. Harvest to Table makes the same practical kitchen distinction: shelling peas suit sweet shelled seeds, snow peas suit mild flat pods, and snap peas suit crunchy fresh eating.
Growing conditions the three types share
Peas are annual legumes that prefer a cool growing window, full sun, even moisture, and soil that drains rather than puddles. They can tolerate light frost better than warm-season crops, but their productivity drops when sustained heat arrives. Penn State Extension gives a broad germination range of 40° to 85°F, yet that does not mean every temperature in that range produces equally vigorous plants; aim for workable, cool soil and follow the packet for the cultivar.
Time sowing for a cool-season harvest
For spring, direct-sow as soon as the ground can be worked and is not saturated. In many climates that means several weeks before the average last frost, but the calendar is only a proxy: cold, wet soil can rot seed, while a late sowing may run into heat before pods fill. The RHS recommends waiting until soil is around 50°F (10°C) for reliable outdoor germination, while Penn State Extension gives six to 17 days as a general germination range and emphasizes checking cultivar instructions.
Plan a second sowing only if your local fall has a long enough cool window. Count backward from the first expected frost by the packet’s days to maturity, then add time for slow germination and short autumn days. Succession sowing every two to four weeks can extend the harvest, but it cannot make peas productive through hot weather; when the forecast is already warm, spend that bed on a warm-season crop instead.
Prepare soil, spacing, and support before seedlings climb
Choose a sunny, sheltered bed with well-drained soil and mix in mature compost if the soil is poor. A useful general range for soil pH is about 5.8 to 7.0, but a soil test is more informative than adding lime or fertilizer by guesswork. Sow roughly 1 to 2 inches deep, with spacing set by the packet; Penn State’s general range is 1½ to 3 inches apart in rows with 18 to 30 inches between rows.
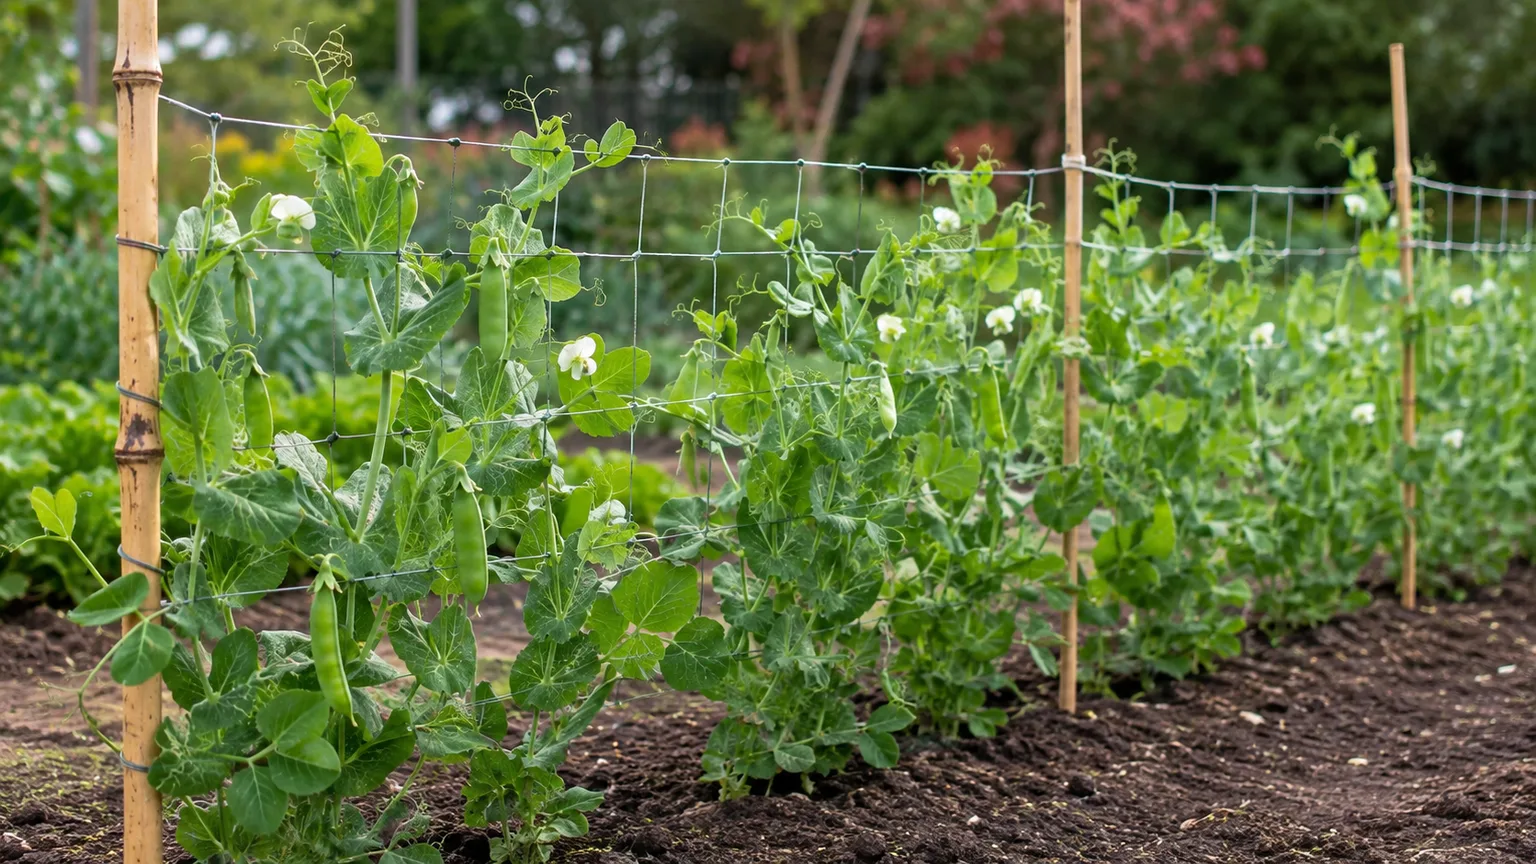
Install support at sowing time, not after a dense tangle has formed. Tall vines can climb netting, chicken wire, or pea trellis mesh; dwarf varieties may need only pea sticks or a short cage, but even a “bush” pea is easier to harvest when it is off the soil. Early support also avoids stabbing roots later, and the open canopy dries faster after dew or rain, which helps reduce disease pressure.
Give the row as much direct sun as your season allows, especially in spring when the days are short. A site with light afternoon shade can help a fall planting hold quality a little longer, but deep shade produces weak vines and fewer flowers. If a wall, fence, or neighboring crop shades the bed, measure the shade at midday before buying a packet that promises a large harvest; better support cannot compensate for too little light.
Read the seed packet beyond the pea type
Type is only the first decision. Also check days to maturity, mature height, disease resistance, seed color or texture, stringless-pod status, and whether the packet describes the variety as early, second early, main crop, dwarf, or climbing. “Days to maturity” is not a promise that every pod appears on one exact date; weather, soil temperature, and whether the count starts at sowing or germination can shift the harvest.
The words “field pea,” “marrowfat,” and “black-eyed pea” can send a new gardener in the wrong direction. Field peas may be grown for dry seed, marrowfat peas are allowed to mature and dry, and black-eyed peas are cowpeas (Vigna unguiculata), not one of the three garden-pea types within Pisum sativum. If your goal is tender green pods, buy a packet clearly labeled shelling, snow, or snap.
Variety height is a space decision, not a pea-type decision. You can find dwarf and tall shelling, snow, and snap peas, so do not choose “snow” merely because you have a small garden. Choose the pod type first, then choose a height that fits the support you can actually install.
Treat the packet’s disease-resistance letters and notes as a tie-breaker rather than a guarantee. Resistance can reduce risk for a named disease, but it does not make a plant immune to every root problem, virus, pest, or weather stress. If two varieties fit your timing equally well, choose the one with resistance to a problem you have actually seen, and save a few seeds of a different type for comparison rather than putting the whole row behind one catalog promise.
Keep water and nitrogen in balance
Water the soil deeply enough to keep the root zone evenly moist, especially from flowering through pod fill. Avoid repeated overhead watering late in the day; wet foliage and crowded vines create a longer-drying canopy. The RHS recommends checking moisture at root level and watering directly onto the soil, while Penn State uses about 1 inch per week when rain is insufficient as a general guide.
Peas are legumes, so more nitrogen is not automatically better. Their roots can partner with rhizobia bacteria that fix atmospheric nitrogen, but the partnership is not guaranteed in every new bed or container. University of Minnesota Extension explains that pea-specific inoculant can be worth considering where peas have not been grown, especially in acidic or biologically poor soil, but also warns that soil conditions and existing nitrogen affect the result.
Use a pea inoculant only as directed and only one intended for peas; it is not a substitute for drainage, light, or water. Avoid routine high-nitrogen feeding that produces a lush vine with few pods. If a soil test shows a deficiency, correct that specific deficiency, and when a healthy crop finishes, cut the stems at soil level and leave the roots in place if disease is absent so the root residue can decompose in the bed.
Harvest each type by a different cue
Begin checking plants every day or two once flowers fade. Pods develop from the lower part of the vine upward, so start there and use two hands or hold the vine while you pick to avoid pulling up shallow roots. Regular picking matters for all three types: leaving mature pods on the plant tells it that the season’s job is to make seed, not more tender pods.
For shelling peas, wait until the pods feel filled and the peas inside are well formed, then open one as a test. Pick before the pods turn yellow or the peas become hard and starchy. Shell them soon after picking; if you have more than you can eat, blanch and freeze the seeds rather than storing them for several days in the refrigerator.
For snow peas, pick while pods are flat, crisp, and tender, with only small seeds visible. Do not wait for a thick, rounded pod: that is the visual signal that the crop has moved past the best snow-pea stage. Remove the string if your variety develops one, chill the pods promptly, and use them while the texture is still firm.
For snap peas, harvest when the pods are rounded and the peas have swollen but the pod still snaps cleanly. Bite-testing one pod is more useful than chasing a fixed length because varieties differ. If the pod is tough or stringy, pick the remaining pods younger; a missed pod can be shelled or cooked, but it should not set the standard for the whole crop.
Quality also depends on what happens in the hour after picking. Keep pods shaded while you finish the row, then refrigerate them promptly in a breathable bag or container; wash only what you plan to use so surface moisture does not speed decay. Shelled peas lose sweetness quickly, so plan to cook or freeze them the day you pick them. Snow and snap peas hold their texture longer, but neither improves with age, and neither should be left warm in a harvest basket overnight.
Fix common pea-growing disappointments
When seedlings never appear, check for waterlogged soil, compacted crust, cold conditions, or mice and birds removing seed. Resow in workable soil, cover the row lightly with mesh if wildlife is the culprit, and avoid soaking seed for more than the packet recommends. Penn State notes that overnight soaking can speed germination, but a wet seed sitting in cold, saturated soil is more likely to rot than to gain an advantage.
If vines are tall and leafy but have few pods, inspect light, heat, moisture, and nitrogen before blaming pollination. Peas generally self-pollinate; a hot spell, drought during flowering, excessive nitrogen, or a missed harvest is a more useful first line of investigation. Move future sowings earlier, water consistently through flowering, and choose a shorter-season or heat-tolerant cultivar only where the packet supports that claim.
If pods are tough, you probably missed the harvest cue for the type you planted. Flat snow pods should be picked before the peas swell, round snap pods while they still snap, and shelling peas before the seeds become hard. If the plant is yellowing at the end of its crop, that can be a normal finish; if it yellows early with stunted growth, inspect the roots and drainage rather than adding fertilizer.
Finally, watch for aphids, slugs, birds, powdery mildew, and soilborne root diseases. Encourage beneficial insects, use physical protection for young plants, improve airflow with proper spacing, and remove diseased residue rather than composting it. Minnesota Extension recommends rotating away from legumes for several years when root-rot problems are serious, and notes that pea powdery mildew is more common in later-season crops; resistant seed and an earlier crop can be more effective than trying to rescue an already stressed vine.
Can you grow peas in containers?
Yes, especially dwarf snow or snap peas, but expect a smaller harvest than from a garden row. Use a container at least about 18 inches wide with drainage holes, fill it with a quality potting mix, sow at the packet spacing, and add support before the vines need it. The RHS advises that smaller varieties can crop in large containers but need regular watering because the mix dries quickly.
Containers are useful for testing a variety, not for escaping the season. A pot on a sunny balcony can still overheat, dry out, or lose the cool window faster than a deep bed. Choose a compact variety, check moisture at least daily in warm weather, and treat the first planting as a measure of how much support and harvest your space can sustain.
Conclusion
The three main types of peas differ by the pod you harvest: shelling peas give you plump seeds, snow peas give you flat tender pods, and snap peas give you a crisp pod with developed peas inside. Once you match that harvest style to the way you cook and snack, the rest of the choice becomes practical—select a height that fits your trellis, a maturity date that fits your cool season, and a variety with useful disease resistance for your garden.
Sow into workable, well-drained soil while the weather is cool, keep moisture steady through flowering, avoid unnecessary nitrogen, and pick often. If you have the room, growing one row of shelling peas and a shorter row of snow or snap peas is a simple way to compare flavor and harvest effort in your own garden.



