How to Grow and Care for Garlic: Planting to Harvest
Learn how to grow garlic with climate-smart planting dates, spacing, watering, scape care, harvest tests, curing steps, and storage advice.
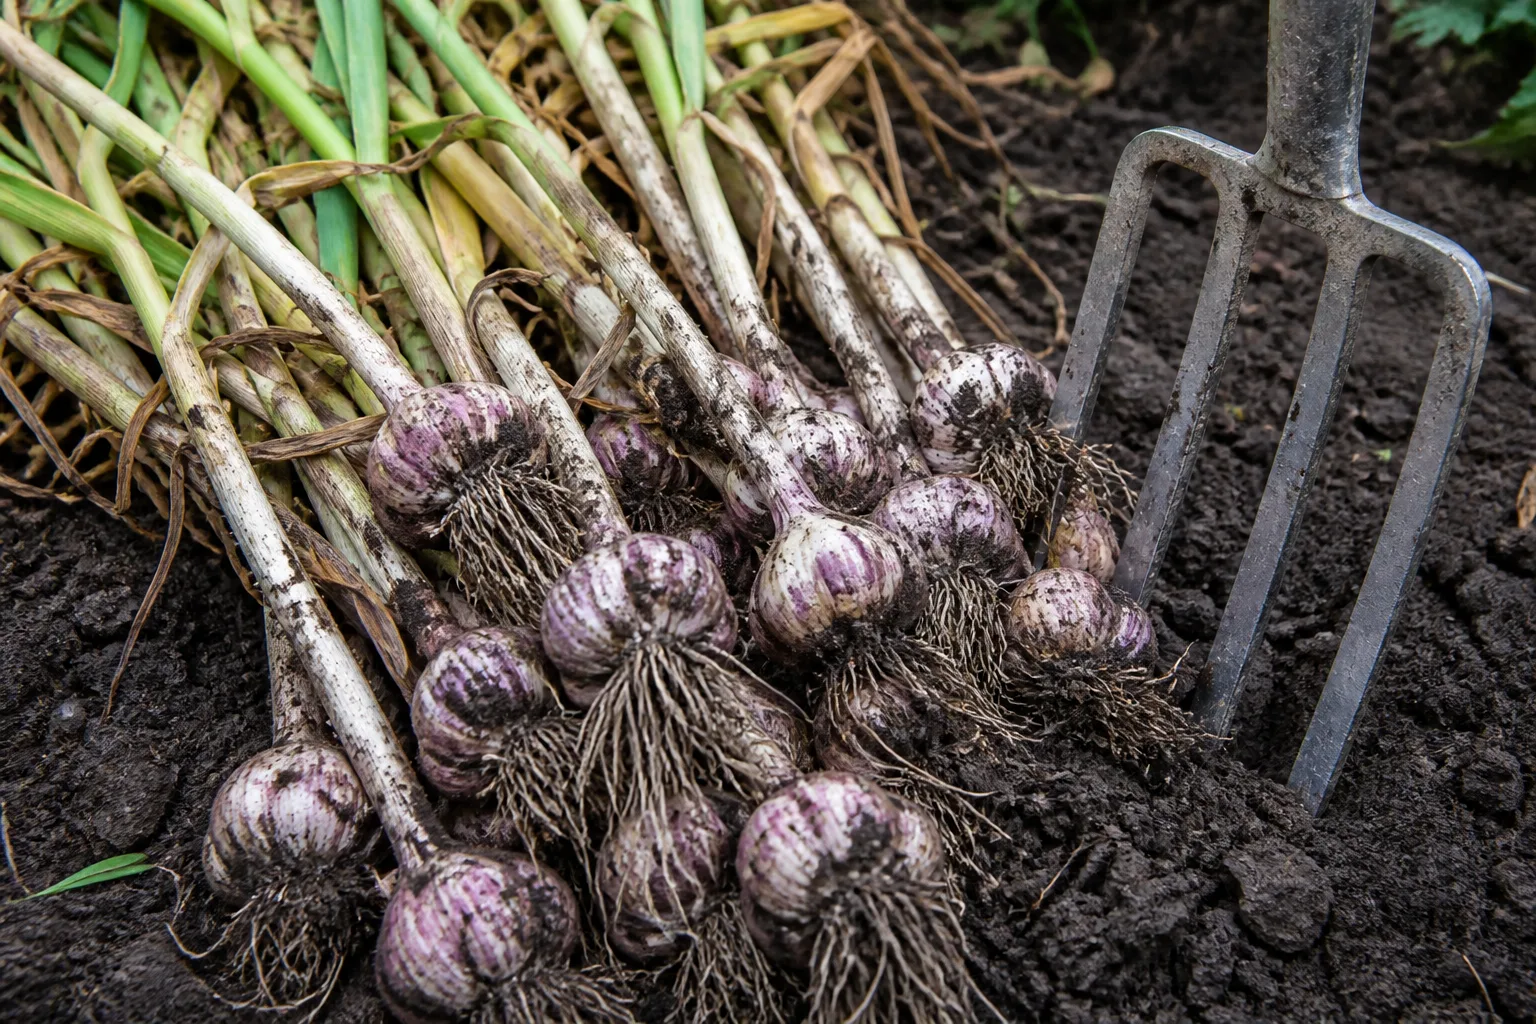
Garlic is one of the easiest vegetables to plant and one of the easiest to harvest too early. A clove planted in fall usually needs eight to nine months to become a full-size, cured storage bulb. Spring planting can still produce edible garlic in roughly three to five months, but the heads are often smaller because the plants have less time to establish roots and respond to winter cold.
The most reliable crop comes from treating garlic as a seasonal bulb, not a quick herb. Give it full sun, loose soil that drains quickly, steady moisture during active growth, protection from weeds, and time to finish. The calendar is useful for planning, but the leaves and wrappers—not a particular date—tell you when to harvest.
The short answer: garlic is an eight-to-nine-month crop
There are three different harvest goals. Green garlic is pulled young, while the clove is still mild and the bulb has not divided completely. Fresh mature garlic is lifted once a bulb has formed and used relatively soon. Storage garlic is allowed to reach the right leaf stage, then cured for two to four weeks before it is stored.
Fall planting is the best route to large bulbs in climates where the soil freezes or winters are reliably cool. The clove roots before winter, rests through the cold period, and resumes leaf and bulb growth in spring. Garlic grown from a spring planting can work in mild climates or when fall planting was missed, but it may make fewer cloves or a smaller head. Harvest to Table’s garlic growing guide likewise treats fall garlic as the longer route to the largest heads.
The length of the season changes with variety, latitude, winter chill, soil temperature, moisture, and spring heat. Plan for a range, then use a test bulb to confirm maturity rather than digging the entire bed on the first date suggested by a seed packet.
Choose garlic that fits your climate and kitchen
Buy planting garlic from a nursery, seed supplier, or local grower when possible. Grocery-store bulbs may be treated to delay sprouting, may be poorly adapted to your winter, or may carry problems that are difficult to see before planting. Choose firm, clean bulbs with intact wrappers and large cloves.
Hardneck garlic
Hardneck types form a stiff central stalk and usually produce a single ring of large, easy-to-peel cloves. They are often the better choice for cold-winter gardens and produce edible scapes in late spring or early summer. Rocambole, Porcelain, and Purple Stripe are common hardneck groups.
Their trade-off is storage: hardneck bulbs often have a shorter storage life than softneck bulbs, especially if they are bruised or cured in damp conditions. Their large cloves and complex flavor make them excellent for roasting and fresh cooking.
Softneck garlic
Softneck types generally suit milder climates, although local adaptation matters more than a simple north-versus-south rule. They tend to form many cloves in layers, store longer, and have flexible necks that can be braided after curing. Artichoke and Silverskin types are common examples.
Softnecks usually do not produce a prominent scape. They can be a practical choice when you want a long storage window or plan to grow garlic in a region with a mild winter.
Pick the best planting window
For fall planting, aim to put cloves in the ground about four to six weeks before the soil is expected to freeze hard. In a cold climate, that may mean early to mid-fall; in a mild climate, it may be later. The useful cue is cool soil and enough time for roots to form, not a universal calendar date.
Garlic benefits from a cold period, often described as about one to two months between 32 and 50°F. This response, called vernalization, helps the plant divide into a bulb. The RHS garlic-growing guide gives the same practical cold range. In warm-winter areas, growers may need a locally adapted type or a period of pre-chilling recommended by the seed supplier.
If you plant in spring, get cloves into the ground as soon as the soil can be worked. Spring garlic is still worthwhile for green garlic and fresh use, but do not judge the planting a failure because the heads are smaller than a fall crop. Next season, shift the planting earlier and compare the results.
For northern gardens, University of Minnesota Extension recommends staying close to the normal local planting window and protecting early shoots with straw mulch.
Prepare a sunny, well-drained bed
Choose a site with at least six to eight hours of direct sun. Garlic can tolerate a range of soils, but it struggles when the bulb sits in compacted, waterlogged ground. Loose soil lets roots expand and allows the bulb to develop without constant pressure against wet clods.
Work finished compost into the bed if the soil is poor, and use a soil test if fertility or pH is uncertain. A slightly acidic to neutral pH around 6.0 to 7.0 is a useful target. Do not plant garlic where onions, shallots, leeks, or garlic recently grew if you can avoid it; rotating away from alliums reduces the chance of carrying pests and diseases into the next crop.
Raised beds are helpful in wet gardens. If water remains in the bed after rain, improve drainage before planting rather than trying to correct root rot later with more fertilizer.
Plant cloves at the right depth and spacing
Break the bulb into cloves immediately before planting. Keep each papery wrapper attached and select the largest healthy cloves for the main crop. The basal root plate goes down and the pointed tip goes up.
Plant cloves about two inches deep, or somewhat deeper in a cold, exposed site if local guidance recommends it. Space them four to six inches apart, with roughly six to eight inches between rows. Closer spacing saves bed space but usually produces smaller bulbs and makes weeding and harvest harder.
Firm the soil gently, water once to settle the planting, and cover the bed with about three to four inches of clean straw mulch. In very cold areas, a deeper protective layer may be useful, but keep mulch airy and avoid piling wet material directly against emerging foliage. Do not peel cloves before planting; the wrapper is part of the bulb’s protection.
Care for garlic through winter
After planting, the crop needs enough moisture to root but not a permanently saturated bed. Check beneath the mulch rather than watering on a fixed schedule. If the soil is already damp several inches down, wait.
Some fall-planted garlic shows green shoots before winter. That is not necessarily a problem. The mulch moderates temperature swings, reduces frost heaving, and suppresses winter weeds. In spring, pull mulch back slightly if it stays wet, but leave enough to conserve moisture and keep weeds from competing with the crop.
Weed early and often. Garlic has a narrow leaf canopy, so it does not shade out weeds well. A weed that looks small in autumn can be stealing moisture and nutrients by spring, exactly when the bulbs begin to enlarge.
Feed and water during spring growth
Spring is the crop’s main growth engine. Keep soil evenly moist while leaves are expanding and bulbs are filling, usually providing about an inch of water per week when rain is inadequate. Water the soil rather than repeatedly wetting the foliage, and make sure containers drain after every irrigation.
Garlic does not need constant feeding. A soil test should guide fertilizer decisions. If nitrogen is needed, a light spring application is more useful than repeatedly adding high-nitrogen fertilizer late in the season. Too much lush leaf growth can delay maturity, and fertilizer runoff is wasted when roots cannot use it.
Stop regular irrigation as harvest approaches. When several lower leaves have browned and the bulb is close to maturity, dry conditions help the wrappers firm and reduce the risk of mold. Do not let drought stress arrive months too early; premature yellowing can reduce bulb size.
Understand scapes and bulb formation
Hardneck scapes emerge from the center of the plant and often curl into a loop. Cut them when they are young and tender if you want to eat them and keep the plant focused on bulb fill. Use clean snips and leave the leaves intact. Removing a scape does not mean the bulb is ready to dig; the plant still needs time to finish underground.
You can leave a few scapes to straighten if you want bulbils for experimentation, but bulbils are a slow way to reach a large storage bulb. The USDA Agricultural Research Service notes that growing garlic from bulbils can take successive seasons. For dependable results, plant cloves from your best cured bulbs.
Grow garlic in containers
A container can grow good garlic if it is wide, deep enough for roots, and fitted with several drainage holes. Use a quality potting mix rather than dense garden soil. A large grow bag, trough, or pot is easier to manage than a shallow window box.
Plant cloves at the same depth and spacing used in a bed, allowing extra room around the edge for watering. Put the container where it receives full sun, protect it from extreme temperature swings, and monitor moisture more often than you would in the ground. Containers dry quickly in spring but can also stay dangerously wet in winter.
Container garlic is especially useful for a hard-to-find variety, but crowded plants will make crowded bulbs. Harvest the green tops early if the pot is too small to support a full storage crop.
Know when garlic is ready to harvest
Garlic is ready when the lower leaves have browned while several upper leaves remain green. A practical starting point is when about one-third to one-half of the foliage has died back, but the exact ratio varies by type and weather. The remaining green leaves correspond to wrapper layers that protect the bulb.
Dig a test bulb before lifting the whole bed. The cloves should fill the wrapper without looking loose, and the bulb should be firm rather than watery. If the wrapper is thin and the cloves are undersized, give the crop more time. If several wrappers are splitting and the cloves are separating, harvest promptly because storage life will be shorter.
Do not wait for every leaf to turn brown. Leaving mature garlic in wet soil can cause split bulbs, stained wrappers, and more exposure to rot. Harvest timing is a balance: too early means small, poorly wrapped bulbs; too late means damaged wrappers and shorter storage.
Lift and handle bulbs carefully
Loosen the soil with a garden fork several inches away from the plant, then lift underneath the bulb. Do not pull hard on the leaves. Garlic bruises easily, and a small unseen injury can become a storage failure weeks later.
Brush off loose soil without washing the bulbs. Keep the leaves and roots attached for curing, and move the crop into a dry, shaded, well-ventilated place. Direct hot sun can scorch wrappers, while a damp shed can encourage mold.
Cure garlic for storage
Spread bulbs in a single layer or hang them in small bunches where air moves freely. Cure for about two to four weeks, depending on humidity and bulb size. The neck should feel dry, the outer skin should be papery, and the roots should be crisp rather than soft.
Once cured, trim roots and cut the stem for ordinary storage, or keep a longer flexible stem if you plan to braid softneck garlic. Remove only the dirty outer layers; do not peel down to exposed cloves. Never store bulbs that are bruised, wet, soft, or visibly moldy with the sound crop.
Store hardneck and softneck bulbs
Store cured garlic in a cool, dry, dark place with good airflow. A mesh bag, basket, or open crate works better than a sealed plastic container. Check the bulbs periodically and use any that begin to soften or sprout.
Softneck garlic commonly stores longer than hardneck garlic. Hardneck bulbs may keep for only a few months under ordinary household conditions, although storage varies by cultivar and cure quality. Do not store garlic in a humid refrigerator drawer unless you understand the sprouting trade-off; moisture and condensation can shorten storage life.
Troubleshoot small, split, or damaged bulbs
Small bulbs usually point to late planting, crowded spacing, weak planting cloves, insufficient sunlight, weed competition, inadequate spring moisture, or a variety poorly matched to the climate. Improve one variable at a time so you can tell what helped.
Split bulbs can result from leaving mature garlic in the ground too long, especially after uneven watering. They may still be edible, but their exposed cloves do not store as well. Harvest the next crop as soon as the test bulb shows full cloves and wrappers are beginning to loosen.
Yellow leaves early in the season can signal waterlogged soil, root injury, nutrient imbalance, disease, or natural maturity if the plant is already near harvest. Look at the whole bed: a single weak plant suggests local damage, while a uniform decline suggests weather, fertility, or drainage.
Poor bulb division is often associated with insufficient cold exposure or a spring planting made too late. Choose adapted seed garlic, plant in the correct season, and avoid treating spring planting as an identical substitute for fall planting.
Prevent pests and diseases
Start with clean planting stock and rotate away from alliums. Nematodes can persist in soil and damage garlic from inside the plant, so remove suspicious plants and do not save their cloves. Onion thrips rasp leaf tissue and may become worse in stressed, dry plants; reduce weed hosts, keep plants growing steadily, and use monitoring before choosing a control.
White rot is a serious soilborne disease that causes yellowing, wilting, root loss, and rotting bulbs. Good drainage and clean stock matter more than a late rescue treatment. If a bed has a confirmed serious disease, do not move cloves or soil from it to another bed, and follow local extension advice about rotation and sanitation.
Garlic is toxic to dogs and cats in sufficient amounts, especially concentrated forms. Keep harvested bulbs, scraps, and preparations away from pets, and do not use garlic-based garden remedies where animals can ingest them.
Save the best bulbs for next season
Choose the largest, healthiest cured bulbs for replanting, not the smallest bulbs that are difficult to use in the kitchen. Store them dry with airflow and separate any bulb that becomes soft or moldy. At planting time, break the selected bulbs into cloves and repeat the same depth, spacing, and mulch routine.
Keep a simple note of variety, planting date, first spring growth, scape date, harvest date, and storage life. That record will tell you more about what belongs in your garden than a generic maturity claim. Over two or three seasons, you can identify the cultivars that handle your winter, soil, and kitchen needs best.
Conclusion
Growing garlic is mostly an exercise in timing and restraint. Plant healthy cloves in loose, sunny soil, protect them through winter, keep spring growth evenly watered and weed-free, then wait for the leaves to give you a harvest signal. Cure the bulbs thoroughly and store them with airflow.
For the next crop, make one improvement based on what you observed: plant earlier, improve drainage, widen spacing, use a better-adapted variety, or harvest closer to the ideal leaf stage. That small feedback loop is how a reliable garlic harvest becomes a repeatable one.



