Norfolk Island Pine Care: Indoor Growing Guide
Learn Norfolk Island pine care with practical guidance on light, watering, humidity, soil, repotting, outdoor moves, and brown-needle troubleshooting.
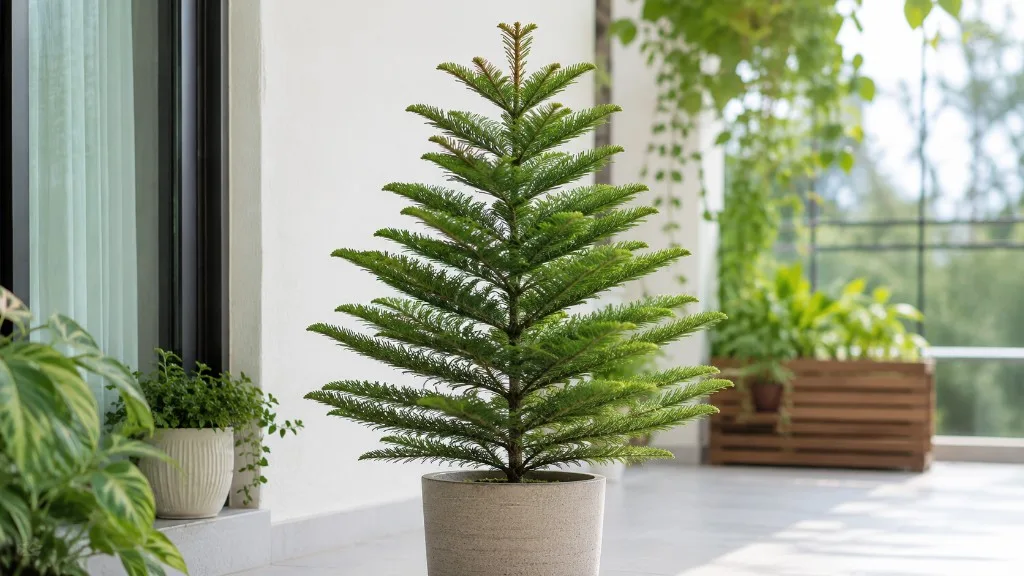
The best Norfolk Island pine care routine is built around one idea: keep the root ball evenly supplied with air and moisture while giving the canopy steady light. A Norfolk Island pine can live for years indoors, but it does not behave like a disposable Christmas decoration or a drought-tolerant houseplant. It is a tropical, slow-growing tree that reacts badly to abrupt changes in light, temperature, and watering.
If you bought a small tree for the holidays, leave it in the house after the ornaments come down. Give it a bright permanent position, water when the upper soil begins to dry, protect it from vents and cold glass, and change only one variable at a time when something looks wrong. That approach is more reliable than adding fertilizer, misting, and moving the pot all at once.
Know what you bought: a tropical tree, not a true pine
Norfolk Island pine is Araucaria heterophylla, an evergreen conifer from Norfolk Island in the Pacific between Australia, New Zealand, and New Caledonia. It is not a member of the true-pine genus Pinus. The species forms a narrow, symmetrical tree with horizontal whorls of branches and soft, closely set leaves that point inward along the branchlets.
In its native and suitable outdoor climates, the tree can become enormous. Indoors, growth is limited by light, root space, and the height of the room, but a healthy specimen can still become a substantial floor plant. NC State Extension describes outdoor trees reaching roughly 60 to 80 feet in cultivated landscapes and indoor plants reaching around 9 feet under good conditions, while Colorado State University Extension notes that many houseplants remain 6 feet or shorter. Those figures are useful as a planning warning, not a promise of a particular mature height. (NC State Extension)
The familiar layered silhouette is also a clue about pruning. A broadleaf houseplant may branch after a cut; a Norfolk Island pine does not reliably replace a removed central leader. If your ceiling is low, choose a smaller plant and a permanent location rather than buying a tall one and planning to top it later.
Place it where the light is bright and usable
Light is the first care decision because it changes every decision that follows. A Norfolk Island pine in weak light uses water slowly, stretches toward the window, loses density, and becomes easier to overwater. A tree in bright light grows more compactly and dries its pot more predictably.
Choose the brightest cool room you can provide. A south, southeast, or east-facing window is a practical starting point; sheer curtains can soften intense afternoon sun in hot climates. The foliage should not be pressed against hot glass, and a plant moved from a dim store display should not be placed immediately in harsh all-day sun. NC State Extension describes full sun as best for compact outdoor growth but notes that light afternoon shade may prevent foliage bleaching; for indoor culture, it recommends a bright, cool room. (NC State Extension)
Colorado State University Extension gives a useful indoor minimum of at least two hours of bright, indirect light daily to help maintain green foliage. Treat that as a floor for survival and color, not an ideal target for dense growth. If the tree is several feet from a window, use its shape as feedback: a leaning trunk, long gaps between branch tiers, and weak new growth mean the plant needs more usable light or a grow light. (Colorado State University Extension)
Rotate it, but avoid constant relocation
Turn the pot about a quarter turn weekly so one side does not permanently grow toward the window. Rotation changes the direction of light without changing the plant’s environment. Hunker’s indoor-care guidance similarly recommends a permanent bright spot and regular quarter turns for a symmetrical tree. (Hunker)
Avoid carrying the tree from a dark corner to a sunny patio every few days. A Norfolk Island pine prefers consistency, and abrupt shifts can combine light stress with temperature and humidity stress. If you must move it, make the change in stages and watch the new growth rather than expecting old, stretched branchlets to tighten up.
Water by soil feel, not by the calendar
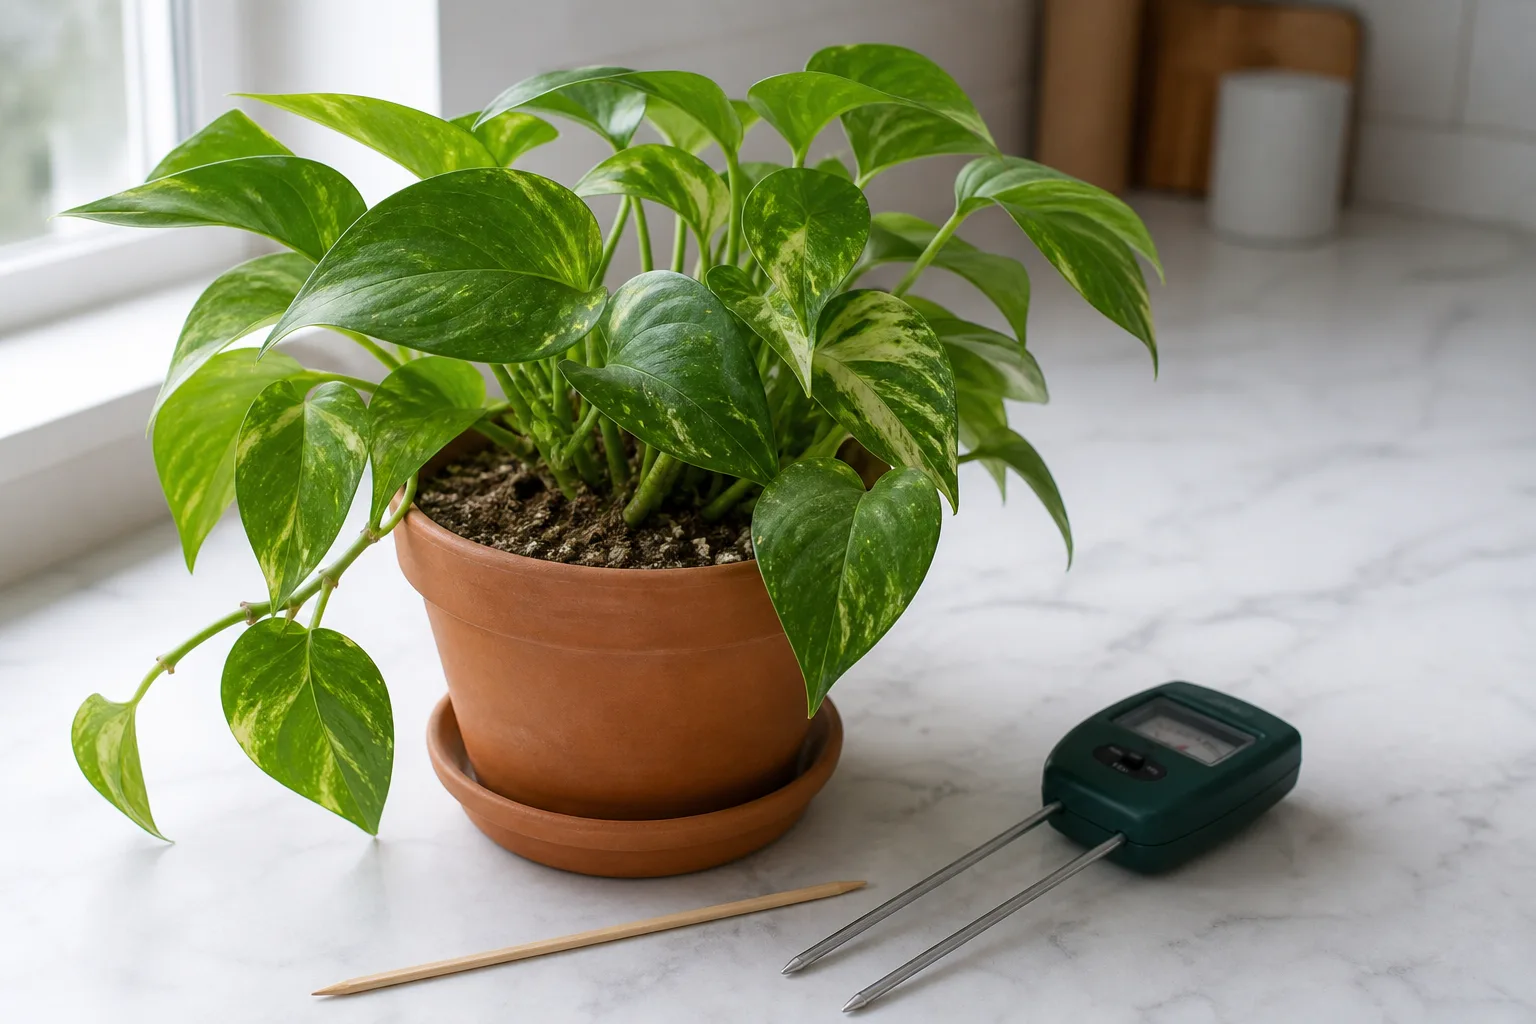
Water when the top inch of the potting mix feels dry, then soak the root ball thoroughly until water runs from the drainage holes. Empty the saucer after the pot has finished draining. The goal is not to keep the surface permanently wet; it is to prevent the root zone from swinging repeatedly from bone dry to saturated.
Use this sequence:
- Push a finger about an inch into the mix in several places, especially near the edge and the trunk. If the surface is dry but the soil just below is cool and moist, wait.
- Lift the pot if you can. A noticeably lighter container supports the finger test; a heavy pot with damp mix does not need more water.
- Pour room-temperature water slowly over the soil surface, pausing if it immediately runs down the gap between the root ball and pot.
- Let the excess drain completely. Do not leave the pot standing in a cachepot or saucer of water.
- Recheck the plant in a few days, then adjust the interval to the room, season, pot size, and light level.
There is no honest universal schedule such as “every two weeks.” A small tree in a warm, bright room may dry faster than a large tree in a cool room, while a dense peat-heavy mix may stay wet long after the surface looks dry. In winter, water use usually slows, but heated air can dry the foliage and top layer faster; check the root zone instead of switching to automatic weekly watering.
Re-wet a dry, compacted root ball carefully
If water races around the sides and exits immediately, the mix may have pulled away from the pot or become water-repellent. Do not respond by pouring repeatedly until the saucer overflows; that can leave the outside wet while the center stays dry.
Set the pot in a sink or tub and water slowly in several passes. You can gently open a few channels in the top layer with a wooden skewer, taking care not to stab through the root ball. Once water begins to soak through evenly, allow the pot to drain fully. If the plant repeatedly becomes hydrophobic or the mix has collapsed into fine sludge, repot during active growth rather than trying to rescue an exhausted medium indefinitely.
Use airy soil and a stable pot
Norfolk Island pine needs a porous, well-drained mix that holds some moisture without becoming a sealed wet mass. A quality indoor potting mix amended with material that improves drainage and air space is a better starting point than garden soil. NC State Extension describes a fertile, porous, sandy, peaty, slightly acidic, well-drained potting soil for indoor plants. (NC State Extension)
The exact recipe matters less than the physical result. When you squeeze a handful of damp mix, it should hold briefly and then crumble rather than form a greasy ball. Avoid adding large amounts of sand to a small container; fine sand can fill air spaces instead of improving them. A commercial mix for indoor trees, combined with perlite, pumice, or fine bark when needed, is easier to control.
Use a pot with real drainage holes and place it inside a heavier decorative cover pot if the tree is top-heavy. The planting pot should not sit in collected water. A heavy, stable base is especially helpful because a Norfolk pine’s tall narrow canopy can catch a bump or a curious pet even when the root system is still small.
Do not choose a much larger pot to “give the roots room.” Excess unused soil stays wet longer and increases the risk of root damage. A modest step up is safer when the root ball is truly root-bound.
Balance temperature and humidity without creating wet roots
Norfolk Island pine prefers stable, moderate indoor temperatures rather than extremes. Colorado State University Extension lists about 60–72°F during the day and slightly cooler nights as optimum. NC State Extension describes a bright, cool indoor room around 55–65°F, while Hunker warns against cold drafts and temperatures below 40°F. The practical overlap is simple: keep it comfortably cool, away from freezing temperatures, heat blasts, air-conditioning discharge, and frequently opened exterior doors. (Colorado State University Extension) (Hunker)
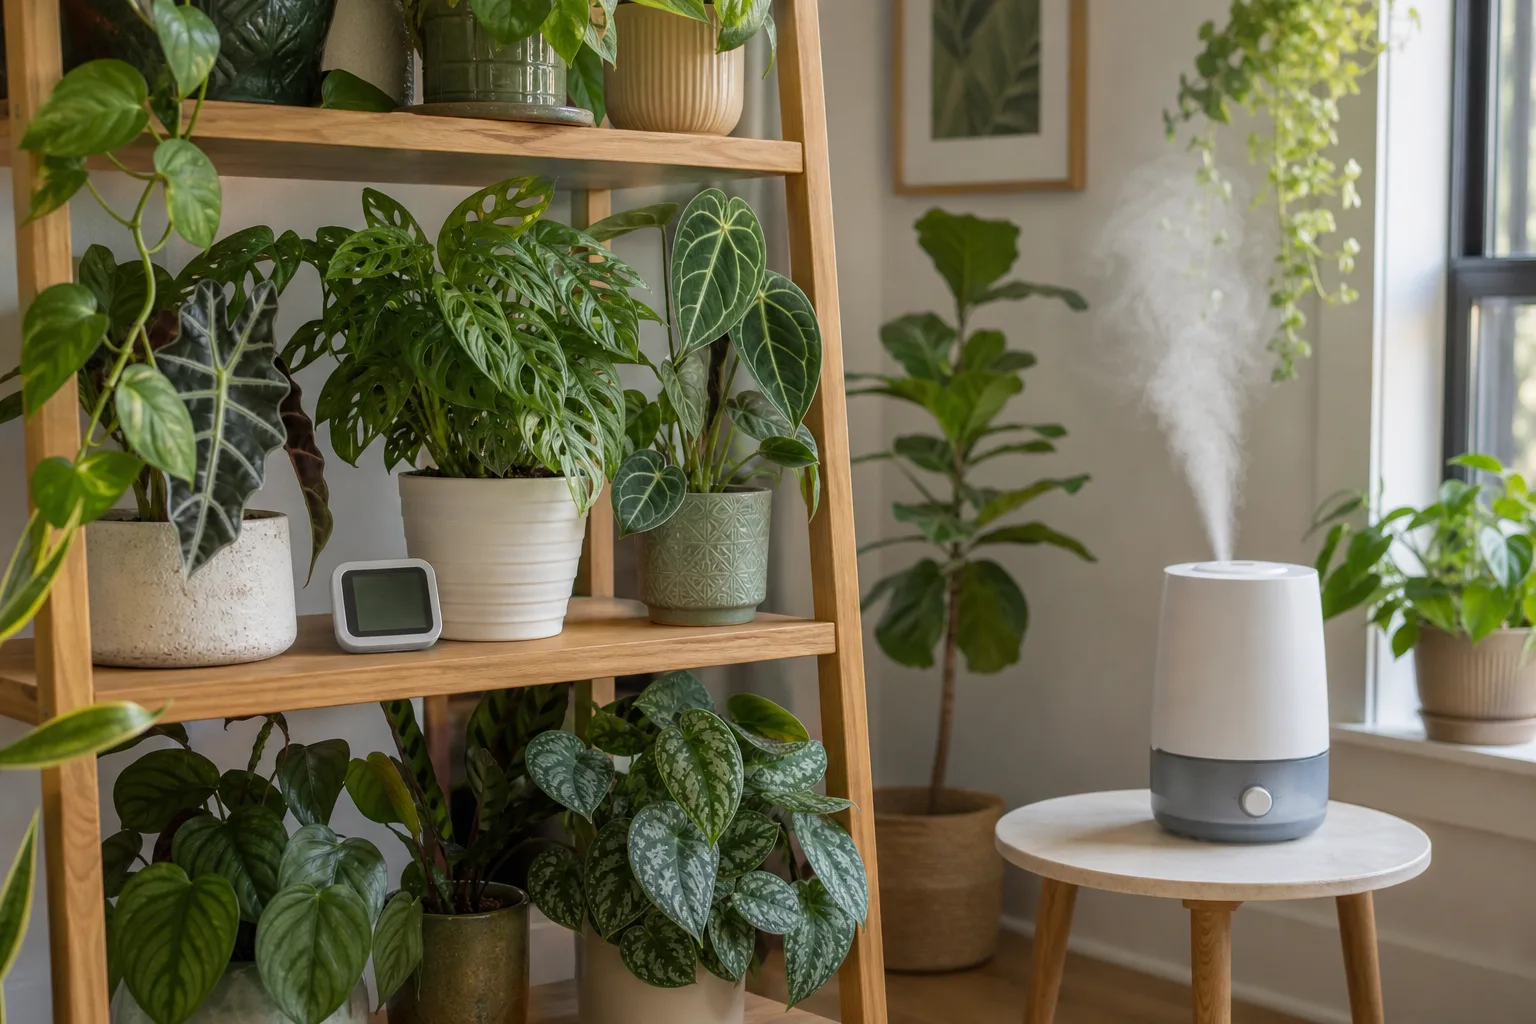
Humidity matters most when the room is heated, the foliage is browning at the tips, or the plant is beside a dry draft. Aim for a stable room rather than a brief burst of moisture. A hygrometer placed near the canopy can tell you whether the air is actually dry; the number at the thermostat or across the room may not match the leaves.
Do not use humidity as a substitute for root drainage. A wet pot in a humid room can still develop root rot, while a well-drained pot in moderately dry air may remain healthy with fewer cosmetic brown tips. Change the room conditions before changing the watering frequency.
Choose a humidifier, plant grouping, or pebble tray
A small humidifier is the most consistent option when several plants need more moisture in the air. Keep the unit clean and place it where mist is not blowing directly onto the tree or soaking the potting mix. Grouping plants can create a slightly more humid pocket, but leave enough space for airflow.
A pebble tray is a limited, local aid rather than a cure-all. Put pebbles in a shallow watertight tray, add water below the tops of the stones, and set the pot on the stones so the drainage holes stay above the waterline. The pot must never sit in standing water. Misting may wet the foliage briefly, but it does not provide the steady humidity of a room-level humidifier and should not be used to compensate for a dry root ball.
Feed only while the plant is actively growing
Fertilizer supports new growth; it does not repair brown needles, revive dead branchlets, or compensate for weak light. Feed a well-watered plant with a balanced liquid houseplant fertilizer diluted according to the label, usually during spring and summer or the plant’s active growth period. Colorado State University Extension places feeding and transplanting in the March-through-September growing period, while NC State Extension suggests dilute applications weekly or biweekly from spring through fall. (Colorado State University Extension) (NC State Extension)
Start conservatively if the plant has just arrived from a store, has recently been repotted, or is sitting in low light. Water first if the soil is dry, and never apply concentrated fertilizer to a dehydrated root ball. Pause feeding in winter when growth and light are low unless the tree is clearly growing under strong supplemental light and the product label supports continued use.
Avoid chasing a leggy tree with more fertilizer. Low light is the primary correction; extra nutrients can push weak, elongated growth that makes the tree less balanced. If a white crust develops on the soil or pot rim, flush the mix with clean water and reassess the fertilizer rate and water quality.
Repot only when the roots actually need room
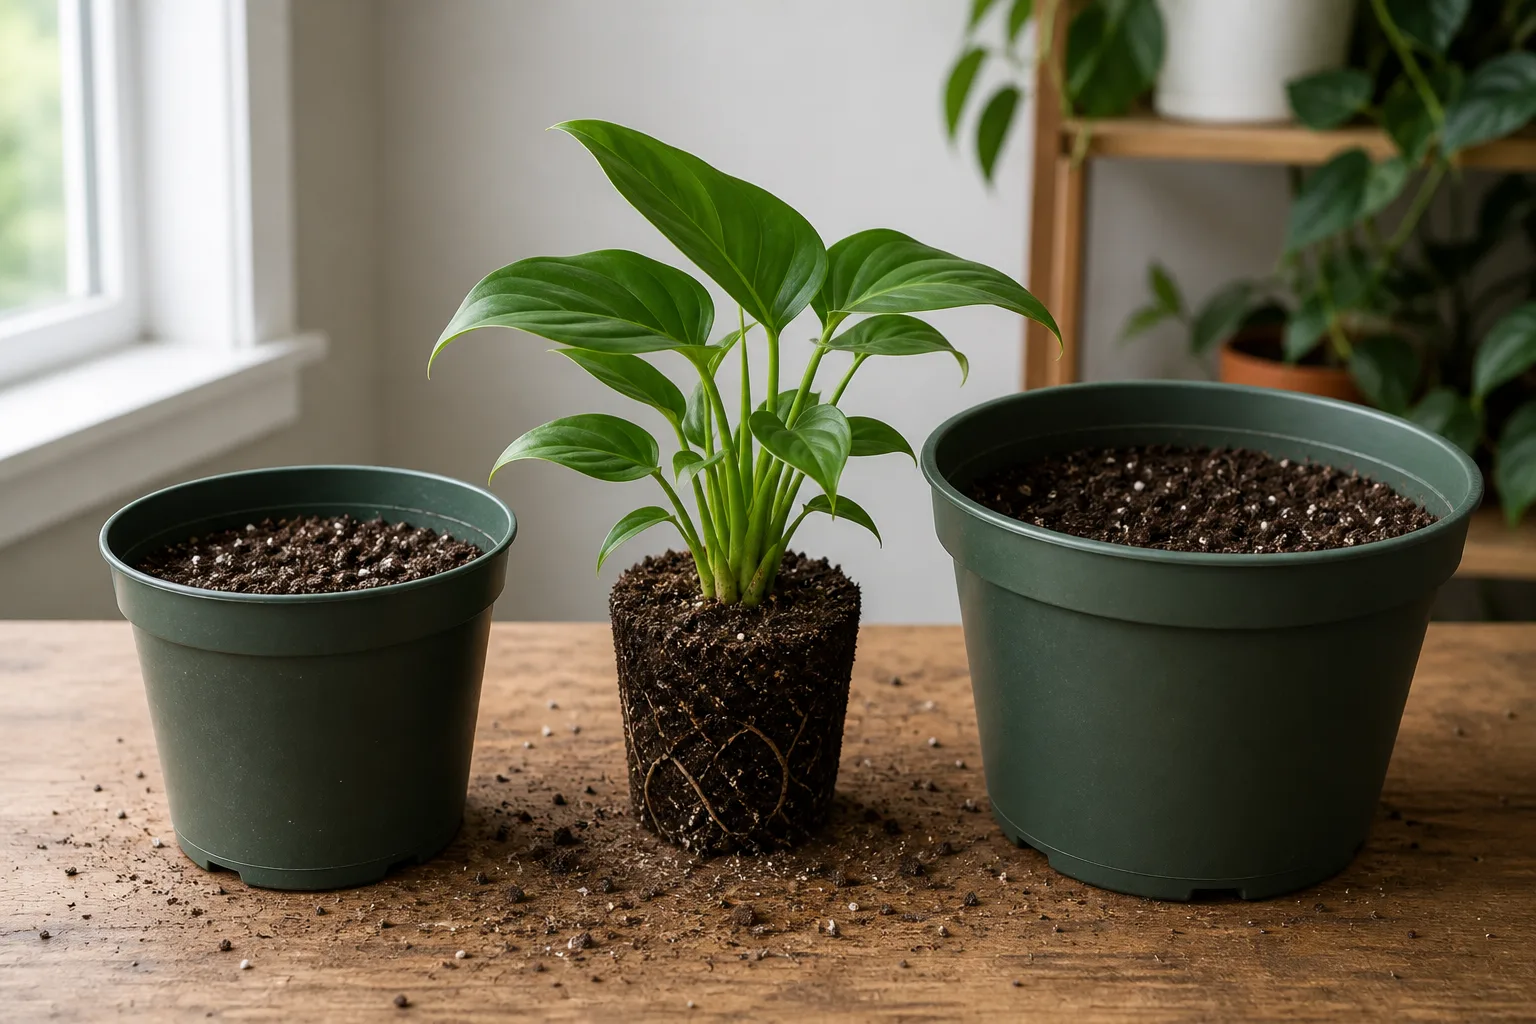
Norfolk Island pines are slow enough that repotting every year is usually unnecessary. Check for roots circling densely inside the pot, roots emerging from drainage holes, water passing through too quickly because the root ball is packed, or a plant that becomes unstable because the canopy has outgrown its base. A pot that dries at a normal rate and supports steady growth does not need a larger container just because a calendar says so.
Repot in spring or another period of active growth. Choose a container only one size larger, preserve as much healthy root ball as possible, and use fresh porous mix around it. Set the trunk at the same depth; burying more of the stem can create persistent moisture and stability problems.
After repotting, water once to settle the mix, drain the pot, and return it to similar light. Do not immediately move it into stronger sun, fertilize heavily, or keep the soil constantly saturated in an attempt to eliminate transplant stress. If roots are brown, soft, or foul-smelling, remove only clearly damaged material and correct the drainage problem; a severely rotted tree may not recover.
Prune for safety and shape, not to force a shorter tree
Remove dead, broken, or diseased branchlets with clean, sharp pruners. Cut back to a healthy junction without stripping healthy green tiers merely to make the tree look smaller. A dead lower branch will not green up again, so removing it improves appearance and airflow even though it will leave a gap.
Do not routinely cut off the top. Removing the central leader can permanently change the classic pyramidal form, and a replacement leader may not develop in a controlled way. If the tree is touching the ceiling, the honest choices are to accept a different silhouette, move it to a taller space, or replace it with a smaller plant rather than repeatedly topping it.
Move a Norfolk Island pine outdoors only in a suitable climate
A potted Norfolk Island pine can spend warm weather outdoors in a climate that does not expose it to cold nights or sudden temperature swings. Outdoor planting is generally limited to warm subtropical or tropical areas; NC State Extension lists USDA Zones 9a through 11b for outdoor landscape culture, while Birds & Blooms recommends outdoor planting only in Zones 10 or 11. That difference reflects local exposure and the fact that a zone label is not a guarantee against a cold snap. (NC State Extension) (Birds & Blooms)
In a cooler region, keep the tree in a container and bring it indoors well before nights approach the plant’s limit. A brief warm afternoon is not enough to justify an outdoor move if the next night is cold. Outdoors, provide room for eventual size, good drainage, and protection from extreme wind; a mature tree can become a serious landscape specimen with large branches and cones.
Acclimate it gradually to outdoor light
Start in bright shade or morning sun for several days. Increase exposure in stages over a week or two, watching for bleached foliage, crisp tips, and wilting that does not resolve after evening. The same rule applies in reverse when bringing it indoors: inspect for insects, reduce exposure gradually, and place it immediately in the brightest indoor location available.
Do not leave a recently moved tree on a hot balcony against a reflective wall. A plant can go from low indoor light to intense outdoor radiation faster than its foliage can adjust. Wind also dries a container rapidly, so check soil more often outdoors without assuming every wilted afternoon means the plant needs another soaking.
Propagate from seed, not ordinary cuttings
Seed is the realistic propagation route for Norfolk Island pine. NC State Extension lists seed as the recommended strategy. If you ever obtain viable seed from a mature cone, sow it fresh in a clean, moist, well-drained medium with the pointed end oriented as recommended for the seed, keep it warm and evenly moist, and give emerging seedlings bright light. (NC State Extension)
Seed propagation is slow and depends on viable, properly developed seed, so it is not the fastest way to make a duplicate houseplant. A store-bought indoor tree is usually a better purchase than a years-long experiment. Ordinary stem cuttings are not a dependable shortcut because removing the growing tip can destroy the single leader and side branches do not reliably recreate the original tree form.
Troubleshoot brown, yellow, or dropping needles
Symptoms overlap, so diagnose in an order that protects the roots first: check soil moisture, then light, then temperature and drafts, then humidity, then pests. Do not change all five conditions at once. A plant that was overwatered and then moved into harsh sun can show several symptoms, and the newest growth tells you more about the current conditions than old damaged tips do.
| Symptom | First checks | Useful next action |
|---|---|---|
| Brown tips or dry branchlets | Dry soil, low humidity, hot or cold draft | Correct the root-zone moisture and remove the draft before adding humidity |
| Yellowing with wet soil | Slow drainage, oversized pot, weak light | Pause watering, check roots and drainage, then improve usable light |
| Sparse or stretched tiers | Low light, especially for months | Move gradually to a brighter position; do not compensate with fertilizer |
| Needle drop and soft roots | Persistent saturation or root damage | Stop routine watering and inspect the root system |
| Drooping with a very light pot | Underwatering or water-repellent mix | Re-wet slowly, drain fully, and monitor recovery |
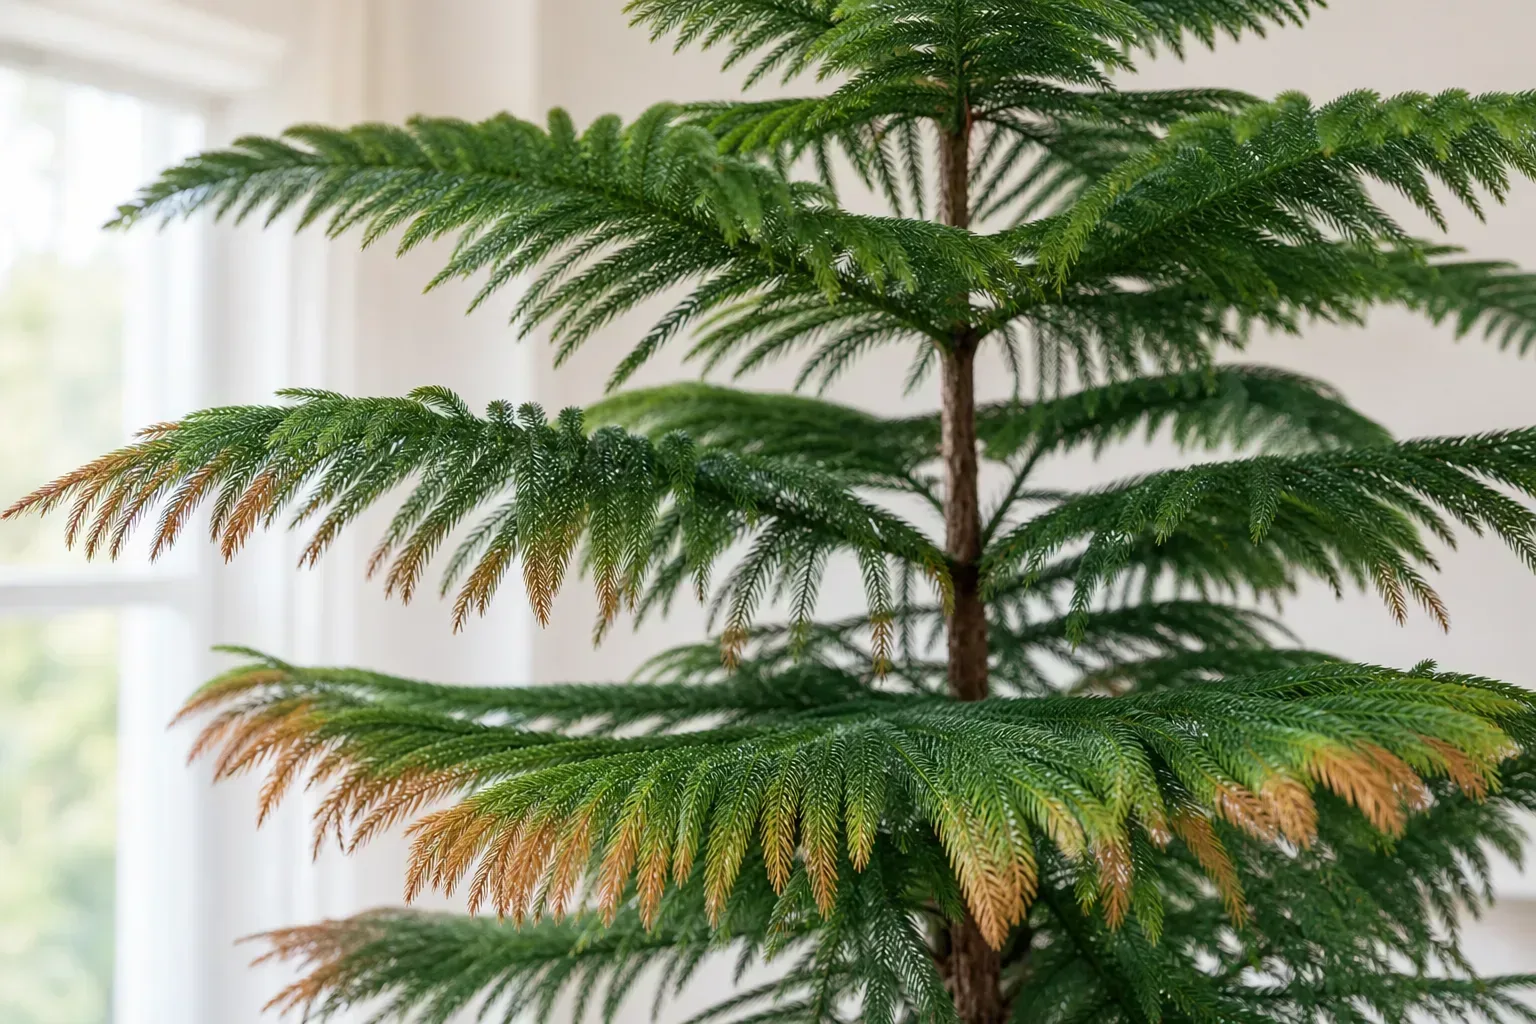
Brown tips and dry branchlets
Brown tips are a stress signal, not a diagnosis. Low humidity, underwatering, overwatering-related root damage, hot air from a vent, cold drafts, and abrupt changes can all contribute. Colorado State University Extension specifically lists too little humidity, too little or too much water, and furnace, air-conditioner, or door drafts among the causes of browning. (Colorado State University Extension)
Start with the soil. If it is dry well below the surface, water thoroughly and slowly; if it is wet after many days, stop watering and check whether the pot drains. Next, feel for airflow from a heater or air conditioner and look for cold glass or an exterior door. Only after the root zone and temperature are reasonable should you add a humidifier or plant grouping.
Existing brown tissue will not turn green again. Trim only the dead ends if their appearance bothers you, and judge the success of the correction by whether new growth stays green and firm. If browning is spreading from the base, the soil smells sour, or roots are soft, treat it as a possible root problem rather than a simple humidity issue.
Yellowing, sparse growth, or drooping branches
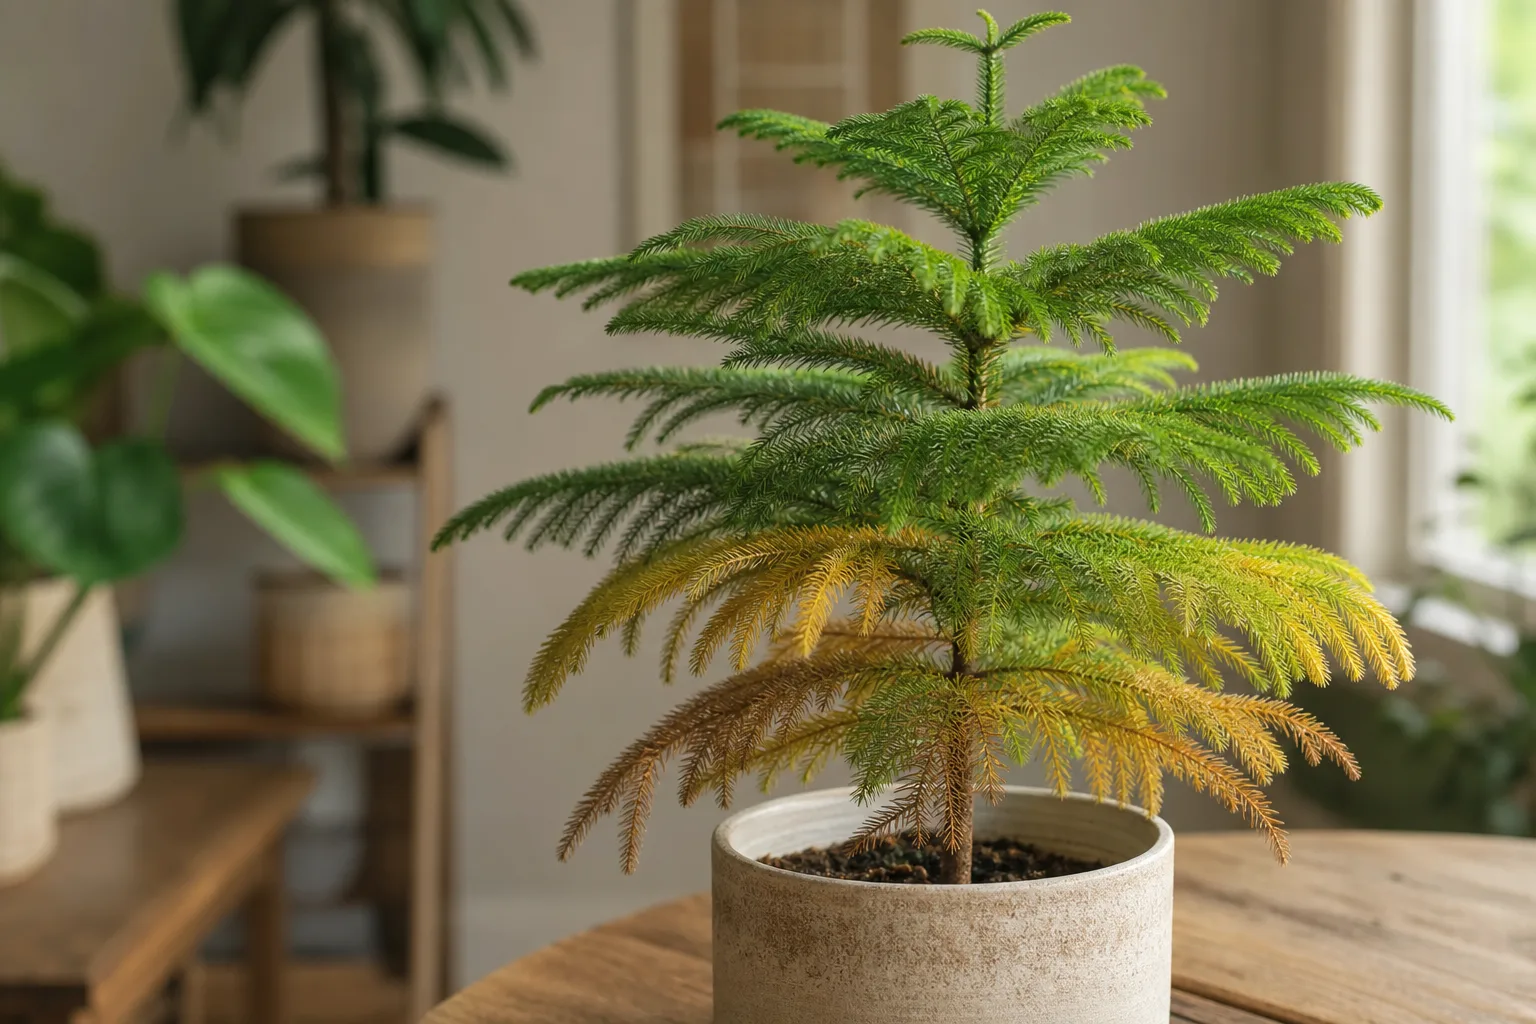
Yellow needles can follow low light, excess water, root injury, or a sudden temperature change. A few older interior needles may age and drop, but widespread yellowing or yellow new growth deserves a root-zone and placement check. The NC State profile notes that indoor plants may tolerate very low light for two or three years before leaf drop and loss of lower branches appear; delayed symptoms do not mean the light was adequate. (NC State Extension)
Drooping branches with dry soil point toward thirst or a compacted root ball. Drooping branches with wet soil point in the opposite direction: improve drainage and inspect for root damage instead of watering again. If the trunk is soft, the roots are dark and mushy, or the smell is sour, recovery is uncertain; remove the tree from standing water and repot only if enough healthy roots remain.
Sparse growth is usually a light problem, not a pruning problem. Give the tree a brighter stable position and rotate it weekly. Do not expect old bare sections to refill quickly, and do not cut the leader to make sparse growth look shorter.
Watch for pests, disease, and pet-safety concerns
Scale insects, sooty mold, and leaf spot are documented concerns for this species. Inspect branch joints and the undersides of foliage when bringing a holiday tree home or moving a container outdoors. Sticky residue, small stationary bumps, cottony clusters, webbing, or spreading spots are reasons to isolate the plant and identify the problem before applying a treatment.
Start with nonchemical measures that fit the pest: remove visible insects with a cotton swab or a gentle wash when the plant and setting allow, prune badly affected dead material, and improve airflow. For any pesticide, use only a product labeled for the plant and pest in your location and follow that label; “natural” does not automatically mean harmless to the tree, people, or pets. A recurring infestation may need a local extension diagnosis.
Pet safety is often misstated for this plant. NC State Extension tags Araucaria heterophylla as non-toxic for cats, dogs, and horses. That does not make the tree edible, and it does not protect a pet from fertilizer, pesticide, ornaments, tinsel, or a heavy pot tipping over. Keep plant-care products and holiday decorations out of reach, and contact a veterinarian if an animal has eaten an unknown treatment or is showing symptoms. (NC State Extension)
Conclusion
Treat Norfolk Island pine as a living tropical tree with a steady indoor home. Give it bright usable light, rotate rather than relocate it, water when the upper mix begins to dry, drain the saucer, keep temperatures stable, and use humidity tools only after the roots are healthy. Feed lightly in active growth, repot only when the root ball needs room, and avoid topping the leader.
When the foliage changes, check soil, light, drafts, and pests in that order. Brown tips are old damage; the real measure of recovery is firm, green new growth. With a stable routine and realistic expectations about its eventual size, the little holiday tree can become a long-lived houseplant instead of a seasonal throwaway.



