How to Grow and Care for Hoya Obovata: Complete Guide
Grow Hoya obovata indoors with practical light, watering, soil, propagation, and flowering guidance, plus ways to diagnose yellow, soft, or wrinkled leaves.
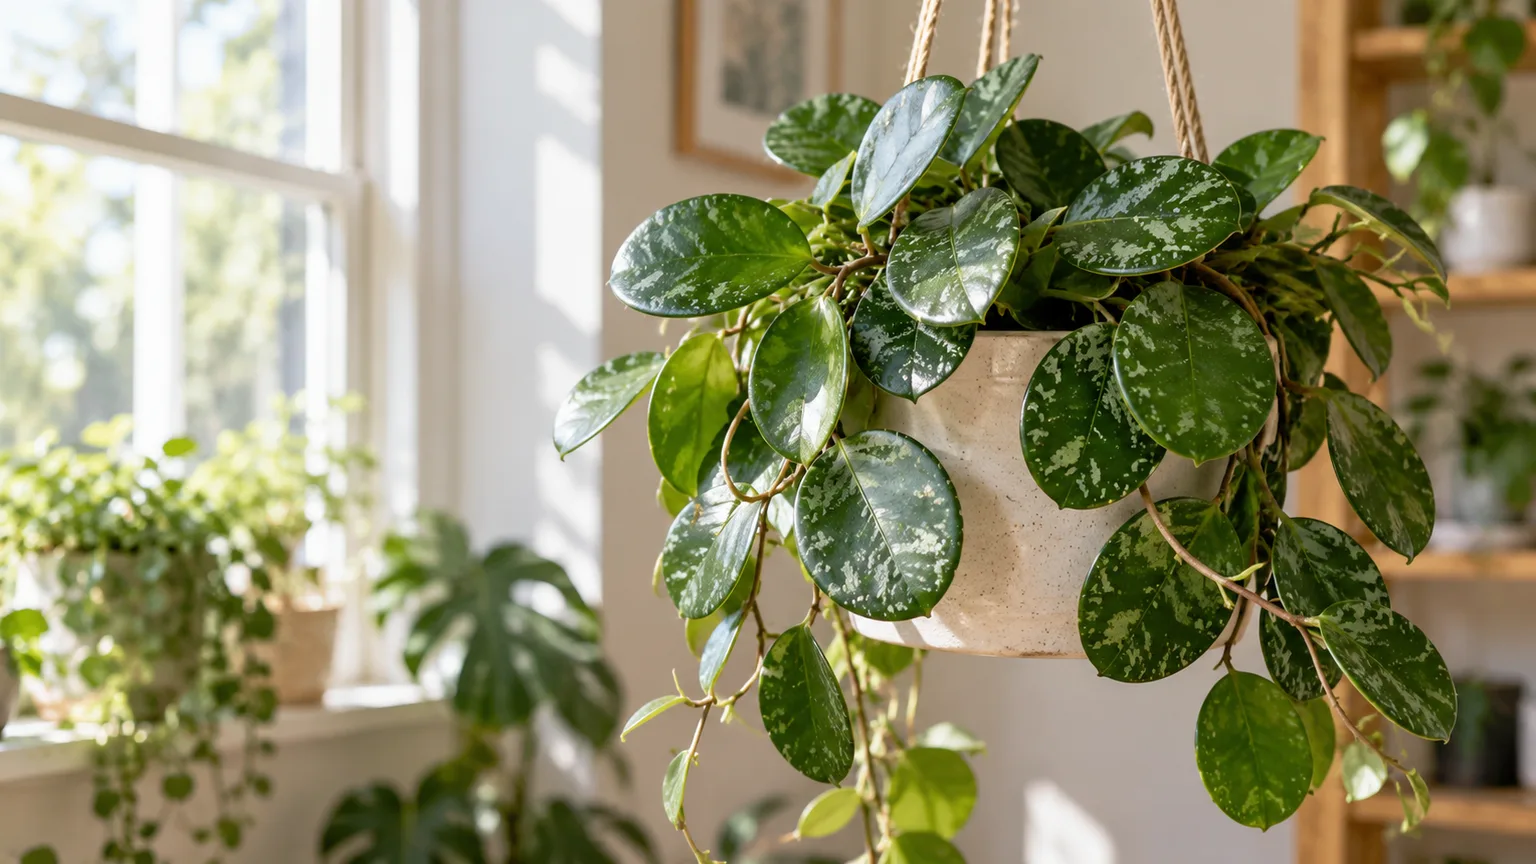
Hoya obovata is a tropical evergreen vine with thick, round-to-oval leaves that often carry silvery splashes. It earns its place as a foliage plant even when it is not flowering, and it can be trained up a hoop or allowed to spill from a shelf or hanging pot. Its care is easiest when you treat it as an epiphyte with succulent-like leaves: give the roots air, offer more light than a dim corner provides, and let the mix dry substantially between thorough waterings.
The plant is native to parts of Indo-China and the Indonesian islands of Sulawesi and Maluku, where it grows as an epiphyte rather than as a plant rooted in dense garden soil, according to Kew’s Plants of the World Online profile for Hoya obovata. Indoors, that background explains its preference for an airy root zone and a measured watering routine; it does not mean the plant can live on room humidity or should be left completely dry for long stretches.
Start With the Plant’s Habit and Growth Pattern
The species name obovata refers to a leaf shape that is wider toward the tip than at the base. Leaves are thick and firm, usually green, and often freckled with silvery markings; NC State Extension lists Hoya obovata among the large-leaved Hoya species with pink and white flower clusters. Splash varies from leaf to leaf and from plant to plant, so one mostly green leaf does not automatically mean the plant is unhealthy or reverting.
Its stems are flexible when young and can trail, climb, or loop around a support. A hanging basket suits a plant with long, loose vines; a small trellis or hoop keeps the same growth more compact and visible. New growth can pause after a move, during shorter winter days, or while a cutting establishes roots, so judge progress over several weeks and by the health of the stem and leaves rather than expecting a new leaf every week.
Hoya obovata is a member of Apocynaceae, a family that includes plants with milky sap. Handle a broken stem with care, wipe sap from surfaces, and wash your hands after pruning. The Kew profile confirms the accepted botanical name and epiphytic habit, while NC State Extension’s Hoya profile provides genus-level guidance that applies to many, but not necessarily every, Hoya species.
Choose Bright Light and Acclimate to Sun
Place Hoya obovata close to a bright window where it receives strong indirect light for much of the day. An east-facing window is a dependable starting point; a west- or south-facing window can work when the plant is set back a little or protected by a sheer curtain during the hottest hours. A north-facing window may be too dim in winter or in a shaded room, even if the room looks bright to you.
NC State Extension notes that most Hoyas grow in bright light, dappled shade, or morning sun rather than needing full sun all day. In a home, this translates into a bright room with some gentle sun being useful, not a requirement to place an unacclimated plant against hot glass. The experienced growers at Ohio Tropics likewise emphasize strong light for Hoya obovata, especially when flowering is a goal, but a plant grown in a darker nursery should be introduced to direct rays gradually.
Look at the newest growth. Compact internodes and firm, evenly colored leaves suggest the plant is getting usable light; long bare sections between leaves, small new leaves, or vines stretching toward the window indicate it may need a brighter position. Pale tan or crisp patches on the window side point instead to sudden sun stress, especially after the plant has been moved outside or closer to a west window.
If natural light is limited, a grow light can supplement it. Keep the fixture at the distance recommended by its maker, start with a moderate day length, and watch the leaves over the next two to three weeks. More light also makes the mix dry faster, so recheck moisture after changing the plant’s position rather than continuing the old watering interval.
Water by Dry-Down, Not by Calendar
Water when the potting mix has dried substantially, then soak the entire root ball and let excess water escape. Check with a finger or wooden skewer a little below the surface; the top inch or two should feel dry, and the mix deeper in the pot should be only slightly damp or nearly dry before watering again. The exact interval varies with window exposure, pot size, mix, indoor temperature, and season, so a weekly rule is unreliable.
A small, airy mix in a warm bright room may dry in several days; a large plastic pot in lower light can stay wet far longer. Check more often when growth is active or the room is warm, and less often when winter light and growth slow. The NC State Extension Hoya profile specifically warns that Hoyas need a free-draining mix that dries between waterings and do poorly in soggy media; Ohio Tropics’ species-specific care notes also recommend checking the soil and watering thoroughly rather than giving frequent sips.
When it is time to water, take the plant to a sink or basin and pour slowly over the whole surface until water runs from the drainage holes. Let it drain fully, then empty the cachepot or saucer. A thorough drink followed by an adequate dry-down encourages roots to explore the pot; small splashes can leave part of the root ball dry while keeping another part persistently damp.
Do not use the leaves alone to set the schedule. Their thickness lets the plant buffer short dry spells, but a wrinkled leaf can also mean the roots are damaged and cannot take up water. If the mix is still wet, do not add more water to “fix” wrinkling; check drainage, smell the root zone, and inspect the roots if the decline continues. If the mix is bone dry and the pot is unusually light, water thoroughly and reassess leaf firmness over the following days.
Build an Airy, Fast-Draining Root Zone
Use a loose potting mix that holds some moisture but does not collapse into a dense, waterlogged mass. A practical starting blend is two parts quality indoor or cactus potting mix to one part coarse perlite or pumice, with a little orchid bark added if the base mix is fine or compact. The proportions are adjustable: choose more coarse material when your room is humid, the pot is large, or you tend to overwater; retain a little more moisture when a small pot dries too quickly in a bright, warm spot.
Epiphytic Hoyas need oxygen around their roots as well as water. NC State Extension describes Hoyas as naturally epiphytic and recommends a free-draining organic mix; Ohio Tropics’ Hoya obovata guide also uses a coarse amendment to improve drainage. The important test is not a single brand or recipe: after watering, the mix should drain freely, and it should not remain heavy and wet for many days under ordinary indoor conditions.
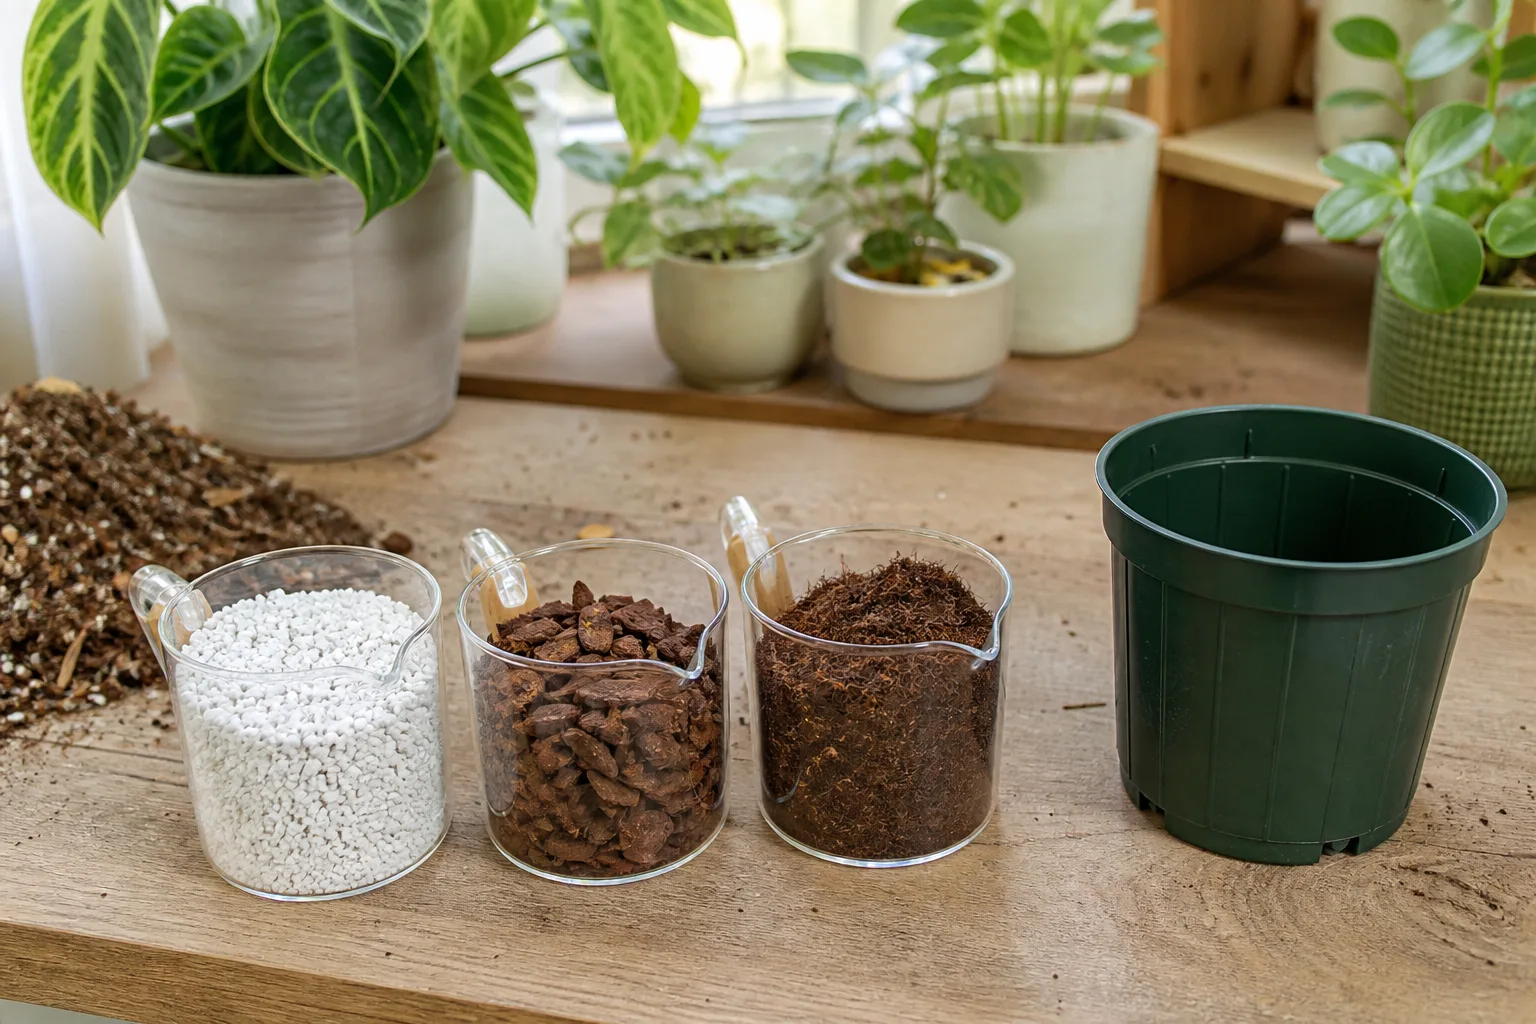
Always use a pot with open drainage holes. A decorative cachepot is fine if the nursery pot can be lifted out for watering and draining. Terracotta loses moisture through its walls and can help a grower whose mix stays wet, while plastic or glazed ceramic dries more slowly and can suit a bright, dry home; whichever material you choose, adjust the watering check to match it.
Avoid a heavy garden soil, a pot with no drainage, or a mix made mostly of fine peat that stays saturated. On the other hand, a mix so chunky that water races through without wetting the root ball can leave the plant thirsty. If water runs down the side and straight out, rehydrate the mix slowly in two passes and consider adding a modest amount of moisture-retentive potting mix at the next repot.
Keep Temperatures Steady and Humidity Practical
Hoya obovata grows best in the stable warmth of an occupied home. Keep it away from cold drafts, air-conditioner blasts, and hot furnace vents, which can make a window-side microclimate much harsher than the room thermometer suggests. NC State Extension notes that Hoyas are frost-intolerant; bring outdoor plants inside well before chilly nights and avoid leaving the pot pressed against cold glass.
Average household humidity is usually workable if the plant is watered correctly and the mix drains well. Higher humidity may help new leaves unfurl, but it does not compensate for a dim location, dry roots, or a pot that stays waterlogged. If your home is very dry and leaf tips repeatedly crisp, a room humidifier can improve conditions for nearby plants; a light mist gives only a brief change and may leave mineral spots, so it is not a reliable care routine.
Good air movement matters more than a sealed, steamy enclosure for a mature plant. Avoid crowding the vines against a damp wall or keeping leaves constantly wet. When a cutting is rooting, a loose clear cover can slow moisture loss, but open it daily and remove it if condensation remains on the leaves or the stem begins to soften.
Feed Lightly While Growth Is Active
A balanced, complete houseplant fertilizer can support new leaves and stems during active growth. Apply it at the rate on the label, or at a reduced concentration if the product is intended for outdoor plants or the plant is growing slowly in a small pot. Begin after growth resumes in spring and pause or reduce feeding when the plant stops actively growing in low winter light.
Fertilizer is not a substitute for light, sound roots, or suitable soil. More nitrogen may produce leaves and vines without encouraging flowers; a high-phosphorus “bloom booster” is not a shortcut to flowering and can add unnecessary salts. If the leaf edges brown, a white crust forms on the mix, or watering no longer seems to re-wet the root ball evenly, stop feeding and flush the pot with plain water if the drainage is good.
Use clean water to moisten the mix before applying fertilizer if the roots are very dry, and never let nutrient solution sit in the saucer. If the plant is newly repotted in a mix that already contains fertilizer, wait until that initial charge is used up before adding more. A light, consistent feed during growth is easier to manage than trying to compensate for months of low light with one strong dose.
Train the Vines, Prune Carefully, and Keep Flower Spurs
Let the vines hang freely if you want a cascading plant, or guide them around a hoop or trellis to keep the footprint narrow. Use soft ties and leave room for each stem to thicken; do not pull a woody vine sharply around a tight corner, because mature Hoya stems can snap. A support is a display choice rather than a requirement, but it can make long vines easier to manage in a small room.
Prune only when a stem is damaged, too long for its place, or sparsely leafed in a way that genuinely bothers you. Use clean snips and cut just above a node, where a new shoot may develop. Remove dead or mushy leaves, but first determine why they declined; trimming symptoms without correcting a wet root zone or poor light leaves the cause in place.
Keep old flower spurs, also called peduncles, attached after the blooms fade. Hoya flowers can return from the same spur, so cutting it off may remove a future flowering point. Ohio Tropics’ Hoya obovata care guide and Epic Gardening’s Hoya flowering advice both emphasize preserving these spurs. If you need to shorten a flowering stem, identify the bare spur first and make the cut beyond it rather than pruning the spur itself.
Repot When the Roots or Mix Need It
Do not repot by the calendar alone. Hoya obovata can grow comfortably in a relatively snug pot, and a larger container holds more mix that may stay damp after watering. Repot when roots fill the pot, the plant dries unusually quickly despite appropriate care, the mix has broken down and stopped draining well, or you need to remove damaged roots.
When repotting, choose a container only one size larger, with multiple drainage holes. Slide the plant out gently and loosen only the roots that separate easily; Hoya roots may cling to the pot and tear when forcibly pulled away, especially from rough terracotta. If the roots are healthy, keep most of the old root ball intact and refill the sides with fresh airy mix at the same planting depth.
After repotting, water enough to settle the mix and drain the excess, then let the plant recover in bright indirect light. Avoid combining repotting with heavy pruning or a major move into stronger sun. If the plant is healthy but merely crowded, waiting until active growth begins gives it a better chance to resume quickly.
Propagate Hoya Obovata From a Stem Cutting
Take a cutting from a healthy vine during active growth. Choose a section with at least two nodes, the points where leaves or aerial roots emerge; include one or two pairs of leaves above the cut and make the lower cut just below a node. Remove leaves from the lowest node so that it can sit in water or substrate without a leaf submerged or buried.
Use clean snips and do not take so much material that the parent plant loses most of its healthy foliage. A cutting with several nodes gives you more than one potential rooting point and makes it easier to anchor in the medium. If the cut end releases sap, rinse it and let it stop dripping before placing the cutting into the rooting medium.
Choose Water or Substrate Based on Your Routine
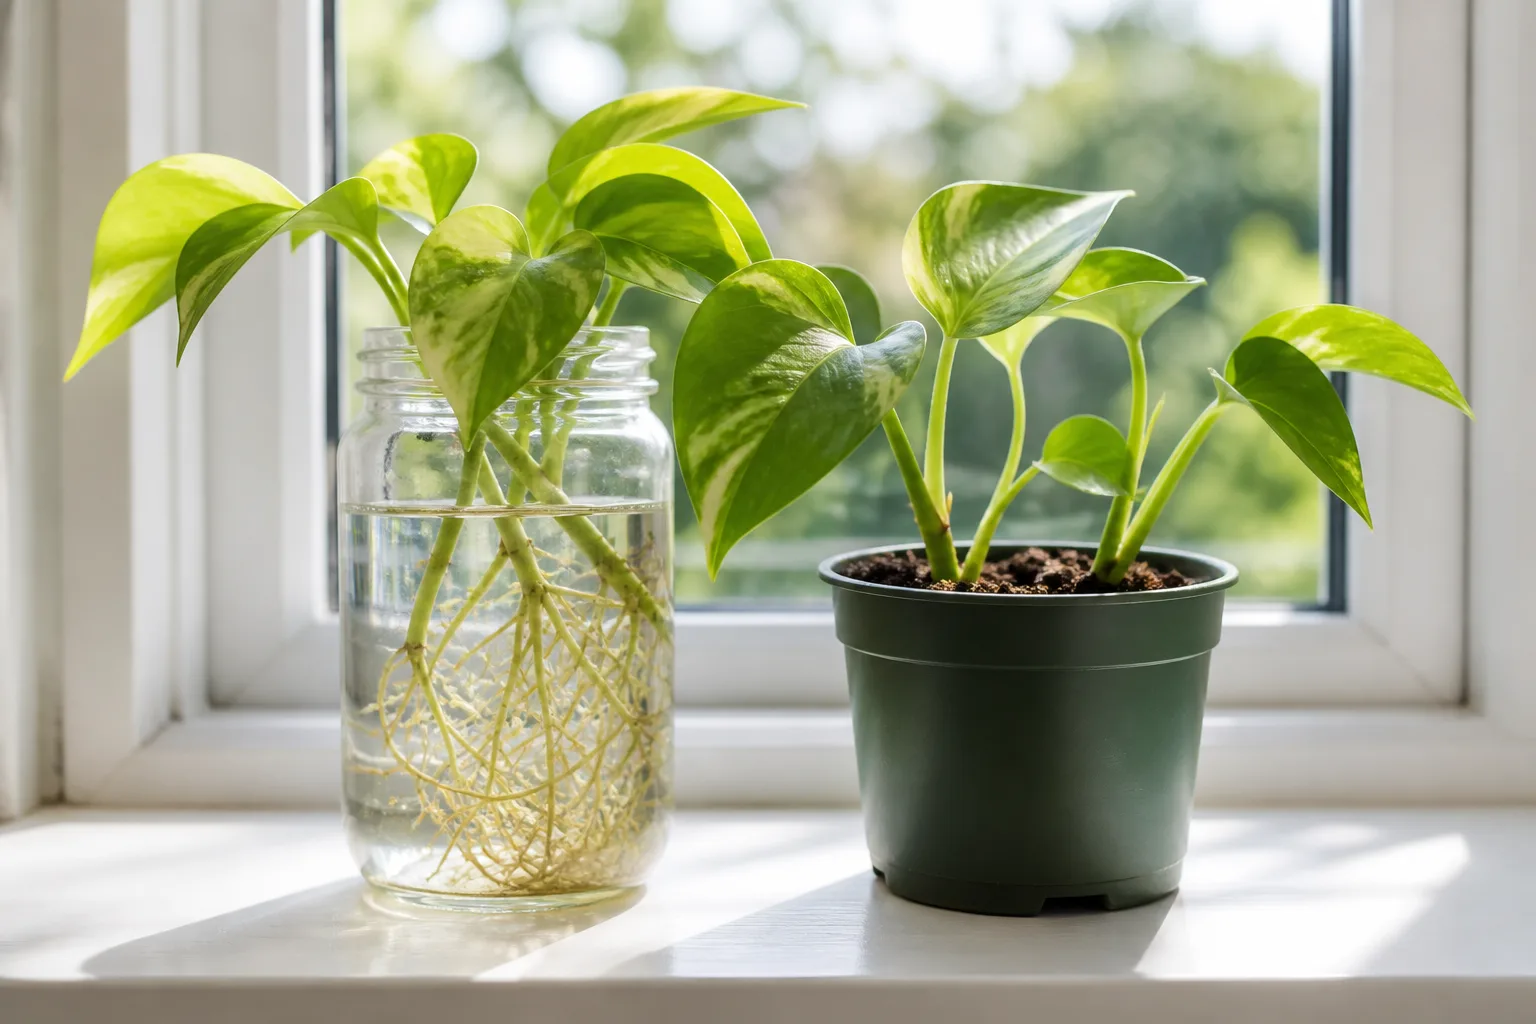
For water rooting, place the lower node or nodes under clean water while keeping the leaves dry. Set the container in warm, bright indirect light and refresh the water when it becomes cloudy or develops residue. Move the cutting into a small pot once roots are visible and long enough to handle, then keep the mix lightly and evenly moist while the new roots adapt; water-grown roots can be more delicate when shifted into a drier substrate.
For substrate rooting, insert the lower node into a small pot of airy mix that has been moistened and allowed to drain. A clear cover can reduce water loss, but leave some ventilation and check that the medium is damp rather than saturated. Ohio Tropics demonstrates both water and soil approaches for this species, while the North Carolina Extension profile notes that most Hoya species can be propagated from stem cuttings.
There is no reliable four-week deadline. Rooting speed depends on warmth, light, cutting maturity, and whether the node is healthy. Resist tugging the stem to check; look for resistance only after some time has passed, or wait for new growth as a stronger sign that the cutting is established. Once roots take hold, gradually follow the adult plant’s dry-down routine instead of keeping the pot constantly wet.
Set Realistic Expectations for Flowers
Hoya obovata can produce rounded clusters, or umbels, of waxy flowers, but a young plant may spend a long time building vines and roots before it blooms. Individual plants vary with maturity, light, growing conditions, and propagation history. A plant sold as a rooted cutting may take longer than a mature specimen, so a healthy plant without flowers is not necessarily failing.
Start with light. A bright position that includes gentle morning sun or strong indirect light gives the plant the energy it needs for steady growth and potential flowering. Next, avoid repeatedly moving it, overpotting it, or pruning every long stem; stable roots and retained flower spurs make it easier for the plant to reach and repeat bloom.
Once buds appear, keep the environment steady and avoid letting the plant swing between bone-dry and soaked. The flowers may release nectar and a fragrance that can be stronger at certain times of day, so protect a shelf or surface beneath them. Do not cut off the peduncle after flowering; it can produce another cluster later.
A fixed season, age, or fertilizer formula cannot promise flowers. Ohio Tropics notes that flowering follows maturity and good conditions, and Epic Gardening similarly prioritizes light, an appropriately sized pot, and intact spurs in its Hoya bloom guidance. If your plant is growing well but not flowering, check whether it gets enough light before changing fertilizer or subjecting it to an intentional dry spell.
Diagnose Leaf Changes Before Changing Care
A single leaf is weak evidence; look for a pattern across new and old leaves, then compare it with the pot’s moisture and recent changes in light or temperature. Check the undersides of leaves and the stem joints at the same time, since pests can cause spotting, stippling, or distortion that looks like a care problem. Change one condition at a time so you can tell whether the response helped.
NC State Extension lists root rot as a risk when Hoya roots stay wet and identifies aphids, spider mites, and mealybugs among common pests. With Hoya obovata, the key is to inspect the root zone when the leaves suggest poor water uptake instead of assuming every wrinkle means the plant is thirsty.
Yellow Leaves, Soft Stems, and Wet Mix
Yellowing across several leaves, especially with a soft stem base or potting mix that remains wet for days, points toward excess moisture or declining roots. Stop watering until the mix dries, empty the saucer, and confirm the drainage holes are open. If the smell is sour, the stem base is soft, or leaves continue to drop, slide the plant out and inspect the roots; trim only roots that are brown, mushy, and clearly dead, then repot into fresh, airy mix.
One old leaf turning yellow while the plant continues to grow can be normal aging. Yellowing limited to the window side may follow sun stress, while pale growth across the whole plant can indicate low light or a nutrient issue. Correct the likely cause before adding fertilizer, because feeding a plant with damaged roots may make stress worse rather than solve it.
Wrinkles, Bare Stretches, and Stalled Growth
Wrinkled leaves on dry mix usually mean the plant has used up stored water; water deeply and let the excess drain. If the mix is wet or the roots smell unhealthy, the roots may be unable to absorb water, so watering again can accelerate decline. Check both the moisture and root condition before choosing between a thorough drink and a dry-down.

Long gaps between leaves and thin vines point toward insufficient light more often than a need for pruning or fertilizer. Move the plant a little closer to the window or add a grow light, then keep the same watering check because higher light will shorten the dry-down time. If the plant has recently been repotted, shipped, or moved into winter conditions, give it several weeks to settle before treating a pause in growth as a serious problem.
Check for Pests and Treat in Stages
Inspect new leaves, leaf undersides, and the places where leaves join the stem. Mealybugs look like white cottony flecks; scale insects form small fixed bumps; spider mites may leave fine webbing and pale stippling; aphids cluster around soft new growth. Sticky residue can signal sap-feeding insects, but also look for other causes before applying a treatment.
Isolate an affected plant from nearby houseplants, rinse off visible pests, and wipe the leaves and stems with a damp cloth. Recheck every few days and repeat physical removal as needed, because one cleaning may miss eggs or insects tucked into a node. If you use an insecticidal soap or another labeled product, follow its label for indoor use and test a small area first; thick leaves can still react to concentrated sprays or application in hot direct sun.
Avoid reaching for a broad pesticide before you know what the pest is. A repeat inspection is more useful than a one-time spray, and pests often reappear if a few individuals remain on the vines or nearby plants. Keep leaves clean, improve air movement, and quarantine new plants before placing them beside an established Hoya.
Handle Pet Safety With Species-Level Caution
Do not assume that a safety listing for one Hoya species automatically applies to every species. ASPCA lists Hoya kerrii, the sweetheart Hoya, as non-toxic to dogs, cats, and horses, but I could not verify a separate Hoya obovata entry in its plant database. The ASPCA explains that its list is not exhaustive and that eating any plant material can cause gastrointestinal upset, so keep this plant out of reach and contact your veterinarian or animal poison control if a pet chews it and becomes unwell.
Move It Outdoors Only in Gentle Conditions
A warm patio or sheltered balcony can provide useful light and airflow during the growing season, but outdoor sun and wind are more intense than they appear from indoors. Wait until nights are reliably mild, place the plant in bright shade first, and increase exposure gradually over a week or two. Bring it back inside if nights turn chilly, if leaves scorch, or if a heat wave dries the pot too quickly to manage.
Check vines and leaf undersides before bringing it back indoors, since outdoor plants can pick up aphids, scale, and other pests. Rinse the foliage and inspect the pot rim and drainage holes. NC State Extension classifies Hoyas as frost-intolerant; in most climates, Hoya obovata is a warm-season container plant rather than an outdoor year-round vine.
Conclusion
Hoya obovata is easiest to maintain when you give its roots air and its leaves enough light to support steady growth. Place it near a bright window, water only after the mix has dried substantially, and let the pot drain before returning it to its saucer. Adjust the timing to the actual conditions around your plant rather than following a fixed schedule.
Keep the plant in a modest, well-drained pot, feed lightly while it is growing, and preserve old flower spurs if you hope to see another bloom. If the leaves change, check the mix and roots before you add water, fertilizer, or pruning. With those simple checks, you can decide what the plant needs without making a small setback worse.