How to Grow and Care for Mint (Without the Takeover)
Mint is easy to grow but hard to contain. Learn which type to choose, how to water it, when to prune, and how to fix yellow leaves or rust.
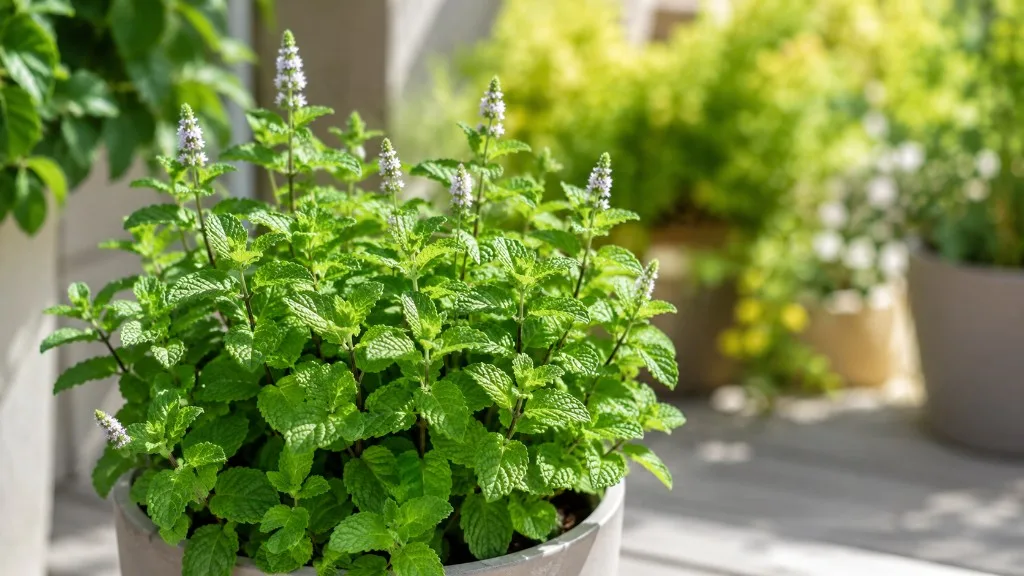
Mint is easy to keep alive, but “easy” does not mean “plant it anywhere and forget it.” A small pot can supply leaves for tea, chutney, salads, sauces, and drinks; an open garden bed can become a tangle of rhizomes and rooting stems before you notice what happened. The best mint care plan starts by deciding where the plant is allowed to grow, then matches light and moisture to the way you harvest it.
The default for most homes is a draining container on a patio, balcony, steps, or sunny windowsill. Give it about four to six hours of direct light, keep the mix evenly moist without leaving it waterlogged, and cut young shoots often. If you want mint in the ground, treat it as a managed colony rather than an ordinary herb in a mixed border.
What mint is and why containment comes first
Mint is a group of plants in the genus Mentha, within the Lamiaceae family. Most garden mints are herbaceous perennials: they can die back in cold weather and return from underground growth, or stay leafy longer in mild climates. Their square stems, opposite leaves, fragrance, and rapid regrowth make them useful culinary herbs and unusually effective escape artists.
The important word is rhizome. A rhizome is a modified underground stem that can travel sideways and produce roots and shoots. Mint can also spread when a long stem bends onto damp soil and roots at a node. NC State Extension describes spearmint as spreading by rhizomes and by stems that root wherever they touch the ground, which explains why trimming alone never solves an in-ground containment problem (NC State Extension).
Many mints are vigorous enough to fill a pot quickly, and that is a benefit when your goal is frequent harvests. It becomes a liability when roots exit through drain holes, stems root into neighboring soil, or fragments are left behind during digging. A container is not just a convenience for mint; it is the simplest physical boundary between a productive herb and the rest of the garden.
Spearmint, peppermint, and specialty mints
Spearmint (Mentha spicata) is the usual garden mint or pudina: bright green leaves, a sweet and relatively gentle flavor, and broad culinary usefulness. It works well for tea, chutney, raita, salads, sauces, and drinks. Peppermint (Mentha × piperita) is a hybrid with a sharper, cooler flavor and darker, often narrower leaves; NC State notes that it prefers rich, moist soil and can do well with only a few hours of sun when conditions are otherwise suitable (NC State Extension peppermint).
Apple mint, chocolate mint, pineapple mint, orange mint, and other named types follow the same containment rules even when their foliage or flavor differs. Variegated types can scorch in harsh afternoon sun, while a shade-tolerant variety may grow lanky and less aromatic if light is too weak. If flavor matters, buy a named plant or multiply a known plant by cuttings or division rather than assuming a seedling will match its parent.
Do not confuse culinary mint with every plant sold under a mint-like name. Pennyroyal (Mentha pulegium) is a related plant that the RHS flags as harmful if eaten; it is not a substitute for spearmint in the kitchen (RHS mint guidance). Read the botanical name on the label when safety or culinary use matters.
Choose a container or the ground before planting
For most gardeners, an above-ground pot is the best choice. It lets you lift the plant, inspect the drain holes, divide the root ball, move it to safer light, and keep escaping stems from contacting garden soil. Place the pot on a hard surface or stand rather than directly on a bed, lawn, or loose soil; otherwise a root finding the drainage hole may establish outside the container.
Ground planting is reasonable only when you deliberately want a spreading patch and can patrol its edges. Mint can serve as a managed groundcover in a moist, isolated area, but it is a poor fit for the middle of a mixed herb border. Decide based on the future maintenance you accept, not on whether the plant looks small when you buy it.
Build an above-ground container that blocks escape
Use a pot with several open drainage holes and a mix that holds some moisture while still draining freely. A container about 12 to 16 inches wide gives a vigorous mint enough root room without turning the plant into a huge, unmanageable mass; the exact size depends on the variety, climate, and how often you harvest. The pot should be wide enough that the plant does not dry out by midday, but not so oversized that a small root ball sits in a large reservoir of wet mix.
Set the pot where you can see the rim and the surface around it. Once a week during active growth, look for pale runners leaving the drain holes, stems leaning onto the ground, and roots circling densely at the bottom. Remove a rooted escapee immediately while it is still a small piece instead of waiting for a second crown to form. Practical container guidance also warns that stolons can bridge neighboring pots when containers are crowded together (Aussie Green Thumb).
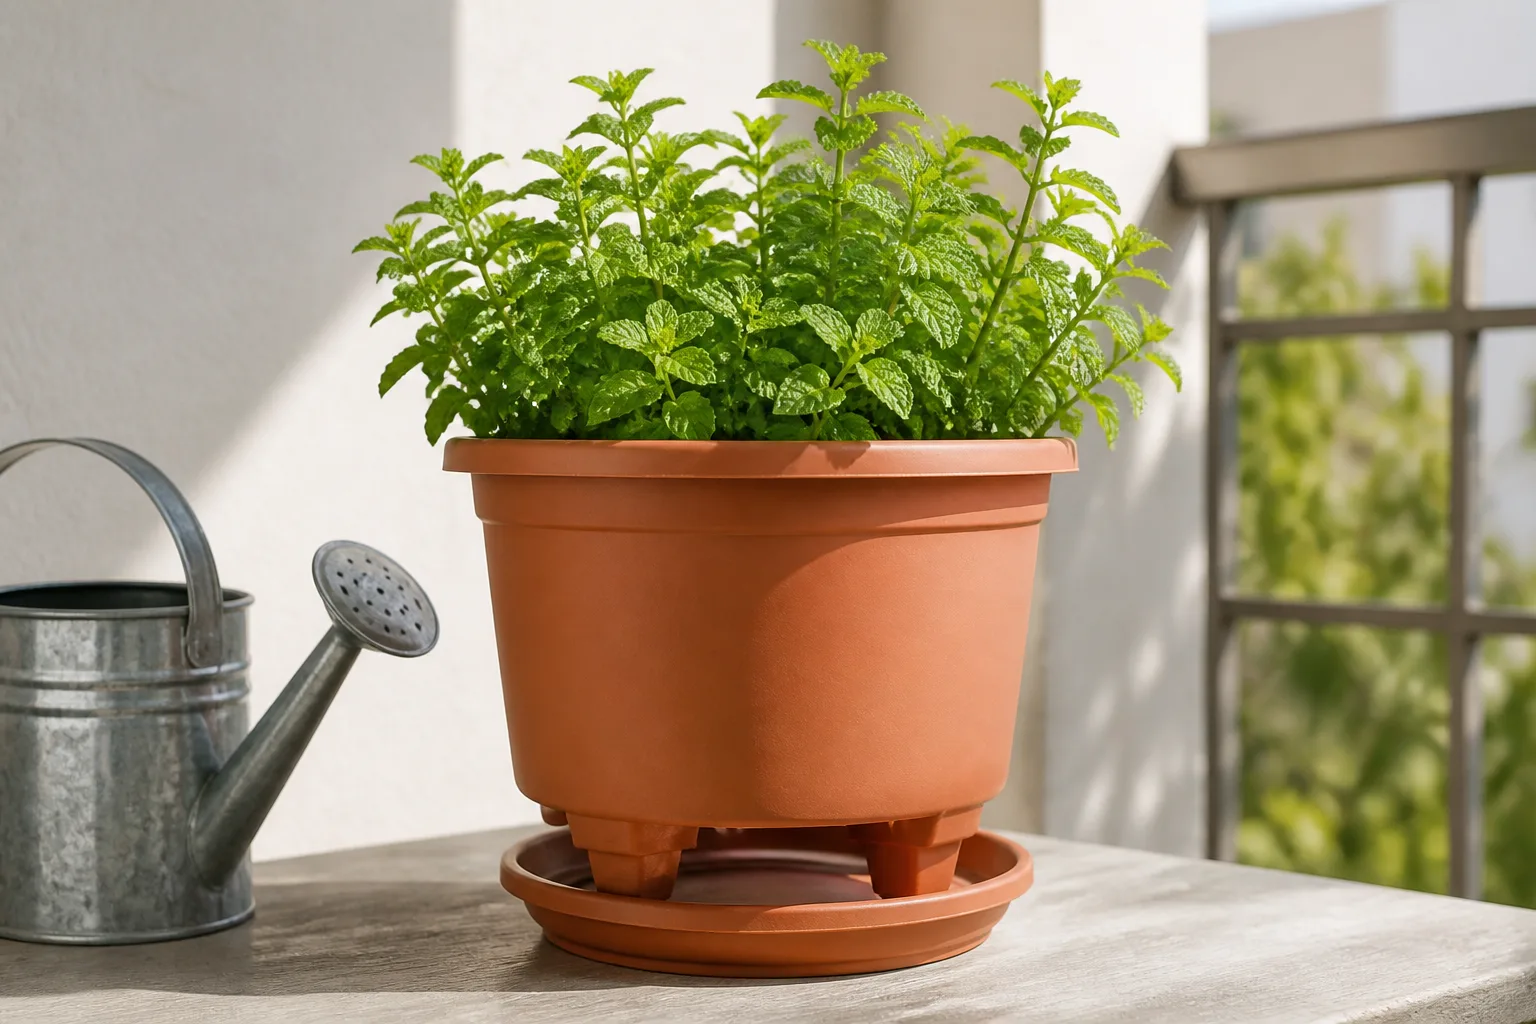
If you grow several varieties, give each its own pot. Mint plants can cross-pollinate, and runners can also make the pots physically mingle. Separation keeps flavors easier to identify and makes it possible to discard one plant if it develops a serious disease without disturbing every mint in the collection.
When a buried pot or dedicated bed makes sense
A buried container can work when you want mint at ground level but still want a boundary. Use a bottomless container or a purpose-built root barrier that allows drainage, leave the rim slightly above the surrounding soil, and keep shoots from rooting over that rim. Utah State University Extension recommends a buried container extending several inches above the soil and roughly 10 to 15 inches below it for containing spreading roots (Utah State University Extension).
Do not bury an ordinary closed pot flush with the soil and assume the job is finished. It can hold too much water around the roots, and mint can still escape over the lip or through cracks and holes if the edge is hidden. A dedicated bed can be simpler when you have an isolated space, a visible edge, and time to remove new shoots each season.
Plant mint for active growth
Plant nursery mint after the danger of frost has passed in cold climates, or in the cooler part of the growing season where summers are extreme. Set the root ball at the same depth it was growing, water it in, and leave a little room around the crown for air movement. Do not bury the stems deeply; the plant will produce its own rooting points.
Newly planted mint needs a steadier moisture supply while roots move into the surrounding mix. Once it is established, let the condition of the pot—not a weekly reminder—set the watering rhythm. Container plants in hot sun may need checking daily, while a shaded, cool pot can remain damp for several days.
Give mint enough light without scorching it
Mint grows best in full sun to partial shade. UC Integrated Pest Management recommends at least four to six hours of light daily and advises keeping mint away from places watered by lawn sprinklers (UC IPM). That range is a practical target, not a demand that every variety receive the same exposure all day.
Use brighter light when you want short stems, dense foliage, and strong flavor. If the leaves bleach, crisp at the edges, or wilt soon after a hot afternoon, move the pot toward morning sun and afternoon shade, especially for pineapple mint and other variegated types. If stems stretch, leaves become widely spaced, and the plant has little aroma, light is probably too weak; prune the lanky growth and move it gradually brighter.
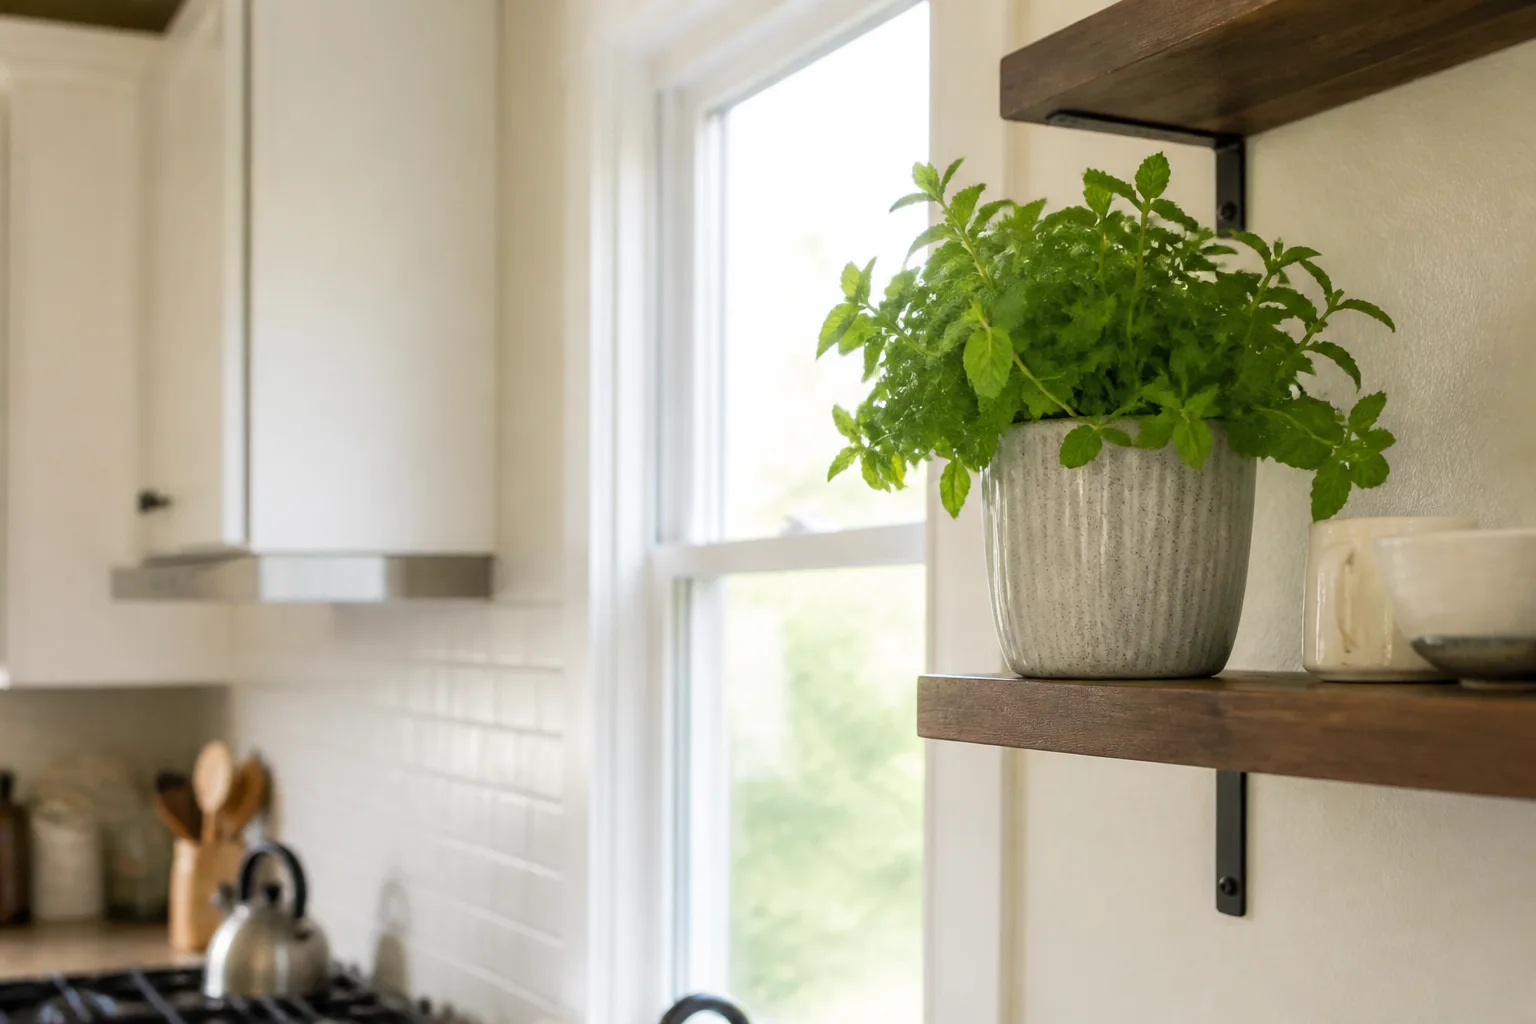
Indoor mint needs the brightest window you have. A kitchen windowsill can work if the glass is not freezing at night and the pot does not sit beside a heating vent. Turn the container every few days so one side does not lean permanently toward the light, and remember that a warm room with weak winter light dries the mix more slowly than a sunny summer patio.
Balance moist soil with fast drainage
Mint likes moisture, but it does not like a stagnant root zone. UC IPM recommends well-drained soil around pH 6.0 to 6.5, while other mints tolerate a somewhat broader range; the practical goal is a loose, fertile mix that stays lightly moist without forming a saturated layer at the bottom (UC IPM).
Use quality potting mix amended with a modest amount of mature compost. Add perlite, pumice, or coarse material if the mix collapses into a dense, slow-draining mass. Do not build a separate gravel layer under the soil; it does not replace a drainage hole. The pot, mix, and placement have to work together.
Check moisture before watering by pressing a finger about an inch into the mix and lifting the pot if you can. Water thoroughly when the upper layer has begun to dry and the container feels lighter, then let excess drain and empty any saucer. A calendar interval can be a useful observation after you learn your pot, but it is not a rule to impose on every season.
Feed mint only when the plant needs it
Mint is a leafy herb, so it needs nutrients for growth, but it is not a plant that improves indefinitely with more fertilizer. In rich soil or fresh potting mix, extra feeding may add salt stress and soft, excessive growth without improving flavor. Utah State University Extension warns that overwatering and overfertilizing can promote rust and diminish mint oil production (Utah State University Extension).
Start with compost or a quality mix. If a container plant is actively growing but produces pale new leaves, very small leaves, or weak growth after you have ruled out low light and root problems, use a balanced fertilizer labeled for edible herbs at the label rate. One spring application of a slow-release complete fertilizer may be enough for a garden plant in nutrient-poor soil; repeated liquid feeding is not automatically better.
Stop and reassess if leaf tips burn, the surface develops a crust, or the plant grows soft and floppy after feeding. Flush a container with clean water if the product label permits and the mix is draining, then wait for fresh growth before applying anything else. Never use a random ornamental pesticide or fertilizer schedule on a crop you plan to eat.
Prune and harvest for bushy, flavorful growth
Harvesting is the most useful pruning routine for mint. Once the plant has several stems and is at least a few inches tall, cut young tips just above a pair of leaves or a node. New side shoots can develop from that point, so repeated tip harvests gradually produce a shorter, fuller plant instead of a few long stems.
Pick in the morning after dew dries if you want the leaves at their freshest. Choose tender shoot tips for the strongest flavor, and take enough to use without stripping a small plant bare. An established mint can tolerate a hard cutback; if stems become long with small leaves, cut the plant back by about one-third to one-half and give it strong light and appropriate water while it regrows.
Flowering is a choice, not automatically a failure. Mint flowers support pollinators, so you can leave a few stems to bloom. If your priority is tender culinary foliage, pinch flower buds or cut back after flowering; Utah State Extension recommends cutting plants close to the ground before bloom for a major harvest, and the RHS says cutting flowered stems back to about 5 cm encourages fresh young shoots (Utah State University Extension; RHS mint guidance).
Store a small harvest in the refrigerator for several days to about a week, or freeze chopped leaves in water in an ice-cube tray. Freezing generally preserves the fresh aroma better than drying. For a large harvest, remove damaged leaves, dry the stems in shade with good airflow, and store the brittle leaves in an airtight container.
Propagate mint from cuttings, division, or seed
Mint is one of the easiest herbs to multiply, which is another reason containment matters. A new plant made from a cutting or division is genetically the same as the parent, so it is the reliable route when you want to preserve a particular spearmint, peppermint, or specialty flavor. Seed is useful when you are experimenting, but hybrid mints may not come true.
Root stem cuttings in water
Take a healthy, non-flowering stem four to six inches long and cut just below a node. Remove the lower leaves so none sit underwater, then place the stem in a clean jar with the lower node submerged and the leaves above the water. Keep it in bright, indirect light and refresh the water every few days.
Roots may appear within one to two weeks. When they are about an inch or two long and the cutting resists a gentle tug, pot it into a small container of moist, draining mix. Keep the new plant evenly moist for its first week, then increase light gradually. The RHS describes mint as readily rooting in water and also recommends softwood cuttings and division as dependable vegetative methods (RHS mint cuttings). Epic Gardening likewise treats cuttings, division, and container growing as the practical way to expand a mint collection without relying on variable seed (Epic Gardening).
You can also place a cutting directly into damp potting mix, but water rooting makes it easier to see whether the stem is alive. Do not leave a supermarket bunch in water indefinitely; once roots form, pot it up, quarantine it from your collection, and inspect for aphids or fungus gnats before placing it beside other plants.
Divide established plants and handle seed carefully
Divide an overcrowded pot in spring or after flowering. Slide the root ball out, separate it into sections that each contain roots and several shoots, discard dead material from the center, and replant divisions at the same depth. Division is also a useful way to refresh an old plant that has filled a pot and slowed down despite suitable care.
For seed, sow lightly on the surface of a damp seed-starting mix, press it in, and keep the surface moist until germination. Move seedlings into small pots once they have several true leaves. Expect variation: peppermint and many specialty mints are hybrids, so a seedling may differ in flavor, leaf shape, or vigor from the plant that supplied the seed. Choose cuttings or division when sameness matters.
Keep mint productive through winter
Many culinary mints are cold-hardy perennials, but hardiness depends on the species, climate, and whether the roots are in open ground or a small exposed pot. A plant in the ground has more insulation around its roots than one sitting above a patio in a thin container. In cold areas, move potted mint to a sheltered, unheated location or sink the pot into the soil before deep freezing, while still preventing drainage holes from becoming blocked.
Outdoor mint may naturally slow down or die back. Cut away old, diseased growth before spring growth starts, but do not mistake winter dormancy for death if the crown and roots are firm. In mild climates, continue harvesting lightly while the plant is actively growing.
To grow mint indoors through winter, bring a healthy pot inside before frost, inspect the undersides of leaves and the soil surface, and place it in the brightest window available. Reduce watering as light and growth decline; cool, dim, wet soil is more dangerous than a slightly drier mix. Keep the plant away from heating vents, and quarantine it if you see webbing, sticky residue, or flying insects.
Diagnose common mint problems
Mint usually fails because the conditions around its roots or stems are wrong, not because it needs a complicated product. Start with three questions: Is the mix dry or wet at root depth? Is the plant getting enough usable light? Is the symptom on a few old leaves, or on new growth across the plant? Those answers narrow the fix faster than adding fertilizer.
Separate drought, soggy roots, and low light
Wilting with dry, crumbly mix points to underwatering or a pot that has become root-bound and dries too quickly. Water deeply, confirm that the root ball is actually absorbing water, and check again the next day. If water races down the sides and out immediately, the mix may have shrunk away from the pot or become hydrophobic; repot during active growth if a thorough soak cannot rehydrate it.
Yellow, soft leaves with wet mix or a squishy stem suggest excess moisture, poor drainage, or root damage. Stop watering until the upper layer dries, move the pot into brighter light with airflow, and inspect roots if the problem continues. Healthy roots should not smell sour or collapse between your fingers. Remove rotten tissue with clean tools and repot into fresh, draining mix only when the root problem is confirmed.
Long internodes, small leaves, and weak aroma usually indicate insufficient light or continual harvesting from old, exhausted stems. Move the plant brighter gradually, cut back the lanky growth, and wait for healthy new shoots. Do not compensate for low light with more fertilizer; that often produces softer growth and a wetter pot.
Brown edges after a sudden hot move can be sun or heat stress, especially on variegated mint. Move it to gentler morning light, keep the root zone evenly moist, and remove only tissue that is fully dead. Brown, crisp leaves from drought are not treated the same way as limp, yellow leaves from waterlogged roots.
Respond to rust, leaf spots, and pests
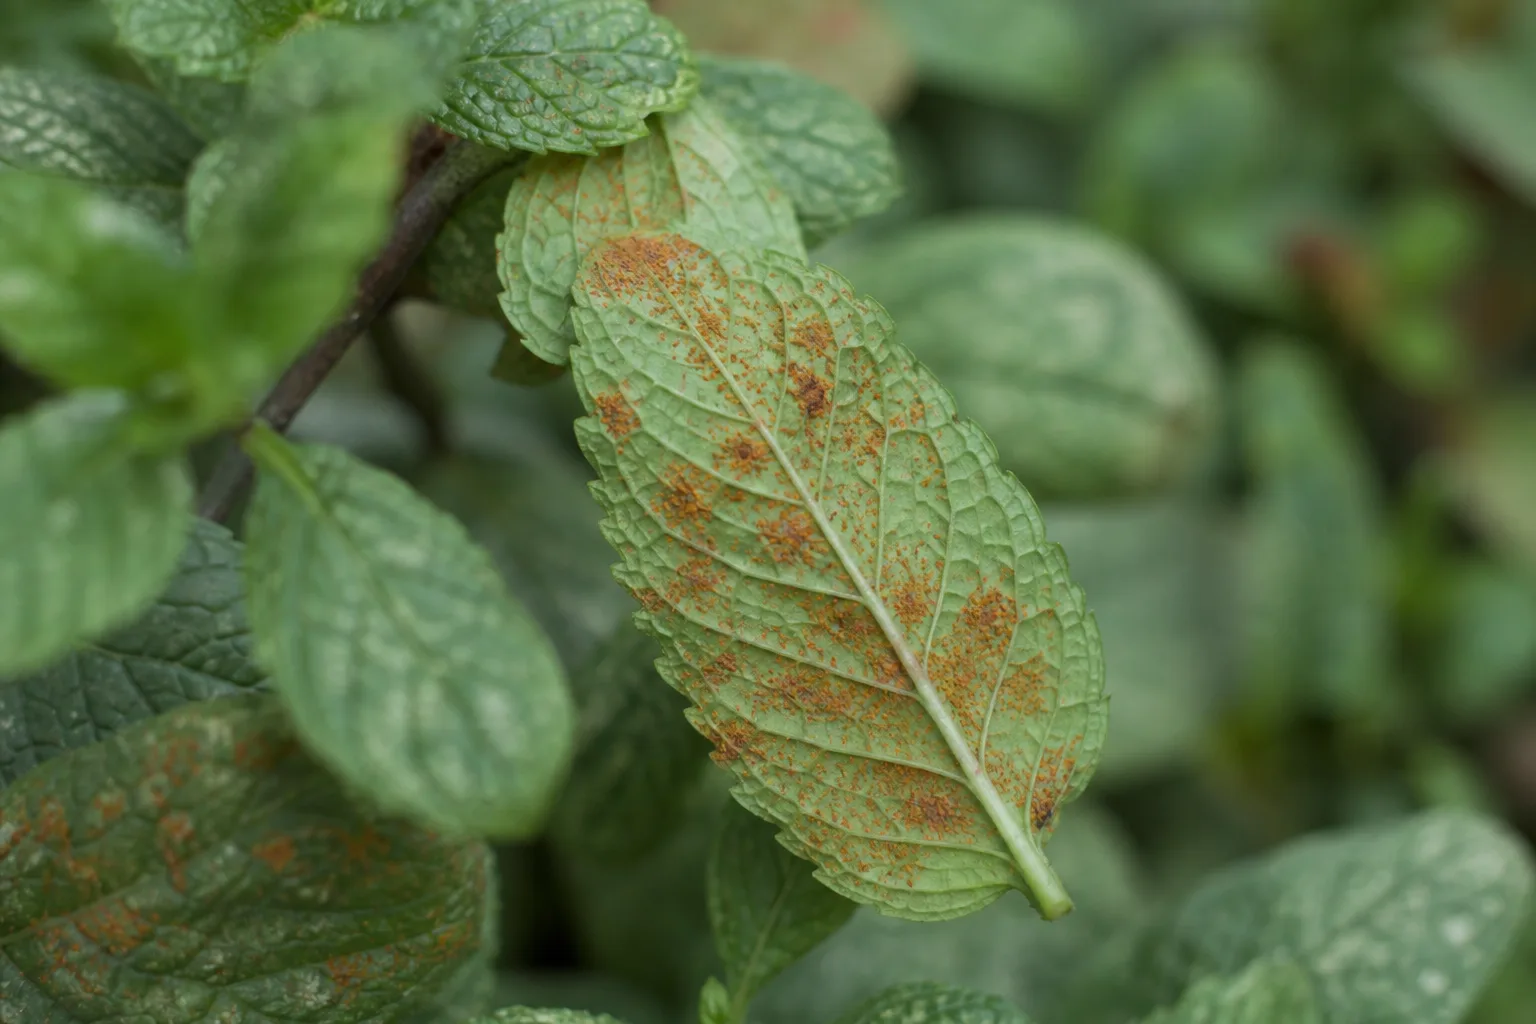
Mint rust begins as small pale or raised spots that develop into orange, reddish, or brown dusty areas, often on the undersides of leaves. USU Extension recommends avoiding wet leaves overnight and using soil-level or drip watering where possible (Utah State University Extension). Remove badly affected leaves, clean up fallen debris, increase airflow, and avoid carrying infected cuttings to another pot.
Leaf spots, anthracnose, and wilt can also worsen when foliage stays wet, plants are overcrowded, or old infected debris remains nearby. Do not jump straight to a fungicide on an edible herb. Identify the pattern, remove affected material as appropriate, and use a product only when it is labeled for the crop, disease, and harvest interval in your area.
Aphids, spider mites, whiteflies, caterpillars, and other pests are more likely when mint is stressed or crowded. Check leaf undersides and new tips weekly, isolate a pot with a confirmed infestation, and knock soft-bodied insects off with a firm stream of water if the plant tolerates it. For any soap, oil, or pesticide, follow the label for edible herbs; concentrated essential oils are not a harmless substitute for diagnosis or a registered treatment.
Mint’s smell may be unpleasant to some insects, but a fragrant pot is not a dependable pest-control barrier. Treat mint as a crop that can still host pests, and use inspection, sanitation, airflow, and correct identification rather than relying on a repellent claim.
Keep culinary mint away from pets
Mint is a food herb for people when it is correctly identified and used as an ingredient, but that does not make the plant safe for every animal. The ASPCA lists Mentha species as toxic to dogs, cats, and horses because of essential oils; large ingestions can cause vomiting and diarrhea. If a pet eats a substantial amount, contact a veterinarian or ASPCA Animal Poison Control at (888) 426-4435 promptly (ASPCA).
Keep mint pots where pets cannot chew them, especially when a cat or dog can jump onto a kitchen sill. Be more cautious with concentrated peppermint or mint oils, which are not equivalent to a few chopped leaves in food. Also label specialty plants clearly: a plant that smells minty is not necessarily a culinary Mentha species, and pennyroyal should not be treated as kitchen mint.
Conclusion
The reliable way to grow mint is to make its vigor work for you. Start with a named culinary type, put it in a draining container on a hard surface, and give it four to six hours of useful light. Keep the mix lightly moist but never stagnant, feed only when growth shows a real need, and harvest young tips above nodes so the plant stays compact.
Check the rim, drain holes, and surrounding ground regularly because pruning cannot stop underground spread. Propagate by cuttings or division when you want a true-to-type plant, allow a few flowers if pollinators matter, and cut back the rest when tender foliage is the priority. If the plant looks unhappy, test moisture, light, roots, and leaf undersides in that order. That simple routine gives you the main reward of mint—fresh leaves on demand—without letting a small herb become the hardest plant in the garden to remove.



