How to Grow Spinach: Planting, Care, and Harvest
Learn how to grow spinach from seed, time spring and fall sowings, prevent bolting, water evenly, grow it in pots, and harvest tender leaves.
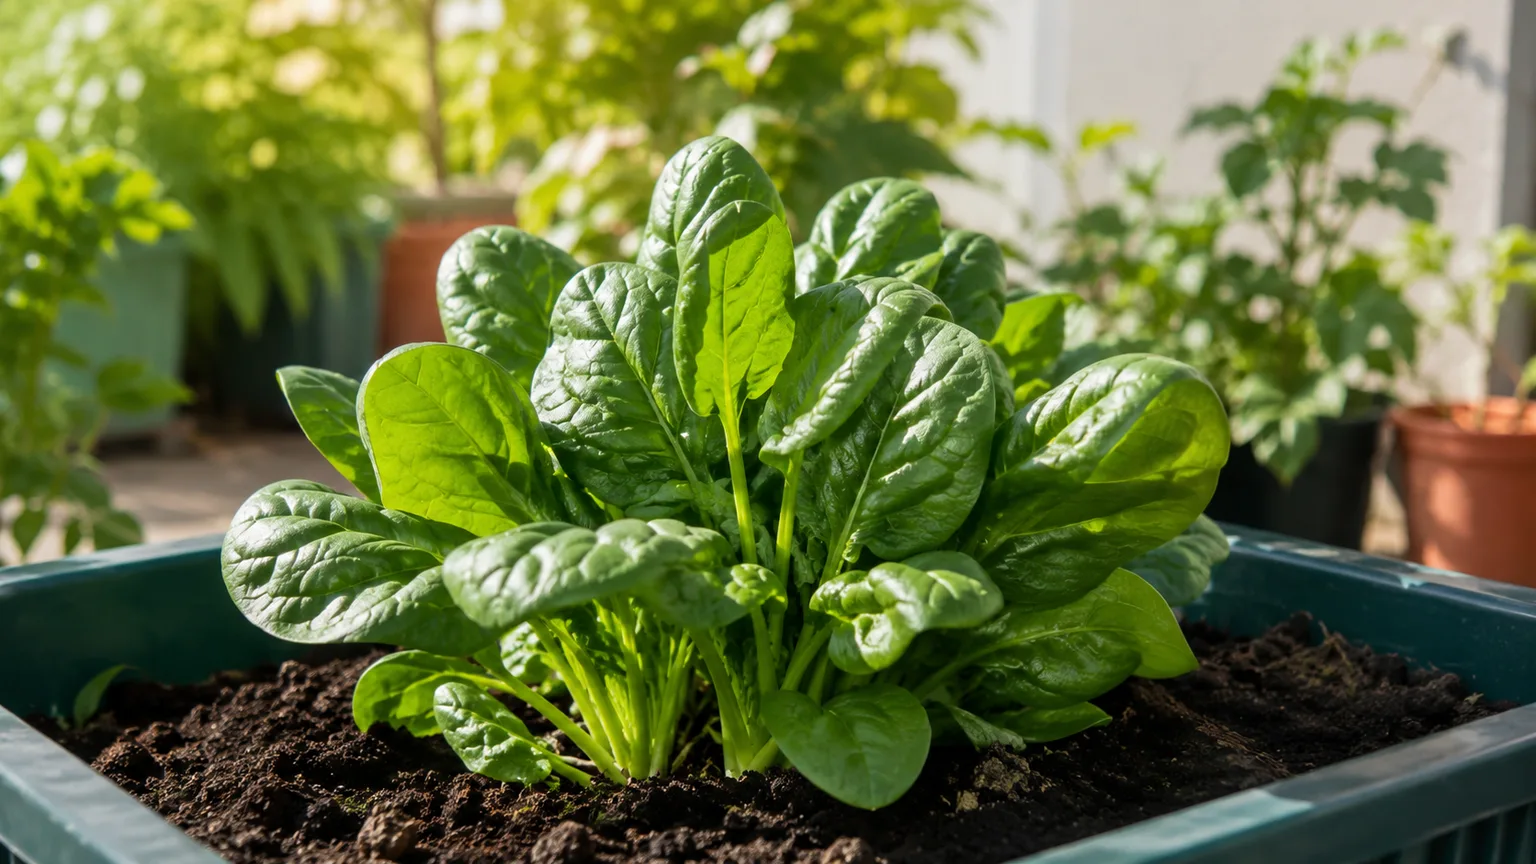
Spinach grows quickly when its seed and roots stay cool, evenly moist, and free of competition. For a reliable crop, sow directly into workable soil in early spring, then sow again in late summer for fall; the goal is to have leafy growth before heat and lengthening days push plants to flower.
The calendar varies by region, so use your frost dates as a starting point and soil conditions as the deciding cue. This guide covers how to choose a variety, sow and thin seed, grow spinach in a pot, prevent common setbacks, and harvest leaves while the plants are still in their compact rosettes.
The Fastest Route to Tender Spinach
Choose a site that gets sun in cool weather and some afternoon shade where spring warms early. Work compost into loose, well-drained soil, sow fresh seed about ½ inch deep, and keep the seedbed damp until seedlings emerge; spinach seed germinates best in cool soil, with extension guidance clustering around roughly 45°F to 68°F. (Penn State Extension, Utah State University Extension)
Thin seedlings to about 4 to 6 inches apart if you want substantial leaves from individual rosettes, or keep them closer for baby-leaf picking. Water whenever the soil begins to dry, weed shallowly, and start harvesting outer leaves once plants are established. Sow a short row every 10 to 14 days while weather remains cool so one crop does not have to supply the whole season. (Harvest to Table)
Choose a Variety for Your Season and Plate
Spinach varieties differ in leaf texture, maturity, disease resistance, and how slowly they bolt. If you are choosing only one packet, select a variety recommended for your season and local conditions rather than assuming all spinach behaves the same; check the current seed packet for days to maturity and resistance claims, which can vary by strain.
For spring and fall, ‘Melody’ and ‘Tyee’ are useful examples of productive types with some downy-mildew resistance, while ‘Olympia’ is a smooth-leaf type noted for slower bolting. ‘Bloomsdale Longstanding’ has crinkled leaves and is often used for fall or overwintering crops, but winter survival depends on local conditions and protection. Resistance slows particular diseases; it is not immunity. (University of Wisconsin–Madison Extension)
Smooth, savoy, and semi-savoy leaves
Smooth spinach has flat leaves that are easier to rinse clean, which can be convenient for frequent fresh use or freezing. Savoy types have puckered leaves that catch more soil but give the familiar crinkled look; semi-savoy varieties sit between the two. Leaf texture is a kitchen preference, not a reliable shortcut for predicting how heat-tolerant a variety will be, so use the cultivar description for bolting and disease traits.
If spring heat arrives early where you live, a slow-bolting variety can buy a little time, but it cannot turn spinach into a summer crop. Gardeners in hot-summer climates usually get a better return by treating spinach as a fall, winter, and early-spring vegetable, then growing a warm-weather substitute such as New Zealand spinach or Malabar spinach after the cool season ends. These are different species with different growth habits, not varieties of true spinach. (University of Wisconsin–Madison Extension, Harvest to Table)
Prepare a Loose, Moist, Well-Drained Bed
Spinach performs best in fertile soil that holds moisture without staying saturated. A raised bed is useful in heavy or slow-draining ground, while a garden bed benefits from compost worked into the top layer before planting. Spinach can form a substantial taproot, so loosen compacted soil rather than planting into a hard crust; avoid turning the whole bed repeatedly after seedlings appear because the young roots are easy to disturb. (Penn State Extension, Utah State University Extension)
Choose a spot that is sunny during cool weather. In a warm spring climate, light afternoon shade can keep leaves cooler and slow drying, but dense shade limits growth and makes the bed stay damp longer. Good drainage and air movement matter most during cool, wet spells, when crowded leaves can remain wet and disease pressure rises.
Before adding fertilizer, look at the bed’s history and, if available, use a soil test. Incorporate compost if the soil needs organic matter, but do not automatically apply a high-nitrogen fertilizer to every bed; Utah State and Wisconsin Extension recommend matching fertilizer to soil needs, and excess feed will not compensate for poor timing, soggy ground, or heat. For an established bed, follow the soil-test recommendation and product label rather than guessing a dose. (Utah State University Extension, University of Wisconsin–Madison Extension)
Time Spring and Fall Sowings by Weather
Spinach is a cool-season crop, but the best planting date depends on the season you want and how quickly your weather shifts. Frost dates help you count backward, while workable soil and a cool forecast tell you whether the bed is ready. Seed is usually sown earlier than tender transplants because spinach tolerates cool conditions once established, but it still needs moisture and time to put on leaves before heat or winter slows growth.
Spring: sow as soon as soil is workable
In many U.S. gardens, direct-sow spinach roughly four to eight weeks before the average last spring frost, as soon as the bed can be worked and soil temperatures are cool. Penn State Extension recommends that window and gives 45°F to 68°F as a favorable seed-germination range; Utah State notes that soil near 55°F to 65°F is especially favorable and that temperatures above 80°F reduce germination. That is why spinach can be planted before the last frost, but may struggle when gardeners wait for settled warm weather. (Penn State Extension, Utah State University Extension)
Use the seed packet’s maturity estimate as a planning guide, not a promise. Spring sowings have a short window between emergence and the combination of warmer days and lengthening daylight; two small plantings spaced about 10 to 14 days apart are often more dependable than one large row. Stop sowing when forecast conditions make it unlikely that a new crop will reach a useful size before bolting.
Fall and winter: count back from slow growth
For fall, sow early enough for the plants to grow before short days and cold weather slow them down. Penn State suggests roughly six to eight weeks before the average first fall frost; Utah State recommends using the variety’s maturity estimate and allowing a buffer around the expected first frost. In warm regions, fall is often the easiest season because the soil cools while daylight is still sufficient for active leaf growth. (Penn State Extension, Utah State University Extension)
Spinach can continue through light frosts, and an established plant may survive winter under a cold frame, row cover, or mulch, depending on climate and cultivar. Growth may nearly stop in the coldest stretch, so do not expect winter leaves to expand at the pace of spring leaves. To overwinter spinach, aim to have plants established before hard freezes, protect them from repeated freeze-thaw and drying wind, and remove or open covers on mild days to prevent overheating. If your winters are severe, plan on a fall harvest rather than counting on a spring comeback. (University of Wisconsin–Madison Extension, Utah State University Extension)
Direct-Sow and Thin for the Leaves You Want
Direct sowing is simple and avoids the root disturbance that can slow transplanted spinach. Rake the bed level, water it before sowing if the soil is dry, and make a shallow furrow about ½ inch deep. Drop seeds roughly 2 inches apart, cover lightly, and water with a fine spray so the seed is not washed out; rows about 12 to 18 inches apart leave room to weed and harvest. (Penn State Extension)
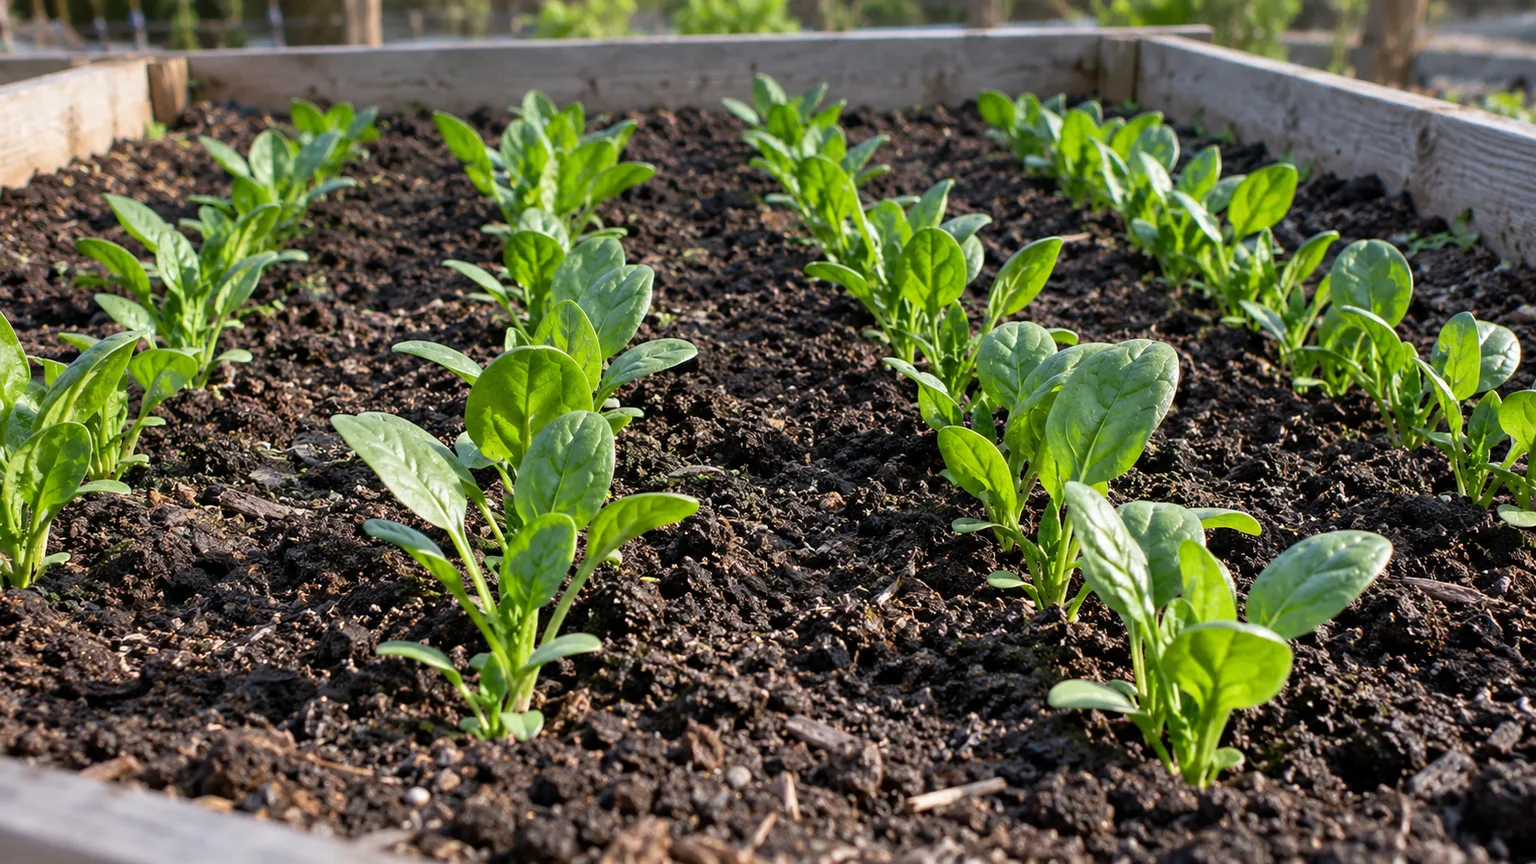
Keep the top layer evenly moist while the seeds germinate. Under good cool conditions, seedlings may appear in about a week, though cooler soil takes longer; spinach seed often loses germination power with age, so use fresh seed when possible. If nothing has emerged after roughly two weeks, check whether the soil dried, crusted, or became warm, and test a few seeds in a cool damp spot before resowing the entire bed. (Penn State Extension, Utah State University Extension)
Thin once seedlings are a few inches tall and have true leaves. For full-size rosettes, leave about 4 to 6 inches between plants; for baby leaves, closer spacing is workable if you harvest young and keep air moving through the row. Snip extra seedlings at soil level rather than pulling them beside plants you are keeping, which reduces root disturbance; the thinnings can go into a salad if they are clean and undamaged. The different spacing recommendations in extension guides reflect different harvest goals, not a single magic distance. (Penn State Extension, University of Wisconsin–Madison Extension)
Spinach can be transplanted, but handle it young and move the root ball intact. If a bed is not ready or the season is already moving, individual cells are easier to plant out than a crowded tray whose roots must be teased apart. Do not hold transplants in small cells until they are root-bound; a delayed transplant loses the advantage of an early start.
Water Consistently and Fertilize With Restraint
Spinach leaves grow quickly, and uneven water slows that growth and can make leaves tough. Keep the root zone evenly moist rather than alternating between dry soil and a heavy soak; Utah State gives about 1 to 2 inches of water weekly as a starting range but notes that actual need changes with soil and temperature. Check the bed after rain and during wind or warm spells, and water when the soil begins to dry rather than following a fixed weekday schedule. (Utah State University Extension)
Water at the soil line when practical, especially late in the day. Wet foliage is not automatically harmful, but leaves that stay damp overnight in a dense bed are more vulnerable to fungal problems; drip irrigation or a watering wand can reduce splash and keep leaves cleaner. A thin layer of clean mulch can conserve moisture and suppress weeds, but keep it from smothering seedlings or trapping excessive wetness around the crown.
Spinach is a leafy crop, but adding fertilizer whenever leaves look pale is not a diagnosis. Older leaves can yellow from age, saturated soil, root damage, or nutrient problems, and excess fertilizer cannot fix a bed that drains poorly. Start with compost and soil-test guidance; if additional feed is warranted, choose a product labeled for edible vegetables and apply the rate on its label. In containers, use a nutrient-rich potting mix and follow its feeding directions because nutrients leach out faster with repeated watering.
Grow Spinach in Containers
A pot is useful when your garden soil is heavy, rabbits are a problem, or you want a movable spring crop near the kitchen. Choose a wide container with drainage holes and fill it with a quality soilless potting mix; garden soil is too dense for many pots and can drain poorly. Harvest to Table suggests roughly one full-size spinach plant per 8-inch pot, while Penn State recommends a large enough container and a nutrient-rich mix rather than a one-size container recipe. (Harvest to Table, Penn State Extension)
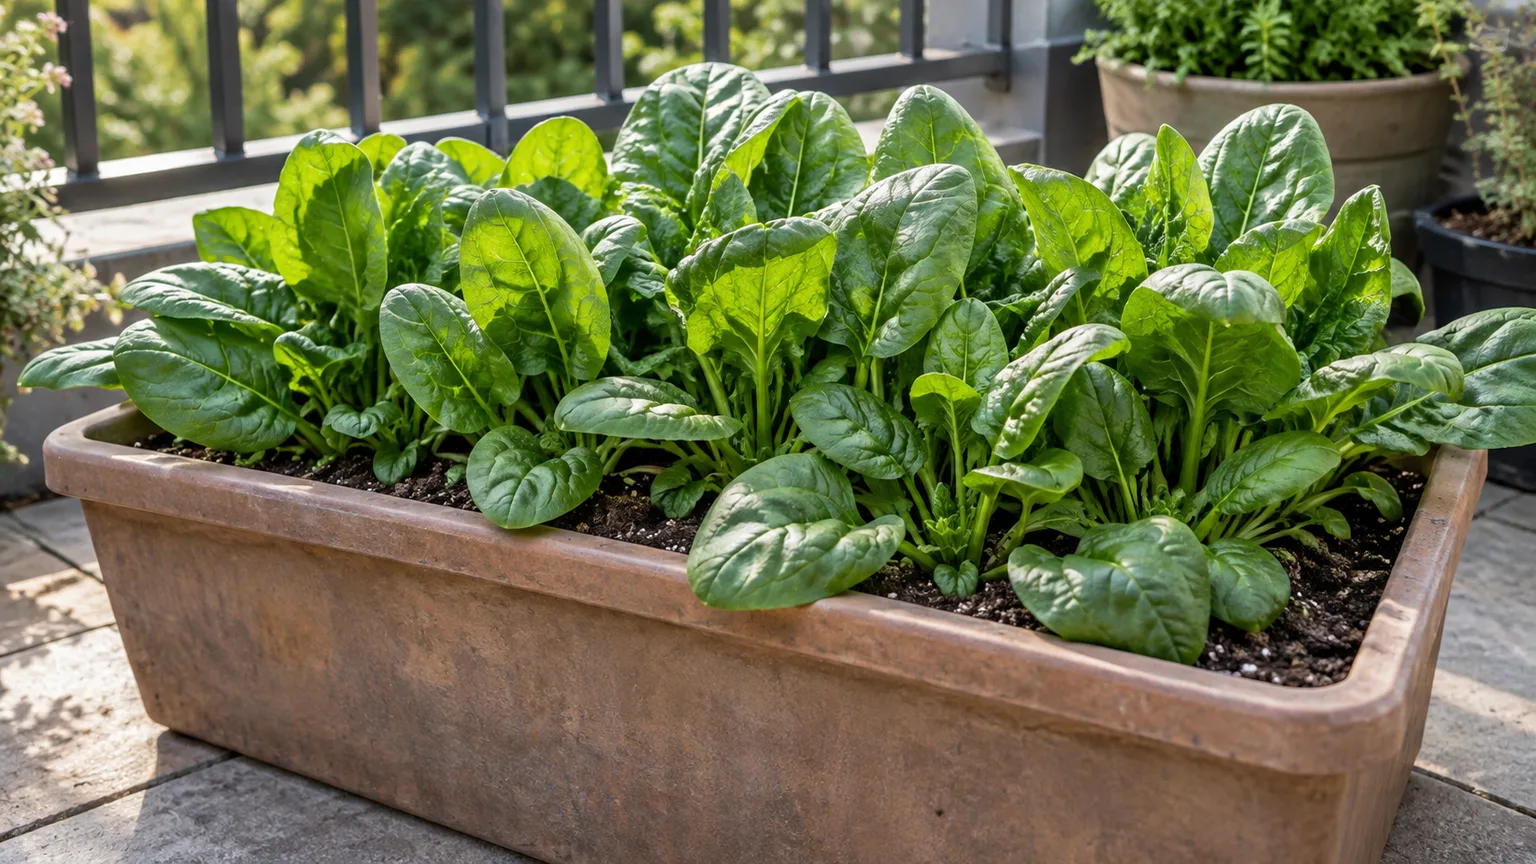
For a steady crop, sow seed directly in the container and thin to the same spacing you would use in a bed. A trough or window box can hold several plants if each has enough room for the harvest size you want; close spacing is best for baby leaves, while mature rosettes need more space. Keep the mix evenly moist, check it more often than garden soil, and move the pot into afternoon shade during warm spells. Containers heat and dry faster than an in-ground bed, so they can bolt early if left on a hot, exposed patio. (Growing Organic)
Reduce Bolting Before It Starts
Bolting is the shift from leaf growth to flowering: the compact center stretches into a taller stalk, and the plant starts making seed. In spinach, warmth and lengthening days both contribute, so a cool spring can still end with bolting once daylight increases. Dry soil and crowded growth add stress; a slow-bolting variety and consistent moisture may extend the harvest, but neither can hold the plant in leaf indefinitely. (University of Wisconsin–Madison Extension, Penn State Extension)
Before bolting, protect the crop with a few practical choices: sow early, use afternoon shade when spring turns warm, mulch lightly to keep the root zone cooler, and avoid letting plants dry out. A floating row cover can exclude some insects and buffer a light frost, while shade cloth can help during a brief warm spell; these covers do not make spinach immune to long hot days. Do not crowd a row in the hope that leaves will shade each other—poor airflow can create a different problem.
Once a central stalk begins to rise, harvest the remaining leaves promptly. Cutting off the stalk may make the plant look tidier, but it does not reliably restore the tender vegetative phase; treat any regrowth as a bonus. Pull the crop when leaves become bitter or the stalk is taking over, then sow another row when the next cool window arrives. For midsummer in a hot climate, switch to a heat-tolerant leafy green rather than repeatedly reseeding true spinach into warm soil. (Penn State Extension, Harvest to Table)
Diagnose Common Spinach Problems
Spinach troubles often start with conditions rather than a mysterious disease: warm soil interferes with germination, dry soil stalls leaf growth, and crowding keeps foliage wet. Look at where symptoms appear and what changed in the weather before reaching for fertilizer or a spray. Remove badly damaged leaves, correct the growing condition, and decide whether the remaining crop still has enough healthy growth to justify keeping it.
Patchy germination or stalled seedlings
If only part of the row germinates, check seed freshness and whether the seedbed stayed damp. A crusted surface can trap seedlings, while soil warmer than about 80°F reduces germination; in that case, shade the bed, wait for a cooler sowing window, or start again in a container that can be moved out of hot sun. Repeatedly watering a saturated bed is not the answer: improve drainage or sow in a raised bed instead. (Penn State Extension, Utah State University Extension)
When seedlings emerge but stop growing, inspect spacing and soil moisture before feeding. Crowded plants compete for light and moisture and are harder to keep dry between leaves; thin them, remove small weeds carefully, and let excess water drain. If a seedling has a damaged or rotting crown, remove it rather than burying it in mulch or applying fertilizer around it.
Aphids, leafminers, slugs, and chewing damage
Aphids cluster on tender growth and leaf undersides, where they can curl new leaves. For a small infestation, rinse them away with a firm stream of water and check again over the next few days; removing a badly infested leaf may be easier than treating the whole bed. Protect seedlings with row cover if aphids or flea beetles are recurring, but lift the fabric on hoops so wind does not rub it against spinach leaves. (University of Wisconsin–Madison Extension, Utah State University Extension)
Leafminers leave winding pale trails or blotches inside the leaf tissue. Remove and discard mined leaves rather than trying to wash out the larvae, and use a floating row cover before adult flies reach the plants; a cover installed after eggs are already on the foliage will not undo existing damage. Slugs make irregular holes and are most active in damp hiding places, so inspect the bed in the evening, clear debris where they shelter, and avoid keeping the crown continuously wet. (University of Wisconsin–Madison Extension)
If rabbits or other animals are taking whole leaves, a floating insect cover is not necessarily enough. Secure the bed with an appropriate physical barrier and check that the edges are closed; otherwise, a healthy crop may disappear overnight. Crop damage from animals is different from disease, so look for cleanly eaten leaves and tracks before removing plants.
Downy mildew, leaf spots, and rot
Downy mildew and leaf spots are more likely in cool, damp, crowded growth. Give plants room, water the soil instead of repeatedly wetting the canopy, rotate the bed when disease is a recurring issue, and choose a cultivar with resistance listed for the disease relevant to your area. Do not assume that every speck or yellow leaf is mildew; compare new leaves with older leaves and check whether the soil is staying wet. (University of Wisconsin–Madison Extension, Utah State University Extension)
Remove leaves that are badly spotted or collapsing, especially if they are touching healthy foliage. If several plants develop soft crowns or a spreading decline in waterlogged soil, stop adding water and improve drainage before replanting. For an edible crop, avoid applying a fungicide based on a guess; use a locally recommended diagnosis and follow the product label if a treatment is needed.
Harvest Outer Leaves or Cut the Whole Rosette
Harvest time is flexible: pick baby leaves as soon as they are large enough to handle, or let plants grow until they have a useful set of mature outer leaves. The seed packet’s days-to-maturity estimate is only a guide because cool soil, cloudy weather, spacing, and variety all change the pace. Start picking before the center stretches upward; once a flower stalk appears, taste a leaf and take the remaining crop if flavor is declining. (University of Wisconsin–Madison Extension, Harvest to Table)
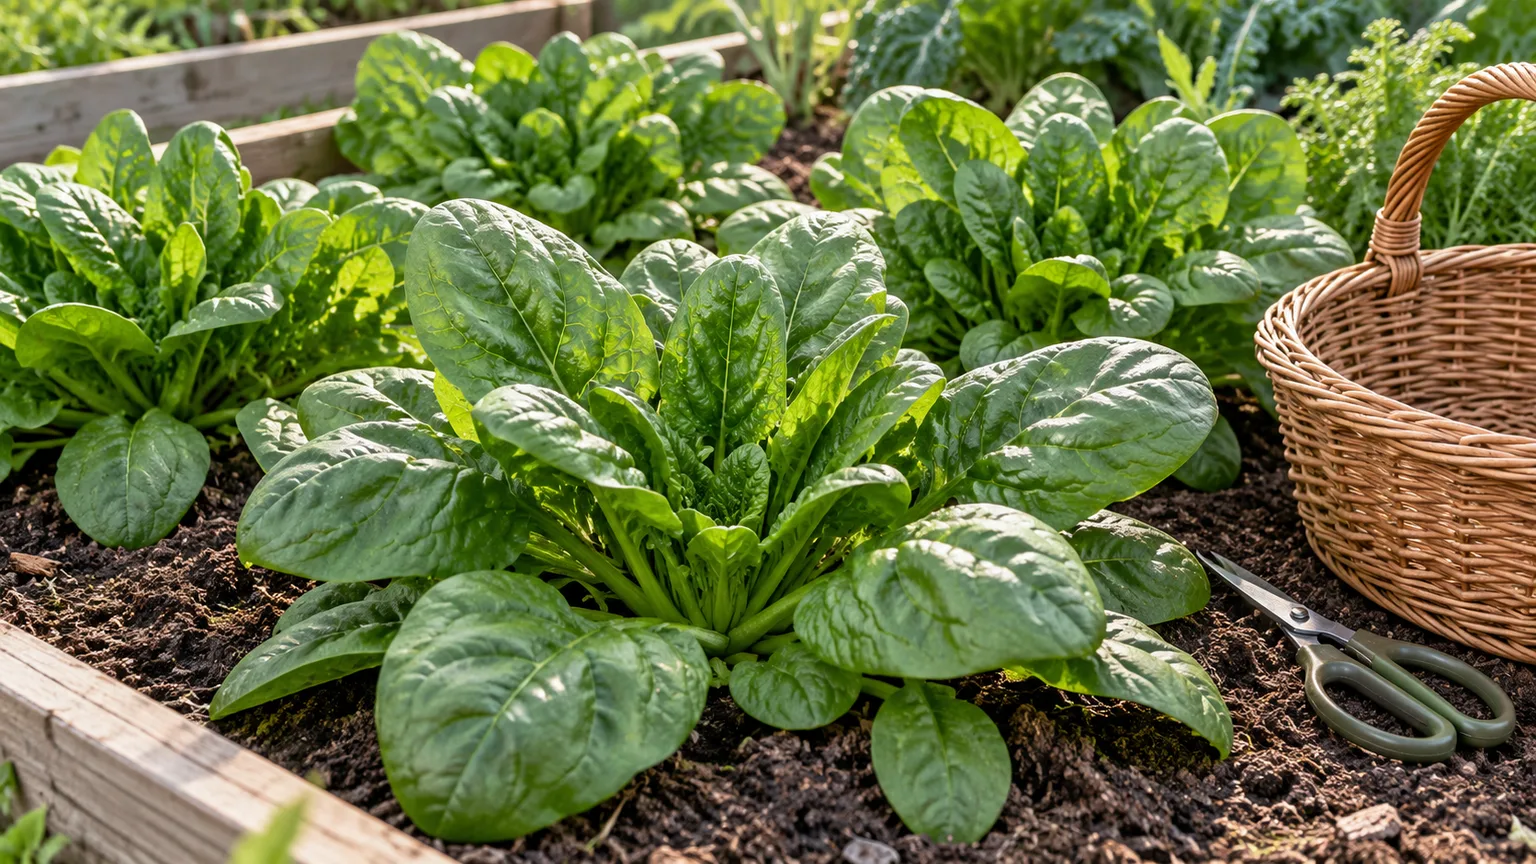
For repeat picking, use clean scissors to cut the largest outside leaves close to the base while keeping the small inner leaves and central growing point intact. Do not strip every leaf from a young plant; it needs enough foliage to keep growing. With a fall crop, selective picking can continue as long as new leaves are forming and the center remains compact. A dedicated spinach harvesting guide covers harvest timing and storage in more detail.
If you need one large harvest, cut the rosette just above the crown and use any later growth as a bonus, not a guarantee. Pull the whole plant only when you are clearing the bed or the crown is damaged, since cutting above the crown keeps soil off the leaves and may leave a chance for regrowth in cool weather. The harvest changes when bolting starts: take the healthy leaves you can use, then remove the plant instead of repeatedly cutting the stalk and waiting for a summer flush.
Wash, Store, and Preserve Your Crop
Spinach leaves often hold grit, especially the crinkled types, so swish them through several changes of cold water and lift them out rather than pouring the dirty water back over them. Dry the leaves well before storing; excess water in a closed container shortens their useful life. Refrigerate promptly in a clean bag or container with a dry towel and use fresh leaves within about a week for best quality. (University of Wisconsin–Madison Extension, Harvest to Table)
For a larger surplus, blanch the washed leaves briefly, cool them quickly, drain well, and freeze in meal-size portions. Frozen spinach works well in cooked dishes where the leaves will be wilted; it will not keep the texture of fresh salad greens. If you have more than you can use, succession sowing a smaller row next time is often easier than trying to preserve one oversized spring harvest.
Conclusion
Spinach is easiest when you treat it as a fast, cool-weather crop rather than a plant that should keep producing all summer. Sow fresh seed in workable cool soil, thin according to whether you want baby leaves or full rosettes, keep moisture steady, and plan a second crop for fall before spring heat and long days arrive.
When growth falters, check the simple causes first: soil temperature, seed age, water, spacing, and drainage. Harvest outer leaves while the center is compact, take the final leaves when a flower stalk rises, and use row cover, shade, or a pot you can move to stretch the season only as far as your local weather allows.