How to Harden Off Seedlings Before Planting
Learn how to harden off seedlings with a flexible 7–14 day plan for sun, wind, temperature, and watering, plus cold-frame and weather-delay advice.
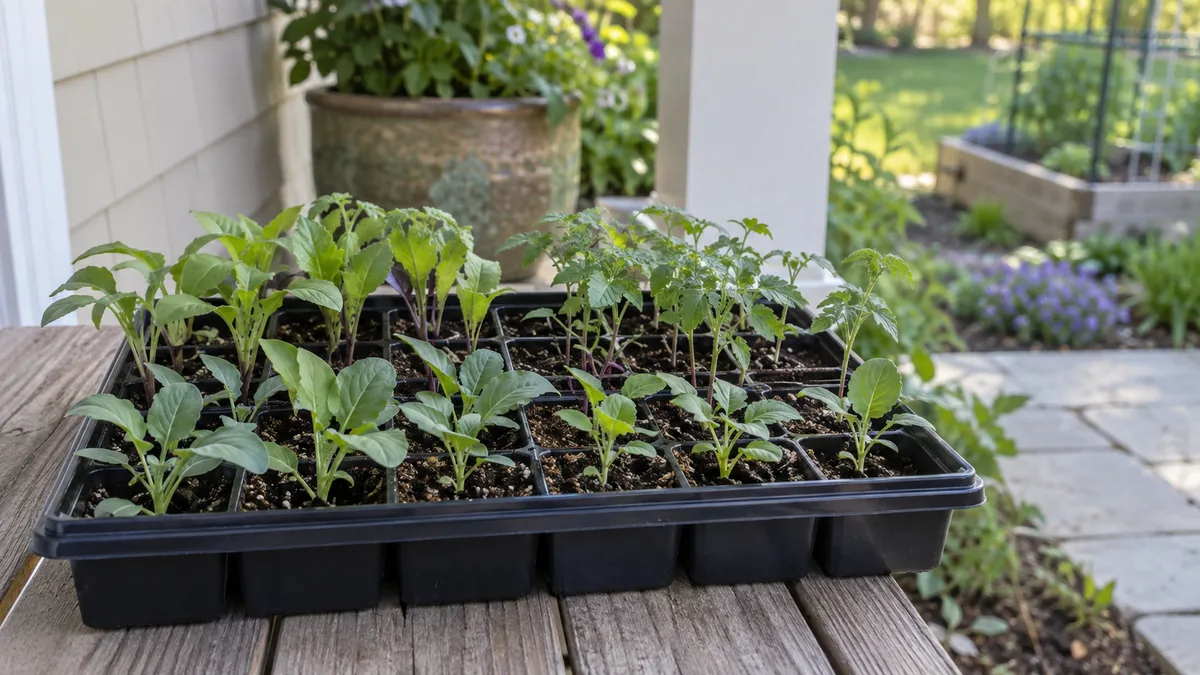
Indoor seedlings can look vigorous under grow lights and still be unprepared for a real garden. Outside, sunlight is stronger, wind pulls moisture from leaves and potting mix, rain can flatten tender stems, and night temperatures swing more sharply than they do in a house. Hardening off seedlings means introducing those conditions in manageable steps before transplanting, so the move does not arrive as one abrupt shock.
Plan on roughly 7 to 14 days, but use that as a working range rather than a countdown. A cool, still week may require more time; a stretch of warm, calm weather may let seedlings move through the stages faster. Crop hardiness, the weather forecast, the seedling’s root system, and how it responds each day matter more than the number on the calendar.
What hardening off actually changes
Hardening off is the transition from protected growing conditions to outdoor ones. A seedling raised inside has not yet experienced unfiltered sun, moving air, rain, or cool nights in the same way it will after planting. Gradual exposure gives leaves and stems time to adjust and helps you discover whether a location is too sunny, windy, cold, or dry before the plant is rooted in a bed.
That transition reduces avoidable stress; it does not make a frost-sensitive crop frostproof or correct every transplant problem. Penn State Extension describes the risk of moving protected seedlings straight into sun and wind: leaves can brown or bleach, and growth may slow while the plant recovers (Penn State Extension’s transplanting guide). Roots can also be damaged when a plant leaves its cell or pot, so acclimation above ground and careful planting below ground are complementary jobs.
Which seedlings need hardening?
Most seedlings started indoors under lights, on a windowsill, or in a warm greenhouse benefit from hardening before they enter an exposed garden. The same is true of young flowers and herbs raised under cover. If you bought a plant, ask whether it has already been hardened and where it was displayed; a plant grown outdoors in conditions similar to your garden has a head start, while one kept in a heated greenhouse or under deep shade may still need a transition.
Cool-season crops such as lettuce, kale, broccoli, and cabbage generally tolerate cooler conditions better than tomatoes, peppers, cucumbers, and other warm-season crops. That changes the safe timing, not the purpose of hardening. UConn Extension recommends using mild spring days to let seedlings experience bright, indirect light first, then adding direct light gradually; it also cautions gardeners to keep watching for late cold snaps (UConn Home Garden Education Office). A seed packet or local Extension guide is a better source for crop-specific planting temperatures than a single cutoff applied to every plant.
When to start: read the crop and forecast
Begin when seedlings are healthy enough to move and you can give them a first outing on a mild, relatively calm day. For frost-sensitive plants, work backward from a safe transplant window after the local frost risk has passed; an average last-frost date is a planning aid, not a promise that frost cannot return. Hardier crops may be moved earlier if the soil and forecast suit them, but hardening does not cancel a freeze warning.
Look at overnight lows as well as daytime highs. A pleasant afternoon can be followed by a night that is too cold for a tender tomato or pepper, and a sheltered porch can still cool sharply after sunset. If nights are unsuitable, bring plants back in, keep them under protection, or delay the hardening start rather than forcing an overnight step because a schedule says “Day 6.”
If the calendar slips and seedlings are getting crowded indoors, potting them into a slightly larger container can buy time. Penn State notes that seedlings held too long in crowded sowing flats can become weak and spindly, while UConn suggests potting up strong seedlings when spring weather is not ready for planting. Do not move an immature, root-poor seedling outside simply because it has reached a date on a chart.
Set up a safe staging spot
Choose a level place that starts in bright shade, stays sheltered from strong wind, and is easy to reach so you can bring trays back in. A porch, the north or east side of a building, or a spot under open tree shade can work. Watch the sun’s path: a corner shaded at breakfast may be in direct afternoon sun, and a dark covered doorway may provide too little useful light for the later stages.
Set trays on a stable table or bench rather than directly on the ground. A tray keeps small pots together, makes carrying them easier, reduces the chance of pots tipping, and can put seedlings out of reach of slugs and some animals. Keep plants close enough to check but not against a hot wall or next to a dryer vent. If the only outdoor spot is exposed, use a light shade cloth or a temporary screen to soften sun and wind; do not seal seedlings in plastic where heat and humidity can build unnoticed.
Before the first outing, water the root ball if it is dry. The goal is evenly moist mix, not a saturated tray. Small cells can dry quickly outdoors, even in shade, because air movement increases water loss; the practical advice from Savvy Gardening is to check the actual potting mix and secure pots in a tray instead of assuming that a cloudy day keeps them wet (Savvy Gardening’s tomato hardening guide).
A flexible 10-day hardening-off schedule
Treat the schedule as a progression of exposures, not a test you pass by completing ten dates. Advance only when the seedlings look steady after the previous stage. If rain, wind, heat, or a cold night interrupts the sequence, repeat or pause the last comfortable stage. Maryland Extension’s hardening-off guidance likewise describes a gradual transition through shelter, more sun and light breeze, and eventually nights outside; the point is avoiding a sudden change, not satisfying a rigid hourly formula (Maryland Grows, University of Maryland Extension).
Days 1–2: sheltered shade and short visits
On the first suitable day, place seedlings outside in bright shade for one to three hours, then bring them in before evening. Choose a sheltered spot with little or no wind. If your first opportunity is cloudy, that can still provide outdoor air and temperature exposure, but do not count it as a full-sun exposure day; the leaves have not yet experienced the light intensity they will need to handle.
On the second day, extend the stay to three or four hours if plants remain upright and unmarked. Check moisture at the surface and near the root ball; a dry cell should be watered, while a wet, heavy tray should be allowed to drain. Keep seedlings protected from slugs, birds, and pets as you would any tender new growth.
Days 3–4: add morning sun and a light breeze
Move plants to a place that receives gentle morning sun, starting with about an hour and extending toward two or three hours if leaves remain healthy. Morning light is generally easier to manage than intense late-afternoon sun, especially for seedlings accustomed to indoor lighting. A light breeze is useful exposure; gusty or drying wind is not a helpful challenge and can knock over trays or desiccate leaves.
After that sun period, return trays to bright shade or use shade cloth to prevent a long, unplanned stretch of direct sun. Check the underside and edges of leaves for bleaching, crisp patches, or curling. A little temporary droop during the hottest part of the day is a signal to inspect moisture and shade, not an invitation to leave the plants out and hope they adapt.
Days 5–7: extend daylight, then test a mild night
If seedlings have tolerated morning sun, add exposure in increments of a few hours. You can move them into a spot with more direct sun, but match the hours and intensity of the final planting location. A vegetable seedling destined for an all-day-sun bed needs more direct-light practice than one that will live in afternoon shade. Do not jump straight from indoor lights to a cloudless day outdoors.
Keep checking conditions around midday, when direct radiation and wind can make containers dry much faster than they did indoors. Water when the root zone is drying; do not intentionally let seedlings wilt to “toughen” them. Savvy Gardening’s practical schedule recommends checking soil moisture throughout the transition and delaying planting when day and night temperatures remain unsettled. That is more useful than assuming every seedling is ready at the same point in a seven-day plan.
Consider an overnight stay only after the seedlings have handled full days outside and the forecast low is within the crop’s safe range. Cool-season seedlings may tolerate a lower low than warm-season seedlings, but neither should be left out through frost simply to complete the schedule. If you are unsure, bring them into an unheated protected space that remains above the crop’s cold limit.
Days 8–10: match the garden and decide whether to plant
During the final stage, give plants most of the light and air movement they will encounter after planting. If they will go into a raised bed that receives direct midday sun, expose them to that location progressively; if they will be in a large container on a windy deck, a garden bed schedule will not fully prepare them for that site. Keep the plants out of dangerous extremes even now. Hardening is about increasing ordinary exposure safely, not proving that seedlings can survive neglect.
By the end of this stage, a healthy seedling should remain upright through the day, keep its leaves intact, and show no persistent scorch or severe wilt after its regular outdoor exposure. If the forecast stays mild, the plant is rooted well, and the soil is workable, it can be transplanted. If it looks stressed or the weather turns sharply colder, repeat the last successful step or wait; extending the schedule by a few days is a small cost compared with losing an established seedling.
Using a cold frame without overheating seedlings
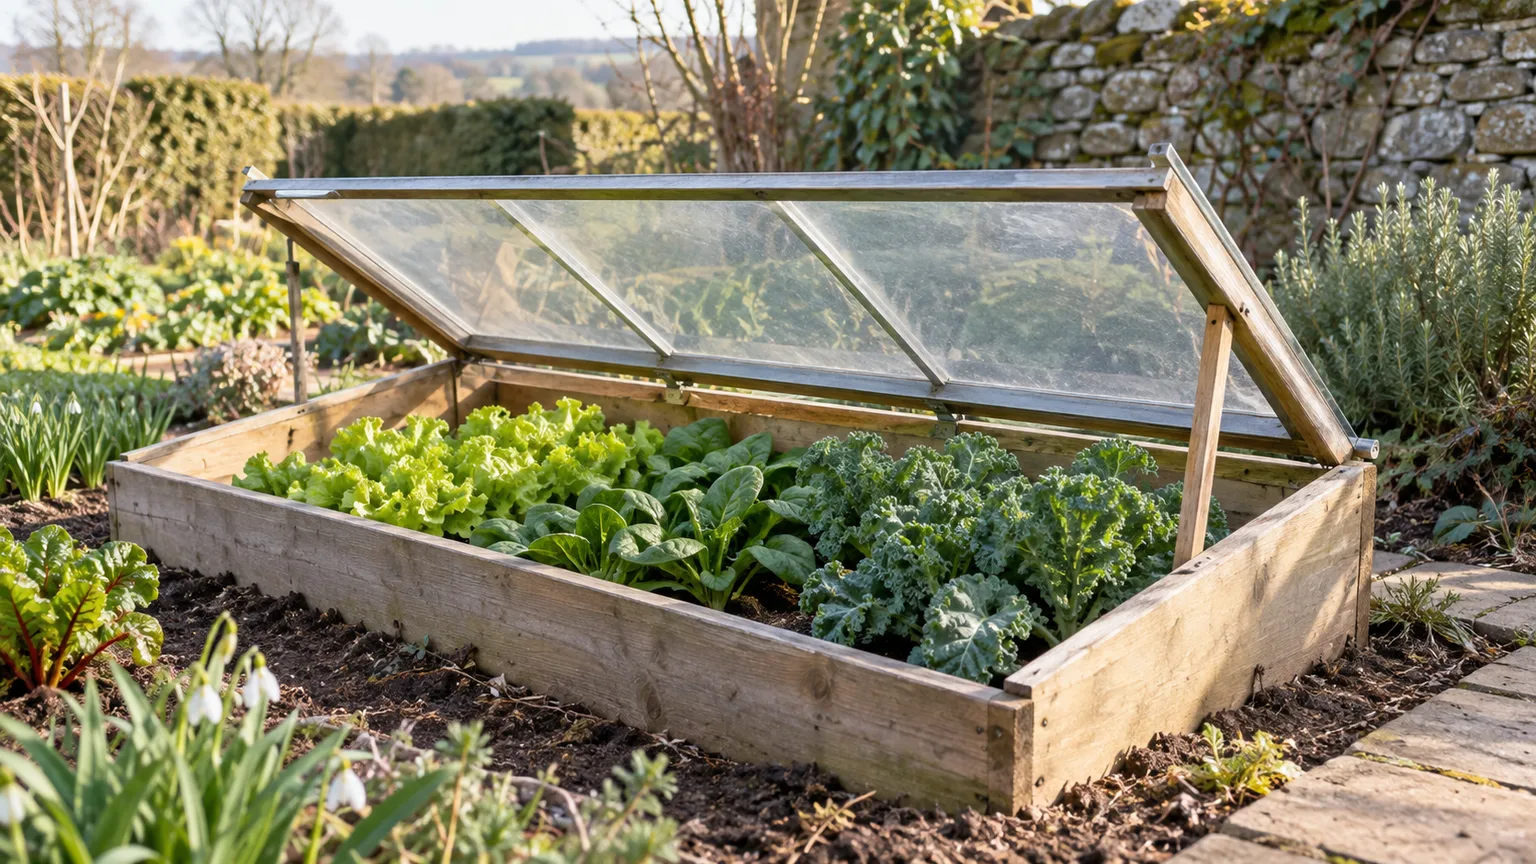
A cold frame can reduce the carrying in and out because it creates a sheltered outdoor transition zone. Place seedlings inside with the lid partly open at first, then increase ventilation and exposure over several days. The cover blocks some wind and can soften cold nights, but sunlight can heat the interior quickly even when outside air feels cool.
Ventilation matters as much as nighttime cover
Do not treat a cold frame as a set-and-forget greenhouse. Open the lid on warm or sunny days, monitor the temperature at plant level, and close it before night only when the crop needs that protection. A closed frame can overheat seedlings and dry their small containers; a cover left open overnight can remove the very protection you intended to provide. If you cannot check it during the day, use a shade cloth, choose a reliably ventilated setup, or bring especially tender plants inside.
UConn Extension describes a cold frame as a way to moderate spring temperature swings, while emphasizing that it should be cracked open on warm days. That advice captures the trade-off: a frame buffers conditions, but it does not replace observation. On a cold, windy evening, a frame or protected porch can be useful; on a bright midday, ventilation may be the more urgent need.
Manage sunlight, wind, temperature, and water
Sun and temperature are related but not interchangeable. A cloudy day can be mild enough for outdoor air exposure yet provide too little direct light to advance a plant toward full-sun conditions. Conversely, a sunny day can make a cold frame or dark patio corner surprisingly hot. Track what the leaves and growing medium experience at plant height, not just the forecast icon.
Wind can be a hidden stressor. Even seedlings in shade can dry quickly when a steady breeze passes over them, and gusts can twist tender stems or tip lightweight containers. Start in shelter, introduce gentle air movement later, and skip or repeat a stage when gusts are strong. Keep trays grouped or weighted so pots do not blow over, but make sure drainage holes are not blocked.
Check moisture by feeling the mix or lifting a representative pot. Water thoroughly enough to wet the root ball, allow excess to drain, and check again during warm or windy outings. Do not keep seedlings standing in water, and do not reduce irrigation so much that they wilt. The aim is a plant that can handle changing outdoor conditions while still hydrated; chronic drought is another stress layered onto the transition.
What to do after a missed or difficult day
If you miss a day because of rain or a busy schedule, do not restart automatically. Resume at the last stage the plants tolerated well, and repeat it if the plants have spent several days back in protected conditions or the weather has changed substantially. Garden Betty’s seven-day outline is useful as a sample sequence, but its own article notes that temperature drops can stretch acclimation; an individual plant’s response is the better guide than advancing because “Day 4” is written on a card (Garden Betty’s seedling guide).
If leaves develop pale, papery patches after sun exposure, return the tray to bright shade and wait for healthy new growth before adding more direct light. Scorched areas will not turn green again, so judge recovery by whether injury stops spreading and the central growing tip remains firm. If plants wilt, first check the root ball and move them out of wind or strong sun; water if the mix is dry. When the mix is already wet and leaves remain limp, stop adding water and reassess roots, heat, and stem damage rather than turning a stress response into waterlogging.
After a cold night, move seedlings to a protected, bright place and wait to see what tissue remains firm. Damaged leaves may be lost, but a living growing tip can recover. Delay the next exposure until the forecast is suitable, then return to the last tolerated light and wind level. For forecast frost after transplanting, bring containers under cover or protect in-ground seedlings with breathable frost fabric supported above the foliage; remove or vent coverings when temperatures rise.
Signs a seedling is ready for the garden
Look for a combination of plant condition and weather, not one visual cue. The seedling should be healthy and actively growing, with a root system that holds its plug together without being a dense, circling mass. It should have experienced the kind of sunlight and breeze it will get in its final location, and it should finish a day outside without ongoing wilt, sunscald, or limp stems.
Then check the planting conditions. The crop must be appropriate for the current soil and night temperatures, frost risk should be acceptable for that crop, and the bed should not be waterlogged or hard enough to damage the root ball. A cloudy, calm day or a cooler late afternoon makes the move easier to manage, but it cannot compensate for a cold-sensitive plant planted weeks before its safe window.
Transplant with less additional stress
Water the seedlings before planting if the mix is dry so the root ball is moist and easier to handle. Prepare the bed first, make the planting holes, and set each plant at the depth appropriate to its species; do not bury stems deeply unless that crop tolerates or benefits from it. Handle seedlings by the leaves or root ball rather than squeezing a delicate stem, and avoid teasing roots unnecessarily when the plug is intact.
Settle soil around the root ball and water the planting area so roots contact moist soil. A thin mulch layer can help stabilize surface moisture if it is appropriate for the crop, but keep mulch from pressing against tender stems. Penn State Extension recommends watering plants close to planting time and notes that cloudy weather or a cooler part of the day reduces exposure to intense sun while plants settle in (Penn State Extension).
Care for seedlings during their first week outside
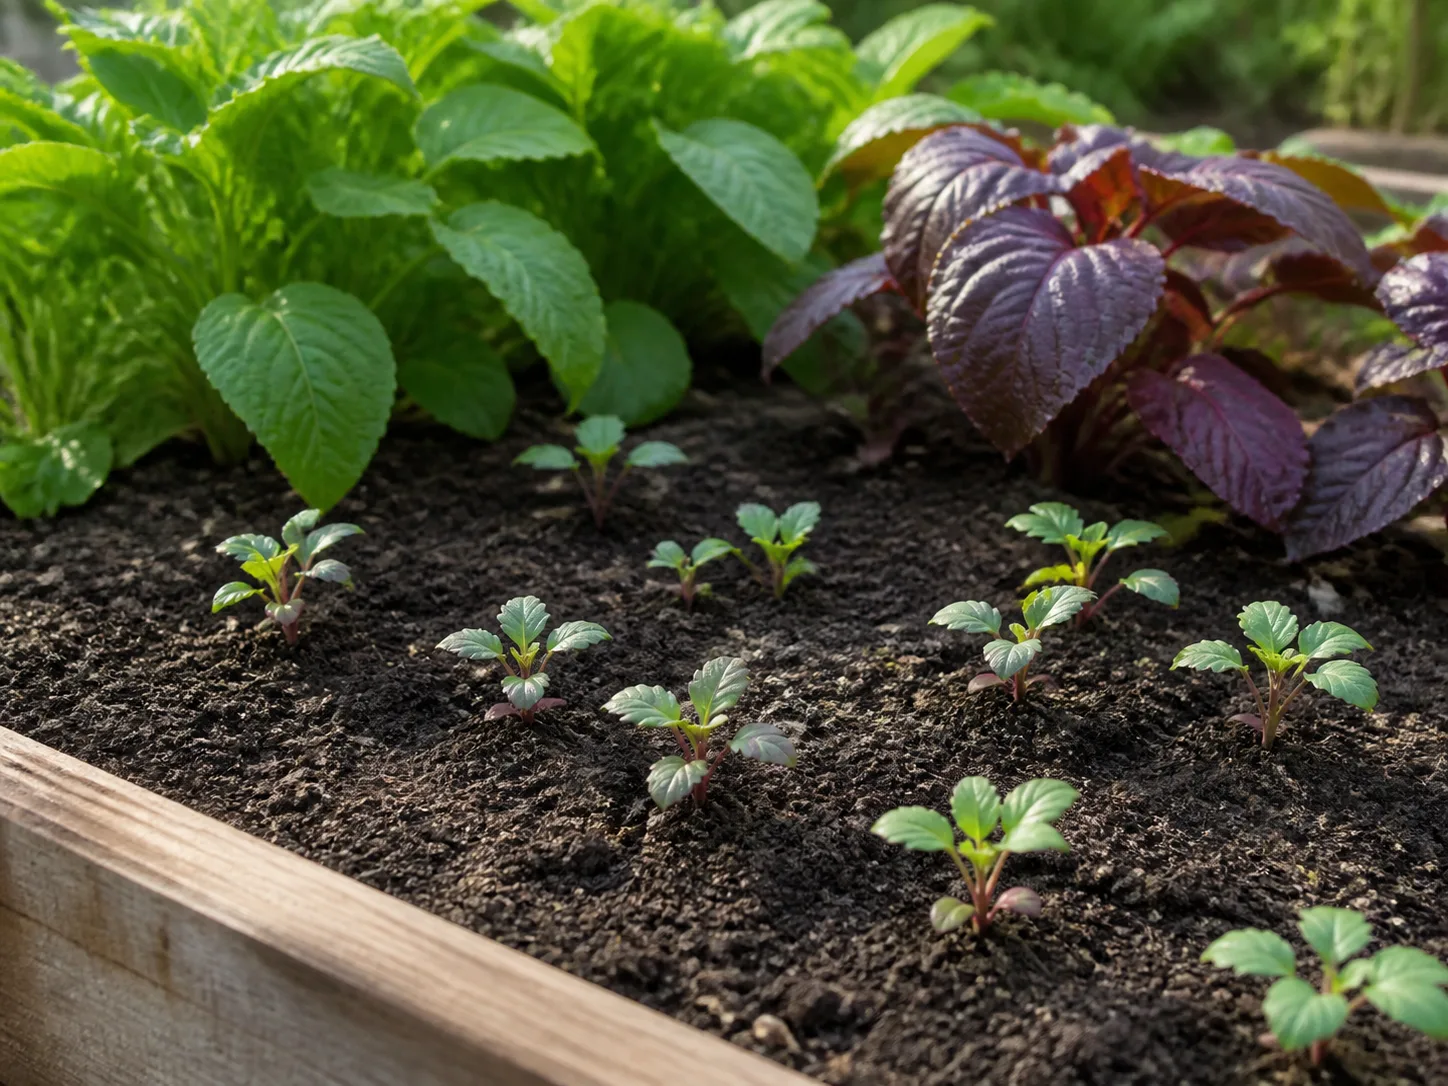
For several days after transplanting, check soil moisture near the root ball rather than watering by the calendar. New roots have not yet explored the surrounding soil, so the original plug can dry even when the bed surface appears damp. Water deeply enough to moisten the root zone, then let excess drain; frequent shallow sprinkling can leave the root ball dry below the surface.
Watch for a weather change during this settling-in period. A brief return to protection or temporary shade can help when a cold snap or heat wave arrives, but remove covers or shade once conditions normalize so the plant receives adequate light and air. UConn Extension recommends monitoring late cold snaps and using frost protection when forecasts warrant it; protection is a backup, not a substitute for planting tender crops at an appropriate time.
Do not respond to every slow day with fertilizer. A seedling that pauses after transplanting may be adjusting to root disturbance, temperature, or moisture. Keep conditions steady first. If the growing tip remains firm and leaves are not progressively collapsing, give the plant time before changing several care variables at once.
Hardening-off mistakes that are easy to avoid
The most common mistake is treating a schedule as permission to ignore conditions. A plant should not move from deep shade to hours of midday sun just because the chart says to increase light, and it should not spend the night out when the forecast is colder than the crop can tolerate. A week-long plan is a useful framework, while weather and plant response determine whether it takes a week or longer.
Other avoidable errors include using a spot that becomes sunny unexpectedly, letting tiny cells dry in a breeze, leaving a cold-frame lid shut on a sunny day, and confusing outdoor acclimation with cold hardiness. Do not keep the mix waterlogged, but do not deliberately stress seedlings by withholding needed water. Do not bury them under a cover that touches leaves if frost protection can be supported above the plant, and remove or open covers as temperatures rise.
Finally, do not assume a nursery label means the plant is ready for every garden. Ask how it was grown, then acclimate it to the actual light and wind of your yard if those conditions differ. A plant hardened in a greenhouse may still need a gradual introduction to an exposed deck or all-day sun bed.
Conclusion
To harden off seedlings, start with short outings in sheltered bright shade, then increase direct light, gentle airflow, and time outdoors over about 7 to 14 days. Use the crop’s cold tolerance and the actual forecast to decide when it can stay out overnight; no hardening schedule makes a tender seedling safe in frost.
Keep the root ball evenly moist, ventilate cold frames on warm days, and repeat a comfortable stage whenever weather or plant response calls for a pause. When seedlings are healthy, have experienced conditions close to their new site, and the soil and forecast suit the crop, transplant with a moist root ball and monitor it through its first week. That steady transition gives young plants a better start without pretending the garden can be controlled by a calendar.



