How to Propagate Fig Trees From Cuttings at Home
Learn how to propagate fig trees from dormant hardwood cuttings, choose healthy stems, root them in pots, and move young plants outdoors with less guesswork.
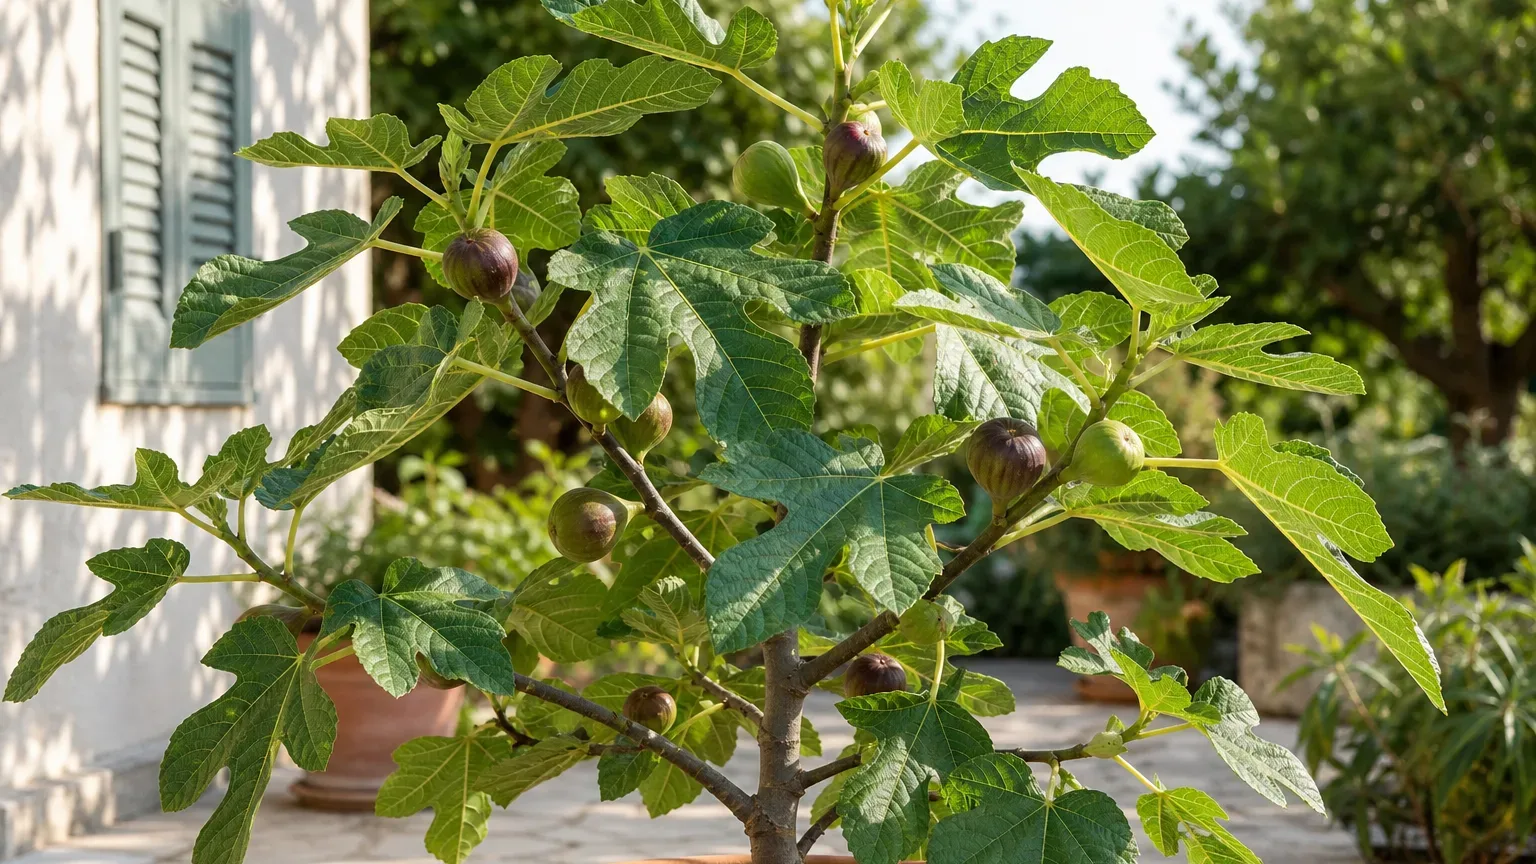
Starting a new fig tree from a cutting lets you grow a plant from a tree you already know and enjoy. The method is straightforward: take a piece of healthy stem, keep it oriented correctly, and give it a rooting medium that stays moist without remaining waterlogged. The uncertain part is how quickly each cutting responds. Some root and grow; others dry out or decay, so take more than one if you want a better chance of ending with a plant.
This guide focuses on the edible common fig, Ficus carica. It is not a guide to the fiddle-leaf fig, Ficus lyrata, a different species usually grown as a houseplant. NC State’s plant profile identifies the common fig as a deciduous fruiting shrub or small tree and lists stem cuttings among propagation options (NC State Plant Toolbox). If your goal is a specific fruiting cultivar, choose a healthy parent tree whose identity and fruit you trust.
Start with the right kind of fig propagation
For most home gardeners, dormant hardwood cuttings are a practical starting point. You cut mature stems while the tree is resting, pot them, and keep the medium evenly damp while roots develop. The method needs little equipment, and new growth can be kept in a container until it is sturdy enough to move outside.
There are other ways to make a fig plant. A low flexible branch may be rooted by layering while still attached to the parent; once it has its own roots, it can be separated. This can suit gardeners in mild climates with an accessible branch, but it takes up ground space around the tree. Soft or semi-hardwood cuttings are another option in active growth, though they generally need more careful moisture control because leaves lose water. Seed is not the usual choice when you want a named cultivar, because a seedling is not a vegetative copy of its parent.
| Method | Best fit | Main trade-off |
|---|---|---|
| Dormant hardwood cutting | A simple, compact home setup | Rooting success and timing vary |
| Semi-hardwood cutting | A summer propagation setup with close humidity control | Leafy stems can dry quickly |
| Ground layering | A low branch and a mild outdoor climate | The new plant remains attached for a season |
This guide explains hardwood cuttings in detail. The NC State Extension account of fig hardwood cuttings offers one practical example, while Gardening Know How’s fig propagation overview describes cutting and layering approaches. Treat their measurements as working ranges, not a rule that every cultivar or climate must follow.
Choose hardwood cuttings for a simple home method
Hardwood cuttings come from mature stems that have finished their season’s soft growth. A dormant cutting has no need to support a full set of active leaves while it is forming roots, which can make moisture management easier for a beginner. Several horticultural sources describe taking fig cuttings in late winter or early spring, before the tree resumes active growth (Epic Gardening; Gardening Know How).
Semi-hardwood cuttings are collected when current-season growth has begun to firm. They can be useful if dormant wood is unavailable, but leaves and soft tips make the cutting more sensitive to drying. If you try this route, reduce leaf area, use a clean medium, and keep the environment humid without sealing stagnant, wet air around the plant. Do not combine the two methods in one pot: label batches by collection date and method so you can see which conditions worked.
You can also layer a low branch without removing it. The process is slower, but the branch remains supported by the parent until it has rooted. If that approach fits your garden, compare it with the step-by-step cutting procedure below and the NC State Plant Toolbox profile for basic information on the species. For a one-pot project, dormant cuttings are usually easier to organize and monitor.
Time collection around dormancy and local weather
Take hardwood material when the fig has dropped its leaves and the wood is mature, but before buds have opened into active shoots. Late winter is a common collection window; in warmer regions that can arrive earlier, while colder gardens may need to wait until the harshest freeze period has passed. Do not use the calendar alone. The condition of the parent tree and your local weather matter more than a universal date.
The NC State Extension example describes collecting short hardwood cuttings between January and April, while Epic Gardening’s fig guide also places collection in late winter. These are practical examples from particular contexts, not a guarantee that the same month is right everywhere. If the only available wood is frozen, damaged, or already pushing fragile leaves, wait for a safer opportunity or use a different propagation season.
Keep your cuttings from sitting in a hot car or drying wind after harvest. Ideally, prepare pots and medium first, then collect and plant the stems in one session. When you must pause, wrap the material loosely in a barely damp paper towel and keep it cool and shaded until you can work. Avoid leaving it submerged or sealed in a dripping wet bag.
Select a healthy parent tree
The new plant will inherit the parent’s basic genetic identity, so start with a fig that is healthy and has the fruit traits you want. Select a tree with vigorous, undamaged growth. Avoid stems with obvious cankers, soft spots, heavy scale or other pests, or unusual dieback. A cutting can carry problems along with the plant material, and a weak parent is less likely to provide good propagation wood.
If the parent is grafted, identify where the desired variety joins the rootstock. Cut only from growth above that graft union; a vigorous shoot rising from below it may belong to the rootstock and produce different fruit. If you are unsure whether a tree is grafted or which cultivar it is, label the new plant as unknown rather than making a promise about its future fruit.
Do not take material from a tree without the owner’s permission. Note the variety, the date, and which side or branch supplied the wood. If you grow a cold-hardy cultivar or want to compare types, our guide to different fig tree species and varieties and the Chicago Hardy fig care guide can help with the next decision: where the young tree can thrive.
Choose stems with useful nodes and mature wood
Choose firm, healthy, pencil-thick wood if available. A workable cutting is often about 6 to 10 inches long and has several visible nodes, the small raised points where leaves or buds were attached. Extension and editorial sources use slightly different sizes, including roughly 6-inch and 8-to-12-inch examples; the important goal is a sound stem with enough nodes to plant securely and leave a bud above the medium (NC State Extension; Gardening Know How).
Avoid tips that are very thin and green, as well as very old, damaged or unusually thick wood. A straight piece is easier to orient and plant than a tangled branch. Collect a few more cuttings than the number of trees you ultimately want because not every stem will root. That is a practical hedge, not a statement that a particular percentage will succeed; published instructions acknowledge that failures occur (Epic Gardening).
Gather a small, clean set of supplies
You do not need a greenhouse or specialized rooting machine. Set out sharp bypass pruners, clean pots with drainage holes, a free-draining propagation medium, labels, a pencil, and a clear cover or loose humidity tent if your air is dry. A spray bottle can help wet the surface, but it should not replace watering the pot when the mix itself begins to dry.
Wash reused pots to remove old medium and debris. Clean the blades before taking cuttings and between parent trees, especially if one tree has disease symptoms. Keep a small container for discarded leaves and stem ends so they do not end up on the potting bench. If you choose to use rooting hormone, read its label and use only the amount directed for that product; it is optional, not a substitute for healthy wood and good moisture control.
Fig stems can exude milky sap when cut. The sap may irritate skin, so wear gloves if you are sensitive or handling several stems, and avoid touching your face. NC State lists contact dermatitis among possible concerns for this species (NC State Plant Toolbox). Wash tools and skin after the job, and keep cuttings away from children or pets while you work.
Prepare, label, and cut each stem without mixing up its ends
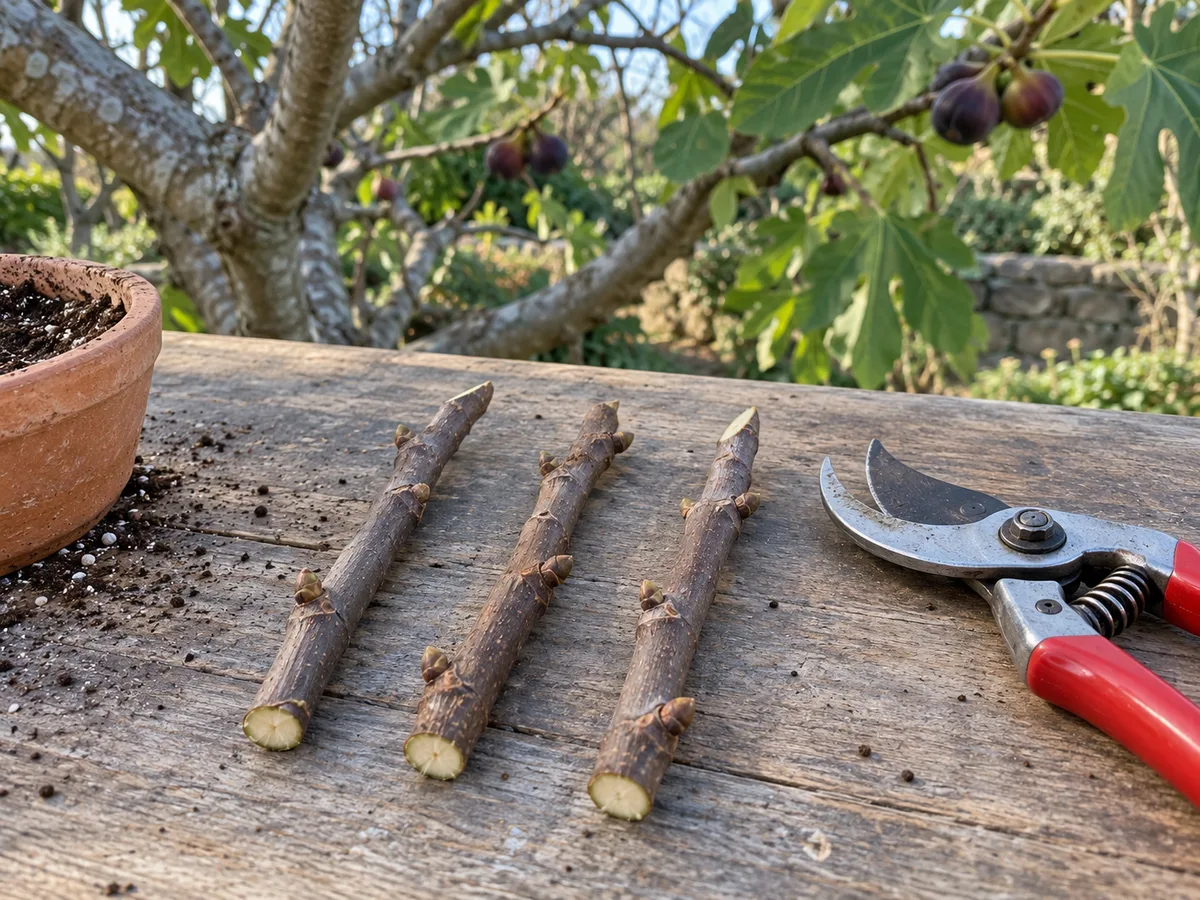
Before cutting individual pieces, mark their direction: slant the upper end and leave the lower end flat. This makes it easier to plant bare stems right-side up. Add the variety and collection date to a label as you work.
Remove leaves or tiny side shoots from the part you will root. For leafy cuttings, reduce the remaining leaf area; dormant wood usually needs no trimming. Avoid scraping the bark or repeatedly recutting the stem.
Keep stems shaded and slightly moist until planting. If you collect from different trees or on different dates, label each batch separately so the records remain useful.
Cut the stem into individual sections about 6 to 10 inches long, adjusting to the space between healthy nodes. Keep at least a few nodes per piece where possible. Use the slanted top and flat bottom as orientation cues. Gardening Know How’s practical instructions describe making the two ends visibly different, while Epic Gardening advises leaving a healthy bud above the surface after planting. A 2026 trial comparing terminal, middle, and basal sections reported stronger growth and root morphology from middle cuttings in the tested setup (BioResources fig-cutting study). That is useful context, not a rule for every cultivar or medium.
Keep the bottom cut clean and avoid crushing the bark with blunt shears. If you use rooting hormone, lightly moisten the basal end and apply it according to its product label; tap away excess powder so it does not form a thick coating. Some extension instructions include hormone as an option (NC State Extension), but different sources use different methods, and the article does not establish that hormone is necessary for every fig cutting.
Work one variety at a time if you have several. Immediately place each finished piece into its labeled container or bundle. If the wood dries before planting, it may be less viable, so plan the setup before harvesting a large amount of material.
Choose a moist, free-draining rooting medium
Use a clean, airy medium that holds some moisture but allows extra water to drain. A seed-starting or propagation mix is a simple choice; a peat-free potting mix amended with perlite can also work if it stays loose rather than compacting. Avoid filling a small pot with heavy garden soil, which can stay dense and wet in a container. The NC State Extension example uses seed-starting mix, and Epic Gardening recommends a well-drained potting medium for fig cuttings (NC State Extension; Epic Gardening).
Choose a pot that is deep enough to hold most of the cutting and has at least one open drainage hole. One cutting per small pot makes it easier to handle the plant later without disturbing neighboring stems. A larger container can hold several cuttings if you leave space between them and are prepared to separate roots gently when potting on.
Moisten the medium before planting. It should feel evenly damp, like a wrung-out sponge, not glossy with standing water. If a squeezed handful drips, add dry mix and loosen it. Starting with evenly moist mix prevents the need to flood the pot after the cutting is already in place.
Plant the cutting at the right depth
Push a pencil or dibber into the mix to make a planting hole, rather than forcing the stem down and scraping off the base. Insert the flat-cut end first. Bury enough of the stem to keep it steady and leave at least one healthy bud or node above the surface. The exact depth depends on the cutting’s length and the pot, but many practical instructions place a substantial portion of the stem below the mix; Epic Gardening describes planting fig cuttings about two-thirds deep (Epic Gardening).
Firm the medium gently around the base so the stem stands upright. Do not pack the pot hard; air and drainage remain important. Add a label with variety and date. Water slowly until a small amount drains from the bottom, then empty any saucer so the pot is not left sitting in water.
If you are planting several stems in one container, keep leaves or buds from touching one another and note each position on the label. You may later discover that one cutting roots before another. Being able to lift or pot it separately reduces the chance of damaging its neighbor.
Create a humid but ventilated rooting space
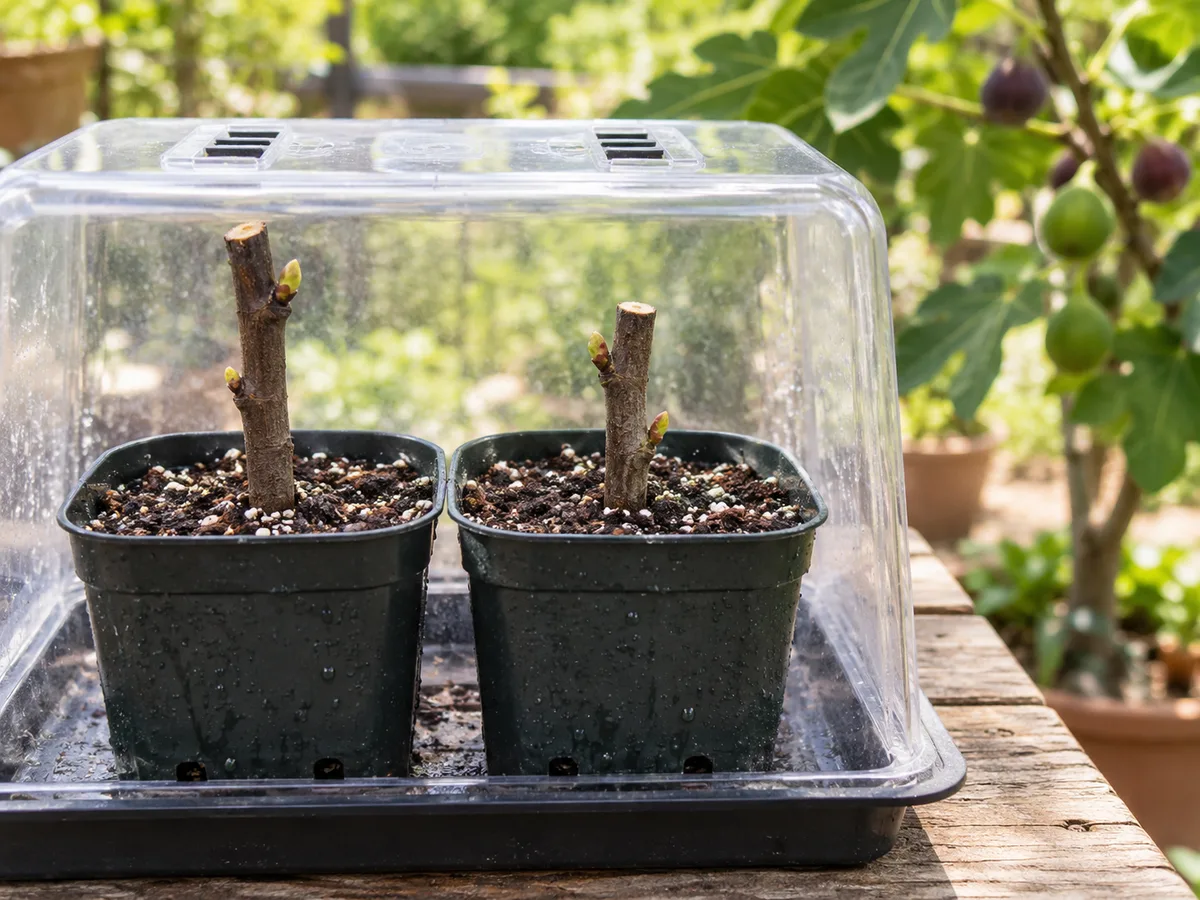
An unrooted stem can lose water before it has roots to replace it. A loose clear cover can slow moisture loss, especially in a dry home, but the goal is a humid environment around the cutting, not a sealed wet chamber. Use a clear tote, propagation dome, or a transparent bag supported so it does not press against buds. NC State Extension describes a covered, greenhouse-like setup as one option for maintaining humidity (NC State Extension).
Open or vent the cover regularly to exchange air and inspect the surface. If heavy condensation runs down the sides or the medium stays saturated, increase ventilation and reduce watering. Remove fallen leaves promptly. A humid setup is not a reason to keep the pot constantly wet; the cutting still needs oxygen around its base.
Give cuttings steady warmth and gentle light
Place the pots somewhere sheltered with bright, indirect light. Strong direct sun can heat a clear cover quickly, while a cold draft can slow root development. A bright indoor location away from hot radiators and icy windows is easier to manage than a sunny windowsill where temperatures swing. As days warm, a sheltered greenhouse or protected outdoor area can also work if it stays above freezing and is not exposed to harsh sun.
Keep the setup stable rather than moving the pots repeatedly to chase a perfect reading. Warmth encourages activity, but extra heat does not compensate for poor drainage or dehydrated wood. Avoid applying fertilizer at this stage; the cutting has little or no root system to use it, and the immediate priorities are hydration and root initiation.
As new buds swell, continue checking that the cover is not overheating. Once leaves expand, gradually increase airflow. The young foliage is tender, so a sudden change from a protected environment to full afternoon sun can scorch it. A sheltered, bright position gives roots time to catch up with shoot growth.
Monitor moisture and look for gradual progress
Check the top of the medium every few days, more often if the room is warm or the pot is small. Water when the upper layer begins to dry, then let excess drain. Do not follow a rigid daily watering schedule. A covered pot may need little water for some time; a warm uncovered pot may dry faster. The feel of the mix and the weight of the pot are more useful guides than the calendar.
Bud swelling and leaf growth are encouraging signs, but they do not prove that a useful root system has formed. A cutting may use stored energy to produce a shoot before it can support long-term growth. Avoid pulling the stem to test it; that can tear roots just as they begin to develop. Instead, watch for continued growth and roots visible near drainage holes or along the pot wall.
Rooting time varies with the wood, cultivar, temperature, and care. One NC State Extension contributor reported seeing roots in about three to six weeks in a particular home setup (NC State Extension); use that as an example rather than a universal deadline. If a cutting remains firm and healthy, patience is often better than constant disturbance.
Judge rooting without repeatedly disturbing the stem
When a cutting has several leaves and appears stable, inspect it carefully rather than tugging. If it is in a small pot, you can slide the root ball out a little to check for roots along the outside, then return it without breaking the mix. If roots are not visible and the stem is still firm, put it back and give it more time. A cutting that has only just opened a bud may not be ready for potting on.
Wait until roots hold the medium together or are clearly extending before moving the plant into a larger container. There is no benefit to rushing a young fig into a large garden hole while its root system is fragile. Conversely, a dense circle of roots in a very small cell is a sign to pot up. Use a modestly larger container with drainage and a growing mix suitable for young plants.
Record which cuttings root and how long they took. If several stems from one parent behave similarly, that information is useful for your climate and cultivar, but it still does not predict every future batch. A small propagation notebook is more useful than assuming all figs respond identically.
Troubleshoot rot, drying, and slow bud growth
If the base turns black or soft, the medium may be too wet, the cutting may have been damaged, or the wood may not have been healthy. Remove a decaying stem so it does not contaminate nearby material. Let the pot drain, increase airflow, and review how often you watered. A firm cutting that has not produced leaves is a different case: it may simply be slow, so do not discard it just because a short timeline has passed.
Wrinkled bark and brittle buds can indicate that the stem dried out. Check whether the cover fits, whether the pot is drying too quickly, and whether the cutting was fresh when planted. If the stem is still firm, correct the environment gently; avoid soaking it in an attempt to reverse severe drying. A stem that is fully brittle or mushy is unlikely to recover.
White fuzz on fallen debris or the medium can occur when air is stagnant and material stays wet. Remove decaying leaves, ventilate the cover, and avoid standing water. Do not apply a pesticide or fungicide by default; first correct the moisture and sanitation issue. If the parent tree had disease symptoms, do not reuse its cuttings for another round.
Pot up rooted cuttings carefully
Once roots are established, move each young fig into a pot only modestly larger than its root ball. Choose a container with drainage holes and a dependable potting mix. Handle the root ball by the medium rather than pulling on the stem. Set the plant at the same depth it was growing before, fill around the roots, and water enough to settle the mix without leaving the pot in a puddle.
Keep the newly potted plant in a sheltered bright spot while it adjusts. If it was under a cover, remove the cover in stages over several days so the leaves do not experience an abrupt drop in humidity. Watch for wilting and check soil moisture before watering again. A little pause in visible growth after potting is not necessarily a failure; avoid immediately repotting it again or feeding heavily.
Container growing can be a useful long-term option for figs, especially where winter protection or limited garden space is a concern. The RHS guide to growing figs describes growing figs in containers and choosing a warm, sunny position; our guide to growing fruit trees in containers covers broader pot and site considerations.
Acclimate young figs before exposing them to full sun
Before planting outdoors or leaving a potted fig outside permanently, acclimate it gradually. Start with a sheltered place outdoors for a short part of the day, then increase the time and light exposure over several days. Protect the young plant from hard frost, drying wind, and intense midday sun while it adjusts. If conditions are unstable, keep it in a container until weather is more predictable.
This gradual transition is especially important for cuttings that formed leaves indoors beneath a cover. New leaves developed in protected conditions may be more delicate than mature leaves on an established tree. If they pale or scorch, move the pot back to gentler light and resume the transition more slowly. The target is a steady move to the light and climate the plant will actually receive.
Figs prefer a warm, sheltered growing site, though cold tolerance varies by cultivar and local conditions. The RHS fig-growing guide and BBC Gardeners’ World fig guide both emphasize site and climate when growing figs. For cold-winter regions, compare the needs of your cultivar with our Chicago Hardy fig guide before choosing an outdoor planting location.
Choose a suitable permanent place or container
Plant in a sunny, sheltered position with soil that drains well, and check the mature size expected for the cultivar. Figs can become substantial shrubs or small trees. If your garden is limited, keeping the young plant in a container gives you more control over its size and winter placement, though container plants need regular monitoring for moisture and root crowding. The Royal Horticultural Society’s fig guide discusses both ground and container growing.
Do not place a young tree where runoff collects or where a wall blocks all airflow. Give the root ball space and water it in after planting. Keep a new transplant evenly moist while roots establish, then adjust watering to weather and soil. A site with a warm wall can help in cooler climates, but avoid assuming that one location or cultivar suits every region.
If the tree is destined for fruit production, learn its pruning needs after it has established. Our guide to pruning fig trees explains how to manage a mature plant without confusing first-year establishment with routine shaping. For another fig-specific question, see our article on whether fig trees bring wasps.
Care for the young fig through its first growing season
During the first growing season, focus on roots, stable moisture, and protection from extremes. Check a container more often during warm, windy weather, but water only when the mix needs it. Avoid leaving the plant in a saucer of water. A new in-ground plant may need closer attention during dry spells than an established tree, so inspect the soil rather than assuming rainfall reached the root zone.
Do not rush a small cutting into heavy pruning or expect a large harvest immediately. Let the plant build a sturdy framework. Remove dead or broken pieces with clean pruners, but save shaping for the appropriate season and the needs of your cultivar. The RHS and BBC Gardeners’ World provide broader advice for caring for established figs; the dedicated fig pruning guide is the better next read before making structural cuts.
Conclusion
To propagate a fig tree at home, collect healthy dormant hardwood, make each cutting easy to orient, and place it in a clean, free-draining medium. Keep the mix evenly moist, provide a sheltered rooting environment, and give the plant time to form roots before disturbing or transplanting it. Take a few cuttings because success is never guaranteed for every stem.
Once a cutting has a sturdy root system, pot it on, acclimate it to outdoor light and weather, and choose a permanent spot or container that fits your climate. Start with a healthy parent tree and a clear label, and you will have a more reliable path from a single branch to a young common fig.