How to Grow and Care for Monstera Acacoyaguensis
Learn Monstera acacoyaguensis care from light and watering to climbing support, airy soil, propagation, pests, and the traits documented for this species.
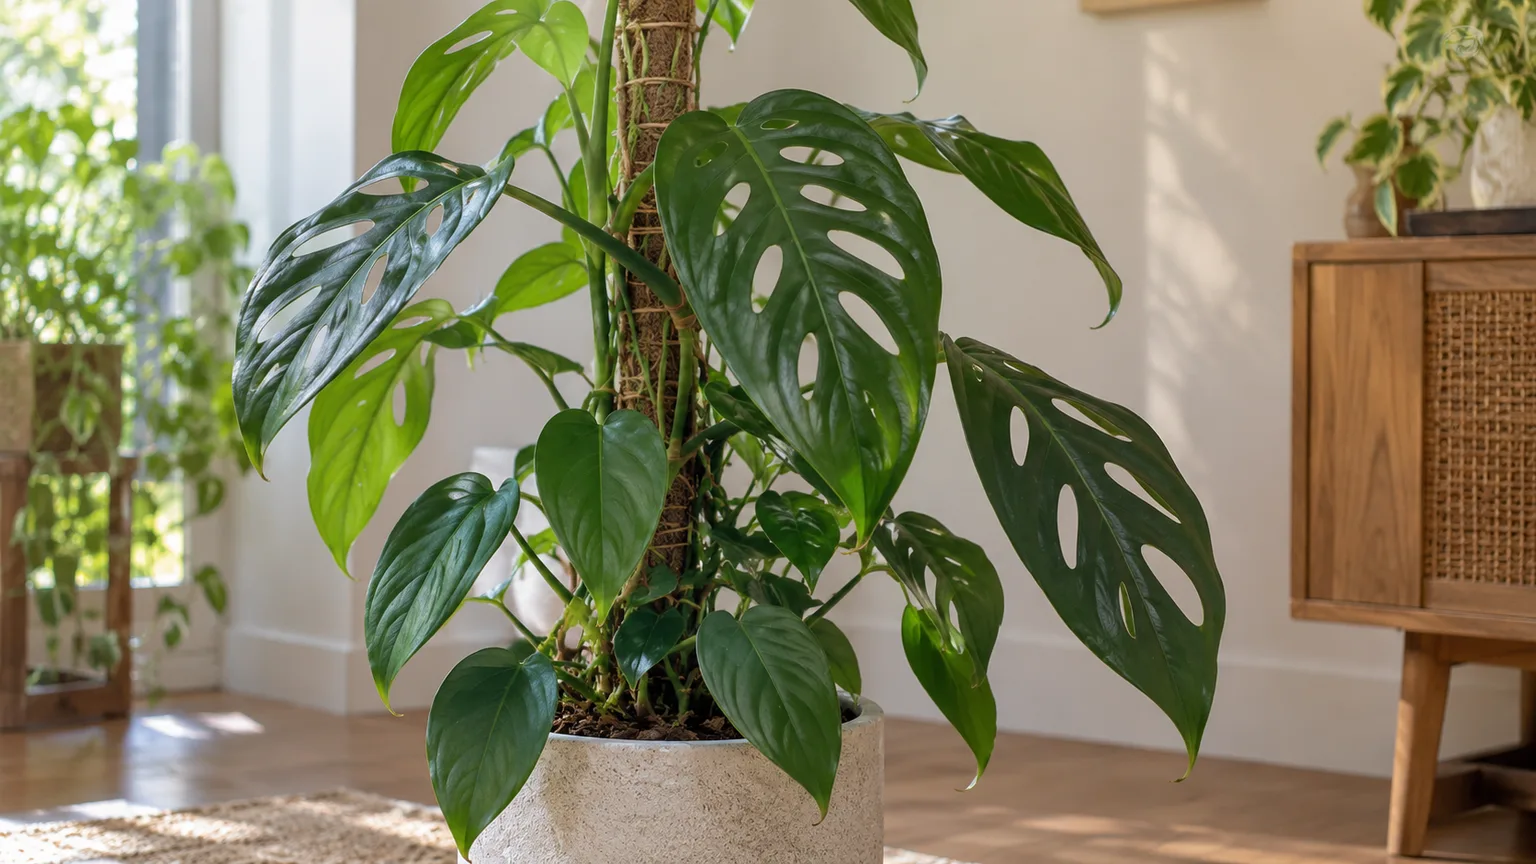
Monstera acacoyaguensis is a tropical climbing aroid best known for broad leaves perforated by oval holes while the outer edge remains whole. Grow it in bright filtered light, a moisture-retentive but airy potting mix, and a pot that drains freely; give the stem a stable support as it climbs. The basic routine is similar to other monsteras, but many precise temperature, humidity, and watering claims online have not been tested specifically on this species.
That distinction matters because this is a less commonly grown species, and web listings sometimes repeat care figures as if they were measured for it. Here, botanical descriptions establish the plant’s identity and wild growth form; the indoor recommendations are practical starting points informed by the Royal Horticultural Society’s species notes and extension guidance for Monstera houseplants. Adjust them to the light, pot, and mix you actually have.
Identify the species—and know where the label is uncertain
Kew’s Plants of the World Online accepts the name Monstera acacoyaguensis Matuda and records its native range as Chiapas, Mexico, to Belize. The Royal Horticultural Society gives the same range but marks the name status “unresolved”; a 2024 Central American revision also notes how strongly Monstera plants change between juvenile and adult forms. These sources make the name credible but do not make every nursery label reliable. (Kew Plants of the World Online, RHS plant profile, and the 2024 Phytotaxa revision provide the taxonomic context.)
A young plant may have entire, glossy oval leaves without holes and a low, creeping growth stage. The botanical description of mature plants records larger ovate leaves, commonly with one or two rows of elongated oval-to-elliptic perforations on each side of the midrib; the edge itself remains intact rather than breaking into the deep, outward cuts seen on some other monsteras. The published adult leaf dimensions are roughly 60–85 centimeters long and 35–45 centimeters wide, but those are botanical measurements, not a promise about the size a houseplant will reach in a pot.
The intact leaf edge helps distinguish a mature M. acacoyaguensis from monsteras with deep outward splits, but it is not a foolproof shopping test. M. adansonii also has holes, and juveniles may not show the adult pattern. Compare the whole plant and its source documentation, not one leaf photo.
When buying, favor a seller who documents the mother plant and shows the stem and nodes as well as leaves. A tag is not botanical verification. If your plant is juvenile, solid new leaves can be normal; judge its health by steady growth and firm roots, not by holes alone.
Monstera acacoyaguensis care at a glance
| Care factor | Practical starting point | What is documented versus inferred |
|---|---|---|
| Light | Bright, filtered light; protect from abrupt hot sun | RHS recommends bright indirect light; exact indoor intensity has not been published for this species |
| Water | Water thoroughly when the upper 2–5 cm (1–2 in) begins to dry; empty the saucer | Root-zone rule is a Monstera-houseplant starting point, not a species-specific calendar |
| Potting mix | Airy, coarse, and moisture-retentive, in a pot with drainage | Species is a wet-tropical climber; the mix recipe is a practical container recommendation |
| Support | Stake, plank, or pole as the vine lengthens | Kew describes a climbing, epiphytic plant; a support is a way to accommodate its habit |
| Humidity and warmth | Stable, comfortably warm room; raise humidity if growth shows stress | RHS advises moderate to high humidity; a precise threshold for this species is not established |
| Feeding | Balanced houseplant fertilizer at label strength during active growth | RHS recommends monthly balanced liquid feeding while it is growing |
| Safety | Keep away from chewing pets and children; wear gloves when pruning | RHS flags irritation; ASPCA identifies Monstera species as containing irritating raphides |
Protect the roots from both a dense mix that stays waterlogged and a coarse mix that dries too fast. Use growth and soil condition—not a calendar—to refine light, watering, and feeding.
Give it bright, filtered light
Place the plant where it receives strong ambient daylight for much of the day without prolonged, scorching midday or afternoon sun. An east-facing window is often an easy starting point; a brighter south- or west-facing window can also work if a sheer curtain, nearby wall, or added distance softens the strongest rays. A north-facing room may keep the plant alive, but growth can be slow if the window is small or shaded by buildings and trees.
Judge light at the leaves, not by compass direction alone: a hand should cast a faint, soft-edged shadow rather than disappear into a dim corner. Turn the pot occasionally if the vine leans toward the window, but keep its climbing side facing the support.
A plant that stretches between leaves, makes smaller leaves, or leans sharply toward one side is asking for more usable light. Move it closer to a bright window in small steps over one to two weeks. Pale bleached patches or crisp areas facing the glass point toward sun or heat stress; move the plant back or filter the exposure instead of adding fertilizer.
Do not use fenestration as the only light gauge. Kew’s description associates the holes with mature leaves, and juvenile M. acacoyaguensis leaves can be entire. Good light supports stronger growth, but age, climbing conditions, plant health, and the exact identity of a nursery specimen also affect what new leaves look like; no reliable light threshold for inducing holes in this species is documented.
Choose a support that matches its climbing habit
In its native habitat, M. acacoyaguensis is described as an epiphyte on the lower trunks of large trees and as a climber. That makes upward support a natural way to manage a long indoor stem. A moss pole, coir pole, rough plank, or sturdy stake can keep the plant upright and help you control the space it occupies; the support is for structure, not a shortcut that forces instant mature foliage.
Set the support into the pot while the plant is still manageable, taking care not to spear the root ball. Face the stem’s natural climbing side toward the pole, then loosely secure the stem with soft plant tape or a reusable tie. Keep ties around the stem rather than squeezing the petioles, which need room to move as leaves turn toward light.
Aerial roots may emerge at nodes. Guide flexible roots toward the mix or pole, but do not force brittle roots into place or cut them just for looking untidy. If one must be trimmed, use clean shears and avoid the stem and node.
Pole, plank, or trailing display?
Choose a pole or plank if you want a vertical plant and have room for its eventual height. A simple stake can support the stem without creating a moist surface for aerial roots to attach to; a sphagnum pole can be kept slightly damp, but that adds maintenance and is optional. Do not keep a pole constantly saturated or let water run into the pot every time you moisten it.
You can also let a small plant trail from a shelf, but a climbing species may sprawl, twist toward light, and take up more horizontal space. Either display is workable indoors. There is no controlled evidence that one commercial support type is uniquely required for M. acacoyaguensis, or that a moss pole alone causes fenestrated leaves.
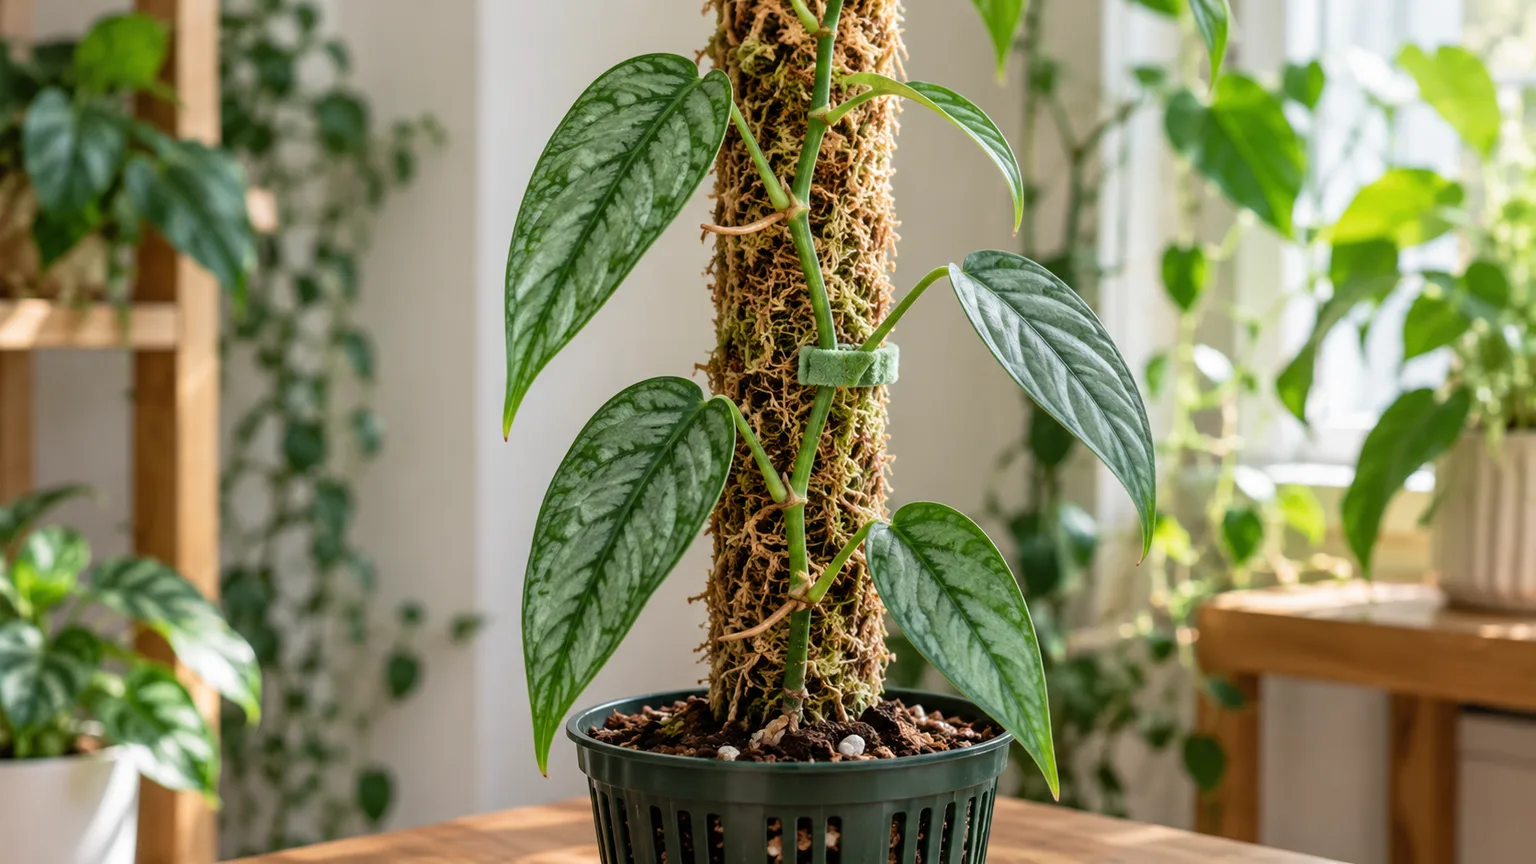
This climbing Monstera shows a support setup; use it as a structural example, not as a species-identification photo.
Use an airy mix that still holds some moisture
The goal is not “as chunky as possible.” Roots need air after watering, but a mix that dries completely in a day can stress a tropical plant, especially in a warm, bright room. Start with a peat-free houseplant mix or a coir-based potting mix, then open its texture with medium orchid bark and perlite or pumice.
A useful first batch is two parts base mix, one part bark, and one part perlite or pumice by volume. This is a practical Monstera container blend rather than a formula tested on M. acacoyaguensis. If water races through without wetting the center, add more base mix or pre-moisten the ingredients; if the pot remains heavy and wet for many days, increase the coarse component and check that drainage holes are not blocked.
Avoid garden soil in an indoor pot. It compacts easily in containers and can hold too much water around roots. Use a pot with open drainage holes, and do not line the bottom with gravel as a substitute for drainage; the water still has to leave the container.
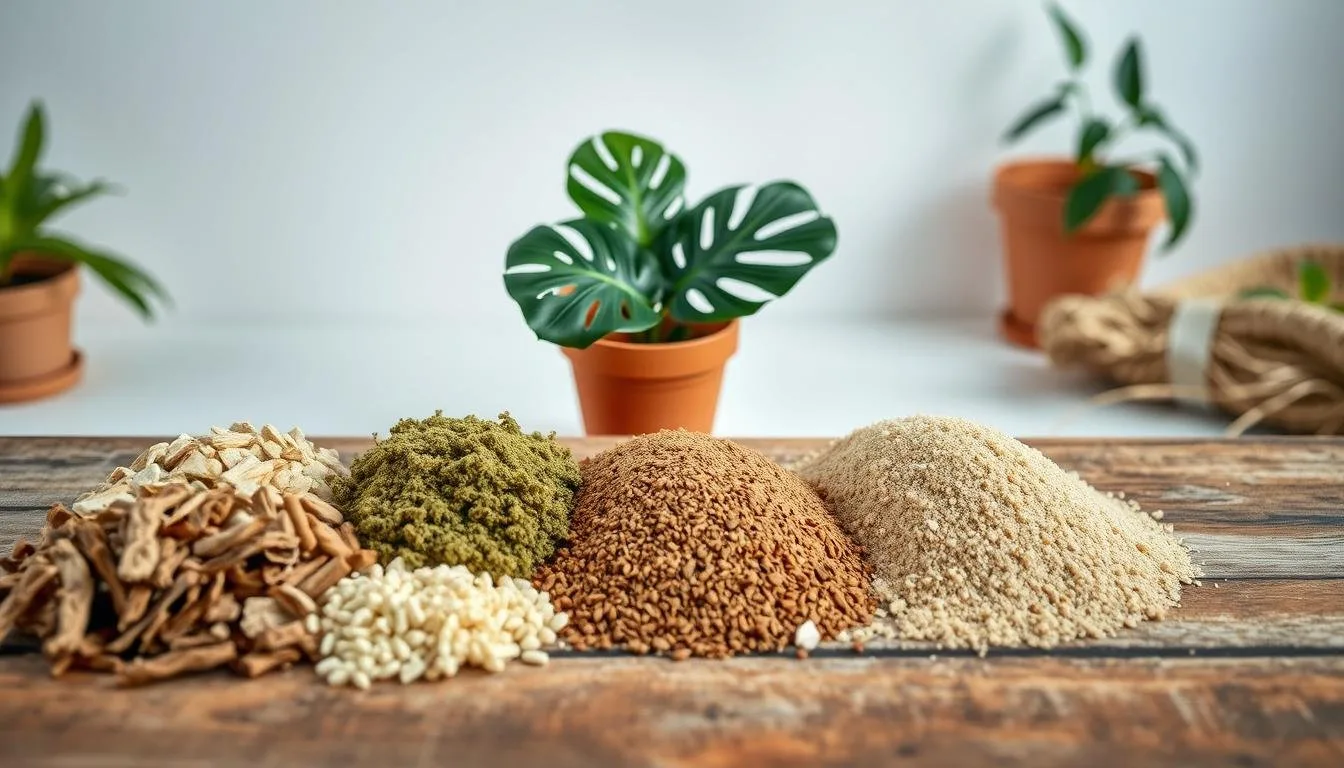
These ingredients illustrate a loose aroid mix; adjust the proportions to how quickly your pot dries and how much light it receives.
Water by checking the root zone, not the calendar
There is no useful universal watering interval for a plant that may be in a small nursery pot, a large decorative planter, or a cool room with limited winter light. Check the mix first: push a finger or wooden skewer about 2–5 centimeters (1–2 inches) below the surface. If it still feels damp or the skewer comes out cool and dark with mix attached, wait; if that upper layer has begun to dry and the pot feels lighter, water thoroughly.
Pour slowly over the surface until excess runs from the drainage holes, then let the pot drain before returning it to a cachepot or saucer. Empty standing water. Penn State Extension’s Monstera guidance also recommends bright indirect light, a well-drained organic mix, and allowing the upper soil to dry between waterings; that is genus-level home-care advice, not a measured schedule for this species. (Penn State Extension: Monstera as a Houseplant.)
A small drink every few days can leave the center of the root ball dry while keeping the surface wet, so a complete soak followed by a sensible dry-down is usually more reliable. If water beads on top or bypasses the mix down the sides, the potting medium may have become hydrophobic. Set the pot in a shallow basin of water for 10–15 minutes, then drain completely; do not leave it standing in water overnight.
Expect the dry-down period to change with season and conditions. Bright summer light, warmth, a small pot, and active growth use water faster; shorter days, cooler rooms, a large pot, or a dense mix slow it down. Check more often when conditions change, but avoid watering just because a certain number of days has passed.
The leaves do not tell you the whole story. A drooping plant can be thirsty, but it can also have damaged, oxygen-starved roots in wet soil. Check the mix and pot weight before adding water; if it is still damp, inspect drainage and roots rather than trying to fix droop with another soak.
Keep temperatures steady and humidity practical
Keep the plant in a warm room where temperatures change gradually. Avoid cold windows at night, air-conditioning blasts, exterior doors that open in winter, and hot air from a heater. The species grows in wet tropical forest according to Kew, and the RHS advises moderate to high humidity for cultivation, but I could not find a published humidity percentage or minimum temperature validated specifically for indoor M. acacoyaguensis.
A hygrometer can confirm whether the air near the plant is dry. If new leaves repeatedly develop dry edges while watering and light are sound, group plants or use a clean room humidifier. A pebble tray has only a small local effect, and misting is brief.
Humidity is only one part of leaf quality. Keep air moving around foliage, wipe off dust, and avoid a humidifier aimed directly at the plant, a radiator, or a cold drafty pane.
If you move the plant outdoors for warm weather, first place it in bright shade and acclimate it gradually over a week or more. Direct sun through a window and outdoor sunlight are not interchangeable; outdoor UV and heat can scorch leaves that developed indoors. Bring it back inside before nights turn cool, and do not leave it out where temperatures may approach frost.
Feed lightly while it is actively growing
The RHS recommends a balanced liquid fertilizer monthly while the plant is in growth. Indoors, that usually means feeding during the brighter, warmer part of the year when you see active new leaves, then reducing or stopping when growth slows in winter. Follow the product label for dilution and frequency; more fertilizer does not make a plant climb or fenestrate on demand.
If the mix is dry, water before feeding; occasionally flush with plain water to limit salt buildup. Crust on the surface or browned tips after feeding are reasons to pause and rinse the mix, then resume at the label’s low end only after the plant is stable.
If the plant is not growing, check light, root health, support, and season before increasing fertilizer. A plant in dim light cannot use a heavy feed to compensate, and excess soluble salts can damage roots. Newly potted cuttings also need time to establish; wait for active growth before feeding routinely.
Prune for health, access, and size
Pruning is mainly for removing dead or badly damaged foliage, controlling a vine that has outgrown its location, or taking a healthy cutting. Use clean, sharp shears and cut the stem just above a node if you want the remaining vine to branch from a nearby growth point. A leaf can be trimmed off at its petiole, but removing a leaf does not create a new plant because the leaf alone has no stem node.
Do not remove every older leaf with a brown edge. Trim a dry tip along its natural outline, leaving a narrow margin; remove a failing leaf at the petiole only after checking the roots and light. Cutting the symptom will not correct its cause.
Aerial roots are not harmful to the plant or to a wall if they are kept inside the pot area. Guide a soft root toward the mix or support, or trim an awkward one if necessary. Wear gloves when pruning and wash sap from skin; the RHS warns that this plant may irritate skin and eyes.
Propagate only from a stem node
A viable cutting must include at least one node—the point on the stem where a leaf, bud, or aerial root emerges. A detached leaf blade or petiole can remain green for a while in water, but without a node it cannot produce a new vine. Take cuttings during active growth if possible, and use a healthy stem rather than one with rot, pests, or severe stress.
Choose a segment with one node and preferably one leaf and an aerial root. With clean shears, cut just below the node. Remove any leaf that would sit underwater or below the potting mix, and label the cutting if you are sharing plants; this uncommon species can be confused with other perforated-leaf Monsteras.
Root a cutting in water or potting mix
For water propagation, submerge the node and any aerial root in a clean glass while keeping the leaf above water. Give it bright indirect light, change cloudy water (at least weekly), and pot it once several healthy roots are a few centimeters long.
For soil propagation, place the node in a small pot of lightly moist, airy mix with the leaf above the surface. A clear humidity cover is optional; if used, open it daily and remove it if condensation remains heavy or mold appears. Keep the mix just damp during rooting, not wet, and do not tug the stem every few days to test it.
Water makes roots easy to inspect but creates a transition to soil; soil rooting avoids that transition but hides progress. Both methods are used for Monstera cuttings. (Gardeners’ World and the Old Farmer’s Almanac describe node-based propagation for other Monstera species; neither presents a controlled comparison for M. acacoyaguensis.)
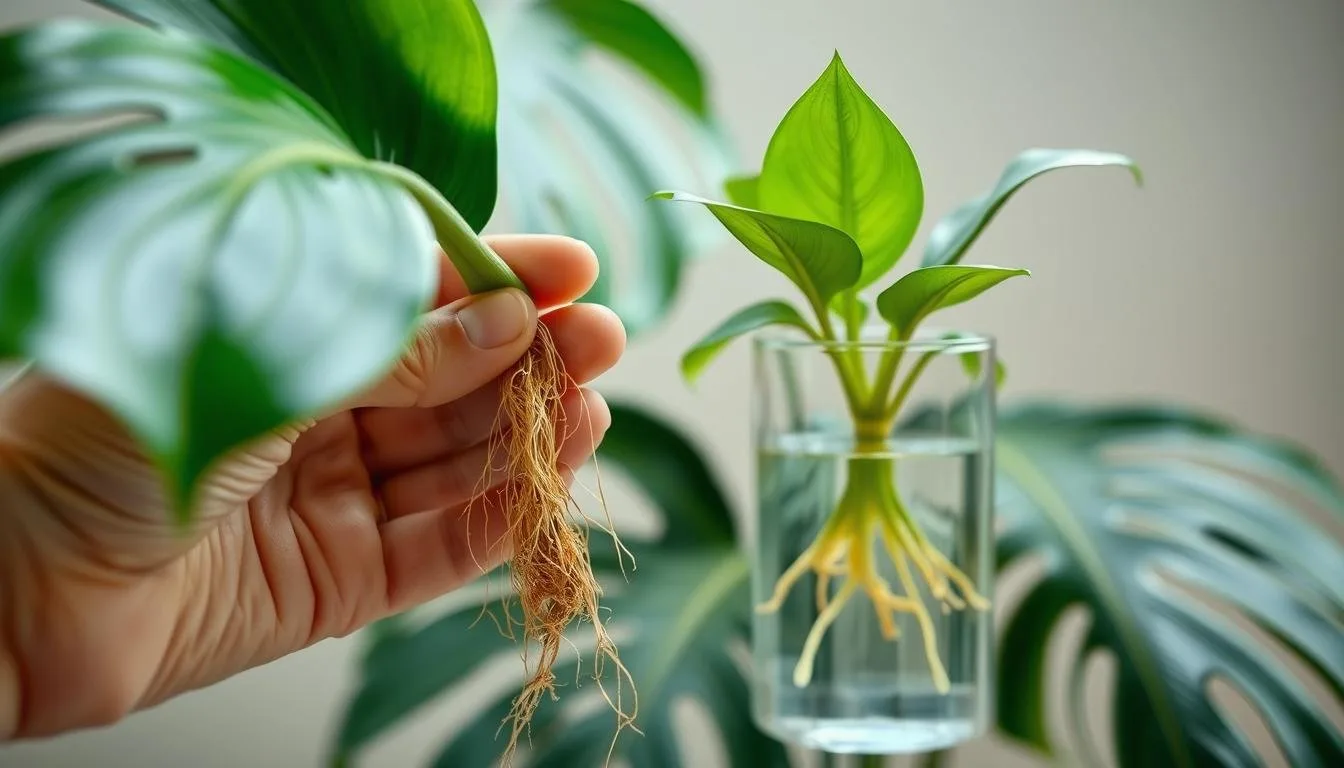
The cutting shown is a genus-level example; for this species, make sure the piece you take includes a node.
Air-layer a long vine before cutting it
Air layering lets a node root while it remains attached to the parent plant, which is useful when a long vine is top-heavy or you want to reduce the risk of losing a valuable cutting. Select a healthy node, wrap it in damp—not dripping—sphagnum moss, and hold the moss around it with a loose sleeve of clear plastic or a propagation pod. Keep the moss lightly moist and check for roots through the cover.
When several roots extend through the moss, cut below the rooted section and pot it into airy mix. If the moss smells sour or the stem softens, unwrap it and remove damaged material. For routine propagation, a single-node cutting is simpler.
Repot when the roots and mix call for it
Repot when roots circle densely around the root ball, emerge from several drainage holes, the plant becomes unstable, or the mix has broken down and stays wet long after watering. A single root poking from one hole is not an emergency. The plant can also be root-bound if water runs straight through while the interior remains dry, but first confirm that the mix is not simply hydrophobic.
Choose a container with drainage holes about 2–5 centimeters (1–2 inches) wider than the root ball. A much larger pot holds more unused wet mix, which can dry slowly around a small root system. Slide the plant out gently, loosen only the outer circling roots, and remove roots that are black, mushy, or hollow; firm light-colored roots are usually healthy.
Set the plant at its previous soil depth, fill around the roots, and water once to settle the mix. Do not bury the stem or compress the blend until it becomes dense. If the existing pole is too short, replace it during repotting or add an extension without levering through the root mass.
Repotting on a fixed schedule is only a rough estimate; pot size, root growth, mix, and light all affect timing. Spring or early summer is convenient, but correct waterlogged, collapsing mix promptly rather than waiting for a calendar date.
Diagnose yellow, brown, or drooping leaves
Start with the pattern and the potting mix. One old lower leaf gradually yellowing while the rest of the plant is growing can be normal aging; several leaves changing at once point to a condition worth checking. Before changing several things, note whether the mix is wet or dry, where the damage appears, which side faces the window, and whether the plant recently moved or was repotted.
| Symptom | First check | Likely next move |
|---|---|---|
| Several yellow leaves and persistently wet mix | Drainage, pot size, and root condition | Let the mix dry appropriately; improve drainage and remove rotten roots if present |
| Yellowing with a very dry, light pot | Moisture in the center of the root ball | Re-wet the mix evenly, then drain; adjust the next check interval |
| Bleached or crisp patches on the window-facing side | Direct sun or hot glass | Filter the light and acclimate gradually |
| Brown tips or margins | Recent dry-out, salt buildup, humidity, or heater/AC exposure | Check watering history, flush accumulated salts, and measure humidity before changing it |
| Limp leaves while the mix is wet | Root oxygen and stem base | Stop watering until the mix is checked; inspect for soft or dark roots and rot |
| Long spaces between small leaves | Light level and support | Move closer to filtered light and train the stem upward |
| No holes on a young plant | Leaf age and growth stage | Continue steady care; juvenile leaves may be entire, and holes are not a quick-fix target |
Root rot is not solved by withholding water for weeks if the soil remains saturated because the container has no drainage or the mix is compacted. If roots smell sour and feel soft, remove the plant, trim the damaged portions with clean shears, and repot into fresh airy mix in a pot only slightly larger than the remaining root system. Keep the plant in bright indirect light while it recovers and delay fertilizer until it resumes growth.
Brown tips do not prove humidity is too low; watering swings, fertilizer salts, hard water, sun, and hot air can look similar. Change one likely factor at a time and judge recovery by new growth, since old brown tissue will not turn green.
Check for pests and protect pets
The RHS lists scale insects and glasshouse red spider mite among pests that may affect M. acacoyaguensis. Other indoor pests such as mealybugs or thrips are possible, but that is a general houseplant risk rather than a species-specific finding. Look beneath leaves, along the midrib, around petiole joints, and at the pole or pot rim; sticky residue, fine stippling, webbing, or cottony white clusters can appear before you see the insects clearly.
Isolate an infested plant and rinse the leaf undersides if the plant tolerates it. Remove a small number of mealybugs with a damp swab, then monitor every few days for new activity. If you need a treatment, choose an insecticidal soap labeled for indoor plants and the pest you have, test it on one leaf, and follow its directions; homemade detergent mixes and strong sprays can damage foliage. (University of Minnesota Extension’s indoor-plant insect guide explains contact treatments and why repeat inspection matters.)
Treat the plant as toxic if chewed. The ASPCA says Monstera species contain needle-like calcium oxalate crystals (raphides) that can cause oral irritation, drooling, or vomiting; its individual Swiss cheese plant entry is for M. deliciosa, so this is a conservative genus-level warning. Keep vines out of reach and contact a veterinarian or animal poison-control service after ingestion, especially if swallowing or breathing is difficult. (ASPCA guidance on Monstera species.)
Conclusion
Give Monstera acacoyaguensis bright filtered light, an airy mix that does not stay saturated, thorough watering followed by a measured dry-down, and a stable support as its stem climbs. Watch the roots and new growth rather than following a fixed watering calendar or expecting every leaf to develop holes on schedule.
The botanical name is accepted by Kew, although the RHS currently marks its listing unresolved, and some care figures online are broader Monstera guidance rather than tests on this species. Start with the conditions you can verify, change one variable at a time, and keep the stem node intact if you want to propagate it.



