Peace Lily Leaves Turning Black: 6 Causes and Fixes
Find out why peace lily leaves turn black, how to tell root rot from cold damage or leaf spot, and what to do today to protect new growth.
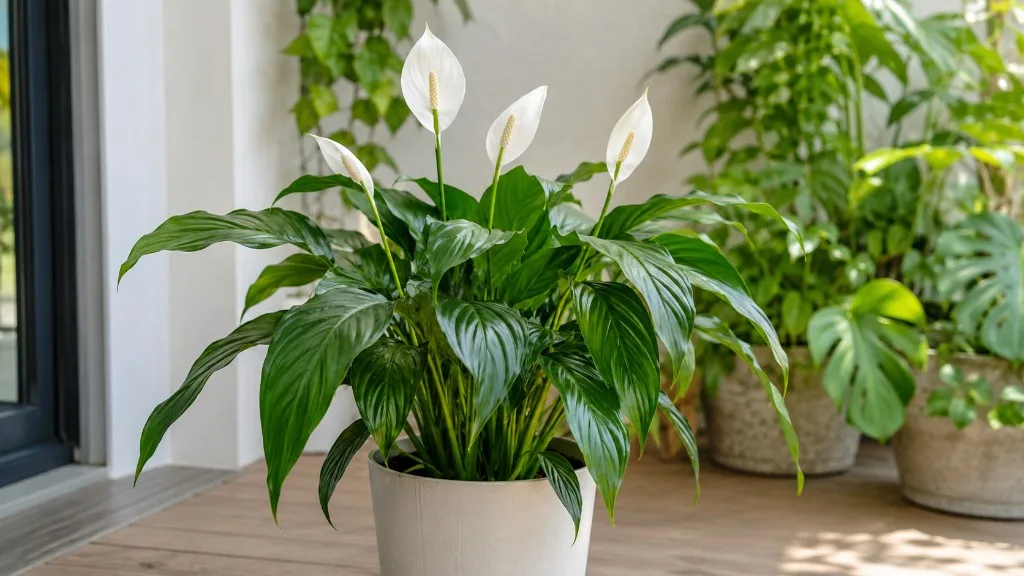
Black peace lily leaves are a symptom, not a diagnosis. The most useful clue is the pattern: a whole leaf that becomes dark and soft points you toward wet roots or cold injury, while separate round lesions suggest leaf spot and one aging lower leaf may simply be finishing its life cycle.
Start by checking the soil and the plant’s location before adding fertilizer, misting, or reaching for a fungicide. Peace lilies prefer evenly moist potting mix, but they still need air around their roots; Clemson University Extension’s peace-lily guide recommends moist rather than soggy soil, slight drying between waterings, and never leaving the pot in excess water. The Royal Horticultural Society’s peace-lily guide makes the same important distinction: regular water is useful, permanently wet compost is not.
Start with the pattern, not the watering calendar
The question is not simply “How often did I water?” It is “Where did the blackening start, what does the tissue feel like, and what changed before it appeared?” A peace lily in bright light and a small plastic pot may need water much sooner than the same plant in a dim room and a large decorative container.
A fast symptom triage
Use this quick comparison to choose the least disruptive first step:
| What you see | Most likely direction | First check |
|---|---|---|
| Several leaves are dark, limp, or soft; mix stays wet | Overwatering or root rot | Feel the mix deeper in the pot and inspect roots if the plant is declining |
| Damage starts at tips or edges after a cold night or draft | Chilling injury | Move the plant to a stable, warm room and wait for new growth |
| Separate brown-black spots, often with yellow around them | Leaf spot or edema | Keep foliage dry, improve airflow, and watch whether new spots appear |
| One old lower leaf slowly yellows, browns, and fades | Natural aging | Remove it cleanly once most of the leaf is spent |
| Crisp tips with otherwise firm, green leaves | Dry air, salts, fluoride, or inconsistent watering | Check water quality, fertilizer use, and root-zone moisture |
| Roots circle densely and the mix dries unusually fast | A crowded pot | Repot only one size up, using a container with drainage |
Black tissue will not turn green again. Recovery means the spread stops, the crown stays firm, and new leaves emerge cleanly; old damaged leaves are evidence of past stress, not a live test of whether today’s correction worked.
1. Overwatering is starving the roots of oxygen
Overwatering is not just “too much water in one session.” It is a root zone that stays saturated so long that air spaces disappear. The roots need both water and oxygen; when the mix remains waterlogged, fine roots weaken, pathogens gain an advantage, and the foliage can turn yellow, brown, dark, or black.
The strongest overwatering clue is a mismatch between the leaves and the soil. A peace lily may look thirsty or droopy even though the mix is still wet because damaged roots can no longer move water normally. Clemson identifies root and stem diseases as common peace-lily problems associated with overwatering, and Houseplant Journal’s peace-lily watering guidance emphasizes fully wetting the mix when it is time to water, then allowing excess to drain rather than relying on small scheduled pours.
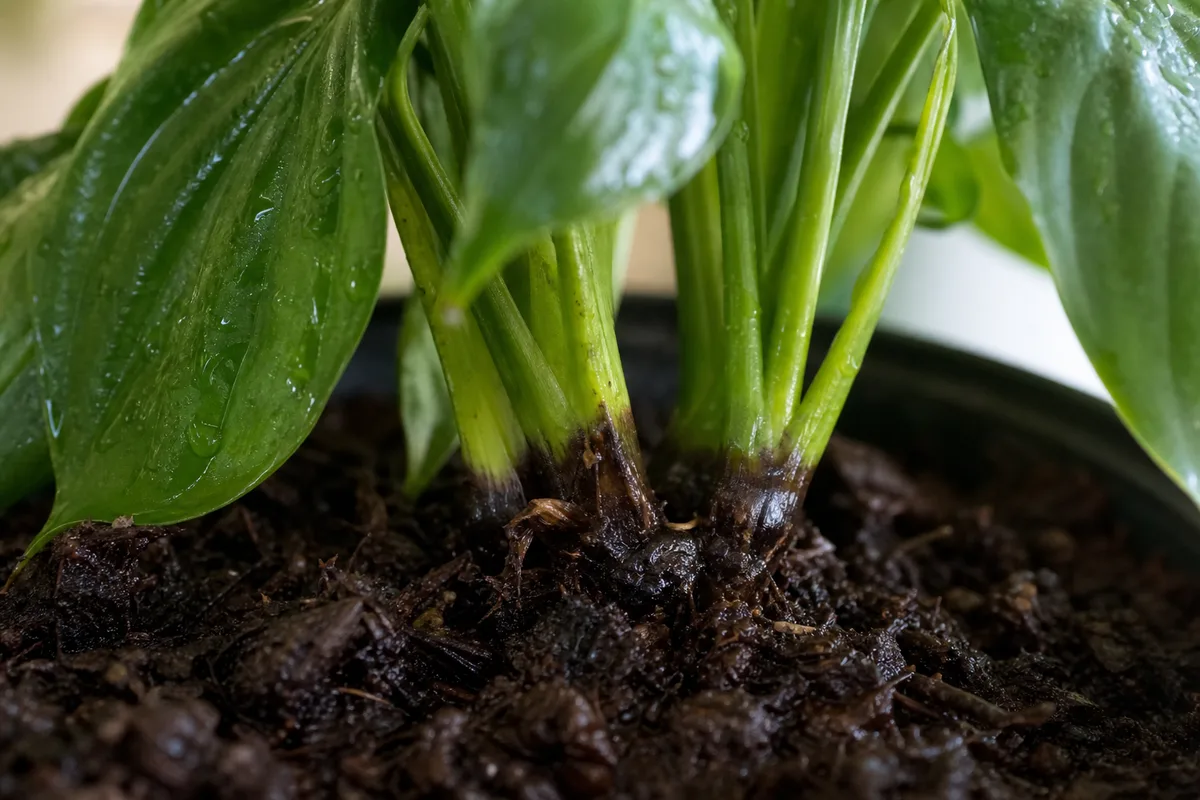
How to confirm wet-root stress
Push a finger or wooden skewer several inches into the mix, not just across the surface. If it is cool and wet deep down days after watering, the pot feels heavy, the lower stems are darkening, or the plant wilts while the soil is wet, treat the root zone as the priority.
Do not “balance” an overwatered plant by letting it go bone-dry in a hot window. Move it into bright indirect light, stop watering until the mix has partly dried, empty any saucer or cachepot, and check whether the container actually drains. If the plant continues to decline or smells sour, unpot it and inspect the roots rather than waiting for the leaves to provide more evidence.
2. Poor drainage keeps the root ball wet too long
A peace lily can be overwatered even when you do not water very often if the pot has no drainage hole, the mix is dense, or the decorative outer pot traps runoff. A large container can create the same problem: extra mix holds moisture around a relatively small root system, so the center stays wet long after the surface looks dry.
The fix is not a layer of gravel at the bottom. University of Maryland Extension’s repotting guidance specifically advises against filling the bottom of a pot with gravel because it does not create the drainage zone people expect. Use a porous houseplant mix in a pot with an open drainage hole; place that pot inside a cachepot if you want a decorative finish, then pour out collected water after watering.
When you water, moisten the mix thoroughly enough for some water to exit the bottom, then let the pot drain fully. A saucer is for catching runoff, not for keeping the pot base submerged. If water takes a long time to leave the pot or runs down a gap at the edge while the root ball stays dry inside, the mix may be compacted or hydrophobic and needs a more deliberate repotting decision.
3. Cold shock kills leaf tissue
Peace lilies are tropical plants, and cold injury can blacken foliage even when the watering routine has not changed. The common triggers are a winter window, an exterior door, a car ride home from a store, an air-conditioning vent, or water that is very cold in an already cool room.
The pattern is often distinctive: damage begins at the leaf tips and edges, moves inward, and may become black before drying. In a University of Florida IFAS study of Spathiphyllum, chilling injury produced necrotic tissue that turned black; injury varied by cultivar and became more severe with colder or longer exposure. Clemson advises avoiding temperatures below about 60°F and keeping plants away from heating and air-conditioning vents, while UF/IFAS describes injury at temperatures well above freezing.

Why cold damage can look fungal
Cold-killed tissue may become water-soaked or dark before it dries, which can resemble a spreading disease. The timing is the clue: if the blackening appeared across the window-facing side after a cold event, and no new spots appear once the plant is warm and dry, cold stress is more likely than an active leaf infection.
Move the plant gradually to a stable, warm location with bright indirect light. Do not put it beside a radiator to “warm it up,” and do not remove every leaf immediately if some tissue is still firm; wait until the extent of the injury is clear, then cut fully dead leaves at the base with clean scissors.
4. Leaf spot spreads as dark lesions
Leaf spot behaves differently from root trouble. Instead of a whole leaf darkening from the base or edge, you see separate round, oval, or irregular lesions embedded in the blade. They may have a yellow halo, merge into larger patches, or continue appearing on nearby leaves when foliage stays wet and air movement is poor.
An Illinois Extension answer on black spots in peace lilies points to leaf spot disease or edema as possibilities and warns that spots can grow together if the cause is fungal. Penn State Extension’s houseplant disease guidance describes houseplant leaf spot as brown-black lesions that may carry a yellow halo and recommends sanitation, dry foliage, air circulation, and prompt removal of infected tissue.
Remove leaves with expanding or numerous lesions rather than trying to save every damaged patch. Disinfect scissors between cuts, put diseased debris in the trash rather than an indoor compost container, water the soil instead of the leaves, and give the plant space around its foliage. A gentle fan can improve air movement, but a cold blast aimed at the leaves simply trades one stress for another.
Fungicide is not the first response to every black mark. If the pattern stops after sanitation and a drier leaf surface, spraying may add risk without solving the underlying issue; if fresh lesions continue, use only a product labeled for the plant and problem in your location, and follow its label exactly.
5. An old leaf is reaching the end of its cycle
Peace lilies continually replace older foliage. One lower leaf can yellow, then turn brown or nearly black as the plant reallocates resources to younger leaves. That is normal when it happens gradually, the rest of the plant is firm and green, and new leaves are emerging without damage.
Natural aging usually affects one of the oldest leaves first, not the newest unfurling leaf or many leaves at once. An aging leaf is also more likely to feel dry or papery than wet and mushy. Cut the leaf stalk close to the soil line with a clean tool once most of it has faded; trimming only the discolored tissue can leave an awkward strip that continues to die back.
If old leaves are blackening in batches, do not stop at “senescence.” Recheck the soil, root health, light, temperature, and water quality. Normal aging is a pattern of occasional replacement, not a convenient explanation for a whole declining canopy.
6. A crowded pot changes how water moves
A root-bound peace lily may dry out unusually fast, push roots through the drainage hole, show dense circling roots at the pot wall, or become difficult to water evenly. When little mix remains around a tight root ball, water can run out quickly while some roots stay dry; the plant then cycles between drought stress and heavy watering, and damaged leaves may darken.
This cause is often misunderstood. Peace lilies tolerate being somewhat snug, and a bigger pot is not automatically healthier. Penn State Extension’s repotting guide recommends looking for dense circling roots, roots through drainage holes, unusually fast drying, or stalled growth before upsizing.
When repotting will help—and when it will hurt
Repot when the roots—not the black leaves alone—show that the plant needs it. Choose a clean container only one size larger, use a porous mix made for houseplants, loosen densely circling outer roots gently, and keep the top of the root ball near its original level.
Do not jump to a much larger pot because the plant looks stressed. The extra soil can stay wet and turn a manageable watering problem into root rot. If the roots are already dark and mushy, the job is rescue repotting: remove rotted material with clean scissors, discard the old saturated mix, and use a clean container with drainage rather than simply burying the old root ball in a bigger pot.
Black tips may be salts, fertilizer, or dry air instead
Not every black-looking peace lily leaf is a root or disease problem. Crisp tips and edges on otherwise firm leaves are more consistent with dry air, repeated dry-down, soluble salt buildup, or fluoride sensitivity than with a mushy root system. A white crust on the soil, recent fertilizer, softened water, or years of small sips instead of thorough watering makes salt or water chemistry more plausible.
An Illinois Extension specialist’s response on peace-lily black leaves notes that peace lilies are susceptible to fluoride-related tip damage and soluble salt buildup. The RHS also warns that fluoride in tap water can damage foliage. Water chemistry varies, so do not assume every tap supply is harmful or that distilled water is mandatory; instead, inspect the pattern, avoid fertilizer overuse, and occasionally water thoroughly so excess salts can drain away.
Dry air can add crispy edges, especially near heating vents or in winter. A hygrometer can tell you whether the room is genuinely dry, but raising humidity does not excuse soggy soil. A humidifier placed nearby, grouping plants with airflow, or a correctly built pebble tray can help the air; misting leaves repeatedly can keep them wet long enough to encourage leaf spot.
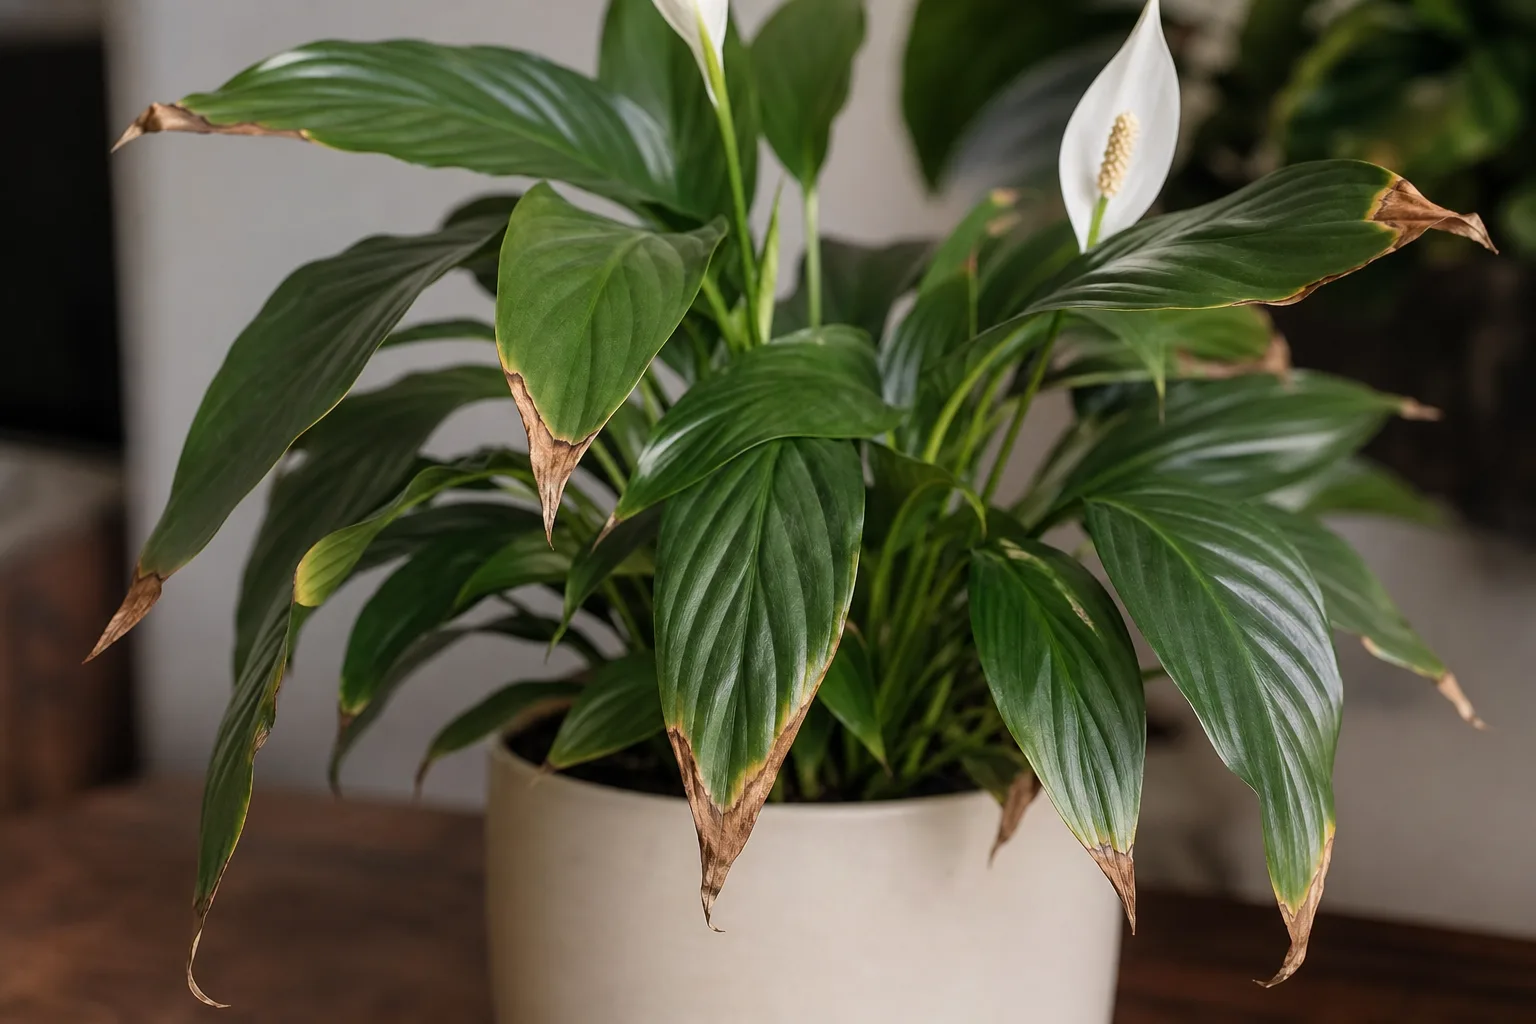
How to rescue a peace lily with black leaves
Treat the cause you can demonstrate. A plant with a cold exposure and firm roots needs warmth and time; a plant with sour wet mix and mushy roots needs a root-zone reset; a plant with spreading lesions needs sanitation and drier foliage. Doing all three interventions at once makes it harder to know what helped and can add new stress.
Remove dead tissue without spreading problems
Wash or disinfect scissors before the first cut and again after any leaf with suspicious spreading spots. Remove a fully black, soft, or mostly dead leaf at the base of its stalk; for a leaf with a small dry patch, trim only the dead area while leaving a narrow margin of damaged tissue rather than cutting into green tissue.
Do not prune healthy leaves just because they are older or slightly marked. The plant still uses green tissue, and an aggressive haircut reduces the canopy that supports recovery. If cold damage has affected many leaves, remove the worst ones first and wait to see which remaining leaves stay firm.
Inspect the roots before choosing a treatment
Slide the plant from its pot over a protected work surface. Healthy roots should be firm enough to hold their shape; rotted roots are typically dark, soft, slimy, foul-smelling, or easy to pull apart. Penn State’s indoor-plant disease guidance describes root rot as blackened, mushy roots associated with overwatering or damaged roots.
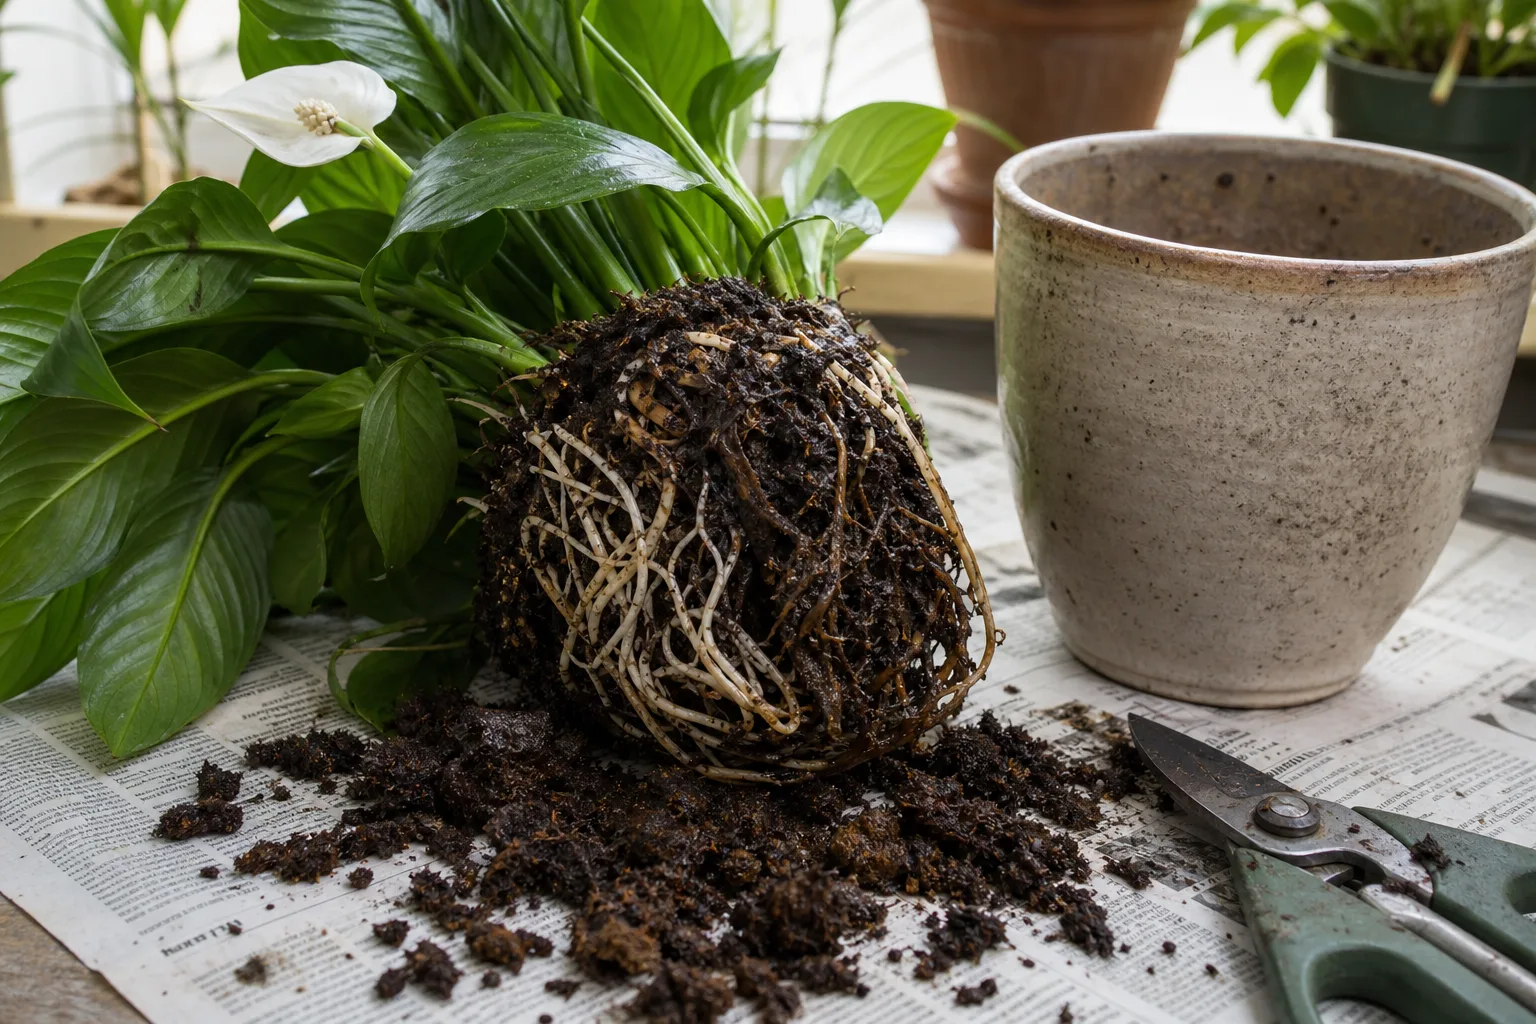
If the root ball is mostly firm and the mix is simply a little wet, do not destroy it in a panic. Let it drain and dry slightly, correct the container setup, and monitor new growth. If a substantial portion is mushy, cut back to firm tissue with clean tools, remove the old wet mix, and repot into fresh, lightly moist mix in a clean pot with a drainage hole.
After repotting, give the plant bright indirect light and stable warmth. Water once to settle the new mix, let it drain, and resist the urge to keep the soil constantly wet while the reduced root system rebuilds.
Recovery is slower than the first correction. A cold-damaged or root-pruned peace lily may pause while it stabilizes, and an old leaf may continue to decline even after the cause is fixed. Count clean new leaves, a firm crown, and a pot that dries at a sensible pace as progress; do not judge the rescue by whether an already black leaf reverses.
Reset care for the next month
For the next four weeks, use observation instead of a weekly reminder:
- Check moisture about an inch or two into the mix, adjusting for pot size, before watering.
- Water thoroughly when the mix has partly dried, then empty the saucer or cachepot.
- Keep the plant in bright indirect light, away from hot or cold blasts.
- Keep leaves reasonably dry and leave space for air to move around the canopy.
- Hold fertilizer while roots are damaged; resume only after active new growth and follow the product label.
- Photograph new leaves as they open so you can judge recovery by clean growth, not old scars.
If the central crown becomes soft, the smell is strong, or blackening continues through the newest leaves despite corrected conditions, the plant may have advanced crown or root disease. At that point, a local Extension office or plant-disease clinic can provide a more reliable diagnosis than escalating home sprays.
Prevent new black leaves with a simple routine
Peace lilies do best with a stable middle ground: bright filtered or indirect light, warmth, moderate humidity, and a root zone that is moist but aerated. Clemson recommends bright indirect light, room-temperature water, and a slight dry-down between waterings; the RHS likewise describes peace lilies as tropical plants that need warmth and regular but not excessive water.
The practical care targets
- Water by the mix, not the date. Feel below the surface before watering. Light, heat, pot material, root density, and season all change the interval.
- Drain every time. Use a pot with an open hole, let excess water run out, and empty the saucer. Do not treat a no-hole decorative pot as the planting container.
- Keep temperatures steady. Avoid cold glass, open doors, and direct vent blasts. If the plant spends summer outdoors, bring it back before cool nights rather than waiting for visible injury.
- Give enough light to use the water. Low light slows growth and drying, so a routine that was safe in a bright summer window may be too wet in a dim winter corner.
- Feed lightly. Peace lilies need little fertilizer, and excess soluble salts can burn roots and tips. Never increase feeding to compensate for black leaves.
- Manage humidity without wet foliage. A humidifier, plant grouping, or correctly positioned pebble tray is safer than keeping leaves damp for hours.
- Check pests and dust. Wipe broad leaves gently and look underneath for scale, mealybugs, or mites; stress from pests can complicate a symptom that already has several possible causes.
Conclusion
When peace lily leaves turn black, inspect the pattern and the root zone before changing everything. Wet mix and soft tissue point toward overwatering or root rot; edge-first damage after a cold event points toward chilling; discrete spreading spots point toward leaf disease; one old fading leaf may be ordinary replacement; and crisp tips may be water chemistry, salts, dry air, or inconsistent moisture.
Remove tissue that is truly dead, correct the condition that caused it, and judge the result by the next leaves. A peace lily does not need perfect care, but it does need a draining pot, stable warmth, indirect light, and a watering routine based on what is happening below the surface.



