How to Grow and Care for Peperomia Caperata
Grow a healthy ripple peperomia with a practical Peperomia caperata care routine for light, water, soil, feeding, propagation, and common problems.
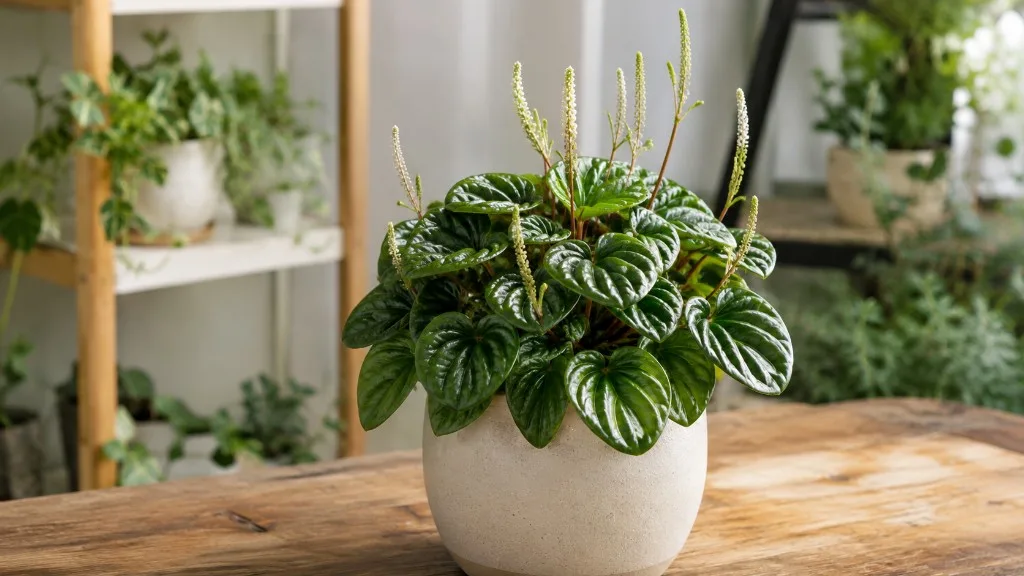
Peperomia caperata, commonly called ripple peperomia or emerald ripple pepper, stays compact because its leaves rise in a tight mound rather than running along long vines. The deeply corrugated, often heart-shaped foliage can be green, silver, burgundy, pink-edged, or red-backed depending on the cultivar. Those ridges are the attraction, but they also make leaf wetness and early pest damage easier to miss.
The plant is forgiving of ordinary indoor humidity and occasional late watering. It is far less forgiving of a dense mix that remains wet around its small root system. Successful care therefore comes down to a simple priority: give the foliage enough indirect light to grow actively, then match watering frequency to how quickly that specific pot dries.
Kew recognizes Peperomia caperata as an accepted species in the pepper family, Piperaceae, native to southeastern Brazil’s wet tropical biome (Kew Plants of the World Online). Indoors, recreate filtered forest light and an airy root zone—not constant swamp-like moisture.
Peperomia Caperata Quick Care Profile
| Care factor | Best practical target | Warning sign |
|---|---|---|
| Light | Bright indirect or filtered light | Long petioles, sparse mound, faded color |
| Water | Water thoroughly after the upper mix partially dries | Wet mix plus soft yellowing or collapse |
| Soil | Loose, moisture-retentive but fast-aerating mix | Water sits on top or pot stays heavy for many days |
| Pot | Drainage hole; only slightly wider than the root ball | Large volume of unused wet mix |
| Temperature | Warm room, ideally about 65–80°F (18–27°C) | Cold drafts, chilled wet soil |
| Humidity | Normal home levels are usually workable | Crispy margins despite correct root moisture |
| Feeding | Dilute balanced feed during active growth | Brown tips or crust on soil after feeding |
| Mature habit | Usually a compact mound around 6–9 inches | Reaching or one-sided growth from weak light |
The Missouri Botanical Garden describes the species as a dense, mound-forming perennial usually about 8 inches tall and wide, with deeply corrugated leaves and narrow whitish-green flower spikes. Size varies with cultivar and conditions, so treat any nursery size as a guide rather than a promise.
Its care profile is not a schedule. A four-inch nursery pot in bright summer light may dry much faster than a glazed six-inch pot in a dim winter room. The right routine changes with the pot, mix, light, temperature, root mass, and season.
Light: Bright Enough for Dense, Colorful Growth
Give ripple peperomia bright indirect light for the tightest growth and strongest cultivar color. It can remain alive in lower light, but “tolerates low light” does not mean it looks its best there. In shade, new petioles tend to stretch, the mound opens up, and growth slows enough that the mix stays wet longer.
Direct midday or afternoon sun through glass can bleach or scorch the raised portions of the leaves. Gentle early sun is usually less risky, especially in winter, but acclimate the plant over a week or two instead of moving it abruptly from a shop shelf to a sunny sill. A sheer curtain or a little distance from hot glass softens intense exposure.
Choosing a Window or Grow-Light Position
An east-facing window is often the easiest starting point. Near a west or south window, place the plant behind a sheer curtain or far enough back that hard sun does not strike it for hours. A north window can work if the room is unobstructed and bright; if the plant leans or its petioles lengthen, move it closer to filtered light.
Under an LED grow light, begin at the fixture maker’s recommended houseplant distance and watch the plant rather than guessing from wattage. Rotate the pot a quarter turn every week or two if light comes from one side. New growth should remain compact, and the leaves should retain their normal cultivar color without pale, dry patches.
The North Carolina Extension Plant Toolbox notes that medium light filtered through a thin curtain is ideal and that the plant can tolerate low light for months. It also warns that very wet soil, very dry soil, and drafty sites are poor fits—useful context because lower light reduces water use.
Water: Moisture Without a Permanently Wet Root Zone
Water thoroughly enough to wet the entire root ball, then let excess drain. Do not give small sips that moisten only the center or top of the pot; dry pockets can persist while you assume the plant has been watered. Empty the cachepot or saucer so the nursery pot does not stand in runoff.
Let the upper portion of the mix dry before watering again. In a small pot with an airy mix, that may mean the top inch feels dry while the lower mix is still faintly moist. In a deeper pot, test farther down with a wooden skewer or judge the change in pot weight rather than relying on the surface alone.
The Reliable Watering Decision
Use three checks together: soil feel, pot weight, and plant condition. Water when the upper mix is dry, the pot feels noticeably lighter than after watering, and the deeper mix is no longer wet. Slight loss of leaf firmness can confirm thirst, but waiting for a dramatic collapse every cycle stresses the plant and makes drought damage easy to confuse with rot.
If the plant droops while the mix is wet and the pot still feels heavy, do not add water. Check drainage, smell the root zone, and inspect the crown for softness. Wet-soil wilt can mean oxygen-starved or damaged roots cannot supply the foliage even though moisture is abundant.
Top and bottom watering can both work. Top watering flushes some accumulated salts through the drainage hole and lets you see how readily the mix accepts water. Bottom watering can rehydrate a mix that has pulled away from the pot, but remove the pot after it has wicked moisture and let it drain; leaving it soaking converts a technique into waterlogging.
The Royal Horticultural Society recommends checking the compost rather than watering routinely, allowing it to partially dry, and reducing water during slower winter growth. That principle is more dependable than “once a week” because indoor drying time can change sharply across seasons.
Soil and Pot: Build Air Around Fine Roots
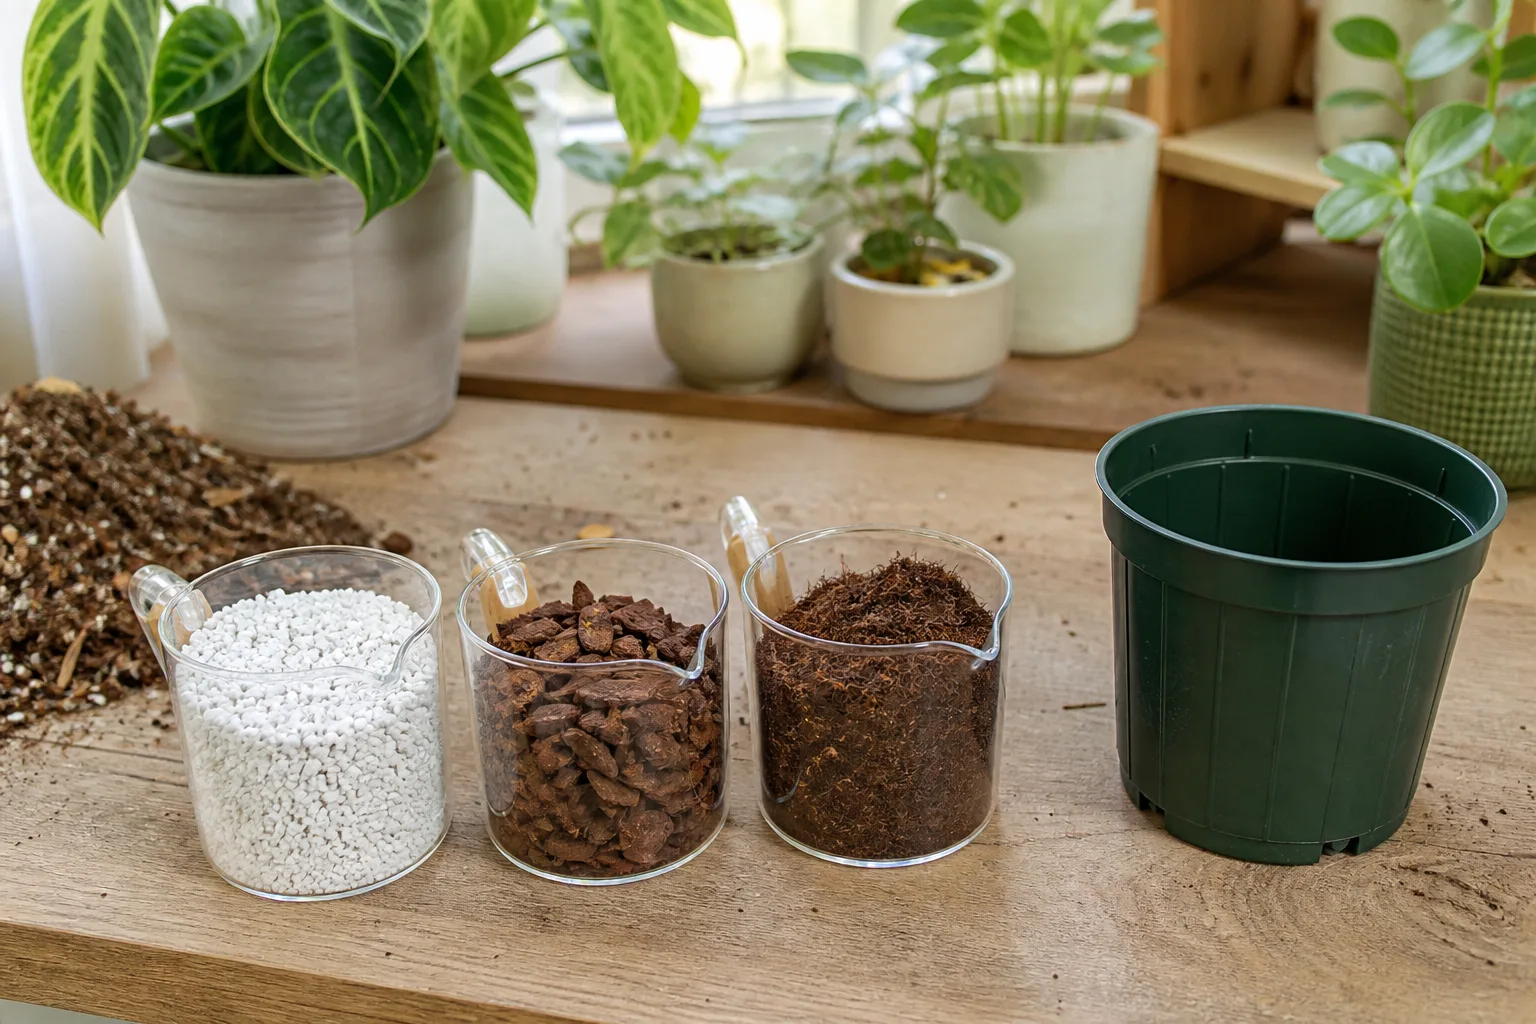
A useful ripple peperomia mix holds enough moisture for fine roots but restores air soon after watering. One practical formula is two parts peat-free houseplant or fine coir-based mix, one part medium orchid bark, and one part perlite or fine horticultural grit. If your base mix is already chunky and free-draining, add less amendment; if it compacts into a dense plug, add more structure.
Use a pot with at least one unobstructed drainage hole. Plastic makes moisture easier to retain; unglazed terracotta dries faster and can help in a cool or cautious setup, though it demands more frequent checking in heat. The material matters less than matching pot size and mix to your watering habits.
Do not place a small root ball in a pot several inches wider “to give it room.” Roots do not immediately use that extra mix, so the unused volume can stay wet. The RHS advises choosing a pot only a few centimeters wider than the root ball because oversized containers remain damp longer and increase rot risk.
A decorative outer pot is fine if the inner nursery pot drains freely. Lift the inner pot out to water, let it finish dripping, and return it only after the reservoir is empty. A layer of gravel beneath a non-draining pot does not create drainage; it simply leaves water trapped inside the container.
Temperature and Humidity Without the Myths
Ripple peperomia prefers a stable warm room. Roughly 65–80°F (18–27°C) supports active growth, while cold glass, air-conditioning vents, and winter drafts become riskier when the mix is wet. Missouri Botanical Garden gives 60°F (about 16°C) as a recommended winter minimum and warns against the combination of wetness and cold.
Average household humidity is usually adequate, although moderate humidity can slow crispy edges and support neater new leaves. A bathroom or kitchen works only if it also provides enough light. Do not trade light for humidity by placing the plant in a dark room.
Misting briefly wets a leaf; it does not create sustained room humidity. On highly ridged foliage, repeated wetting with poor airflow may leave moisture sitting in grooves. If dry air is genuinely causing trouble, use a nearby humidifier with airflow and clean it regularly, or group plants without crowding them so tightly that leaves remain damp.
A pebble tray has limited reach and should never hold the pot base in water. It may slightly alter the immediate microclimate as water evaporates, but it cannot correct chronically dry heated air across a room. Measure with an inexpensive hygrometer before treating humidity as the cause of every brown edge.
Fertilizer, Flowers, and Pruning
Feed only while the plant is producing new leaves. A balanced liquid houseplant fertilizer at one-quarter to one-half label strength every four weeks is a conservative starting point in spring and summer. Plants under strong grow lights may remain active longer; plants in low winter light may need no feed until growth resumes.
Never fertilize a dry, wilted, recently repotted, or root-damaged plant. Water first if the mix is dry, and occasionally flush the pot with plain water to reduce soluble-salt buildup. White crust on the mix or pot rim, stalled growth, and browned tips after feeding are reasons to pause and flush rather than add more.
The thin upright “rat-tail” structures are normal flower spikes, technically inflorescences. They are usually cream to greenish white and less showy than the foliage. Keep them if you enjoy them, or snip them near the base with clean scissors if you prefer the plant to direct resources toward leaves.
Pruning is mostly cosmetic. Remove damaged leaves at the base of the petiole and trim uneven growth with clean blades. Peperomia caperata does not need hard annual pruning; if a plant becomes open and leggy, improve light and propagate healthy material rather than repeatedly cutting without correcting the cause.
Repotting Without Creating a Rot Problem
Repot when roots densely circle the root ball, emerge through drainage holes, or the mix has collapsed and no longer wets or drains evenly. Slow top growth alone is not proof that the plant needs a larger pot. Peperomias often remain comfortable in the same container for two or more years, and an unnecessary size jump creates more wet mix around the roots.
Spring or early summer is easiest because warmth and active growth support recovery. Move up just one pot size—usually 1–2 inches (2.5–5 cm) wider—and keep the crown at its original depth. Tease away only loose, spent mix; aggressive bare-rooting can damage fine roots unless you are removing rot or contaminated soil.
After repotting, water once to settle the mix and let the pot drain fully. Then resume moisture checks instead of watering extra because the plant “looks stressed.” Temporary softness can follow root disturbance, but repeatedly saturating the new mix is more likely to prolong stress than cure it.
Propagating Peperomia Caperata
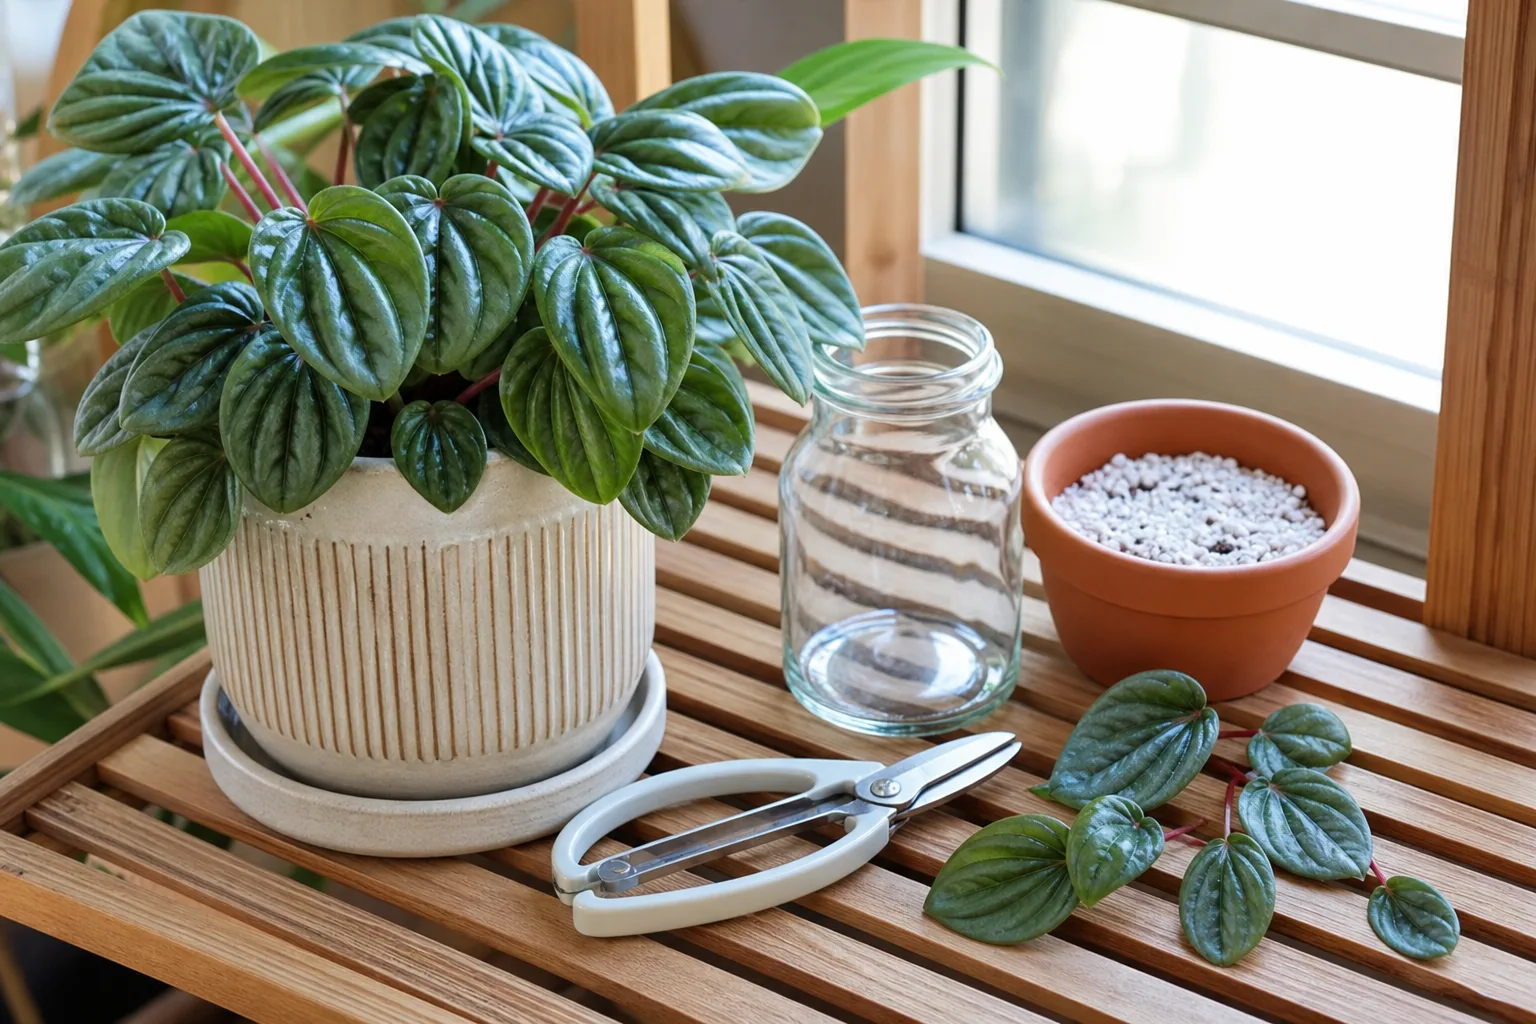
Ripple peperomia can produce new plants from leaf tissue, leaf petioles, stem tips, or divisions. Propagate during warm, bright growth for faster rooting and lower rot risk. Start with hydrated, pest-free material and a clean blade; one infected or decaying cutting can spoil a humid propagation container.
Choose the method based on your goal. Leaf cuttings can produce several plantlets from little material, but they take patience. Stem cuttings establish a recognizable rosette faster when a usable stem is present. Division gives the quickest full-looking plant but requires a mature clump with naturally separable crowns.
Leaf-Petiole and Leaf-Section Cuttings
For a leaf-petiole cutting, remove a firm mature leaf with 1–1½ inches of petiole if possible. Insert the petiole at a slight angle into a pre-moistened, airy rooting medium such as perlite mixed with fine coir or peat-free compost. Keep the blade above the mix and place the pot in bright indirect light.
For leaf sections, cut a healthy leaf horizontally into halves and insert the cut edge shallowly into the same medium. This method exploits the leaf’s ability to form adventitious roots and shoots from wounded tissue. The UF/IFAS propagation resource specifically shows that peperomia leaf pieces can form multiple plantlets from major veins.
Cover loosely with a clear dome or bag to reduce water loss, but provide some air exchange and keep plastic off the leaf. The medium should be lightly moist, never sodden. Iowa State University Extension reports roots commonly forming in three to four weeks and plantlets appearing in six to eight weeks for leaf-petiole propagation, though cool or dim conditions can take longer.
Pot plantlets individually after they have useful roots and several leaves. One important limitation: leaf propagation may not preserve complex chimeral variegation. UF/IFAS notes that variegated chimeral peperomia can produce all-green shoots from leaf cuttings, so use a stem or division when retaining a cultivar’s exact pattern matters.
Stem Cuttings and Division
For a stem-tip cutting, take a healthy piece with at least one node and remove foliage that would sit below water or mix. Root it directly in an airy medium for the least transition, or place the node in clean water while keeping leaves dry. Refresh water once or twice weekly and pot up around the time roots reach about 1 inch.
Water-rooted cuttings may wilt after transfer because water roots differ from roots formed in aerated potting media. Iowa State warns that water-formed roots can be coarser and poorly adapted to soil. Reduce the shock by using a small pot, evenly moist—not saturated—mix, and steady indirect light while new soil-adapted roots form.
Division works when several crowns can be separated with their own roots. Slide the plant out, locate natural splits, and ease or cut the clump apart with minimal damage. Pot each division snugly at the same depth; tiny rootless rosettes are better treated as cuttings than as divisions.
Cultivars and What Their Appearance Tells You
The species is recognized by its compact rosette, deeply furrowed leaves, reddish petioles, and narrow flower spikes. Cultivars alter shape and color, so identify the label before assuming a difference is damage. ‘Rosso’ usually has narrow, pointed, strongly rippled leaves with red undersides; ‘Frost’ is silvery; ‘Luna Red’ carries deep burgundy foliage; other selections add pink, cream, or metallic tones.
Color intensity often responds to light, but genetics set the basic pattern. A burgundy cultivar becoming greener in shade may improve when moved to brighter filtered light. A random pale patch that later turns crisp, by contrast, is more consistent with scorch or physical injury than healthy variegation.
Buy plants with firm foliage, active central growth, and no cottony residue in leaf grooves. Check the soil surface for fungus gnats and lift the nursery pot from its cover to see whether it is sitting in water. A compact plant can conceal a poor root system, so unexplained looseness at the crown deserves attention.
Troubleshooting Ripple Peperomia

Start diagnosis with the root zone, not the leaf color. Ask whether the mix is dry or wet, whether the plant recently moved, and whether the newest growth differs from old damage. One yellow leaf at the base may be normal aging; several rapidly changing leaves point to an active care or pest problem.
Change one major variable at a time unless the plant is collapsing. Moving, repotting, fertilizing, and changing the watering routine together makes the response impossible to read. Severe rot is the exception: remove decayed tissue promptly and preserve healthy leaves or stems as backup cuttings.
Yellow, Brown, Curled, or Drooping Leaves
Yellow leaves with wet mix suggest excess moisture, poor aeration, weak light, cold roots, or developing rot. Pause watering, improve warmth and light, and inspect roots if the plant is loose, smells sour, or continues to decline. Healthy roots are firm; rotten roots are dark, soft, and easily stripped.
Drooping with dry mix and a light pot usually indicates thirst. Water thoroughly, drain, and reassess over the next day. Drooping with wet mix is more urgent because additional water cannot fix damaged roots. Soft petioles or a mushy crown call for unpotting, removing rot with a clean blade, and restarting healthy material.
Crispy brown margins can come from a root ball drying too far, hot sun, fertilizer salts, or very dry air. Check those causes in that order rather than assuming humidity. Bleached tan patches on the light-facing side usually indicate sun scorch; move the plant out of hard direct rays but leave already damaged tissue until it is dry and easy to remove.
Curling or distorted new leaves can result from inconsistent moisture, cold, pests, or stress at the root zone. Inspect both leaf surfaces and the tight center with a flashlight. Old distorted leaves will not flatten, so judge the fix by whether subsequent growth emerges normally.
Pests, Fungus Gnats, and Root Rot
Mealybugs lodge as white cottony clusters where petioles meet leaves. Spider mites cause fine stippling and sometimes webbing, while scale appears as attached brown or tan bumps. Isolate the plant, physically remove light infestations, and use a product labeled for the pest and indoor ornamental plants; test any spray on one leaf because textured foliage can mark.
Fungus gnats are also a moisture clue. Adults are nuisance flies, while larvae occupy damp organic media. UC Statewide IPM advises isolating infested houseplants and notes that fungus gnats thrive in moist organic potting media; correcting chronic wetness is therefore part of control, not merely a watering preference.
Root rot is a condition, not a diagnosis of one pathogen. Persistently wet, poorly aerated media damages roots and favors several disease organisms. Remove the plant, trim soft roots and crown tissue, disinfect tools between cuts, repot the viable remainder in fresh airy mix, and reduce the pot size to fit what roots remain.
If little healthy root or crown tissue survives, propagation is often more reliable than repeated rescue attempts. Take unaffected leaves or stem sections before rot reaches them. Discard badly decayed material and do not reuse contaminated mix.
Seasonal Care and Growing Outdoors
In spring and summer, brighter light and warmth usually increase water use and support propagation, repotting, and light feeding. In autumn and winter, indoor growth may slow even though the home stays warm. Check less often by habit if you wish, but water based on actual drying rather than declaring the plant dormant on a fixed date.
Keep the plant back from cold window glass and away from heating vents. A humid room can still produce slow drying in weak light, so humidity is not permission to keep the mix wetter. Dust foliage gently with a soft dry brush or careful rinse followed by good airflow; ridged leaves can trap debris.
Outdoors, P. caperata is suitable only for reliably frost-free conditions. Missouri Botanical Garden lists it for USDA Zones 11–12, and container plants can spend warm weather outside in bright shade after gradual acclimation. Bring them in before nights turn cool, quarantine them from the indoor collection, and inspect for hitchhiking pests.
Do not expose an indoor-grown plant suddenly to outdoor sun, wind, or heavy rain. A covered, shaded patio provides more control than an open bed. Tropical rain does not make a waterlogged container safe; the pot still needs drainage and protection from repeated saturation.
Pet Safety
The ASPCA lists emerald ripple peperomia, Peperomia caperata, as non-toxic to cats, dogs, and horses. That makes it a useful choice for pet households compared with many popular tropical foliage plants.
“Non-toxic” does not make chewing desirable. Plant material can still upset an individual animal’s stomach, and fertilizers, pesticides, decorative stones, or contaminated potting mix introduce separate hazards. Move the plant out of reach if a pet repeatedly eats it, and contact a veterinarian if an animal develops concerning symptoms.
Conclusion
Good Peperomia caperata care is less about recreating a rainforest and more about maintaining the right balance: useful indirect light above the leaves and air between moisture around the roots. A compact pot, structured mix, and watering decision based on dryness and pot weight prevent the most common decline.
Once that foundation is stable, the rest is straightforward. Feed lightly during active growth, repot only when the roots or mix justify it, propagate healthy tissue in warmth, and diagnose wilt by checking whether the soil is dry or wet before reaching for the watering can. The plant’s next leaves—not a rigid calendar—will tell you whether the routine is working.



