Why Rubber Plant Leaves Turn Yellow: Causes and Fixes
Rubber plant leaves turning yellow? Use the soil, leaf pattern, light, pest, and root checks to find the cause and choose the right fix.
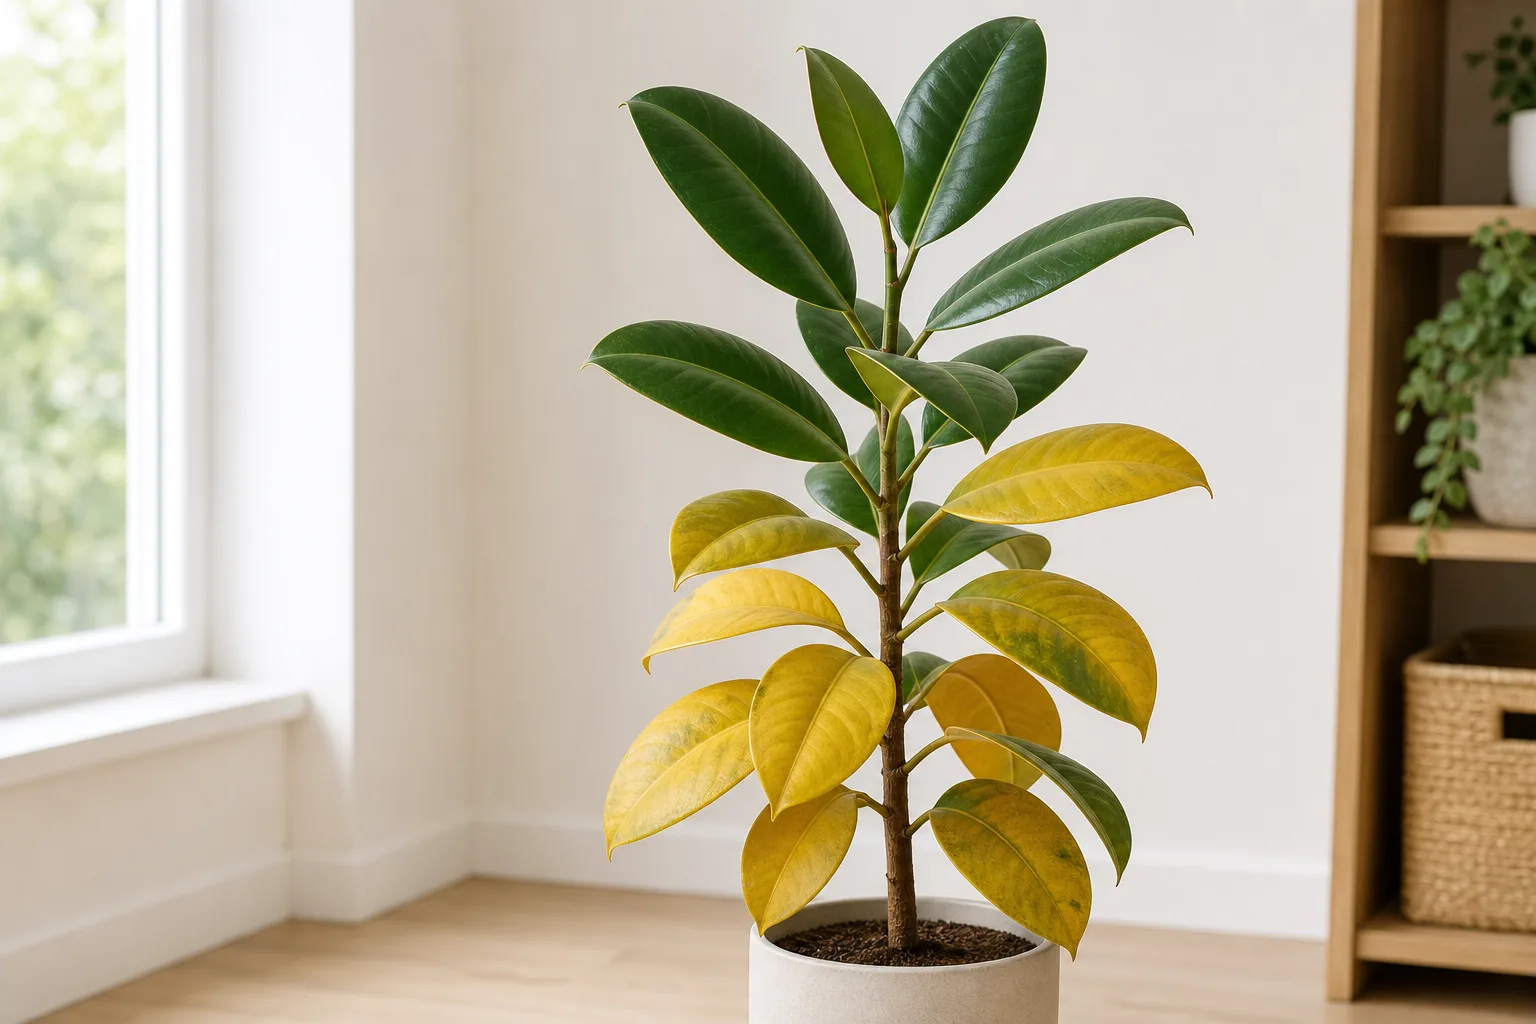
Yellow rubber plant leaves are a clue, not a diagnosis. The same color change can follow soil that stays wet, a root ball that has gone bone-dry, too little light, sudden sun, pests, a cold draft, or ordinary aging of one old lower leaf.
The safest first move is to check the root-zone moisture and the pattern of yellowing together. If the soil is wet, do not add water; if it is dry and the pot is light, rehydrate it thoroughly; if the yellowing is stippled or sticky, inspect for pests before changing the routine. That short pause prevents the most common rescue error: treating every yellow leaf as thirst.
The short answer: start with the soil, not the leaf
Rubber plant usually means Ficus elastica, a broadleaf evergreen with thick, glossy leaves. NC State Extension describes it as a low-maintenance plant that grows best indoors in bright indirect light or partial shade, with good drainage, some drying between waterings, and protection from cold temperatures and drafts (NC State Extension’s Ficus elastica profile). Those conditions give you a useful baseline, but they do not translate into a fixed “water every seven days” rule.
If just one or two of the oldest leaves near the bottom slowly turn yellow while the stem is firm and the newest leaf is healthy, normal senescence is a reasonable explanation. If several leaves yellow at once, yellowing reaches new growth, the plant droops while the mix is wet, or the pot has a sour smell, treat it as a stress signal and investigate the roots before watering or feeding.
The color itself also matters less than its distribution. Even pale yellowing across much of the canopy suggests a root, light, or nutrient problem; tan-yellow patches only on the window-facing side suggest scorch; and tiny yellow dots between green tissue suggest sap-sucking pests. Use the whole plant as evidence.
Use this 60-second yellow-leaf triage
Before you move the pot, prune, repot, or fertilize, take one minute to collect the clues that separate the likely causes.
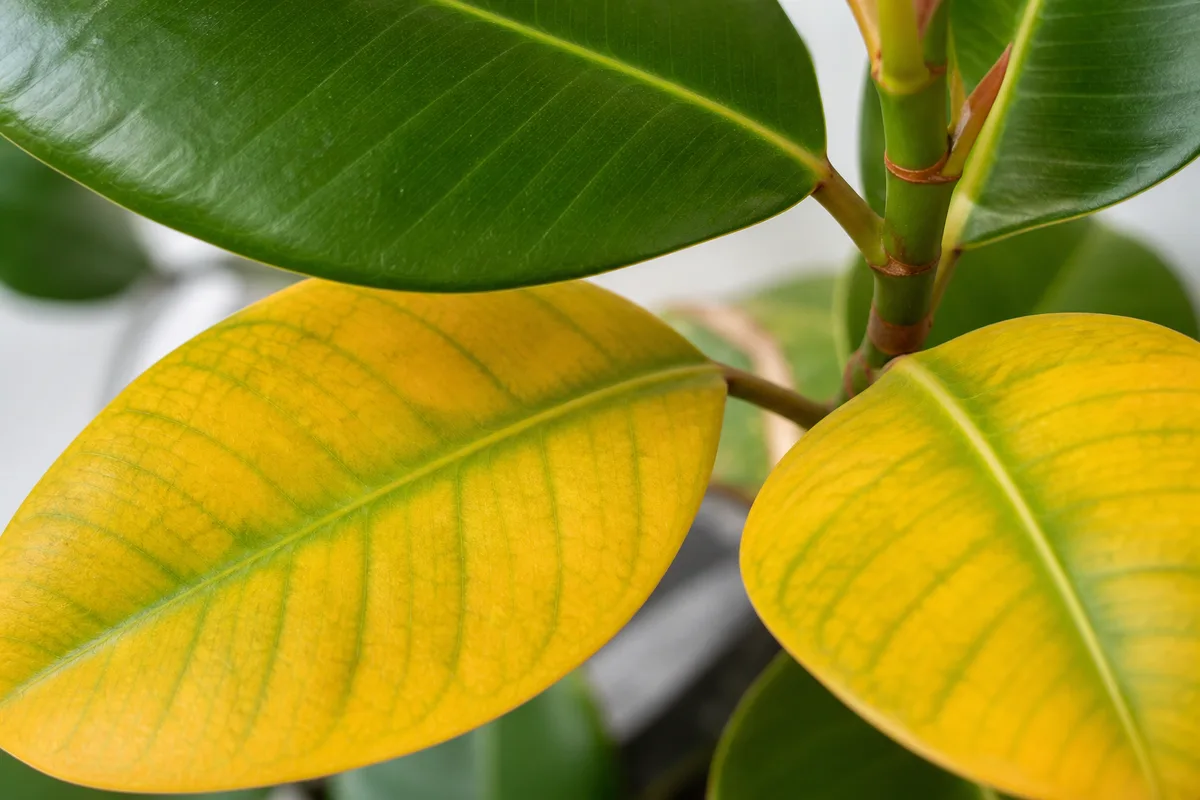
A close look at yellow rubber plant leaves is most useful when paired with the plant’s soil moisture, leaf position, and recent changes.
| What you see | More likely direction | First action |
|---|---|---|
| Several soft yellow leaves and soil that stays wet | Overwatering, poor drainage, or root damage | Stop watering; check the drainage hole and saucer |
| Yellow leaves with crisp edges, dry mix, and a light pot | Underwatering or repeated dry-down | Rehydrate slowly and let the pot drain fully |
| Bleached yellow-tan patches on the window side | Sun scorch or heat through glass | Move back from harsh sun and acclimate gradually |
| Fine stippling, webbing, bumps, or cottony residue | Spider mites, scale, or mealybugs | Isolate and inspect every leaf and stem |
| One old lower leaf yellowing while new growth stays green | Natural aging | Keep care steady and remove it when fully yellow |
| Yellowing after a move, cold night, or vent change | Environmental shock | Restore a stable, draft-free location |
Read leaf position, texture, and timing
Start at the bottom and work upward. Lower leaves are the oldest, so a plant can shed one occasionally without being in danger. Lower leaves that are soft, yellowing rapidly, and accompanied by wet soil are different: that combination points toward water stress or damaged roots rather than routine turnover.
Texture narrows the field. A dry-stressed leaf is more likely to feel thin, limp, papery, curled, or crisp at the margin. A leaf on a waterlogged plant often feels soft or unusually limp, and it may develop brown or black areas as roots lose function. These are tendencies, not proofs, so confirm them against the soil.
Timing is a powerful but underused clue. A decline that begins within days of moving the plant, changing windows, turning on heat, or carrying it home in cold weather implicates environmental shock. A slow spread over several weeks with webbing or stippling fits a pest buildup better than a single missed watering.
Check moisture below the surface
Push a finger about 1 to 2 inches into the potting mix, or use a clean wooden skewer to sample deeper. Lift the pot before and after watering so you learn its normal weight. The top can look dry while the middle is saturated, especially in a tall decorative cachepot or a dense mix.
The correct question is not “When did I last water?” but “Is this root ball dry enough for this plant, in this light, at this time of year?” RHS recommends growing rubber plant in bright filtered or indirect light with soil that is moist but well drained, watering moderately during growth and sparingly in winter (RHS rubber plant profile). Let that guidance shape your checks, not a calendar.
What healthy rubber plant growth should look like
A healthy rubber plant has firm stems, glossy leaves with an even color appropriate to the cultivar, and a growing tip that is holding or producing new foliage. A new leaf can be lighter green or bronze while it hardens; do not confuse normal immature color with deficiency. Variegated cultivars also have stable cream, pink, or yellow patterning that should not be mistaken for disease.
Rubber plants are adaptable, but “tolerates low light” is not the same as “grows well in a dark room.” NC State lists dappled sunlight and partial shade as suitable outdoor light categories and recommends bright indirect light indoors. It also notes that some bottom leaves naturally yellow and drop, while overwatering and cold drafts can cause leaf loss. That combination explains why one old leaf is not an emergency but a whole flush of yellow leaves deserves a check.
Use the plant’s new growth as your best report card. An old yellow leaf will not become glossy green again, but a stable plant should stop producing new abnormal yellow leaves, hold its growing tip, and eventually make foliage with normal size and color. If the newest leaf is shrinking, pale, distorted, or failing to open, keep looking for a root, light, pest, or temperature problem.
Overwatering and root stress
Overwatering is not only “too much water in one session.” It is any combination of watering frequency, dense soil, a pot without a clear drainage path, low light, or trapped runoff that keeps the root zone wet longer than the plant can use it. In that saturated mix, roots have less air available and may stop functioning; the foliage then yellows even though the pot is full of water.
The strongest pattern is yellow, limp leaves plus a heavy pot that remains damp for many days. A cachepot can hide standing water, and a saucer can keep the bottom of the pot wet after the surface appears dry. If the plant is in a dim room, it uses water more slowly, so an old routine can become excessive when winter light drops.
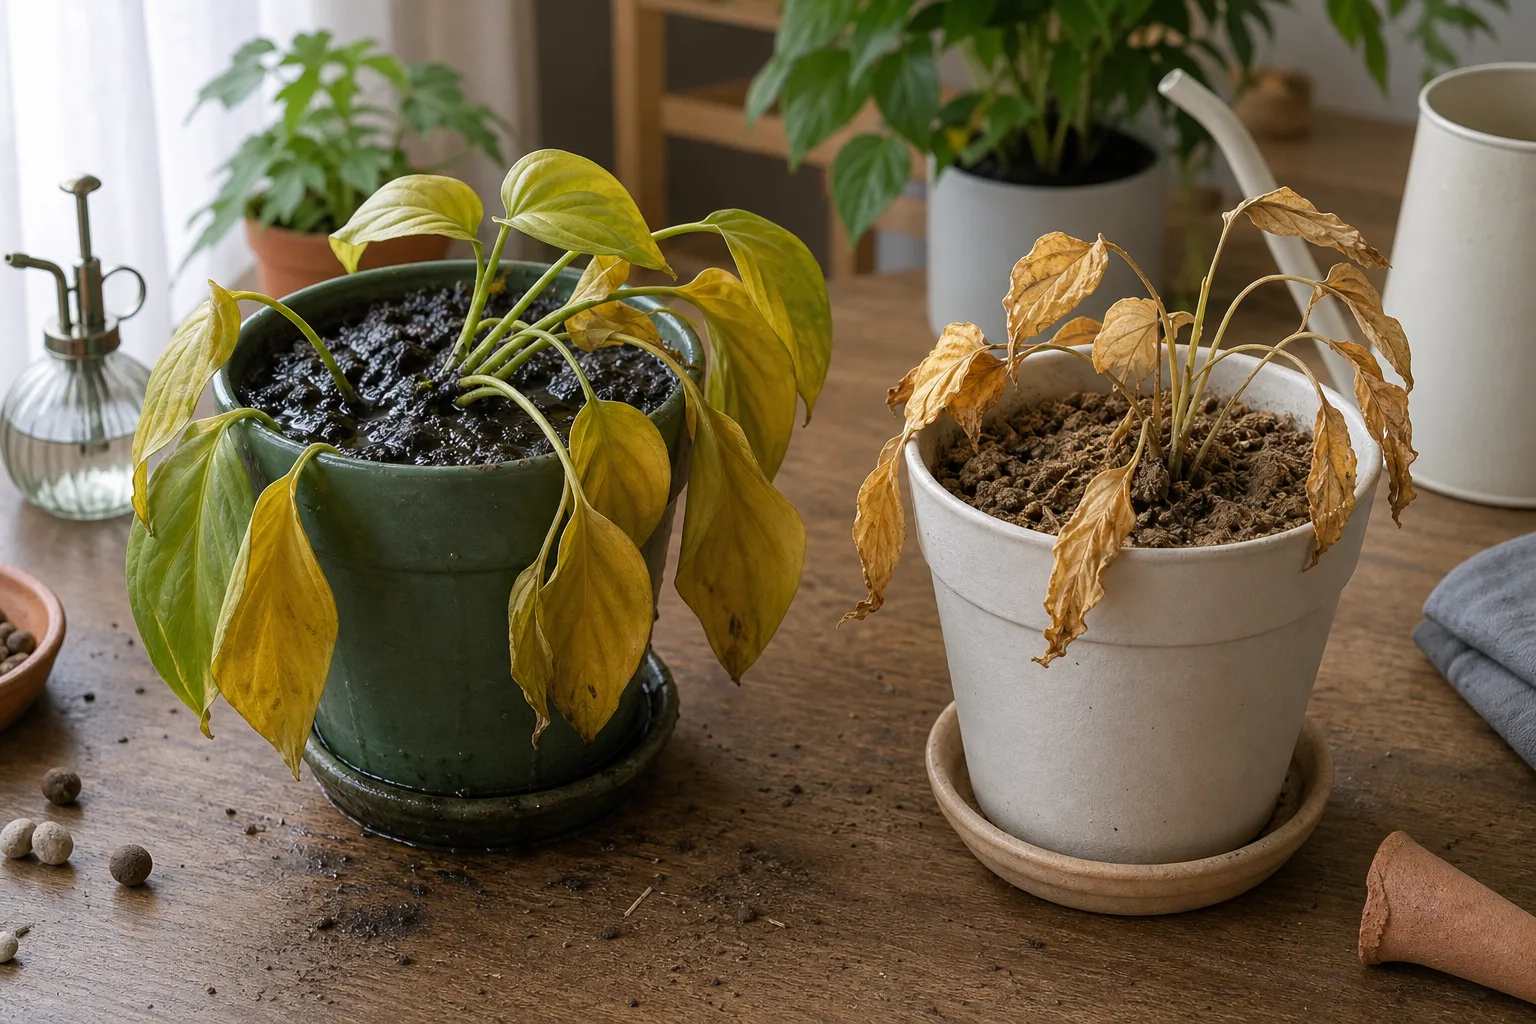
How to fix a wet root ball
First, stop watering and empty the saucer or cachepot. Confirm that the inner pot has open drainage holes and that water can actually escape; a hole blocked by compacted mix is functionally the same as no hole. Place the plant somewhere bright and stable with gentle airflow, but do not put a suddenly waterlogged plant into harsh direct sun to “dry it out.”
If the mix is only moderately damp and the stems are firm, allow the upper layer to dry and monitor how quickly the pot lightens. Do not keep adding small sips of water, because frequent shallow watering can leave the lower root zone wet indefinitely. At the next watering, soak the mix evenly until some water drains, then discard the runoff.
If soil stays saturated, smells sour, or yellowing continues while the plant droops, a root inspection is more useful than another waiting period. Do not fertilize during this stage. Fertilizer salts cannot repair roots that are short of oxygen, and extra feeding can add stress to a plant already struggling to take up water.
When to unpot and inspect roots
Unpot when the moisture and foliage disagree: the plant looks thirsty but the mix is wet, the stem base is soft, the smell is foul, or the pot has failed to dry after a reasonable interval. Gently slide the root ball out and brush away enough soil to see the roots. Healthy roots are firm and resilient; damaged roots are dark, soft, slimy, or easy to pull apart.
Trim only roots that are clearly dead with clean shears, then repot into fresh, airy potting mix in a clean container with drainage. Use a pot only slightly larger than the remaining root ball; a much larger pot stores more water around a reduced root system. If almost no healthy roots remain, preserve firm green stem sections as a backup rather than assuming the original root ball will recover.
For a deeper rescue sequence, use the houseplant root-rot guide. The key principle here is simple: a rubber plant with wet soil and damaged roots needs air, clean mix, and time—not repeated drinks.
Underwatering and repeated dry-down
Underwatering usually leaves the opposite moisture evidence. The mix is dry well below the surface, the pot feels unexpectedly light, and leaves may curl, droop, wrinkle, or develop crispy brown edges before they yellow and drop. Bright light, heat, an undersized pot, a dense root ball, and a warm dry room can make a previously adequate routine fail.
Give a genuinely dry plant a slow, thorough watering. Pour around the surface until the entire root ball is wet and excess drains from the bottom, then empty the saucer. If water races down the pot wall or straight through without wetting the mix, the soil may have shrunk away from the container or become water-repellent; soak the pot in a basin briefly, then let it drain completely rather than leaving it submerged.
Do not follow a rescue soak with daily watering. Check the mix again after a few days, then adjust the interval for the plant’s actual light and season. Repeated swings from bone-dry to saturated can stress roots just as surely as a consistently poor routine. Gardener’s Path makes the practical point that rubber plant moisture needs change with light, weather, soil, HVAC use, and the time of year, so the calendar should remind you to inspect rather than command you to water (Gardener’s Path’s rubber-tree yellow-leaf guide).
If the soil is dry but leaves stay limp after a complete soak, do not keep pouring water. Check for a severely root-bound plant, root damage, a broken drainage path, or temperature stress. A root system that has lost fine roots may not absorb water normally even when the pot was recently dry.
Too little light slows everything down
Low light can create a slow, whole-plant fade rather than a dramatic spot. Leaves may look washed out, growth may become sparse or stretched, and the soil may remain wet longer because the plant is using less water. That last effect is why moving a rubber plant into a dim corner can turn the same watering routine into overwatering.
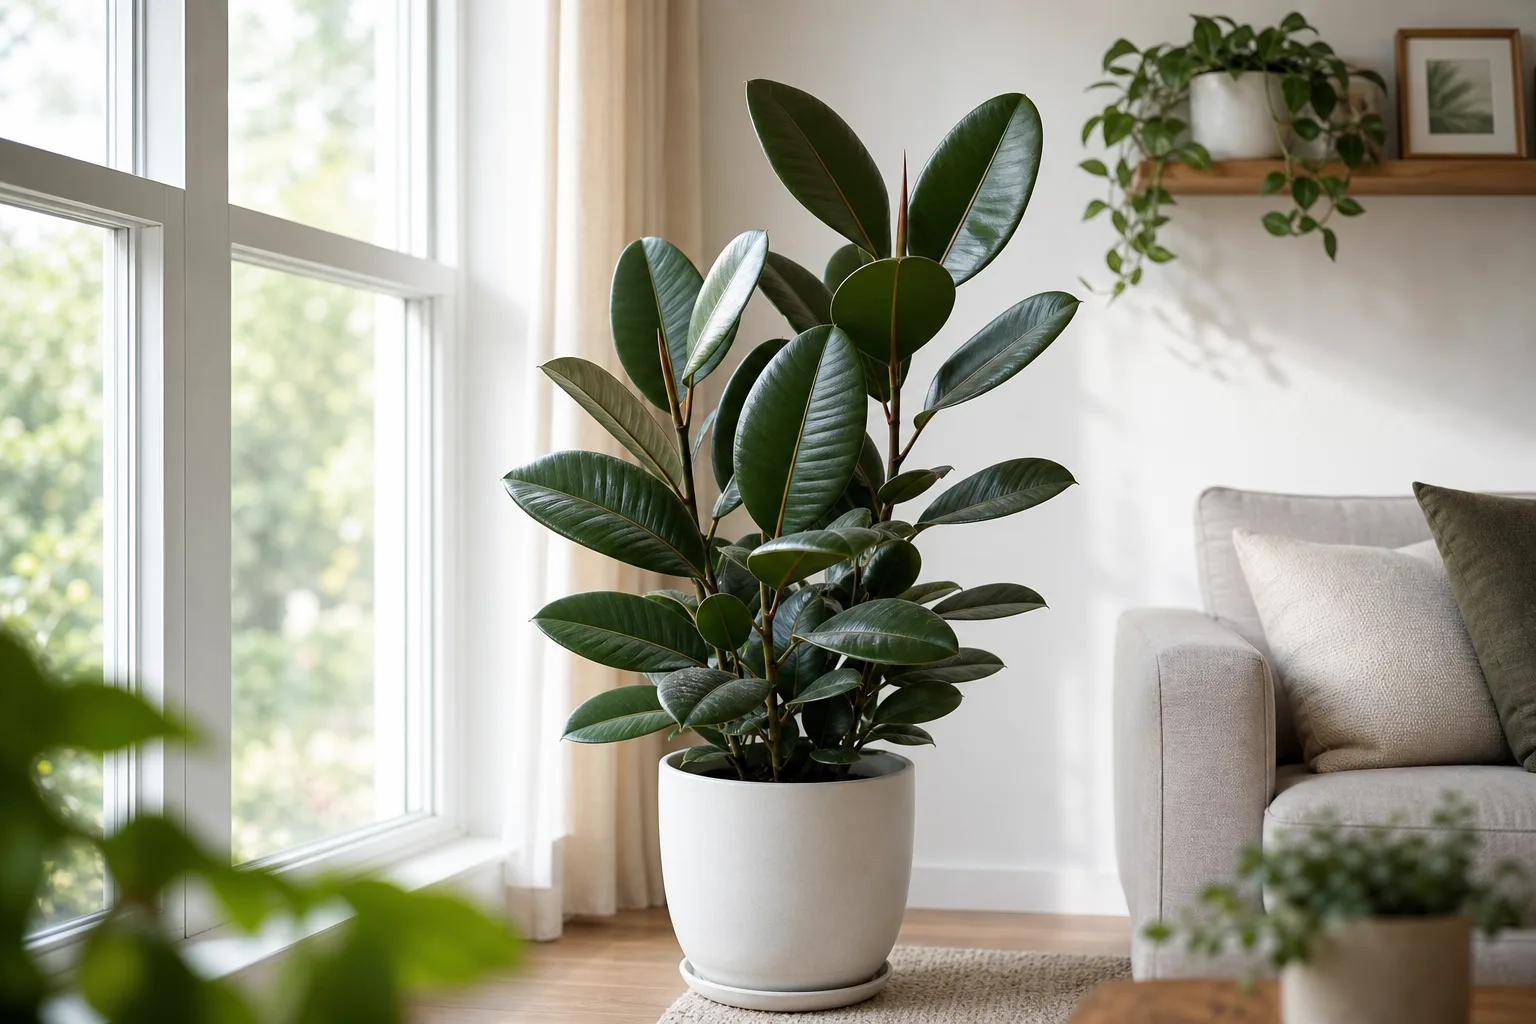
Move it toward bright filtered light, such as near an east window or a few feet back from a brighter south- or west-facing window with a sheer curtain. Make the change in stages if the plant has been in a dark room for a long time. Gardener’s Path recommends gradual acclimation when a plant is moving into substantially brighter light, because an abrupt jump can trigger scorch and leaf drop even when the long-term location is better.
Rotate the pot every week or two if one side is leaning toward the window, but avoid relocating it repeatedly while it is recovering. A grow light can help in a consistently dark room, provided it is positioned according to the fixture’s instructions and used as a supplement rather than paired with more frequent watering. Improve light first, then watch whether the mix begins drying at a healthier pace.
Sun scorch looks yellow but needs a different fix
Sun scorch tends to appear as bleached yellow, tan, or dry patches on the side of the leaf facing the glass or strongest light. The rest of that leaf and leaves in shaded positions may remain green. Heat trapped against a window and reflected light from a mirror or pale wall can intensify the exposure.
Rubber plants can handle brighter conditions when acclimated, but a plant moved straight from a dim shop or room into strong afternoon sun can burn. Move it back from the glass or filter the harshest light with a sheer curtain. Do not swing it from hot sun into a dark corner; aim for bright, stable, filtered light.
Scorched tissue will not turn green again. Leave a partly green leaf attached if it is still contributing energy, and remove it only when it is mostly dead, unstable, or unsightly enough to justify the loss. New leaves without fresh bleached patches are the sign that the light correction worked.
Pests: look for stippling, webbing, or sticky residue
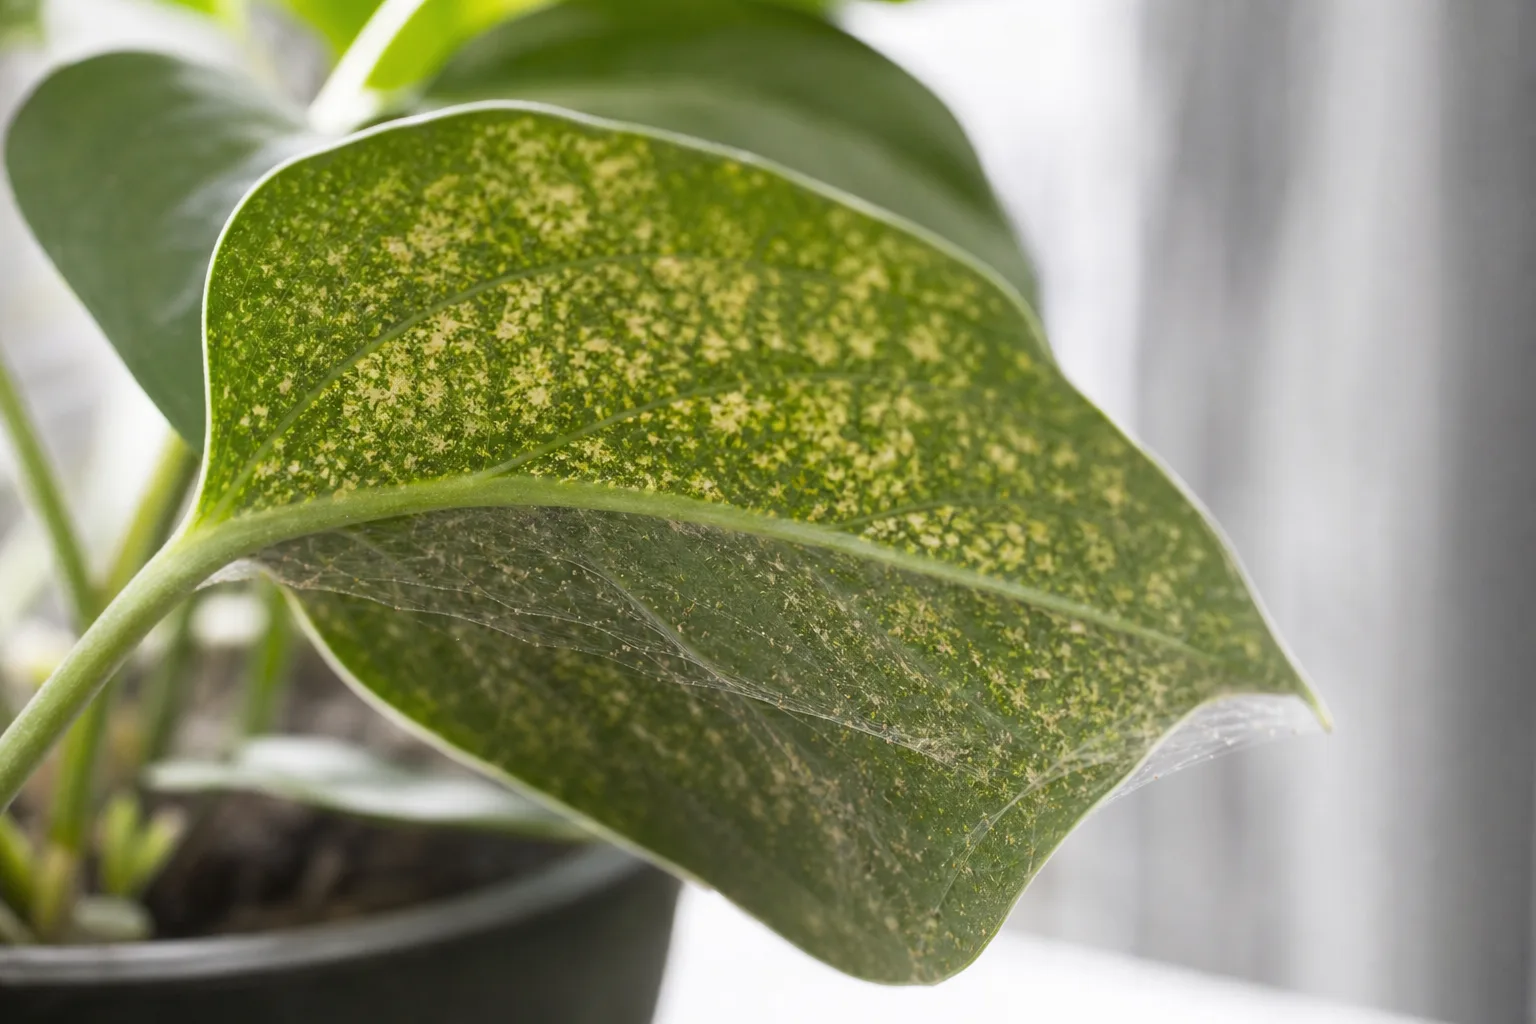
Pests rarely produce a clean, uniform yellow leaf by themselves. Sap-sucking spider mites, scale insects, and mealybugs more often create fine stippling, pale flecks, distorted growth, sticky honeydew, cottony clusters, fixed bumps, or webbing. RHS lists red spider mite, thrips, mealybugs, and scale among pests that can affect rubber plant under glass (RHS pest notes for Ficus elastica).
Inspect both sides of several leaves, the midrib, leaf joints, and the newest growth. Spider mites favor warm, dry conditions and can leave fine silk; scale looks like attached brown or tan discs; mealybugs resemble small white cottony deposits. Sticky residue can point to a honeydew-producing pest, although sap from a fresh cut or leaf-shine product can look similar.
Treat pests without spreading the problem
Isolate the rubber plant before treatment and check plants that were touching it. Remove heavily infested leaves only if the plant can spare them, rinse sturdy foliage with a gentle lukewarm stream, and wipe visible scale or mealybugs from stems and leaf joints. Repeat inspections matter because a single cleaning does not prove that eggs or hidden insects are gone.
If you use insecticidal soap or horticultural oil, choose a product labeled for indoor plants and the pest you have identified. Follow its directions, test a small area first, and keep the plant out of harsh sun while wet if the label warns of injury. Avoid improvising with concentrated household detergent or applying several products at once; leaf damage from a “stronger” mix can look like the problem you are trying to solve.
Keep correcting the underlying stress. A pest treatment cannot compensate for roots sitting in water or a plant weakened by a dark, drafty location. When fresh growth is clean and repeated inspections find no live pests, the yellowing should stop even though damaged leaves may remain marked.
Cold drafts, heat, and sudden moves
Rubber plants dislike abrupt changes more than they dislike an ordinary fluctuation within a stable room. A cold window at night, a heating vent, an air-conditioner stream, or a sudden move outdoors can trigger yellowing or leaf drop. NC State specifically advises keeping rubber plant away from drafts and cold temperatures and notes that temperature drops can cause leaf loss.
Look for timing: did yellowing start soon after the plant changed rooms, the weather turned cold, or the HVAC system began running? If yes, move it to bright, steady light away from direct airflow. Insulating the plant during cold transport can prevent the shock, but once damage has happened, warmth and consistency are more useful than another move every few days.
Do not respond to temperature stress by watering more or fertilizing heavily. Check the soil, let the plant settle, and wait for the growing tip to show whether it is still active. A damaged leaf may continue to yellow after the move is corrected because the injury is already in the tissue.
Nutrient shortage and salt buildup
Nutrient deficiency belongs on the list, but it should not be your first guess. An old plant in depleted mix may develop generalized pale leaves or slow growth, while a more specific pattern—such as green veins surrounded by yellow tissue—can involve nutrient availability, root function, or pH. The same pattern can appear when roots are damaged and cannot take up nutrients, so feeding before checking moisture can hide the real cause.
If the plant is in fresh mix, growing slowly because of winter light, or sitting in wet soil, hold fertilizer. If moisture, roots, light, and temperature are all reasonable and the plant has been in the same mix for a long time, feed only during active growth and follow a balanced fertilizer label. RHS recommends a high-nitrogen fertilizer monthly during growth and sparse winter watering; that is a seasonal baseline, not a reason to feed a declining plant immediately.
Salt buildup can leave a white crust on the soil or pot rim and can interfere with root function. If drainage is good and the roots are healthy, run plain water through the mix long enough for some runoff to leave the pot, then empty the saucer. Do not flush a pot that cannot drain, and do not use Epsom salt or extra nitrogen without a confirmed reason; unnecessary salts can worsen a stressed root zone.
Pot size, soil, and drainage checks
The container can be the hidden cause behind an apparently inconsistent watering routine. A pot without drainage, a blocked hole, a heavy compacted mix, or a cachepot holding runoff can keep roots wet. A pot that is too small can dry rapidly, leave roots circling densely, and make the plant alternate between drought and flooding after each watering.
Slide the inner pot out far enough to check for circling roots and a blocked bottom. If roots are tightly circling and the mix dries unusually fast, repot in a container only one size larger with fresh, well-draining houseplant mix. Gardening Know How recommends a draining pot and a new container only one to two sizes larger when a rubber plant is pot-bound, with dead or diseased roots removed during the check (Gardening Know How’s rubber-plant yellow-leaf guidance).
Do not repot automatically because one leaf is yellow. Repotting is another environmental change, and a stable plant with a workable pot often benefits more from corrected watering and light. Repot when there is clear evidence—roots circling densely, mix that has collapsed and stays wet, drainage failure, or roots that are damaged—not because a calendar says it is time.
How to remove yellow leaves
Wait until a leaf is fully yellow, brown, dead, detached, or clearly diseased before removing it. A partly green leaf can still photosynthesize and support recovery, so cutting every leaf with a yellow patch can strip energy from the plant without fixing the cause.
Use clean, sharp scissors or pruning shears and cut the leaf stalk close to its base without nicking the main stem. Rubber plant tissue can release milky sap when cut, so wear gloves if your skin is sensitive, keep the sap away from eyes and pets, and wash your hands and tools afterward. NC State notes that cut leaves can drip sap; pruning is a cosmetic and sanitation step, not a cure.
If many leaves are yellowing, prune selectively after you have corrected the likely stress. Start with leaves that are fully yellow or collapsing, then leave any partly green foliage that is not rotten or pest-covered. A rubber plant leaf-drop guide can help when yellowing is followed by a larger flush of dropped leaves.
A two-week recovery plan
Day 0: Photograph the whole plant and one affected leaf. Record whether yellowing is low, new, one-sided, or speckled. Check moisture below the surface, lift the pot, inspect drainage, look at the undersides of leaves, and note any recent move or temperature change.
Days 1–3: Correct the clearest cause only. Let wet soil drain and remove standing water; rehydrate genuinely dry soil; move a draft-stressed plant to a stable bright spot; or isolate a plant with confirmed pests. Hold fertilizer while roots are wet, damaged, or still unexplained.
Days 4–7: Recheck the soil and the same leaves. The goal is not for old yellow tissue to turn green; it is for the pot to dry at a reasonable rate, the stem to stay firm, and no new yellow leaves to appear. If yellowing spreads despite corrected moisture, unpot and inspect roots rather than stacking on a new treatment.
Days 8–14: Check the growing tip and newest leaf, inspect for live pests again, and compare the plant with the original photo. Stable color in new growth, a firm stem, and fewer new symptoms indicate recovery. If the plant continues to decline, has a soft stem base, foul-smelling soil, or extensive pest activity, use the yellow-leaves diagnosis tool or contact a local extension service with photos and details of the root zone.
Avoid changing water, light, soil, fertilizer, pot size, and pesticide all at once unless the plant is in immediate danger from saturated roots or a severe infestation. One measured correction gives you a clearer answer and reduces the chance of adding a second shock to an already stressed rubber plant.
Conclusion
Rubber plant leaves turn yellow when the plant cannot maintain normal leaf function, but the reason is visible in the pattern around the leaf. Wet soil with limp yellow foliage points toward overwatering or root trouble; dry soil with crisp edges points toward underwatering; pale stretched growth suggests too little light; one-sided bleached patches suggest sun scorch; stippling, webbing, bumps, or stickiness suggest pests; and one old lower leaf may simply be aging.
Start with the root zone, correct the most likely cause, and give the plant a stable two weeks before judging the result. Fully yellow leaves will not regain their color, but healthy new growth, firm stems, sensible dry-down, and the end of new yellowing are the signs that your rubber plant is back on track.



